Community Brag Posts

Range Hood Cover

I have a very ugly, plain old range hood that needed to go.  It's not in my budget to get a custom range hood or to buy and insert.  So, I decided to cover up the existing one.  Turned out great IMHO :)  For details and a step by step tutorial including cut list for my project, click over to my blog.  Thanks for looking!!


Estimated Cost
$20
Estimated Time Investment
An Hour or Two (0-2 Hours)
Finish Used
Off the shelf Semi gloss White paint
Recommended Skill Level
Beginner

6'x6' Box

Submitted by Anonymous (not verified) on Wed, 04/20/2016 - 19:22

I found these plans online and was just waiting for the kids' grandpa to come out and build it. Could be built in one afternoon (depending on how many trips to your local Home Depot, and availability of the correct tools)
Modifications from original plan:
6x6 instead of 4x4
Brackets to hold patio umbrella for shade
Added seat gussets for additional support
Added "wooden flange" around bottom of box to run lawnmower on
One additional center back support on each bench
One centered handle (instead of a handle on each end)
Stapled landscape weed barrier fabric onto the bottom
Sanded all exposed edges

Materials:
4@2x10x8'
12@1x6x6'
2@2x6x12'
8 hinges
2 handles
3 1/2" decking screws (for attaching 2"x boards)
1 5/8" decking screws (for attaching 1"x boards)
2+ 1 1/4" 2-hole straps for metal conduit (for attaching patio umbrella*)
*Our patio umbrella pole was 1 1/2" diameter, but 1 1/2" straps had too much play, so we used 1 1/4" straps and misc flat washers to adjust the snugness to the pole
Cut lengths:
2@2x10 cut to 72" (long sides of the box)
2@2x10 cut to 69" (short sides of the box)
Cut one each of the following out of a 12 footer:
2@2x6 cut to 75" (long side "flange")
2@2x6 cut to 64" (short side "flange")
No cuts were made to the 12 1x6's
Used one leftover 2' from the 2x8x10's ripped in half cut to 11.5" for arm rests
Used two leftover 2' sections from the 2x8x10's ripped in half cut to 21" for back supports
Used the last 2' cutoff to make two seat gussets (cut about 9 1/2" off and then ripped it at 45 degrees)
Used the remaining piece (ripped in half length-ways) to attach to the center of the backrest for additional support and as the attachment point for our handles
We decided to do one handle in the center of the backrest so one reasonably strong adult could open the lid
The bottom "flange" was assembled with the box upside down. Basically a 2x6 screwed to the bottom edge of the box allowing 1 1/2" overhang all the way around
After making cuts, but before assembly, we recommend using a quarter-sheet pad sander (or similar) with 60 grit paper to break all of the edges and round over any ends or corners that will be in contact with sandbox users
Followed other general assembly instructions

Built from Plan(s)
Estimated Cost
$300 with umbrella and sand
Estimated Time Investment
Day Project (6-9 Hours)
Finish Used
We live in a very arid climate (Utah) so we chose not to varnish or paint this project
Recommended Skill Level
Beginner

Drop down murphy bar

Submitted by nick_h on Tue, 12/06/2016 - 10:54

My attempt at the murphy bar featured on this site. Still have to add the sash locks. Added pallet crossmembers at the back, an x in the leg, and a french cleat to mount to the wall. 

Estimated Cost
$45
Estimated Time Investment
Day Project (6-9 Hours)
Finish Used
Special Walnut Minwax on the bar top and shelves, crisp linen matte latex and dry brushed casual gray for accents/aging. 2 coats of polycrylic for protection. If built again would pre stain and base coat all the wood before build time, then assemble, add accent brushing and spray the polycrylic.
Recommended Skill Level
Beginner

Comments

zannej

Tue, 12/31/2019 - 11:49

This looks awesome! I want to help my friend build this for his kitchen. I've looked at the plans in the link & I'm wondering what modifications you made for the X pattern-- how much did it alter the material & cut list?

Would you please share your material & cut list for this?

Poolside Towel Cabinet from Benchmark Cabinet Plan

Submitted by Anonymous (not verified) on Thu, 03/23/2017 - 11:21

My father and I made this awesome poolside towel cabinet using the Benchmark Cabinet plans. A super easy 1 day build and it looks amazing on the patio. Bring on the pool weather! 

Estimated Cost
$60
Estimated Time Investment
Day Project (6-9 Hours)
Finish Used
Chalk paint/Poly topcoat
Recommended Skill Level
Beginner

Modern Farmhouse Bed Frame

Submitted by SofiaTaz on Thu, 01/06/2022 - 23:15

I love how this bed frame turned out! Everywhere that has stain is cedar and the rest is all scrap spruce. Thanks for another great plan Ana!

Built from Plan(s)

Comments

Laundry Station

Submitted by Anonymous (not verified) on Mon, 02/27/2017 - 10:03
We followed these plans, but instead of building two cabinets, we combined them with one side in the middle. We also used pine planks on top. The sides are painted with chalk paint, and the top is finished in dark wax. 
Built from Plan(s)
Estimated Cost
$200
Estimated Time Investment
Afternoon Project (3-6 Hours)
Recommended Skill Level
Beginner

Comments

Lawnmower Shed

Submitted by PipesTX on Wed, 01/07/2015 - 06:19

Modified the design to allow me to roll lawnmower directly in the end. Fun project.

Built from Plan(s)
Recommended Skill Level
Intermediate

Comments

Chicken coop and run

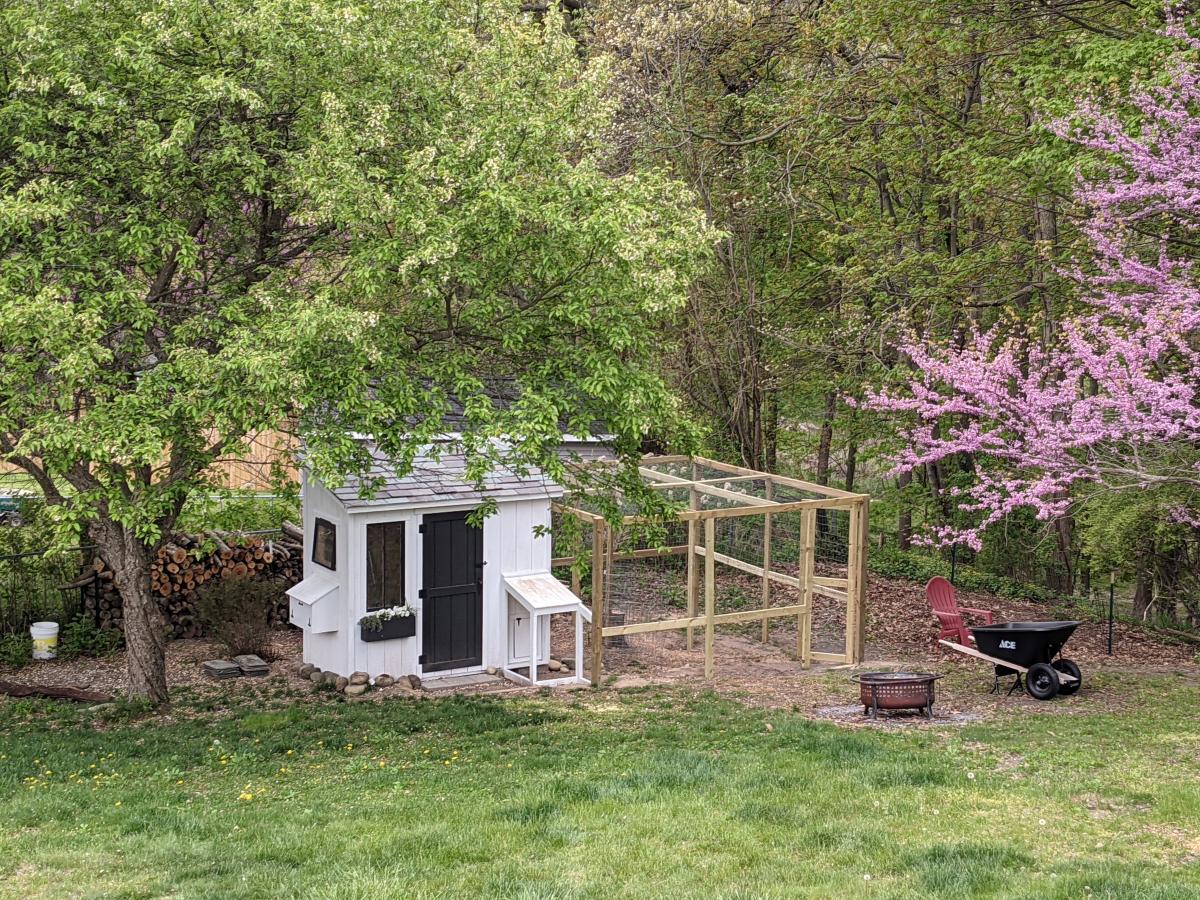
Submitted by Anonymous (not verified) on Tue, 10/05/2021 - 11:01

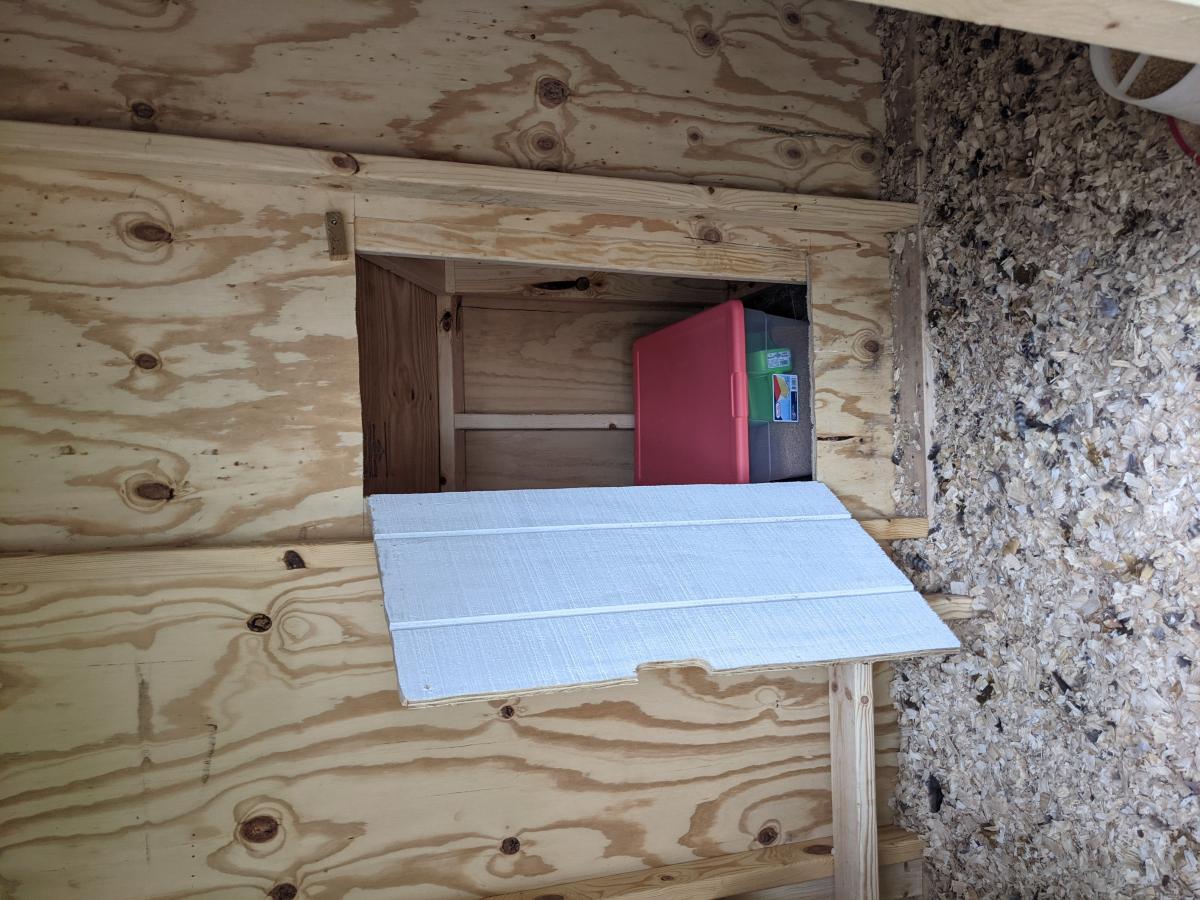
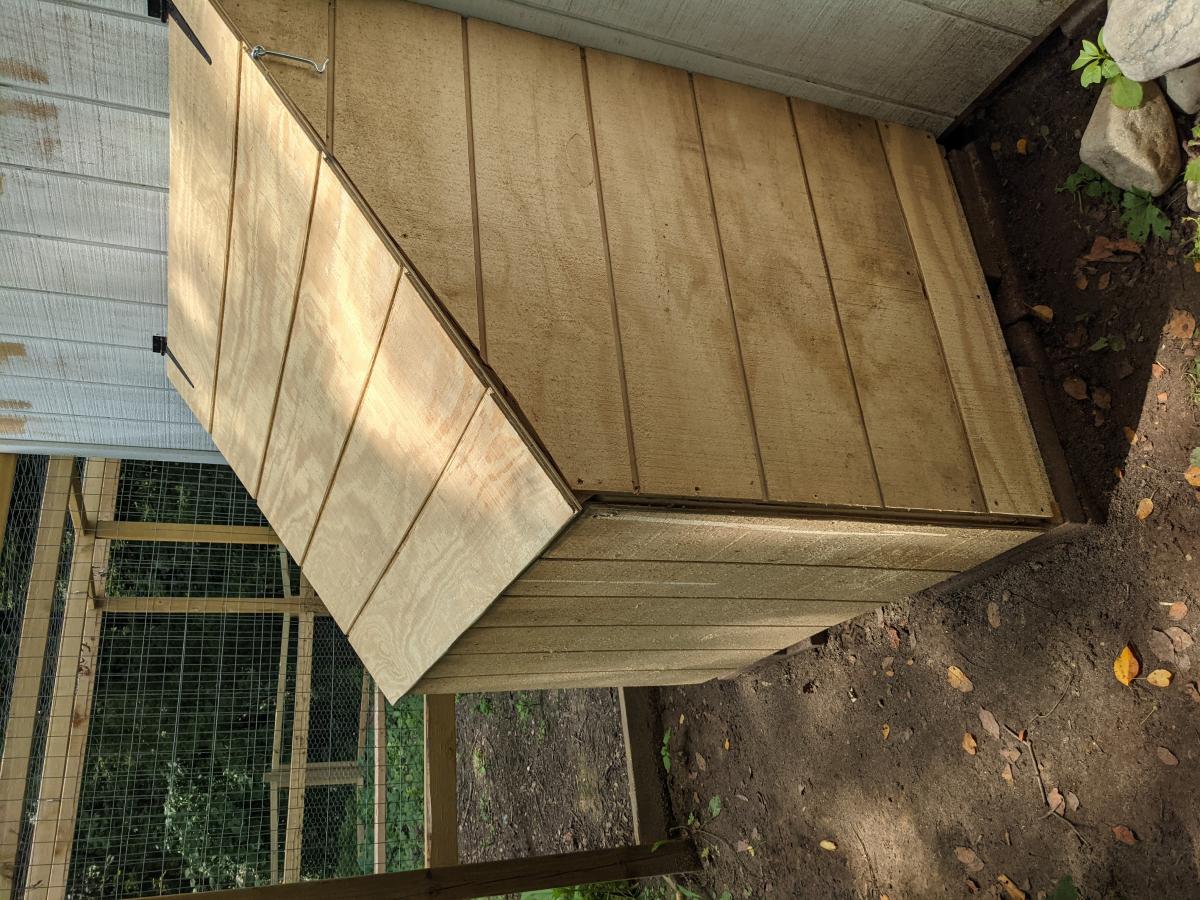
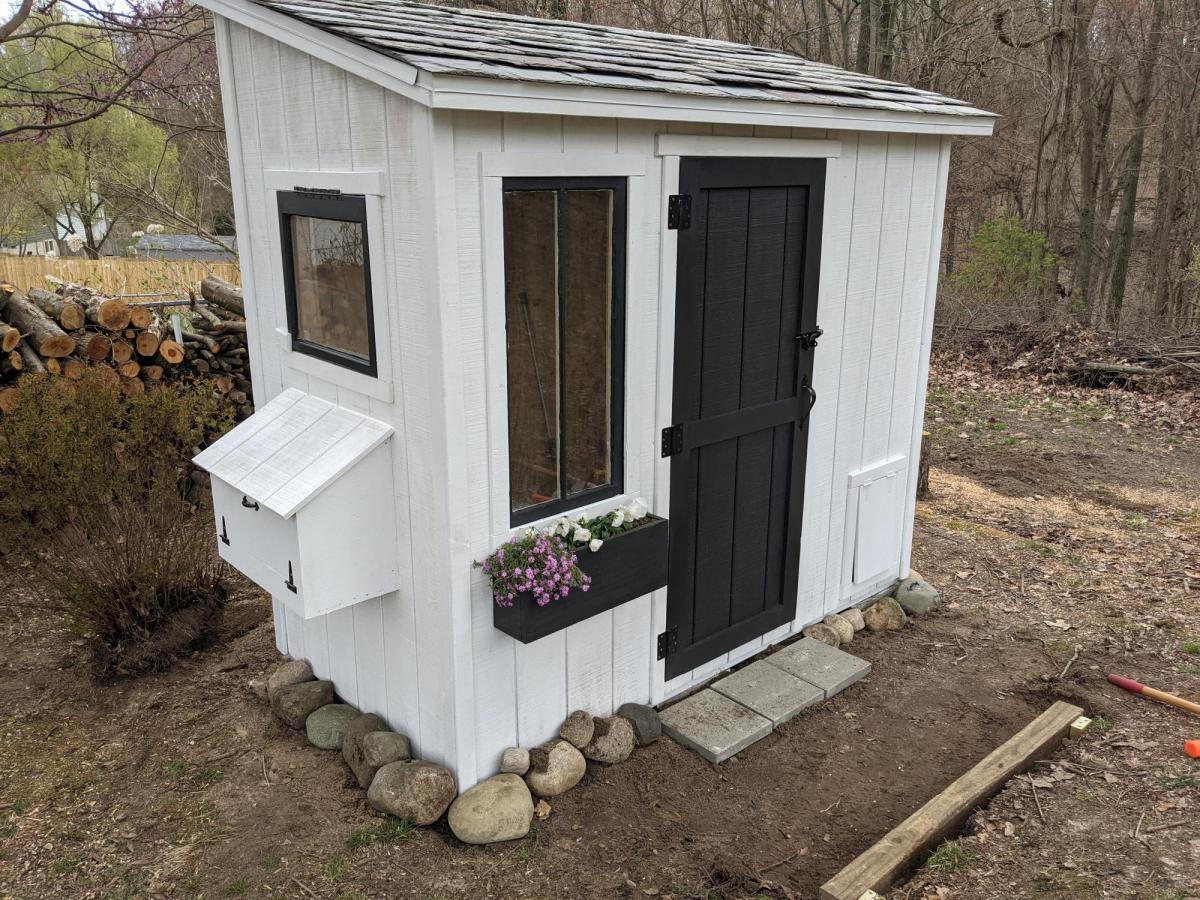
I followed the Shed Coop Plans to make this chicken coop and designed my own run. Because I wanted to view the chickens coming in and out of the coop, I moved the chicken door to the front and built a little covered area to shelter the coop door so I did not have to have the entire run extend over the front. I also made the access to the layer boxes be accessible from the front rather than the top so that my kids could more easily access the egg boxes. I thought these were great plans to follow and easy to adapt to fit what I wanted in a coop. I also ended up adding a lean-to storage on the back with an inside access so I could easily refill their feed.

Built from Plan(s)

Comments

Seasonal And Holiday

Rustic Queen Sized Wall Bed

Submitted by ldo2626 on Wed, 06/25/2014 - 09:09

Expecting our second child, my wife and I decided to do away with our guest bedroom and combine it with our office. The only problem was our queen bed took up way too much space and it didn't get enough use to justify the sacrifice. We looked at the wall bed options available for purchase and decided they were way too blah and very expensive. I then found the "A MURPHY BED YOU CAN BUILD, AND AFFORD TO BUILD" post on Ana's website (thanks for the inspiration)! 

 Using cheap pine boards, plywood, door hinges, vinyl upholstery and stain I constructed the wall bed you see here. It really wasn't that difficult but facing it took the most time. To give the boards a more rustic look I used a utility knife to shave off the edges/corners and stained them with the Minwax American Walnut water based stain and the Minwax White Wash Pickling. When this started we thought we were going to have to settle for something unattractive and less than desirable. Seeing it in our office now, we love our new bed and actually think it makes the room look much better!  I didn't keep track of costs, but it couldn't have been more than $150.


Estimated Cost
I didn't keep track of costs, but it couldn't have been more than $150.
Estimated Time Investment
Weekend Project (10-20 Hours)
Finish Used
Minwax American Walnut water based stain and Minwax White Wash Pickling
Recommended Skill Level
Beginner

Comments

jwm816

Tue, 07/08/2014 - 08:08

Looks great! May I ask what the final outside dimensions were? Curious to see if this would work for me.

Thanks!

ldo2626

Wed, 08/06/2014 - 09:23

I would have to measure it when I get home... at work currently. Looking back, I think the best approach is to take the measurements from the plan, find the difference between standard mattress and queen mattress dimensions (check wikipedia for standard sizes), then add that difference back to the plan. I cut it real close on mine and could use a little more space. It would be nice to make it a bit deeper and with some head room to store comforters and pillows.

lopixy

Sun, 11/30/2014 - 18:10

I love this!  Could you give more details about how you did the facing?  Are the pine boards just nailed onto the plywood? 

chefrgk

Sun, 12/28/2014 - 12:59

I am dying to get started on this wall bed project. I keep getting this message when trying to open the Plans.

The page you are looking for is temporarily unavailable.
Please try again later.
can someone help me find them.

chefrgk

Sun, 12/28/2014 - 12:59

I am dying to get started on this wall bed project. I keep getting this message when trying to open the Plans.

The page you are looking for is temporarily unavailable.
Please try again later.
can someone help me find them.

nicolanala

Tue, 08/09/2016 - 15:24

Hi. I would love to try this. Looking to build in the next month before parents in law come over. Is there any working links to the plans??

josheli

Thu, 01/25/2018 - 13:06

click on the bed picture above and it will take you to the plans


Outdoor Sofa and Chair with Slanted Back

Submitted by Anonymous (not verified) on Sun, 07/16/2023 - 10:22

OK, I think this build may be my biggest project yet! It is definitely the heaviest. With the strong winds we can get here in Florida we needed substantial outdoor furniture.
I did make some modifications along the way measurement-wise so the sofa would fit my front porch better. All in all, this took 2 full days. I built the sofa first, stained it the next day and then decided (due to trying to get stain in all the nooks and crannies) to stain the chair pieces first before putting it together.
I am so happy with the results and so far, almost a year later, this furniture looks great and hasn't moved an inch in any of the thunderstorms we've had! Thank you Ana!!

Modern Outdoor Chair with Backrest

Submitted by PoppaZotch on Mon, 08/17/2020 - 11:53

Per request of my wife, I opted to add a backrest to the chair. I feel as though my backrest design keeps with the style of the original build. I accomplished this by cutting the 2x4 vertical arms of the backrest at 13 inches with a 10 deg miter cut at the base. This allows you to keep with the 3/4" on the 2x6 backrest slats. I finished it off with a 2x4 top plate. I'd also note that I made slight modifications to the plans to accommodate 24" cushions.

Estimated Cost
$100
Estimated Time Investment
Afternoon Project (3-6 Hours)
Finish Used
sanded to a 220 grit
Recommended Skill Level
Intermediate

Folding Workbench

Submitted by MrsCordz on Fri, 10/11/2019 - 07:47

We chose this project because we have a small garage and space is at a premium.  The dimensions of this build fit well in our limited space and allowed us to organize items such as paint, stain, screws and nails into one central location. I chose 2x4's on the sides to give it a more stable feel. Our garage and parking lot are all sloped and with the 2x4's this prevented the twisting. It feels solid and the wheels are smooth. We picked everything up at Home Depot. The screws that came with the hinges are to long and my husband used the Dremel to grind them down. You could just buy shorter screws.  This is one of my firsts builds and I've definitely learned a lot of lessons along the way. Measure, measure, then measure again before you cut a piece and use a level surface to make level pieces. Overall, everyone in my family played a part in helping me build this piece and so I love it and will cherish this piece and the memories always. Thanks Ana for all your fun videos, sharing your life with your family, and providing resources like this plan to us for free. I'm thankful for my son who bought me a compound miter saw for Mother's Day and other family for buying me a Ryobi circular saw. I'm truly blessed and loved. Thanks

Built from Plan(s)
Estimated Cost
120
Estimated Time Investment
Weekend Project (10-20 Hours)
Finish Used
I'm leaving it in the raw due to the nature of the piece. I may put a clear coat on it later.
Recommended Skill Level
Beginner

Comments

Large Garden Enclosure

Submitted by Anonymous (not verified) on Sun, 05/19/2024 - 10:40

The enclosed garden plan.
I made mine 12x12 and added a middle The instructions were very easy to follow. I also had old paver stones, sand and gravel kicking around from a project from last year so created a floor to help with weed control. I used screws and fender washers instead of staples to attach the caging. I added two tiny beds to the inside for sweet peas to grow up the caging to attract pollinators. Let the growing begin!

Barb

Built from Plan(s)
Seasonal And Holiday

Two Story Rabbit Hutch

For my first woodworking project, I foolishly decided to build a rabbit hutch without plans for my daughters new Easter Bunny. So I literally scratched some ideas on my wood working bench and started going to work. I did some construction over a decade ago, but never attempted to build any furniture before, so I'm pretty happy with how this came out.

I spent a few days researching various rabbit cages and for our place we needed something that was ascetically pleasing and functional as it was going in our living room. I got some ideas from the web and decided the best thing for us would be to have an entry ramp, 2 sets of barn doors for each level (for easy cleaning) and an open roof. We went with linoleum floors since she's already litter trained. The floors could easily be modified to add 1/2" wire mesh if we decide to change things down the line. Also, we chose an espresso finish with silver hardware to accent the wire mesh

I pretty much crashed and burned on the staining as I've never done that before, but it ended up looking ok after all. I did a light sanding, but will probably invest in a planer and jointer to get my wood in better shape before assembling in the future. Also, I'll probably lightly dab some stain on ends of wood before final assembly as it made it difficulty trying to hide the white pine with the dark stain.

Other cages I saw ran around $200-$350.00 so i don't feel so bad about the cost. It's really the time that it took learning and making mistakes. I'm sure if I had plans I could of cut my time in 1/2.

Total Cost came out to around $150.00 but probably would of been cheaper if I had some plans to go by. I probably wasted a few 2x2s and accidentally mis-cut a scrap piece of 1/4"plywood which added another $16.00 to the bottom line.

Here's a breakdown of my total cost.

Hardware - $30.00
Includes 5 latches, 4 sets of hinges (8 total) and a 3' piano hinge

Stain - $8.00

Linoleum Tile @ ¢.69 sq ft - $16

Brushes, Stain Rags - $5.00

Screws - $6.00

Wire Mesh Roll $30.00
Needed 2 rolls at $15.00 each. I used 1" Wire Mesh measuring 2'x15'

Total Wood $50.00-$60
I used 2x3's for the legs - 2 @ 8' - $2.00 each ($4.00)
probably 15-20 2x2's - $1.52 each - can't remember how many I used to be honest ($30.00)
and a few 1x6's for the Doors - $2.00 each ($6.00)
Sheet of 1/4 plywood - $12.00

Estimated Cost
$150
Estimated Time Investment
Week Long Project (20 Hours or More)
Recommended Skill Level
Intermediate

Comments

ashinshaw

Thu, 05/03/2012 - 08:09

I also have been thinking with the idea of building a two story hutch for our rabbit. I love your ideas so now i have a new project to work on. Thanks for sharing!

Nicolene (not verified)

Mon, 10/08/2012 - 12:46

I LOVE your cage! We have 2 rabbits and 2 Guinea pigs which means we have 2 ugly cages in our living room. We are planning something similar, but a bit bigger (but lower if that makes sense). And we'll put a 3rd story on for our Guinea pigs. So we have everyone on the same patch of real estate so to speak. I was going to do 3 solid walls with wire "windows" too keep all the hay, poops and such contained. I am also going to put lockable wheels underneath, so I can move it to my office if I ever need to (parties and renovations).

Is there anything that you can now think of that you would like to change on yours? R my research purposes.. :) It looks awesome, I'm just picking your brain for "hindsight" tips.

Chair Build with Loveseat Modification

Submitted by Joshh81 on Sat, 09/02/2017 - 12:26

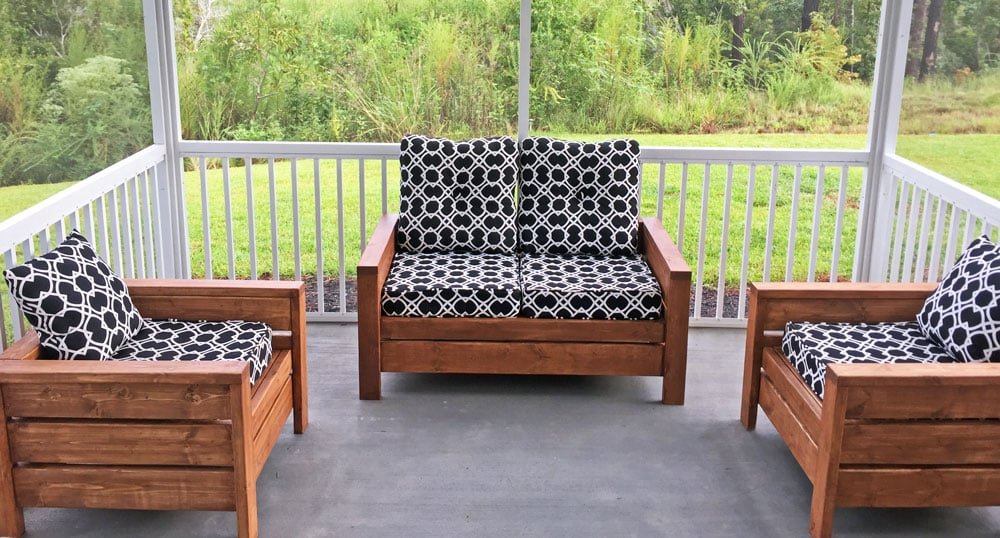
Built the 2 chairs according to the plans, and then modified it for a bench that's 48" (our cushions are 23.5 x 23.5). Worked really well!

Estimated Time Investment
Weekend Project (10-20 Hours)
Recommended Skill Level
Beginner

Comments

Seasonal And Holiday

DIY Sofa - Storage Sectional

Submitted by LittleG on Thu, 08/09/2012 - 15:38

Basically I took Ana's plan and tweaked it to create a diy sofa, a love seat, and a corner piece to make a sectional. All 3 pieces have the same basic design and function (they all have a storage compartment), although the corner piece, because of its placement and the thickness of the seating cushions, doesn't open unless the couch is opened first. We purchased custom cut, 6" thick foam cushions for the seats (we bought the XL-38 foam from https://www.buyfoam.com/, but if we had to do it again, we'd go with the XL-28 as the 38 is VERY firm). We also used upholstery fabric instead of a paint drop-cloth to cover the couches. The foam and upholstery fabric upped the overall cost significantly. Other changes from Ana's plan, I used 15/32" OSB because the 1/4" plywood just felt too flimsy (I'm a large guy). I also added I bolts to the underside of the seat before the foam and upholstery so I could add a stress relief rope to prevent the kids from opening the top and dropping it and ripping out the hinges. I used piano hinges as they seemed to me to provide the most support. Finally, I ended up using 1x2s for the base trim since I couldn't find any 2x2s that were straight and finish-ready, then I added router detailing to provide some visual interest. I used 3" pieces of 4x6 for the feet and added matching router detail. Additionally, I used T-Nuts and bolts to make the feet and base trim completely removable.


Built from Plan(s)
Estimated Cost
$1300
Estimated Time Investment
Week Long Project (20 Hours or More)
Finish Used
Minwax PolyShades Espresso
Recommended Skill Level
Intermediate

Comments

masmith38

Fri, 10/23/2015 - 11:11

Love this!  Totally want to think hard about doing this instead of buying when time for a new couch comes. Job well done, and the storage is a total plus.  

Chased

Sun, 05/15/2016 - 21:15

Where can I find the plans to this or the cut list

mikeyb

Mon, 10/03/2016 - 18:11

Awsome job!!! question? is that a typo on the cost to build??

mikeyb

Mon, 10/03/2016 - 18:12

Awsome job!!! question? is that a typo on the cost to build??

albertmick30

Mon, 08/17/2020 - 07:46

It is superb blog and i really appreciate your blog. It is because i always like the informative blogs. You did a great job and thanks for sharing.I am impressed by your post. It contains very informative data and i gain a lot information from it. It is very useful for me. Thanks for sharing and keep on sharing that type of posts.The Mobile App Developer Dubai provides good service you visit here site https://www.mistersaad.com/

Gate-Leg Sewing Table

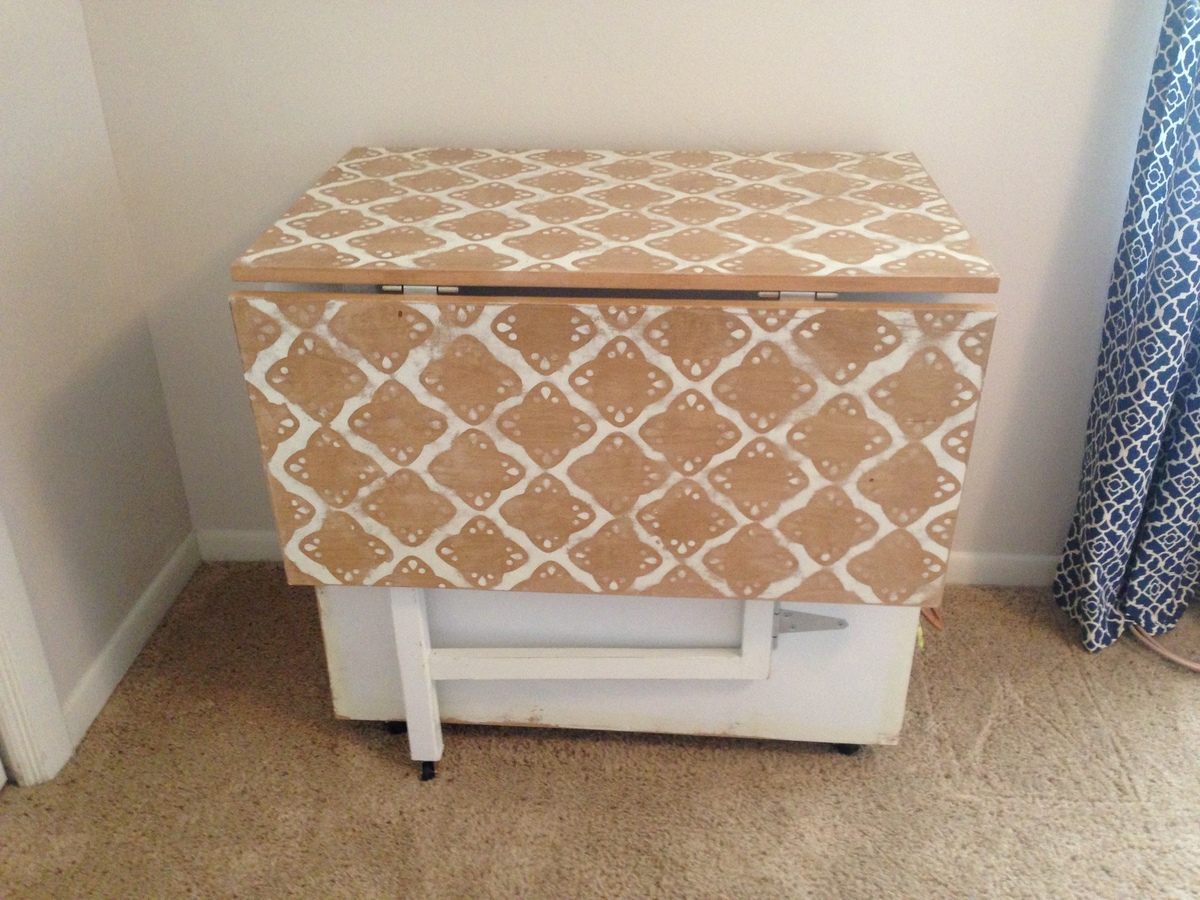
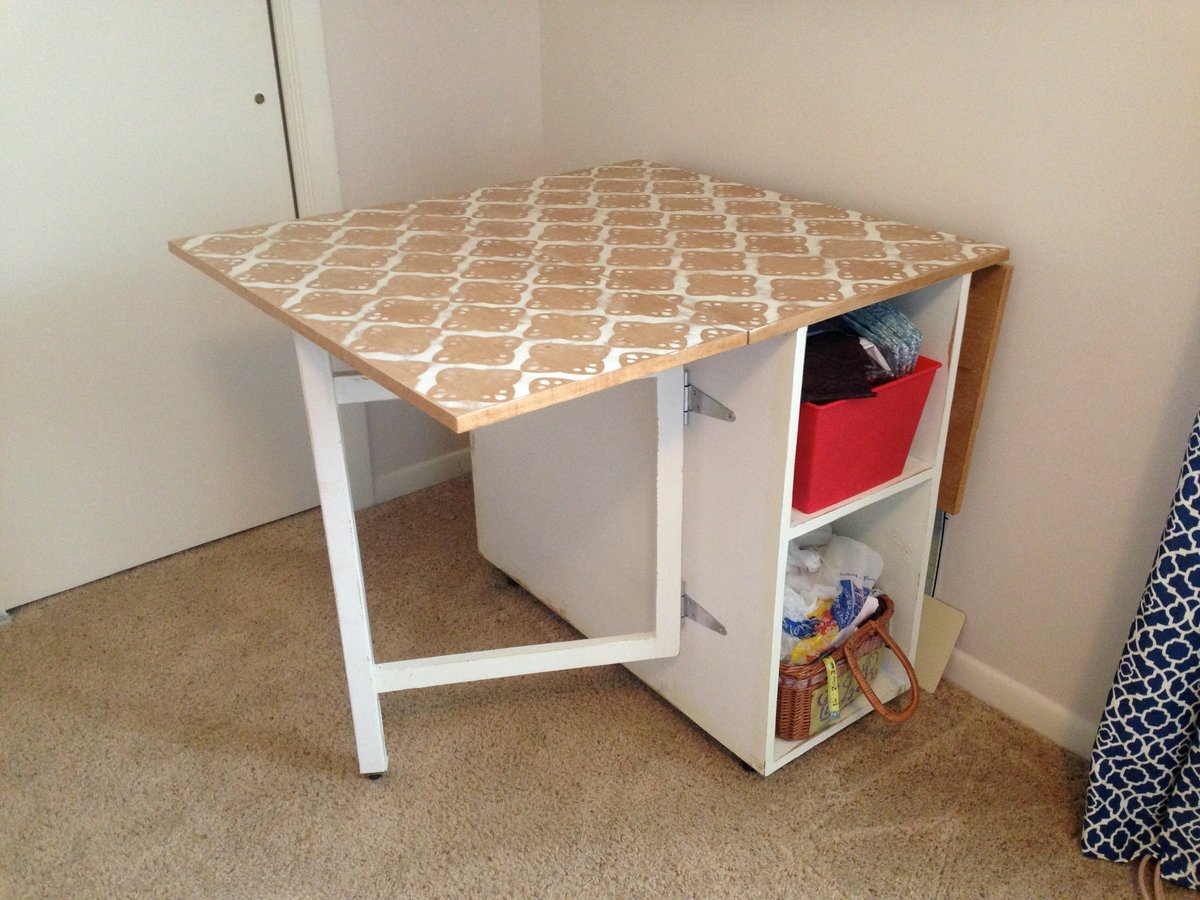
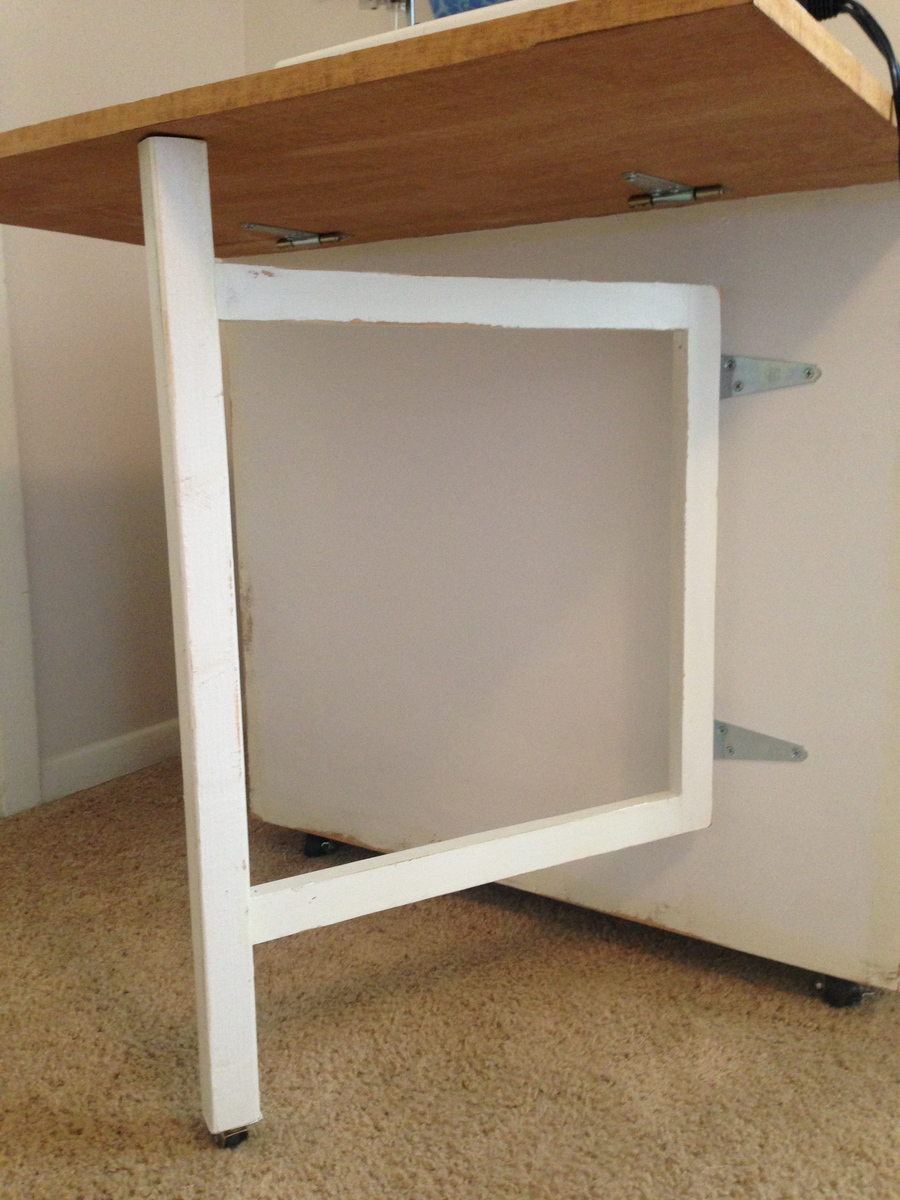
My husband and I built this table as our first project. We followed all of the dimensions from Ana's "Small Sewing Table" project here: http://ana-white.com/2010/10/plans/sewing-table-small-spaces?page=1 The only thing we changed was the size of the table top and the legs. We were worried about putting my heavy sewing machine on top of the leaf called for in the plan, so we created gate legs to support the leaves. Since the legs were going to be folded up in between the base and each leaf, we extended the center portion of the table top to accommodate the change. After it was assembled and stained, I decided that I didn't like the solid color, so I stenciled on a pattern with white latex enamel paint (what I had on hand) and continued to paint the base. After lightly scuffing it up with the sander, I layered 3 coats of poly on top. It has held up well, even after many large quilt projects! I just LOVE my sewing table!

Built from Plan(s)
Estimated Cost
$120
Estimated Time Investment
Weekend Project (10-20 Hours)
Finish Used
Golden Oak Minwax Stain
Polycrilic
Valspa Latex Enamel in Satin White
Recommended Skill Level
Beginner

Comments

TinyHouser

Fri, 08/05/2016 - 13:41

Hi there. Could you please tell me what the brackets are you used with the gateleg? Do you remember where you got them? Thank you!!!

msweeley

Sun, 05/12/2024 - 08:40

How heavy of sewing machine can this hold? My machine is 32 lbs. Would it be able to sit and be used on the “leaf” side of the table ?

Back