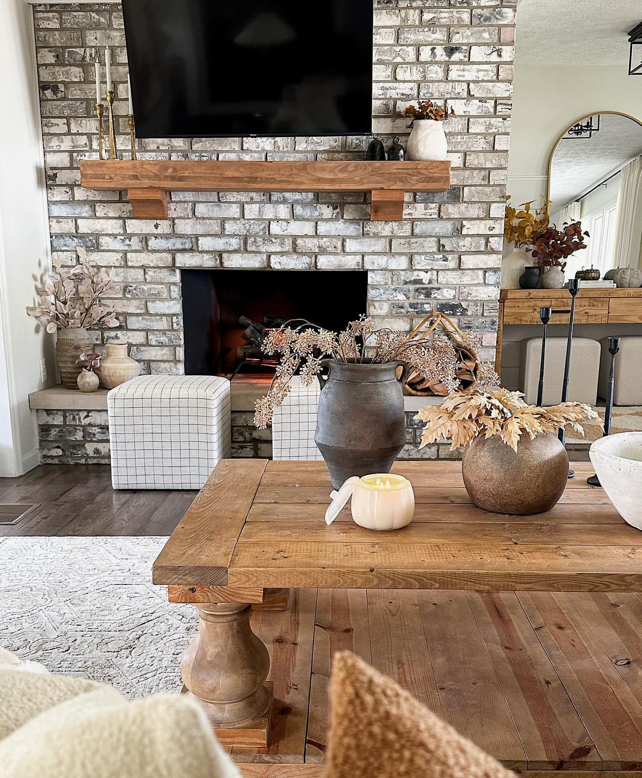
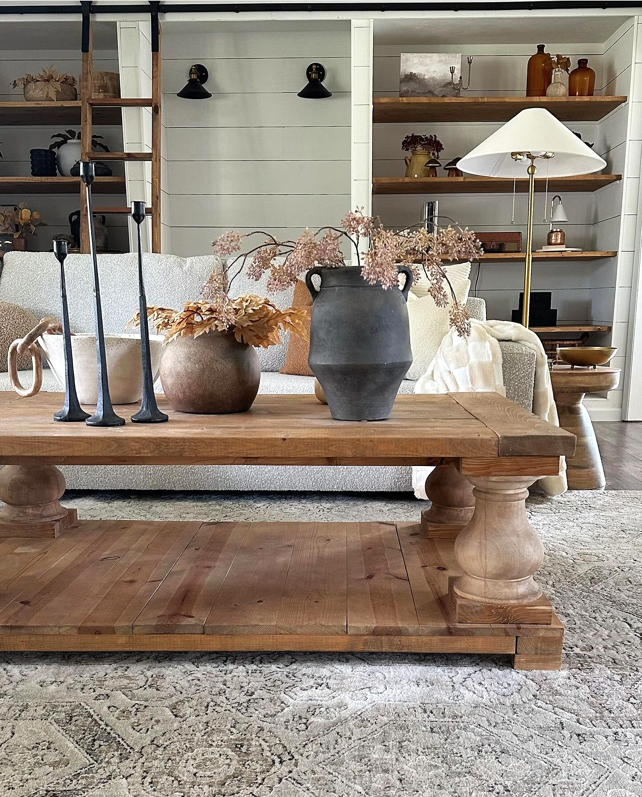
Fall Console Table
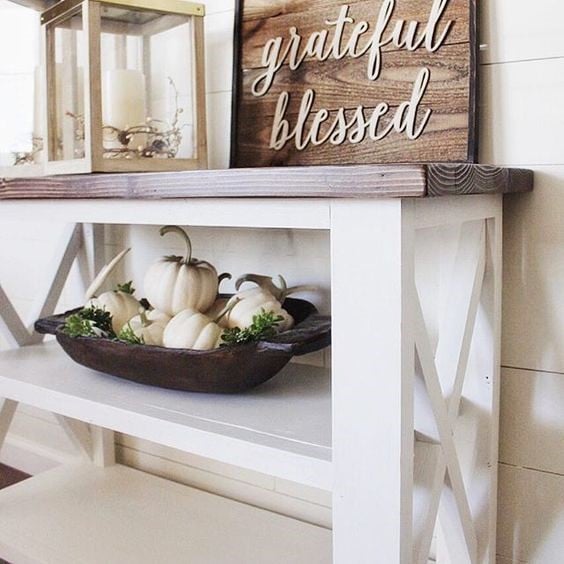
Beautiful fall decor console table.
Built from Plan(s)
Seasonal And Holiday
Beautiful fall decor console table.
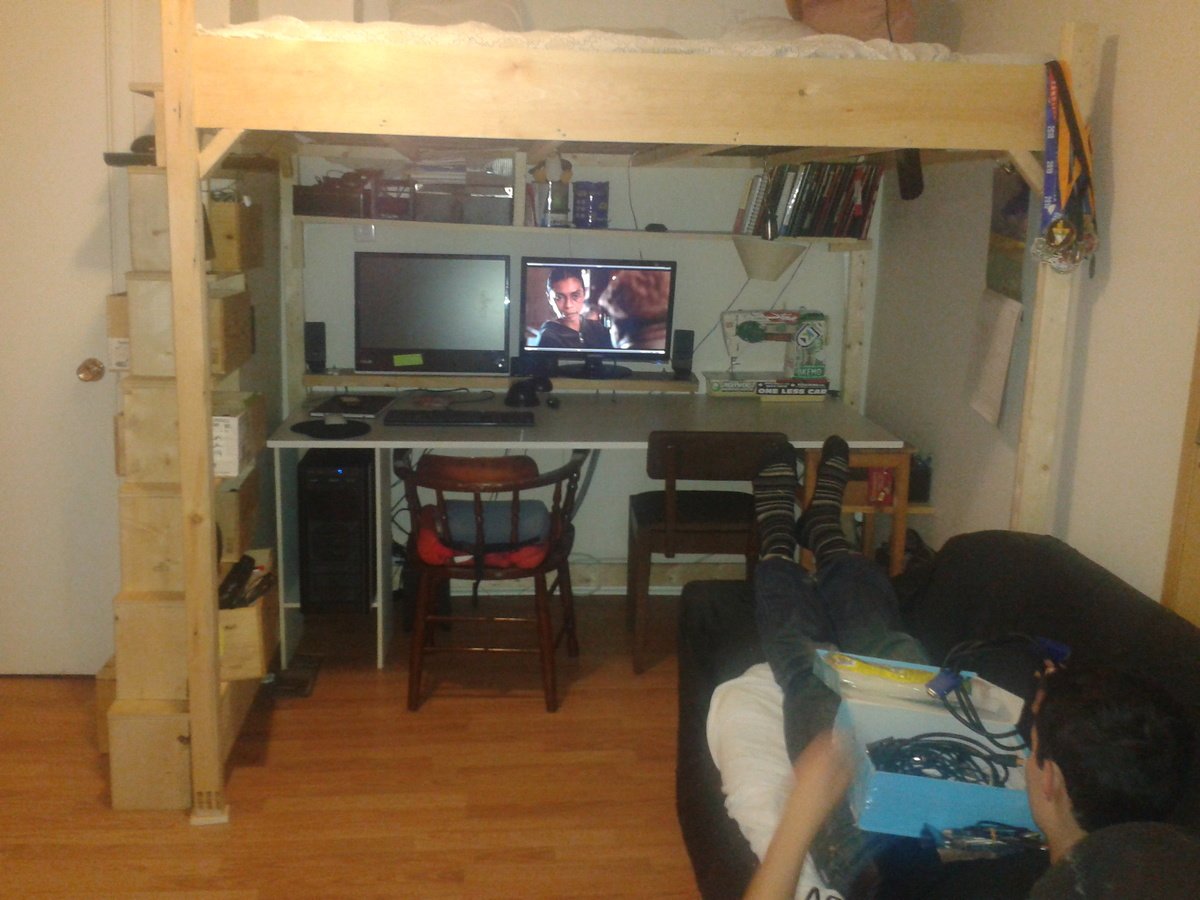
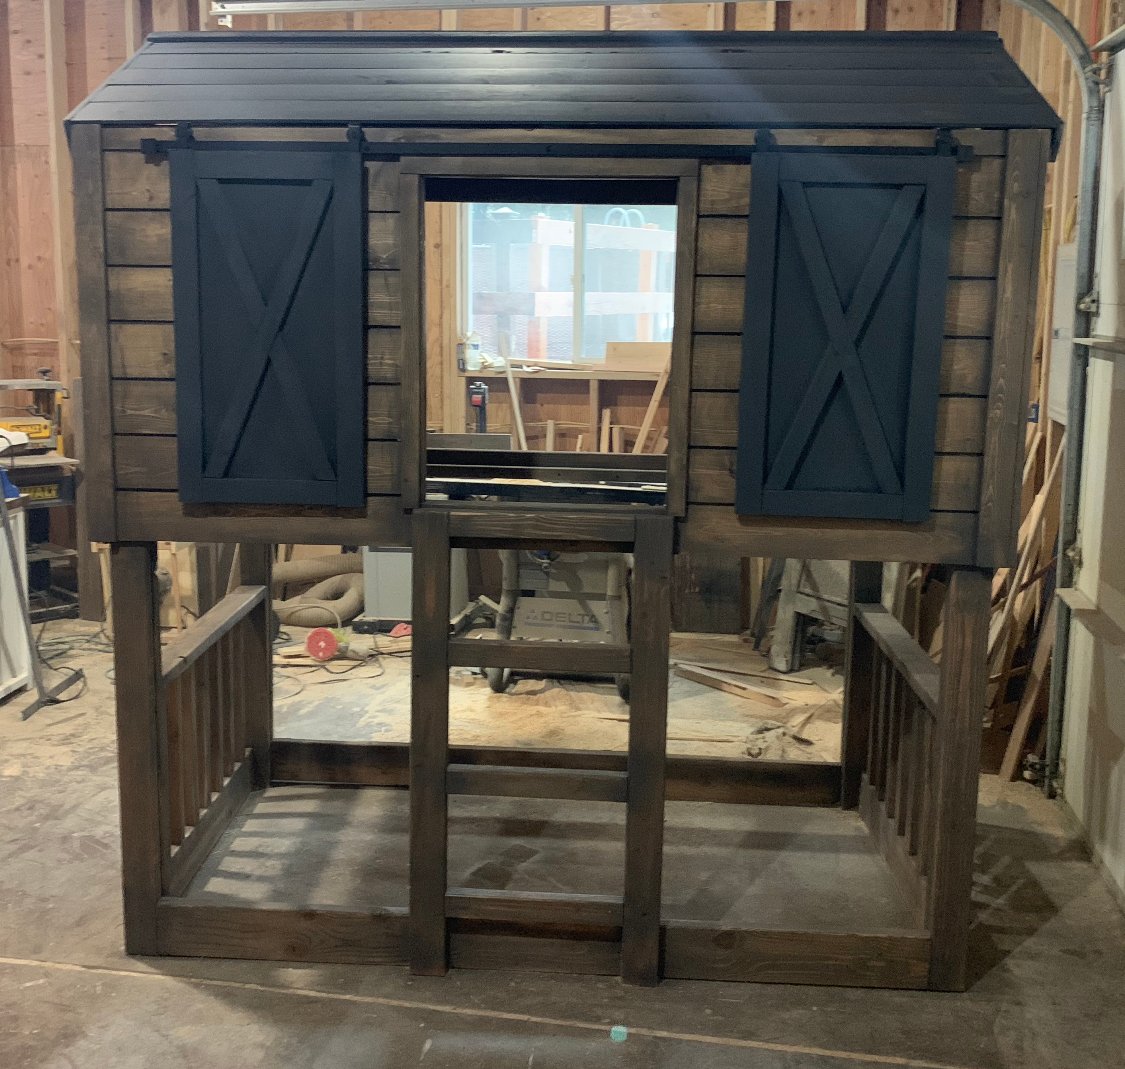
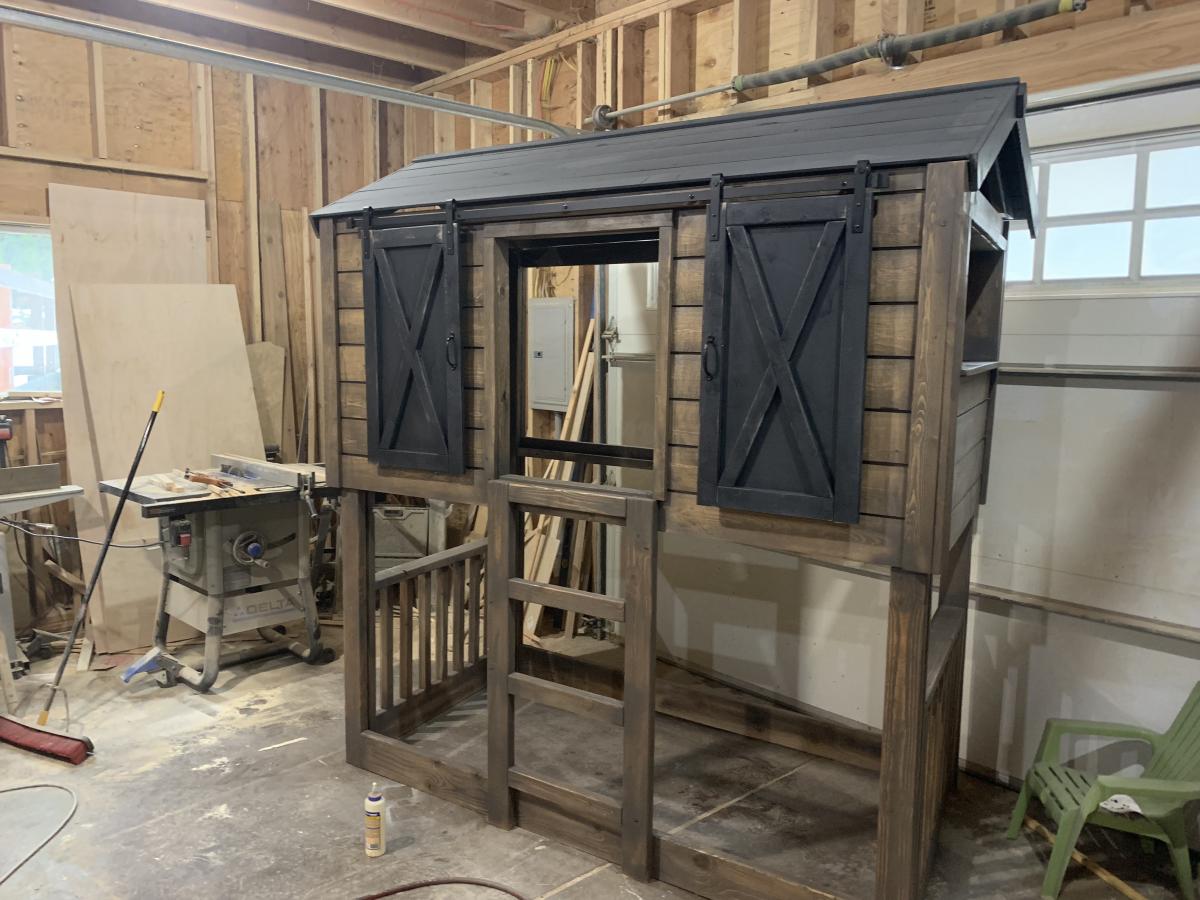
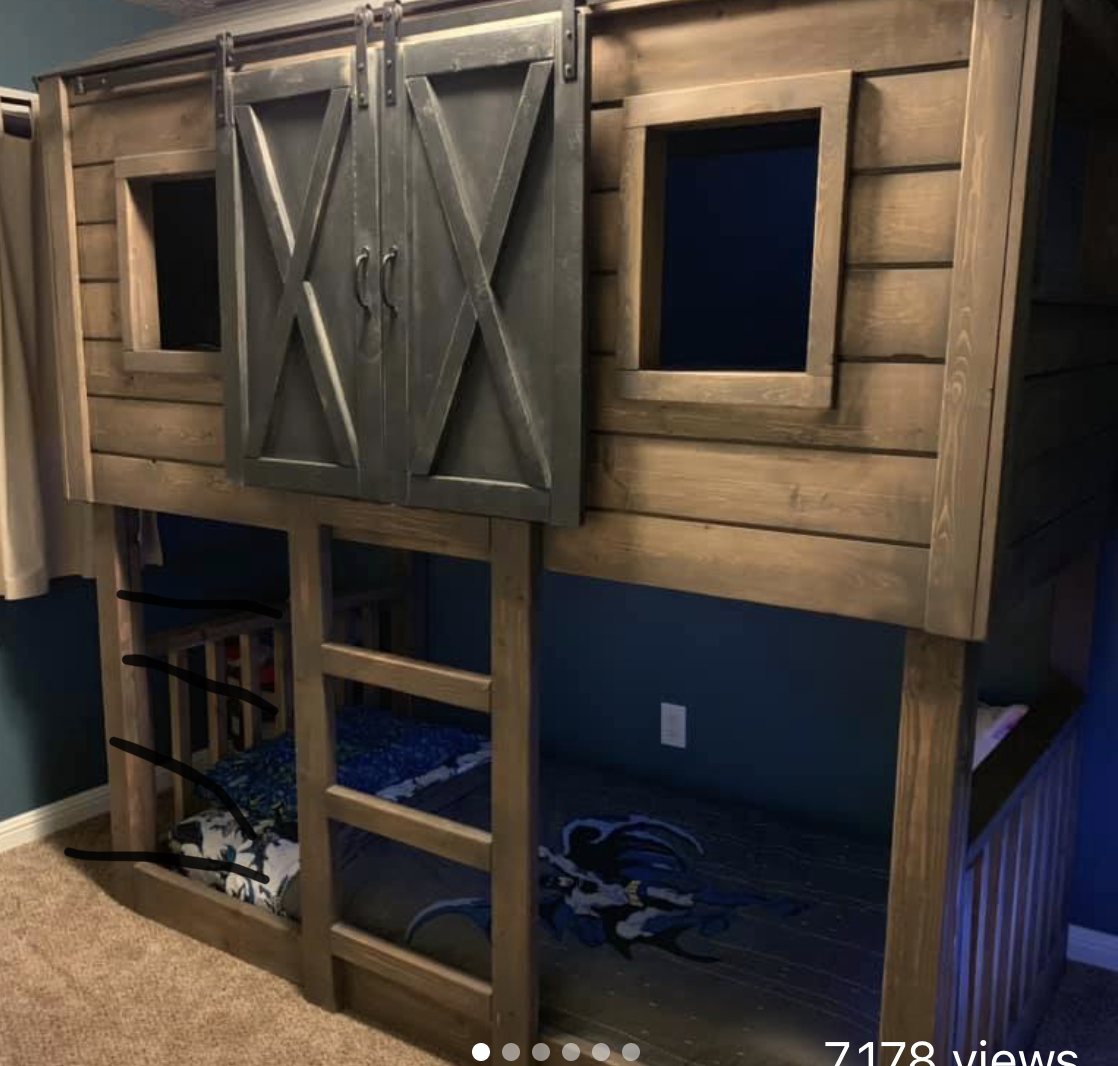
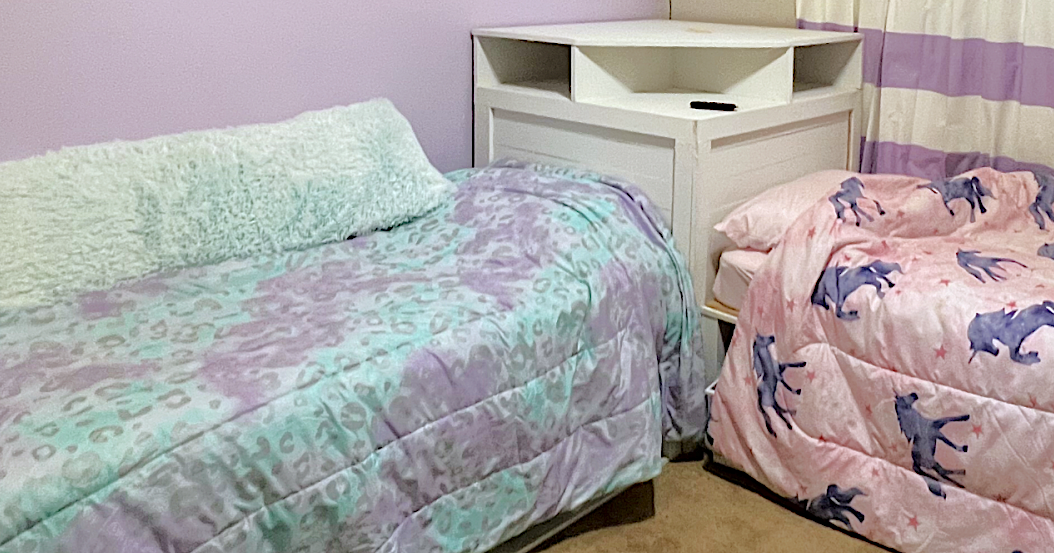
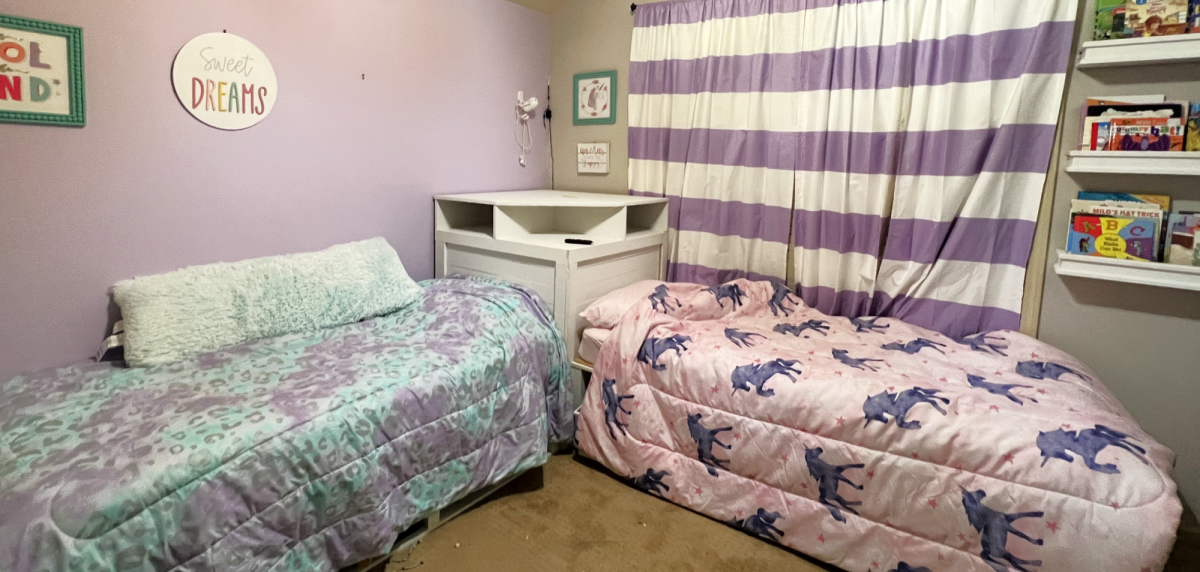
Our den is an awkward spot and we wanted to have a usable double bed as well as desk space for two people, but putting in two desks and a futon made it really cluttered and took up a lot of space, plus we were always having to move one of the desks in order to use the futon as a bed. So we combined all three items!
I changed the dimensions of the loft to accomodate the futon frame (I actually just dropped the futon bed support into the top of the loft) and then I used a long counter I already had as a desktop. The desk is sitting on large shelf brackets that are attached to the uprights of the loft, and then at the front there are shelves to hold up the front part of the desk.
It's ideal because most of the time we are not both working and so we can take advantage of the other person's space, but if we are both there there is enough room as well.
The plan I used below is awesome because everything is really firm but you can still take apart the key parts to get it out of the room. So I built it outside but put it together in the room itself.
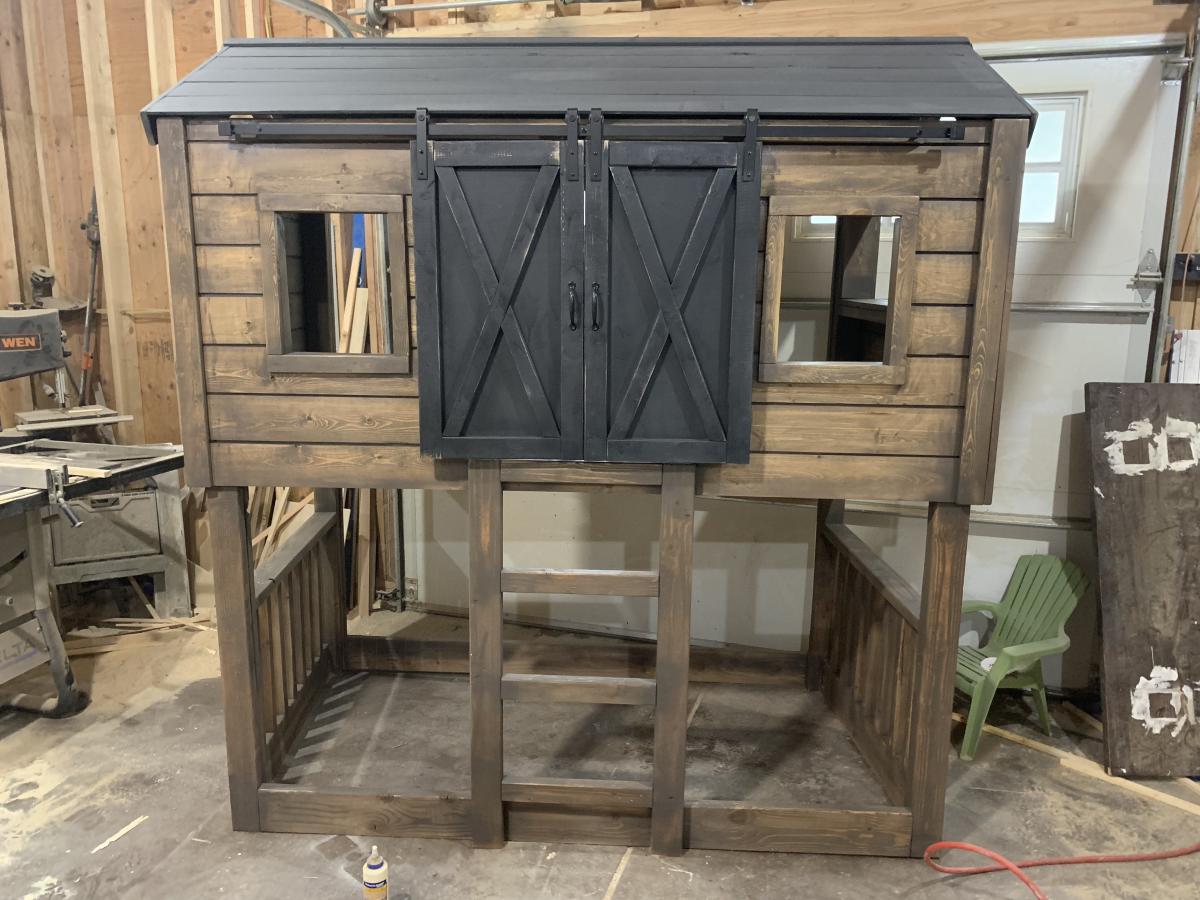
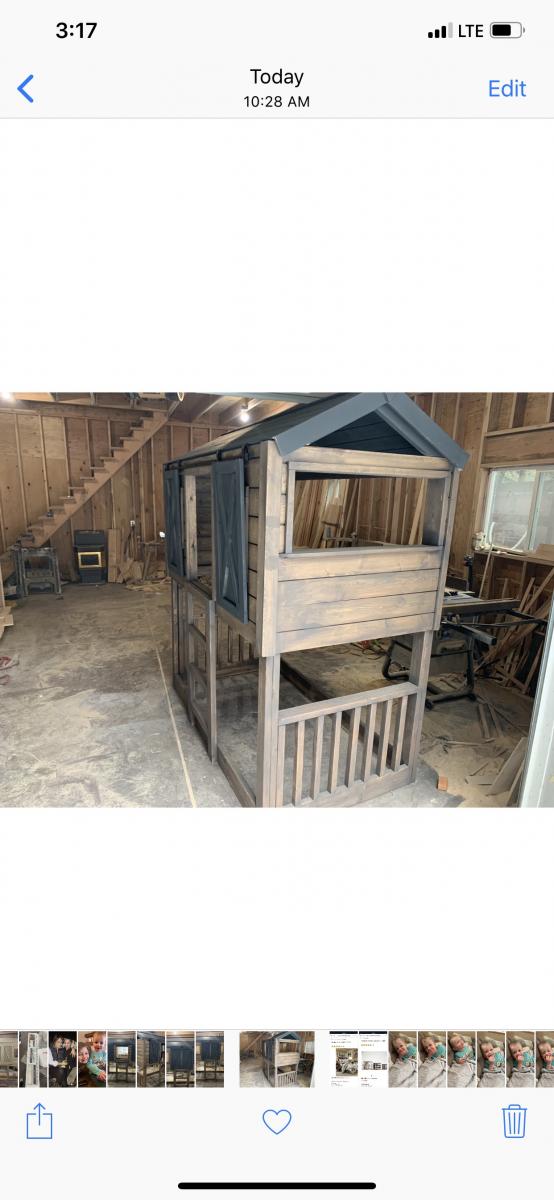
We call it the sky bed and my friends love it. I also ditched the ladder and built the shelving unit you see that is both a ladder and shelves, and takes advantage of the shape of the room.
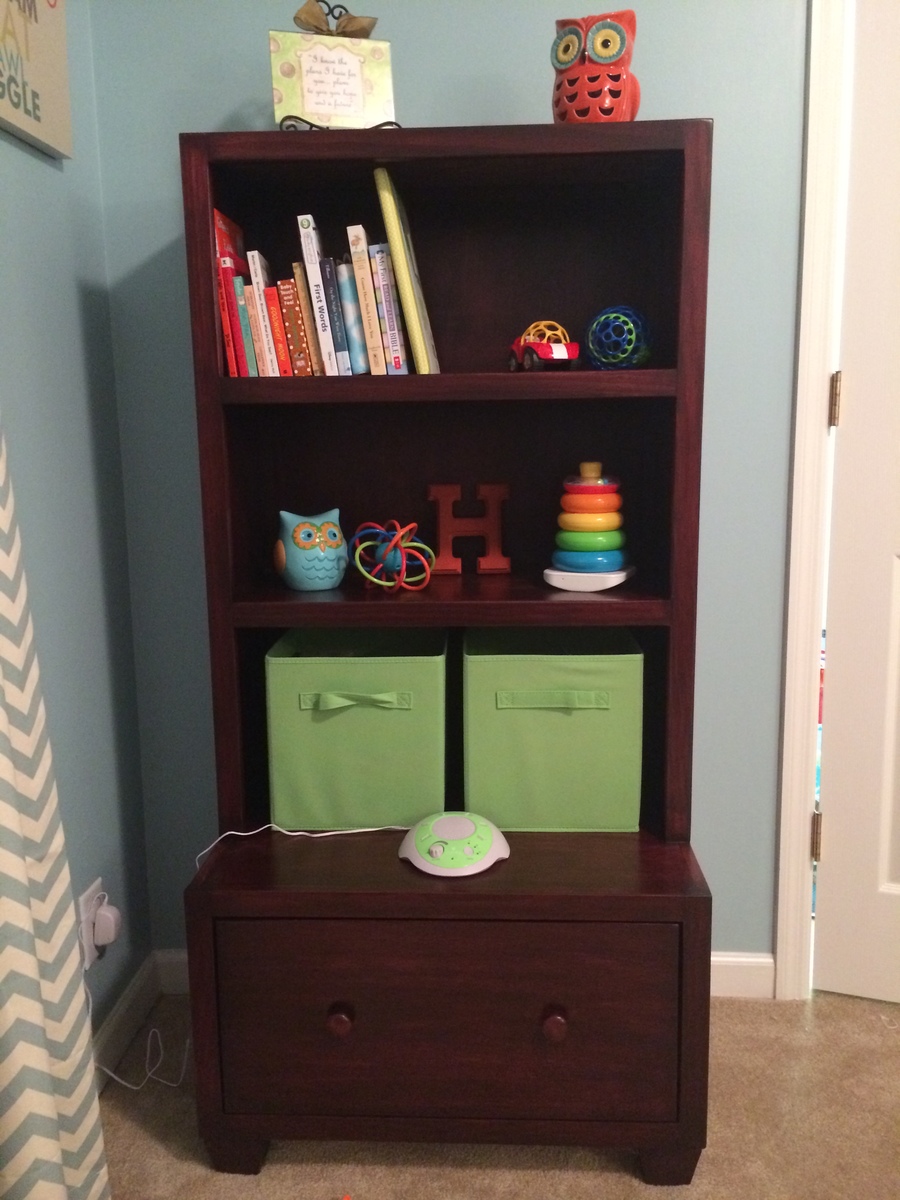
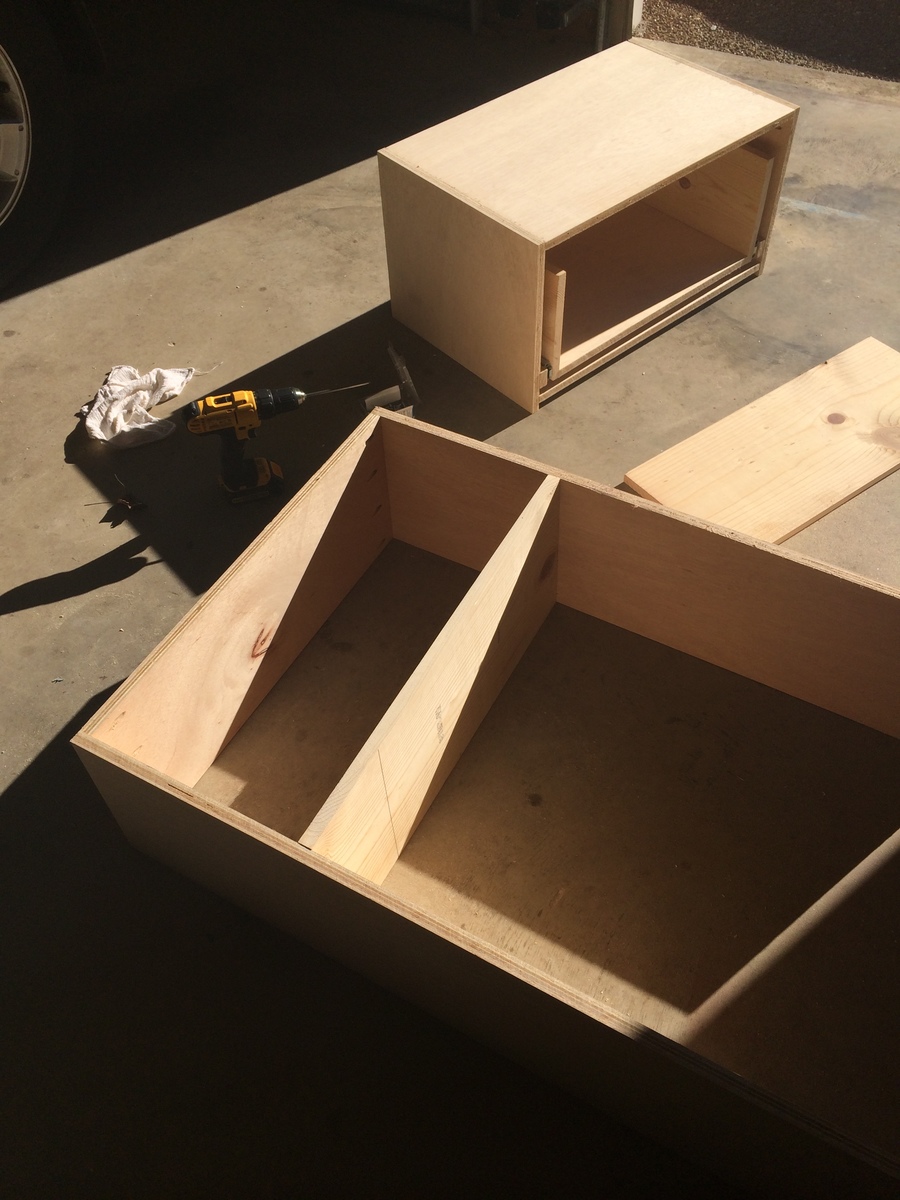
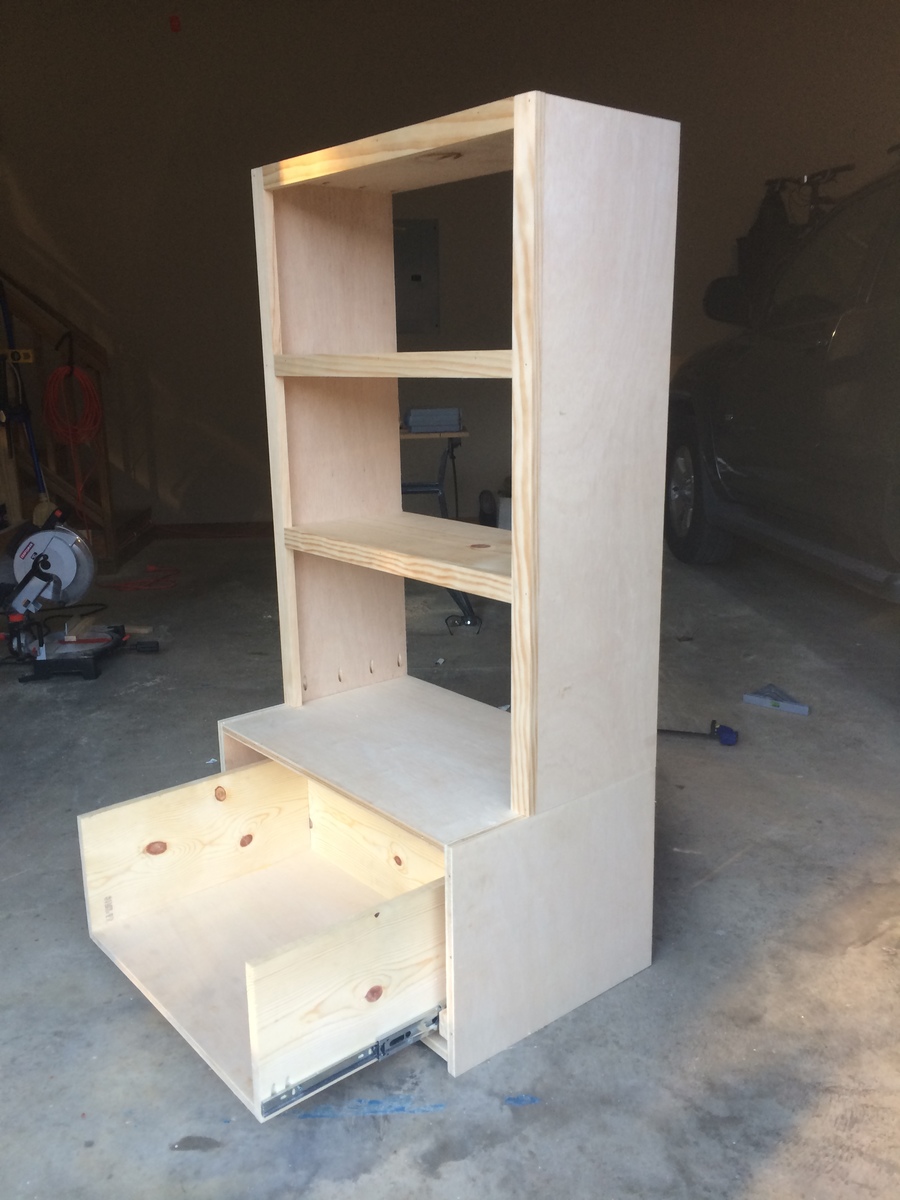
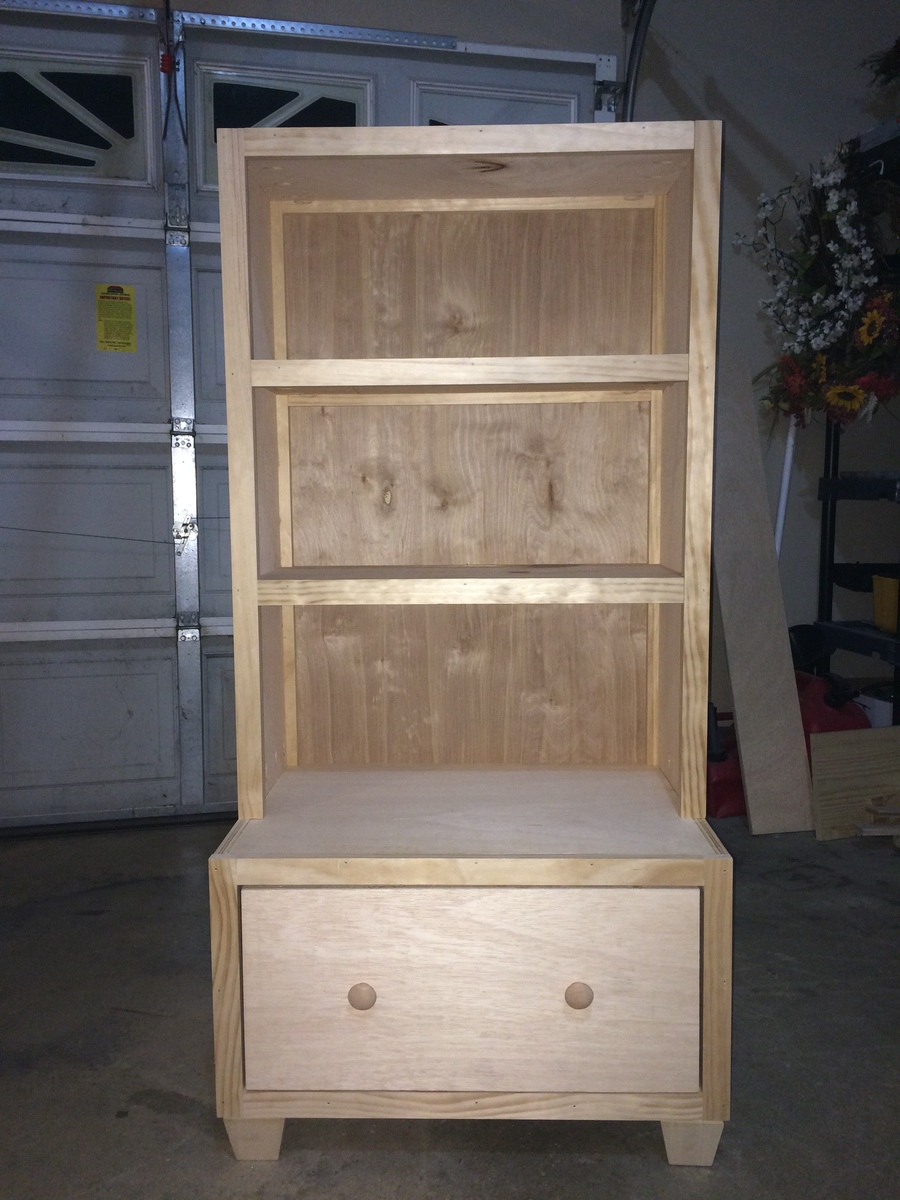
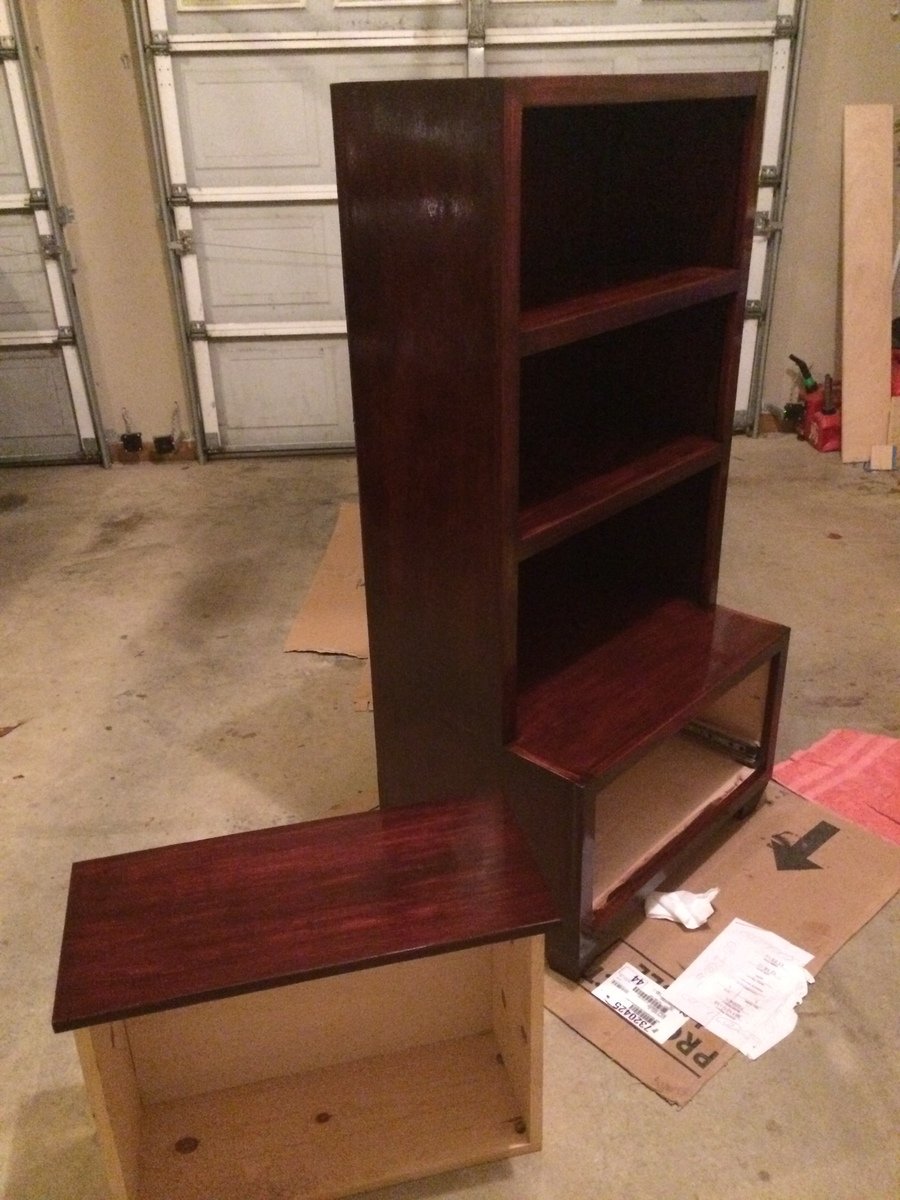
I built a bookcase with a large drawer beneath for my son's nursery. This build was based on Ana's plans for the Cube Drawer Bench and Hutch, but I changed a few things to make it my own. This was my first real attempt at making any kind of furniture, or anything else, really, and I'm fairly happy with the way it turned out. More importantly, my wife loves it.
I learned a TON from all the resources on this website. Thanks Ana!

Mon, 02/10/2014 - 15:59
It looks really great! One question, how did you attach the hutch to the bench?
Mon, 02/10/2014 - 16:54
Thank you!
I attached the hutch to the drawer by drilling 4 pocket holes on the inside of the bookcase where the bottom meets the top of the drawer. I also used wood glue. I was concerned about the hutch moving around, and the possibility of it tipping over, so I decided to go ahead and build the two components as one piece, essentially.
Also, in order to add some additional strength and stability, I combined the frames on both components so that I would have vertical 1x2's going down the entire length of the backside of the piece. I also added horizontal 1x2's on the backside of each shelf. All these things combined really gave it a lot of extra strength.
Ended up skipping the drawer slides as I made the drawers too wide. Not as tricky a project as I expected, and we’re thrilled with result!

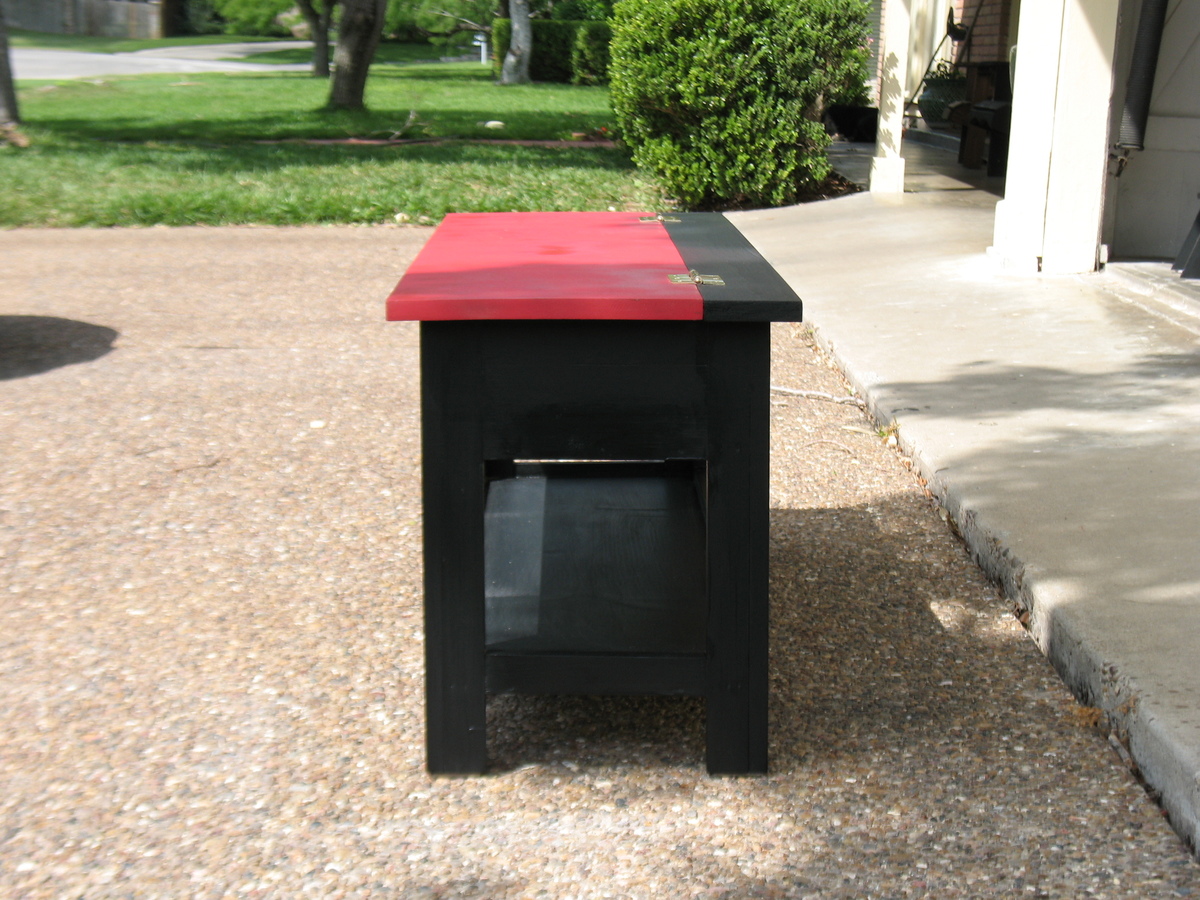
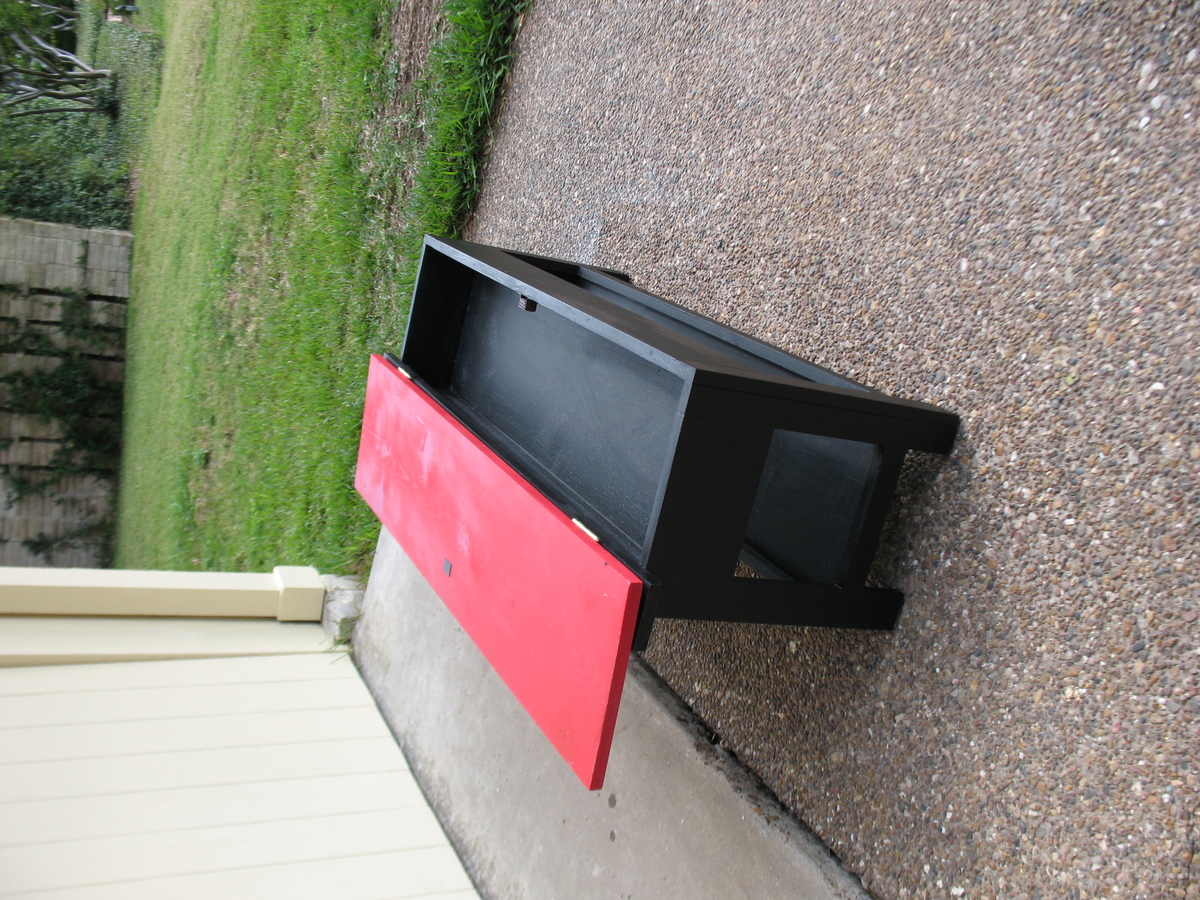
It is a great storage bench. It took me a while to finish it because I made the decision to make the storage area deeper to 4.5 inches without thinking about how that would change the side panels. So I had some adjusting to do. I took my medicine and moved on. I was going to use the bench in the garage to store tools but it came out so well that now I may find a place in the house. Great bench and very sturdy. I was going to paint it entirely black but the idea of the flip top being a different color hit me and I kinda like it. If I do it over I would go with black hinges, which I can still do.
This is my first build!
Had a blast building this and turned out beautiful!
cant wait to start on my next!
Sun, 02/16/2014 - 22:21
Looks AWESOME! I did something similar with the wood on white, I just posted the build :) I am going to have to copy this though!!!

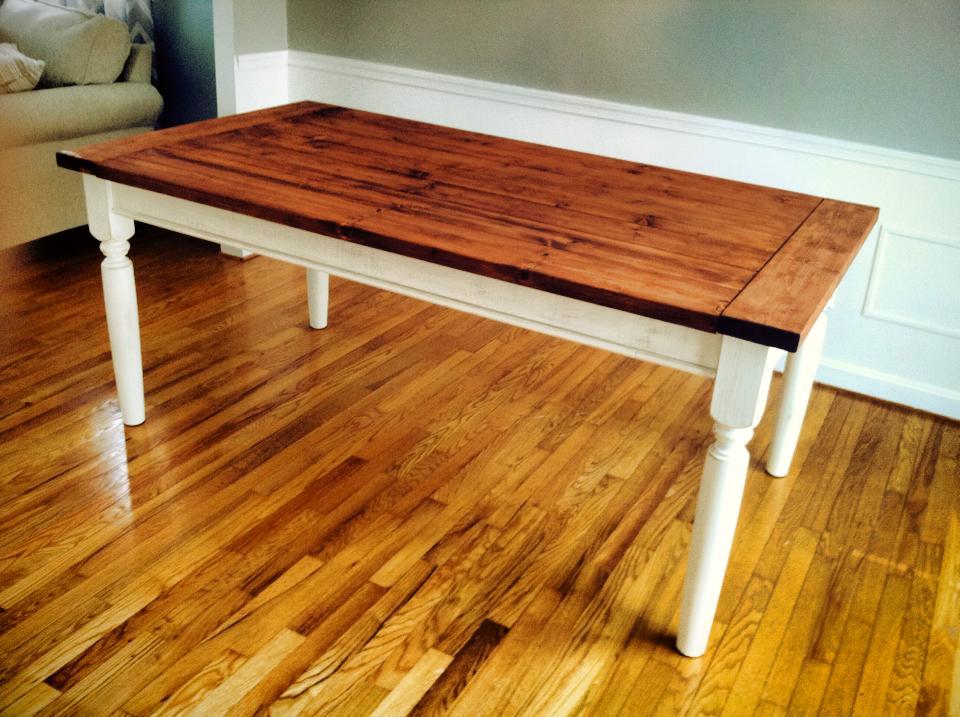
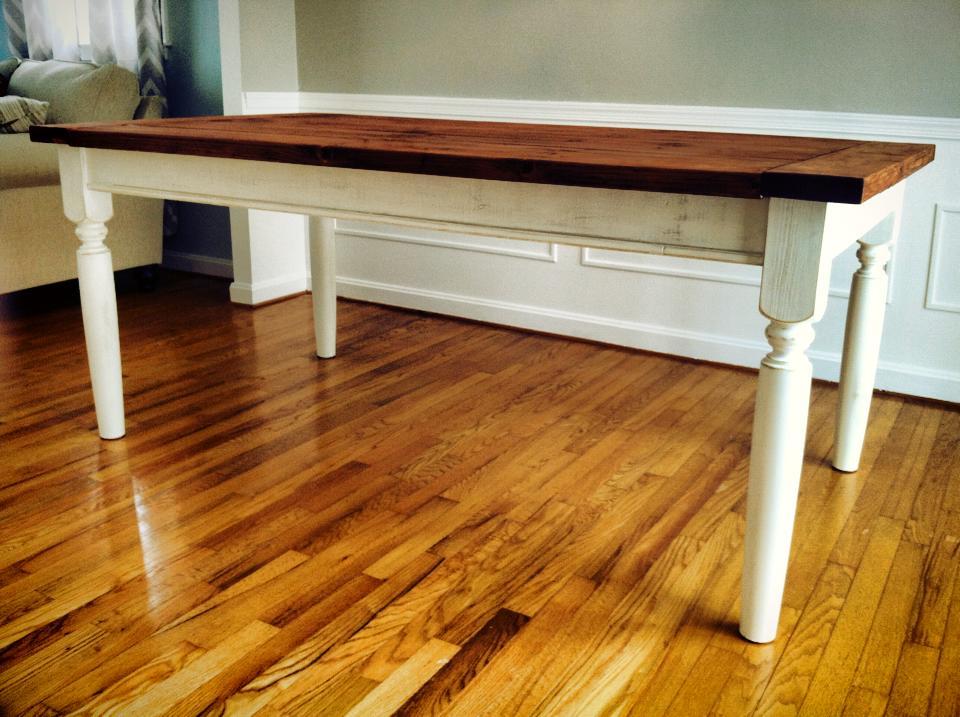
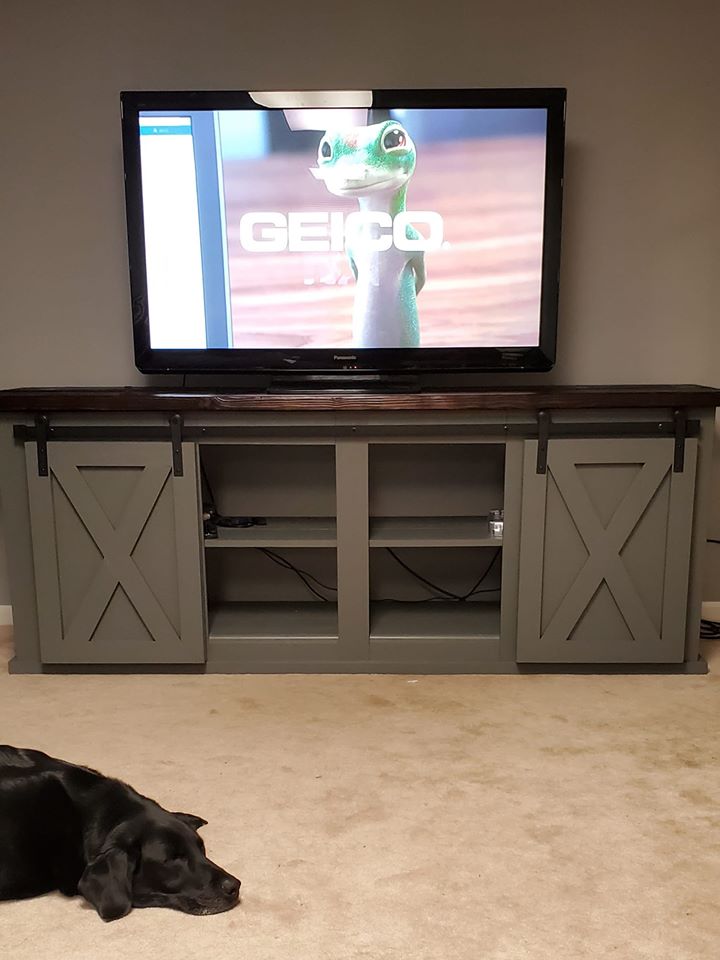
We made some minor changes to the overall finish from the plans for the coffee and end tables, I had a hard time matching the stain color, as well as omitting the hardware (I painted it but we never got around to attaching it).
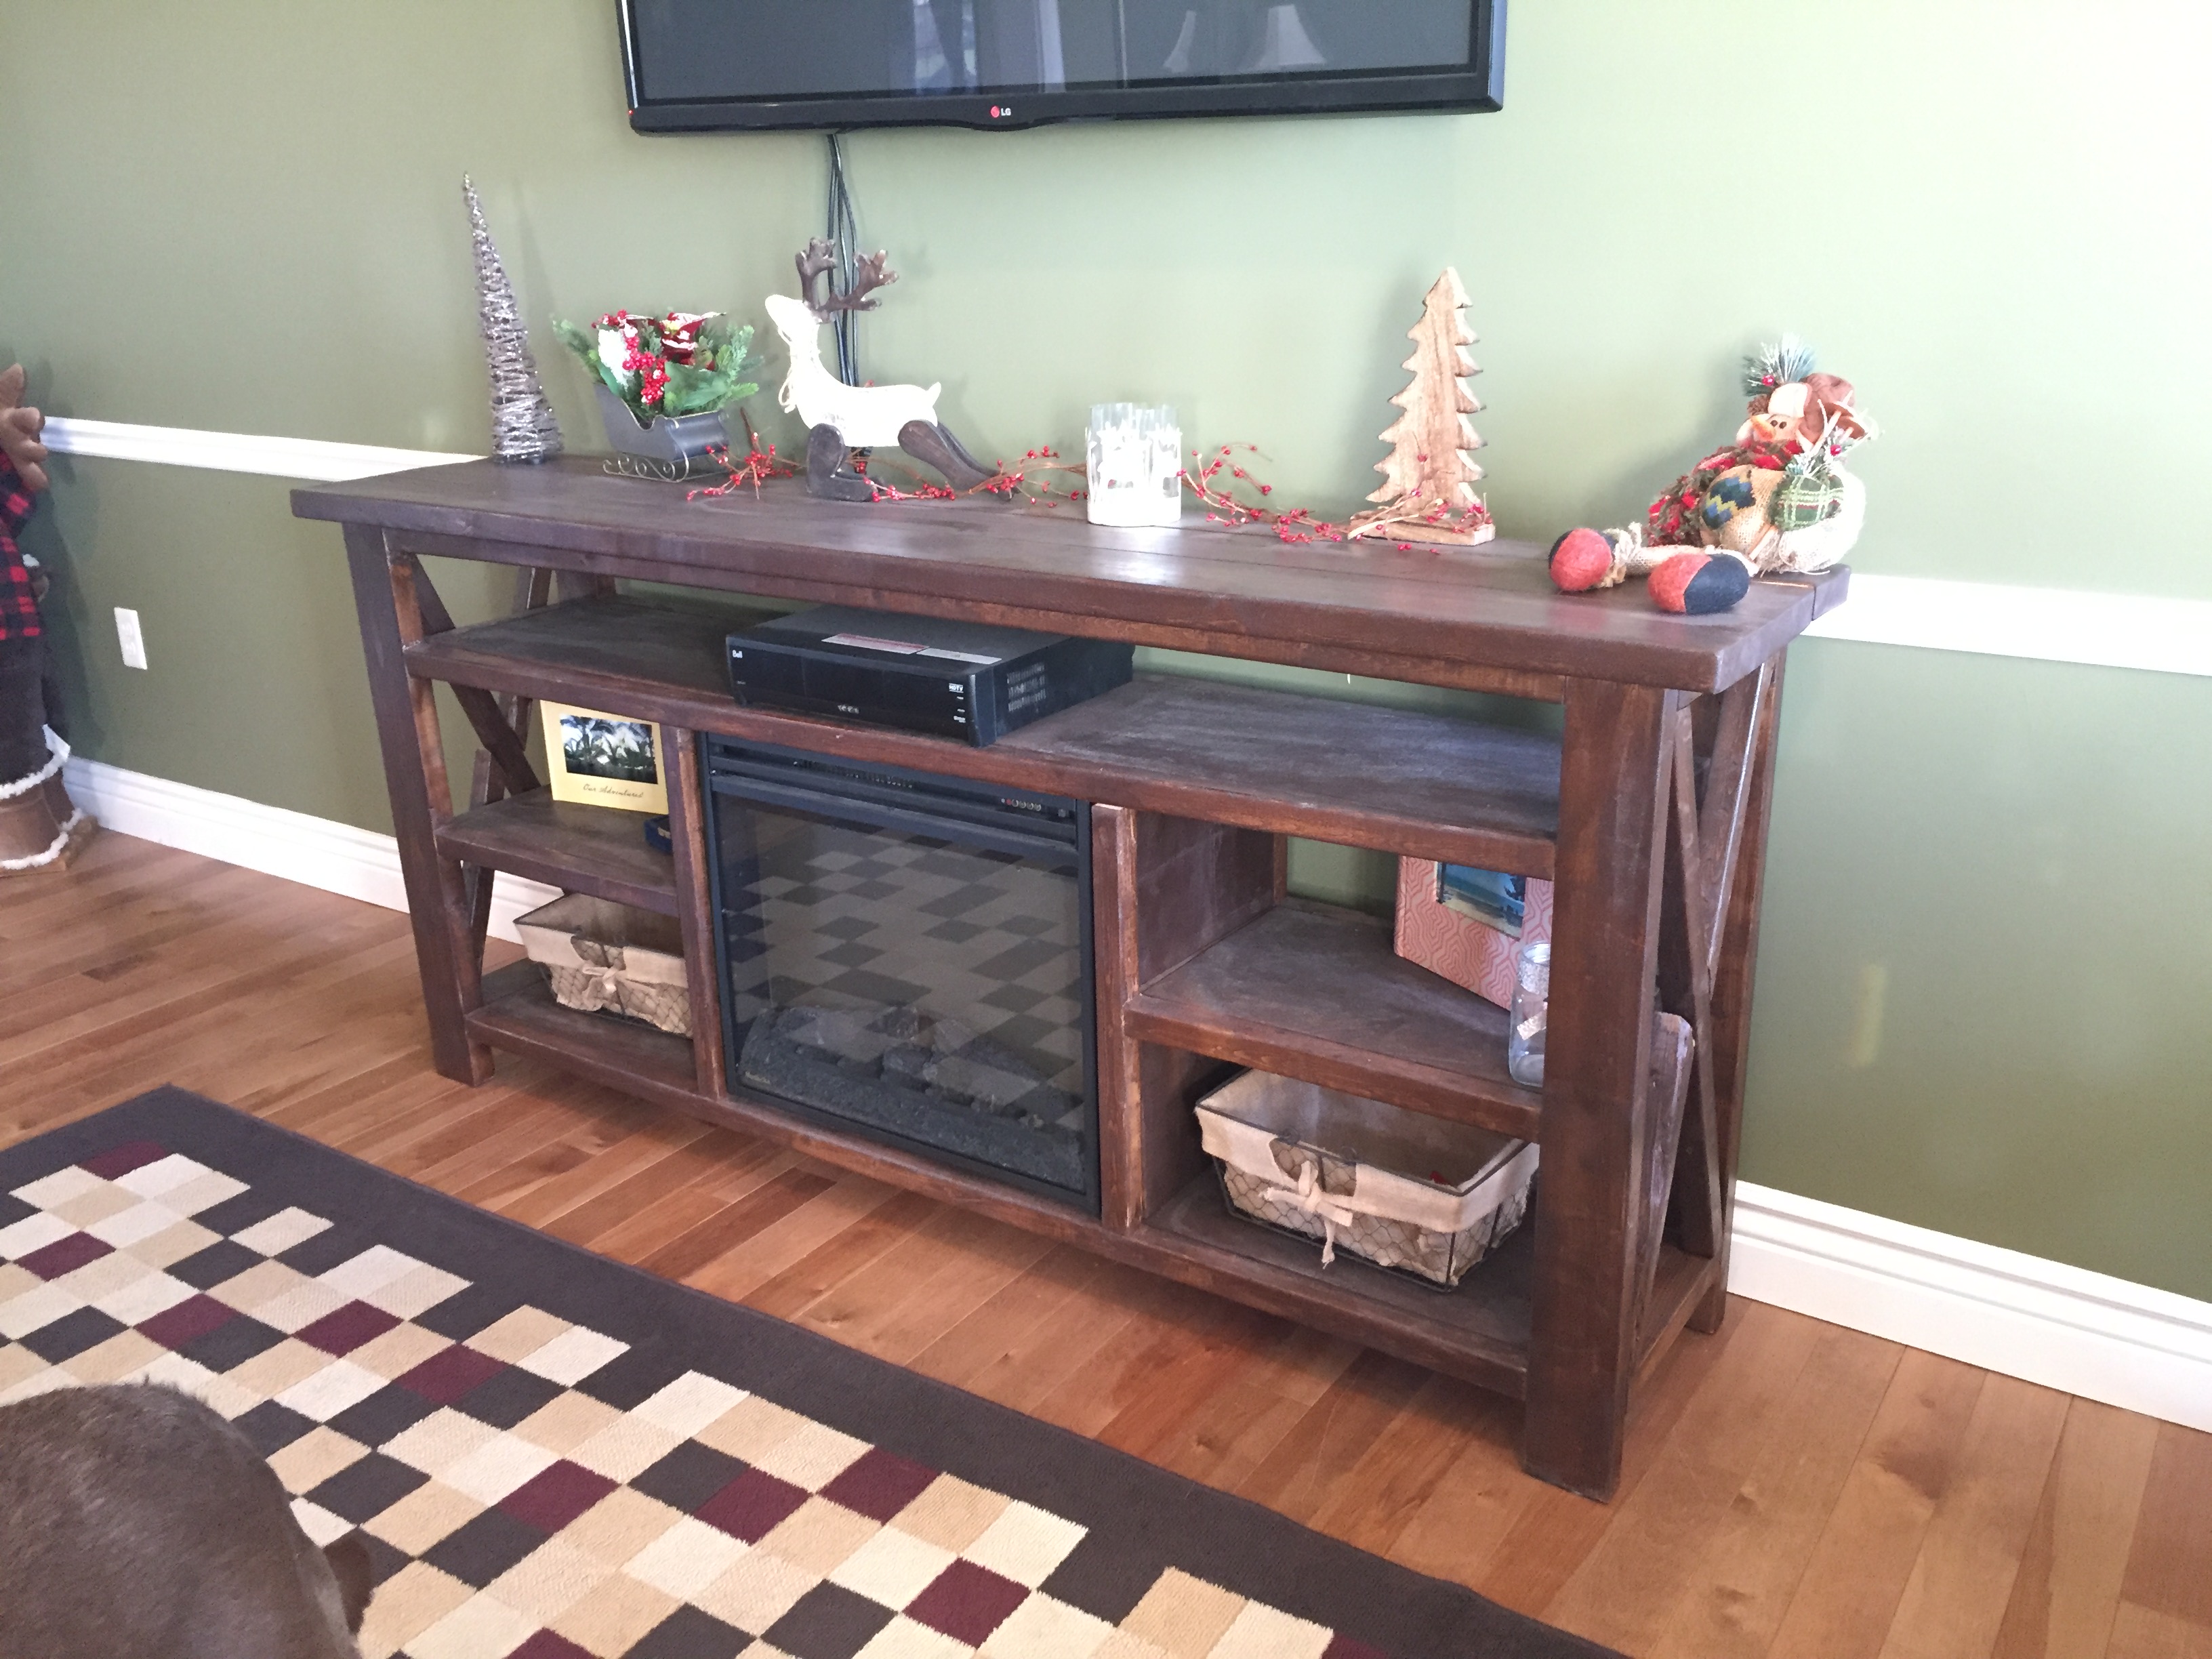
We had a console table that we were replacing (we bought it when we first moved in and I've never been overly thrilled with how it looked in the room) and hubby did a GREAT job incorporting the fireplace from that unit into the console table.
Over all, a fun and inexpensive set of living room furniture. Can't wait for our next preoject!! We're planning an "X" inspired dinning room table for 10. I'll be sure to post pictures!


Hand made kids fort bed
Tue, 02/18/2020 - 19:16
This is perfection! And exactly what my boys have been asking for. Any chance you have your modifications? Thanks!
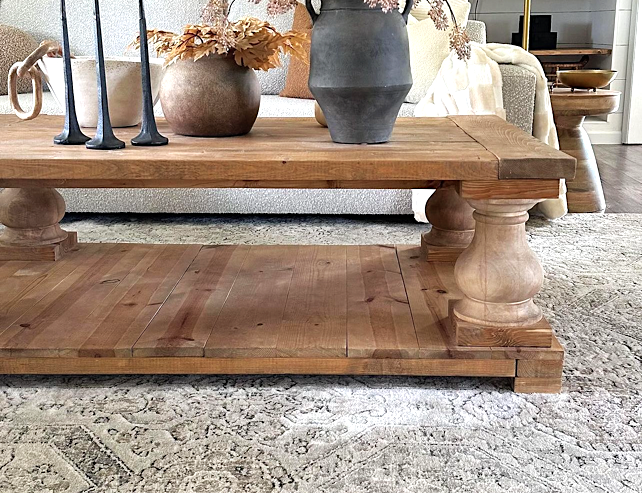
Gorgeous wood coffee table decorated for fall by hendersonhom_ on Instagram
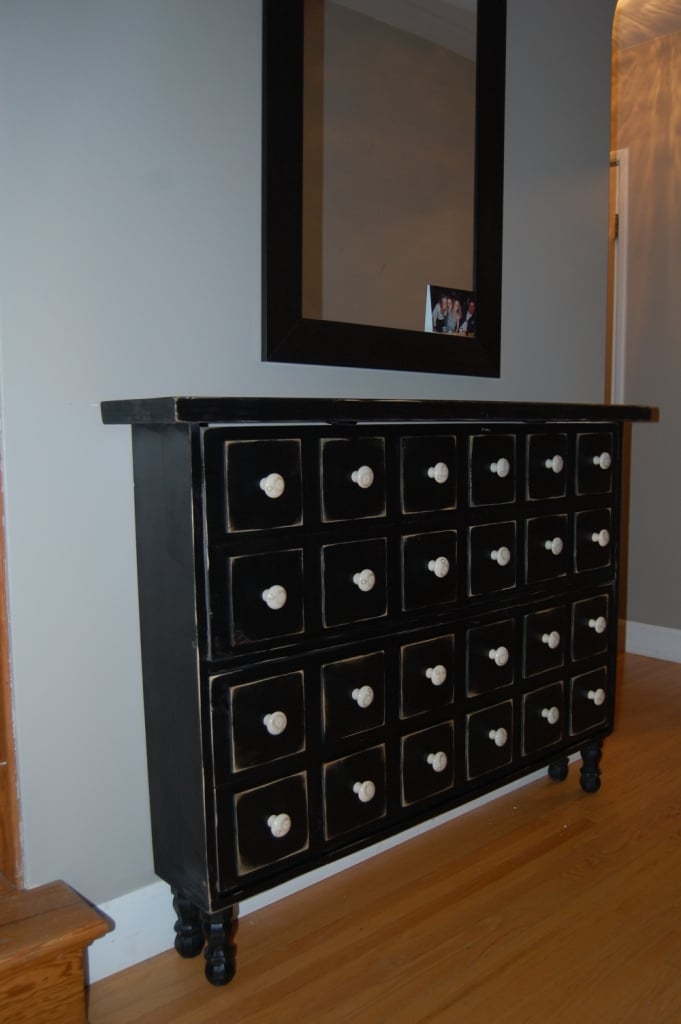
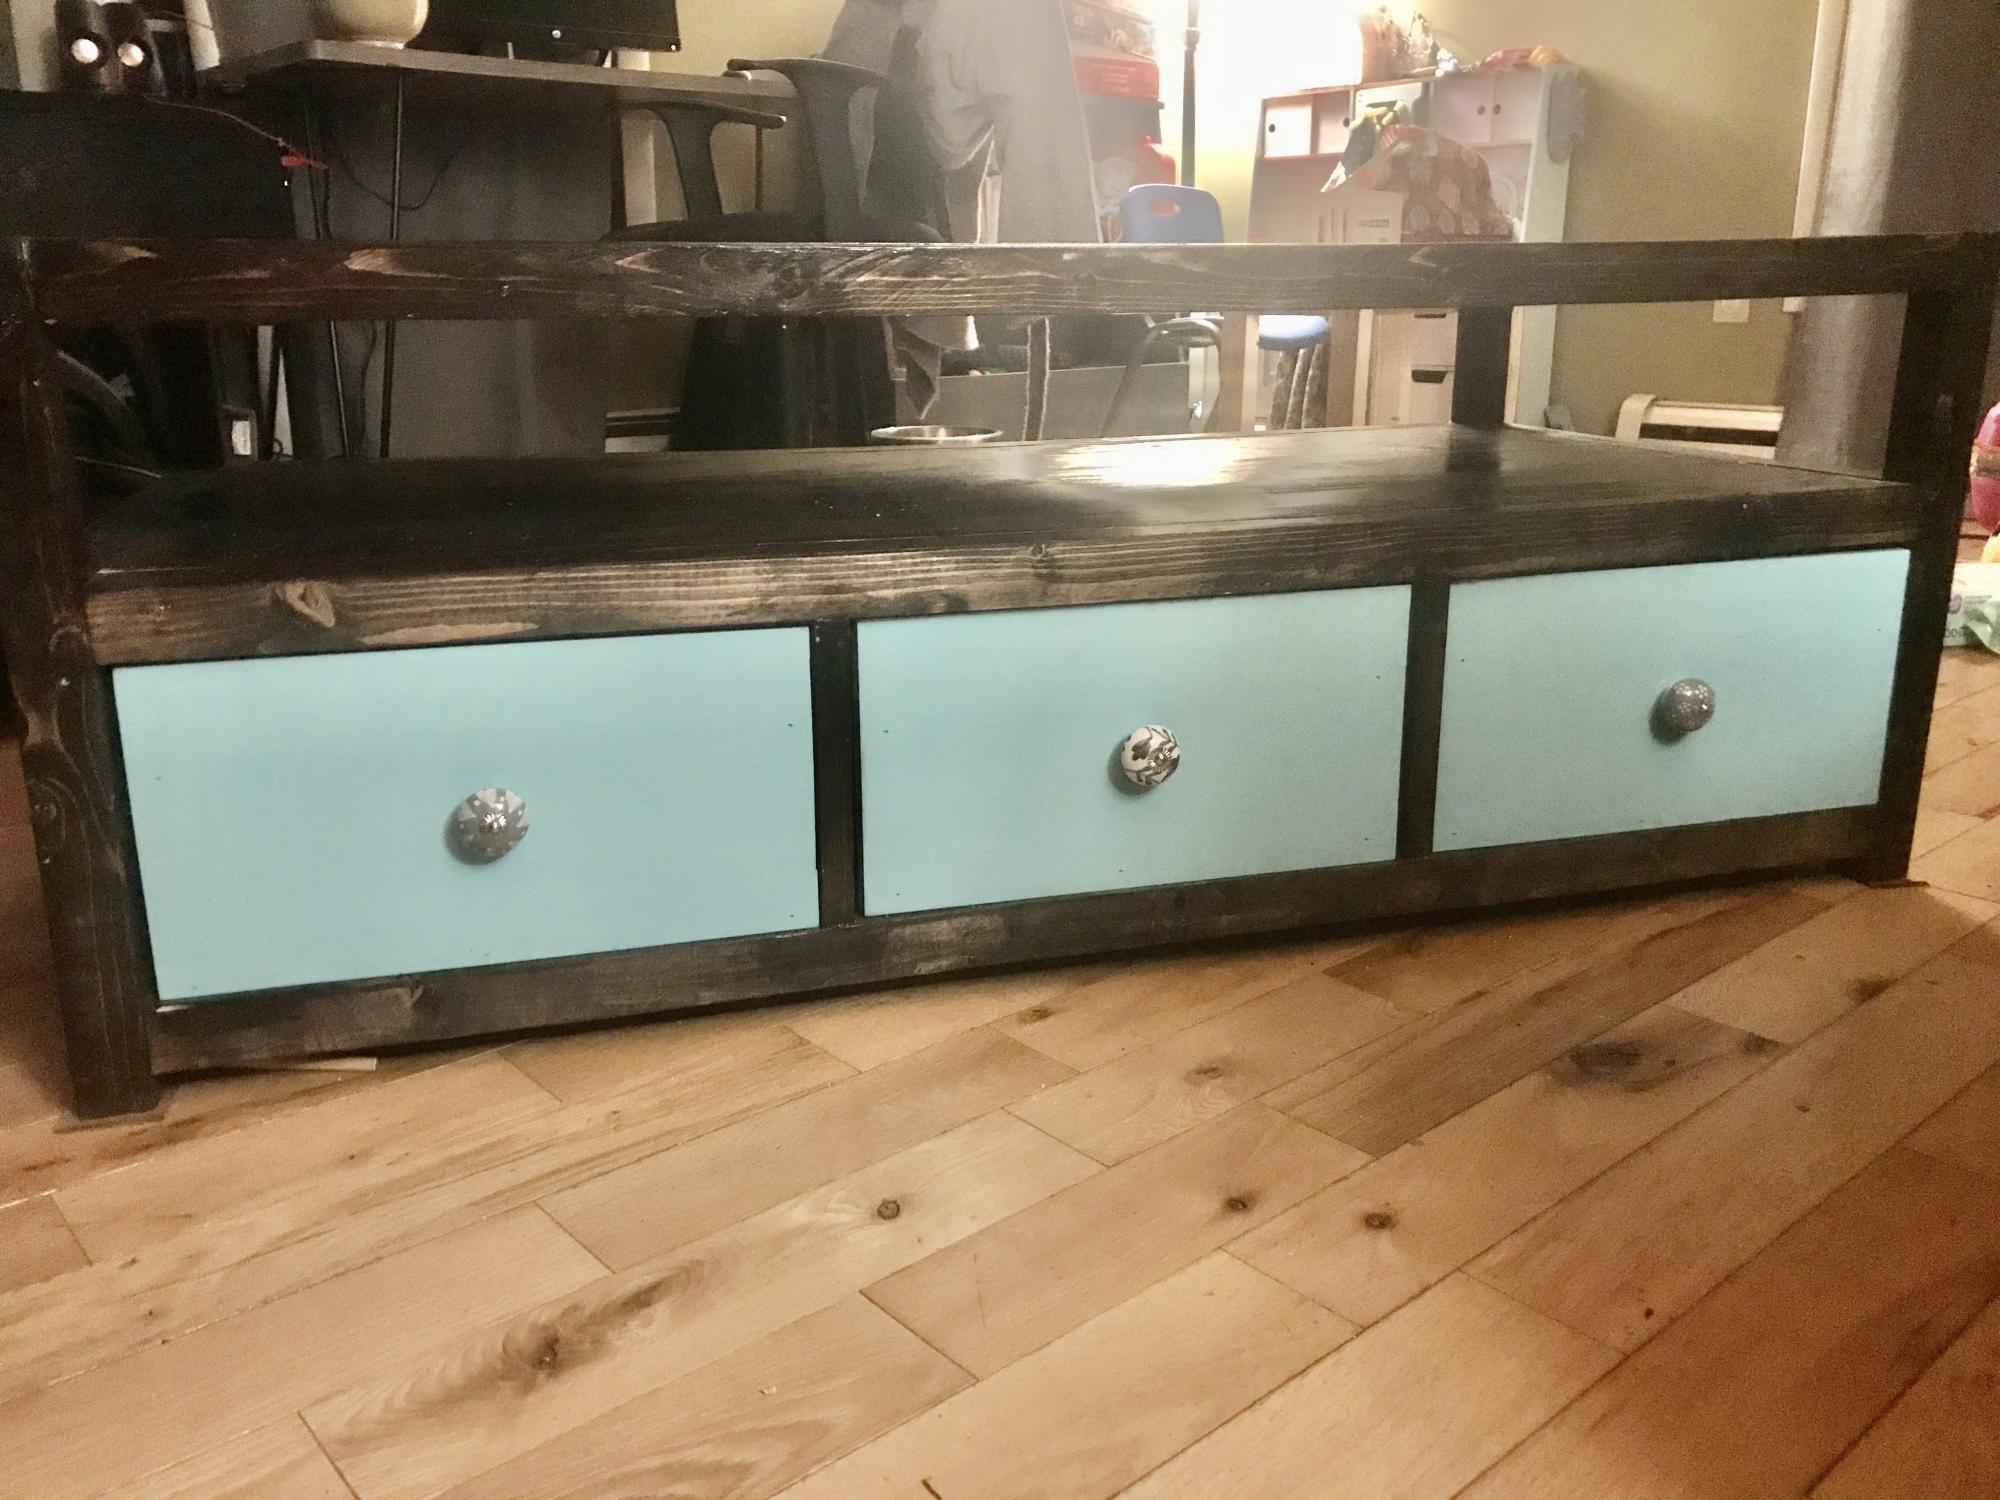
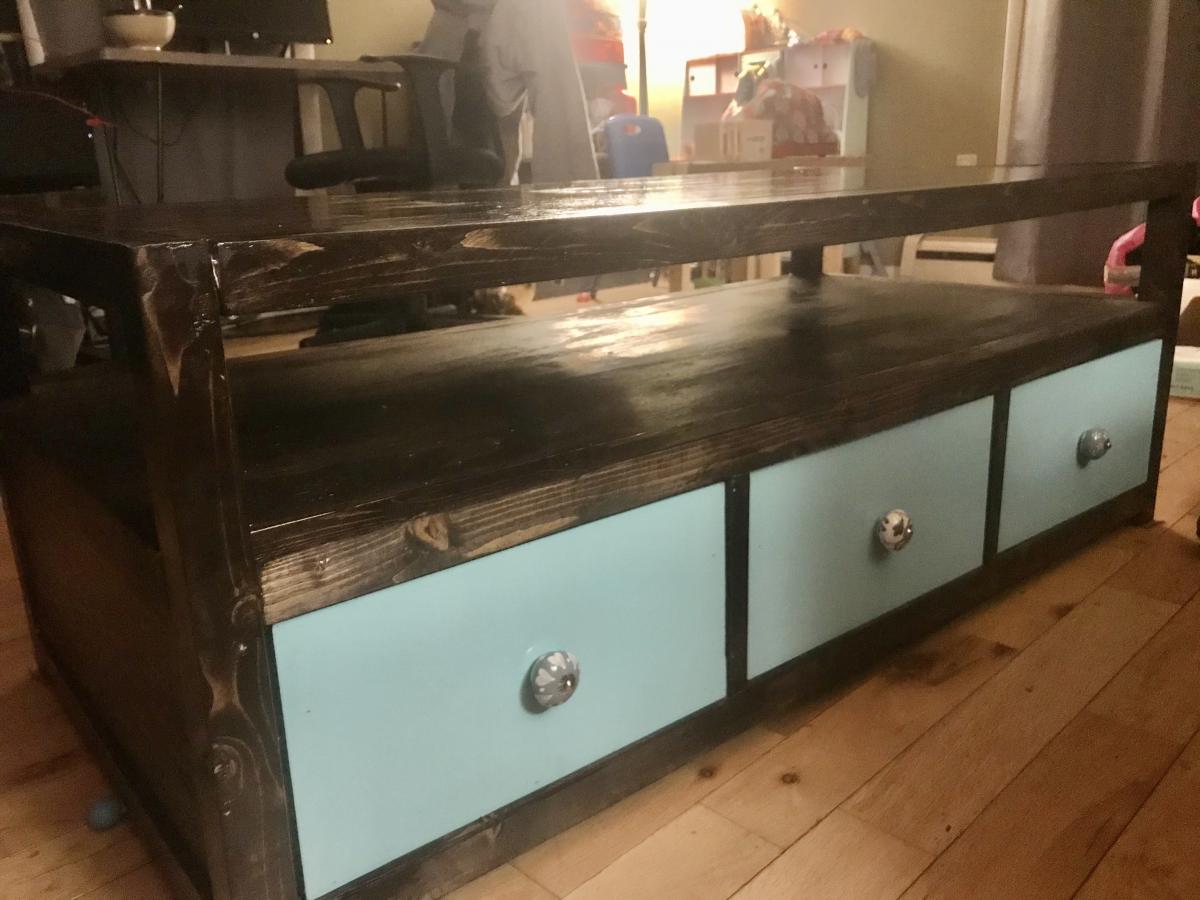
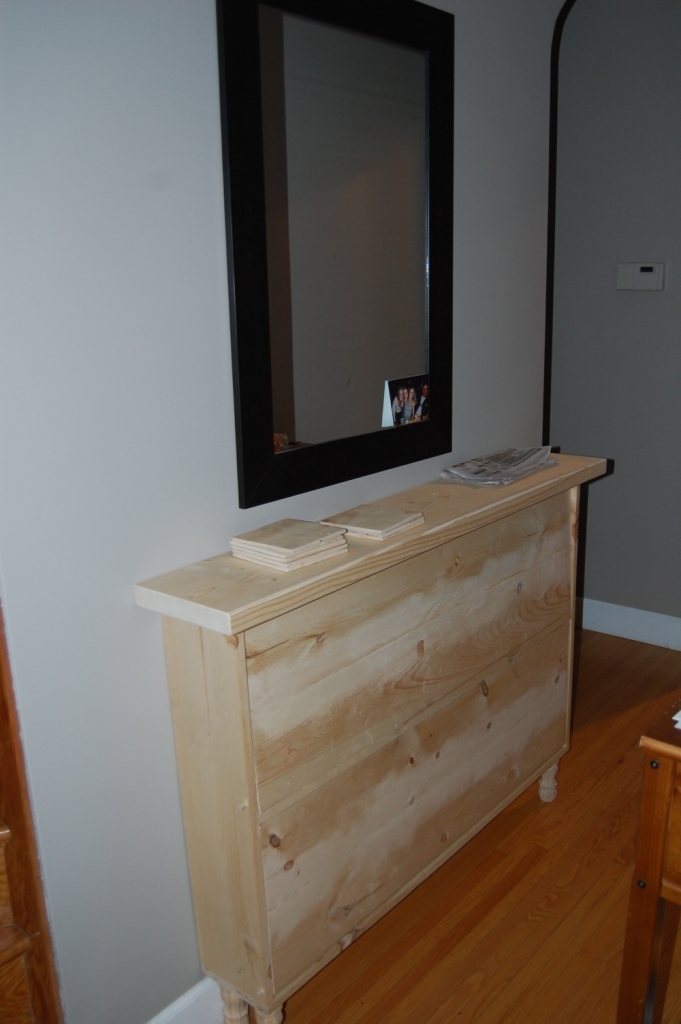
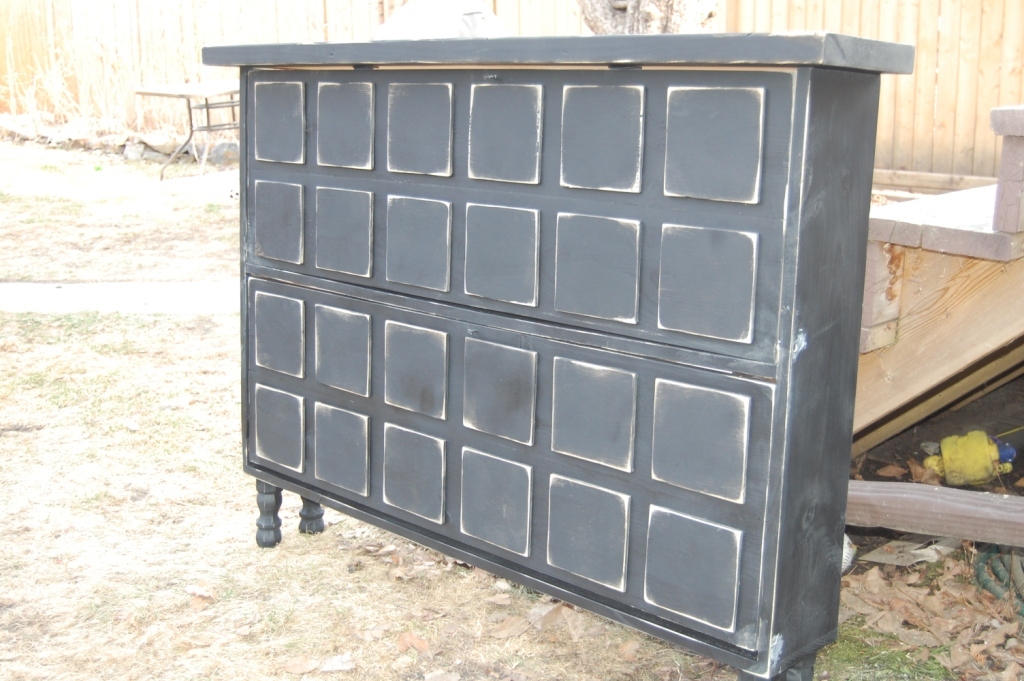
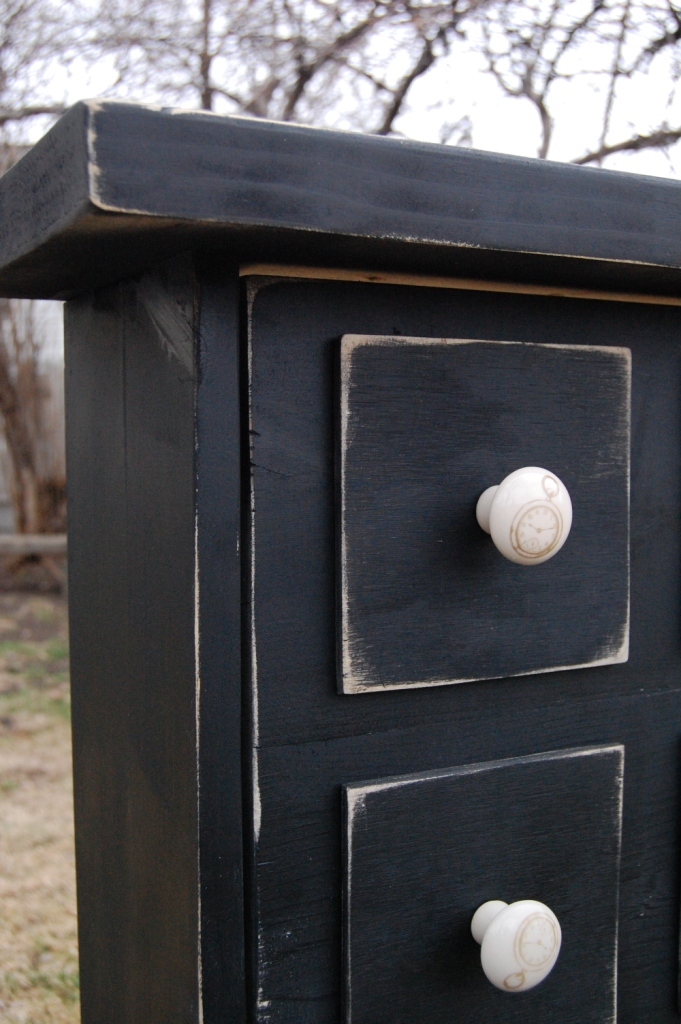
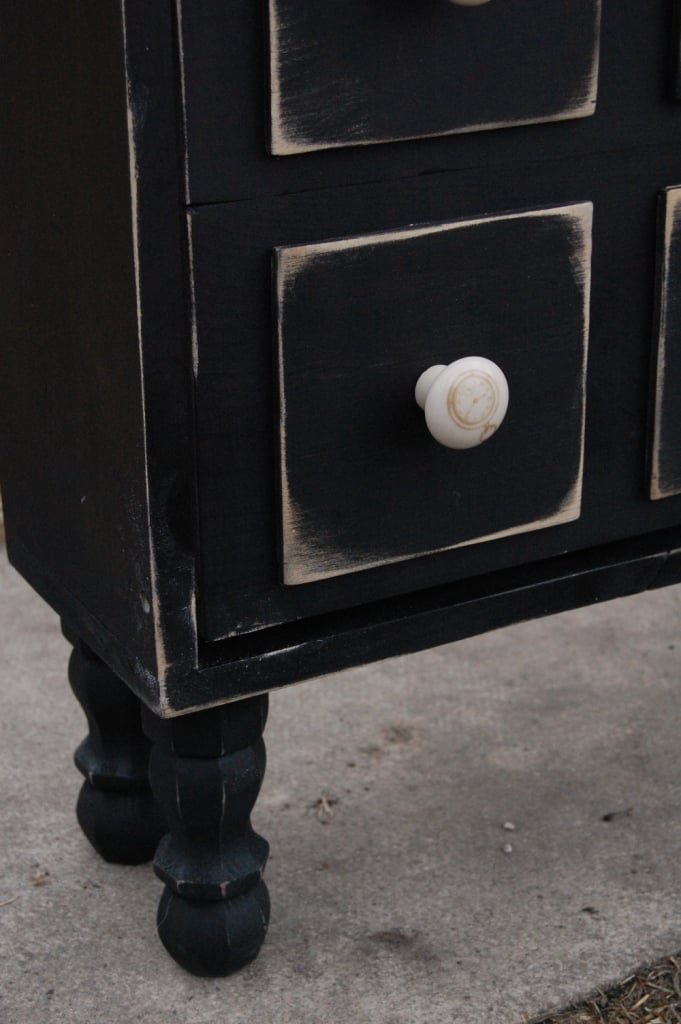
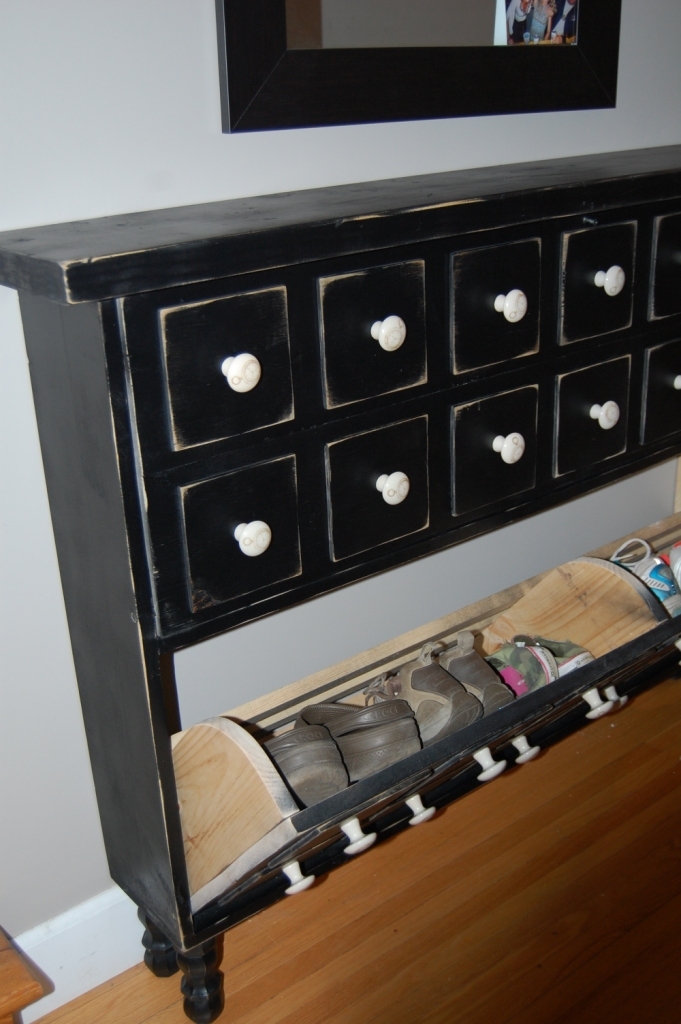
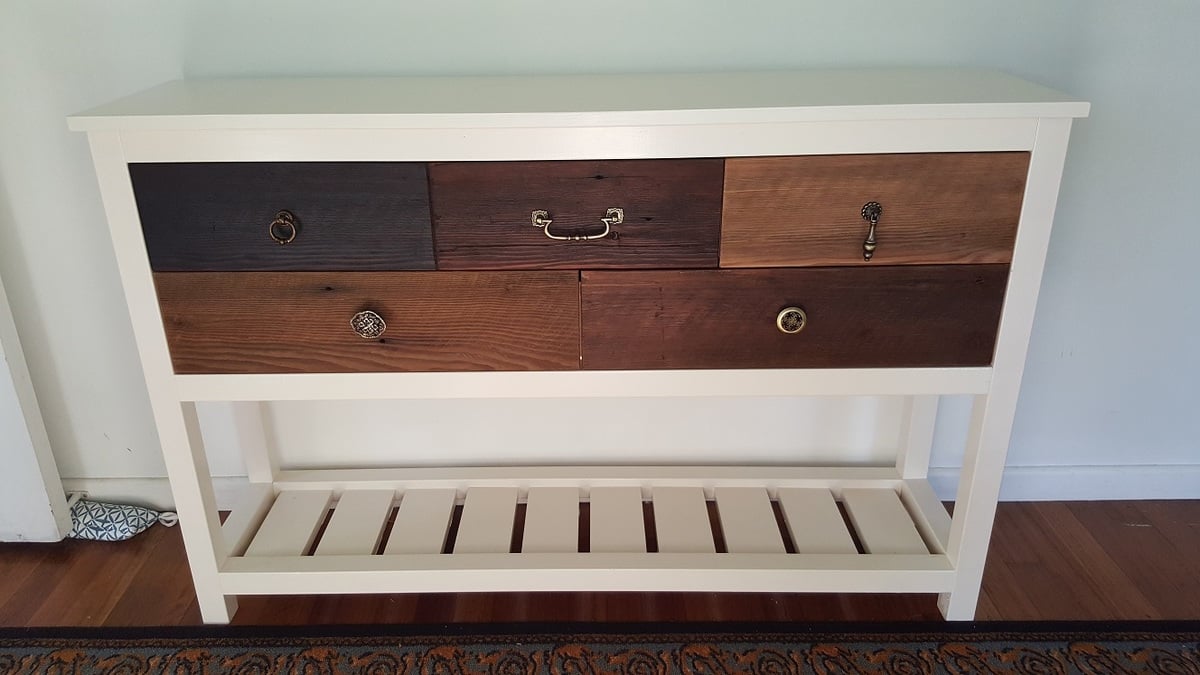
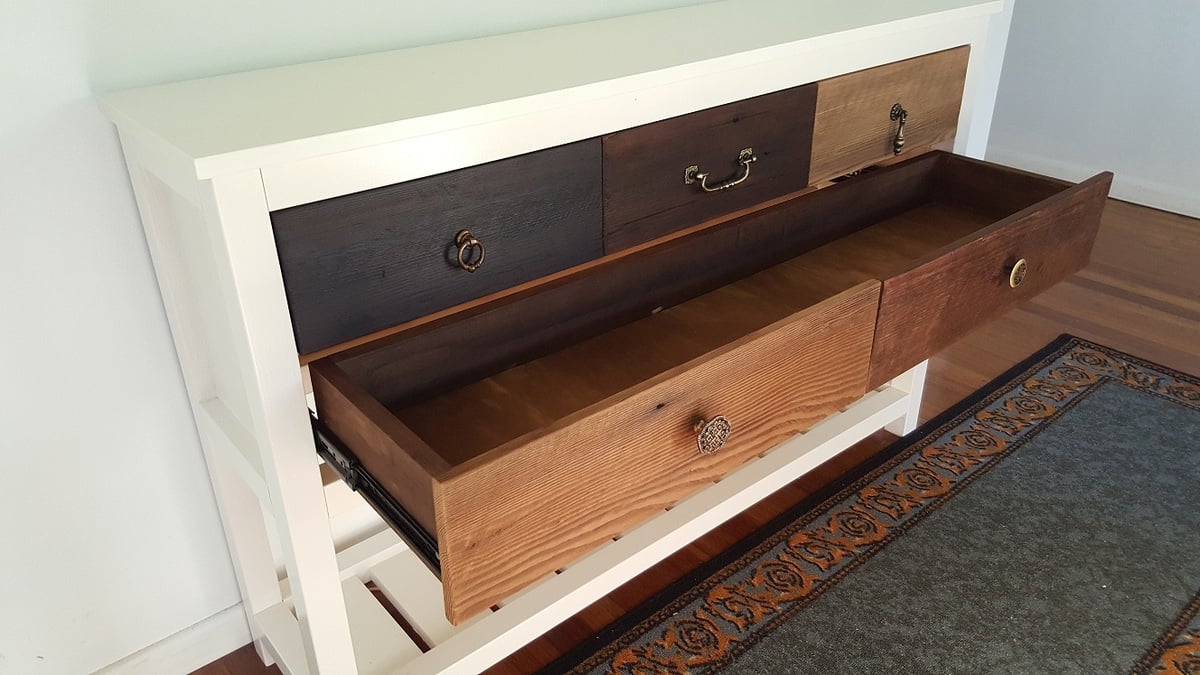
I have been planning to build the apothecary media console, but my desire for a new hall table and shoe storage won out. So...I transferred the look, and I love it! I wanted a vintage feel so I added legs, apothecary drawer fronts and knobs, a 2x10 top, and a distressed finish.
Tue, 05/01/2012 - 07:52
You are a very smart cookie - who would think that there are shoes in there! awesome~
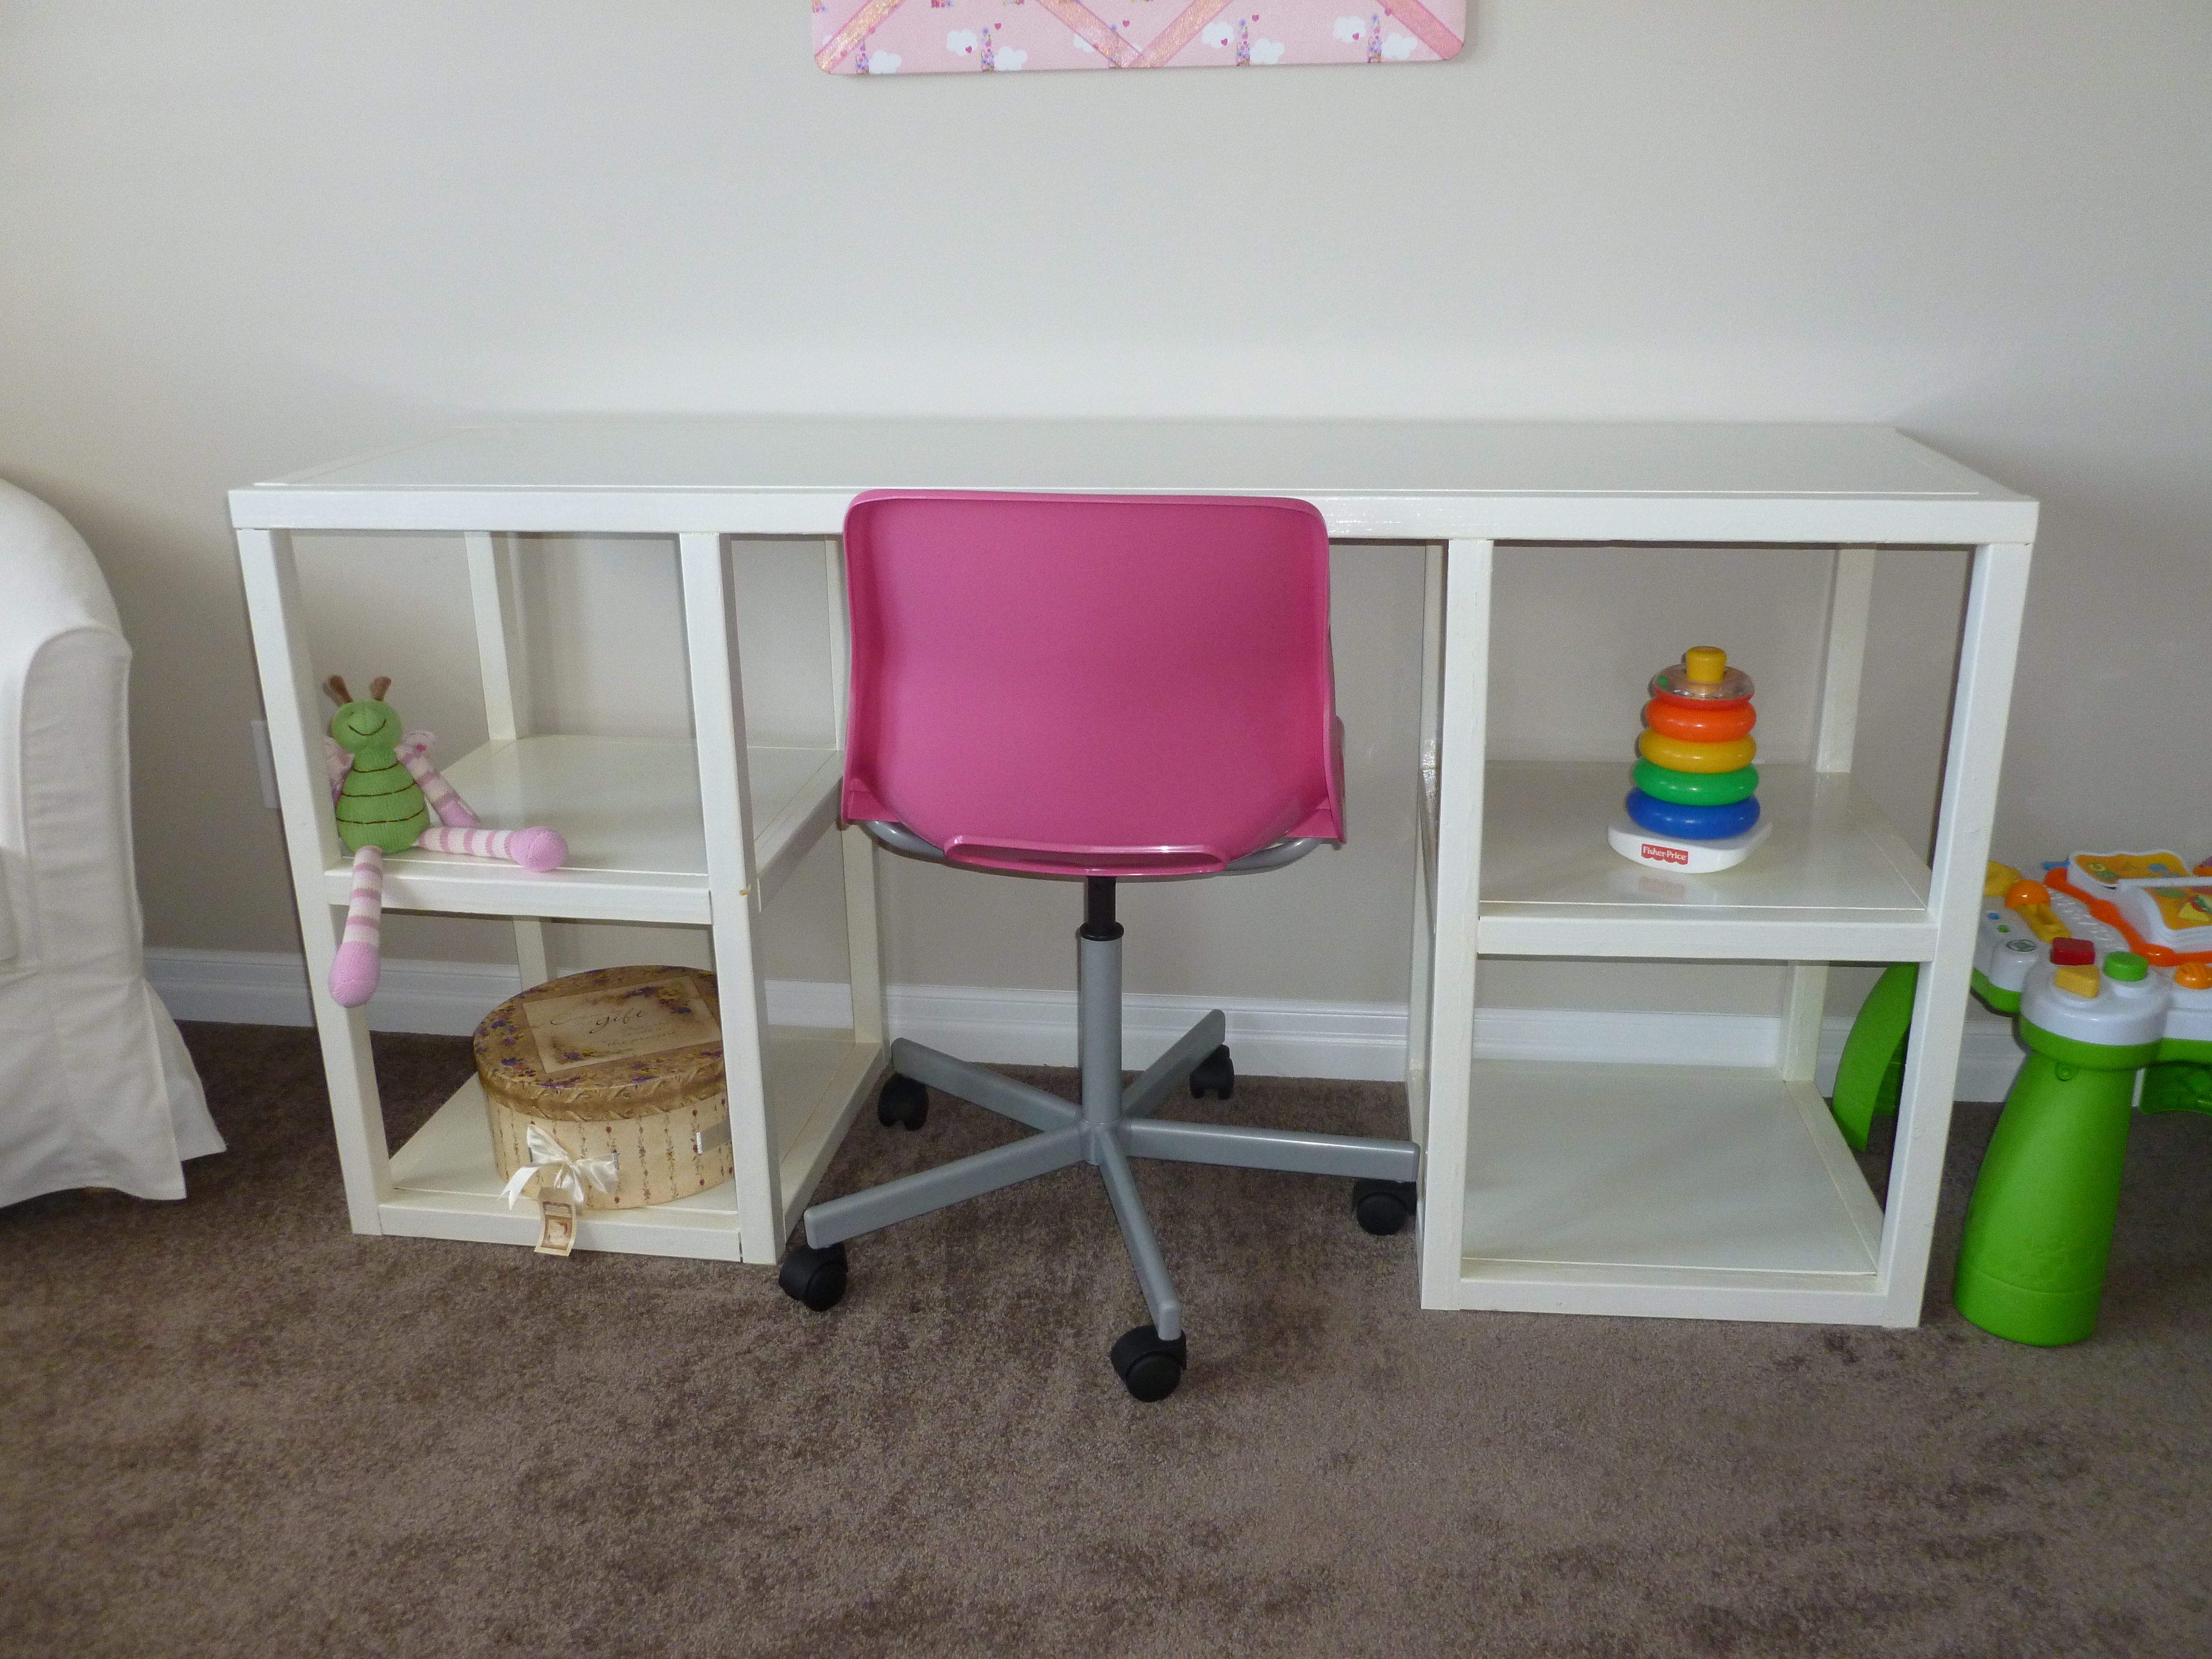
I was very excited to make this for my daughter. I made the tops and shelves from MDF. Unfortunately, I made the mistake of buying construction-grade 2 x 2s, instead of select pine, as I didn't know there was a difference at the time. DON'T do this! The select pine looks much better, with crisper edges and cleaner lines.
The assembly was a bit tricky on my own, but I managed to get it done. I really like the general looks of this desk, but I made a few mistakes along the way so I'm probably going to build another, without the mistakes.
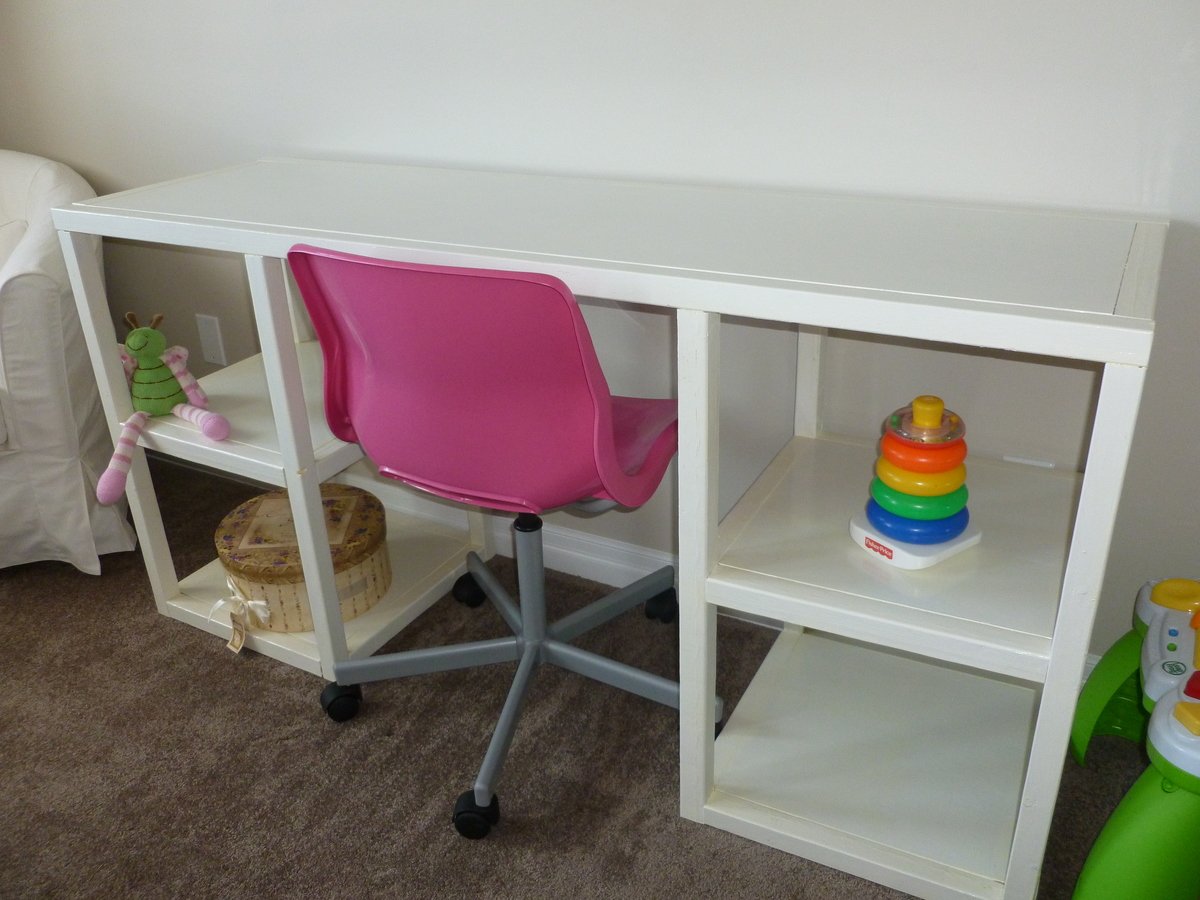
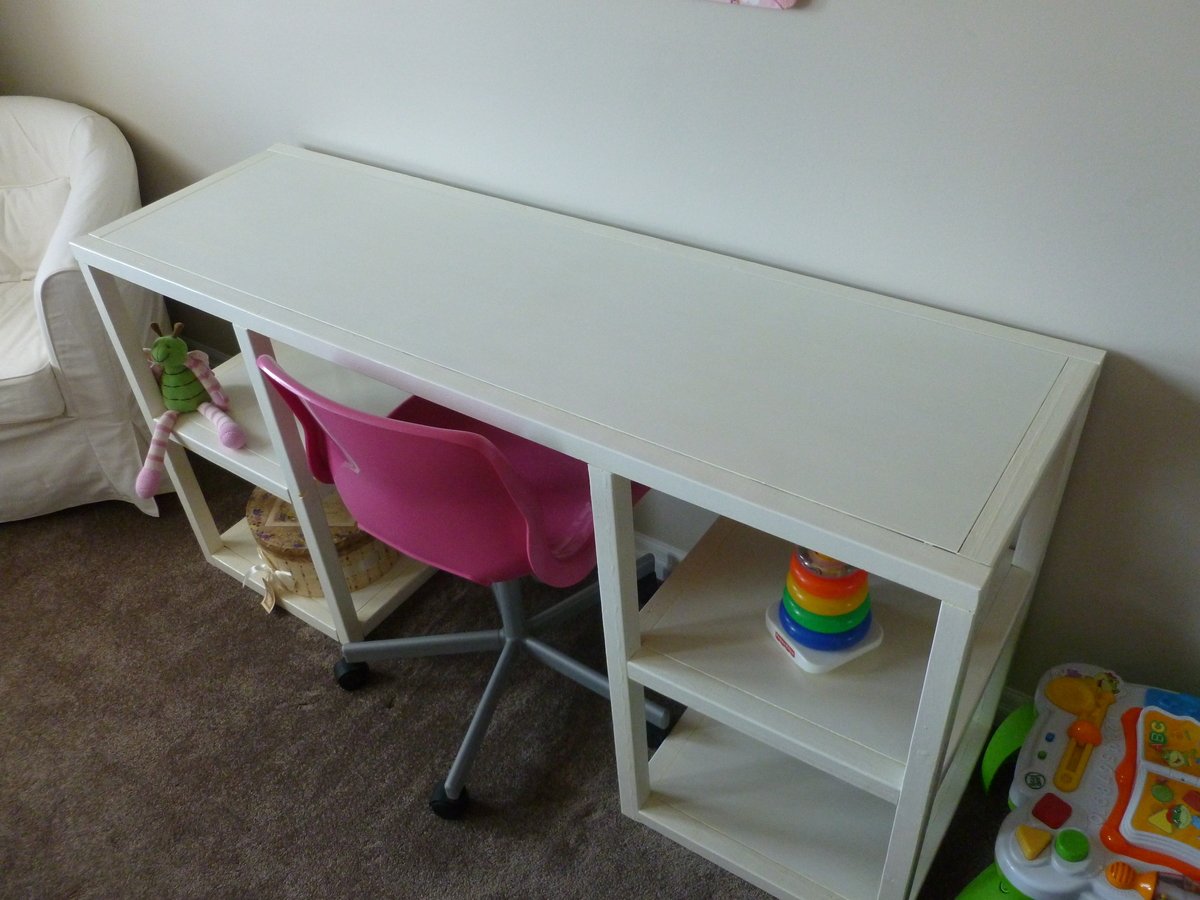
This was a great first project. Thanks for the plans and the inspiration.
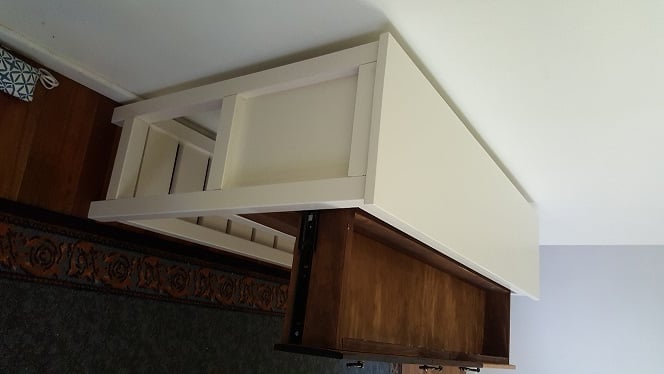
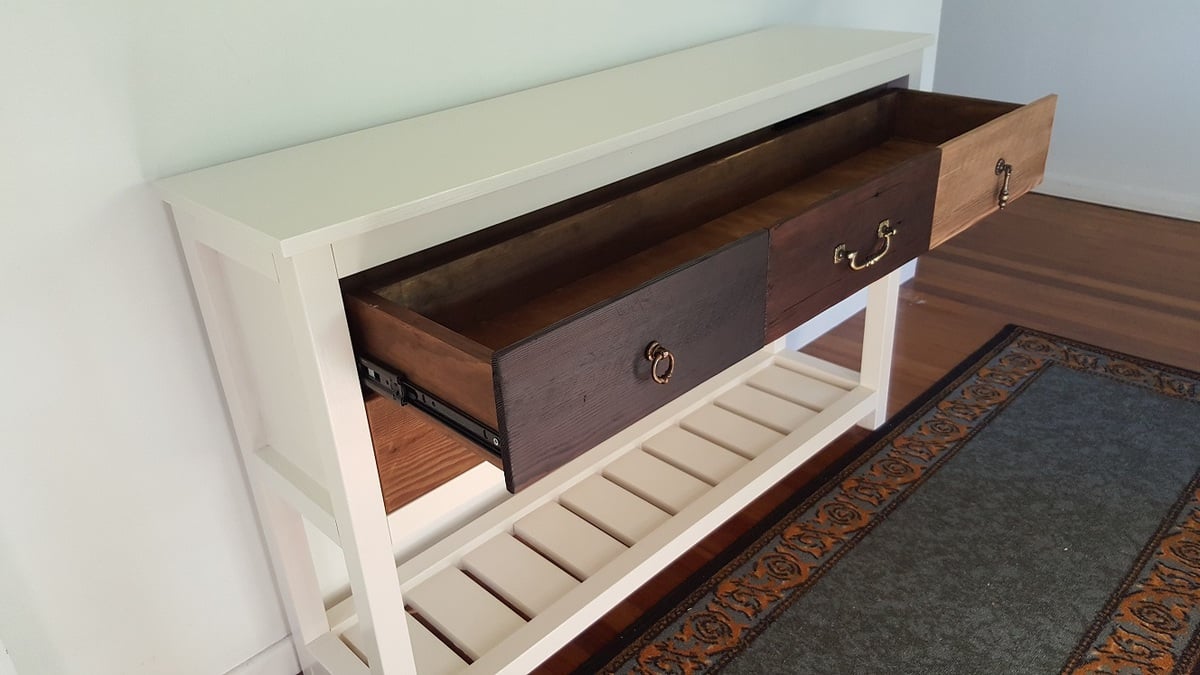
I needed to make a hall table so made a narrower version, and had to alter the dimensions to suit the metric system and readily available materials at Bunnings (Australia), and also made the upper and lower sections identical in height. It ended up about 300mm deep because the shortest drawer runners I could find were 250mm. These are full extension Hafele side rails, opening 100% to make the most of the narrow depth.
The drawer fronts are from a single piece of reclaimed Oregon Pine sourced locally and then stained with various strengths of Victorian Antique Wood Dye from eBay. The stain is natural/non-chemical and made from walnut husks - just dilute with water to the desired shade and worked well on this timber.
Thanks Ana and thanks Jamison!
Made this for my granddaughters from Ana White’s plans.
jburks23 Instagram: johnburks31

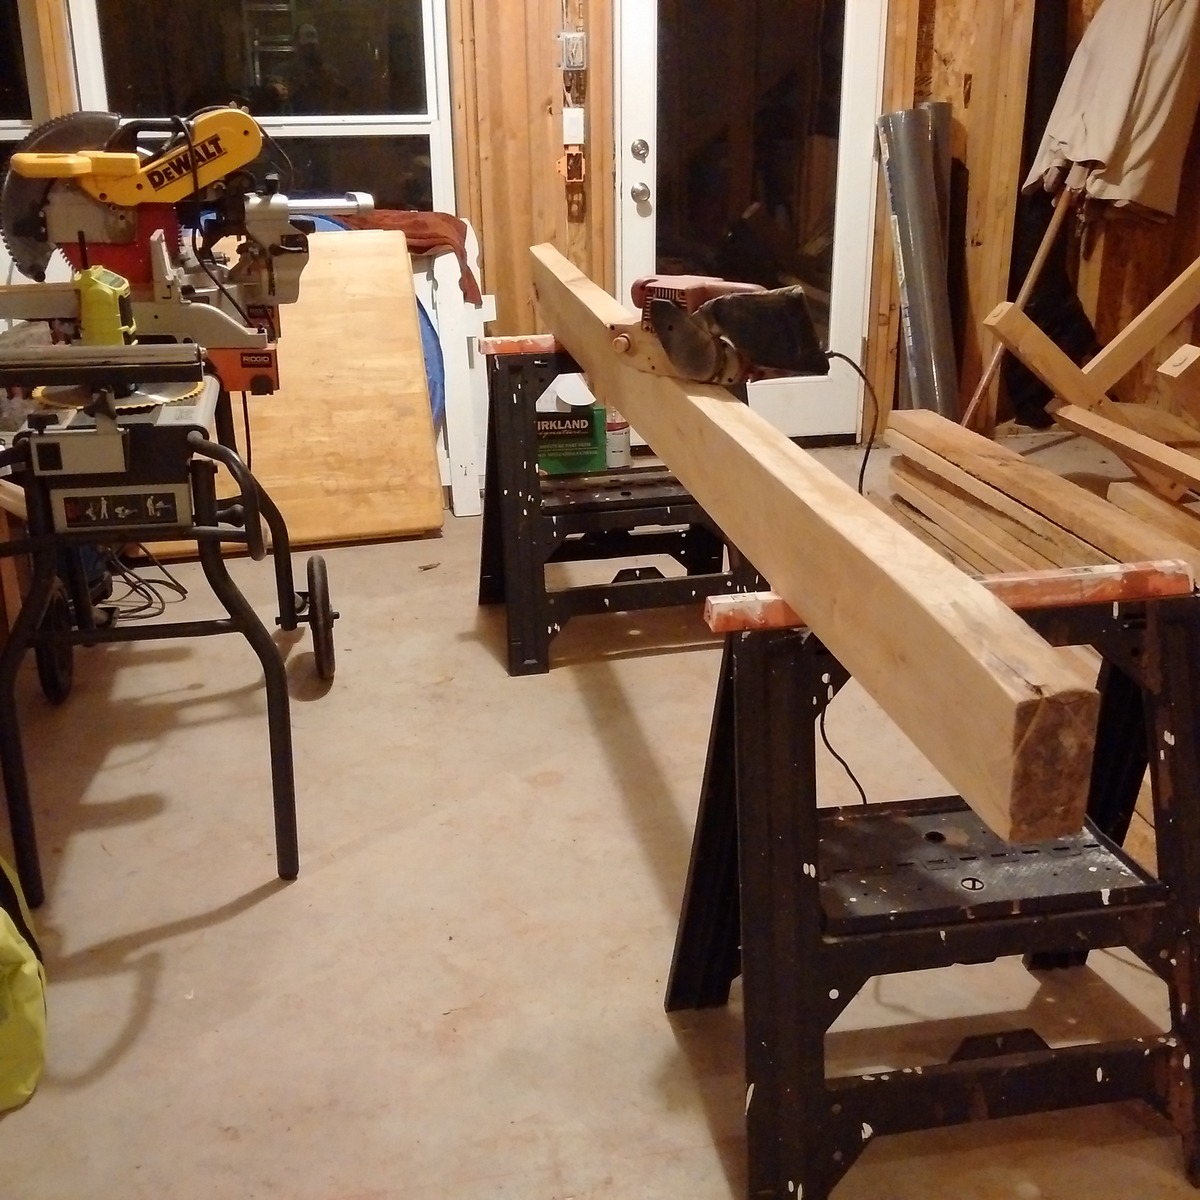
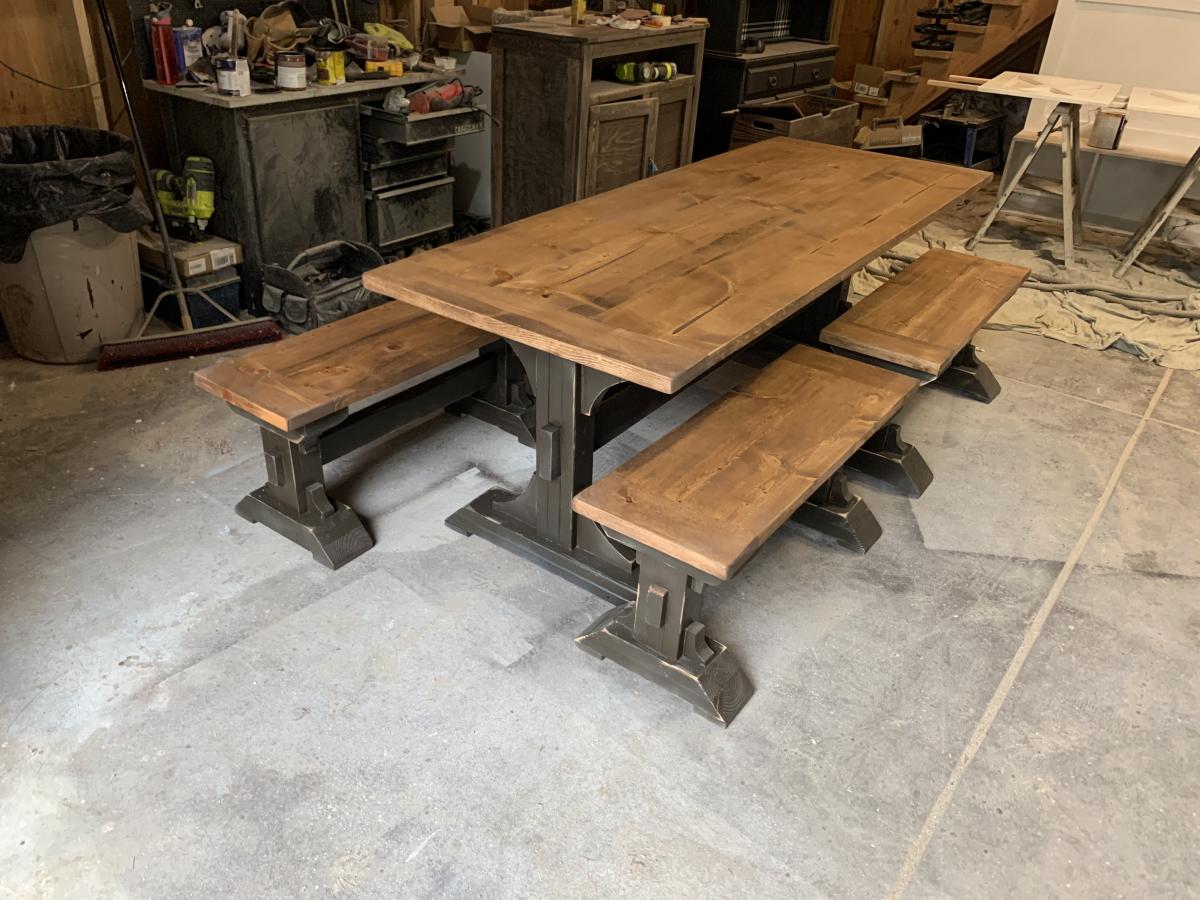
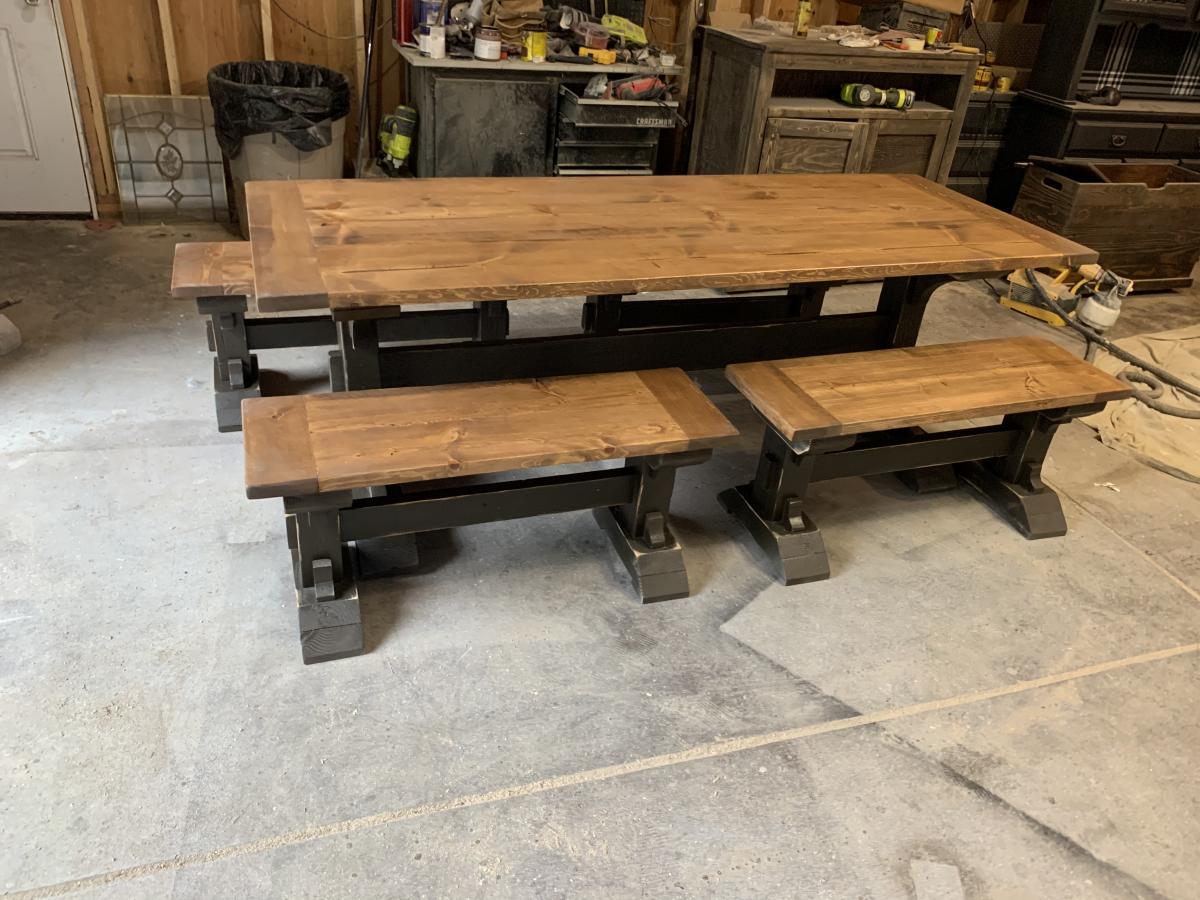
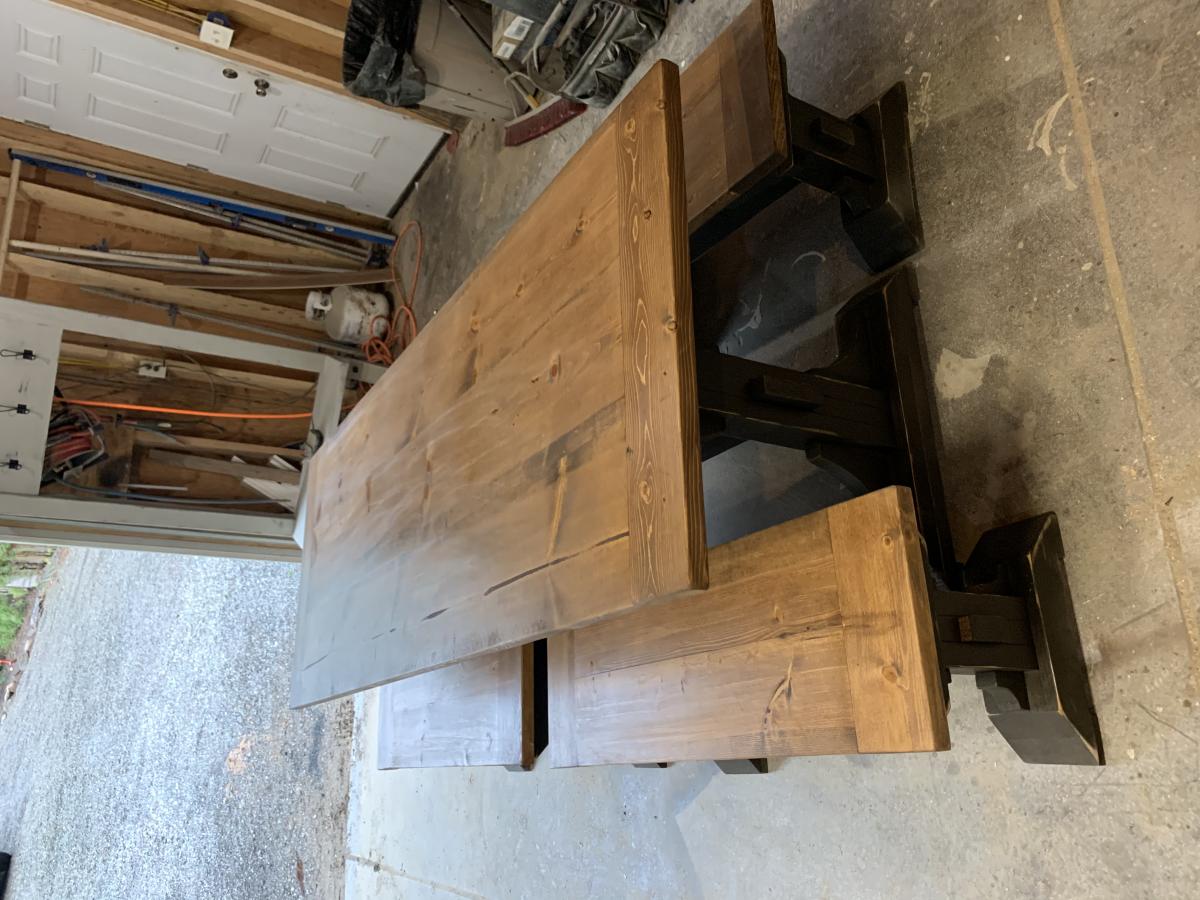
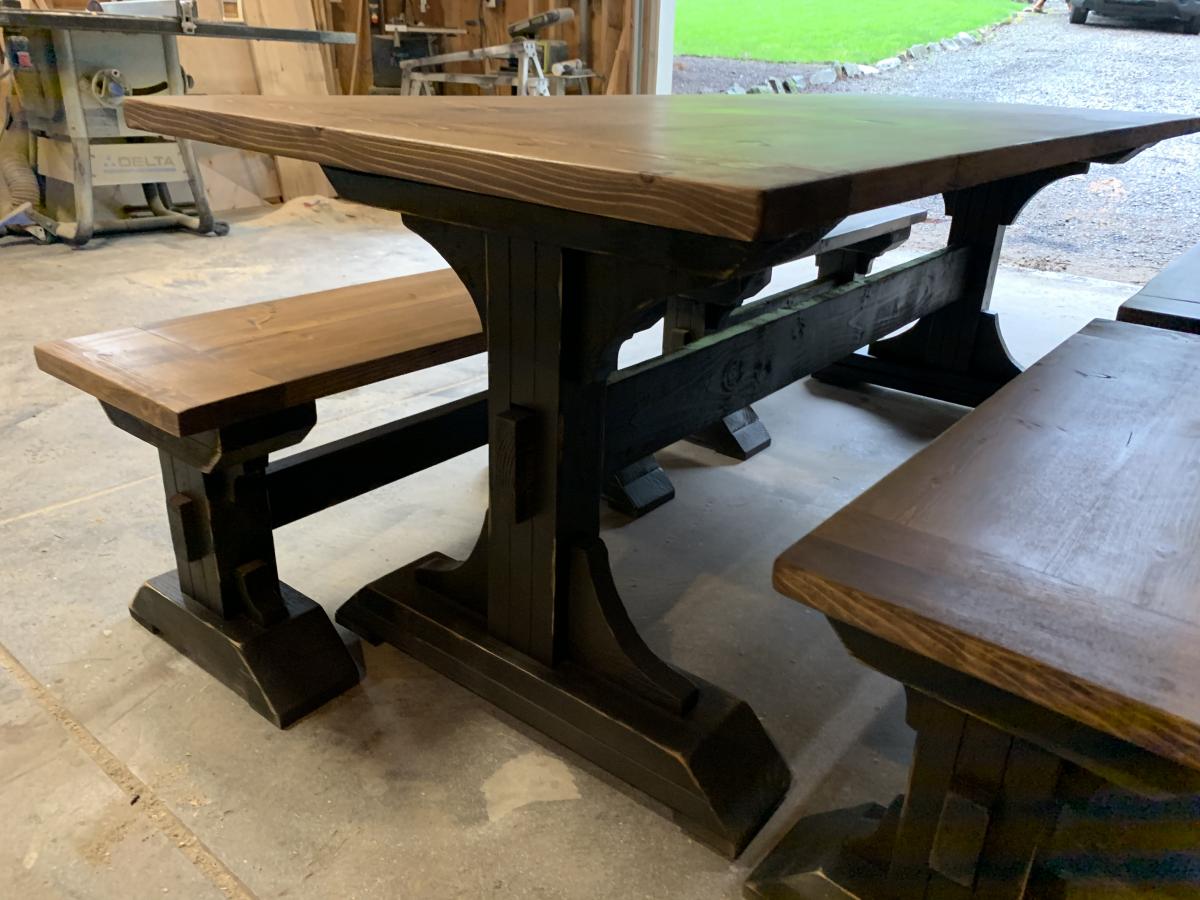
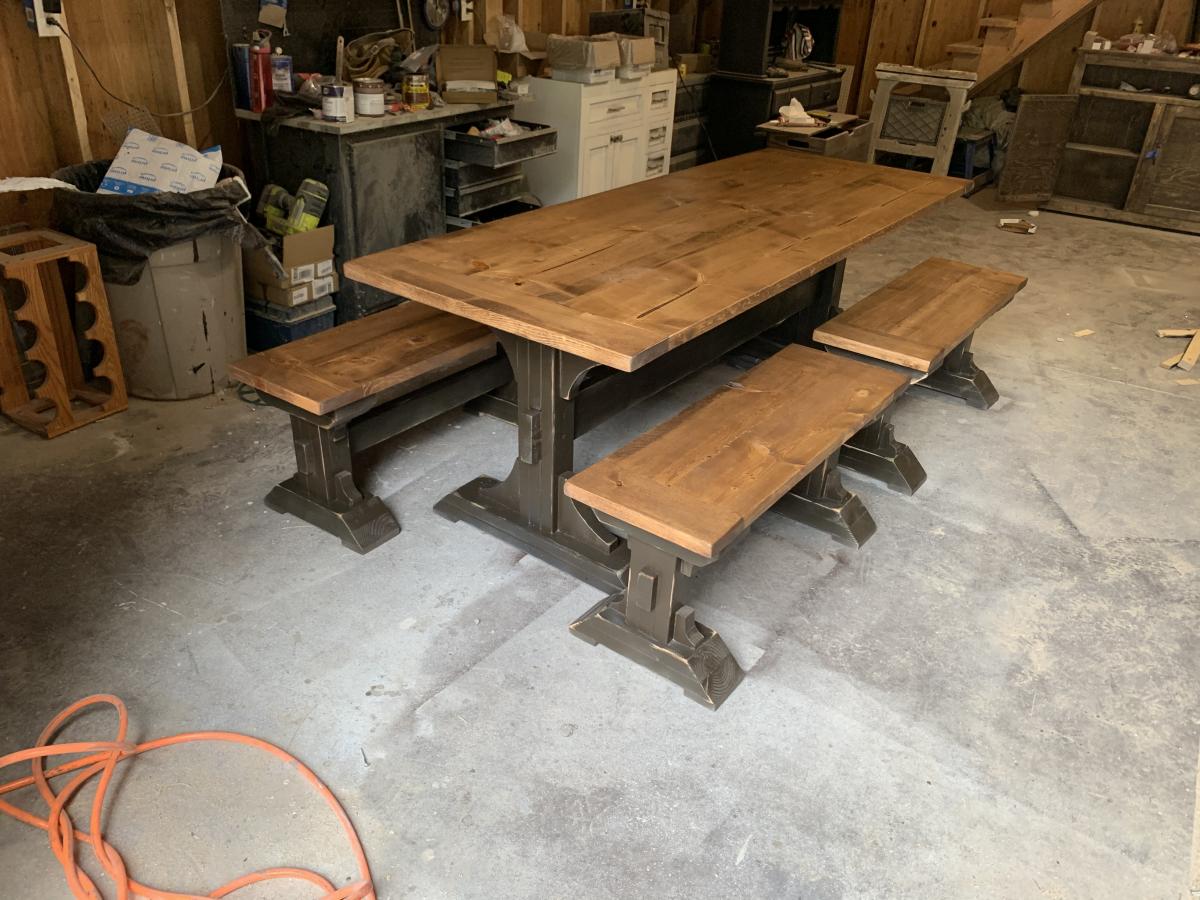
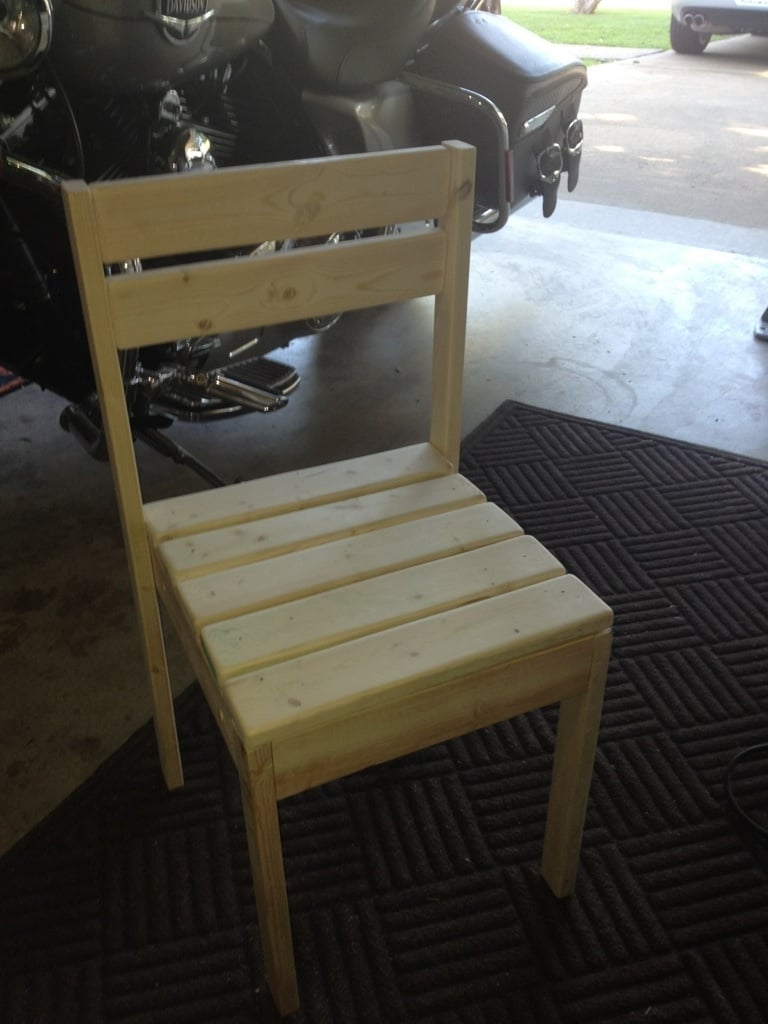
These were made for a charity auction and ended up selling for much more then I expected.
I was suprised and how strong the chairs ended up being. I'm thinking of making another table chair set only with 4 chairs and a longer table.
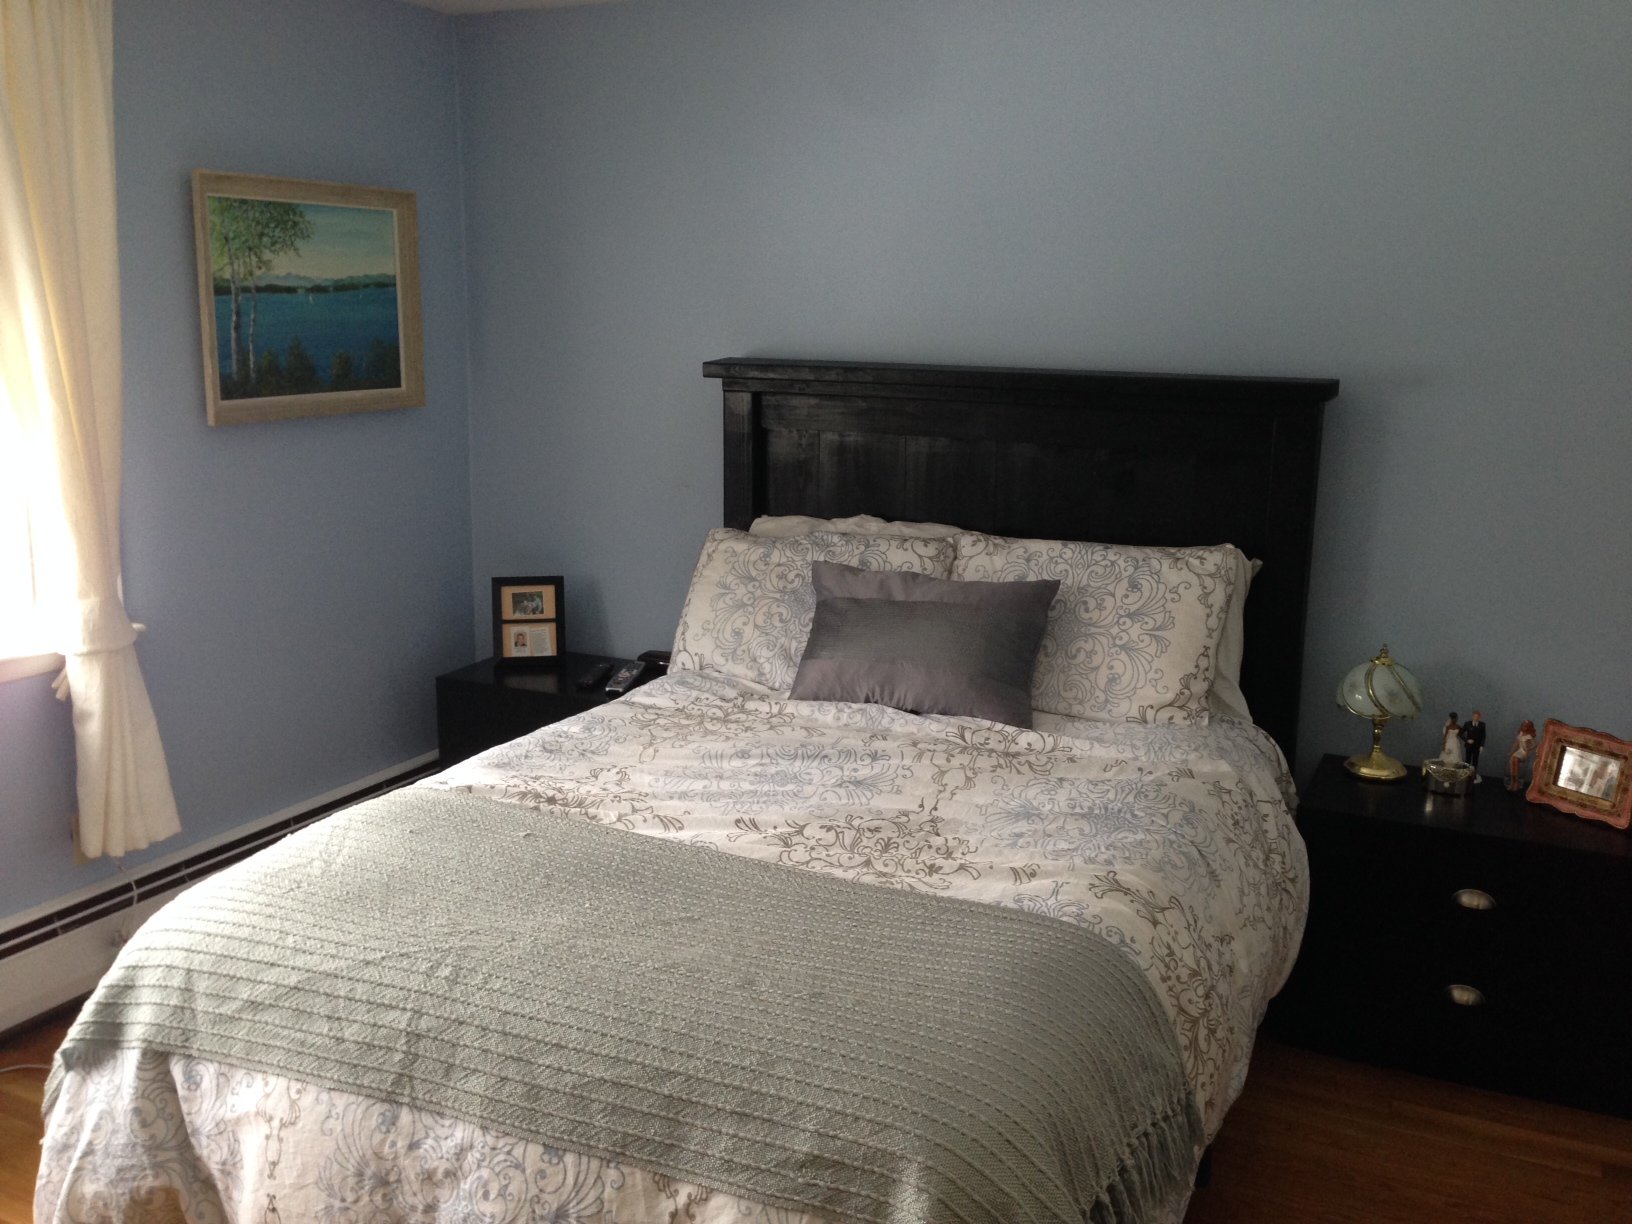
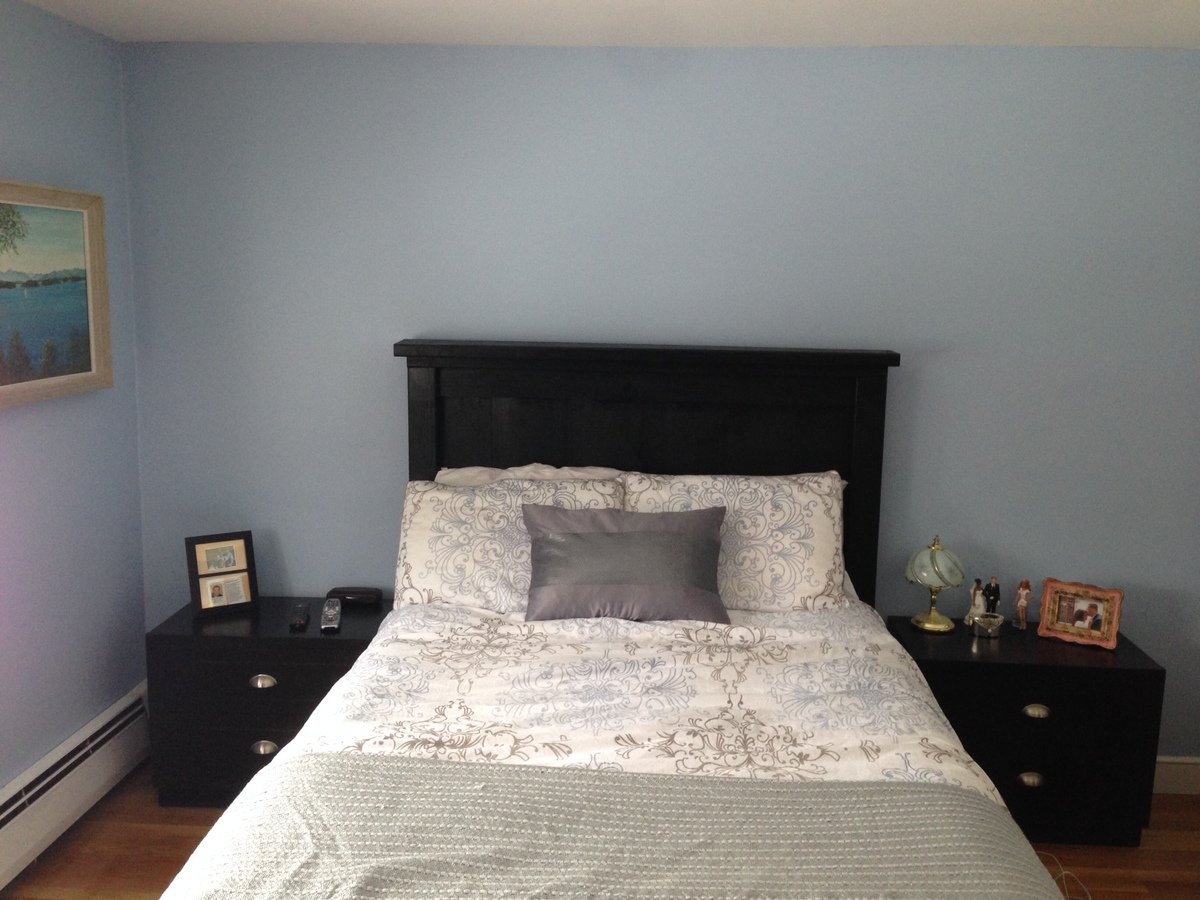
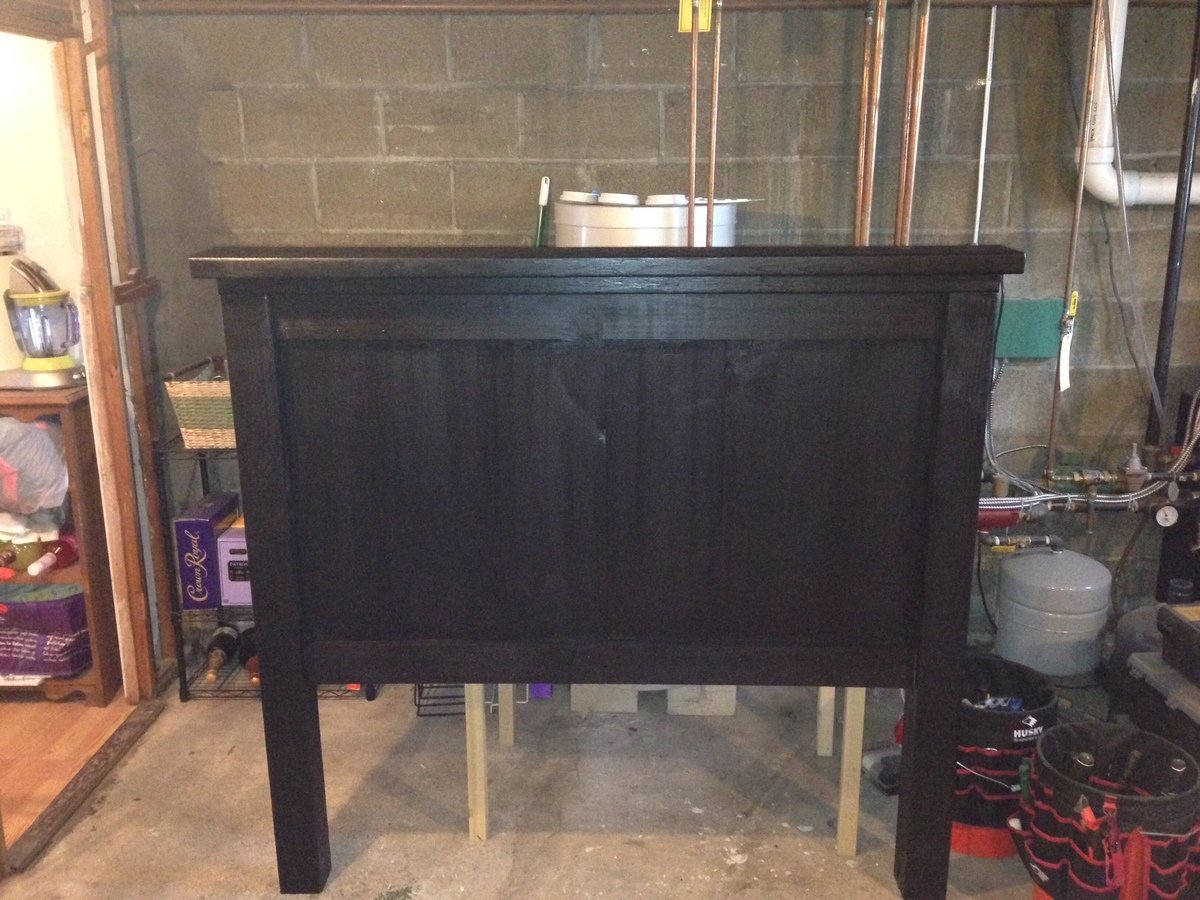
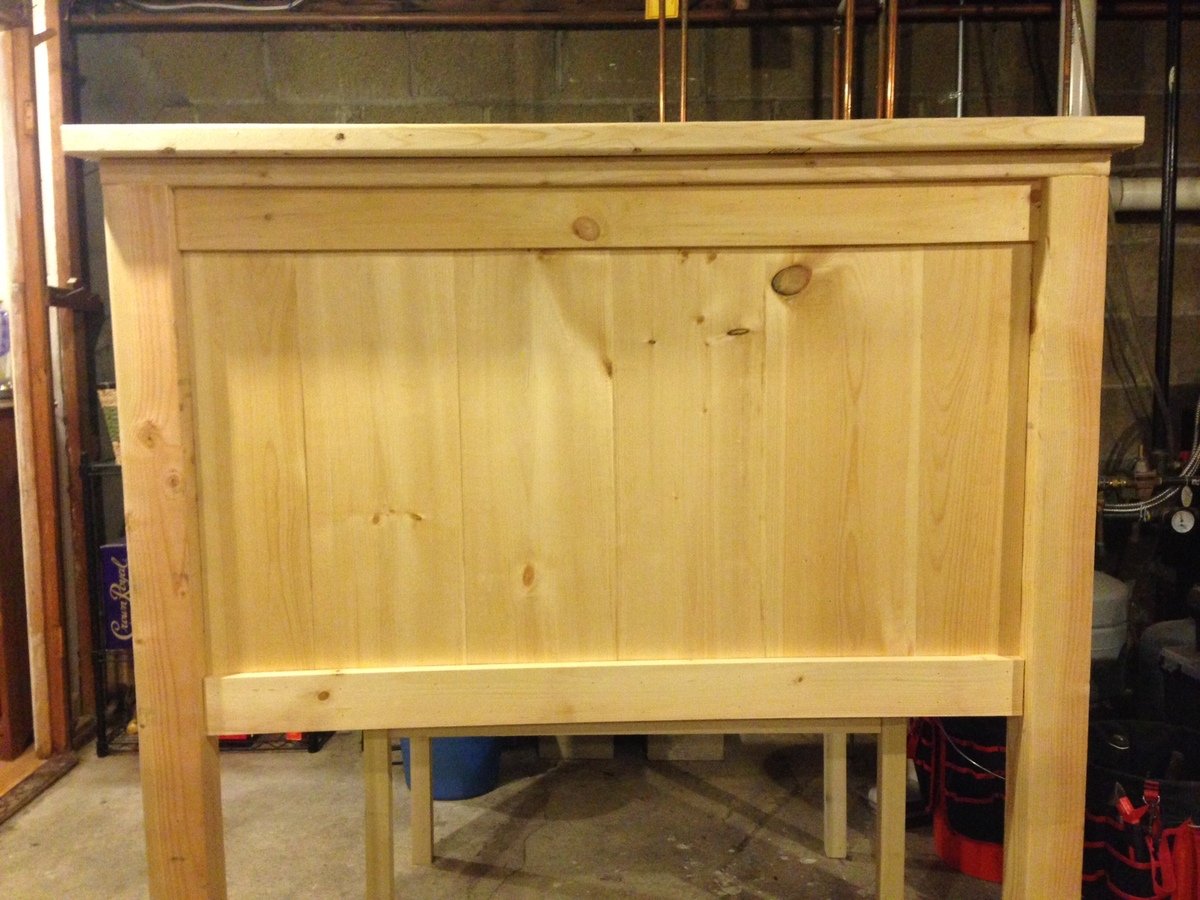
My wife wanted a black headboard to match our existing bedroom set so I built just the headboard from the farmhouse bed plans. It was simple to build, looks great, and my wife and I love sleeping under it.
Mon, 06/09/2014 - 10:03
I just built this headboard for my daughter's new full bed and she wanted the headboard with the metal frame. I was wondering if you could share how you attached your headboard to the frame? The holes in our metal frame on the the flanges for the headboard are rather large. I used kiln dried 2x4's for her legs because we don't get 4x4's here that aren't pressure treated.
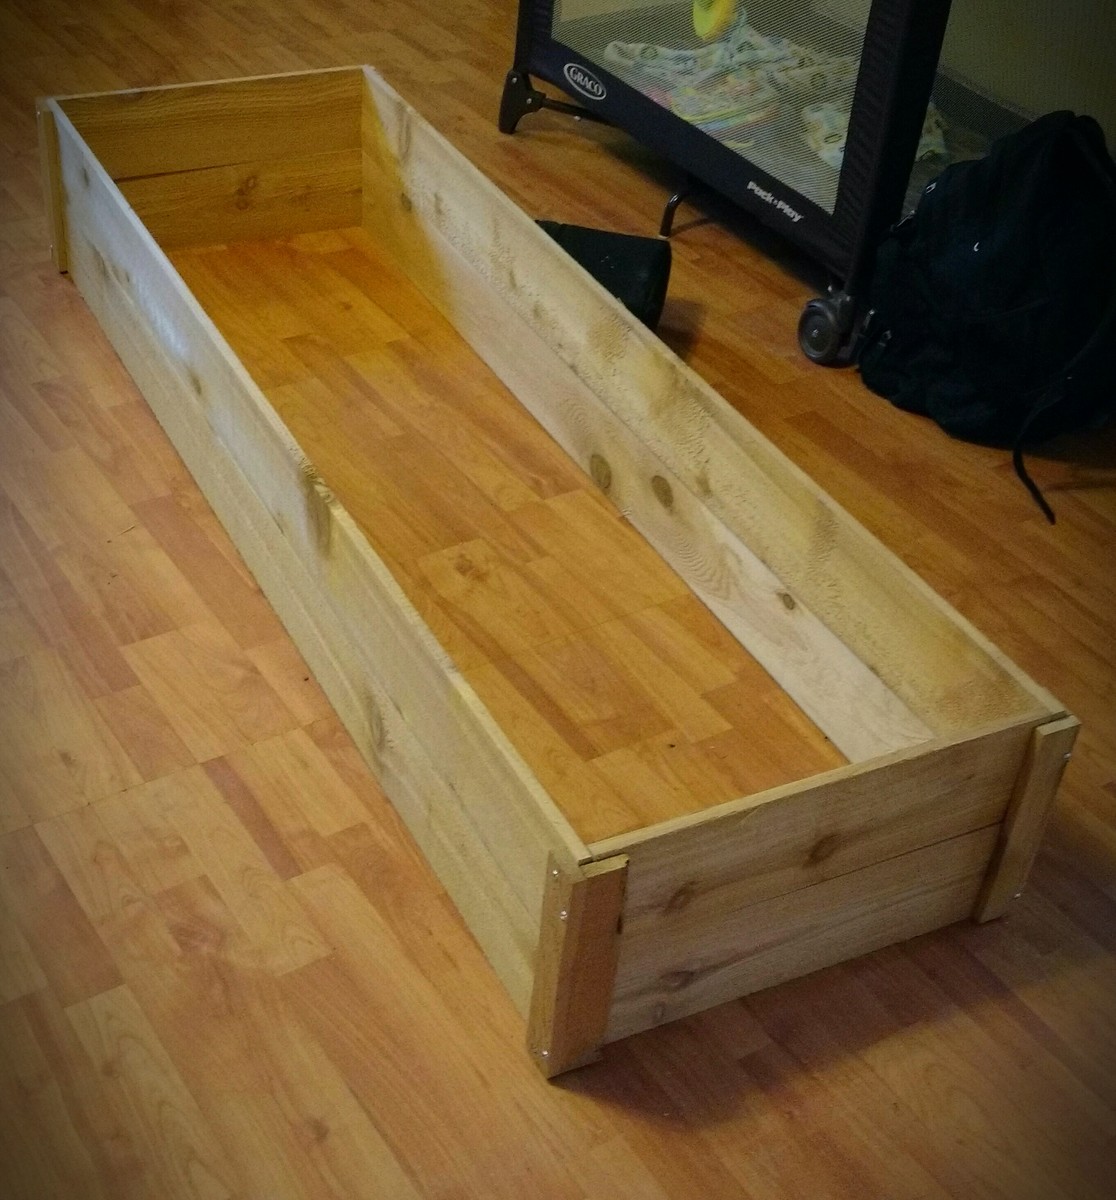
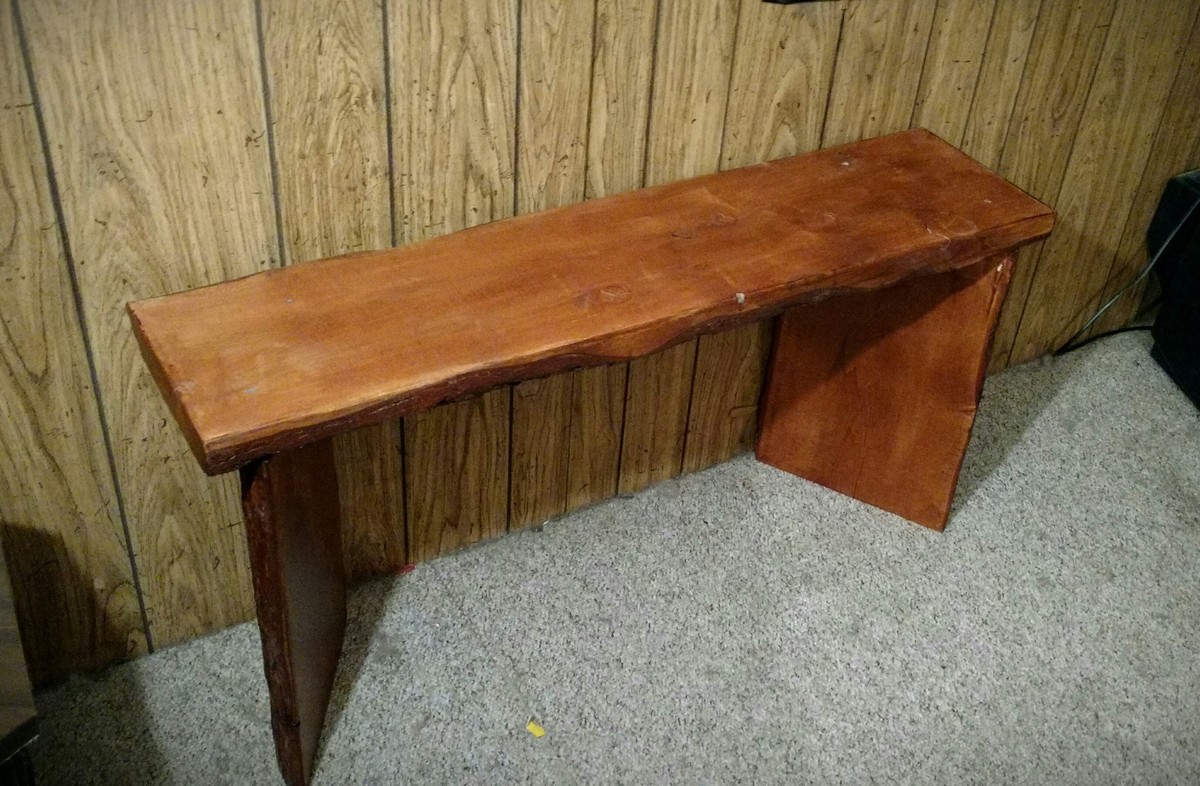
My little sister is building her first garden this year, and had asked about a garden bed and bench. I found this plan on the Ana White site, and waited until the local Home Depot had cedar fence pickets on sale for $2.34 each. Once these were purchased, the 3 garden beds were put together easily with screws and some Titebond II, and then sprayed with spar urethane on the outside for further protection. I also took some live edge fir slabs I'd gotten for free from a lumbermills scrap pile, and cut, sanded, and stained them to put together a live edge bench. I assembled the bench using rabbet and tenon, and then further braced the legs with small L brackets that cant be seen from the front and some 3" screws from bench top to legs. After assembly, I spar-urethaned the bench with 4 coats for protection. My sister loved both the bench and her boxes. Thanks for the plan!
Built by Renee Boone
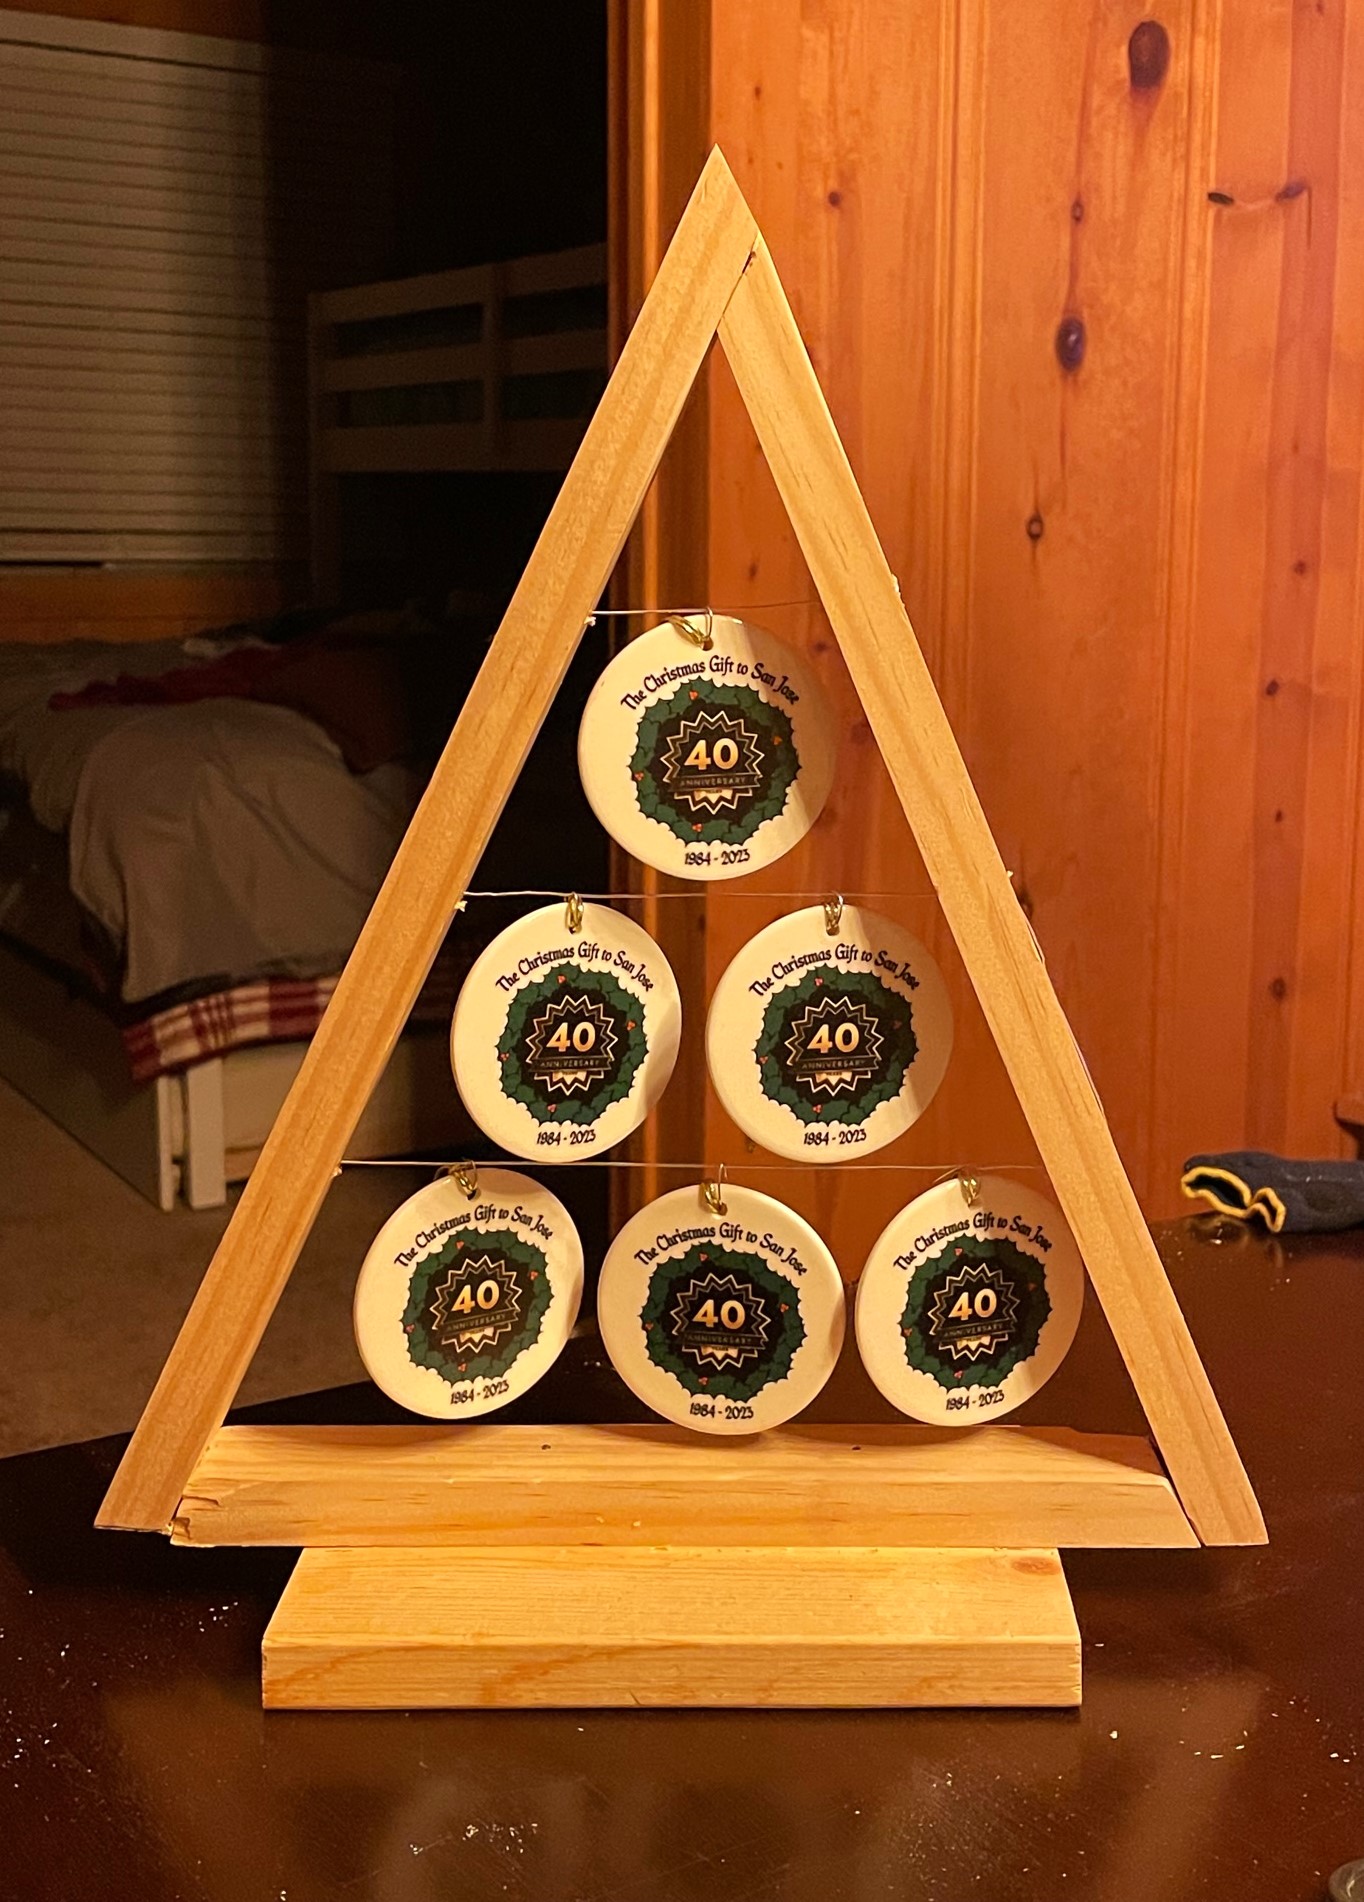
I made 15 of these ornament trees for our church's Christmas banquet. We adjusted the height to 14". I locked the wire in place with 8 x 3/4 screws that were countersunk. I plan to paint the trees gold.
Don Fugate
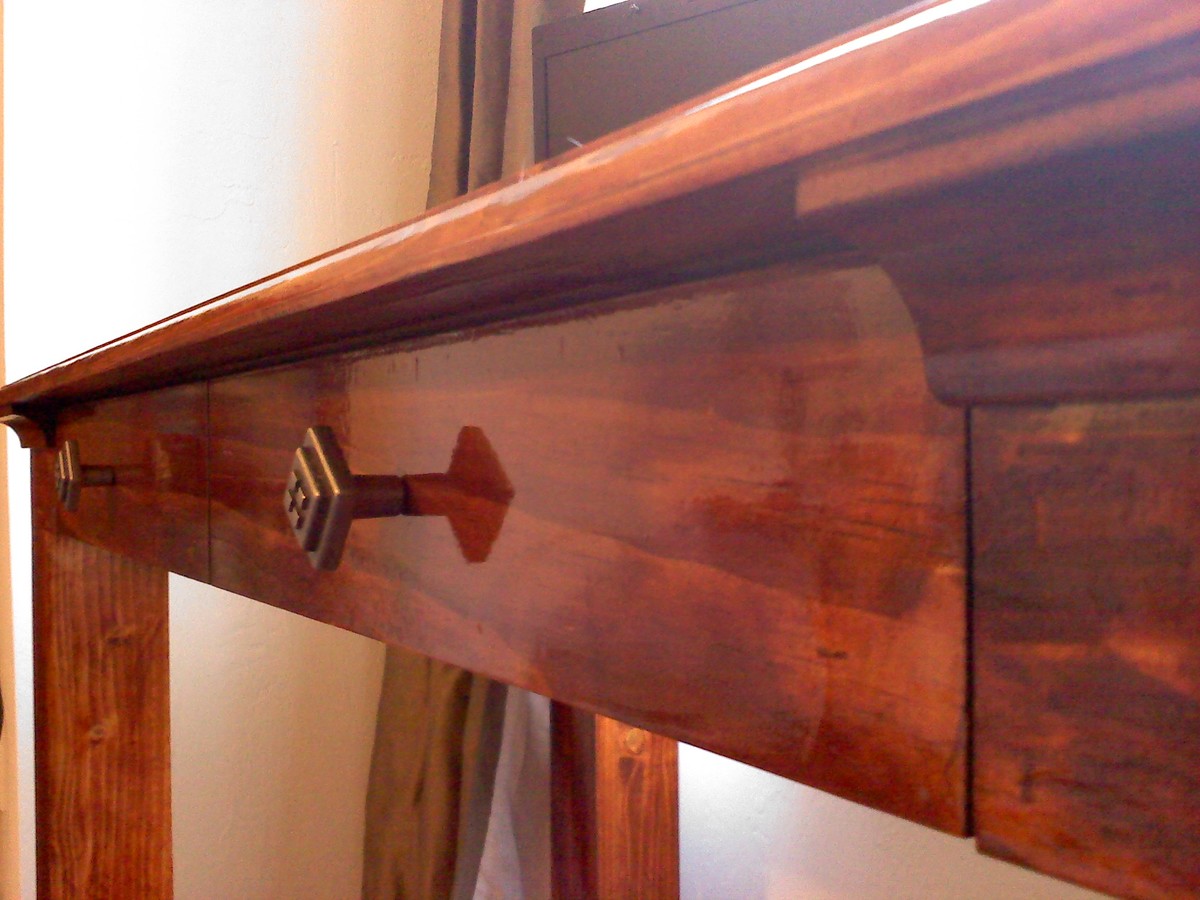
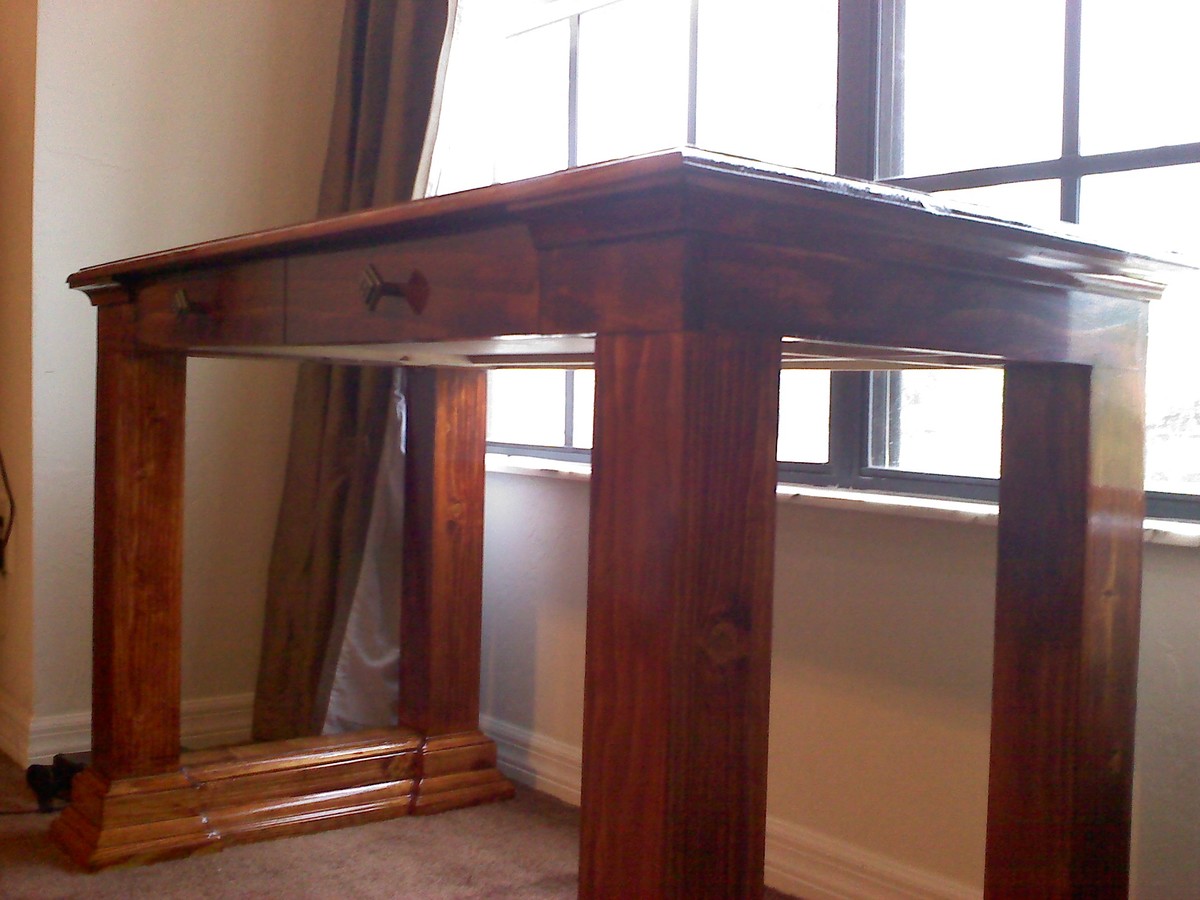
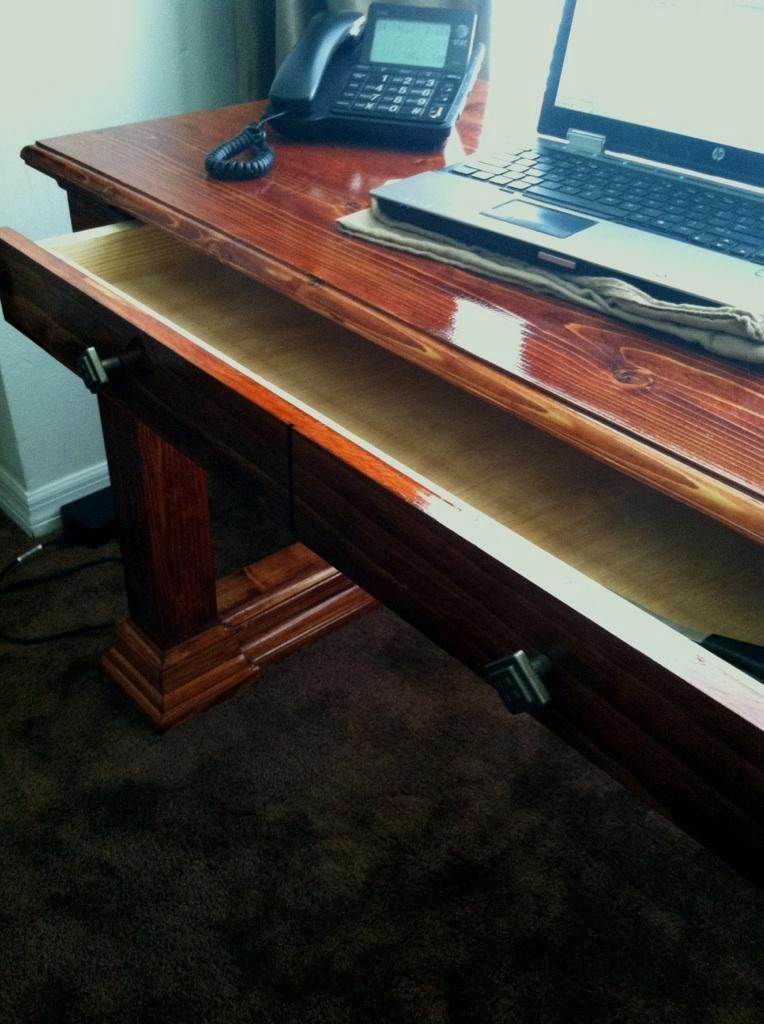
A friend contacted me about building a custom sized desk to coordinate with a set of dressers that she purchased used (I refinished them years before). We started with the Simple Modern desk (more in overall look), but made some changes away from "Modern" such as the bases, overhanging and routed top and trim on the side aprons. The legs of the desk aren't solid 4x4, but1x4s and 1x3 furring strips kreg jig'd and sanded till nearly seamless. The support under the desktop was redesigned to create a large, single drawer faced as two. The top is made from pine boards edge joined together. The two "bases" combined, have 96 pieces of trim to create this look. It was alot of work to get some tiny pieces just right, but well worth it in the end.
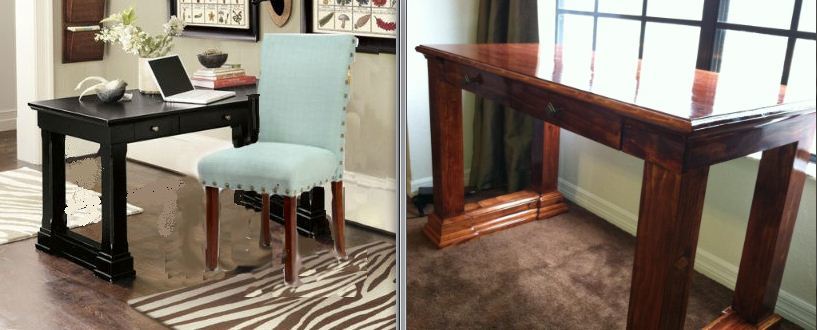
There are two comparison pictures uploaded. the photoshopped photo is the inspirational photo that came with the "Can you build me one of these?" and the second is the side by side with one of the dressers I was asked to compliment.
At 4 ft by 2 ft, she says its the perfect size for her home office laptop.
Overall, I was pretty surprised about how different of a turn this desk could take in style as I went from bare to adding the trim. Perhaps it can inspire others as well.


Tue, 05/08/2012 - 12:49
I have been looking at some different design ideas for a desk. I love what touches you put on the table legs. I might have to try something like this when I start building.
Tue, 05/08/2012 - 17:13
Gorgeous finish. What's your method? Pine has been killing me. I put 6 coats on my last table top or polyurethane. Time after time the wood just soaked up the finish. I could never get a smooth surface. Maybe if I would have applied 10 more coats...
Wed, 05/09/2012 - 05:22
Washington- keep in mind the size of the trim pieces if you do a base like this. Some of those trim pieces are 1/2 wide and angled... not the easiest to get to fit right. If I were to do it again, I would cut in more to make the cuts a little easier. However, I loved this result.
These legs are hollow also, a definite idea to keep in mind for anyone wanting to do a 4x4 leg project but unable to find treated 4x4's.
Patrick- everything was well sanded in advance. then a coat of wood conditioner. Then the stain (2 coats of the gunstock and 2 coats of the Golden Oak). With the Poly, In between coats, I buff with 0000 Steel Wool then wipe clean. That surface, minus the places where I left the charachter in the wood on purpose, is VERY smooth.

Wed, 05/09/2012 - 06:31
You did a really beautiful job and it does match the dresser so nicely.
Thu, 05/10/2012 - 19:15
Ahh poly in between coats. What a great method. Will try that.
Wed, 05/16/2012 - 05:40
Patrick.. you apply poly, give a very light sand with the 0000 steel wool (A little more than running over the surface with minimal pressure) until the surface feels smooth with no drag. Then wipe down with tack cloth and apply a new layers of poly.
Keep in mind that with polyacrylic.. the water based stuff, you can't use the steel wool. I'm told it will rust. This is strictly for polyurethane.
Wed, 05/16/2012 - 05:42
Washington- the middle layer of trim is on top of spacer to raise it up. It provided a great look.
Wed, 03/27/2013 - 21:25
The desk looks great. I was trying to figure out how you attached the four pieces of wood that make the legs. You indicated a Kreg jig, but it would seem that there would need to be some pocket screws on the outside. I don't see any...what am I missing here?