Community Brag Posts
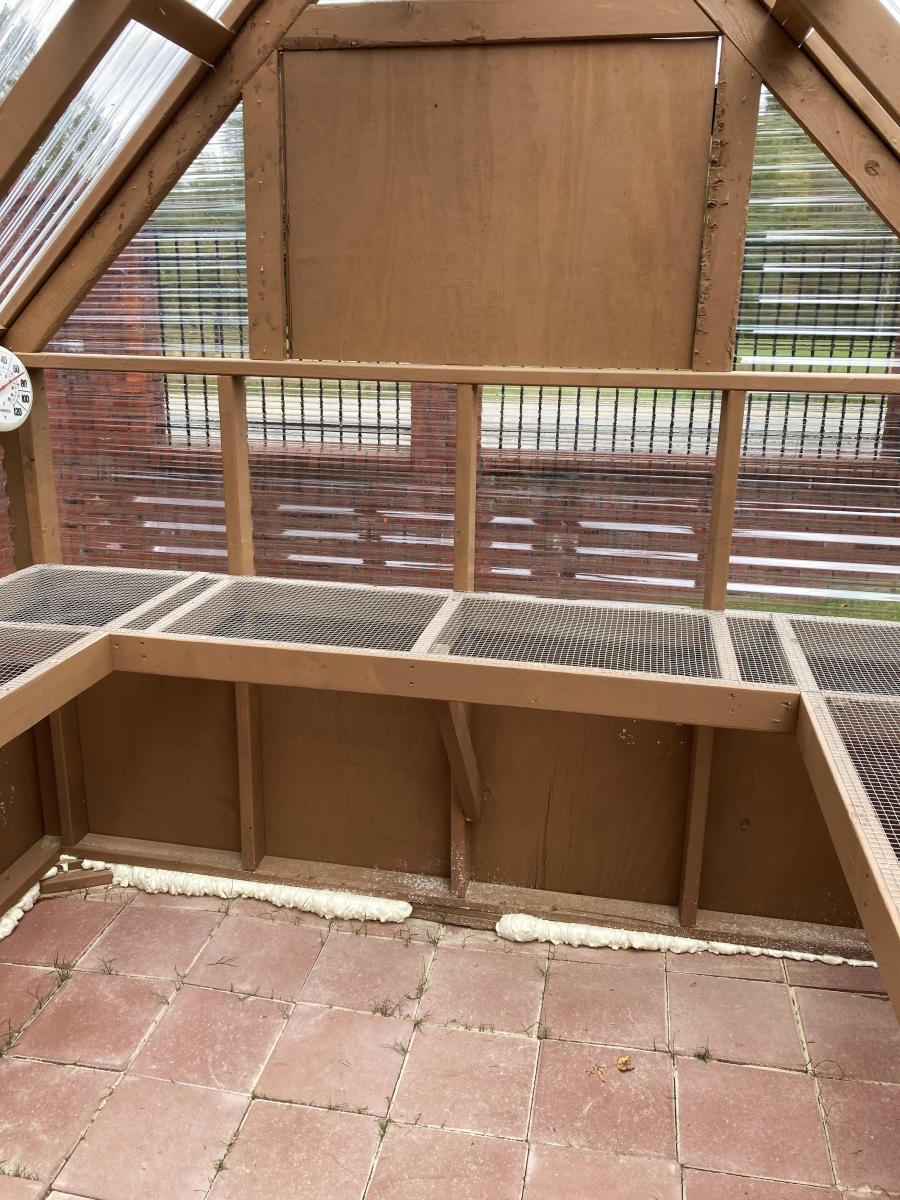
DIY Gable Roof Greenhouse

I love my new Ana White designed greenhouse! It was amazingly easy to build and the material shopping list ensured there was very little waste or materials leftover after the build. I can’t wait to get started using it.
Bill Crabtree
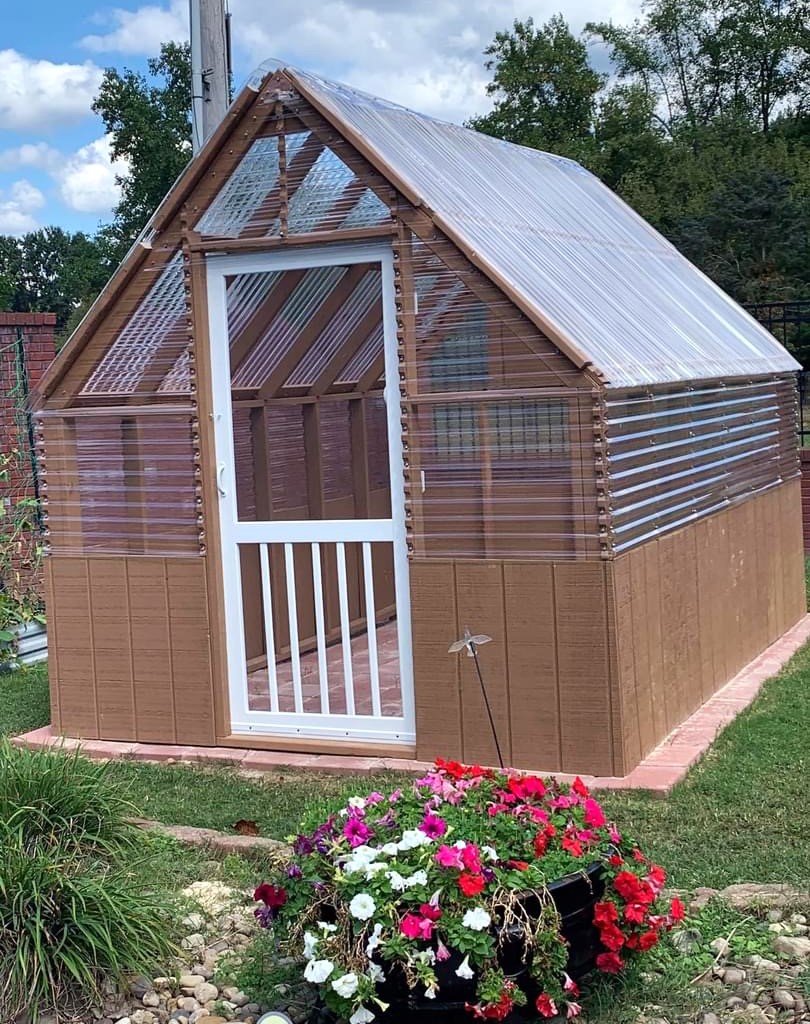
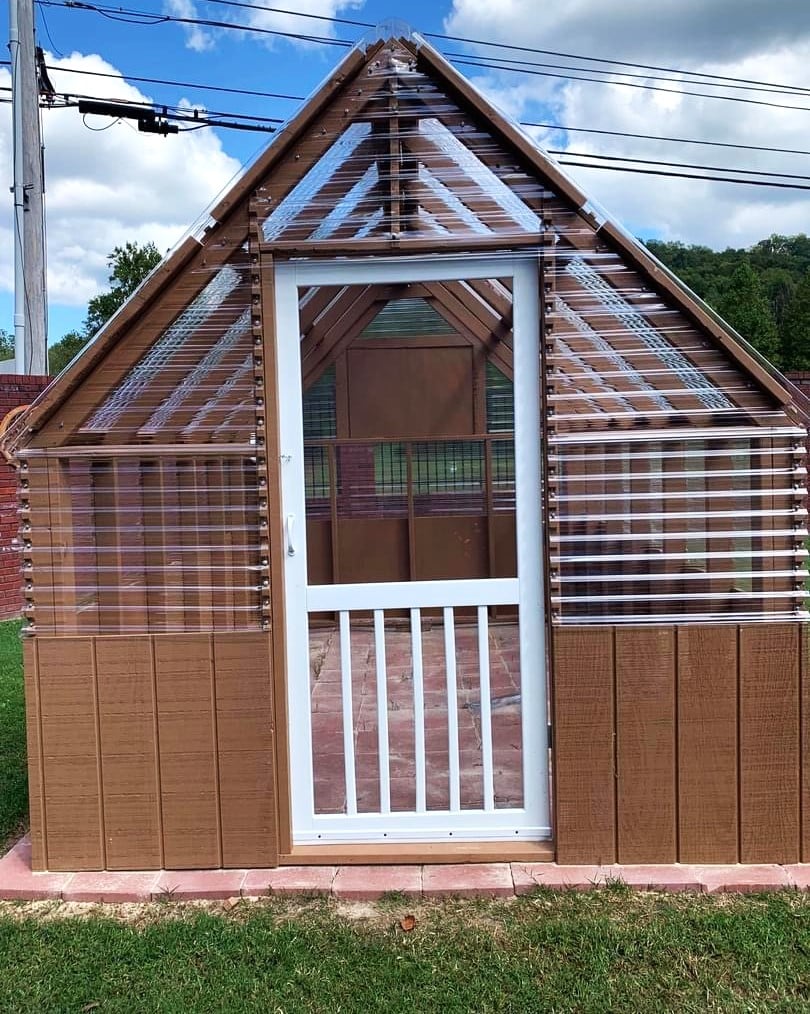
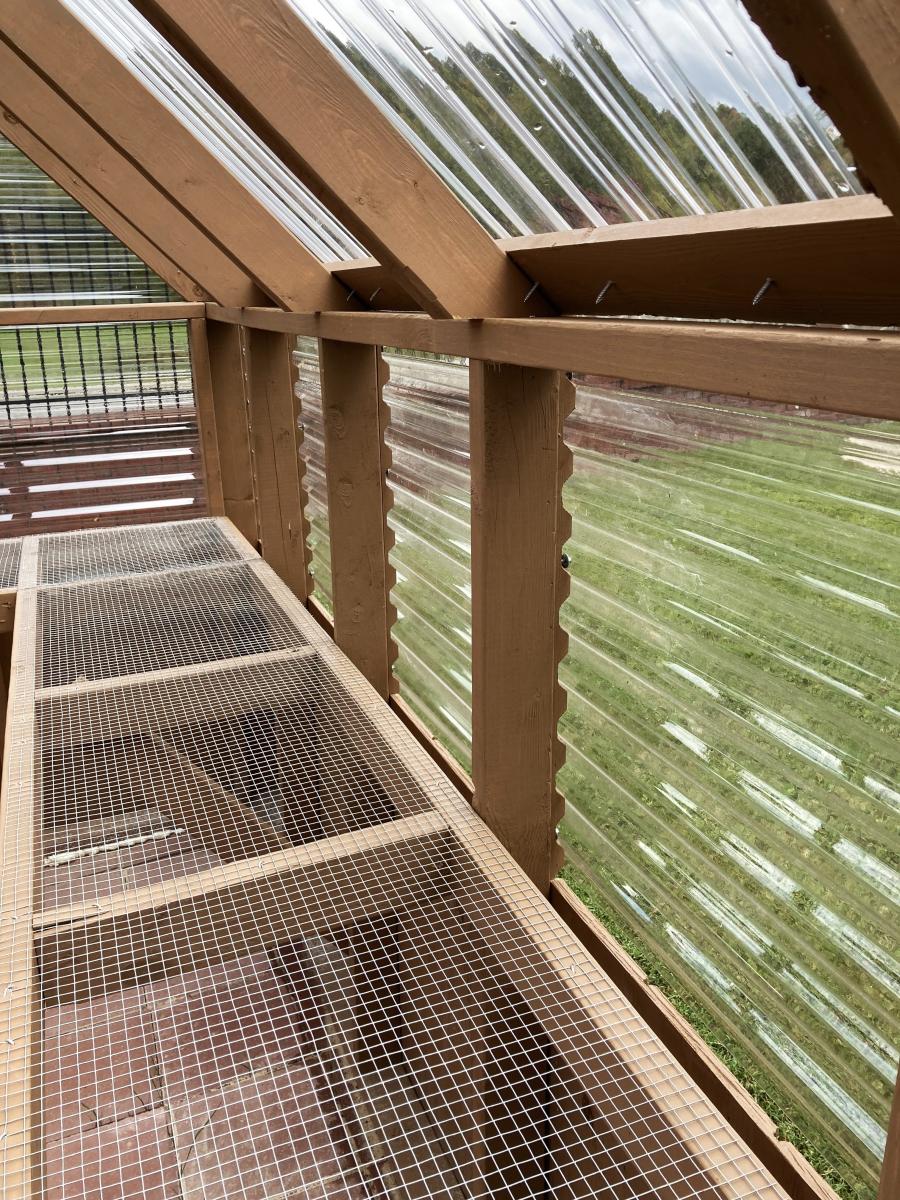
Built from Plan(s)
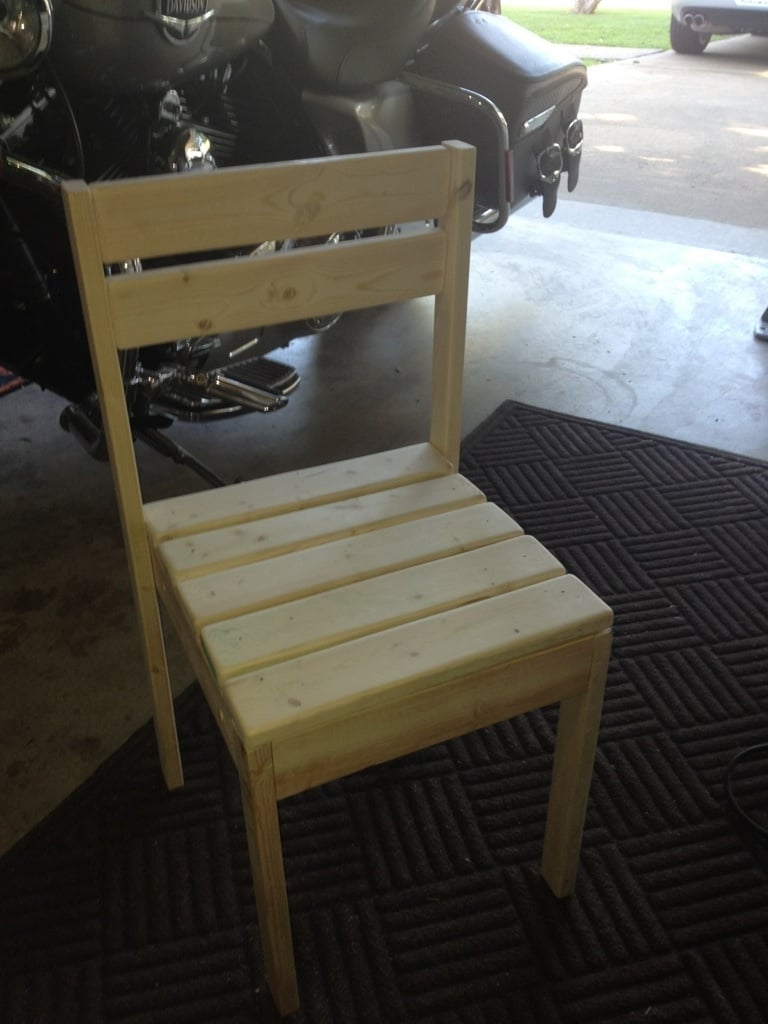
$4 chairs with chalkboard top storage table

These were made for a charity auction and ended up selling for much more then I expected.
I was suprised and how strong the chairs ended up being. I'm thinking of making another table chair set only with 4 chairs and a longer table.
Estimated Cost
$50 majority of cost was paint
Estimated Time Investment
Day Project (6-9 Hours)
Finish Used
white spray pain in a flat finish then a glossy clearcoat. Tble top is chalkboard spray paint 3 coats. Table storage bottom is covered with cork.
Recommended Skill Level
Beginner
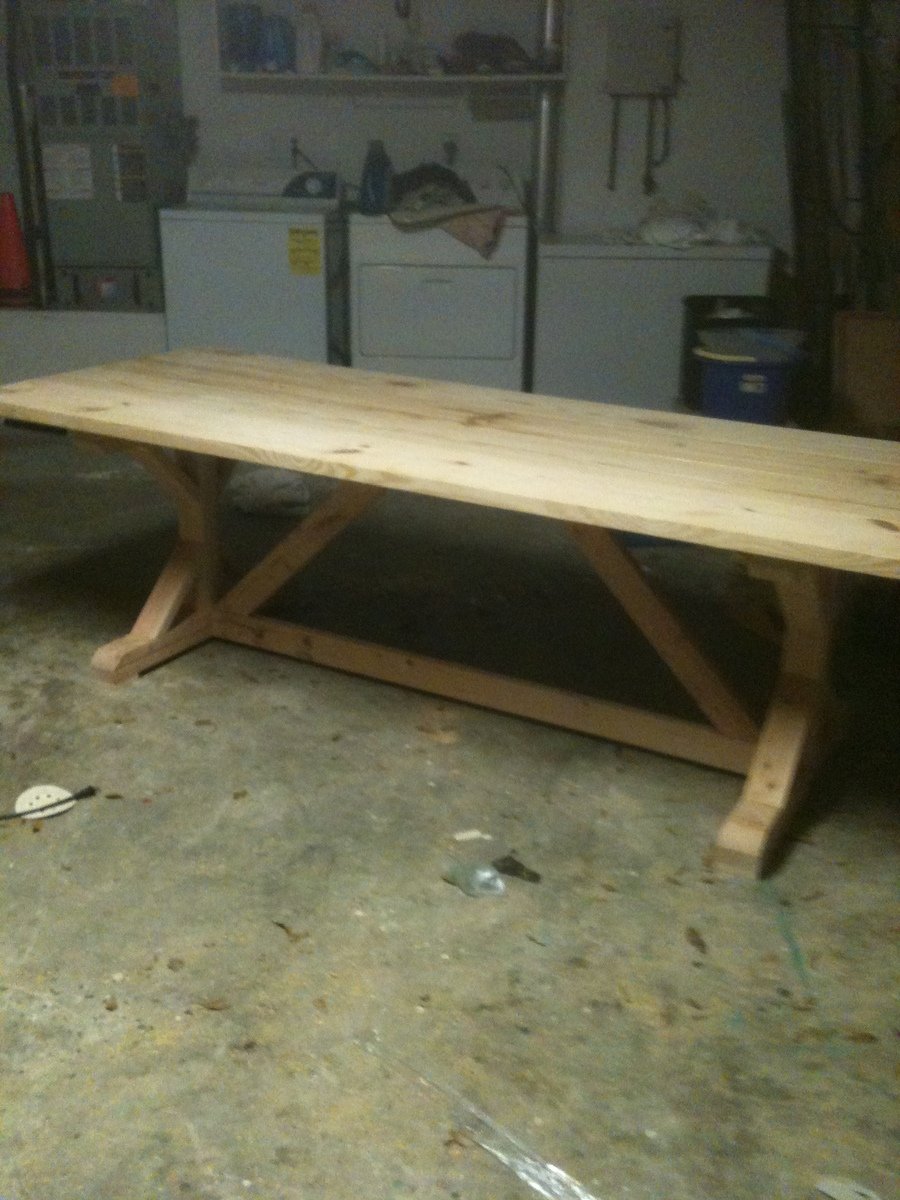
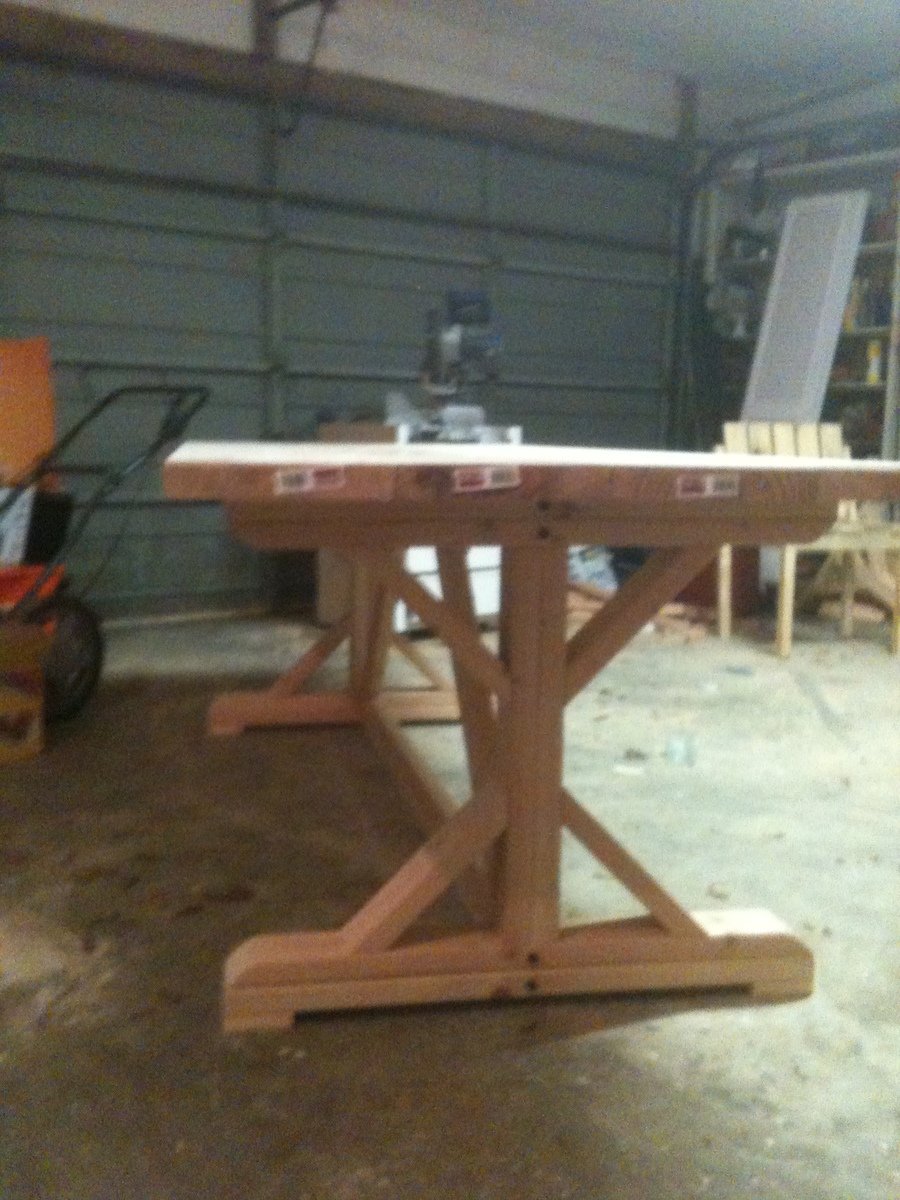
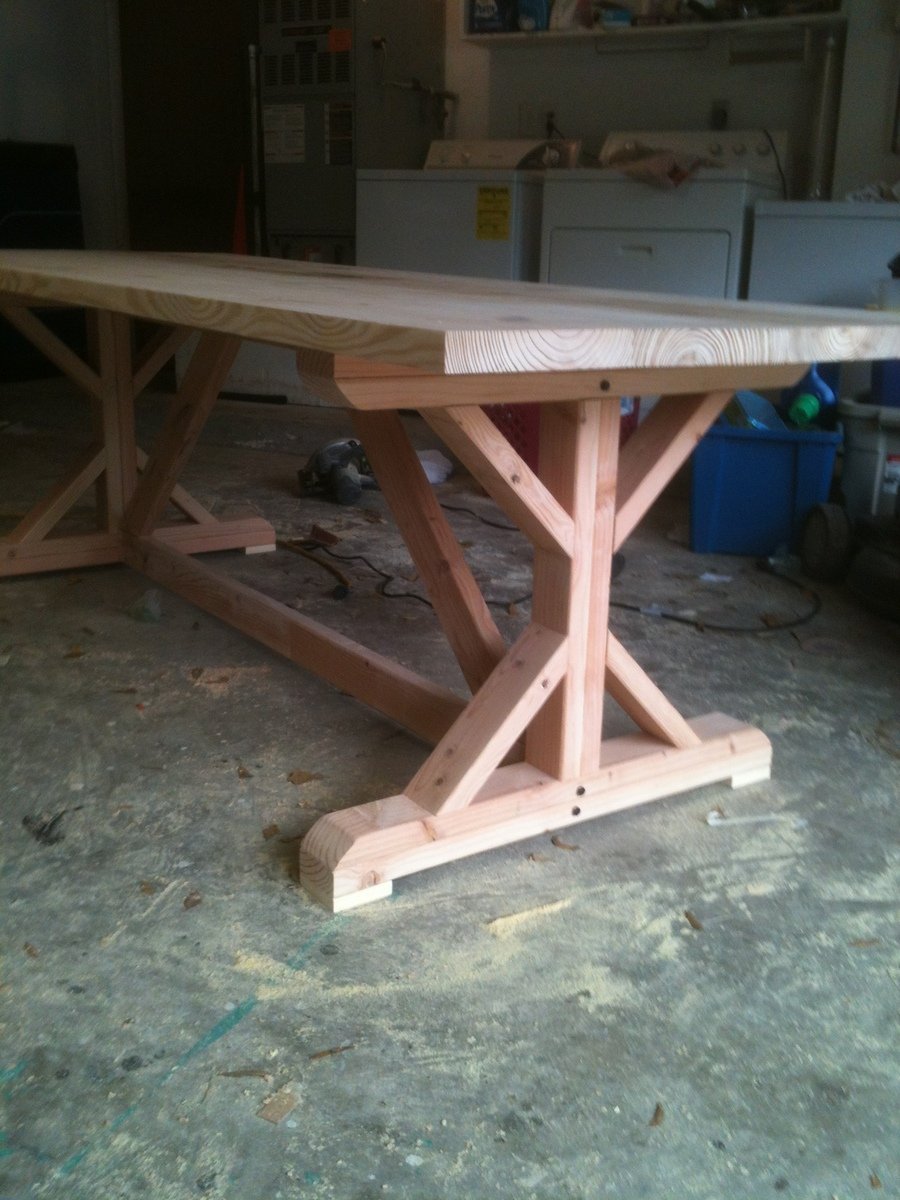
farm house table
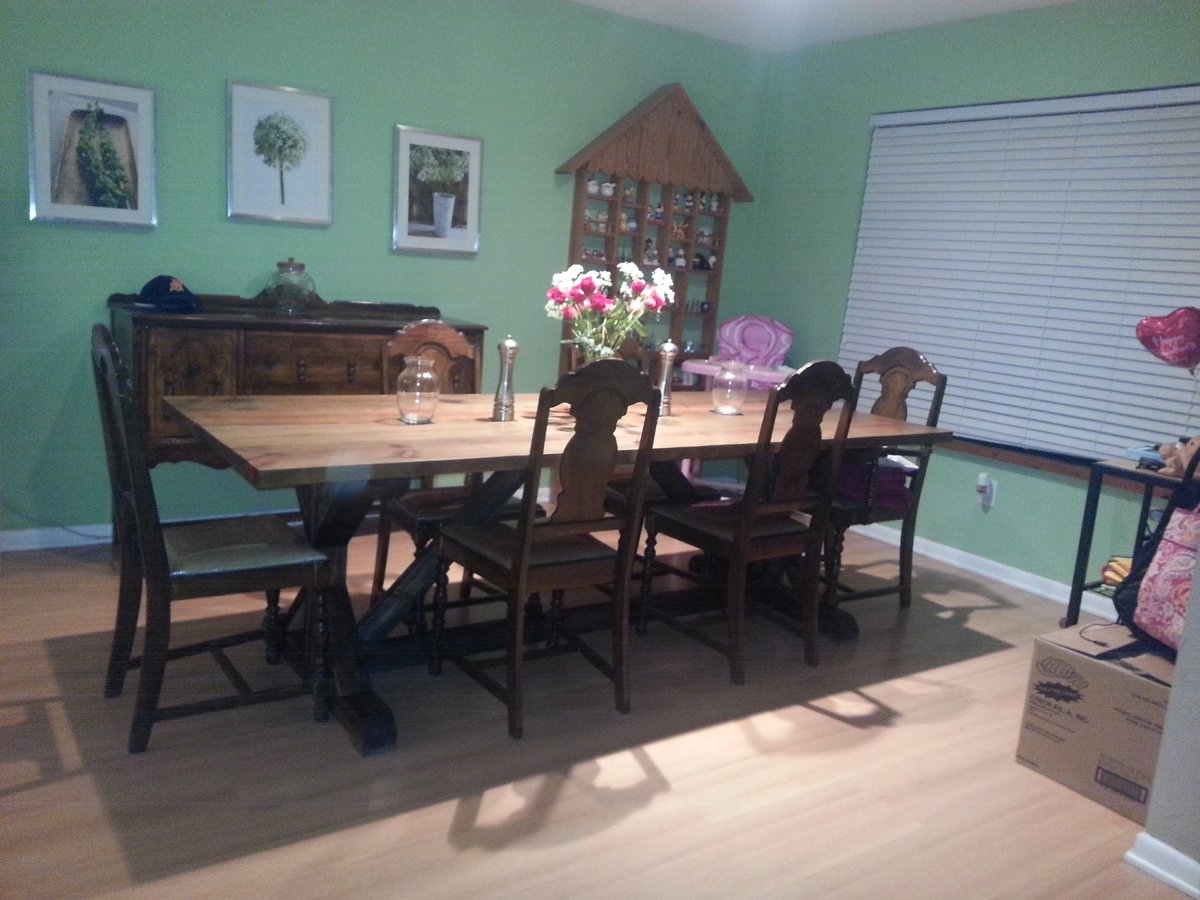
With the new addition to the family it seems that most holidays everyone in the family will be coming to our house. So with that in mind we needed a new table to fit everyone. Ana you great website has pulled me out of a jam yet again. Finding the plans for this table was a life saver. Hope you all enjoy!
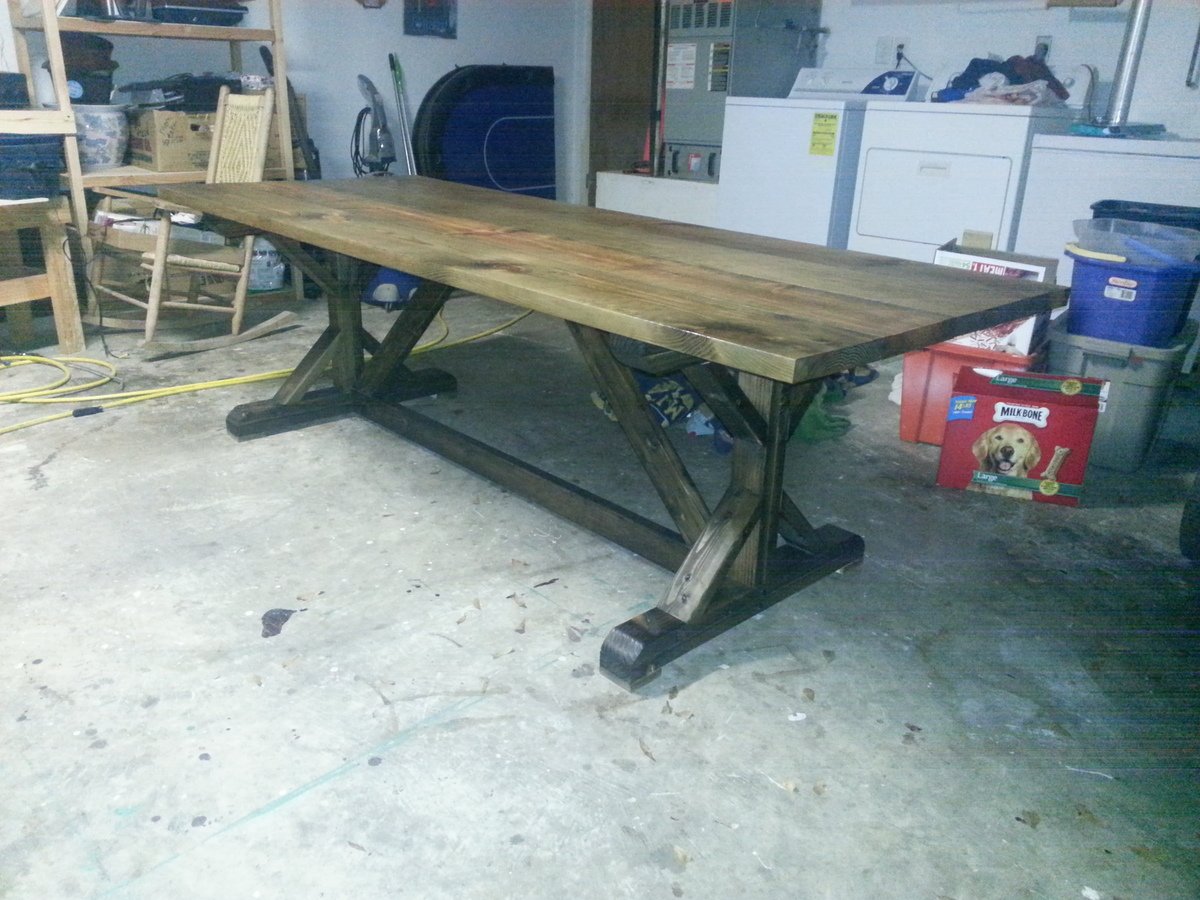
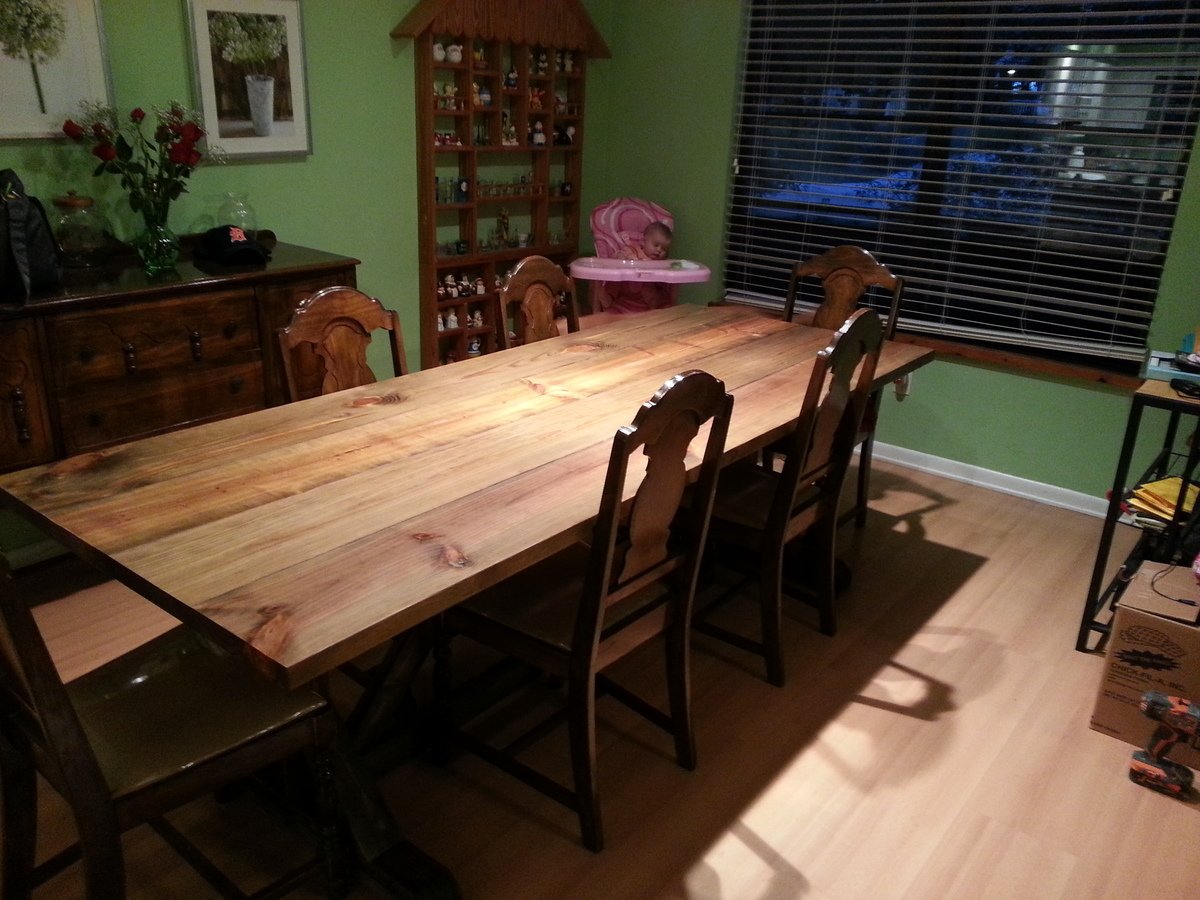
For the finish I found a website that showed me how to mix steel wool, vinegar and tea together to make a beautiful stain. It took a couple coats and a couple days to dry but I think it turned out great. Even though it was kind of scary at first when it started to turn shades of green rather than a dark color but after the stain soaked in and it dried it turned out the way i wanted it.
Built from Plan(s)
Estimated Cost
$200.00
Estimated Time Investment
Week Long Project (20 Hours or More)
Finish Used
steel wool, vinegar, tea and polly.
Recommended Skill Level
Intermediate
Comments
In reply to Beautiful table by sgilly
Tue, 02/18/2014 - 14:59
Thank you!
Thanks, My wife loved it as well!
Rebecca Media Center-Side Base
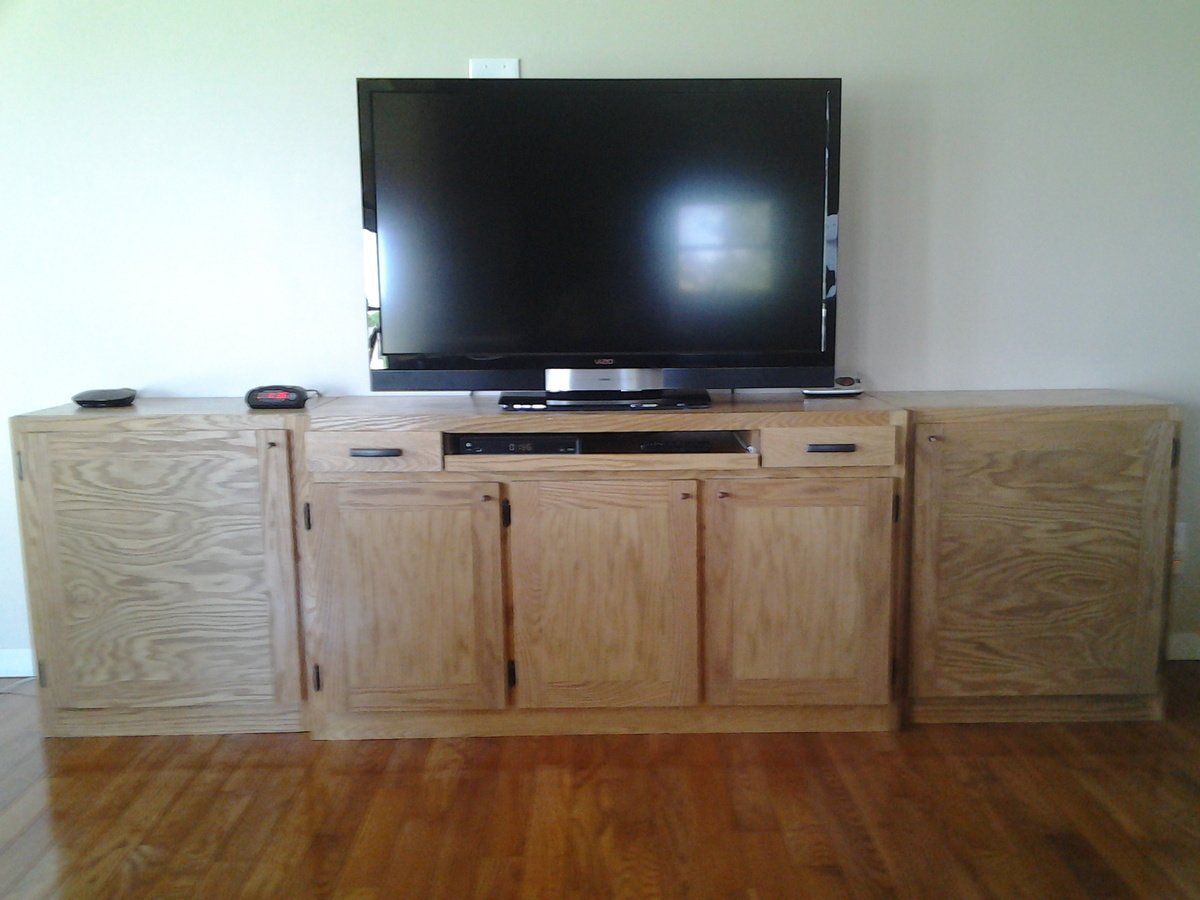
Oak Plywood and Oak Trim
We just love your work and detailed plans!
Hubby and I built the Console Unit and now the Base Units and plan to add on the hutches. We built the units only 30" tall vs. the 34-1/2" height from the plans. We used oak plywood and oak trim and finished it with a Minwax Fruitwood Stain and Minwax Polyurethane Seal. My hubby loves to make You Tube videos and made one of our work and posted it at:
https://www.youtube.com/watch?v=YtB6LK1xEHg
Keep up the great work and we plan to post more pics!
Built from Plan(s)
Estimated Cost
$100 for 1 piece of oak plywood and approximately 3 pieces of oak trim. We also used approximately 40 kreg jig screws.
Estimated Time Investment
Weekend Project (10-20 Hours)
Finish Used
Minwax Fruitwood with Polyurethane Seal. Watch the video to see it applied at:
https://www.youtube.com/watch?v=YtB6LK1xEHg
https://www.youtube.com/watch?v=YtB6LK1xEHg
Recommended Skill Level
Intermediate
Corner Entertainment Center with Barn Doors
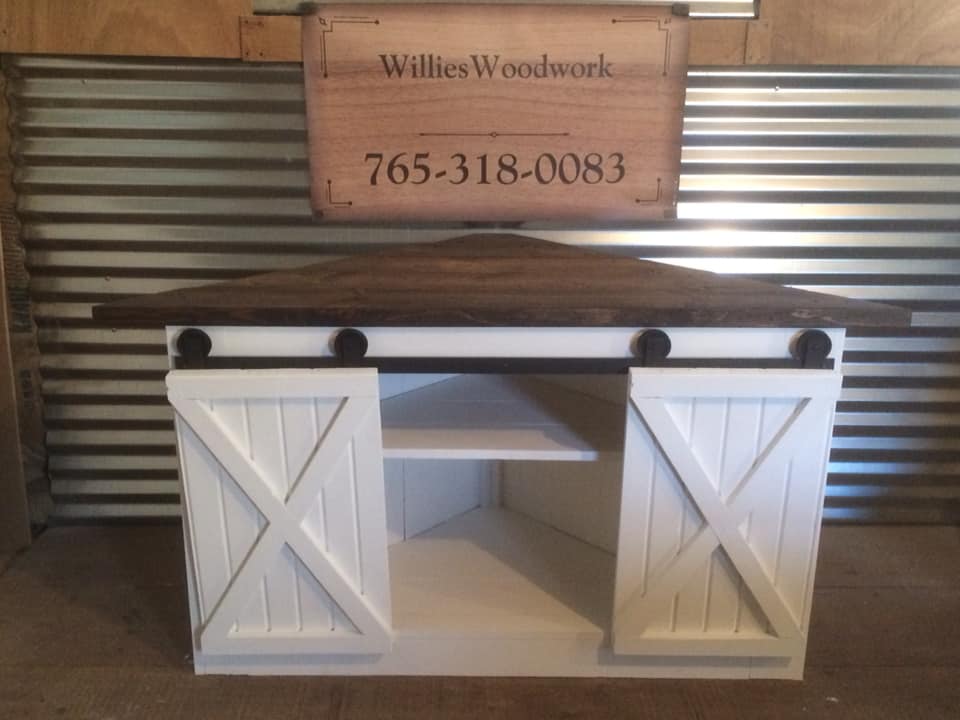
Built by Willies Woodwork
Built from Plan(s)
Easy DIY Twin Beds
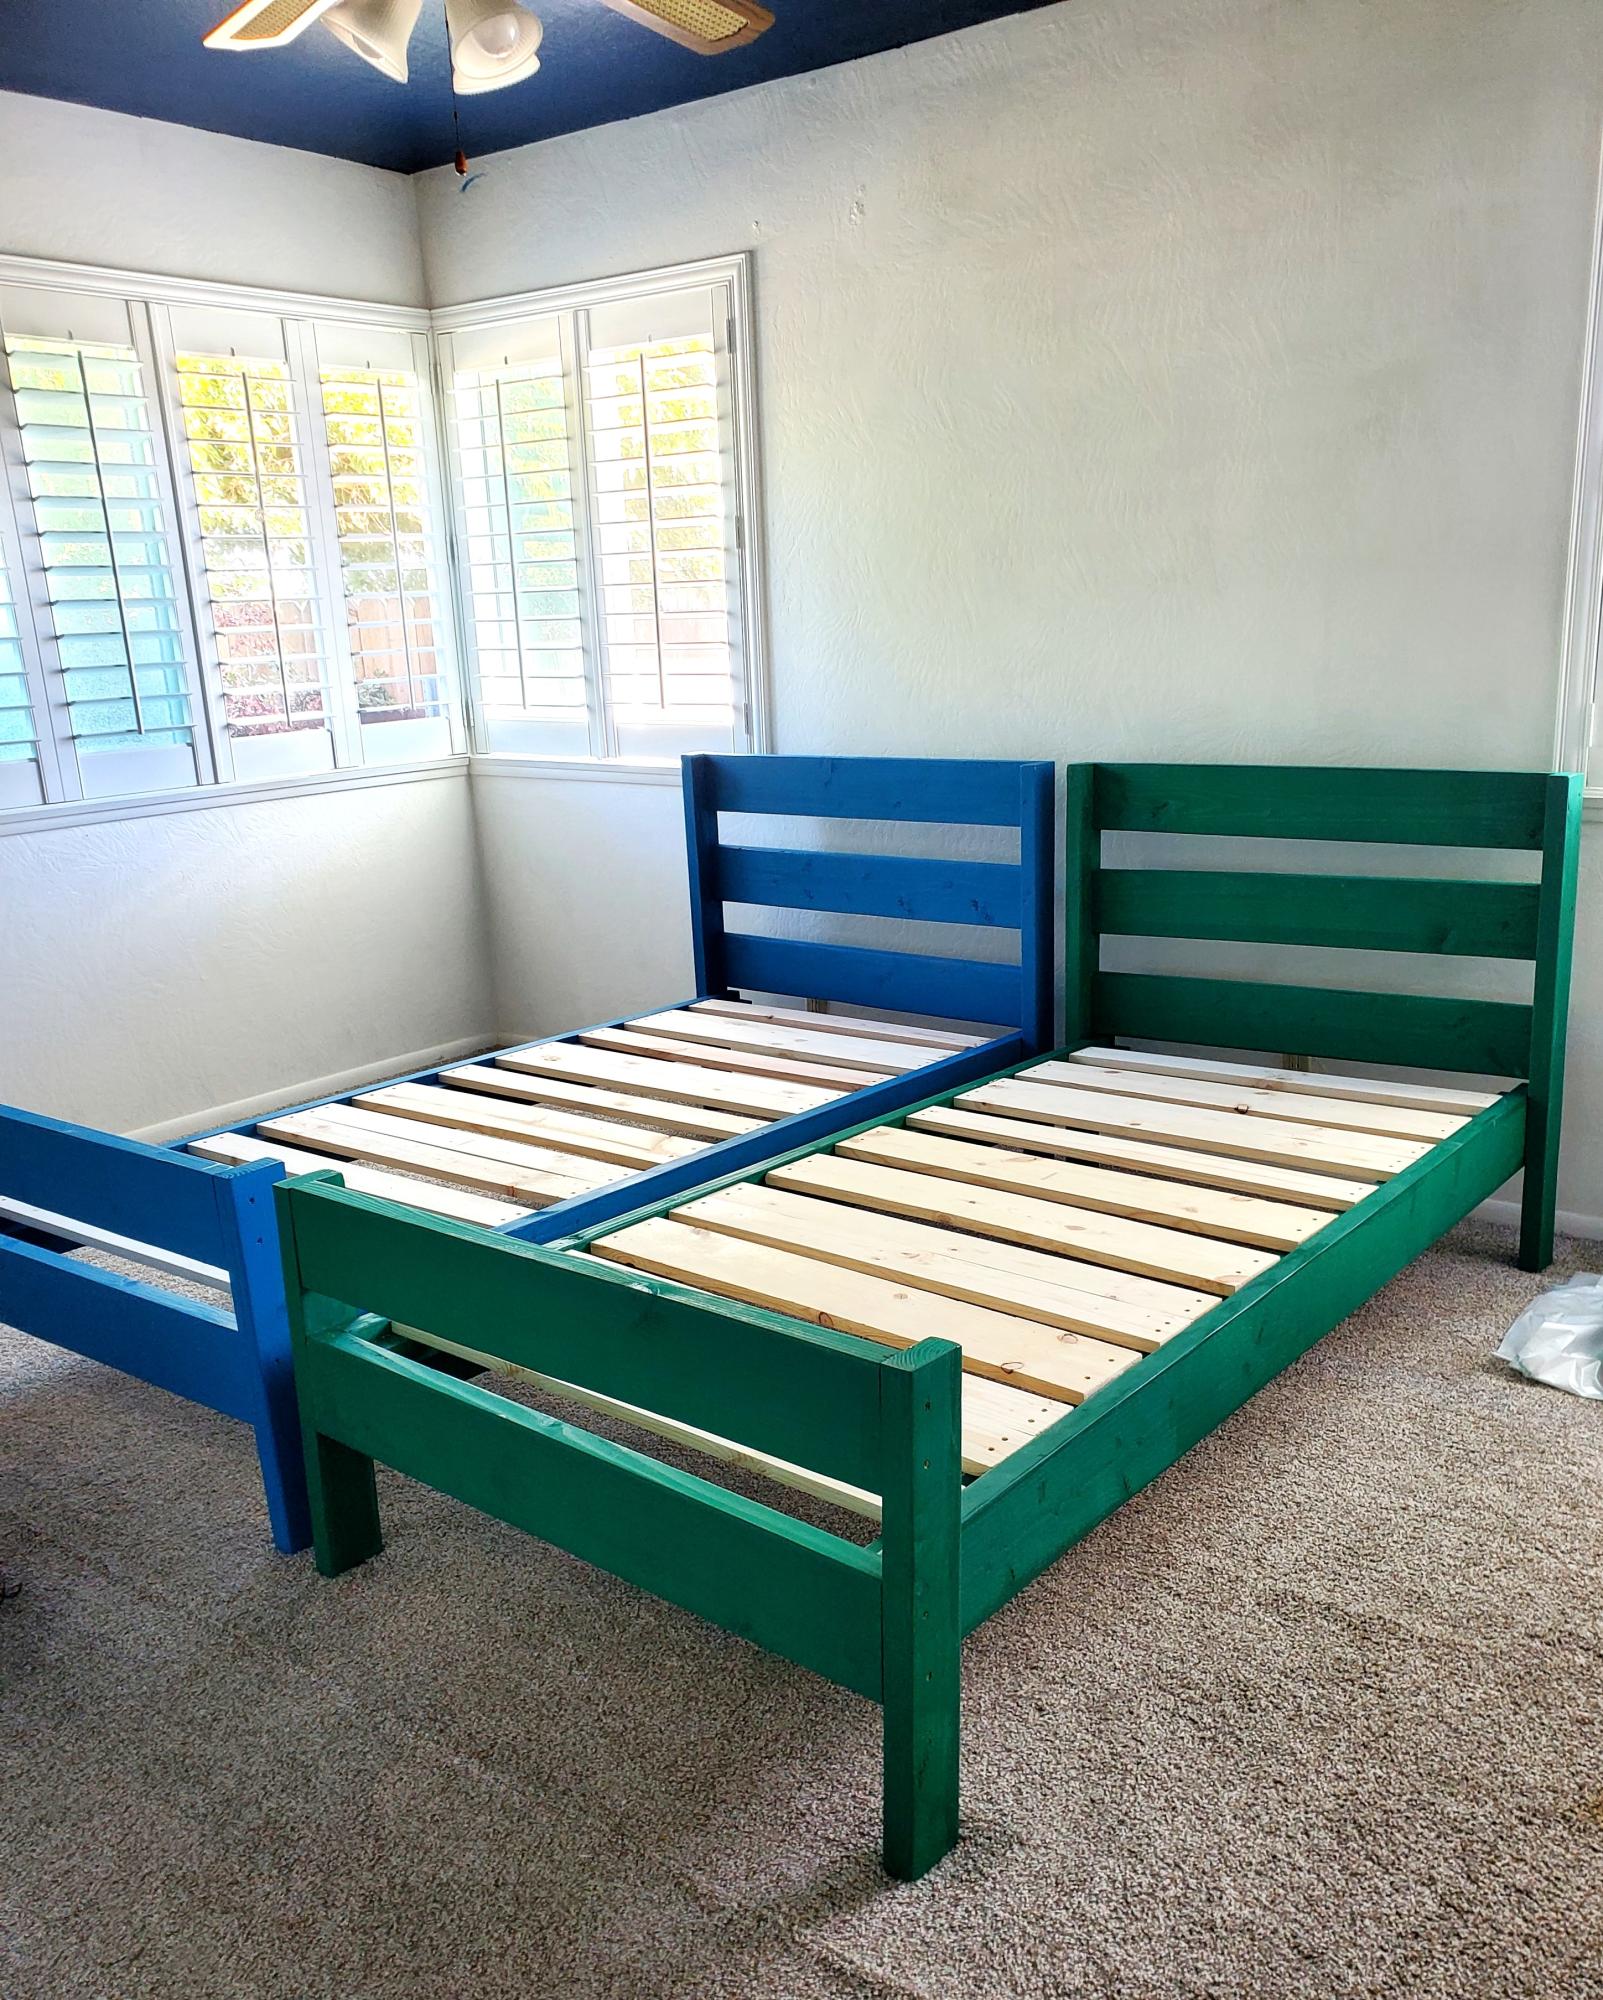
I have twins and they were fastly growing out of their toddler beds, so when I found Ana's plan for the easy twin bed (I made XL twin beds) I was ecstatic. In less than 4 days, both beds were built, painted, and ready for bedding!
BonjourTwinMama
Built from Plan(s)
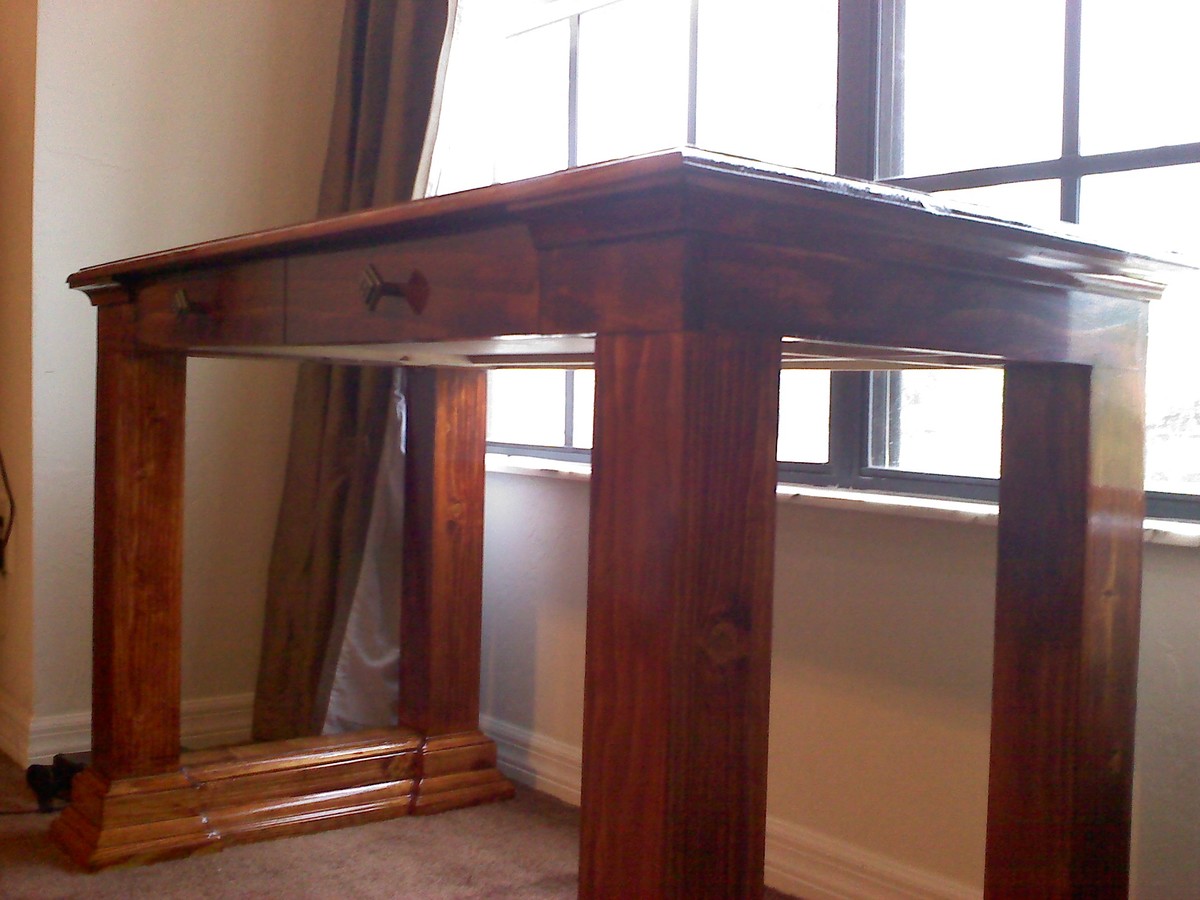
A not so modern version
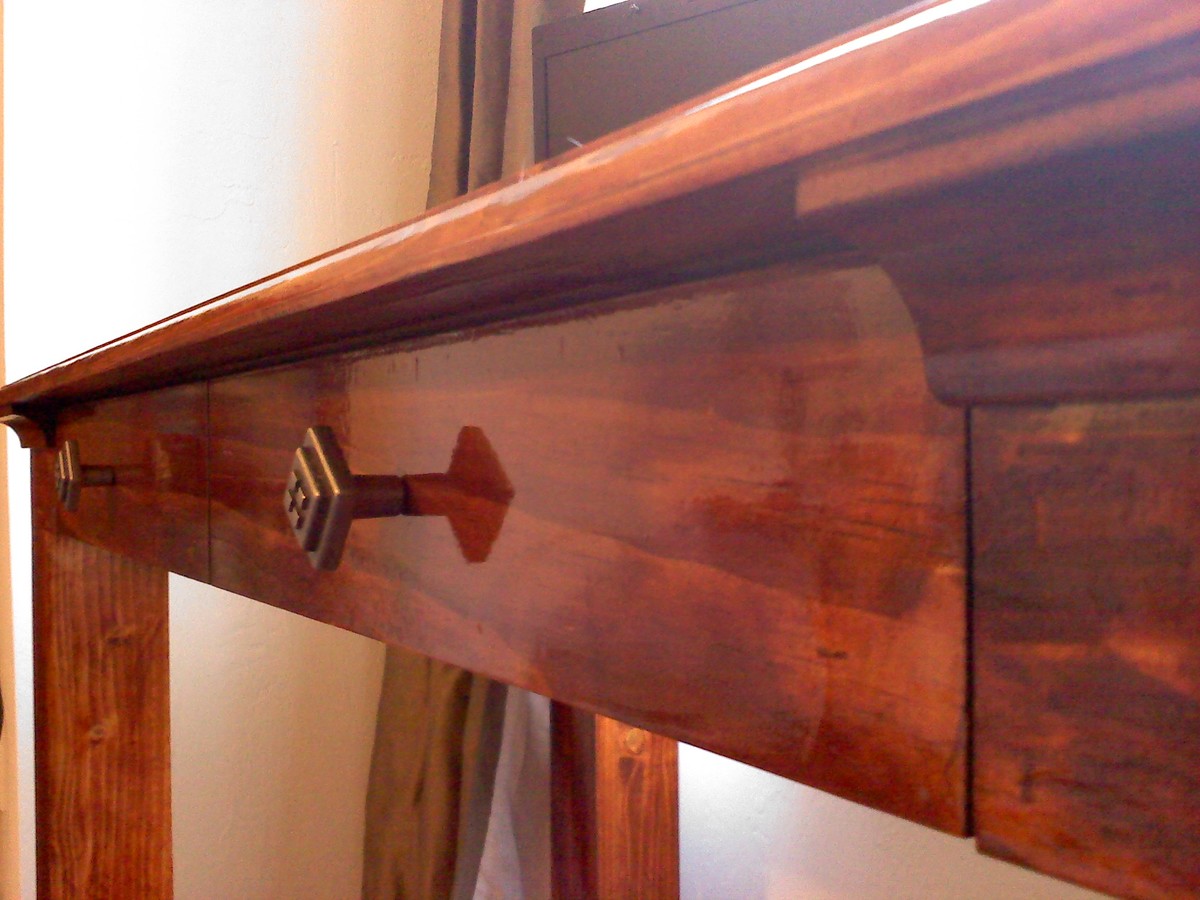
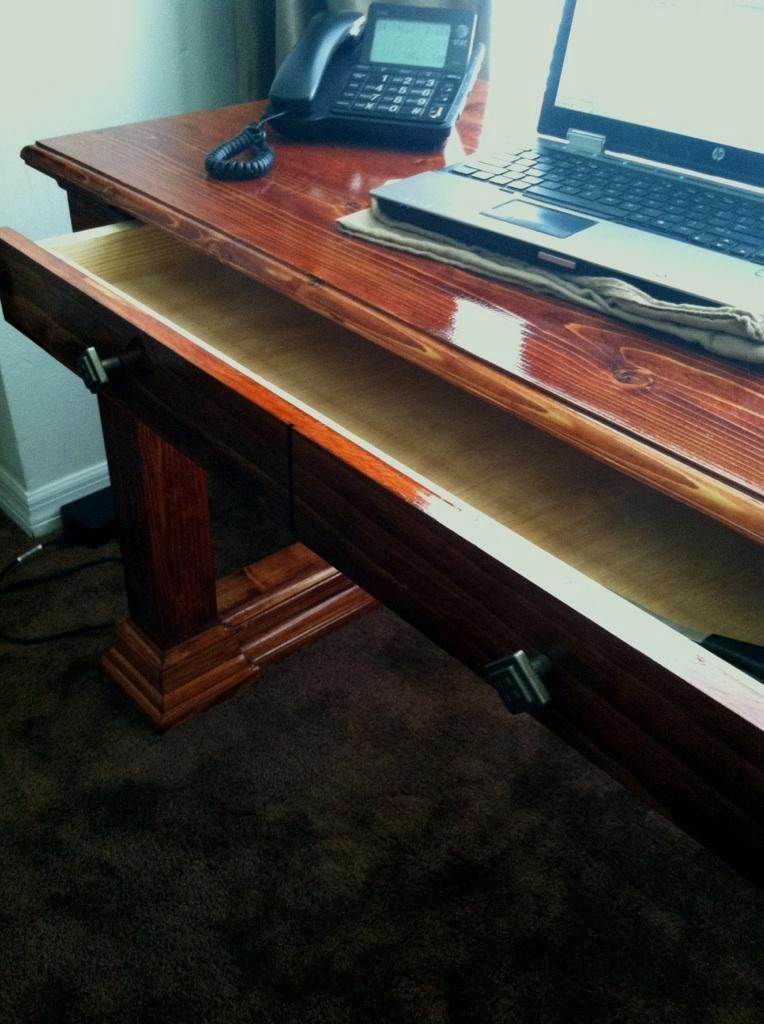
A friend contacted me about building a custom sized desk to coordinate with a set of dressers that she purchased used (I refinished them years before). We started with the Simple Modern desk (more in overall look), but made some changes away from "Modern" such as the bases, overhanging and routed top and trim on the side aprons. The legs of the desk aren't solid 4x4, but1x4s and 1x3 furring strips kreg jig'd and sanded till nearly seamless. The support under the desktop was redesigned to create a large, single drawer faced as two. The top is made from pine boards edge joined together. The two "bases" combined, have 96 pieces of trim to create this look. It was alot of work to get some tiny pieces just right, but well worth it in the end.
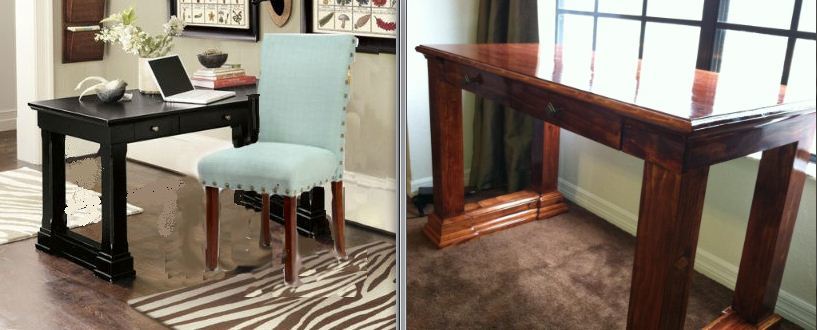
There are two comparison pictures uploaded. the photoshopped photo is the inspirational photo that came with the "Can you build me one of these?" and the second is the side by side with one of the dressers I was asked to compliment.
At 4 ft by 2 ft, she says its the perfect size for her home office laptop.
Overall, I was pretty surprised about how different of a turn this desk could take in style as I went from bare to adding the trim. Perhaps it can inspire others as well.


Built from Plan(s)
Estimated Cost
Materials were around $130
Estimated Time Investment
Week Long Project (20 Hours or More)
Finish Used
The stain is a combination of Minwax Gunstock and Golden Oak with 6 coats of Semi-gloss poly on top.
Recommended Skill Level
Intermediate
Comments

Tue, 05/08/2012 - 12:49
Love the details!!!!
I have been looking at some different design ideas for a desk. I love what touches you put on the table legs. I might have to try something like this when I start building.
Tue, 05/08/2012 - 17:13
Finishing
Gorgeous finish. What's your method? Pine has been killing me. I put 6 coats on my last table top or polyurethane. Time after time the wood just soaked up the finish. I could never get a smooth surface. Maybe if I would have applied 10 more coats...
Wed, 05/09/2012 - 05:22
thanks !
Washington- keep in mind the size of the trim pieces if you do a base like this. Some of those trim pieces are 1/2 wide and angled... not the easiest to get to fit right. If I were to do it again, I would cut in more to make the cuts a little easier. However, I loved this result.
These legs are hollow also, a definite idea to keep in mind for anyone wanting to do a 4x4 leg project but unable to find treated 4x4's.
Patrick- everything was well sanded in advance. then a coat of wood conditioner. Then the stain (2 coats of the gunstock and 2 coats of the Golden Oak). With the Poly, In between coats, I buff with 0000 Steel Wool then wipe clean. That surface, minus the places where I left the charachter in the wood on purpose, is VERY smooth.

Wed, 05/09/2012 - 06:31
You did a really beautiful
You did a really beautiful job and it does match the dresser so nicely.
Thu, 05/10/2012 - 19:15
Ahh poly in between coats.
Ahh poly in between coats. What a great method. Will try that.
Wed, 05/16/2012 - 05:40
between coats
Patrick.. you apply poly, give a very light sand with the 0000 steel wool (A little more than running over the surface with minimal pressure) until the surface feels smooth with no drag. Then wipe down with tack cloth and apply a new layers of poly.
Keep in mind that with polyacrylic.. the water based stuff, you can't use the steel wool. I'm told it will rust. This is strictly for polyurethane.
Wed, 05/16/2012 - 05:42
raised trim
Washington- the middle layer of trim is on top of spacer to raise it up. It provided a great look.
Wed, 03/27/2013 - 21:25
How did you build the legs?
The desk looks great. I was trying to figure out how you attached the four pieces of wood that make the legs. You indicated a Kreg jig, but it would seem that there would need to be some pocket screws on the outside. I don't see any...what am I missing here?
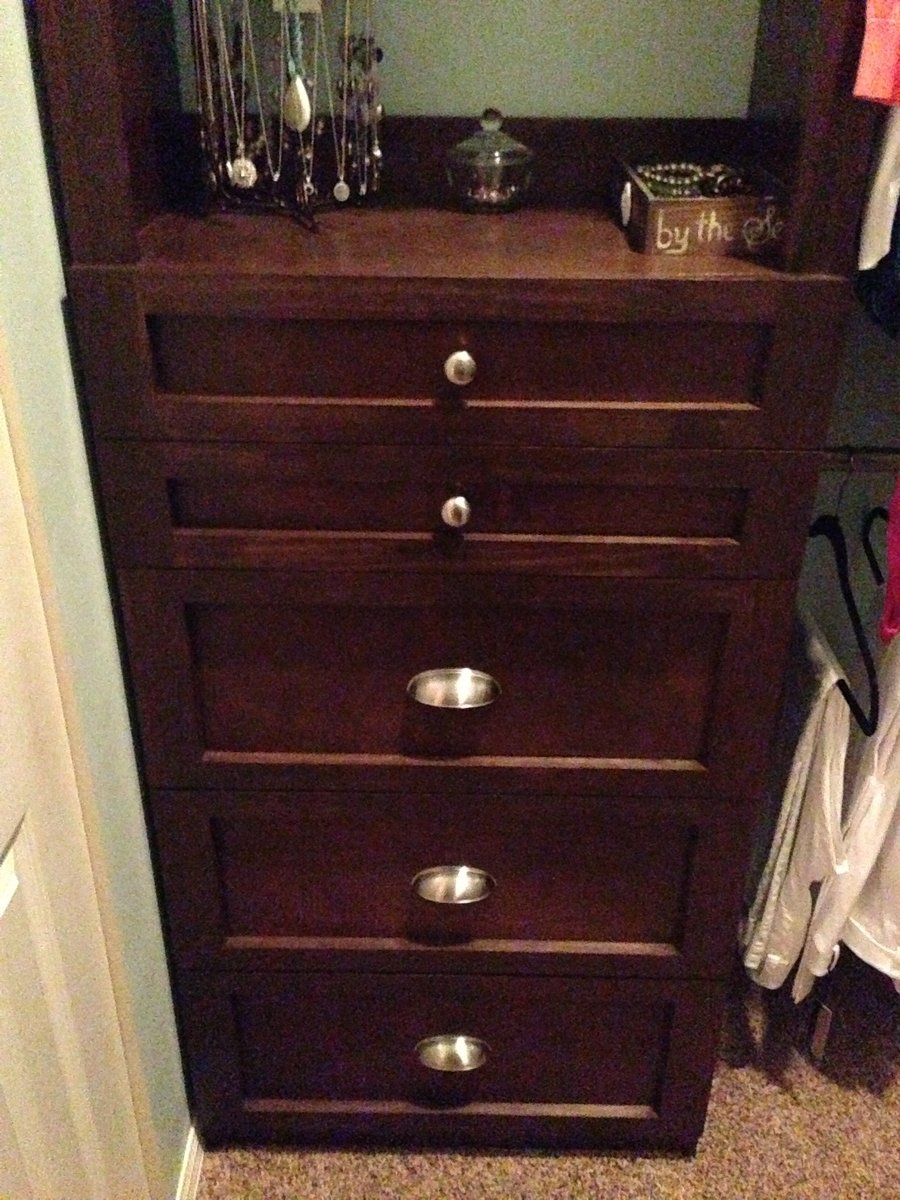
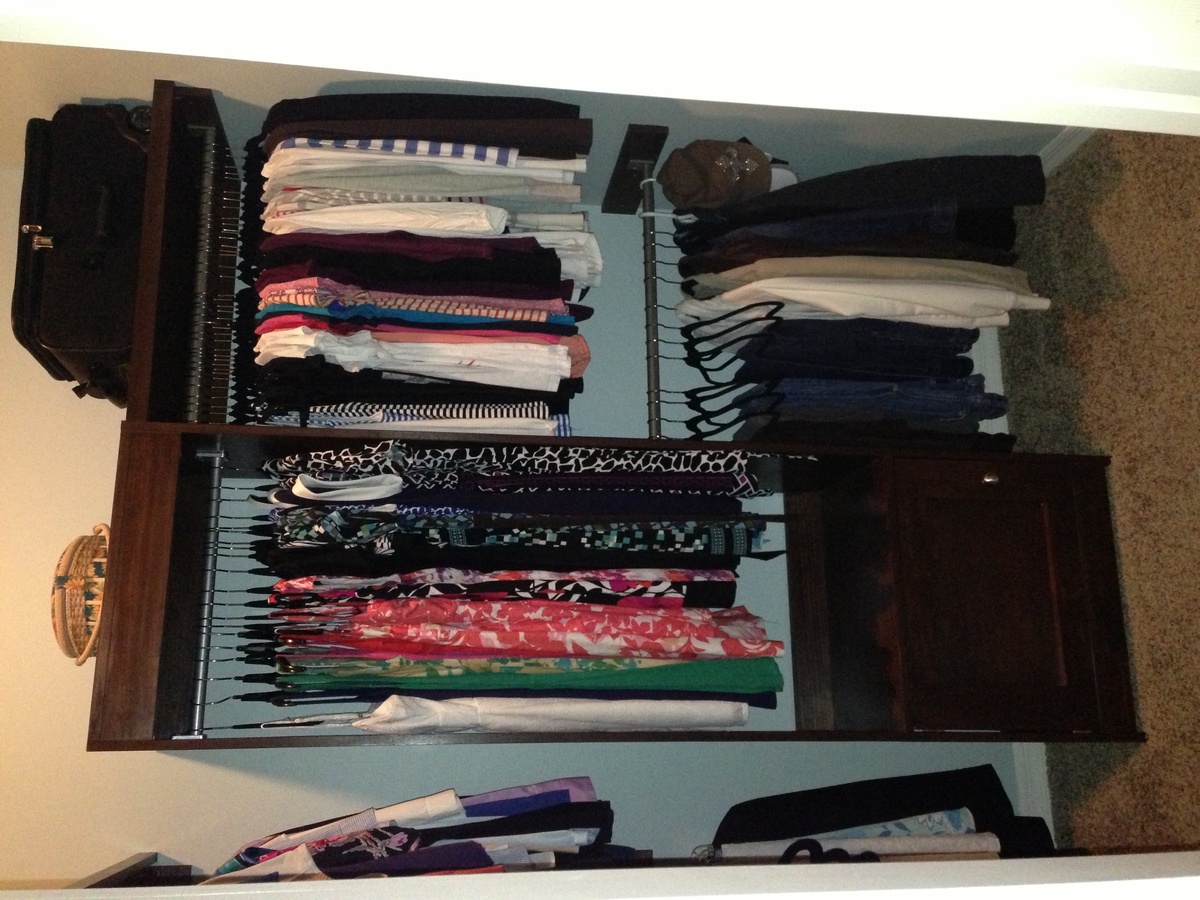
Master Closet Overhaul
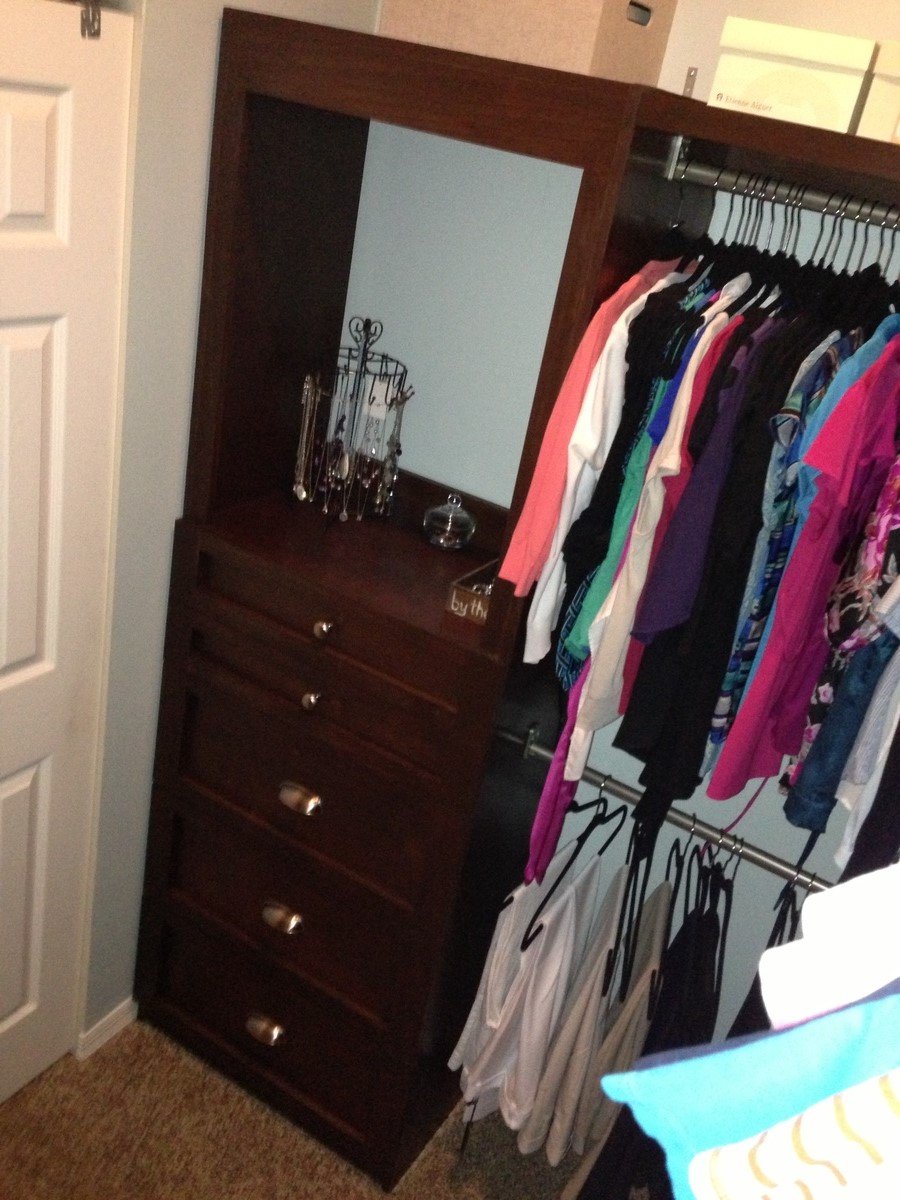
This project was desperately desired and needed! We had old wire shelving which previous owners of the home had installed improperly and were falling off the wall. This took about 6 weeks from start to finish, but I am SO happy with the results. Unfortunately, here in south Florida, our homes are built with metal studs which are more often than not spaced all over the place. So, attaching anything to a wall securely is next to impossible. I believe I've gotten things as securely attached as possible and things seem to be holding up really well. The icing on the cake was my mother-in-law purchasing 100 Huggable Hangers for me for my birthday! The OCD in me was ecstatic! Anyhow, thanks Ana for the great plans and helping bring custom organization to our homes!

Built from Plan(s)
Estimated Cost
$375
Estimated Time Investment
Week Long Project (20 Hours or More)
Finish Used
Varathane Ultimate Stain in Carrington (LOVE-5 stars) and satin polycrylic
Recommended Skill Level
Intermediate
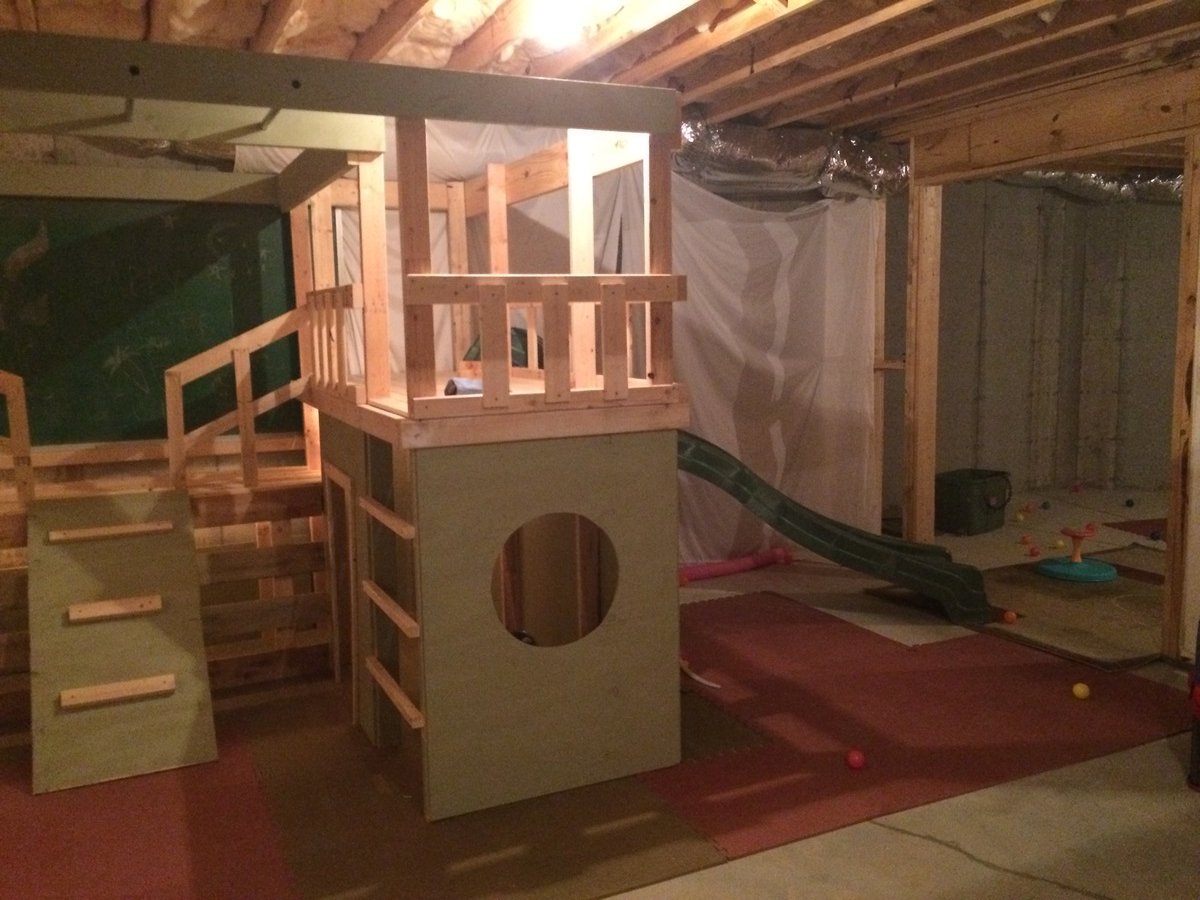
Indoor Playhouse Fun
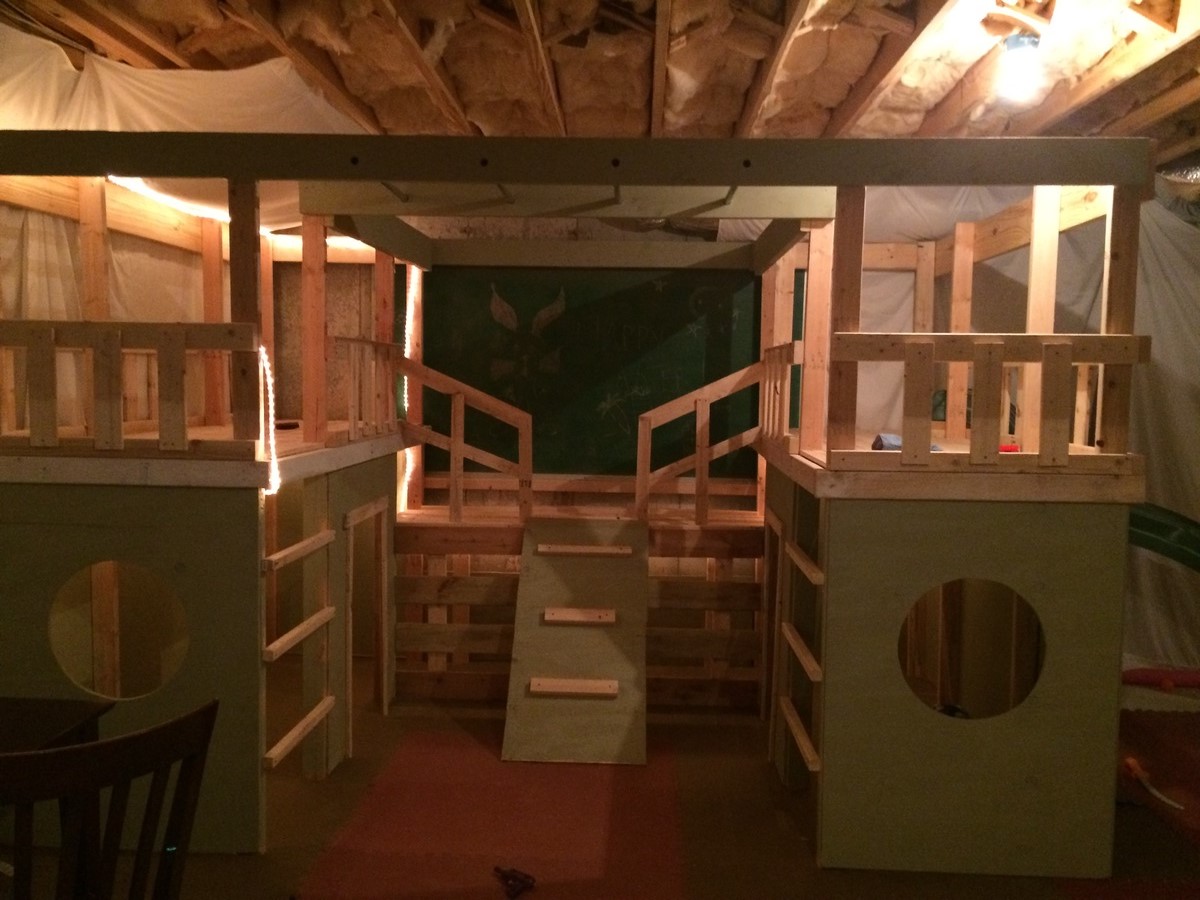
This project was a success!! I had a week of vacation that I dedicated to this great project! The directions were easy to follow...thank you Ana!
I managed to get the slide from someone's outdoor play set that they were giving away :) I secured it to the side of the upper level. It's been the kids favorite part!
Built from Plan(s)
Estimated Time Investment
Week Long Project (20 Hours or More)
Recommended Skill Level
Intermediate
First project!
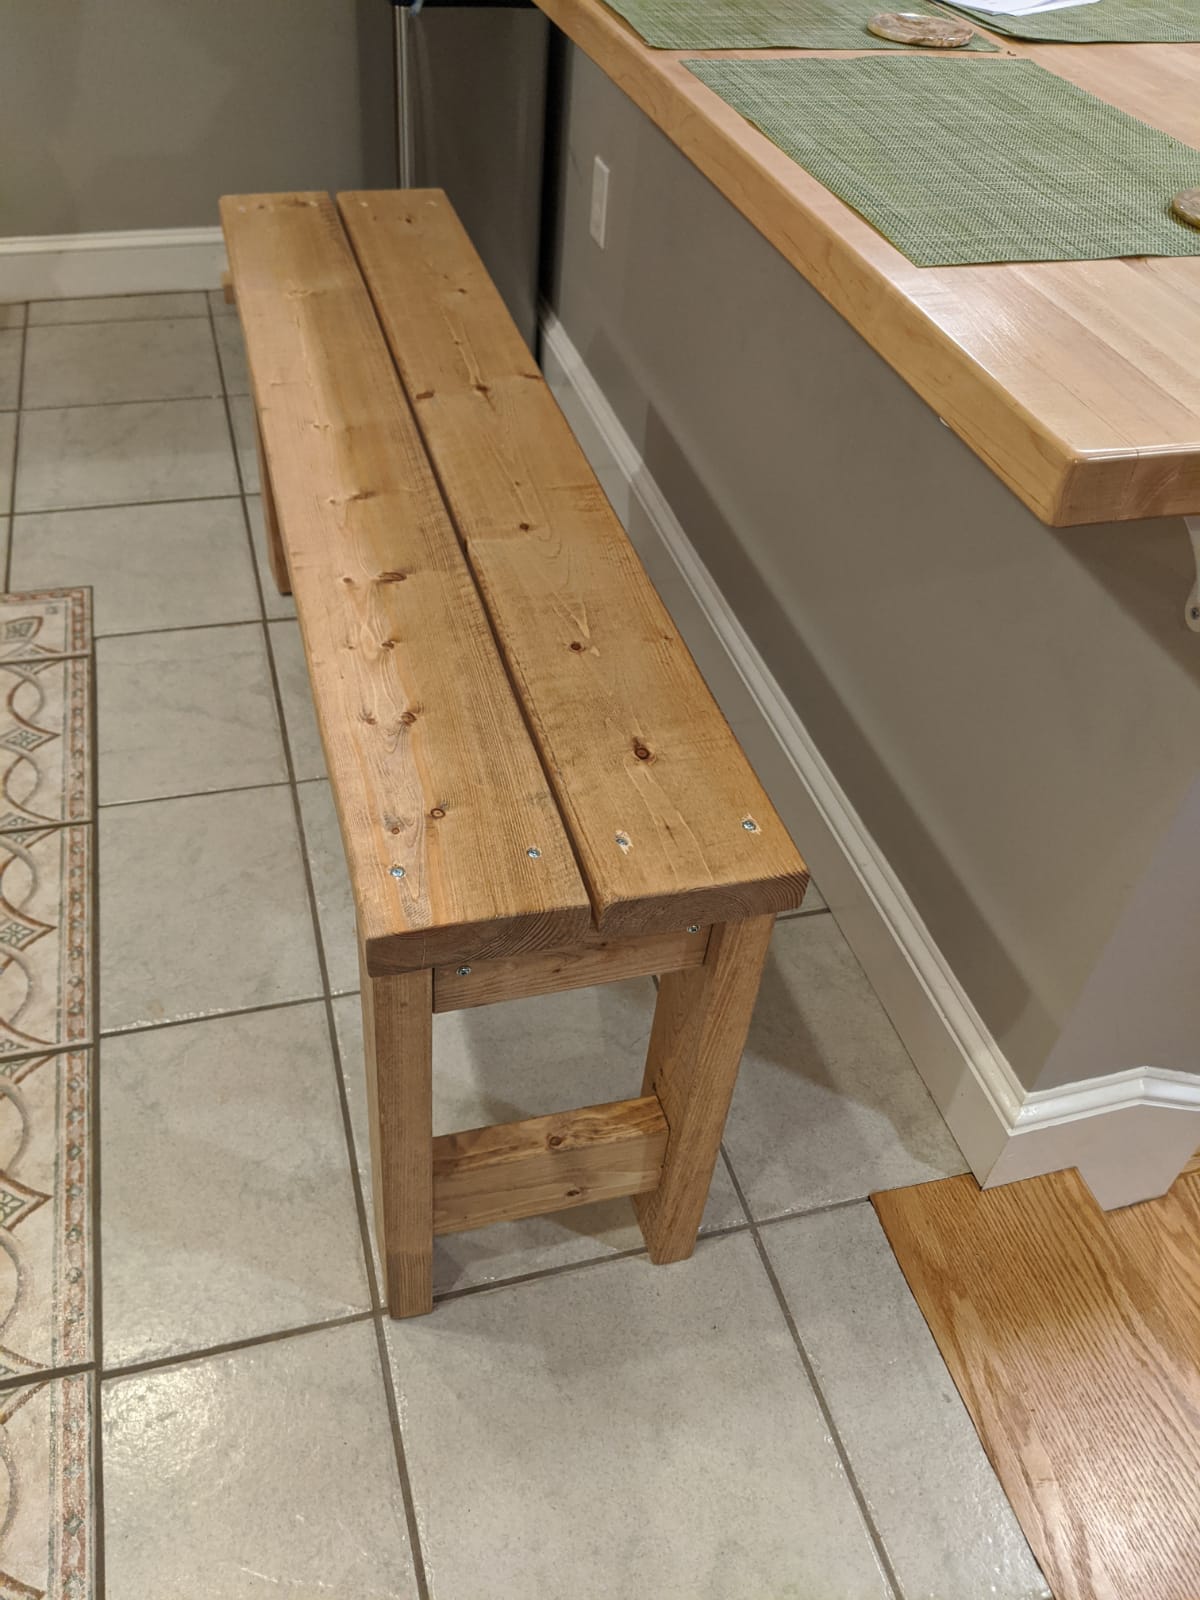
We finally finished our first project - definitely made mistakes, but learnt a lot. I feel ready for tackling the next one
Built from Plan(s)
Estimated Cost
20
Estimated Time Investment
Day Project (6-9 Hours)
Finish Used
Medium Walnut - I wasn't a fan with the end result, so I'll probably try a lighter stain with 2x4s the next time
Recommended Skill Level
Starter Project
Stocking Stand and DIY Name Tags
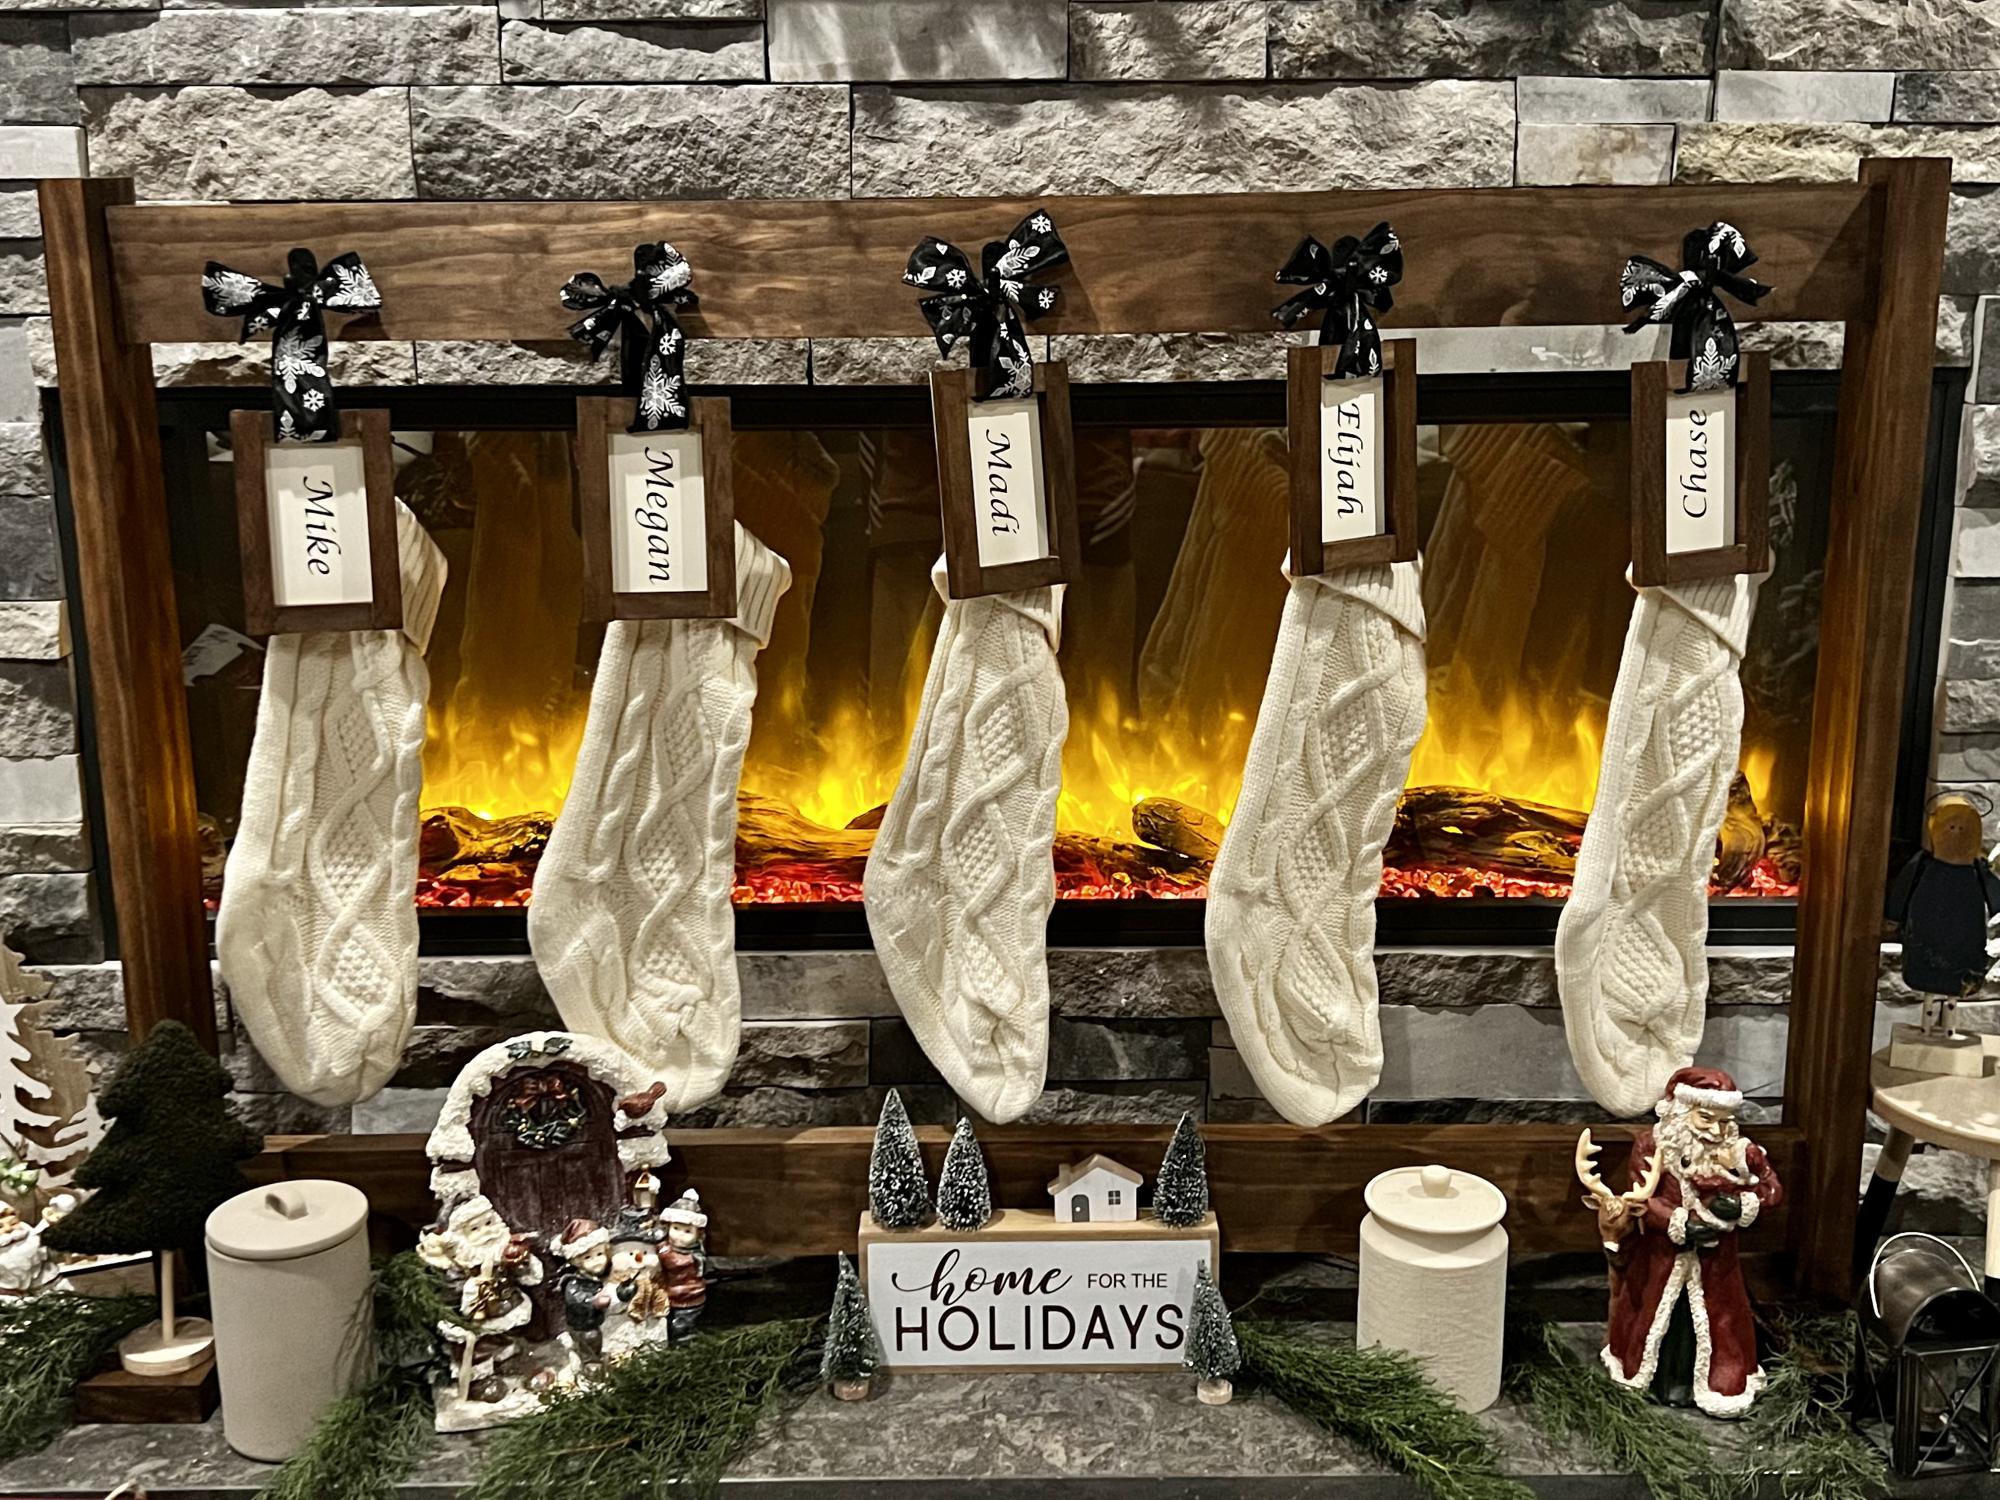
Did these last year!
Mike Dvorak

Built from Plan(s)
Seasonal And Holiday
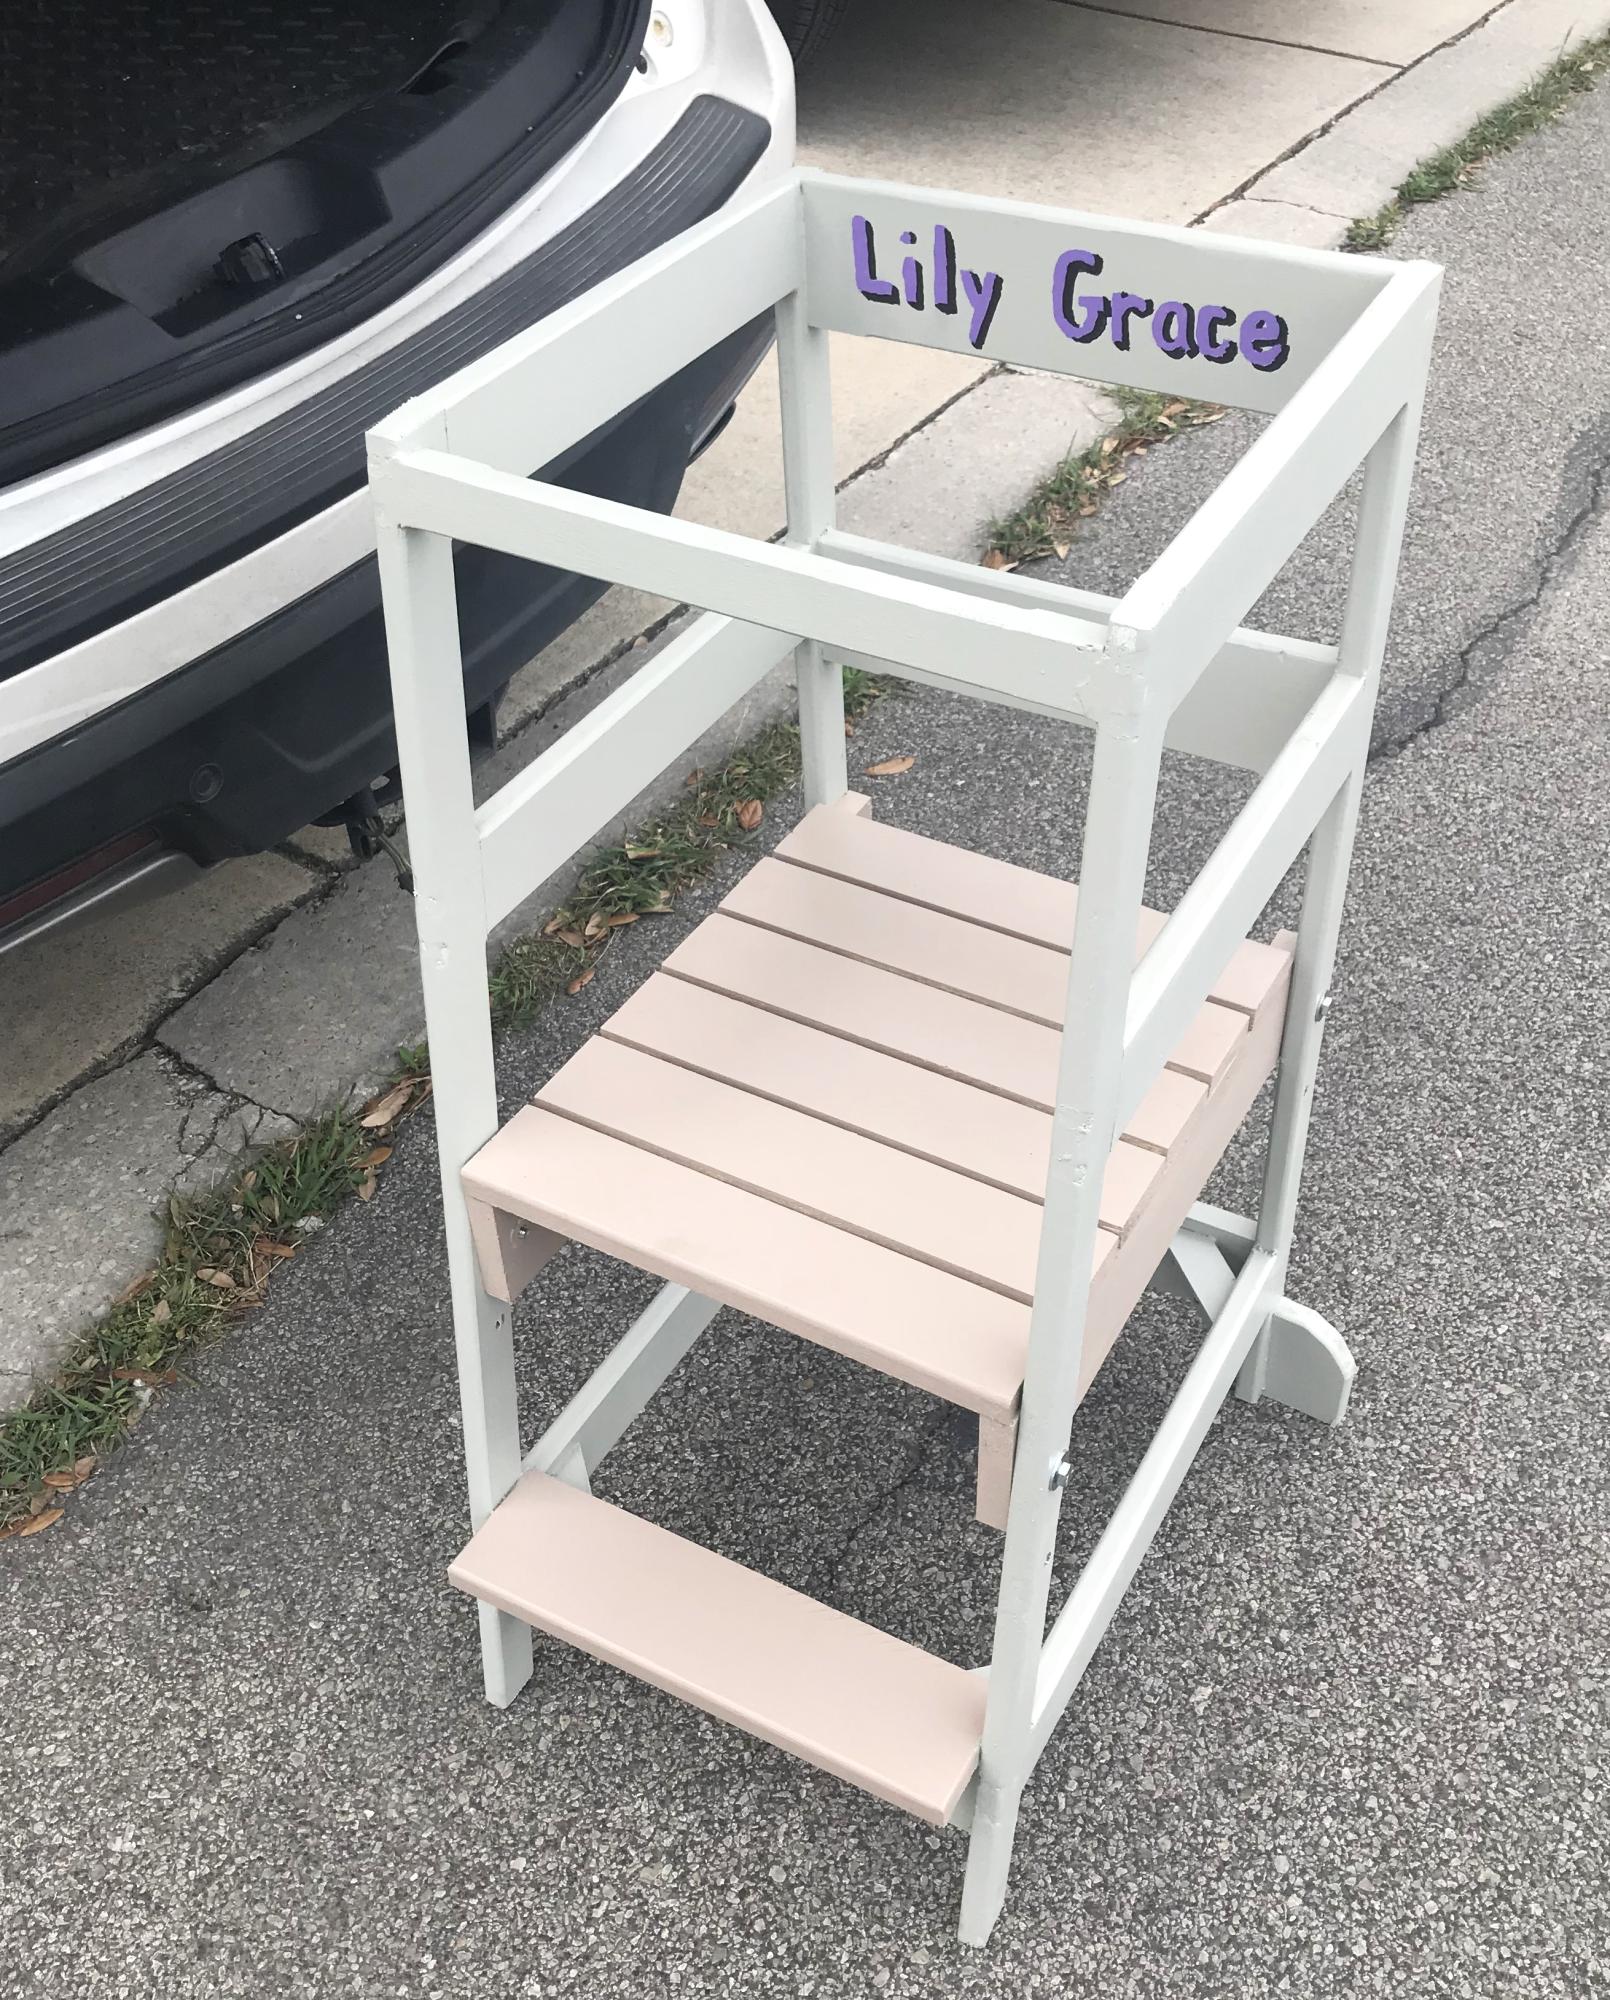
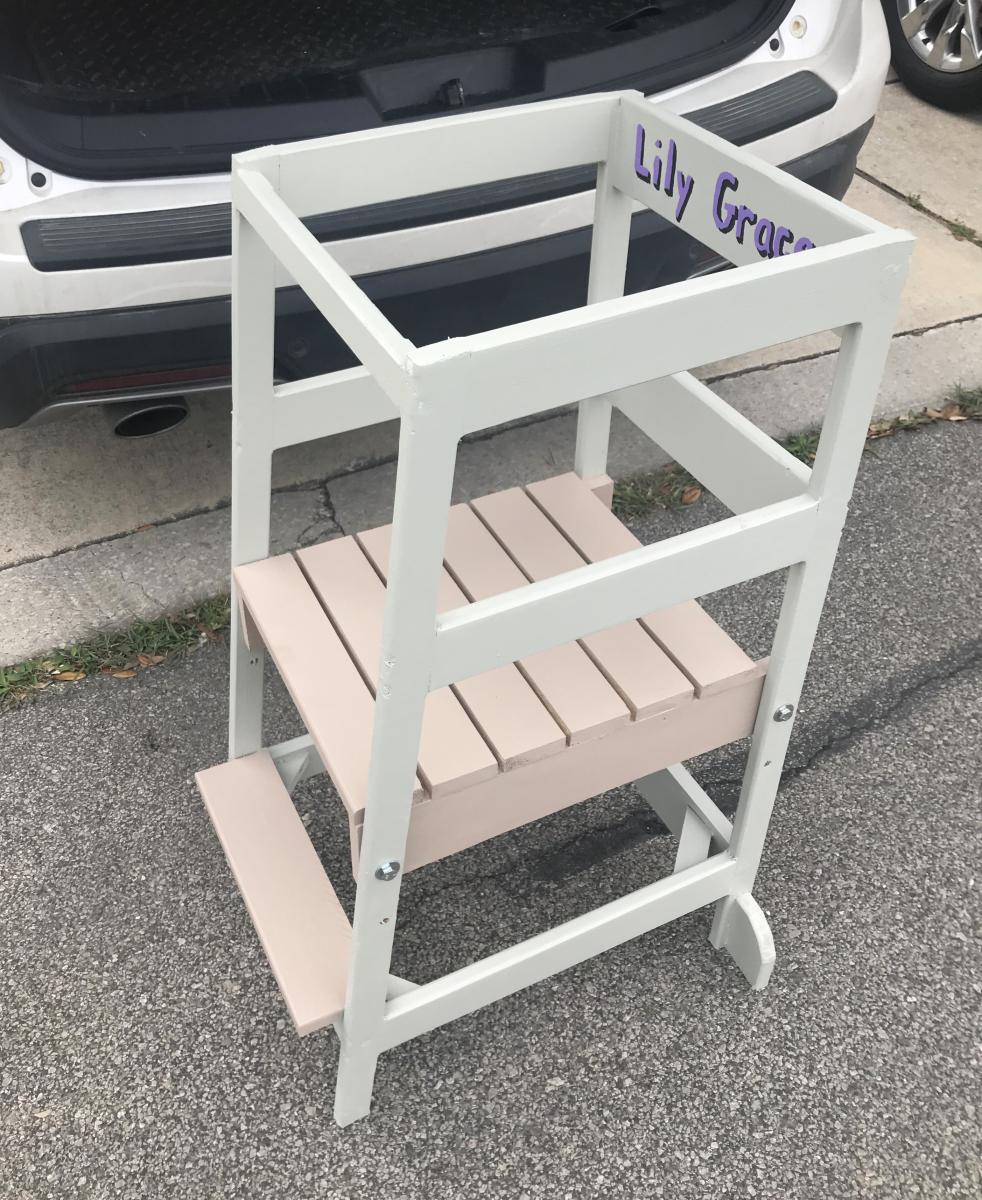
Simple Bunk bed with a triple twist and cubby steps.

I'm a father of 4 girls ages 6,5,4, and 1. So a regular bunk wasn't enough so I decided to add the 3rd bunk. Each painted in my girls favorite colors. The paint was Martha Stewart signature paint which was on clearance on Lowes. Think it was 3 or 4 dollars a quart. The cubby steps are basically just 4 boxes stacked on top of each other and nailed together and made from 3/4" furniture grade plywood.
It didn't come out perfect but I'm pretty happy with the results. Let me know what you guys think. Thanks.
PS, Ana...my wife is a big fan of yours. She's the one who turned me onto your site.

Built from Plan(s)
Estimated Cost
$200-$250
Estimated Time Investment
Week Long Project (20 Hours or More)
Finish Used
Martha Stewart Signature Paint
Recommended Skill Level
Beginner
Comments
Fri, 05/11/2012 - 17:30
That looks awesome! It's
That looks awesome! It's definitely one of a kind too. Nice job.
Sat, 11/24/2012 - 09:06
Help please!
Hi,
We are looking to build something very similar, but are needing more information. How did you attach the loft bed to the top bunk bed? What do you have at the foot of the loft bed to keep it up? Thanks so much for any information.
Thu, 07/31/2014 - 14:17
This is BEAUTIFUL. I bet your
This is BEAUTIFUL. I bet your girls have loved it and worn it well. :) I would love to see 2-years-later pics to see how it has held up over the years. :)
My first Adirondack chair
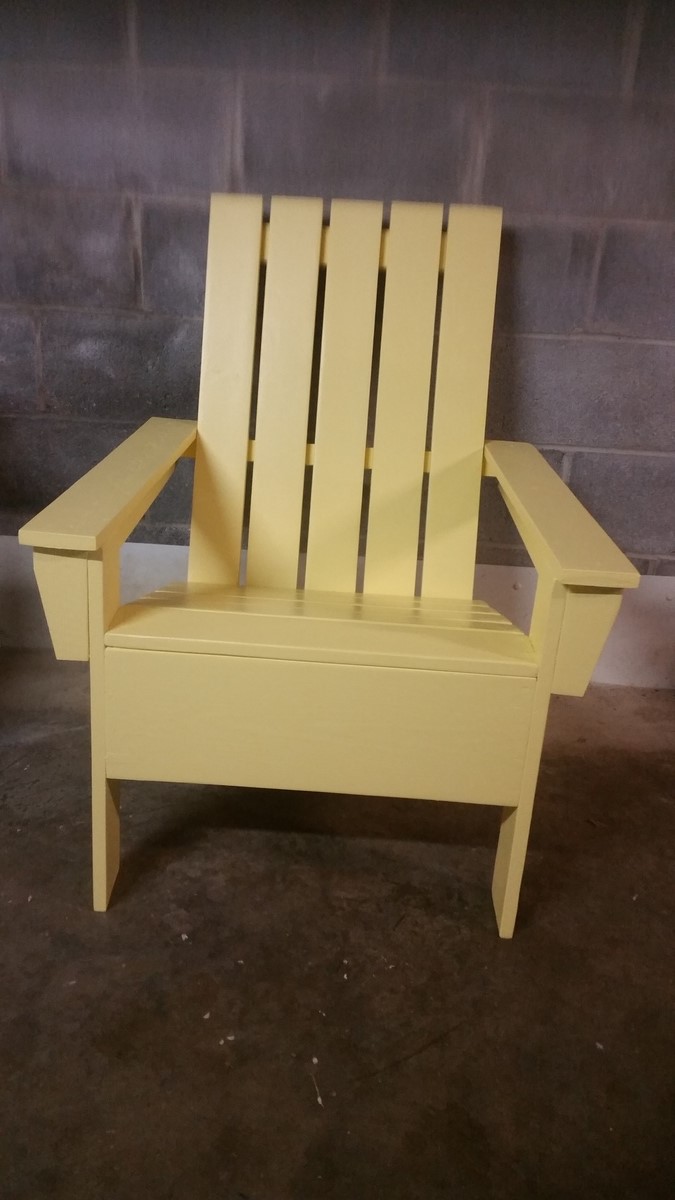
My first attempt at building an Adirondack chair. Ana's plans were easy to follow and very accurate. I would classify myself as a Beginner+.. Recently suffered bad thumb cut making cedar planters. Always think safety first.
Built from Plan(s)
Estimated Cost
$55.00
Estimated Time Investment
Week Long Project (20 Hours or More)
Finish Used
Glidden Latex. One coat of primer and 3 coats of Glidden canary yellow latex.
Recommended Skill Level
Beginner
My first project!
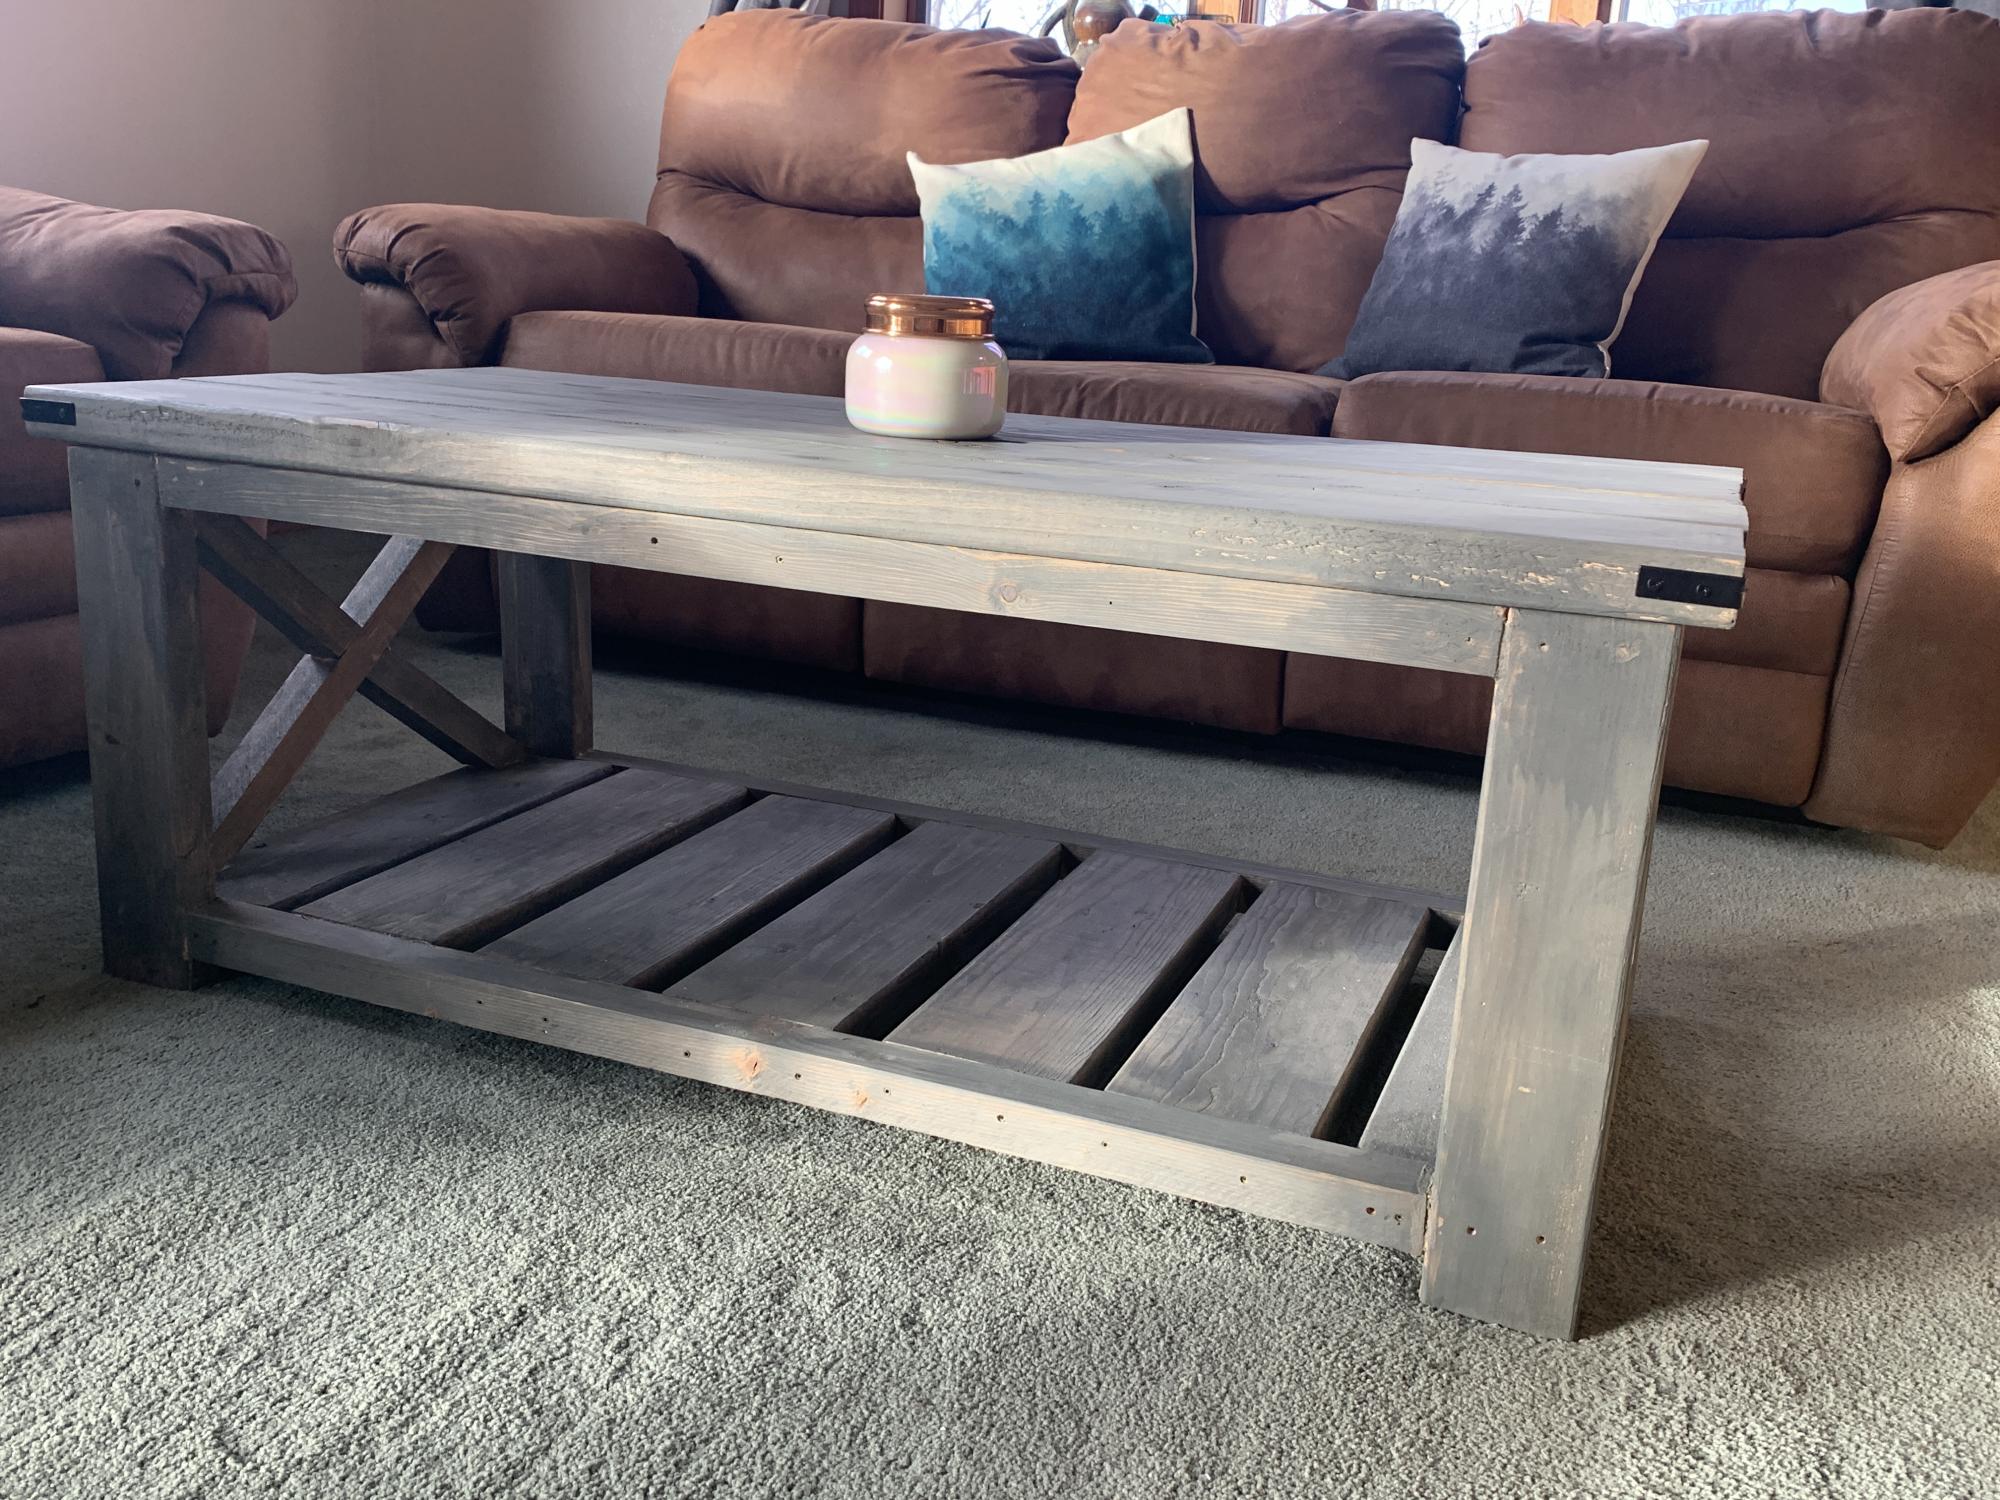
For my first project I chose the farmhouse coffee table. It turned out much better than I expected! The hardest part for me were the angle pieces on the ends. The design was super easy to follow and I love the rustic look. It didn’t turn out perfect but I am pretty happy with it. Can’t wait to see my husbands reaction when he gets home :)
Thanks Ana!
Built from Plan(s)
Estimated Cost
$60
Estimated Time Investment
Day Project (6-9 Hours)
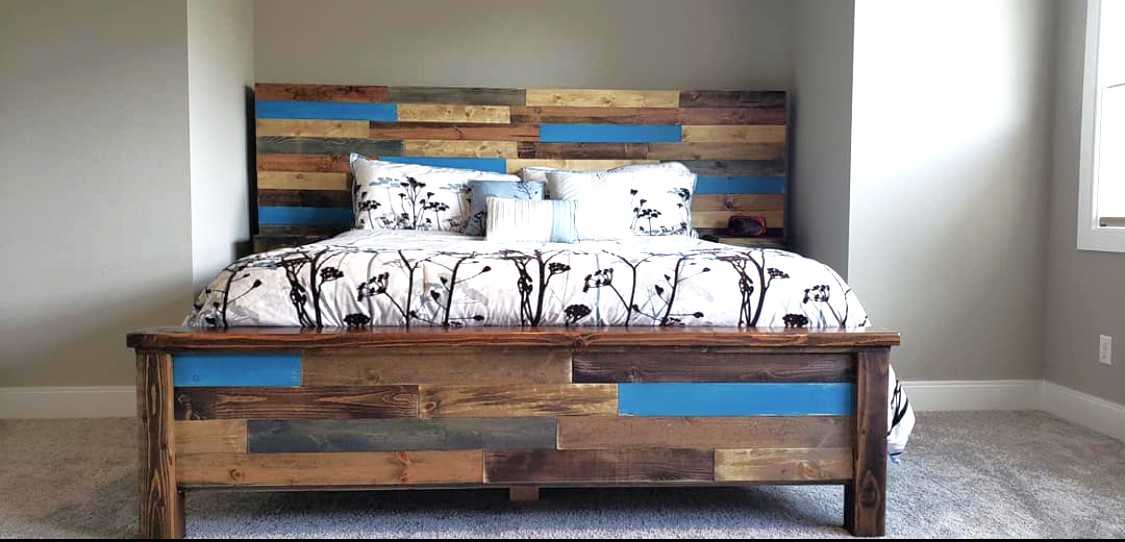
DIY Farmhouse Bed
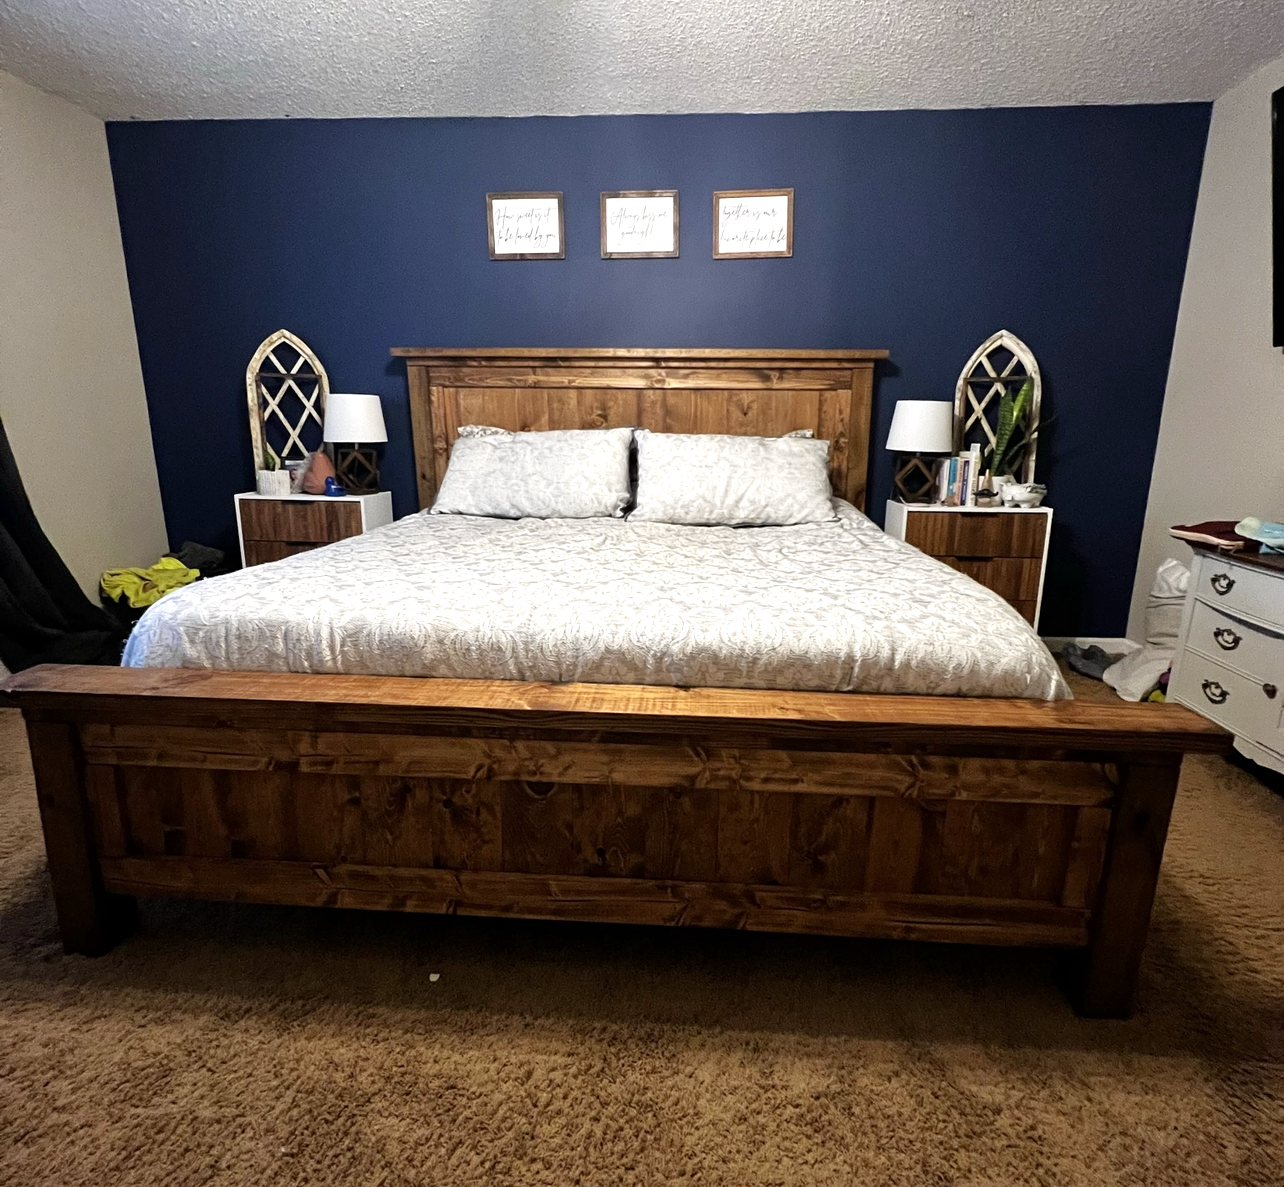
I needed a new bed and stumbled upon your plan for a bed frame. I love it and had so much fun building it!
Marielle Krupa
Built from Plan(s)
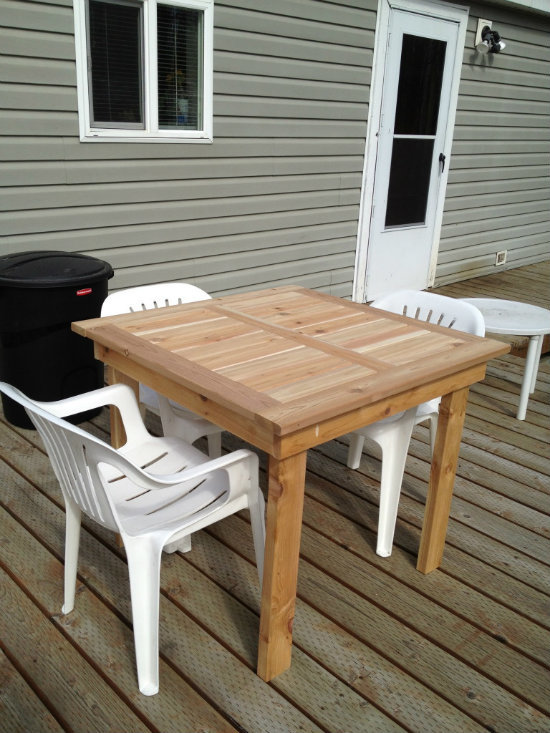
Simple Outdoor Stabackable Chairs and Table
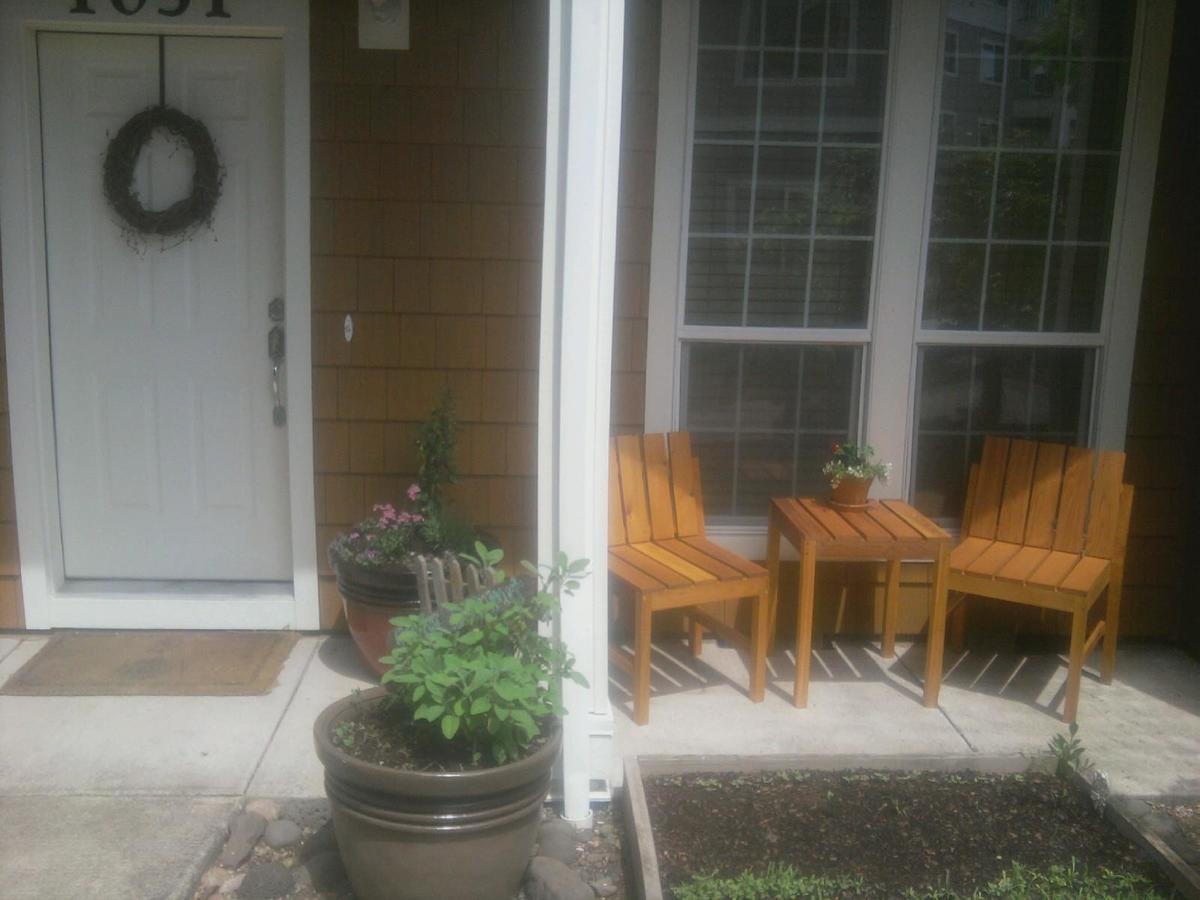
We used cedar for these nice, little chairs and based the table on the chair model, only 24" tall, rather than the 18" of the chair seats. It took longer to cut than assemble these - total time: @4 hours for all.
Thank you, Ana!
Darin
Built from Plan(s)
Estimated Cost
$60
Estimated Time Investment
Afternoon Project (3-6 Hours)
Finish Used
Stain with weather protectant.
Recommended Skill Level
Beginner
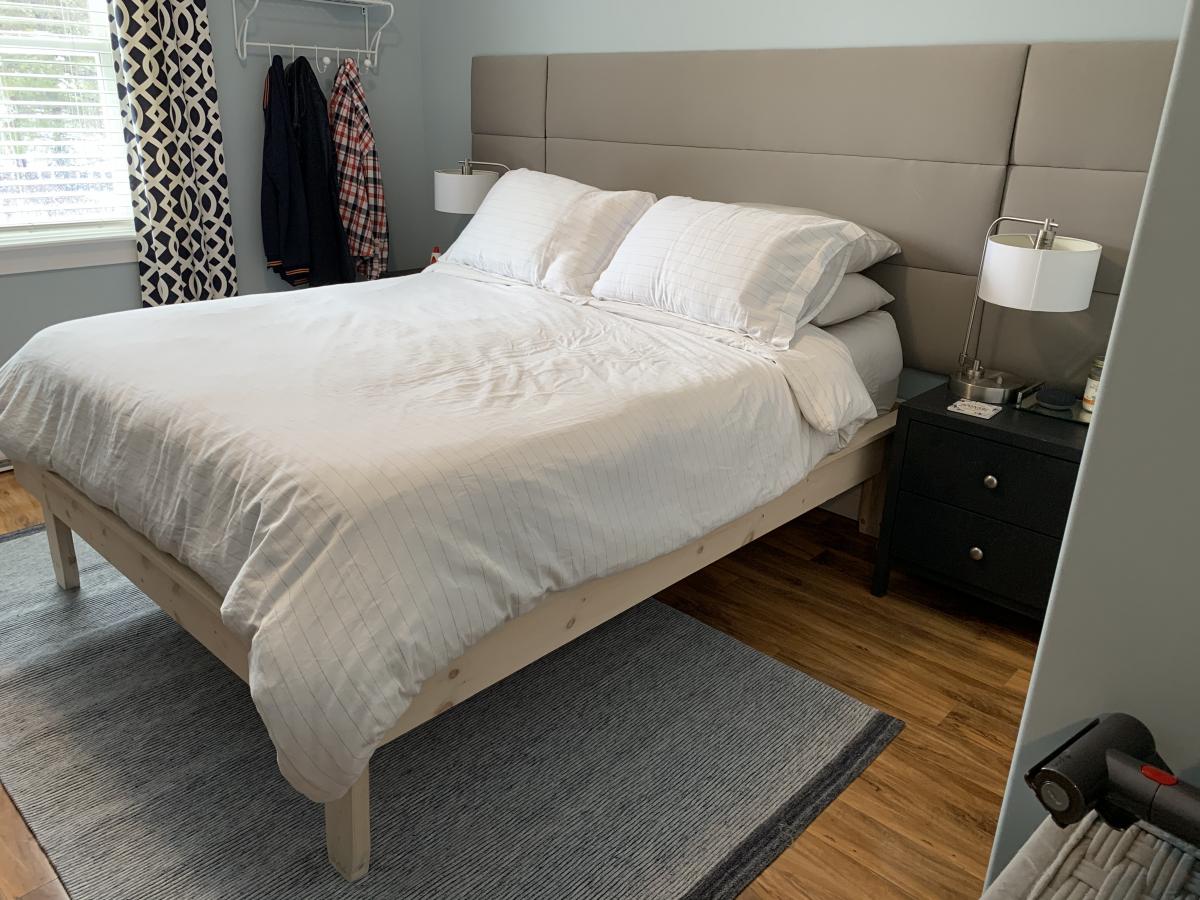
Hailey Platform bed
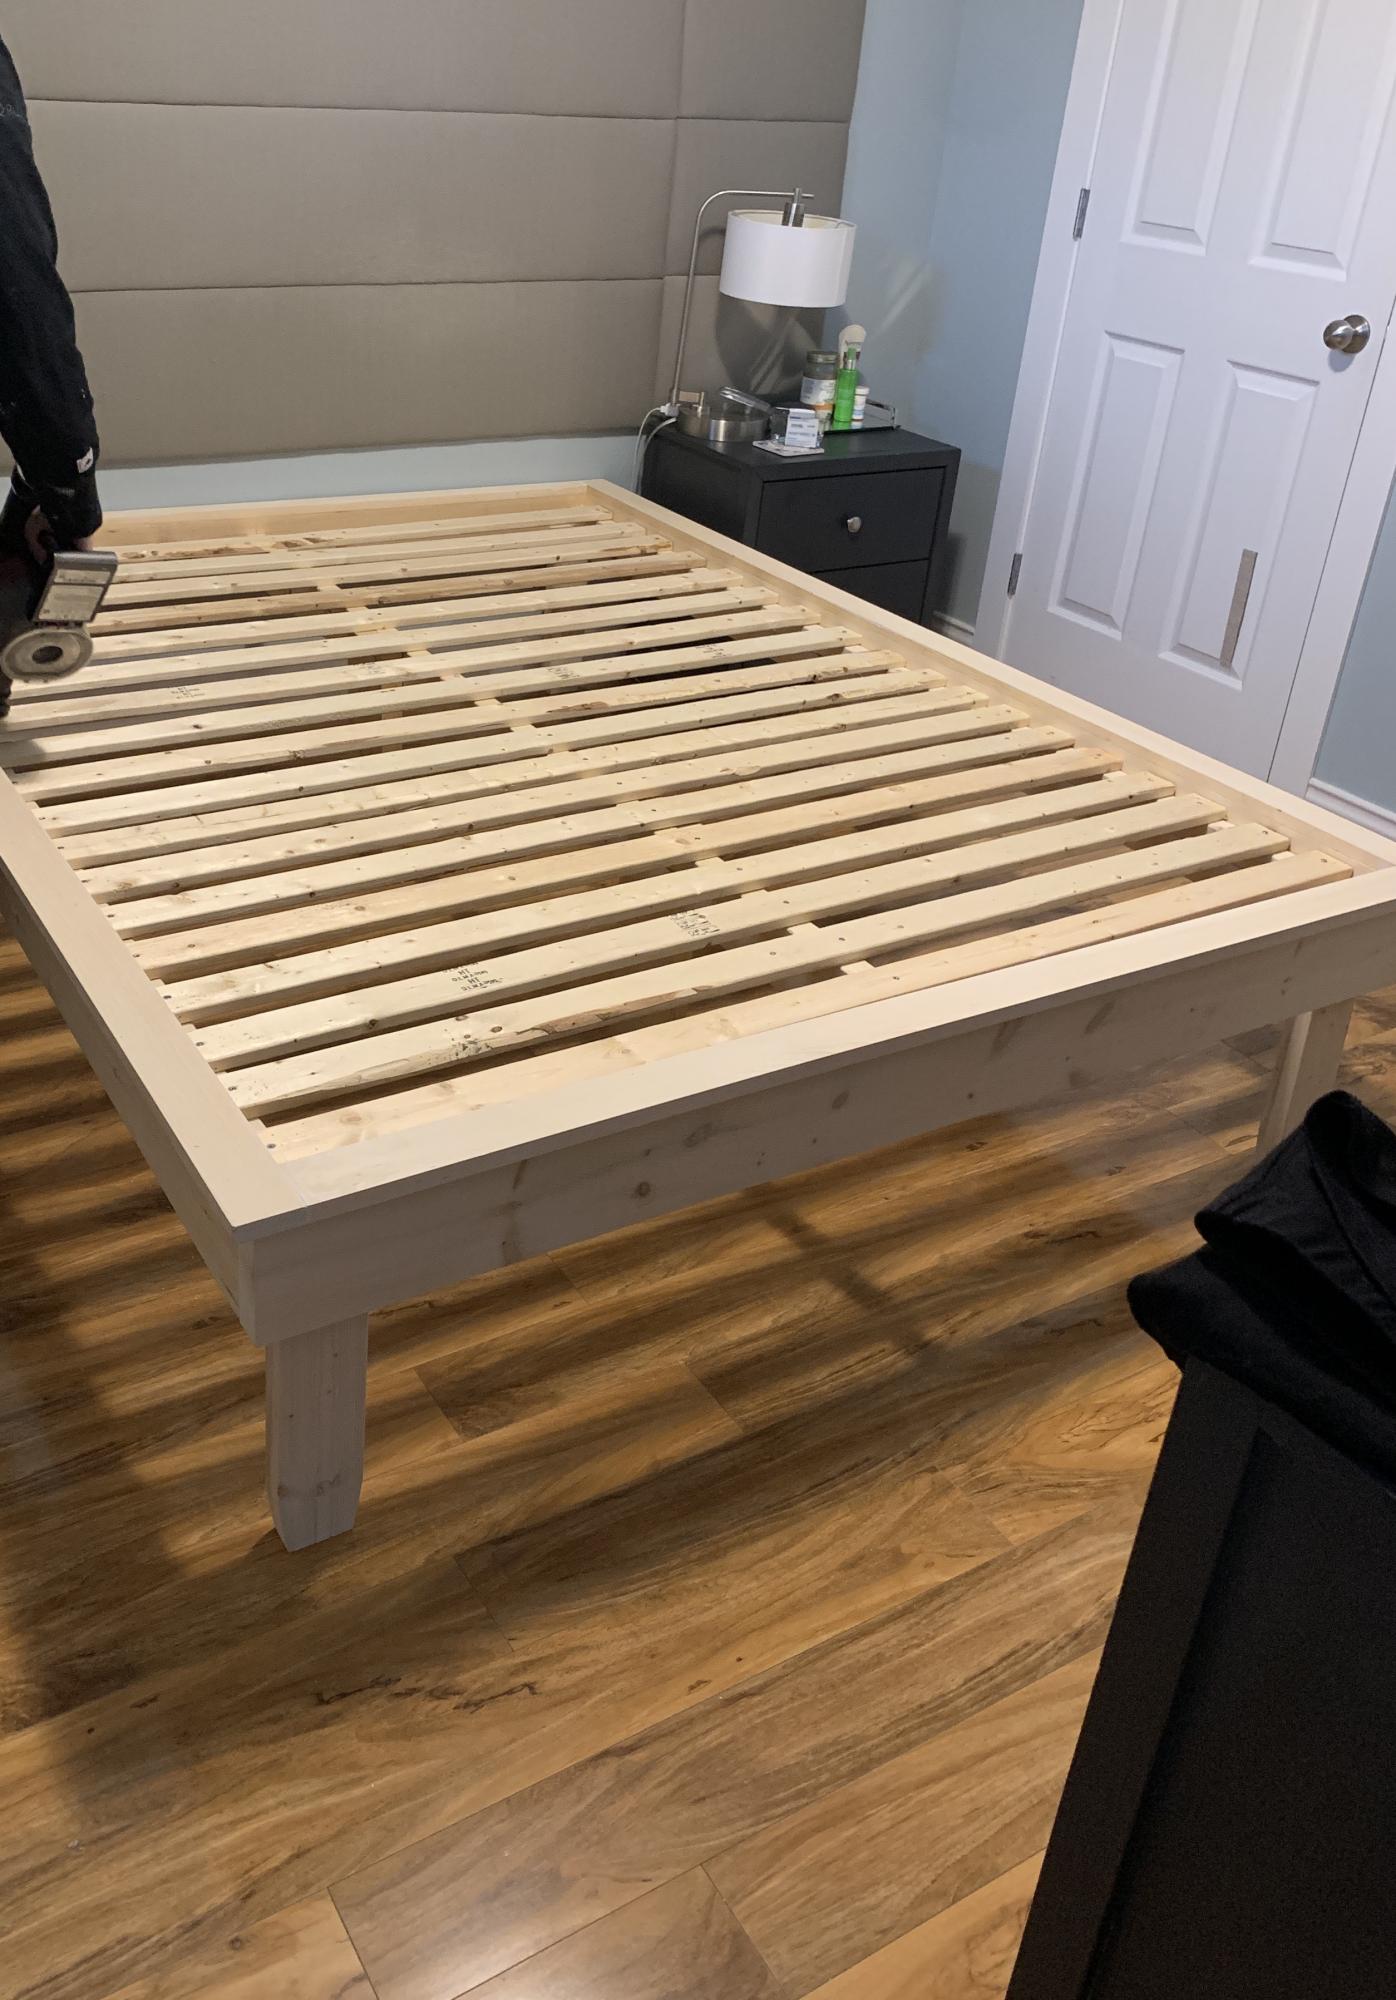
We extended the legs to match the headboard previously installed.
Built from Plan(s)
Estimated Cost
250.00
Estimated Time Investment
Weekend Project (10-20 Hours)
Finish Used
Simply white
Recommended Skill Level
Beginner
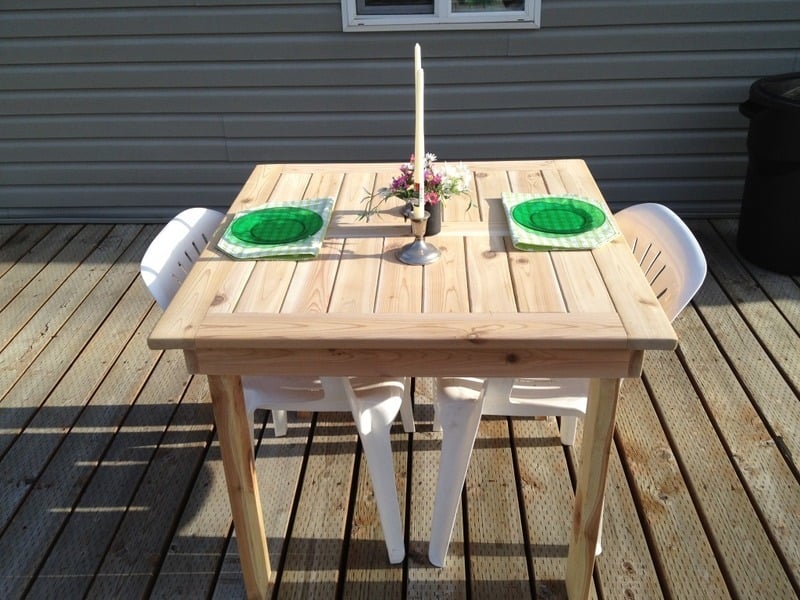
modified outdoor dining table
My wife has been wanting new patio furniture so here is my version of the simple outdoor table, I shortened it to fit our needs. Next is the chairs to match.
Built from Plan(s)
Estimated Cost
$55
Estimated Time Investment
Day Project (6-9 Hours)
Recommended Skill Level
Beginner
Comments
Sat, 06/16/2012 - 16:00
loving it.!
What are the dimensions? I am trying to build a similar table and am thinking 40" square.
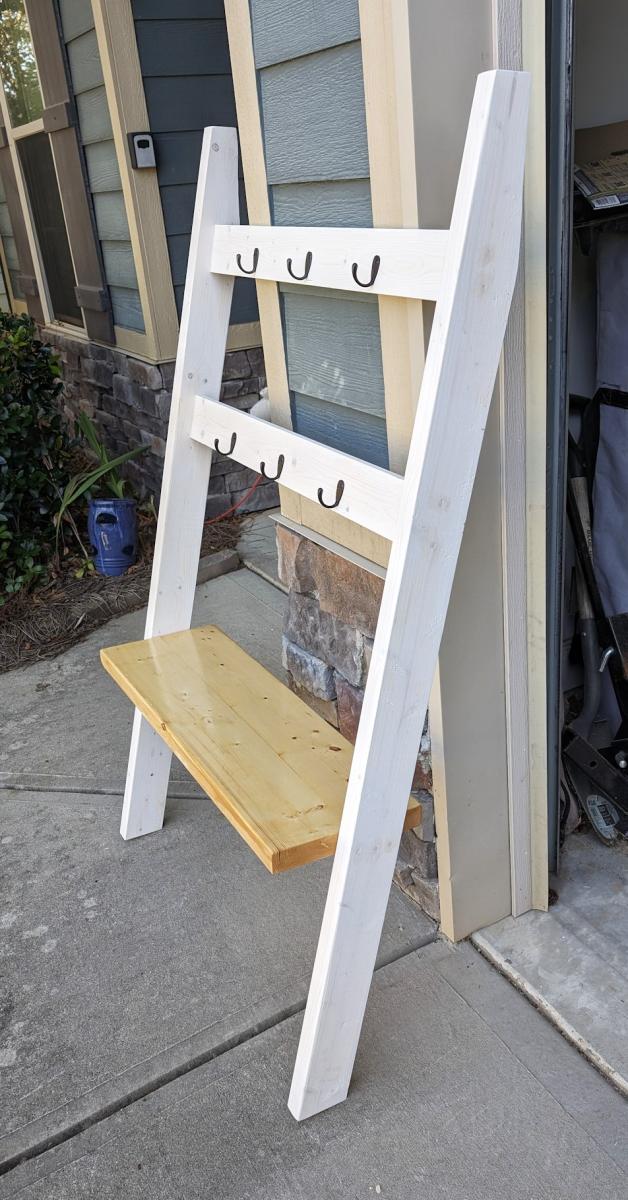
Leaning Hall Tree
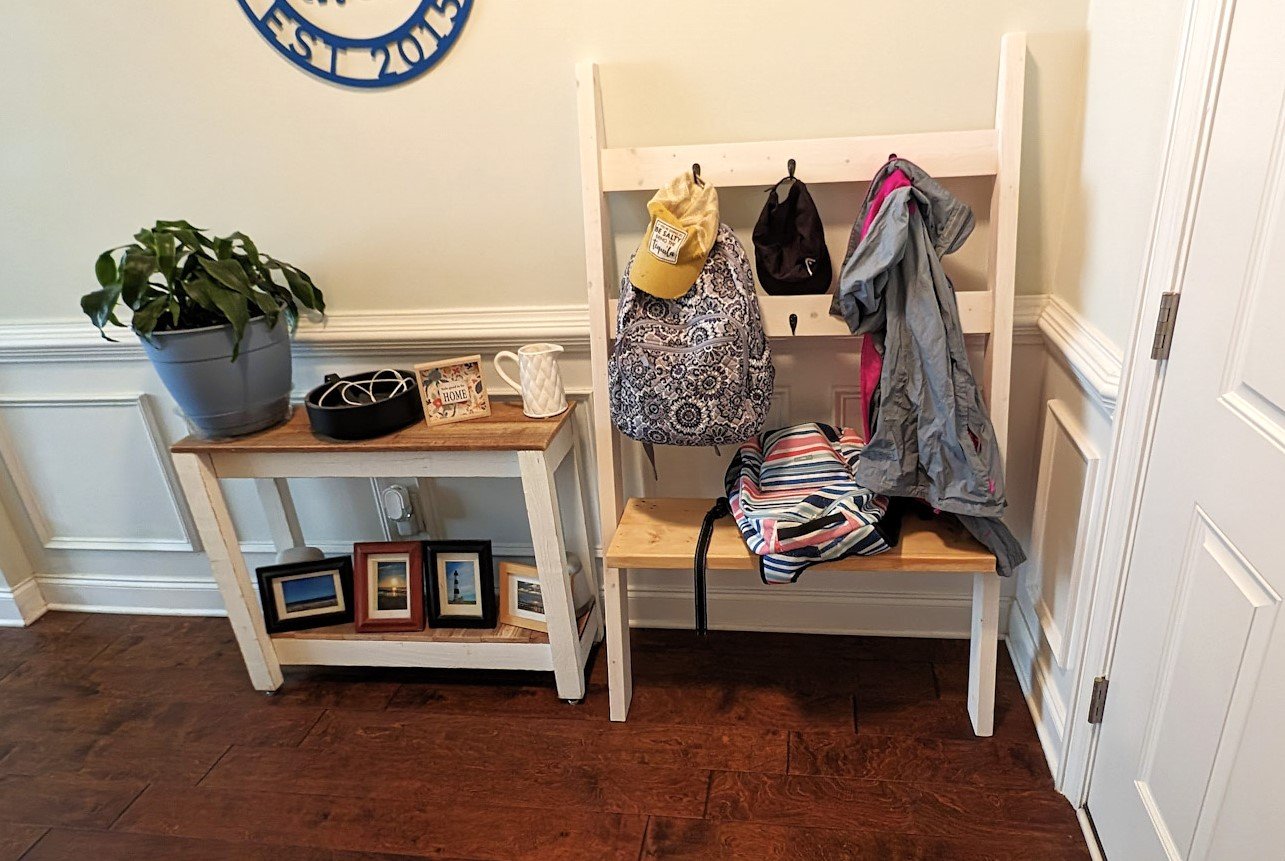
Super simple and fits right in!
ScottW
Built from Plan(s)