Community Brag Posts

Front porch planters

Submitted by Anonymous (not verified) on Thu, 01/07/2021 - 20:21

Followed your plan but added extra 1 x 2 trim to the sides, feet made from 1 × 3 and 1x 3 trim around the top

Built from Plan(s)
Estimated Cost
$35 per planter
Estimated Time Investment
Afternoon Project (3-6 Hours)
Finish Used
Cedar Naturaltone Behr Waterproofing Wood Finish
Recommended Skill Level
Intermediate

Comments

Seasonal And Holiday

Lawnmower Shed

Submitted by PipesTX on Wed, 01/07/2015 - 06:19

Modified the design to allow me to roll lawnmower directly in the end. Fun project.

Built from Plan(s)
Recommended Skill Level
Intermediate

Comments

Washer & Dryer Pedestal / Platform with Drawers

Submitted by dmccoy on Tue, 03/12/2013 - 10:26

Platform (Pedestal) with Drawers for front-loader Washer & Dryer. Cheaper than buying the manufacturer's plastic pedestals and more fun to build anyway! The drawers are also much wider and deeper than the manufacturer's pedestals. We can usually fit about 3 full loads of laundry in each drawer. (That's 6 loads of laundry before we have to start folding!) It's a very easy and basic DIY project. I made a 2nd one for my brother using these plans (sans the drawers). I gotta say, the drawers are SO nice to have though. But you could just leave the front open, without drawers, and slide some laundry baskets underneath for an even quicker project. We've been using this platform now for over 2 years and there is still no squeaking or rattling. The washer & dryer haven't moved from the vibration even in the slightest. They're exactly where I placed them on the pedestal 2 years ago. There's also zero problem with the weight of the washer either...it really is a strong frame. (After finishing, I jumped up and down on it!) A couple small tweaks I would make doing it over is raising the drawers a 1/2" in. off the floor to tuck a rug underneath (as is, they sit about 1/8" in. off the floor). Also, I would cut out a couple of square holes in the back panel to access those socks that fall behind (I can't access the sides of my W&D in our particular laundry room). Lastly, I would have painted with a quality paint (I just used a few cans of white spray paint to be quicker). Step-by-Step Plans and Materials List (PDF) and many more photos found at the Blog Link below...I'm certainly no professional "Plans Writer" so email if you have questions! Happy DIY-ing! Estimated Cost: ~$200 (2x6 lumber, plywood, drawer trim, nails, screws, paint)

Estimated Time Investment
Weekend Project (10-20 Hours)
Finish Used
White spray paint
Recommended Skill Level
Beginner

Comments

nikolegraves@h…

Wed, 03/13/2013 - 10:12

I have wanted to do the pedestal project for quite a while. I am so glad I held off though. Yours are fantastic! I would never have thought of drawers to hide the dirty laundry! Love it!

gmccoy20

Tue, 04/02/2013 - 11:06

Really appreciate the help with mine brotha! We really like them (even without the drawers) and are glad you had these plans to go off of for ours.

I'll be calling you for our next project!

strahmers8

Fri, 02/07/2014 - 17:05

Hello this looks great and for the amateur carpenter I am but one item I need clarified "the top measurement at 64" is .25" greater than the bottom at 63.75"

Please explain if I am missing something
Thanks

dwm22

Mon, 02/10/2014 - 15:33

Not sure what measurement you mean that's 63.75" since there's no "bottom" to the pedestals. Or do you mean 1/4" wider than the sides? The top panel should overhang both sides by 1/4" each so that when the side plywood is attached, it will be flush. Hopefully that helps? (If I'm understanding the question correctly)

jmkc

Mon, 02/24/2014 - 10:29

Could leave the back panel of plywood out so you could reach what may fall behind? Then you would just have to pull the drawers out?

heverest

Wed, 06/22/2016 - 16:35

Back panel is very very structural and provides lot of strength. If i wanted more access than the 5-7 inch of duct space behind the pedestal gives me, then i would replace the back panel with a long 2x6, that holds the three legs from going in different directions due to all that weight.

dmccoy

Mon, 12/12/2016 - 14:58

This is the one modification I could make if i could redo these plans...I would still put on the back panel of plywood as it stabilizes the pedestal, I would just have cut out a rectangle (behind each drawer) so that I could remove the drawers and stick my hand/arm through to grab fallen clothes or vacuum the lint.

dachiri

Mon, 12/18/2017 - 19:17

Rather than cut holes in the back, I just cut the back and side boards a little small and left a gap around the bottom the whole way around.  That way I can get a vaccuum hose in there or reach through and get lost items.  Because my washer and dryer seem to be deeper than yours (I needed at least 33" depth, so I went with 3'), that also worked out well in getting the most out of the boards.  I could do the top, back, and sides out of one single sheet of good 3/4" plywood just leaving those small gaps at the bottom for clean-up and retreival.

Jperera

Fri, 11/20/2015 - 05:23

Hello,

I downloaded the pdf but have exactly the same information that the website html, where can I find a solution step by step guide?

Thank you for all the interesting posts.

Raised Garden Beds

Submitted by kari on Sat, 03/12/2011 - 09:54

I made these last summer for my sister. And she didn't even use them yet! Very easy to make. She did want them taller, so that is the only modifacation I made. We're hoping the bunnies won't notice all the yummy veggies up this high :) I know, probably wishful thinking. Makes a great kid corral too.

Estimated Cost
it's been a while
Estimated Time Investment
An Hour or Two (0-2 Hours)
Finish Used
none
Recommended Skill Level
Starter Project
Seasonal And Holiday

My incredible chicken coop and run!

This was my first attempt at building anything....ever. It was so incredibly fun and I certainly learned a lot. My 8 little chickens are loving their new home and I can't wait to build my next project!

Estimated Time Investment
Week Long Project (20 Hours or More)
Recommended Skill Level
Intermediate

Comments

GreenLaLa

Wed, 06/19/2013 - 11:51

Hello! Could you repost the picture / info on your chicken run? I keep getting "page not available" and I've been trying for days :O) I think I want to build that chicken shed (too big for 3 hens?? It's just so cute!) and a run like that to go with it! Thanks! Have a great day!

DIY PLANTER BOXES WITH PALLET WOOD

We picked up a couple 14.9" square plastic garden planters from Home Depot and ended up creating some wood planter boxes from pallet wood for them to sit in. 

I didn't add up the cost of these boxes, because we had most of the wood and only needed a few pieces, but I'd say they were definitely less than $10 a box. 

We altered our dimensions to fit our HD planters so they would slip in for a snug fit and made the legs flush with the top of our sides. We build a simple frame for the top, which allowed the lip of our HD planters to sit firmly on top. 

Something I didn't do, but wish I did: fill in the cracks with wood filler.  There were a couple places that really could have used it, but I was in a rush and decided to skip it.  They turned out great, but could have been even better had I taken an extra 30 minutes.  On an off weekend, we are going to use wood filler in the seams, sand them down, and do a second coat of white paint. 

Can't wait to plant these with some mums for Fall! :)

Built from Plan(s)
Estimated Cost
$20 total for 2 boxes.
Estimated Time Investment
Day Project (6-9 Hours)
Finish Used
White Semi-Gloss outdoor paint
Recommended Skill Level
Beginner

Reclaimed Wood Outdoor Sofa

Submitted by Anonymous (not verified) on Sun, 07/30/2023 - 14:43

We had a small deck with many rotted boards. The contractor who demoed it, knowing my interest in diy projects, sorted out any usable boards. I loved the idea of an outdoor sofa, so altered your beautiful pattern to accommodate decking boards - I literally only had to purchase 2 boards for the entire project! I’m so thrilled with how it turned out! Thank you!!

Camey Brown

Built from Plan(s)

John Deere Green Barn Shelf

Submitted by Veronica P on Wed, 07/30/2014 - 22:08

After finishing my boys' new John Deere room and tractor bunk bed (also posted), I saw this plan and thought it would be the perfect thing for some extra toy storage.

Yes, I know, barns are supposed to be red. Everything else in the room is John Deere green and I had paint leftover, which is not cheap. So green it is! I used my new paint sprayer for the first time on this project and am thrilled with it. I would recommend it to anyone who dislikes painting as much as I do. I bought the Wagner Flexio 590 which comes with a detail sprayer as well as the full size and I'm very happy with both.

Thanks to Ana for the well laid out, easy to follow plan and also for helping me create a big boy room that my boys love!

Built from Plan(s)
Estimated Cost
$60.00
Estimated Time Investment
Weekend Project (10-20 Hours)
Finish Used
John Deere green paint plus primer, black & white paints, white paint marker for the shingle detail and satin polyurethane.
Recommended Skill Level
Starter Project

Comments

Veronica P

Thu, 07/31/2014 - 09:38

Thanks so much for your comments. It's so nice to hear positive feedback since I'm very new to this! My 3yr old is quite particular about everything being in its place, I'll pass along that you liked his animal placement. Lol :)

Corner Desk - from Farmhouse Desk plans

Submitted by james_e on Wed, 01/13/2021 - 14:15

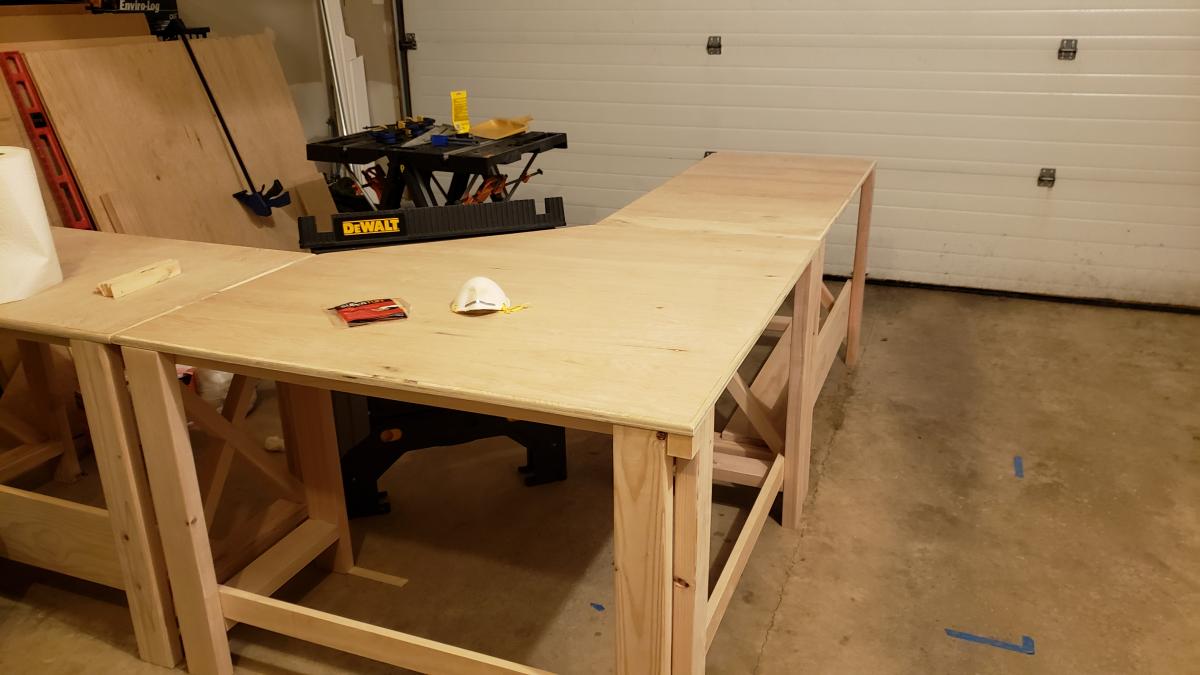
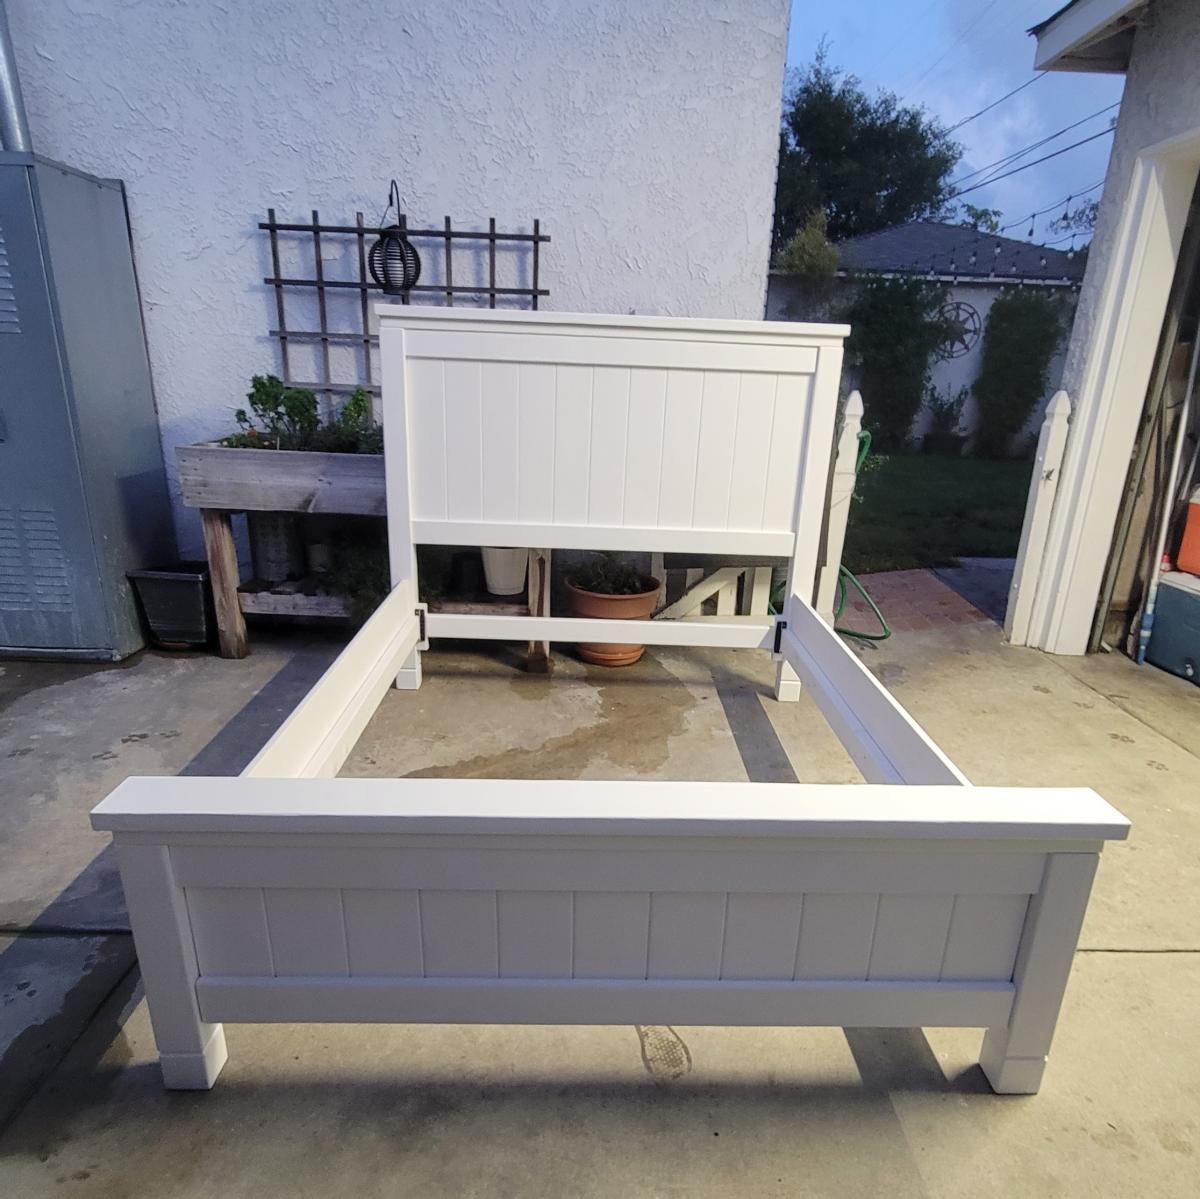
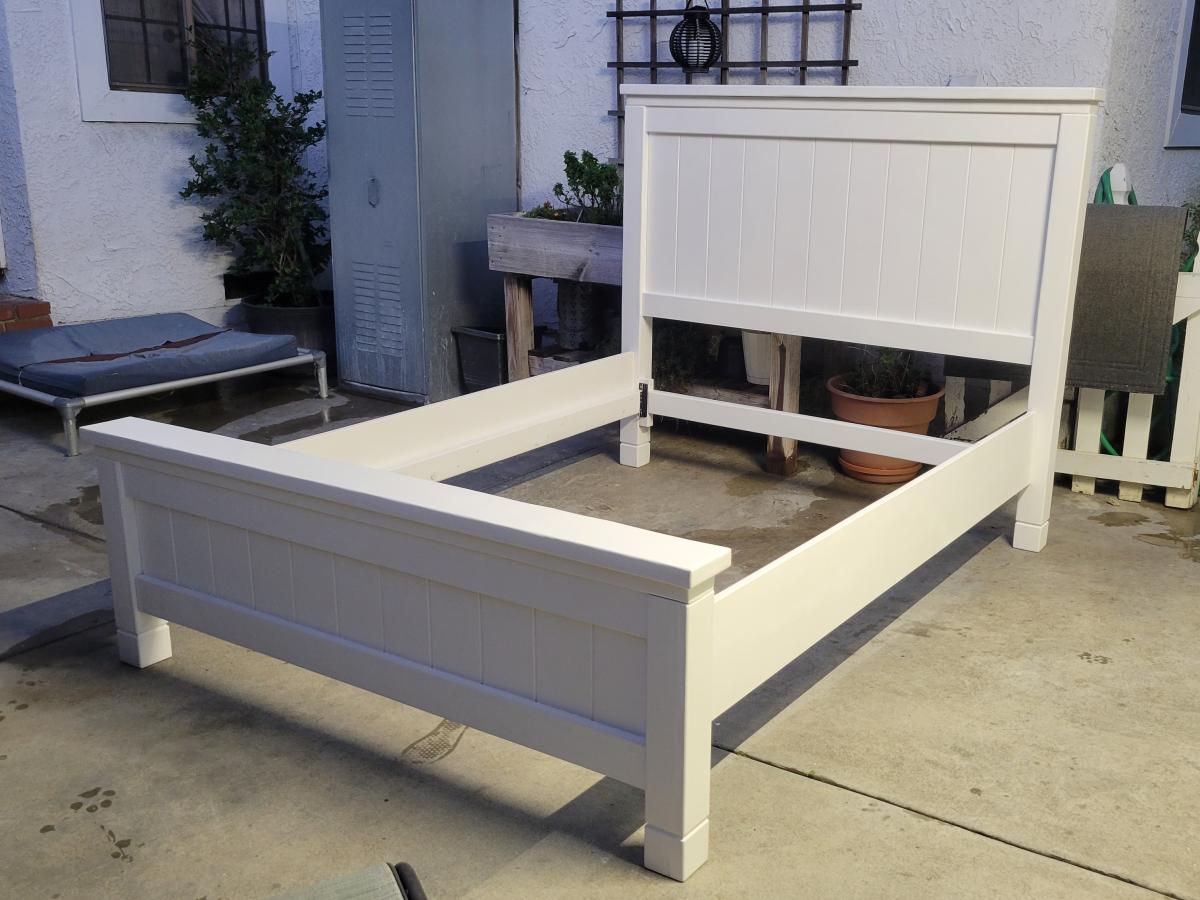
My wrist has not taken well to the work at home requirement of the pandemic. So, I decided to replace my desk with a similar one that I have at work. Only, this one is much prettier.

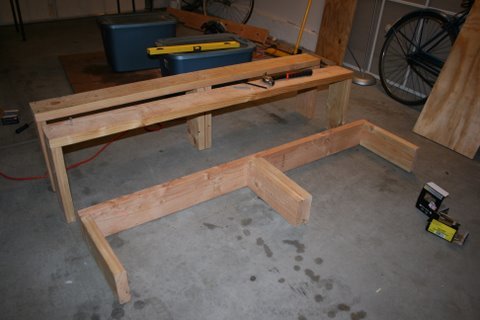
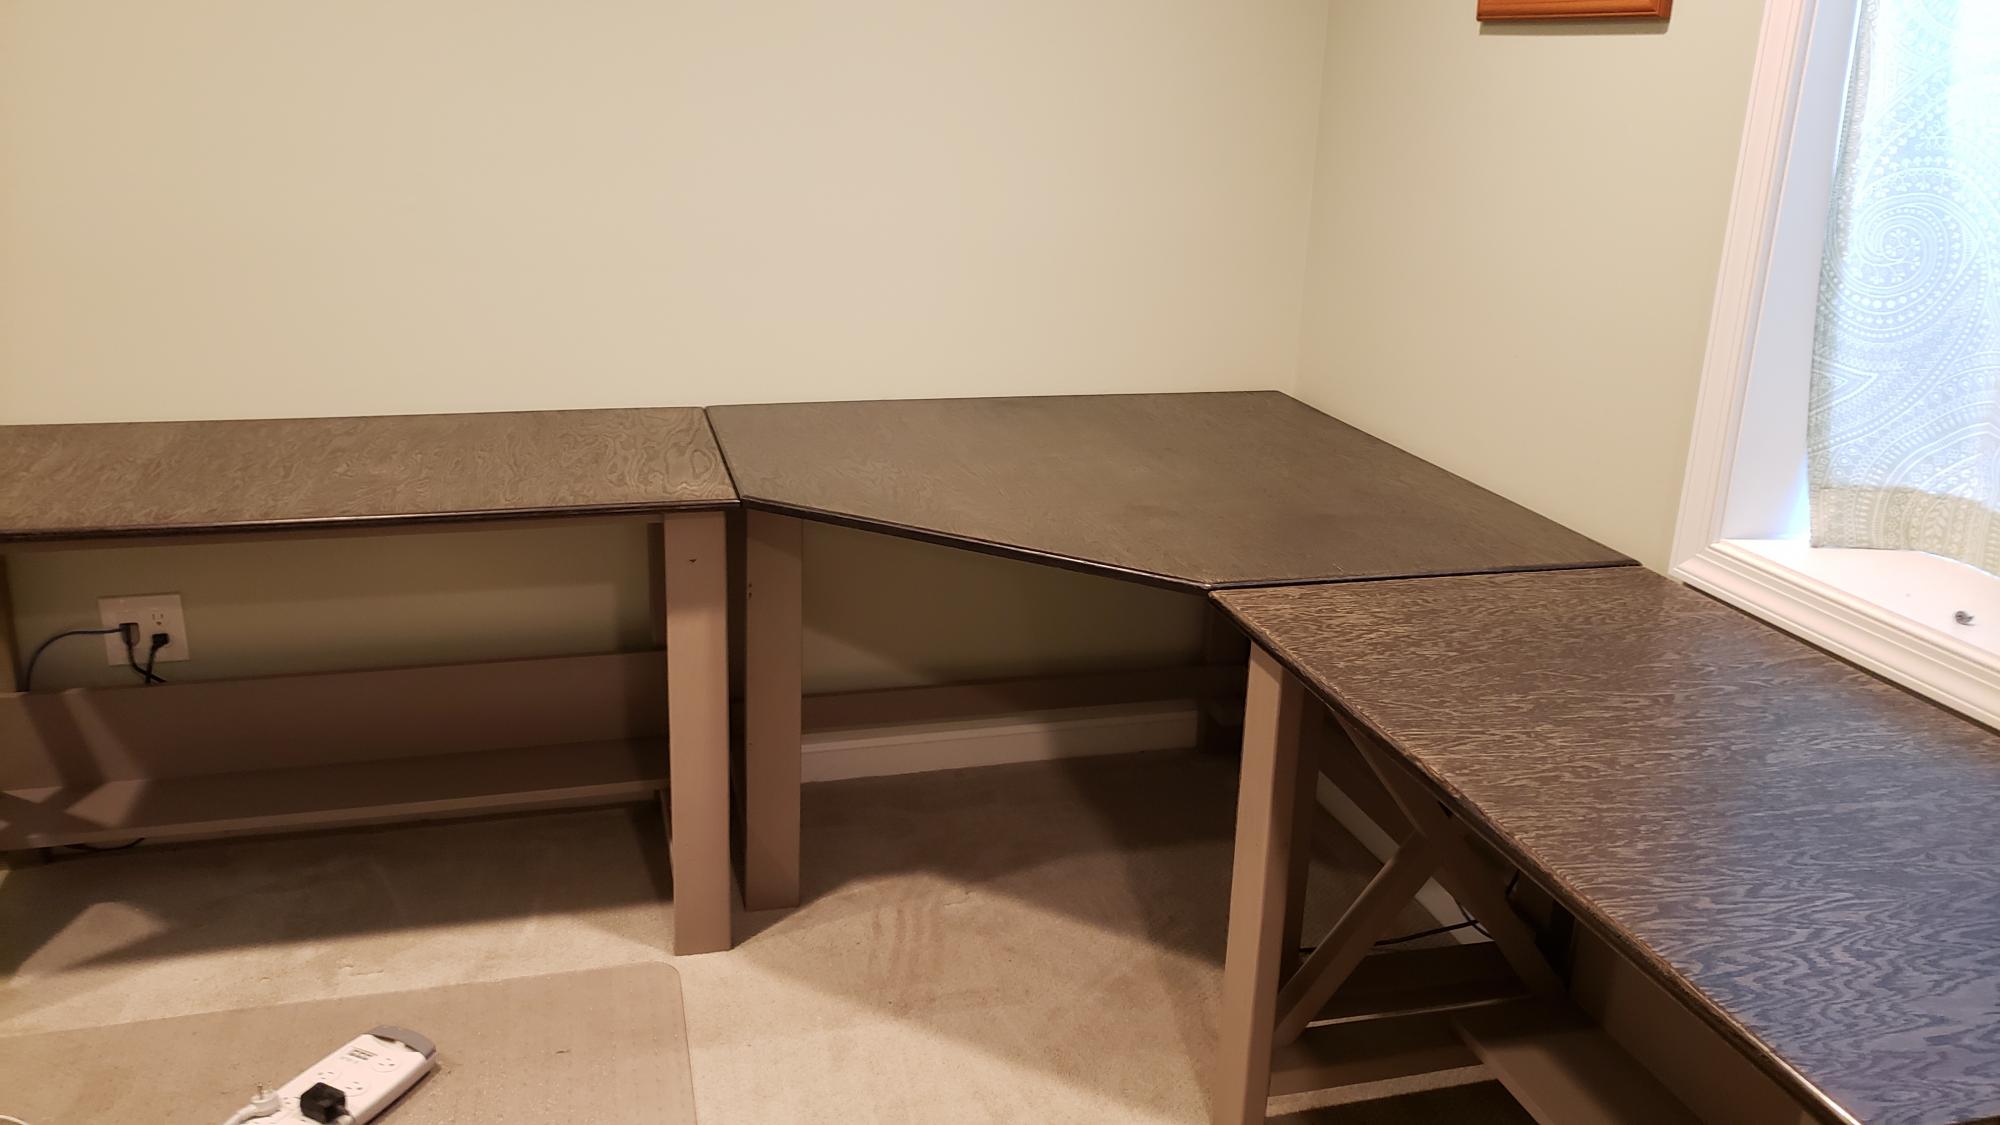
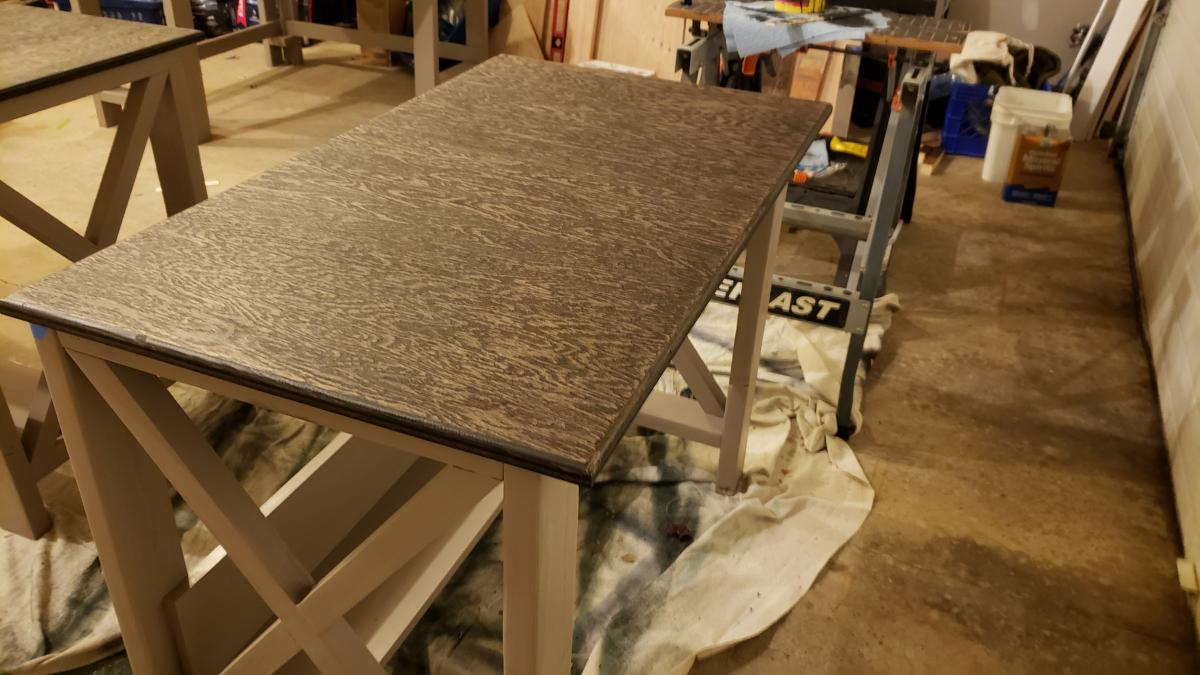
Essentially, I built two desks using the farmhouse desk plans. One of them I made less wide than the plans by simply making the horizontal pieces 36" instead of the plan's 47 1/2".

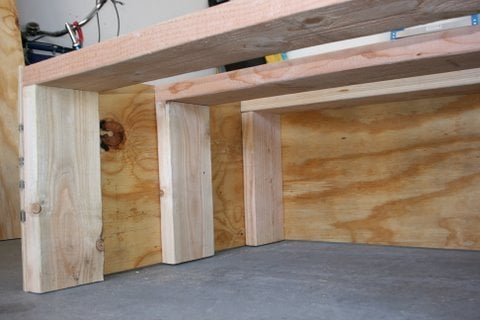
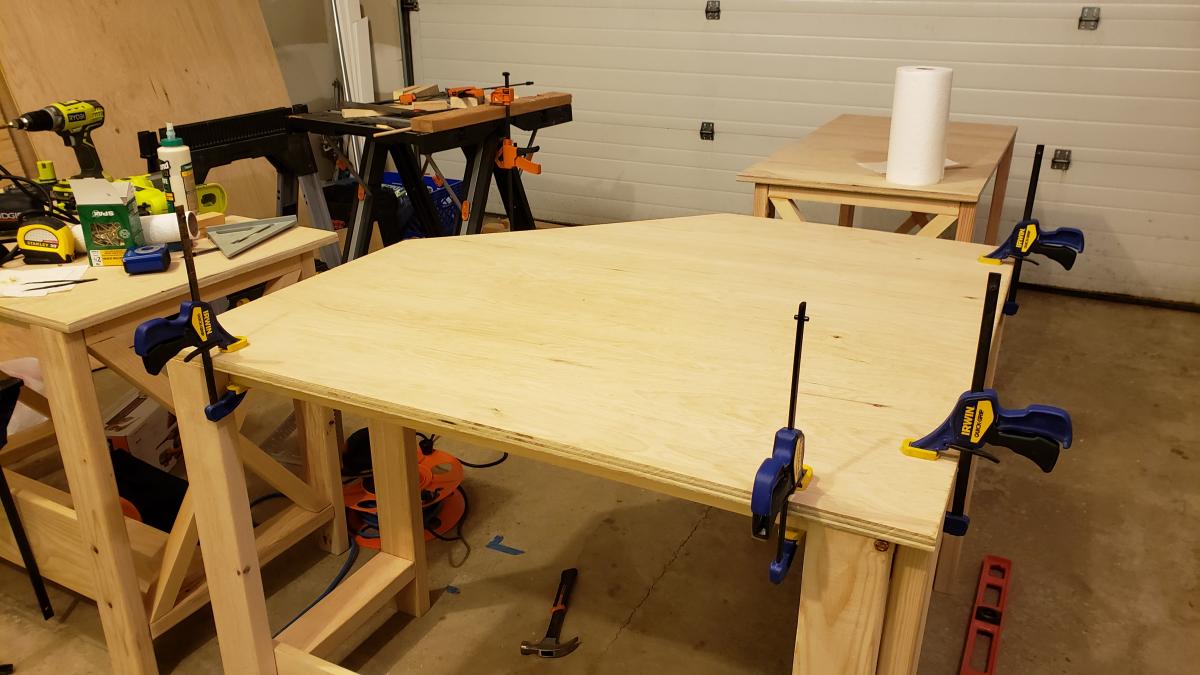
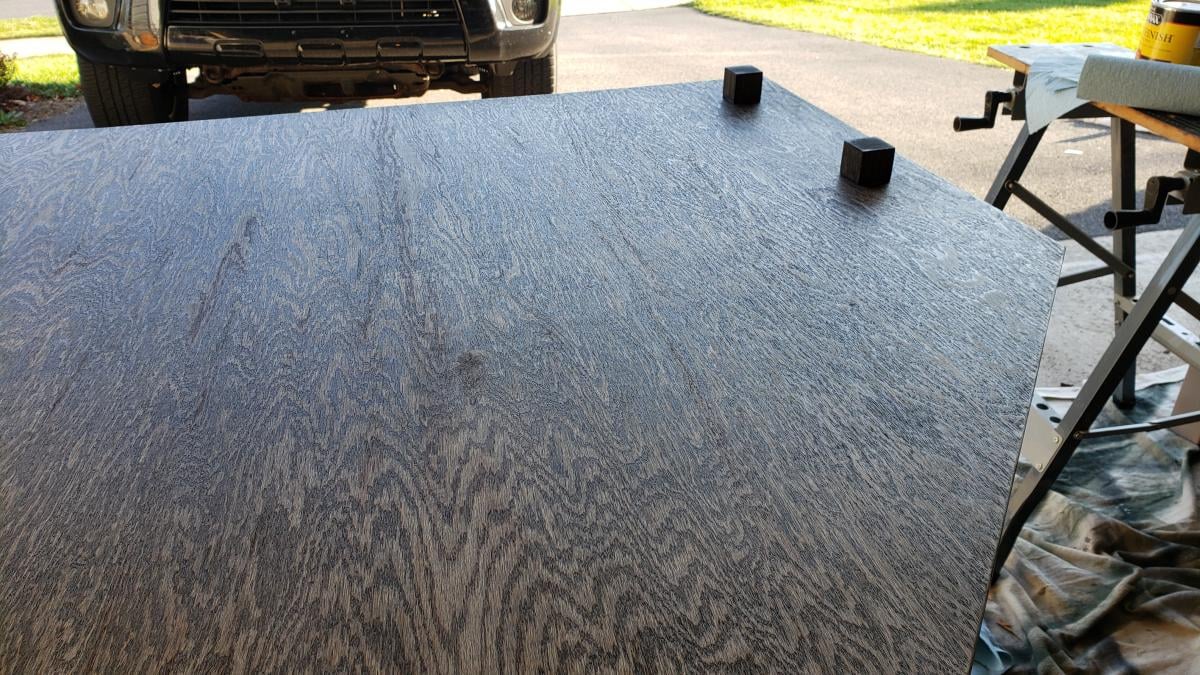
For the middle portion of the corner desk , I based it off of the Office Corner Desktop plans. I made just the middle portion for those plans, but made the edges 46" instead of 38" for a deeper desk as well as to allow more room for my legs not to hit the uprights of the farmhouse desks. I made the corner desktop detachable, so it was easier to fit down the stairs to the office, using some small ~2" cubes placed on the bottom. They just serve to keep the desktop from moving around on the frame. The base of the middle portion I made up using the same ideas used to create the farmhouse desk frames.

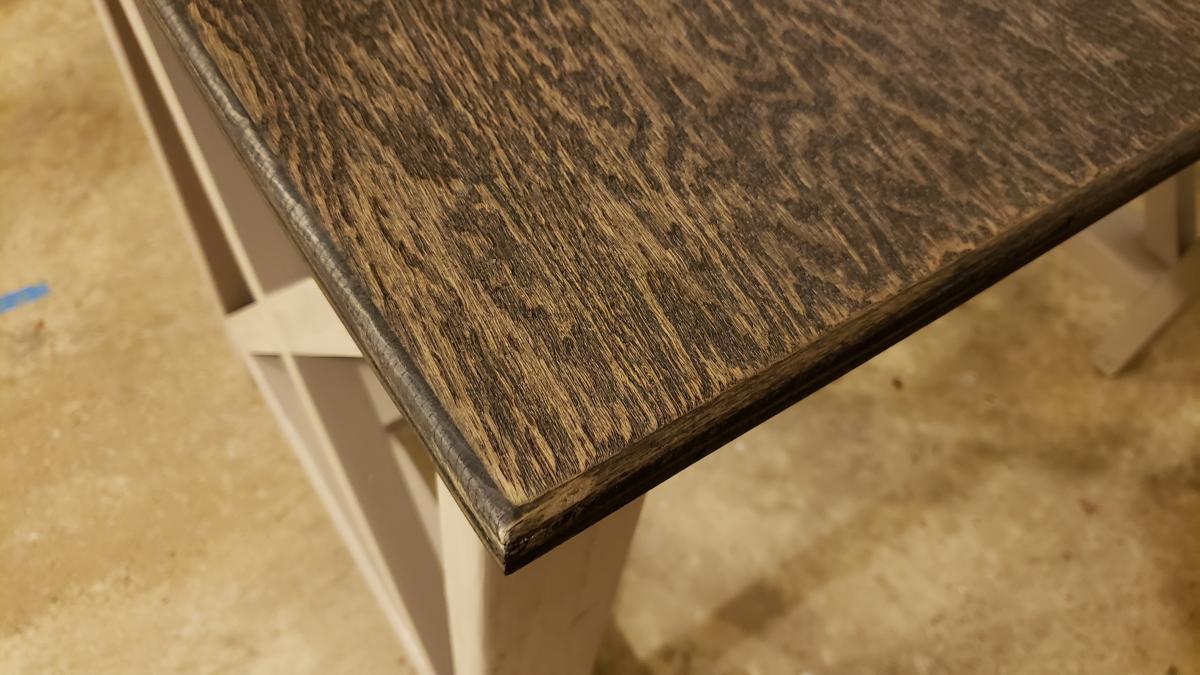
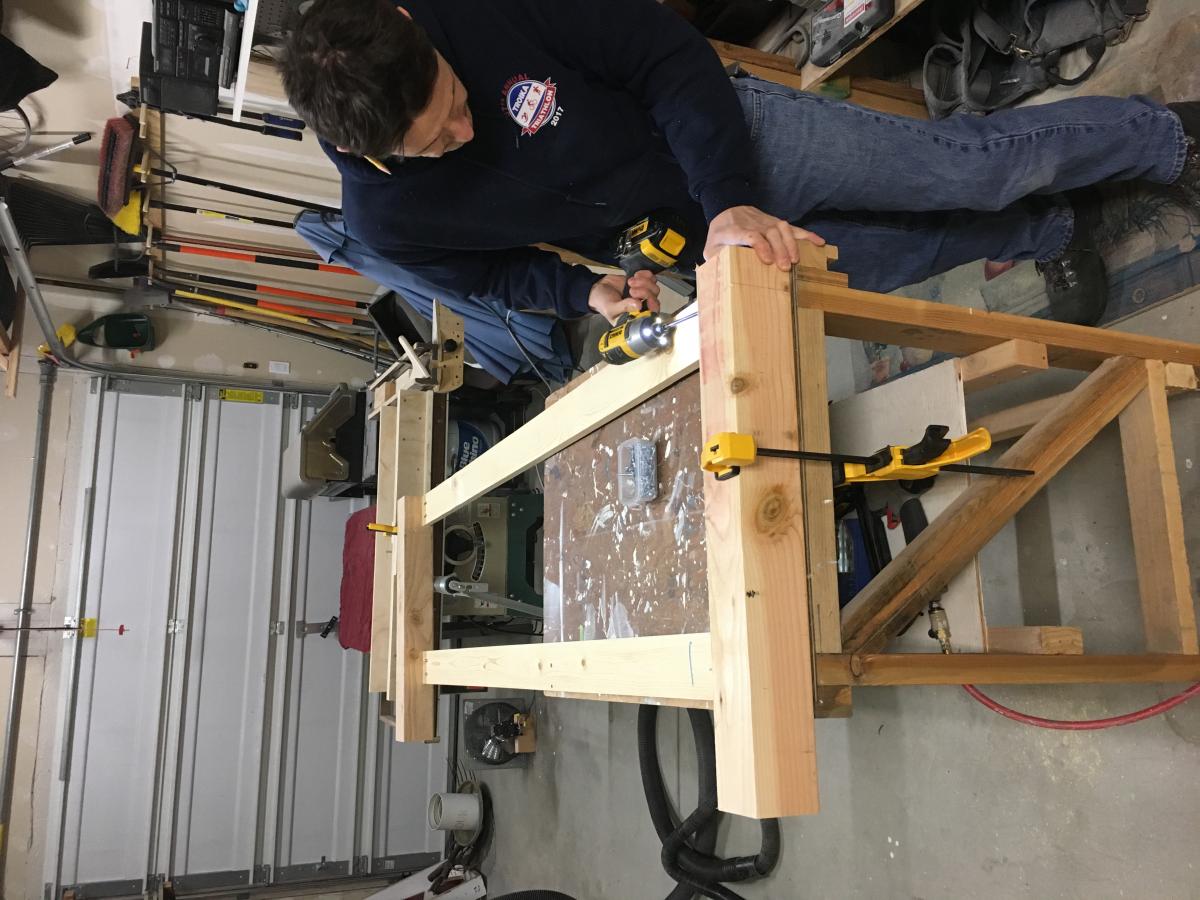
I made plenty of mistakes along the way as I'm a software engineer, not a carpenter. I think next time I'll buy a miter saw, most of these cuts were by hand and aren't as straight as I'd like them to be. But, I like to work with my hands and this has made my day job less painful while I'm working from home.

Estimated Cost
$200
Estimated Time Investment
Week Long Project (20 Hours or More)
Finish Used
Minwax oil based Ebony 2718, then satin poly
Recommended Skill Level
Beginner

Laundry Basket Rack

This was a great last minute Christmas gift. Took me a little over two hours. Made completely out if pallet wood.

Comments

Queen Farmhouse Bed Frame

Submitted by Anonymous (not verified) on Sat, 04/08/2023 - 16:33

I am a newbie to wood working and was inspired by Ana's Farmhouse bed frame. I built this for my newly married daughter and she is so happy with it. It's very sturdy and has plenty of storage underneath. The instructions, buy & cut lists were super easy to follow. I can't wait to build the Extra Wide Dresser next.

Comments

King Farmhouse Bed

Submitted by Anonymous (not verified) on Tue, 10/01/2019 - 21:30

Fun weekend project to build together. We are loving the fresh look to our master bedroom.

Estimated Cost
350
Estimated Time Investment
Weekend Project (10-20 Hours)
Finish Used
General Finishes Snow White milk paint with Satin Topcoat
Recommended Skill Level
Intermediate

Comments

Camp Loft Bed

Submitted by MommaBlue on Tue, 10/08/2019 - 10:58

I built this bed for my 8 year old son's room "face lift." His only request was to have a place to hang out, but being his room was so small, that was a struggle! The loft bed allowed us to make a cozy little hangout - the poor guy can't get rid of his siblings now!

I added a few extra inches to the height of the Camp Loft plan, I also added the pipe hand rail for additional safety and give his room a little older boy vibe! It was a very easy build, the staining/sealing took the longest. The stairs make it much easier to change sheets and getting up and down for those of us who aren't 8 year olds :).

Estimated Time Investment
Day Project (6-9 Hours)
Finish Used
I used a mixture of Varathane Weathered Gray and Minwax Special Walnut. It is about 3/4 Gray and 1/4 Walnut.
Recommended Skill Level
Beginner

Modern Adirondack Chair, Super Sized

Submitted by Anonymous (not verified) on Fri, 08/21/2020 - 10:39

Am a big fan of Ana's work, and have used several of her plans in prior builds including the more traditional Adirondack chairs. Those stayed with my old house, and I wanted something different for my new house. Really liked her Modern Adirondack design with the floating arm rest. However, plans are like recipes to me--a guideline. I wanted the back boards to run up and down, and I am a bit more robust than the lovely and petite Ms. White, so they would need to be wider after I built the first one at 19 1/2" wide per plan. The next three I made 22" wide and that worked well without throwing off the geometry and angles of the other parts. Since I ran the backboards up and down, I needed some cross beams for stability and to give an attachment point for the middle of the boards. Cut some 2x4s at 15" wide, drilled pocket holes in both ends, and attached in between the back supports with the pockets facing up to be hidden by the back boards. All of the 2x4s were leftover cut-offs from the houses being built in my neighborhood. Since the frames were free, I splurged and went with cedar boards for the backs and bottoms. With the wider frames, I had to use 1x12s ripped down to 10 3/4" to get the right look (about a board's width in between). Needed some color, so I painted the frames Teal Seaglass from Menards. Cedar was stained with a natural deck stain from Sherwin Williams. I experimented with salt paint (mixing unsanded grout with the paint) to give a heavily textured and weathered finish but this was unecessary--the wood was distressed enough and I am a terrible painter. It also toned down the color so I skipped that step and just went with 2 coats of plain paint. It looks like outdoor furniture should up close. As always, am pleased with Ana's plans. Thank you for doing all the hard work!

Estimated Cost
about $200 for all 4 chairs due to cedar and paint
Estimated Time Investment
Weekend Project (10-20 Hours)
Finish Used
Paint - Pittsburgh matte exterior with Dutch Boy coloring Teal Seaglass
Stain - Sherwin Williams Superdeck stain, Natural finish
Recommended Skill Level
Starter Project

Comments

Seasonal And Holiday

Sandbox with built-in seats in our playhouse

Submitted by Anonymous (not verified) on Thu, 09/10/2020 - 10:55

The base of our playhouse felt like the perfect spot to use the sandbox plan with built-in seats. The bench seats actually fold flat to create a lid for the sandbox when it’s not in use. I followed Ana’s plans exactly and used the list of materials she provided. The only modification I made was eliminating the back supports. It was not necessary for me to add the back supports since we have the playhouse posts to support the back of the bench.

Built from Plan(s)
Estimated Cost
$60
Estimated Time Investment
Afternoon Project (3-6 Hours)
Finish Used
Stain
Recommended Skill Level
Beginner
Seasonal And Holiday

Tall Bedroom Dresser

Had a blast with this project and am getting more confident with drawer slides. I built a matching dresser that is much shorter and wider. It can be found here: http://www.ana-white.com/2018/08/DIY_furniture/bedroom-dresser

Estimated Cost
$150-$200
Estimated Time Investment
Weekend Project (10-20 Hours)
Finish Used
Varathane Weathered Wood Accelerator, Varathane Poly
Recommended Skill Level
Advanced

Comments

hutchingslv

Thu, 08/12/2021 - 15:35

Any way to get a copy of these plans? I really like the look and want to give it a shot. Have to make a few of these if all goes well for all my boys.
Thanks

Back