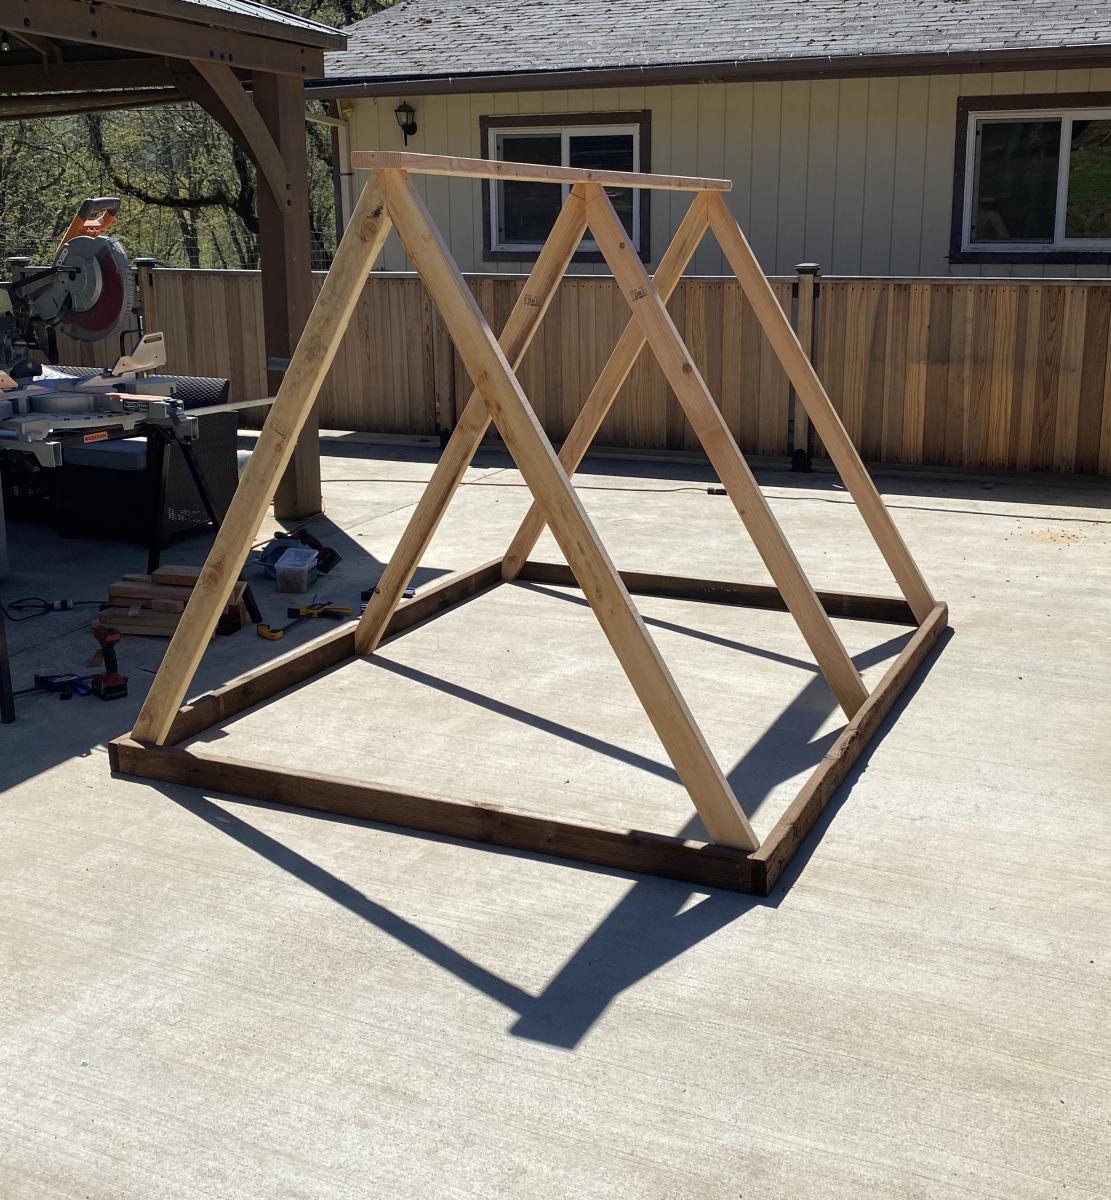
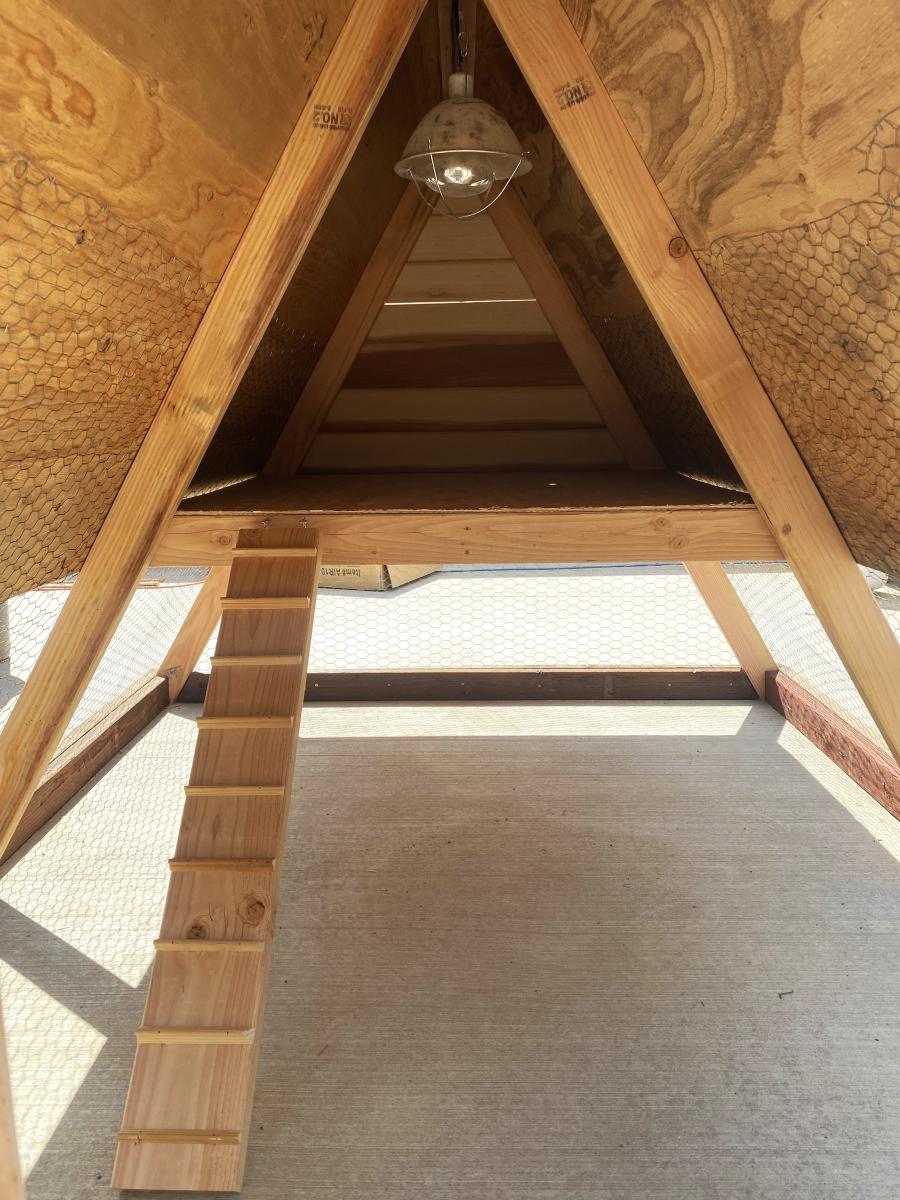
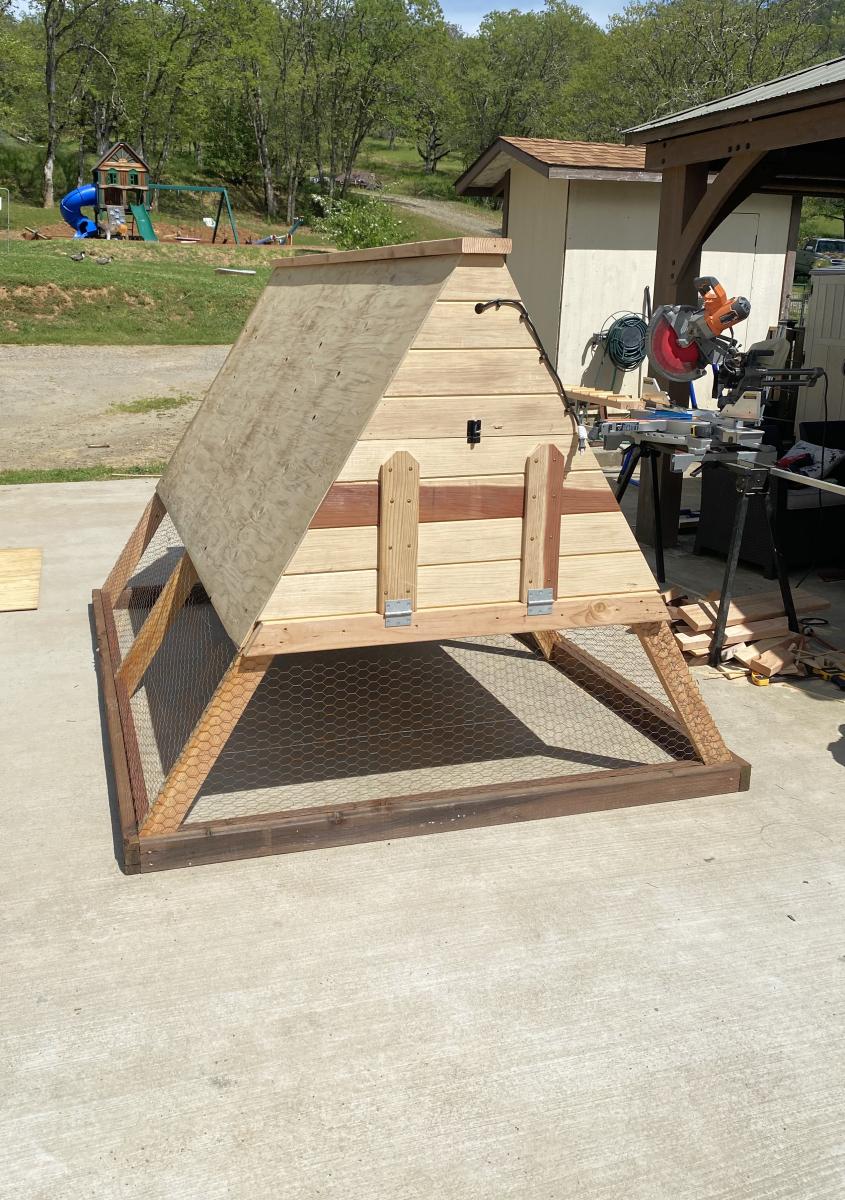
A-Frame Hen House
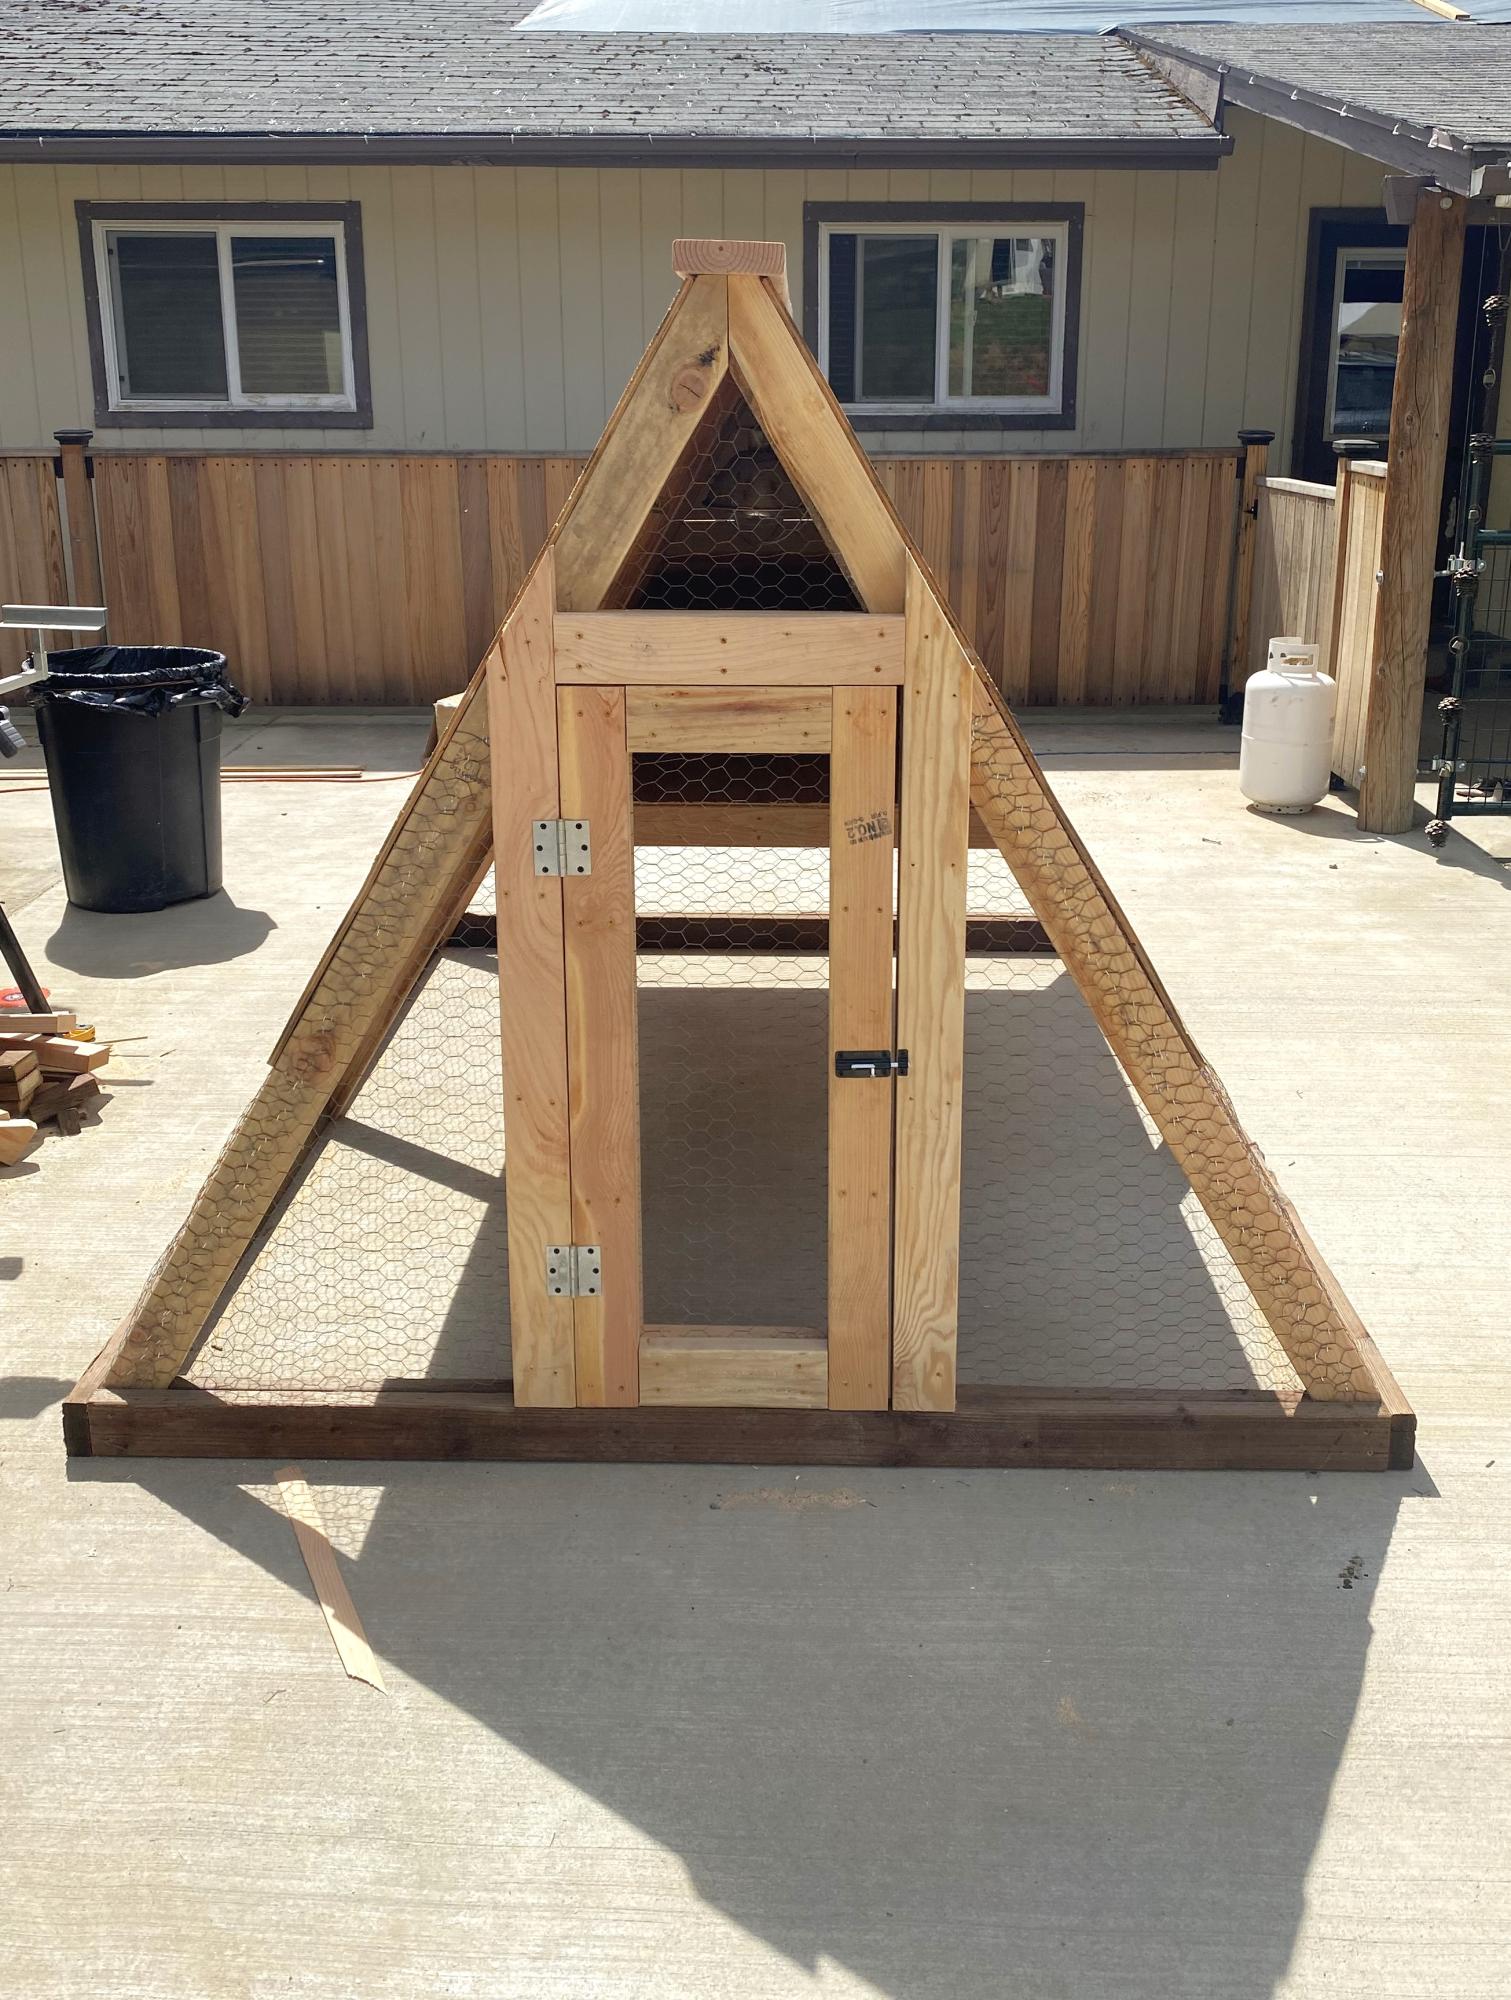
Great easy project to get the bigger chicks out of the garage to integrate with the older hens. Made some modifications because we have a lot of critters trying to kill the chickens/chicks.
Built from Plan(s)
Great easy project to get the bigger chicks out of the garage to integrate with the older hens. Made some modifications because we have a lot of critters trying to kill the chickens/chicks.
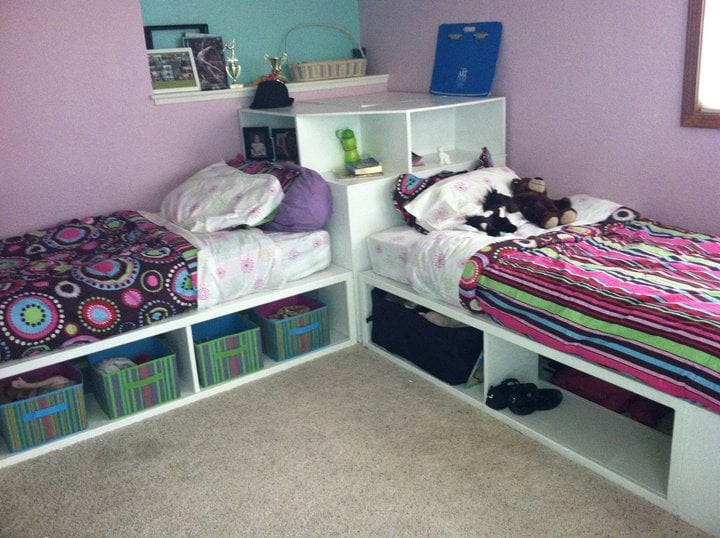
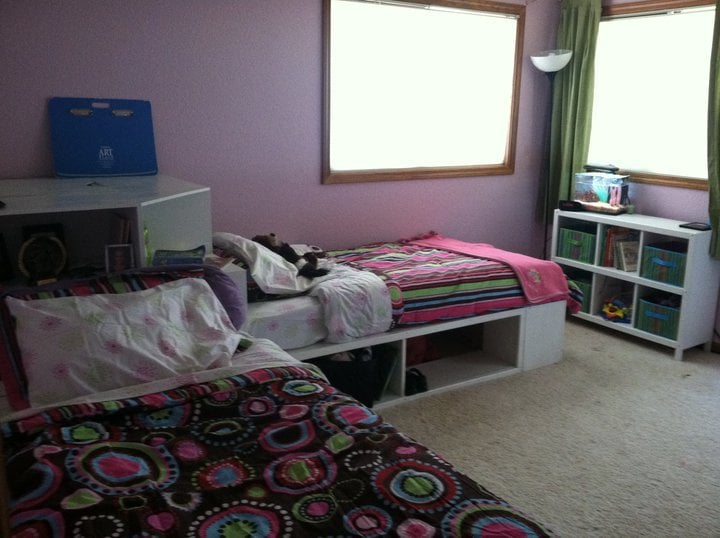
We made these beds for my daughters, who were ready to pass on the bunkbeds to their little sisters. We have 4 girls in one room, so use of space is crucial! I originally wanted the hutch as well, but as you can see in the picture, we had to work around a wall cut out, so we modified the corner unit to have a larger shelf area to fit the space. We also left the sides open to be able to slide containers in to store out of season clothes and blankets, though the ends have a backing.
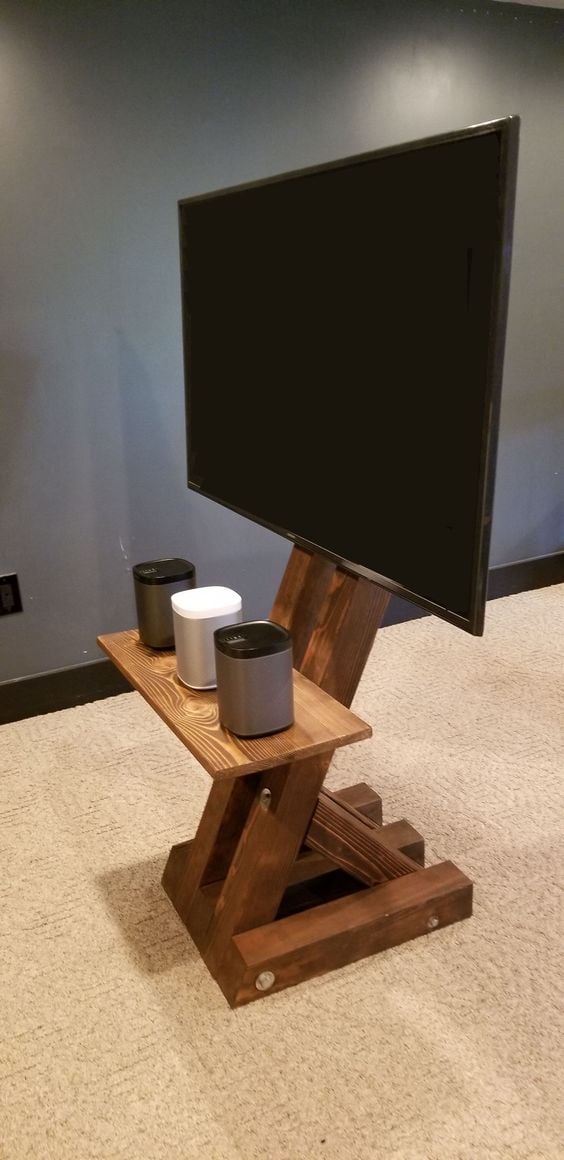
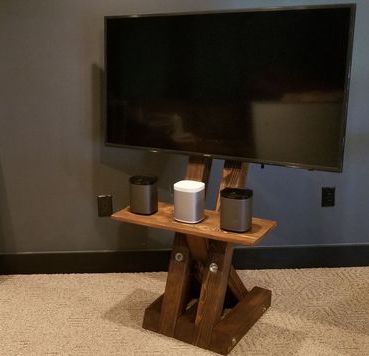
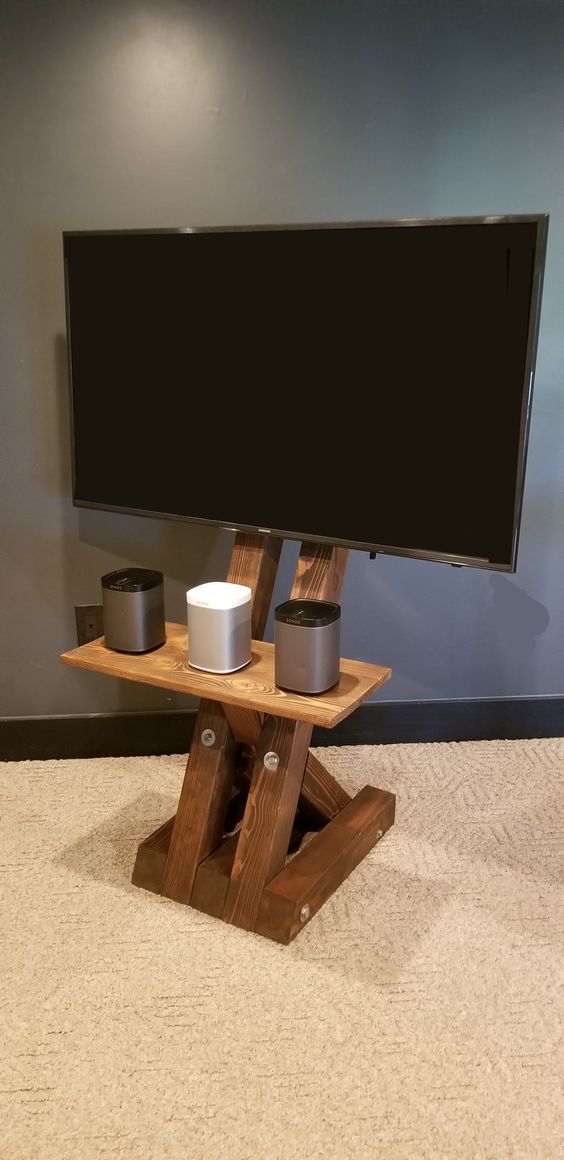
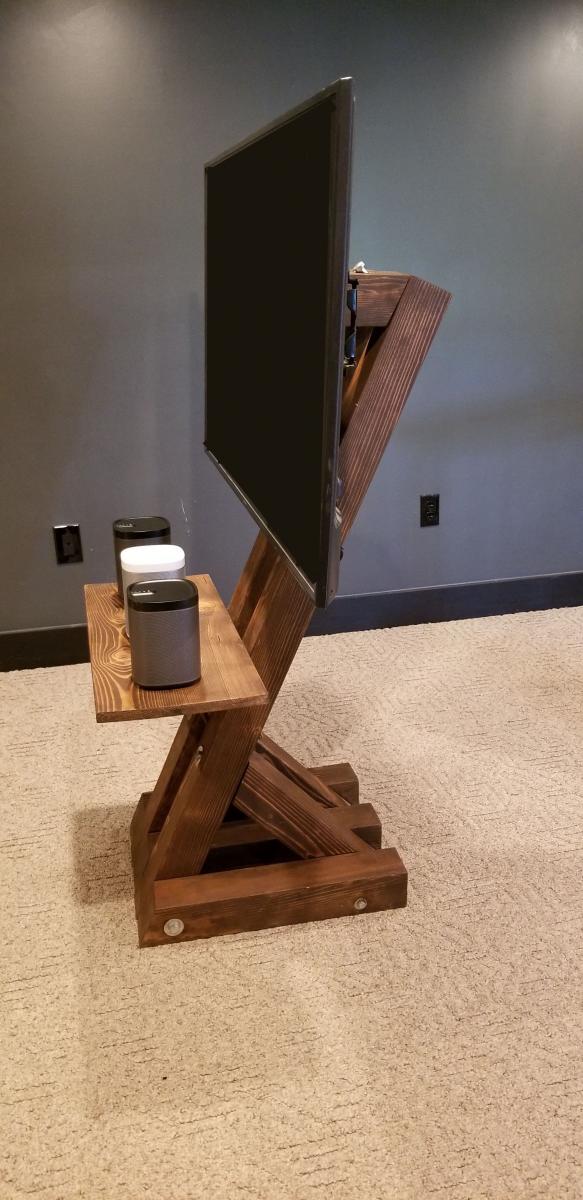
The Gíaffe Free Standing TV Mount. Handcrafted and engineered to use its center mass to deliver strength and balance for tv sizes 30-60". Display your television without detracting from your home's decor. The Gíaffe Free Standing TV Mount is the perfect solution and its rich finish will be perfect for any house/office room.

Wed, 03/11/2020 - 07:16
I absolutely love this!! Are there plans available?
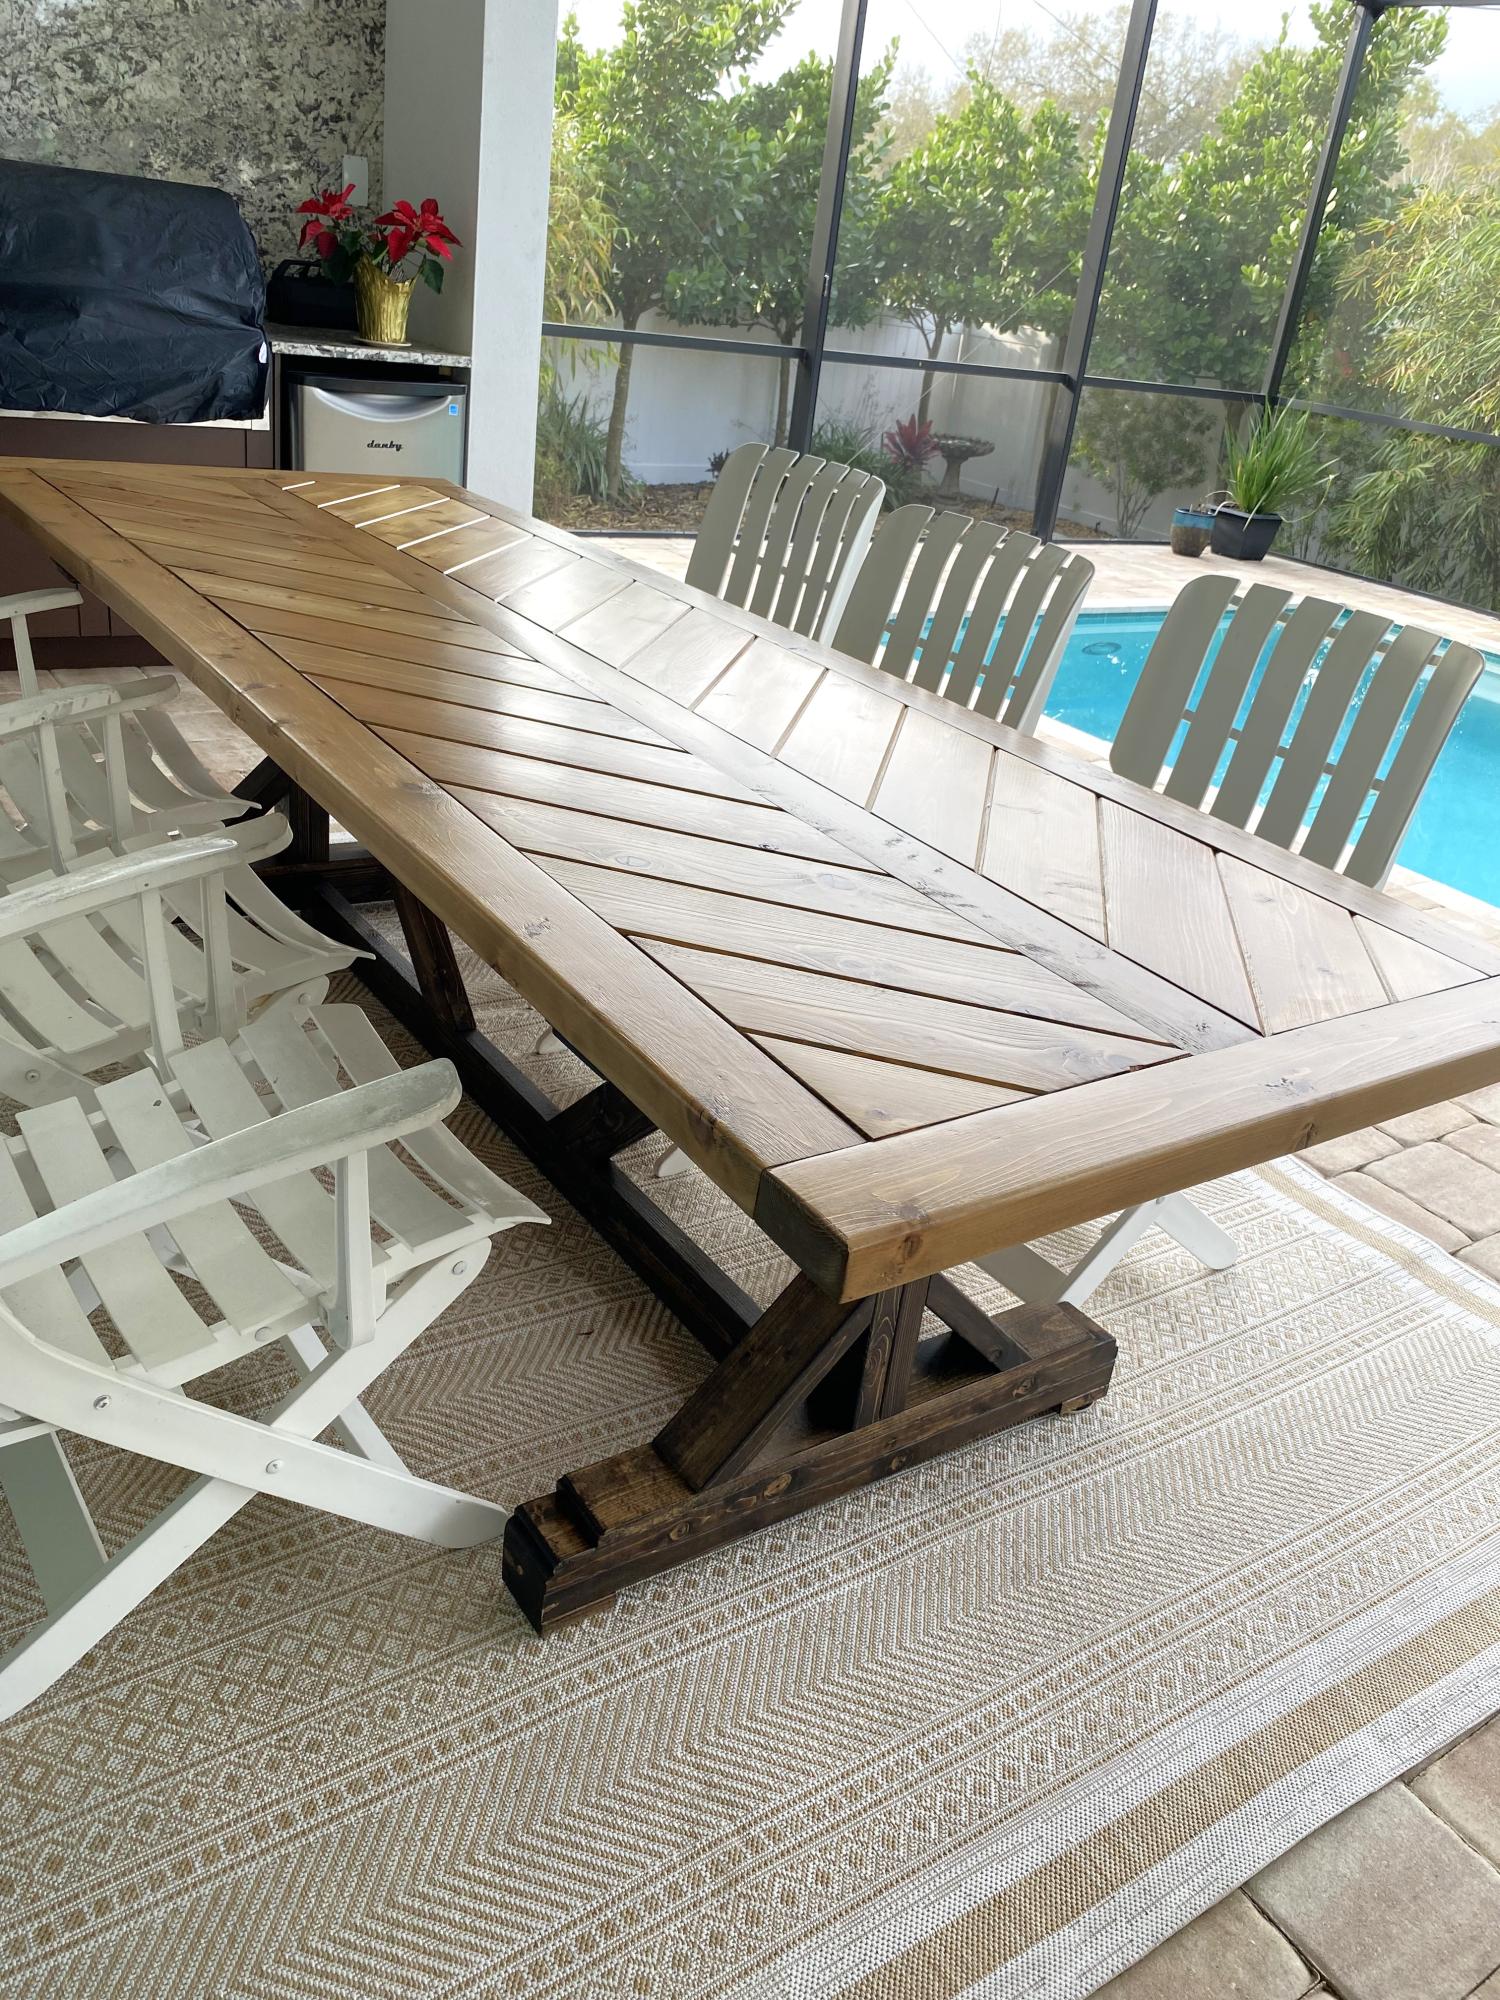
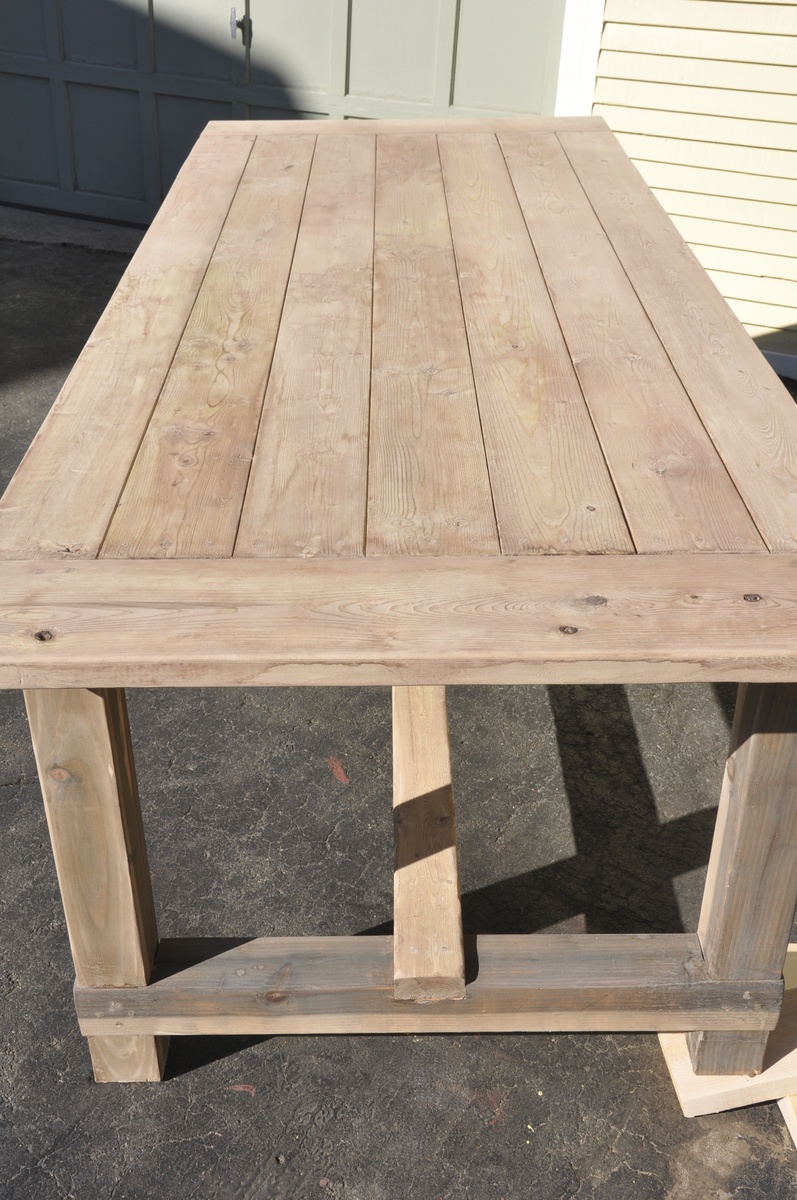
Your beautiful Fancy X farmhouse table. We wanted to seat 8. Used your plan with the top idea from Hint of Home. We used cedar tongue and groove for the top. We are so pleased with it! Now for chairs!
Thanks for the awesome, easy to follow plans!! All that's left to do is stain it and build another one- I'm going to have 2 on my back patio! A successful first project! Thanks!!
Sat, 03/07/2015 - 12:27
So awesome!!! Especially for your first project! Super inspiring for those of us who would like to attempt a project like this! Thank you for sharing!
Mon, 07/20/2020 - 07:15
Niiice...I'm thinking about this for my next project. Great work.

First table built by us. I think it turned out pretty good! Custom built to avoid baseboard heater.
Sun, 01/15/2017 - 21:24
I need the table that is green/gray/blue whatever on the bottom and stained brown on the top
Tue, 01/17/2017 - 12:35
i plan on making this next week, so i can update you with the plans, the only thing i am doing different is the way i am doing my cross in the back.
stay tuned
Tue, 01/17/2017 - 12:35
i plan on making this next week, so i can update you with the plans, the only thing i am doing different is the way i am doing my cross in the back.
stay tuned
Sat, 02/04/2017 - 13:12
This is beautiful and simple! Great job!
You costum built it to fit the baseboard, were the original plans Ana White's? Can you link it or tell me the name to find it?
I'm new to the site and not navigating very well. I'm trying to save plans for a console similar to this to my profile/account and looking for the little "save to plans" to easily find this again
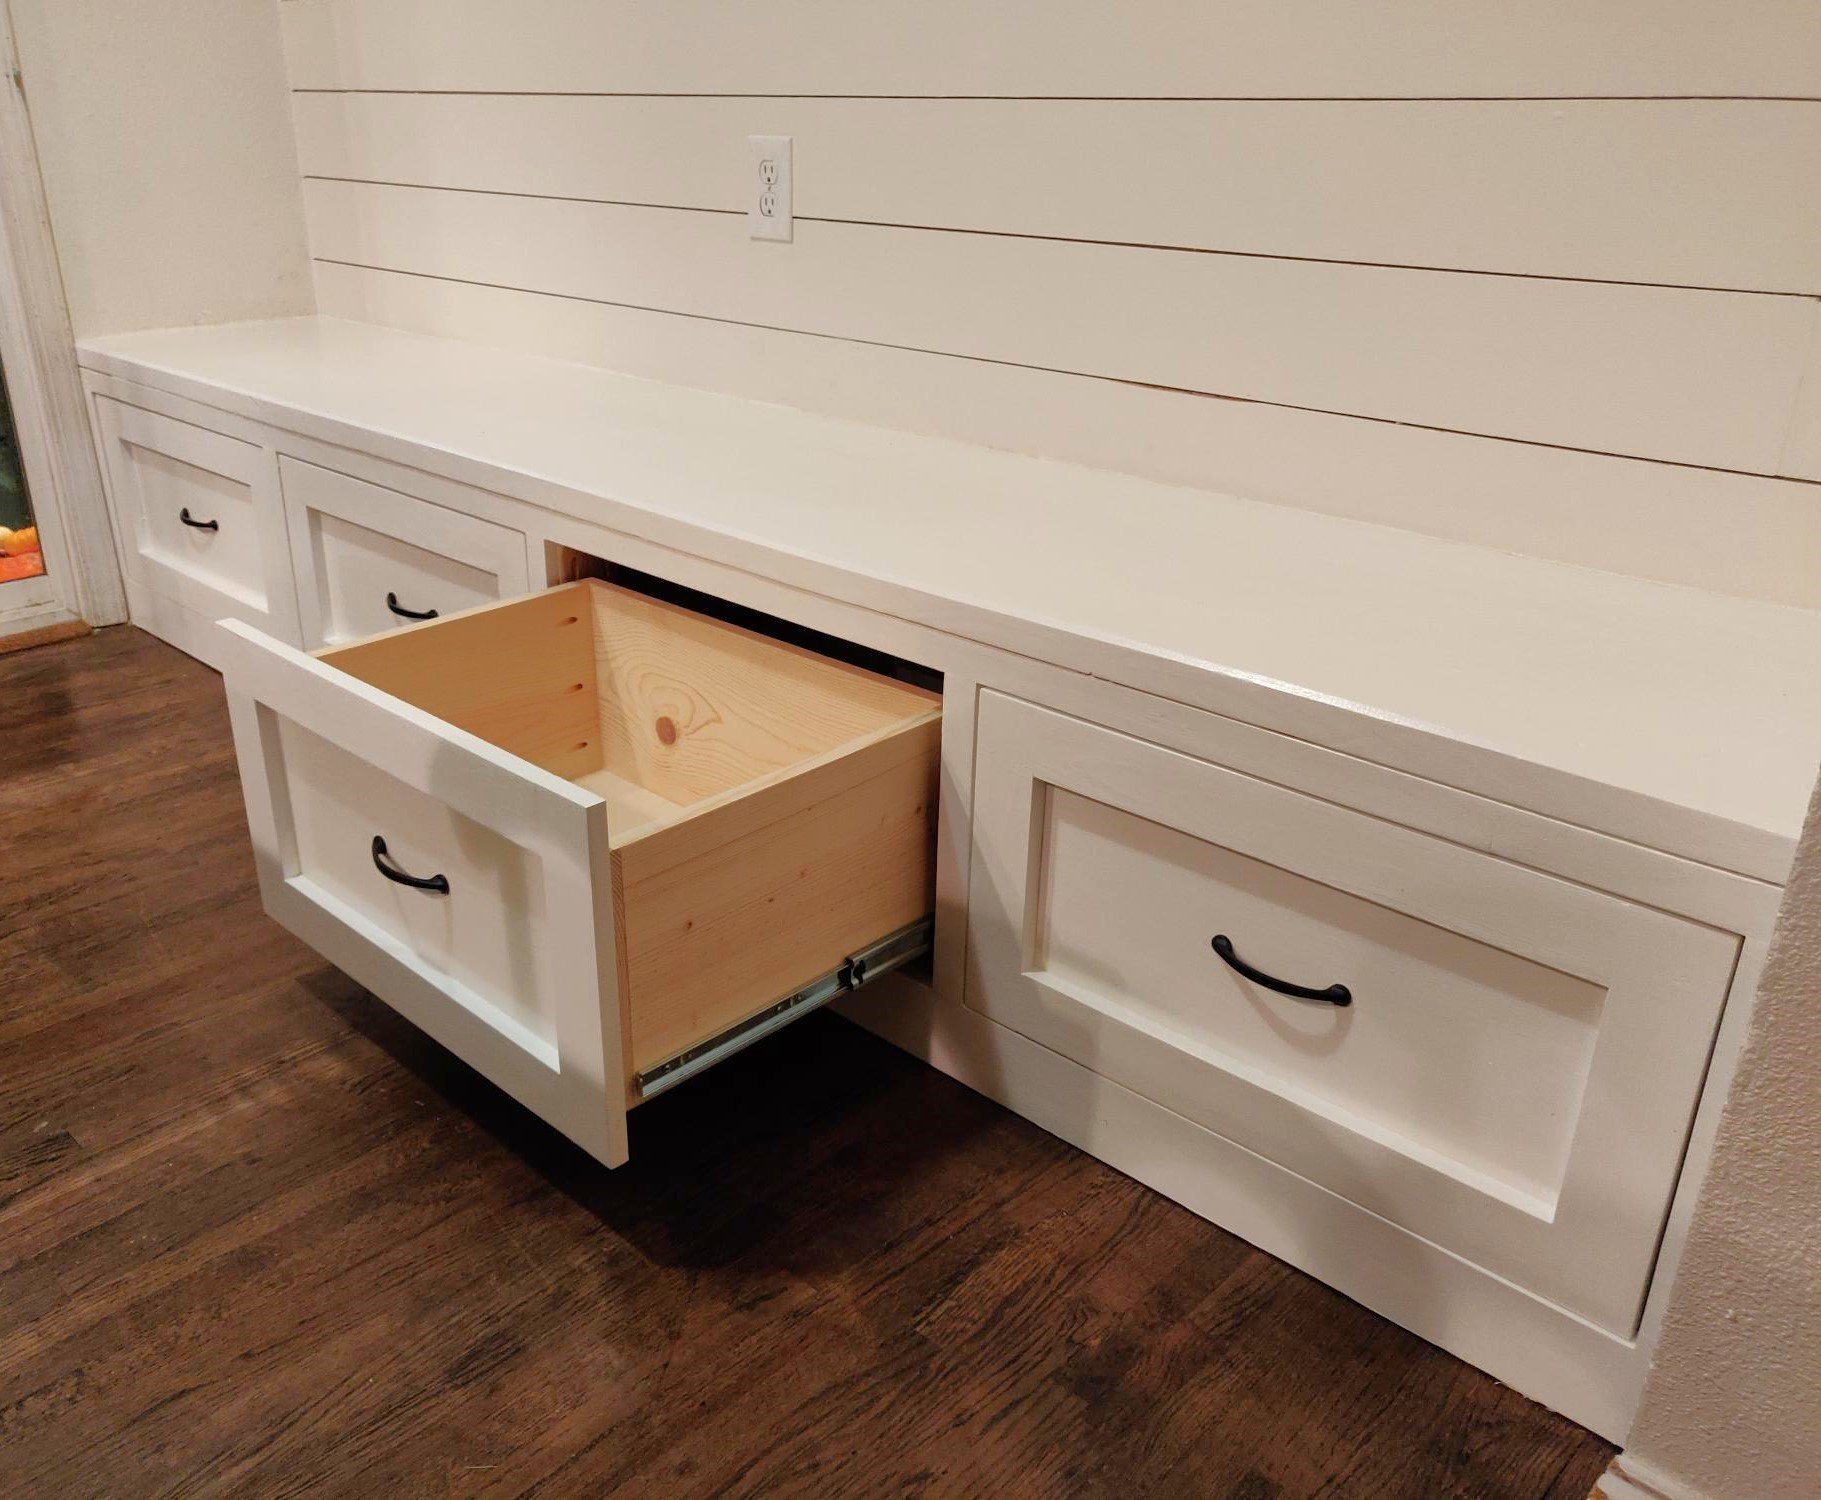
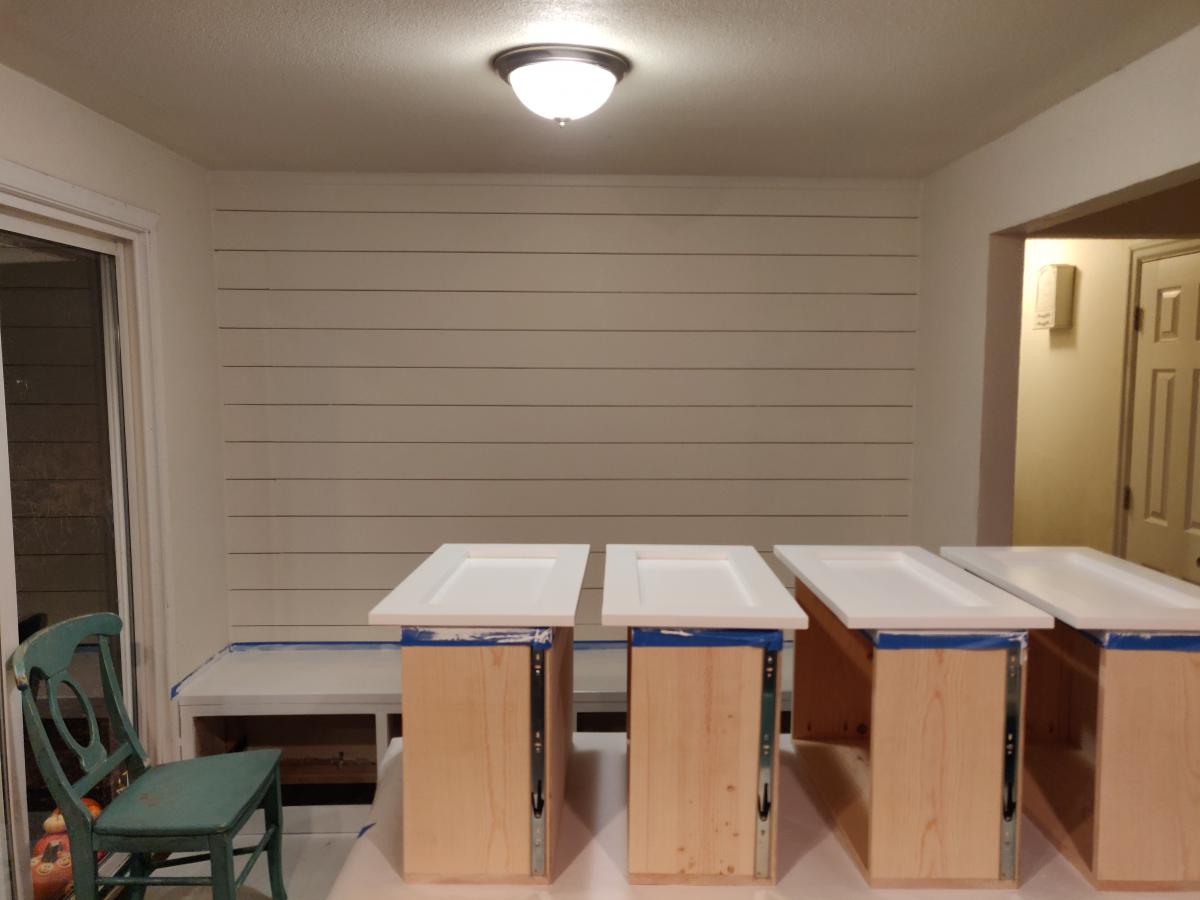
We've been desperate for more storage in our little house and this build really helped. The whole bench is 103“ wide and each drawer gives us 24"x17" of usable space. We had to do some custom shaping for the benchtop (two joined fir 2x12's) fit as the walls are not square but in the end we were really pleased.
The hardest part of the project was getting all of this built and in place while working around a busy family as this is our only meal space and the majority of cutting/forming was done either on the weekends or after bedtimes. If I were to do this again I'd prioritize sending the kids to grandparents for the weekend and know king everything except for paint out in one go.
We could have spent less time with the benchtop by using plywood like in the plans but we wanted the look of a separate benchtop. We may replace the fir with stained oak down the line but this should be plenty sturdy for the next several years.
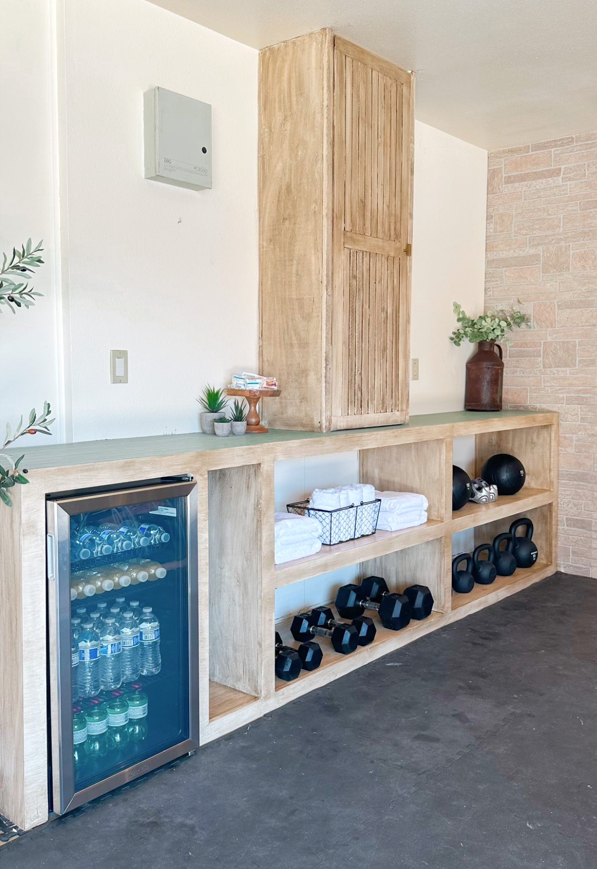
Fabulous home gym by Nailgun Nelly!
*Incorporated and modified the grand waterfall console plan

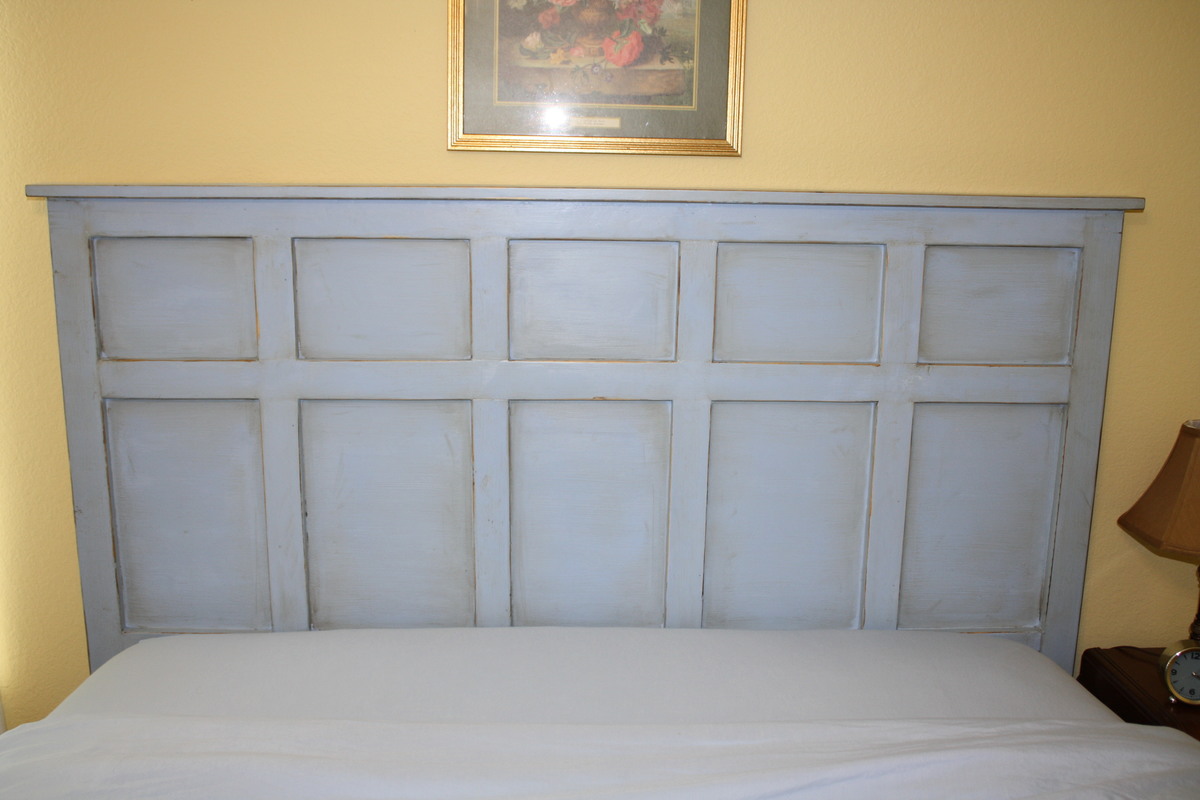
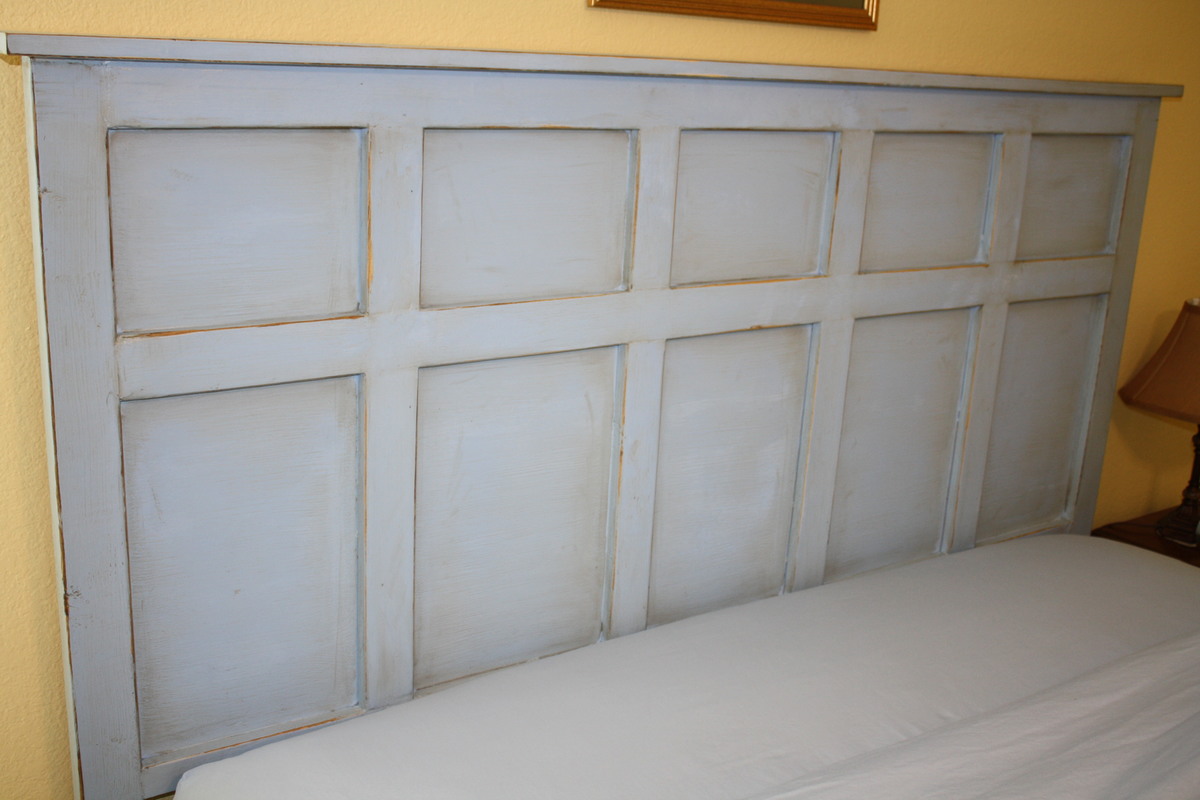
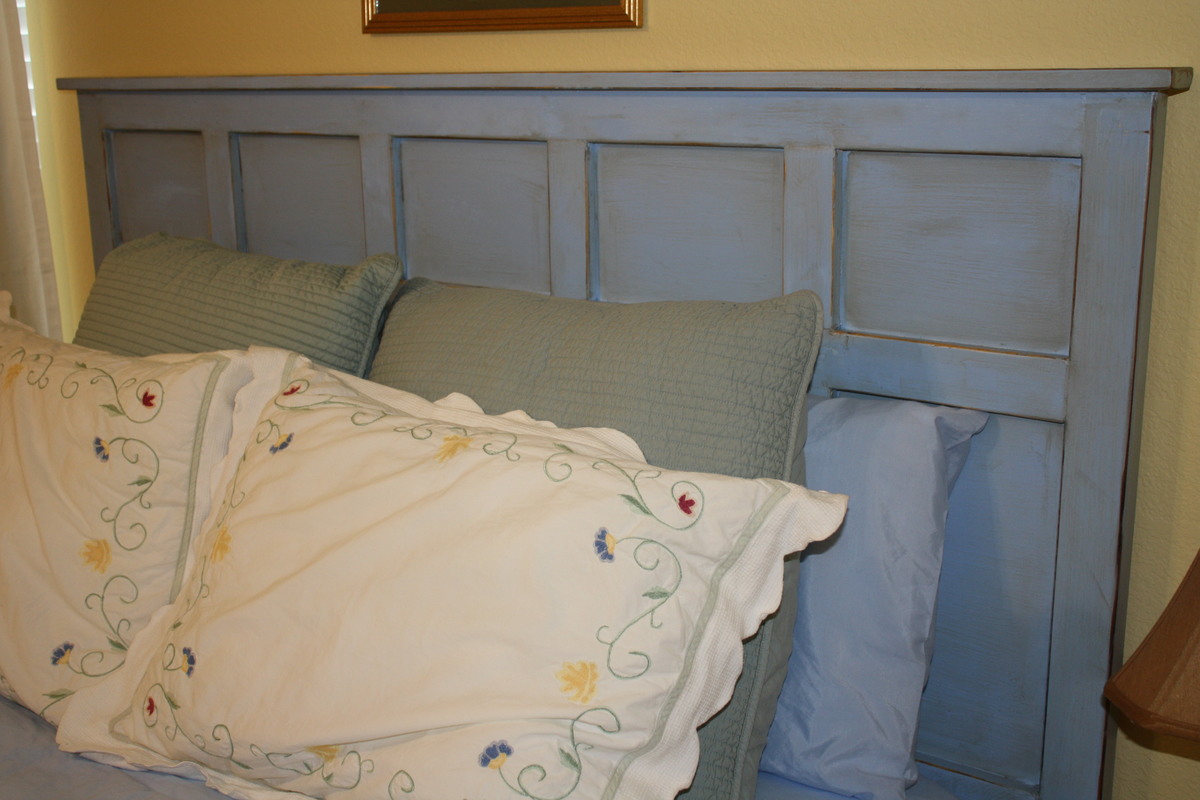
Our guest room finally has a headboard! I put together this queen size headboard using what I had learned building my daughter's headboard (and consulting the plans for the Reclaimed Wood Headboard) using the remainder of the plywood sheet from her headboard project, 2x3s for the legs, a 2x4 to join the legs (and connect to the metal bed frame), furring strips, and a 1x3 to top it off.
Our plywood had been cut to fit our car, so the first vertical furring strip was placed to hide the seam where I joined the two pieces back together. Then we evenly placed them from center as just looked right to us.
We had a great time seeing this come together as we didn't follow a specific plan, but were able to be a bit more creative inspired by various plans.
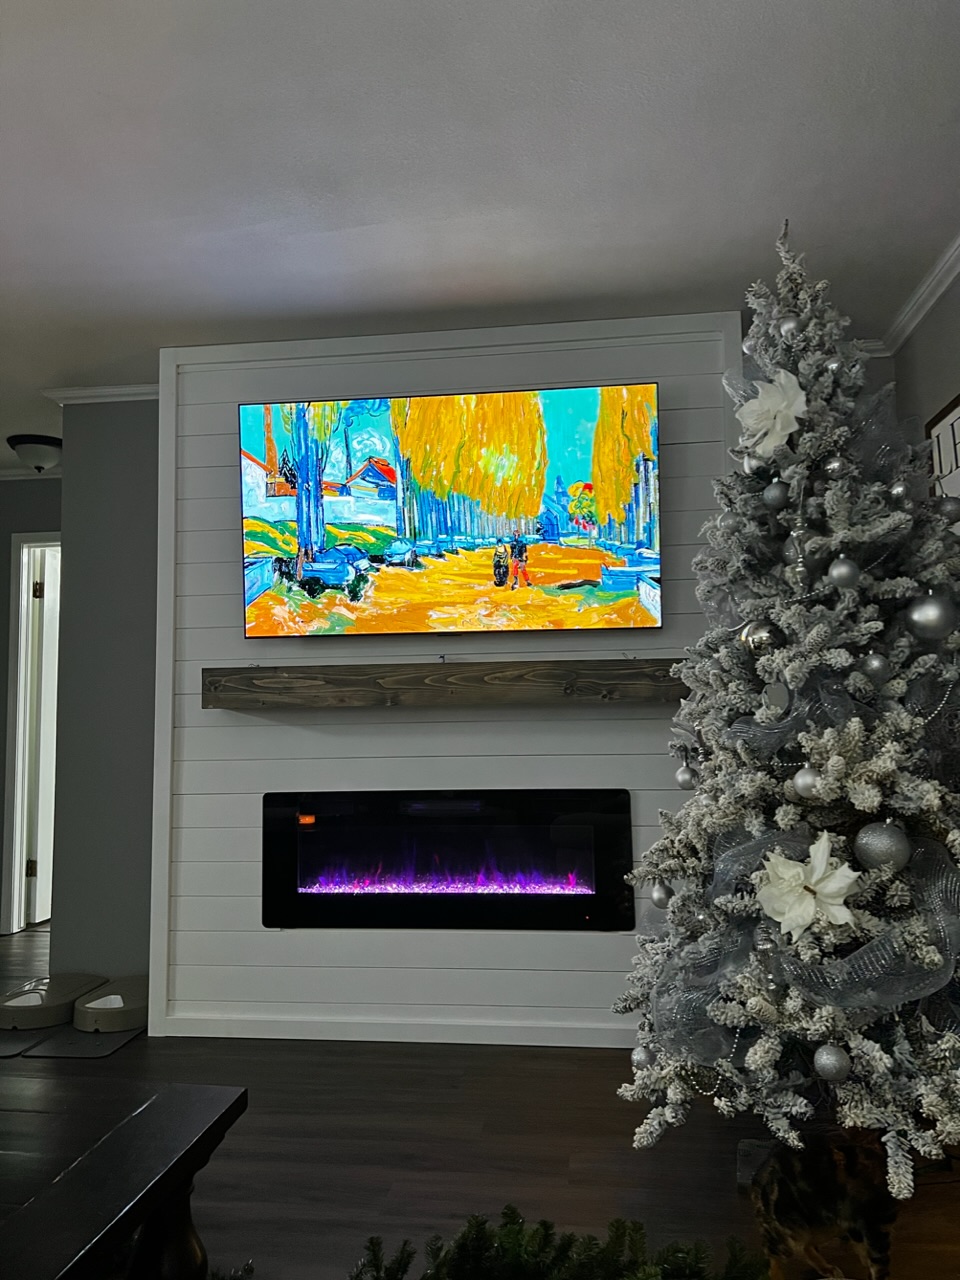
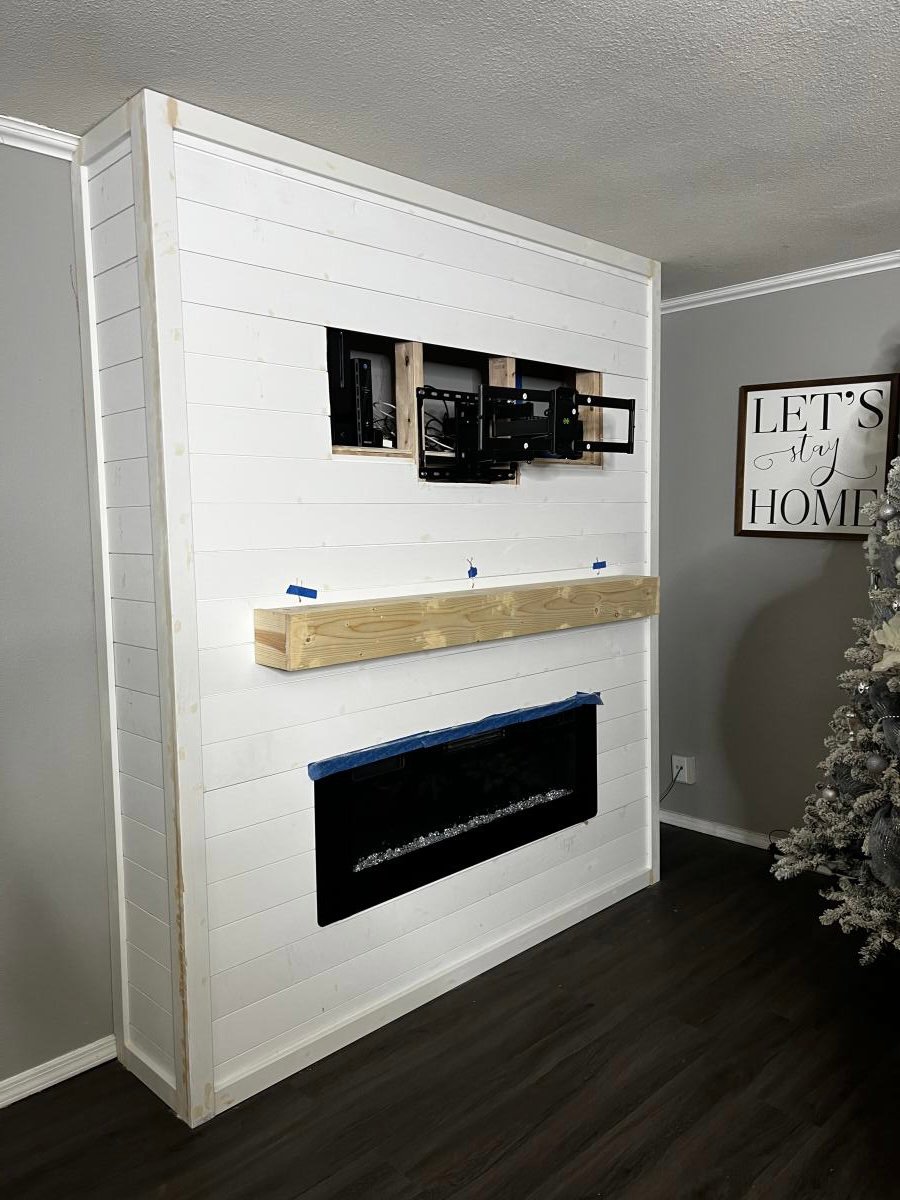
We did the Easiest Shiplap Fireplace in a weekend, thanks to Ana’s plans. I convinced my husband to help me build this by upgrading to a 65” tv and adjusting the dimensions. We also built a shelf behind the tv to hold our receiver and Xbox that is hidden when the tv is in place. Ana’s tutorial was amazingly and gave us the confidence to finally build something that’s been on our list for 2 years!
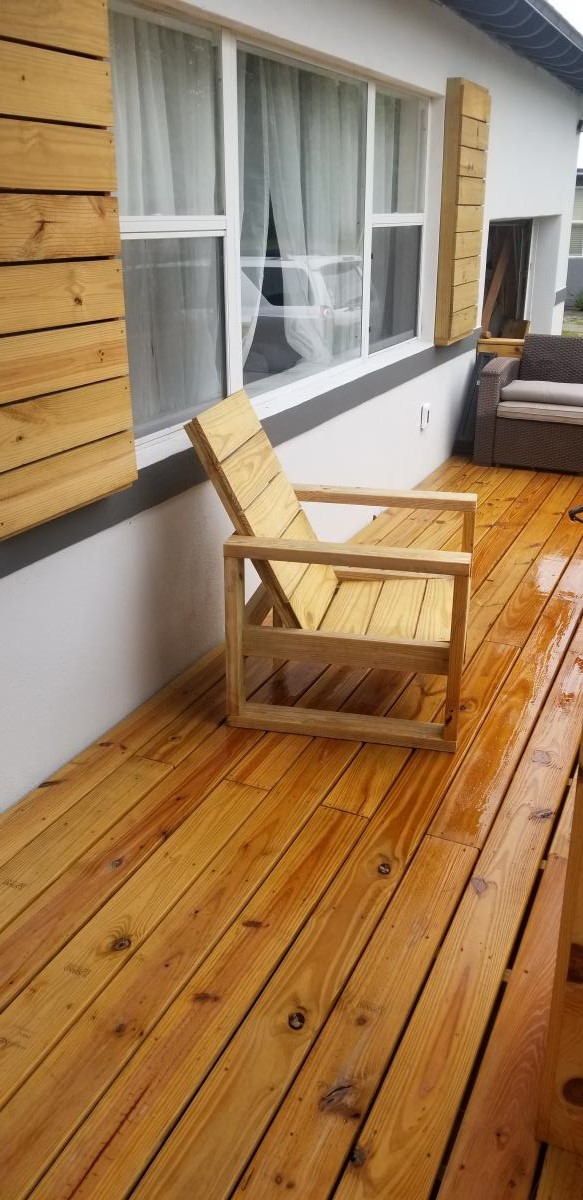
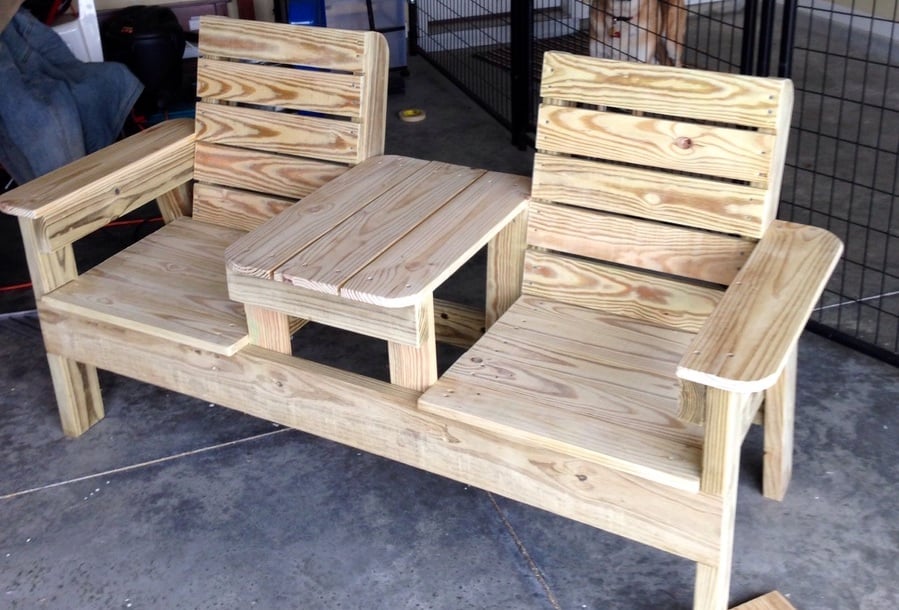
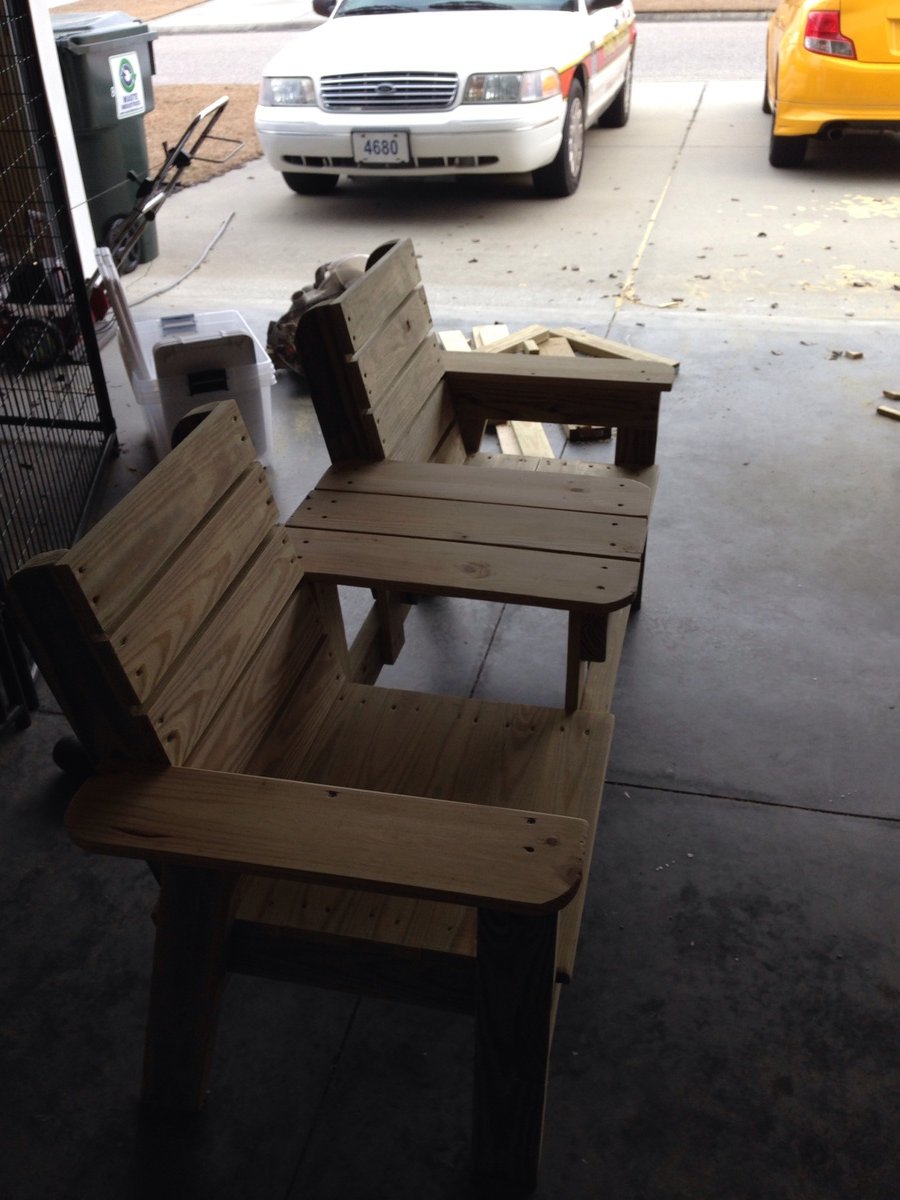
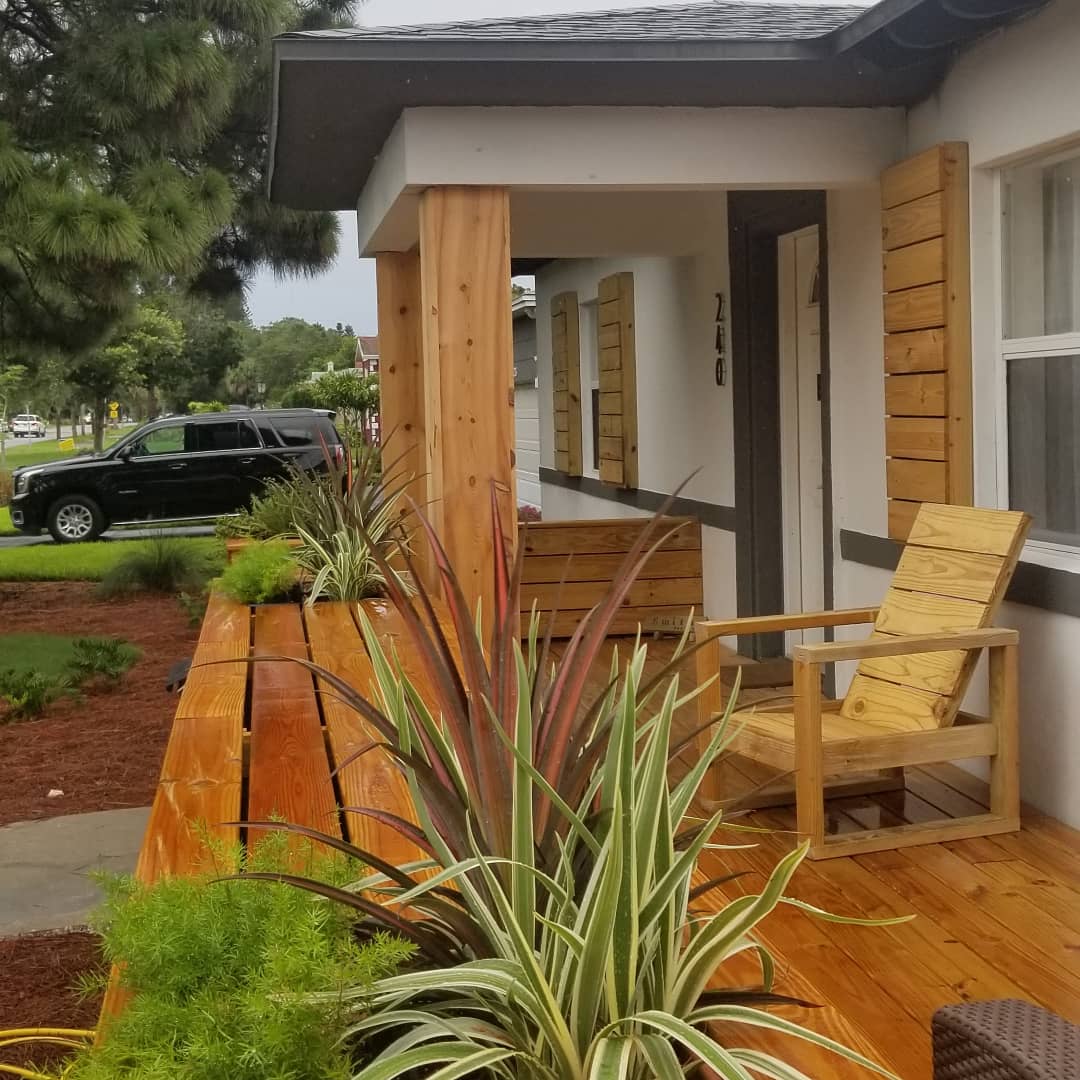
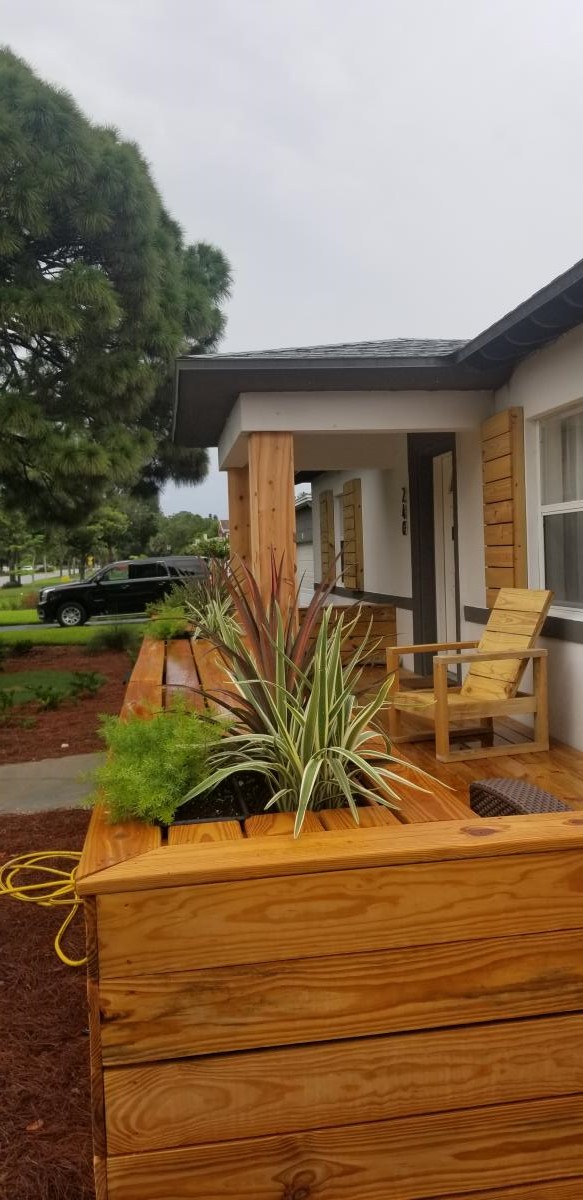
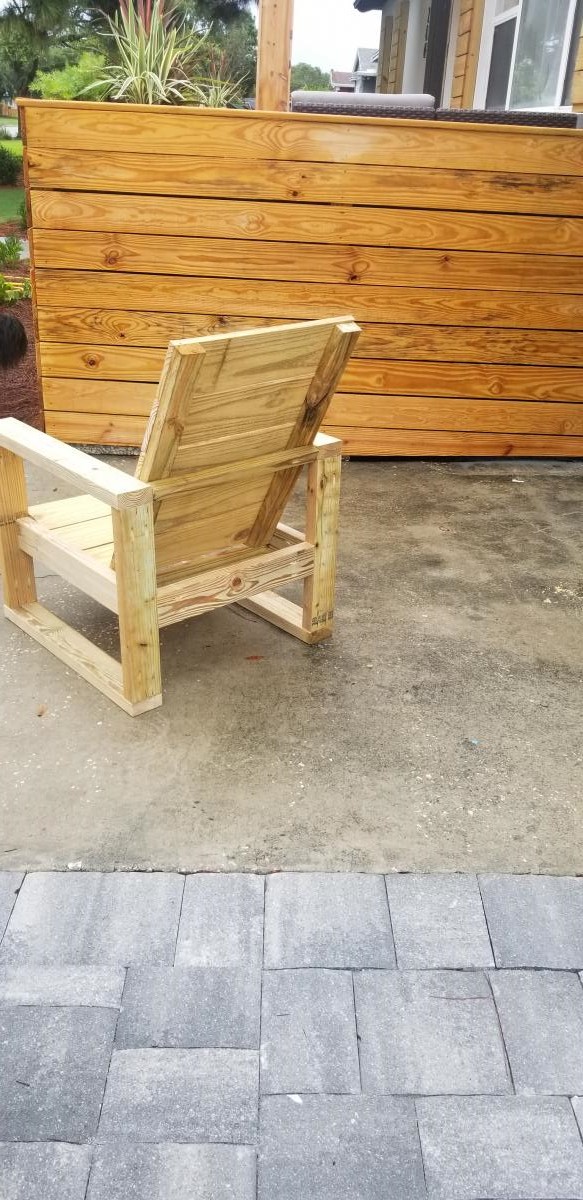
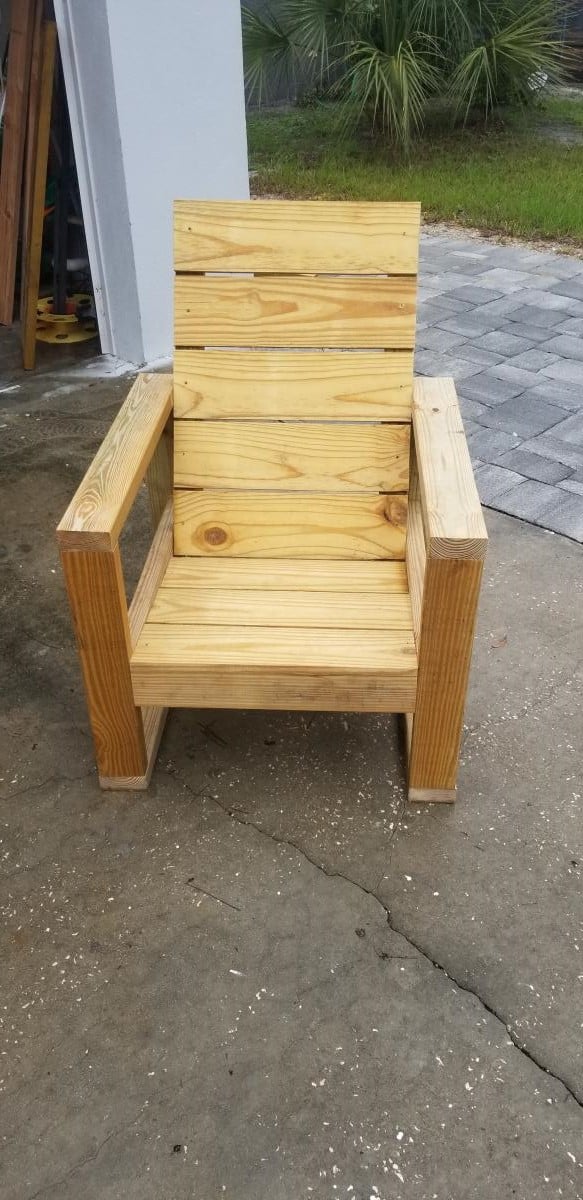
I built a set of these chairs based on Ana's simple modern outdoor chair. I wanted it to match my front porch which I built a few weeks ago. Thank you for the plans.
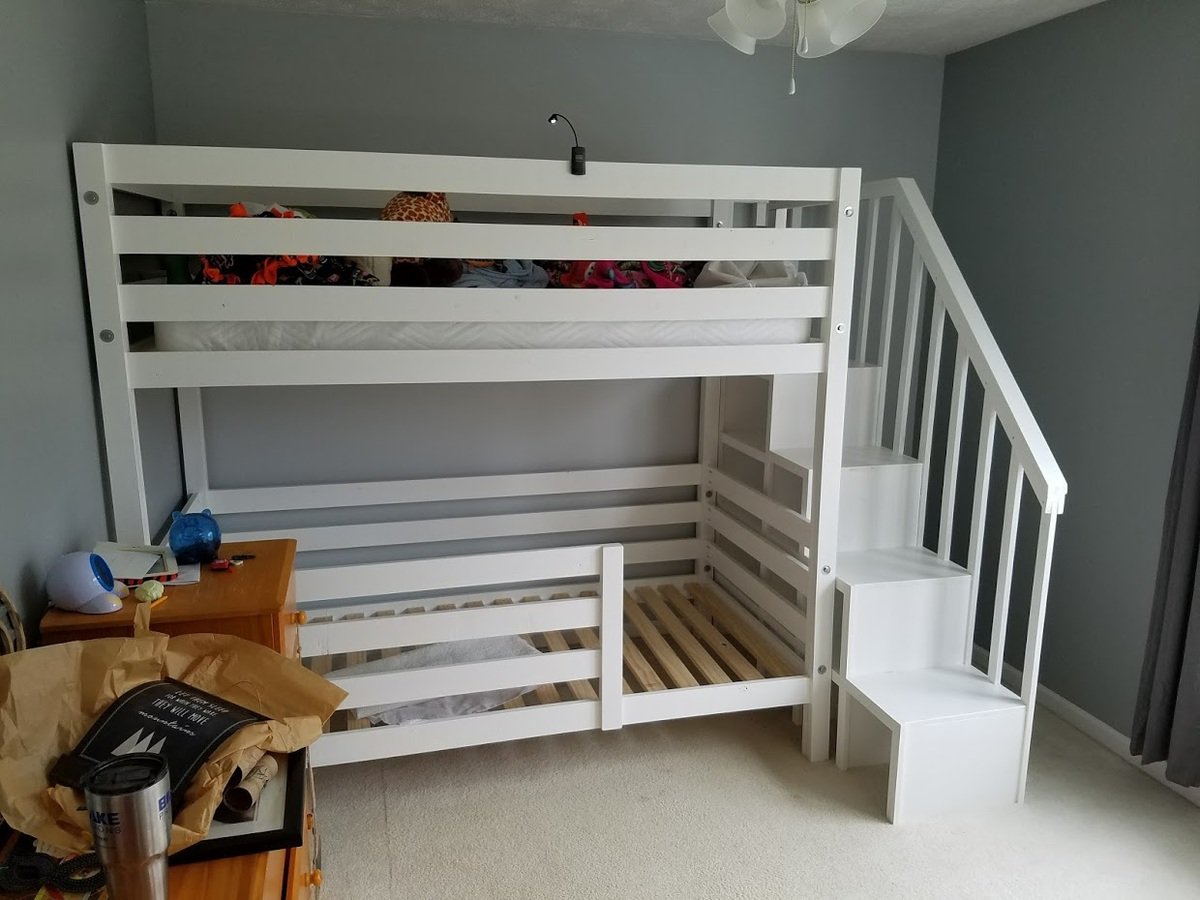
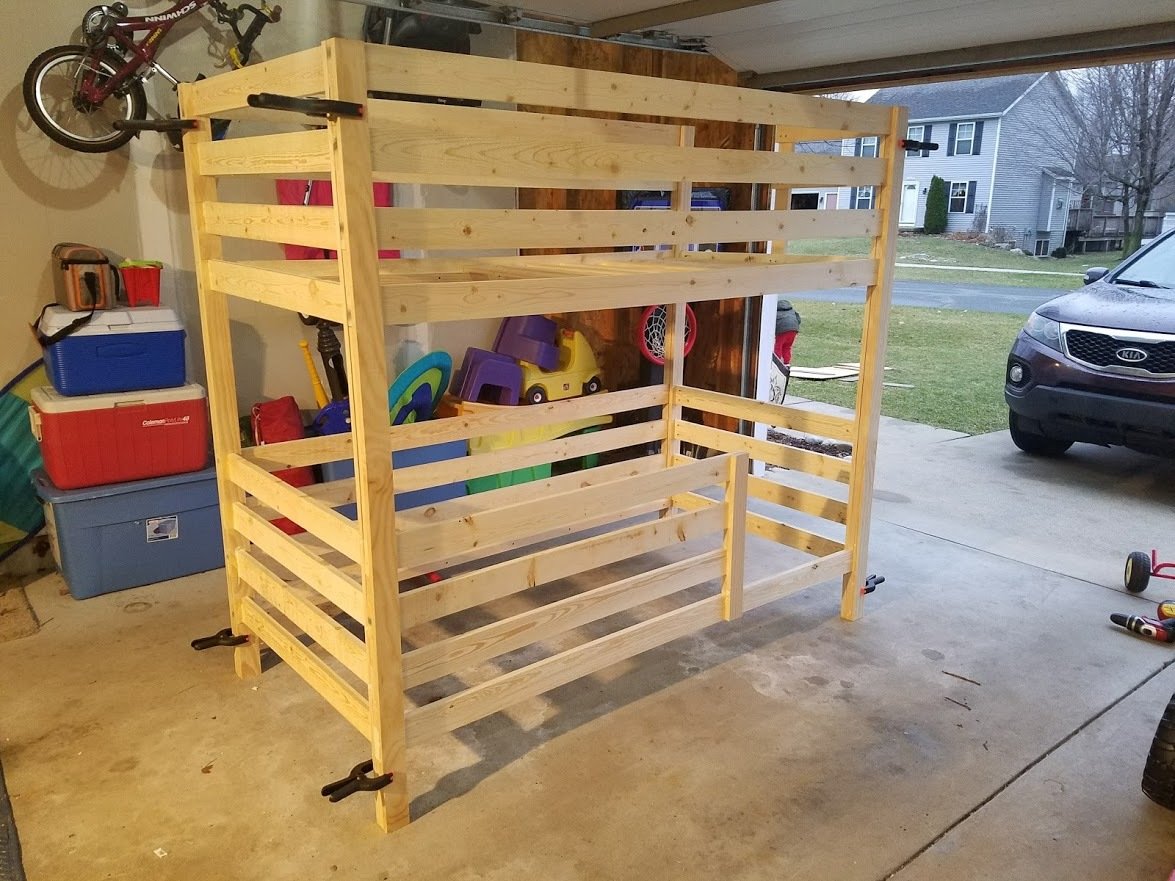
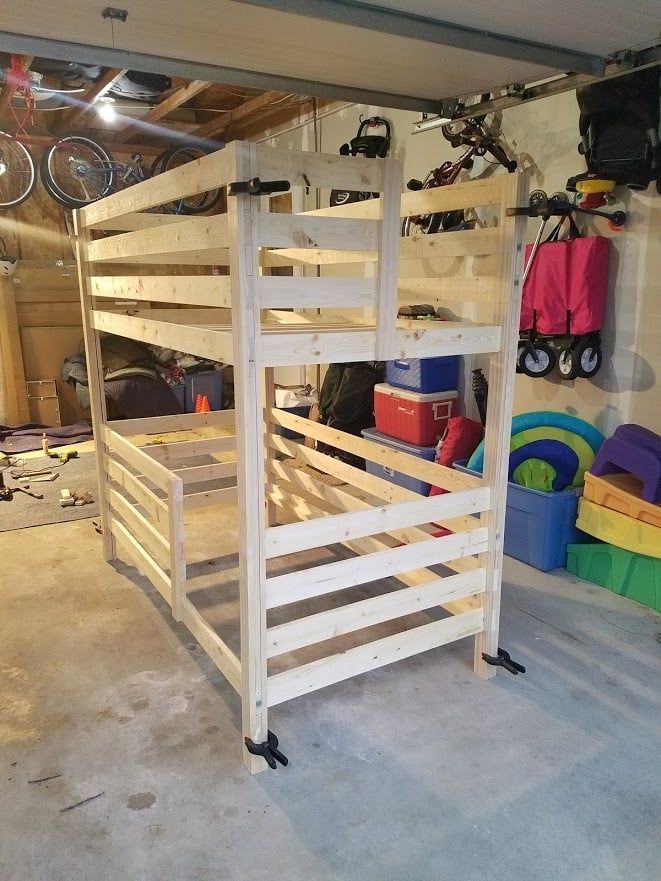
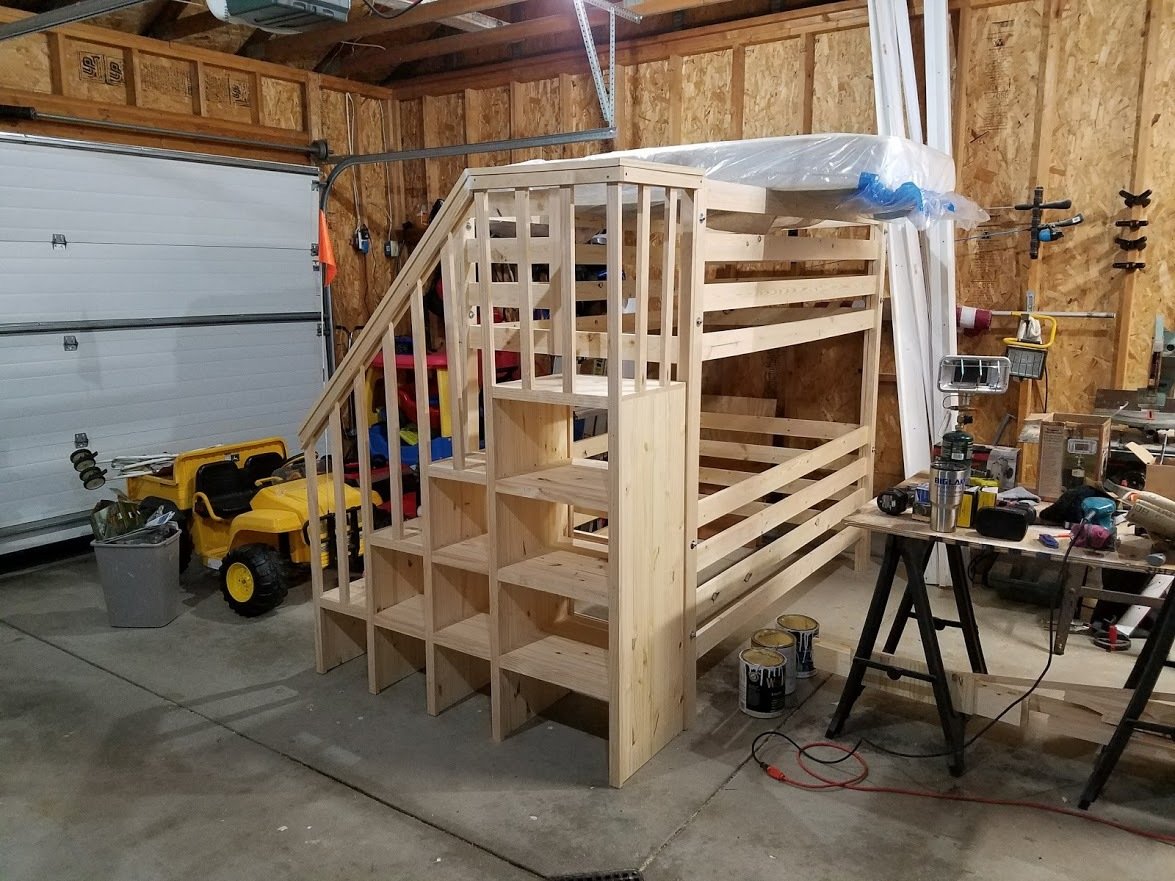
I modified the plans for the Classic Bunk beds by making them 74" tall instead of 63" and added a fourth slat all the way around to add more protection from potential falls. I created one opening in the front for my youngest to get into the bottom bunk, and built slats about 2/3's across the front to act as a gaurd rail. I created another opening on the side for my oldest to get into the top bunk with stairs instead of ladders to again prevent falls. I had to modify the Sweet Pea stairs to accomodate for the extra height in the bunk beds, simplified the railings, and I created each cubby to be big enough to use cloth storage totes that were 11x11x11. Sanded the whole bed and stairs so the corners and edges were all rounded and smooth, and put two coats of white Deck and Porch paint to stand up to the the boys running up and down. I used brackets to secure the stairs to the bed, and sixteen 3" bolts to bind the bed together. Precut and drilled 17 slats for each bed seperated them 2" apart. Spent a few hours every night during the week measuring, cutting, glueing, drilling and assembling the bed and stairs. Spent an entire weekend sanding and painting. Very happy with the way these beds turned out. Overall cost of the project including the paint was around $400.


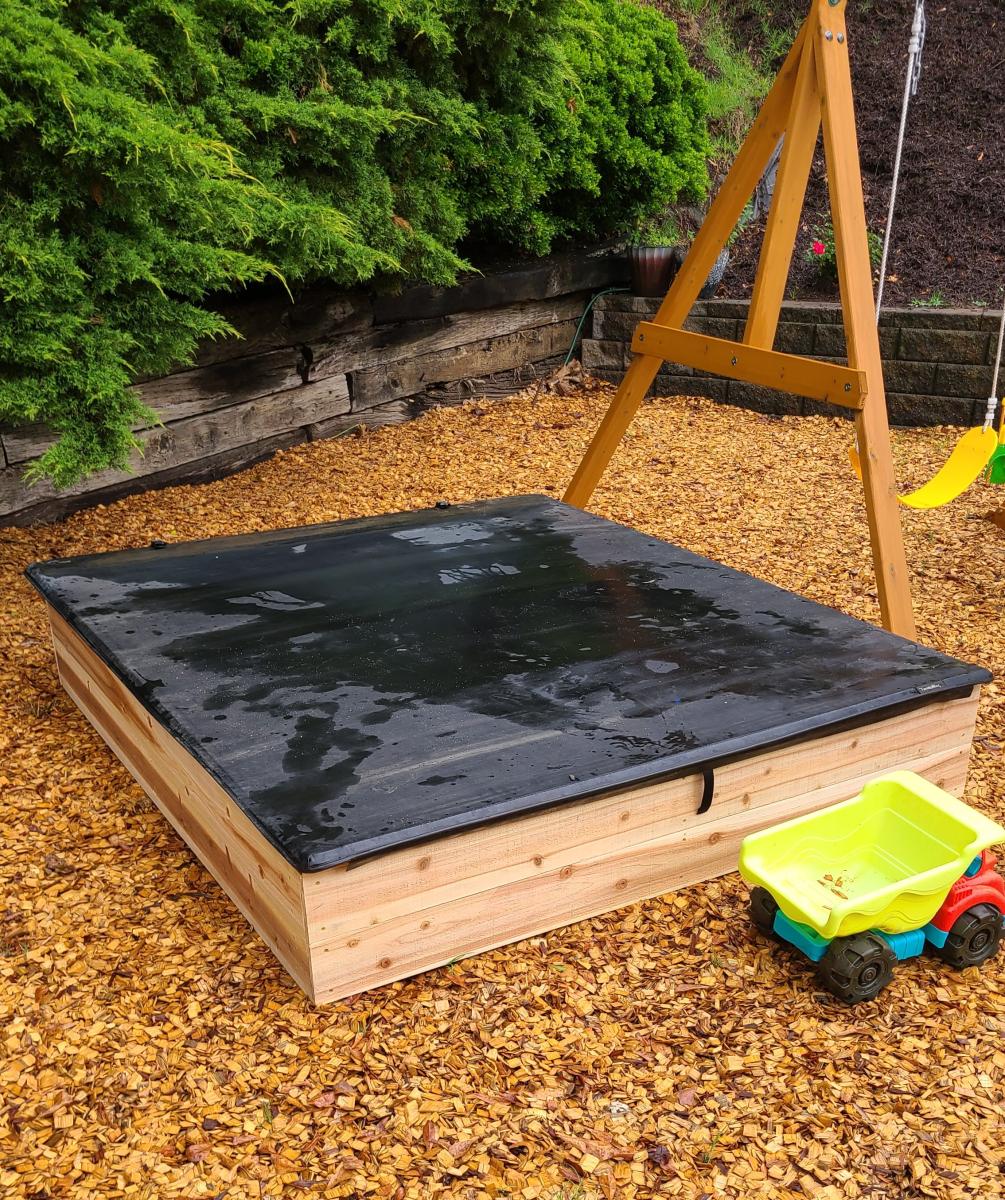
The cover is a tonneau cover for a pickup truck. It's for a 6.5' truck bed so if you notice, I had to ad a 2x4 and one more picket on top to accommodate the extra length.
The cover would add a ridiculous amount of money to the project but it was repurposed. I found it on a truck that was in an accident and going to the scrap yard. I think it it came out great and my grandson loves it.
John

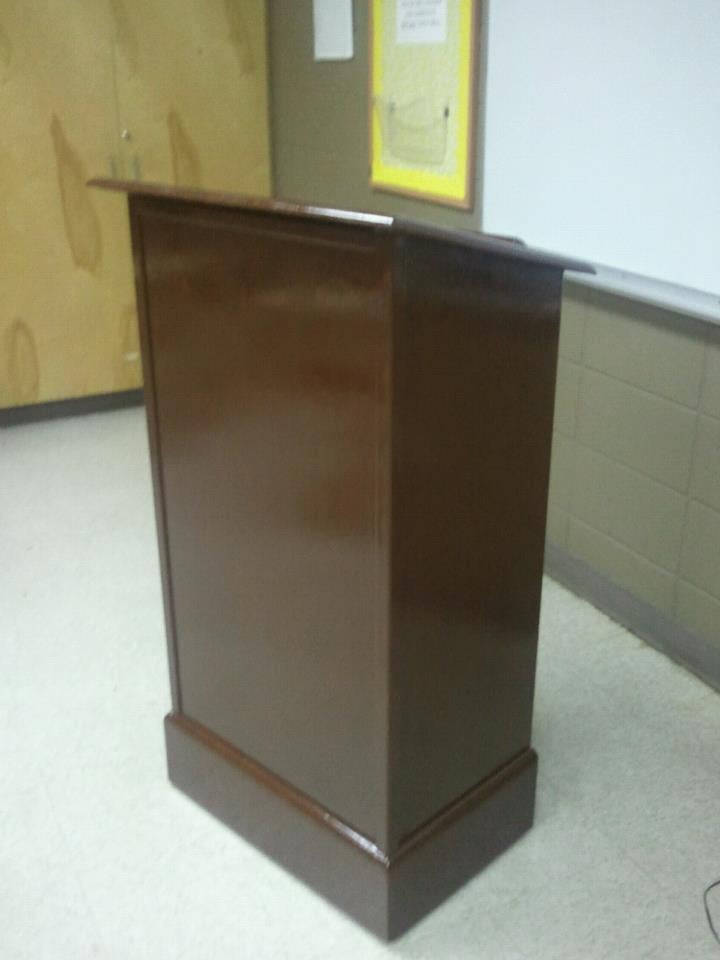
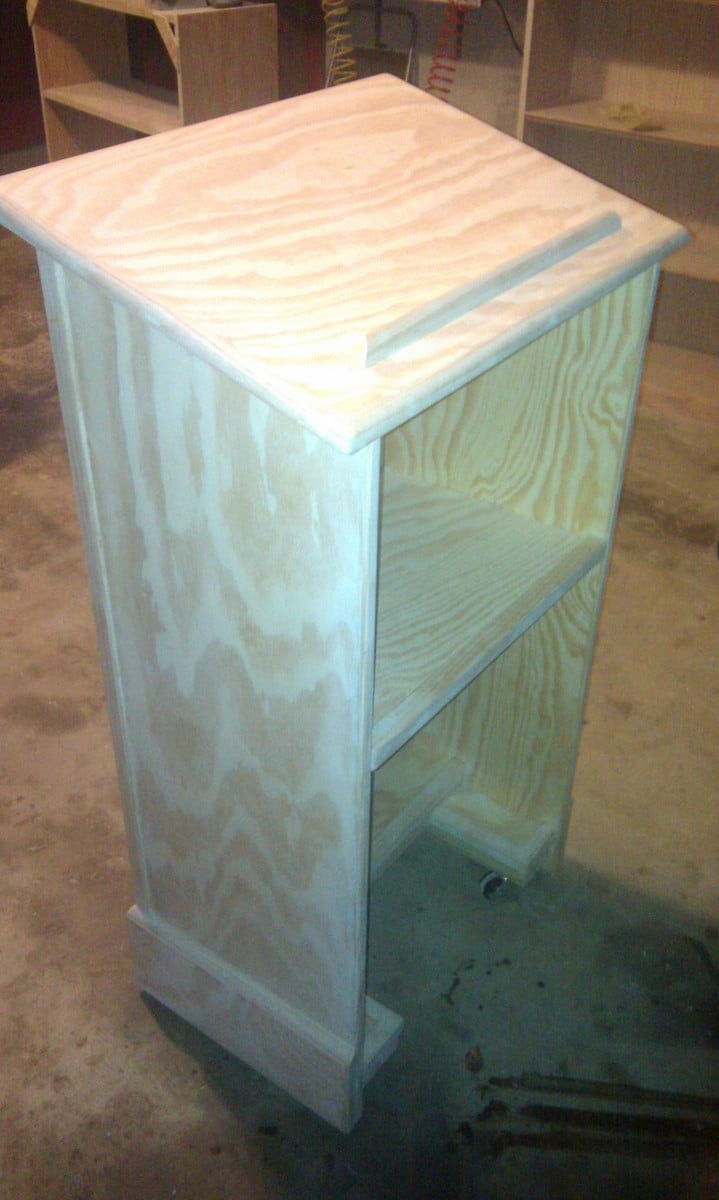
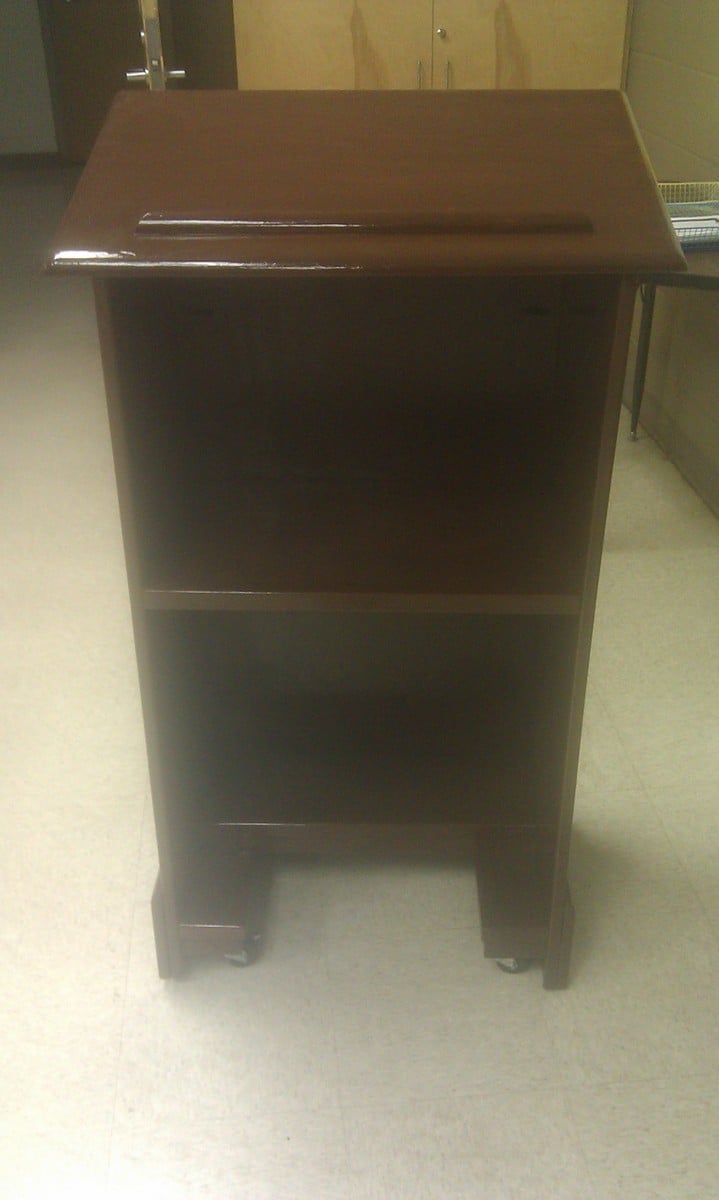
This is my first try at building furniture. I've built larger things in the past like decks and a fort for my nephews, but never furniture. Even though I used the plans to build the main box, I did change up the bottom and added some new stuff. I added wheels to the bottom my wife could easily move it around her classroom. I didn't want to put a square base on it because I thought it might hit her ankles when she was standing close to it. So I sort-of notched it out to give an opening for her feet and I used some scraps to create a short shelf at the bottom. I also added more trim that the plans call for. I cut strips of the pine plywood for the base molding and topped it with quarter round. I used corner trim for the front corners, the self inside and the bottom notched shelf. I also used screen trim for the back of it. I think it came out nice and I've very pleased with it. I used 2 coats of Minwax PolyShades American Chestnut on it.


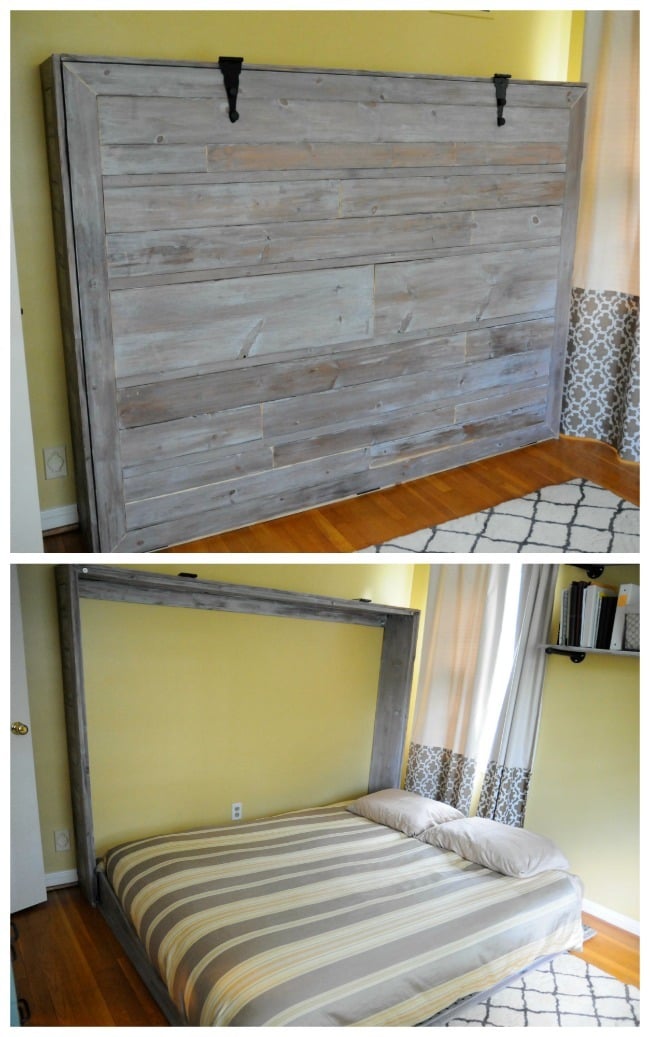
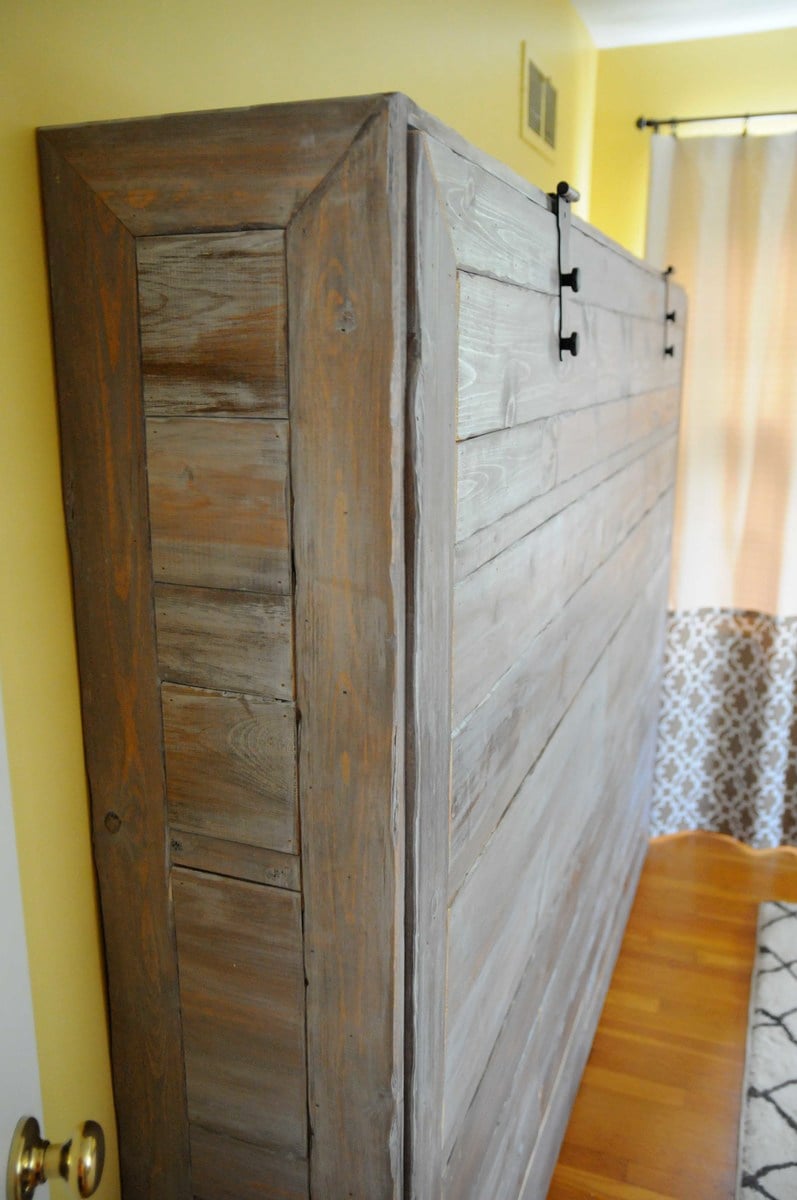
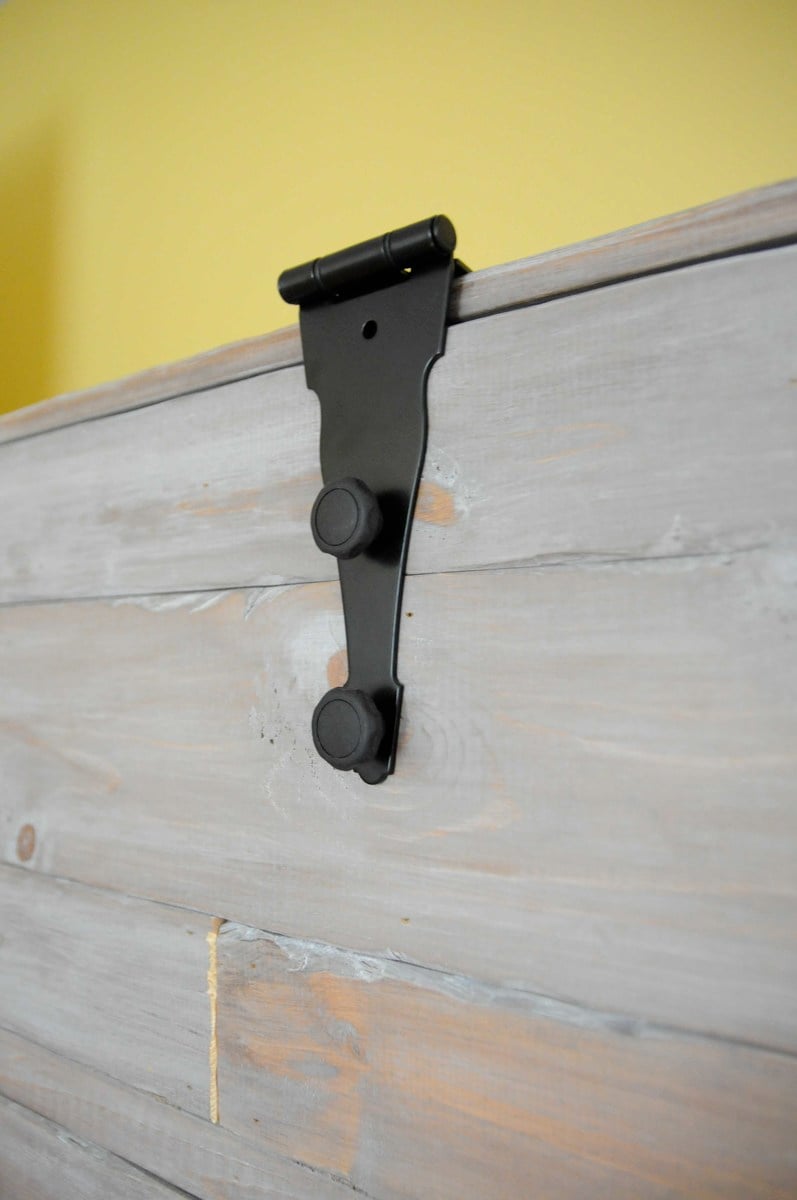
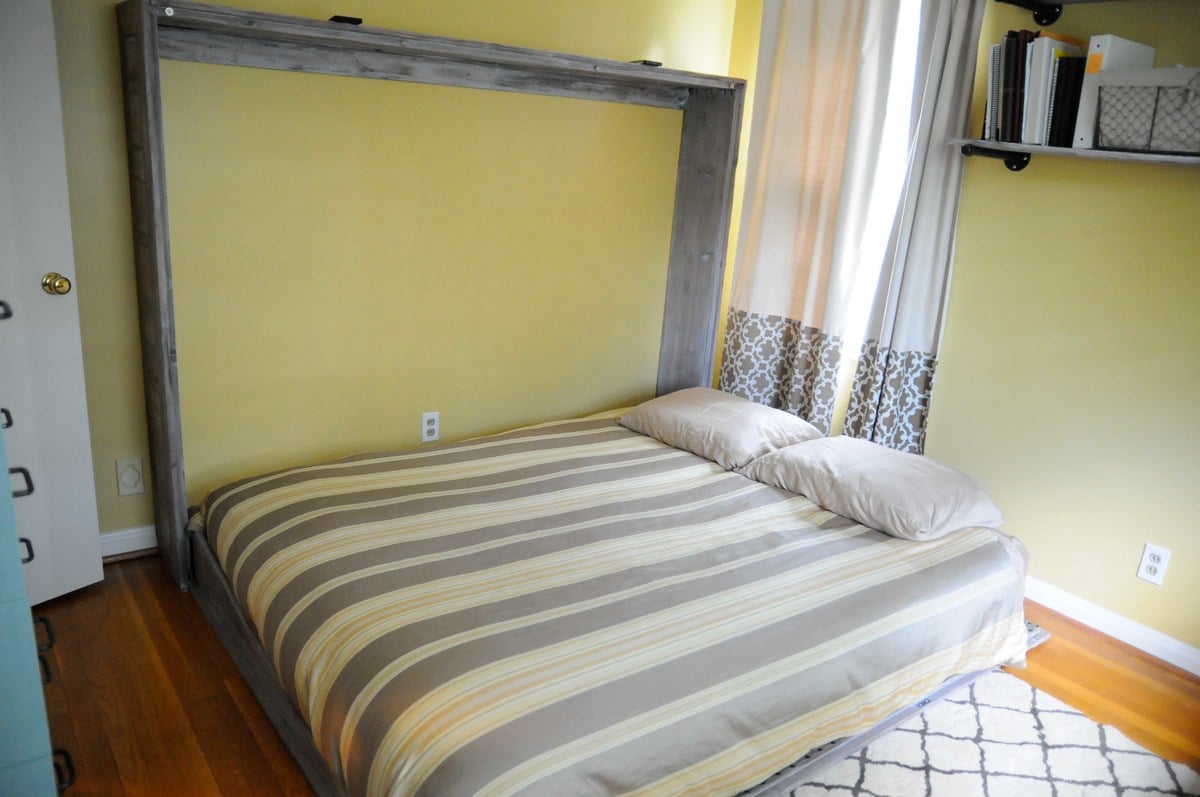
Expecting our second child, my wife and I decided to do away with our guest bedroom and combine it with our office. The only problem was our queen bed took up way too much space and it didn't get enough use to justify the sacrifice. We looked at the wall bed options available for purchase and decided they were way too blah and very expensive. I then found the "A MURPHY BED YOU CAN BUILD, AND AFFORD TO BUILD" post on Ana's website (thanks for the inspiration)!
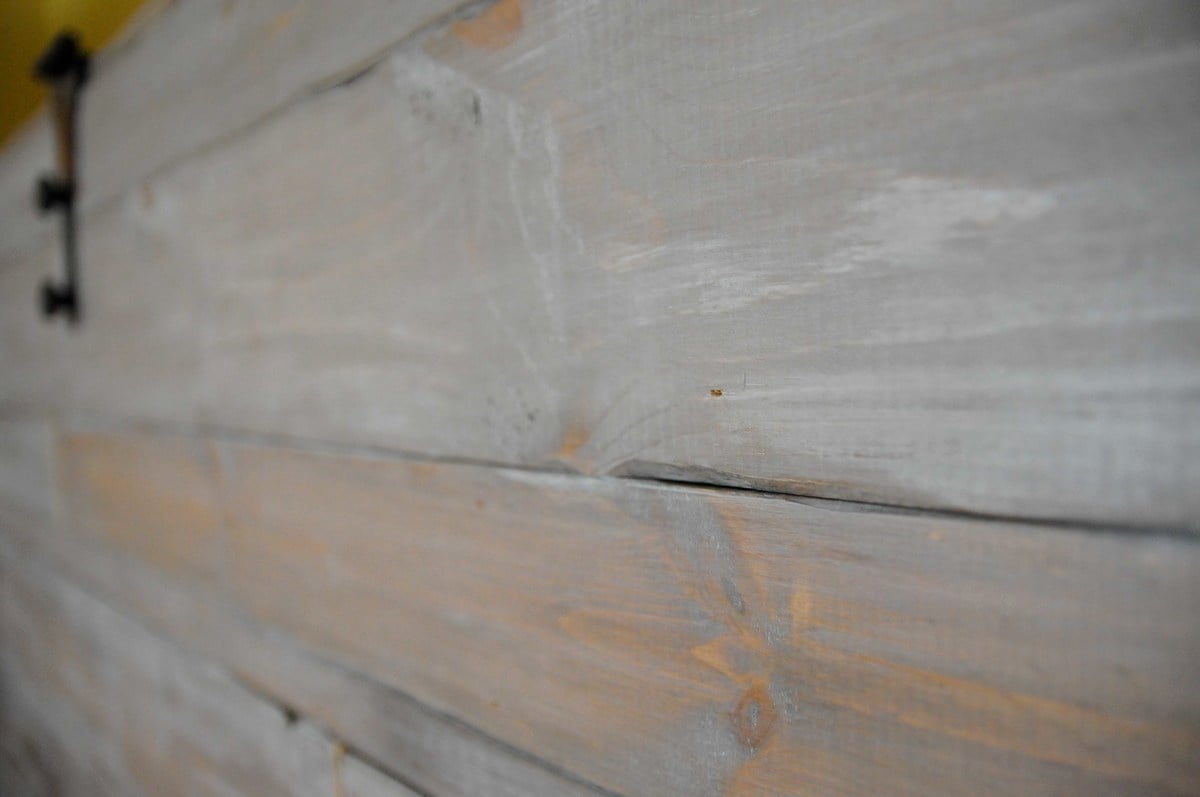
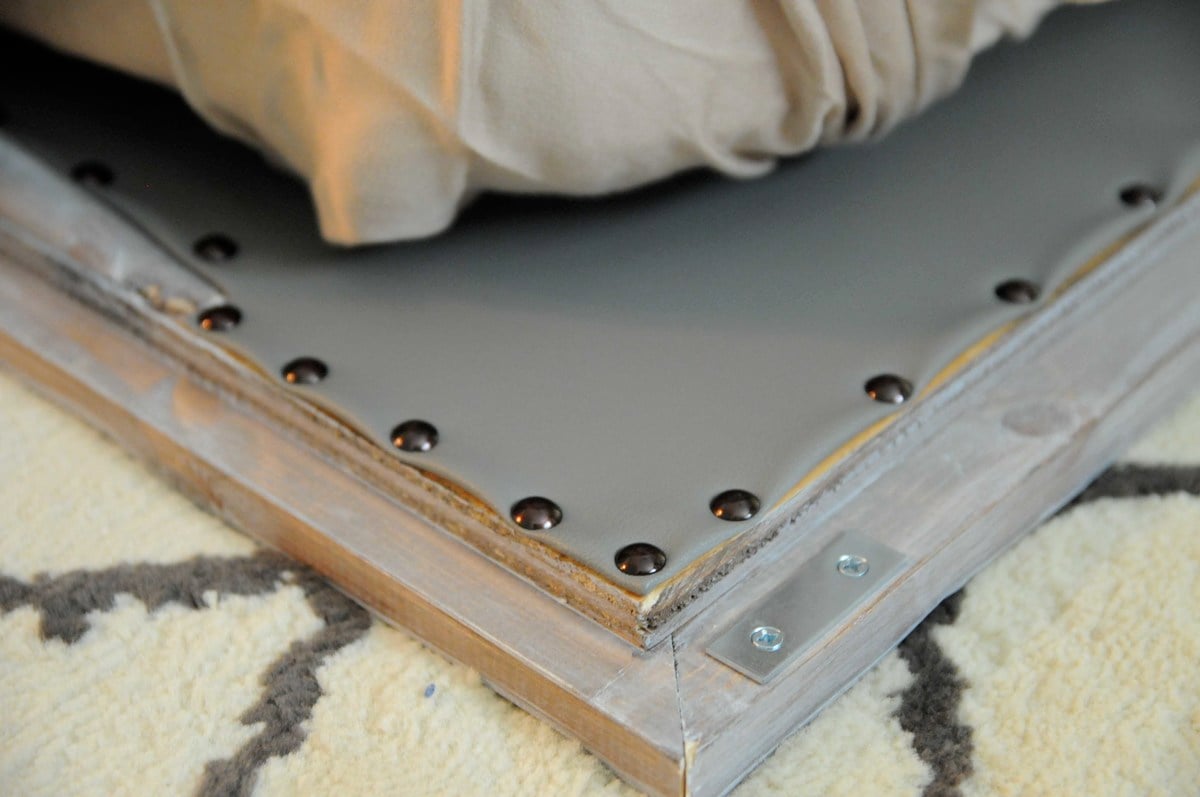
Using cheap pine boards, plywood, door hinges, vinyl upholstery and stain I constructed the wall bed you see here. It really wasn't that difficult but facing it took the most time. To give the boards a more rustic look I used a utility knife to shave off the edges/corners and stained them with the Minwax American Walnut water based stain and the Minwax White Wash Pickling. When this started we thought we were going to have to settle for something unattractive and less than desirable. Seeing it in our office now, we love our new bed and actually think it makes the room look much better! I didn't keep track of costs, but it couldn't have been more than $150.
Tue, 07/08/2014 - 08:08
Looks great! May I ask what the final outside dimensions were? Curious to see if this would work for me.
Thanks!
Wed, 08/06/2014 - 09:23
I would have to measure it when I get home... at work currently. Looking back, I think the best approach is to take the measurements from the plan, find the difference between standard mattress and queen mattress dimensions (check wikipedia for standard sizes), then add that difference back to the plan. I cut it real close on mine and could use a little more space. It would be nice to make it a bit deeper and with some head room to store comforters and pillows.
Sat, 03/21/2015 - 08:32
To fasten the facing I used wood glue then a Ryobi 18ga nail gun. It's part of their 18v One+ line and works great!
Sun, 12/28/2014 - 12:59
I am dying to get started on this wall bed project. I keep getting this message when trying to open the Plans.
The page you are looking for is temporarily unavailable.
Please try again later.
can someone help me find them.
Sun, 12/28/2014 - 12:59
I am dying to get started on this wall bed project. I keep getting this message when trying to open the Plans.
The page you are looking for is temporarily unavailable.
Please try again later.
can someone help me find them.
Sat, 08/15/2015 - 12:05
did you ever find the plans?
I'm having thee same problems

Tue, 08/09/2016 - 15:24
Hi. I would love to try this. Looking to build in the next month before parents in law come over. Is there any working links to the plans??
Wed, 01/24/2018 - 21:42
WHERE CAN I FIND THE PLANS, MATERIALS LIST AND DIMENSIONS? THE ATTACHED LINK TO YOUR ARTICLE LEADS TO A TWIN SIZE BED. THANK YOU
Thu, 01/25/2018 - 06:30
is there a link to the plans? I can't find them and I really want to make this

My hubby took the plans from the Triple Pedestal Farmhouse Table and altered it to make it just over six feet. It is perfect and accommodates our smaller dining area space.


Fri, 02/15/2013 - 07:23
hi! could u post/share how he altered this from the larger plan? love it!
Wed, 10/09/2013 - 10:09
I love this. I planned on reducing mine to 6 feet. Do you have the altered plans? Thanks.
Wed, 10/09/2013 - 10:14
Hi. I went to martha.anna blog. This is the comment she posted on the dimensions.
From martha.anna:
I've had many emails and inquiries about the dimensions of this table. So, here's what I've been sharing with everyone...
Our dining room is 11 x 10 and there is a lot of room around it to fit in a hutch and still walk around easily. (Just for size reference.)
The overall length of the table is 6' 4.5". It is such an odd measurement so that the strips of board (1x6) on the tabletop would look in proportion. They are 33" long (the 1x6).
The beam across the bottom is 55.5" from outside edge to outside edge and my husband left 1/2" showing.
The pedestals are 10.5" from the end of the table.
Phew! I hope all of the information helps everyone out there! :)
Sat, 11/16/2013 - 09:27
Hi there what would the revised materials needed list be? Also did u notify the benches? Do u have the dimension on that? My step dad is building this for me it's my job to get plans and supplies. Thank you for your help I appreciate it!!
Mon, 01/13/2014 - 14:20
Oh my. After several months I'm able to get all the material needed to do this table. I did the legs a couple of months ago. Now it's time to complete the rest. Hopefully, I can do it in a day's time - hopefully :).
Fri, 01/12/2018 - 09:04
Ill be making this table whcih is in the same design as the original triple pedestal table but Ill be making it smaller. Are you able to give me the measurements for this modified table? Do I make my top first and then the pedestals? I feel like if I make the same pedestals, then Im forced to make this a 40" wide table, and I only want it about 35-37".
Thanks!
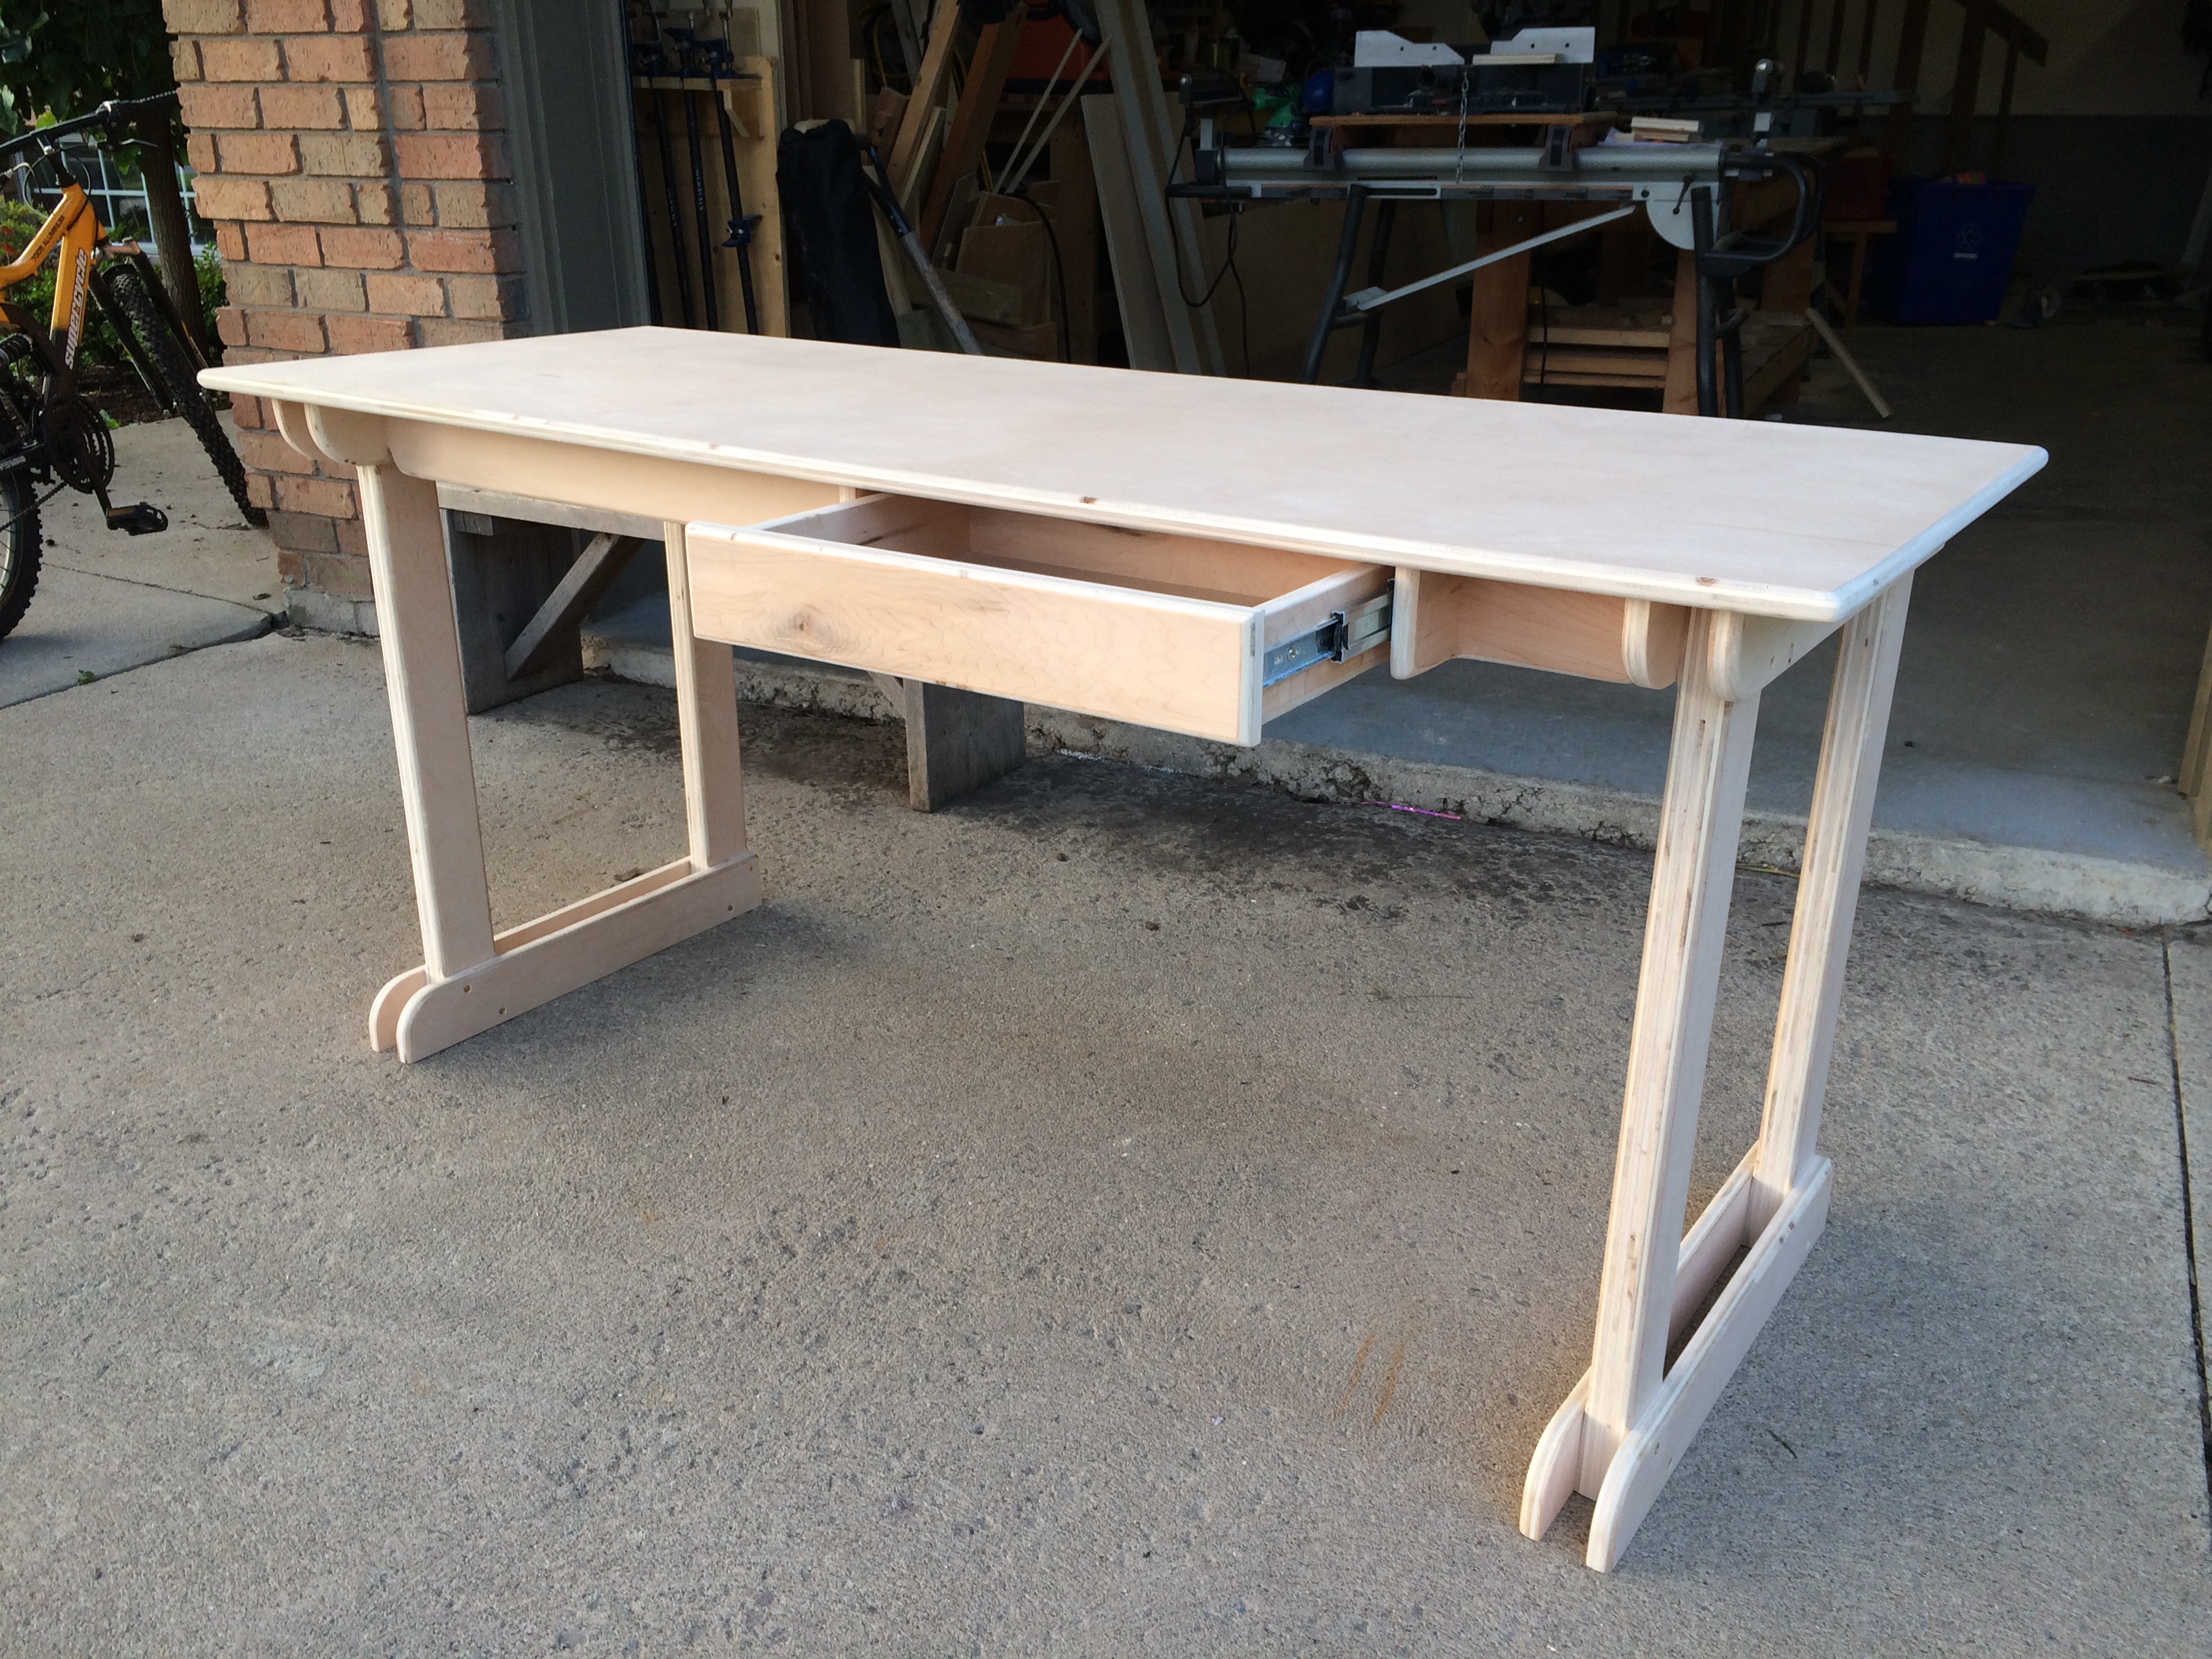
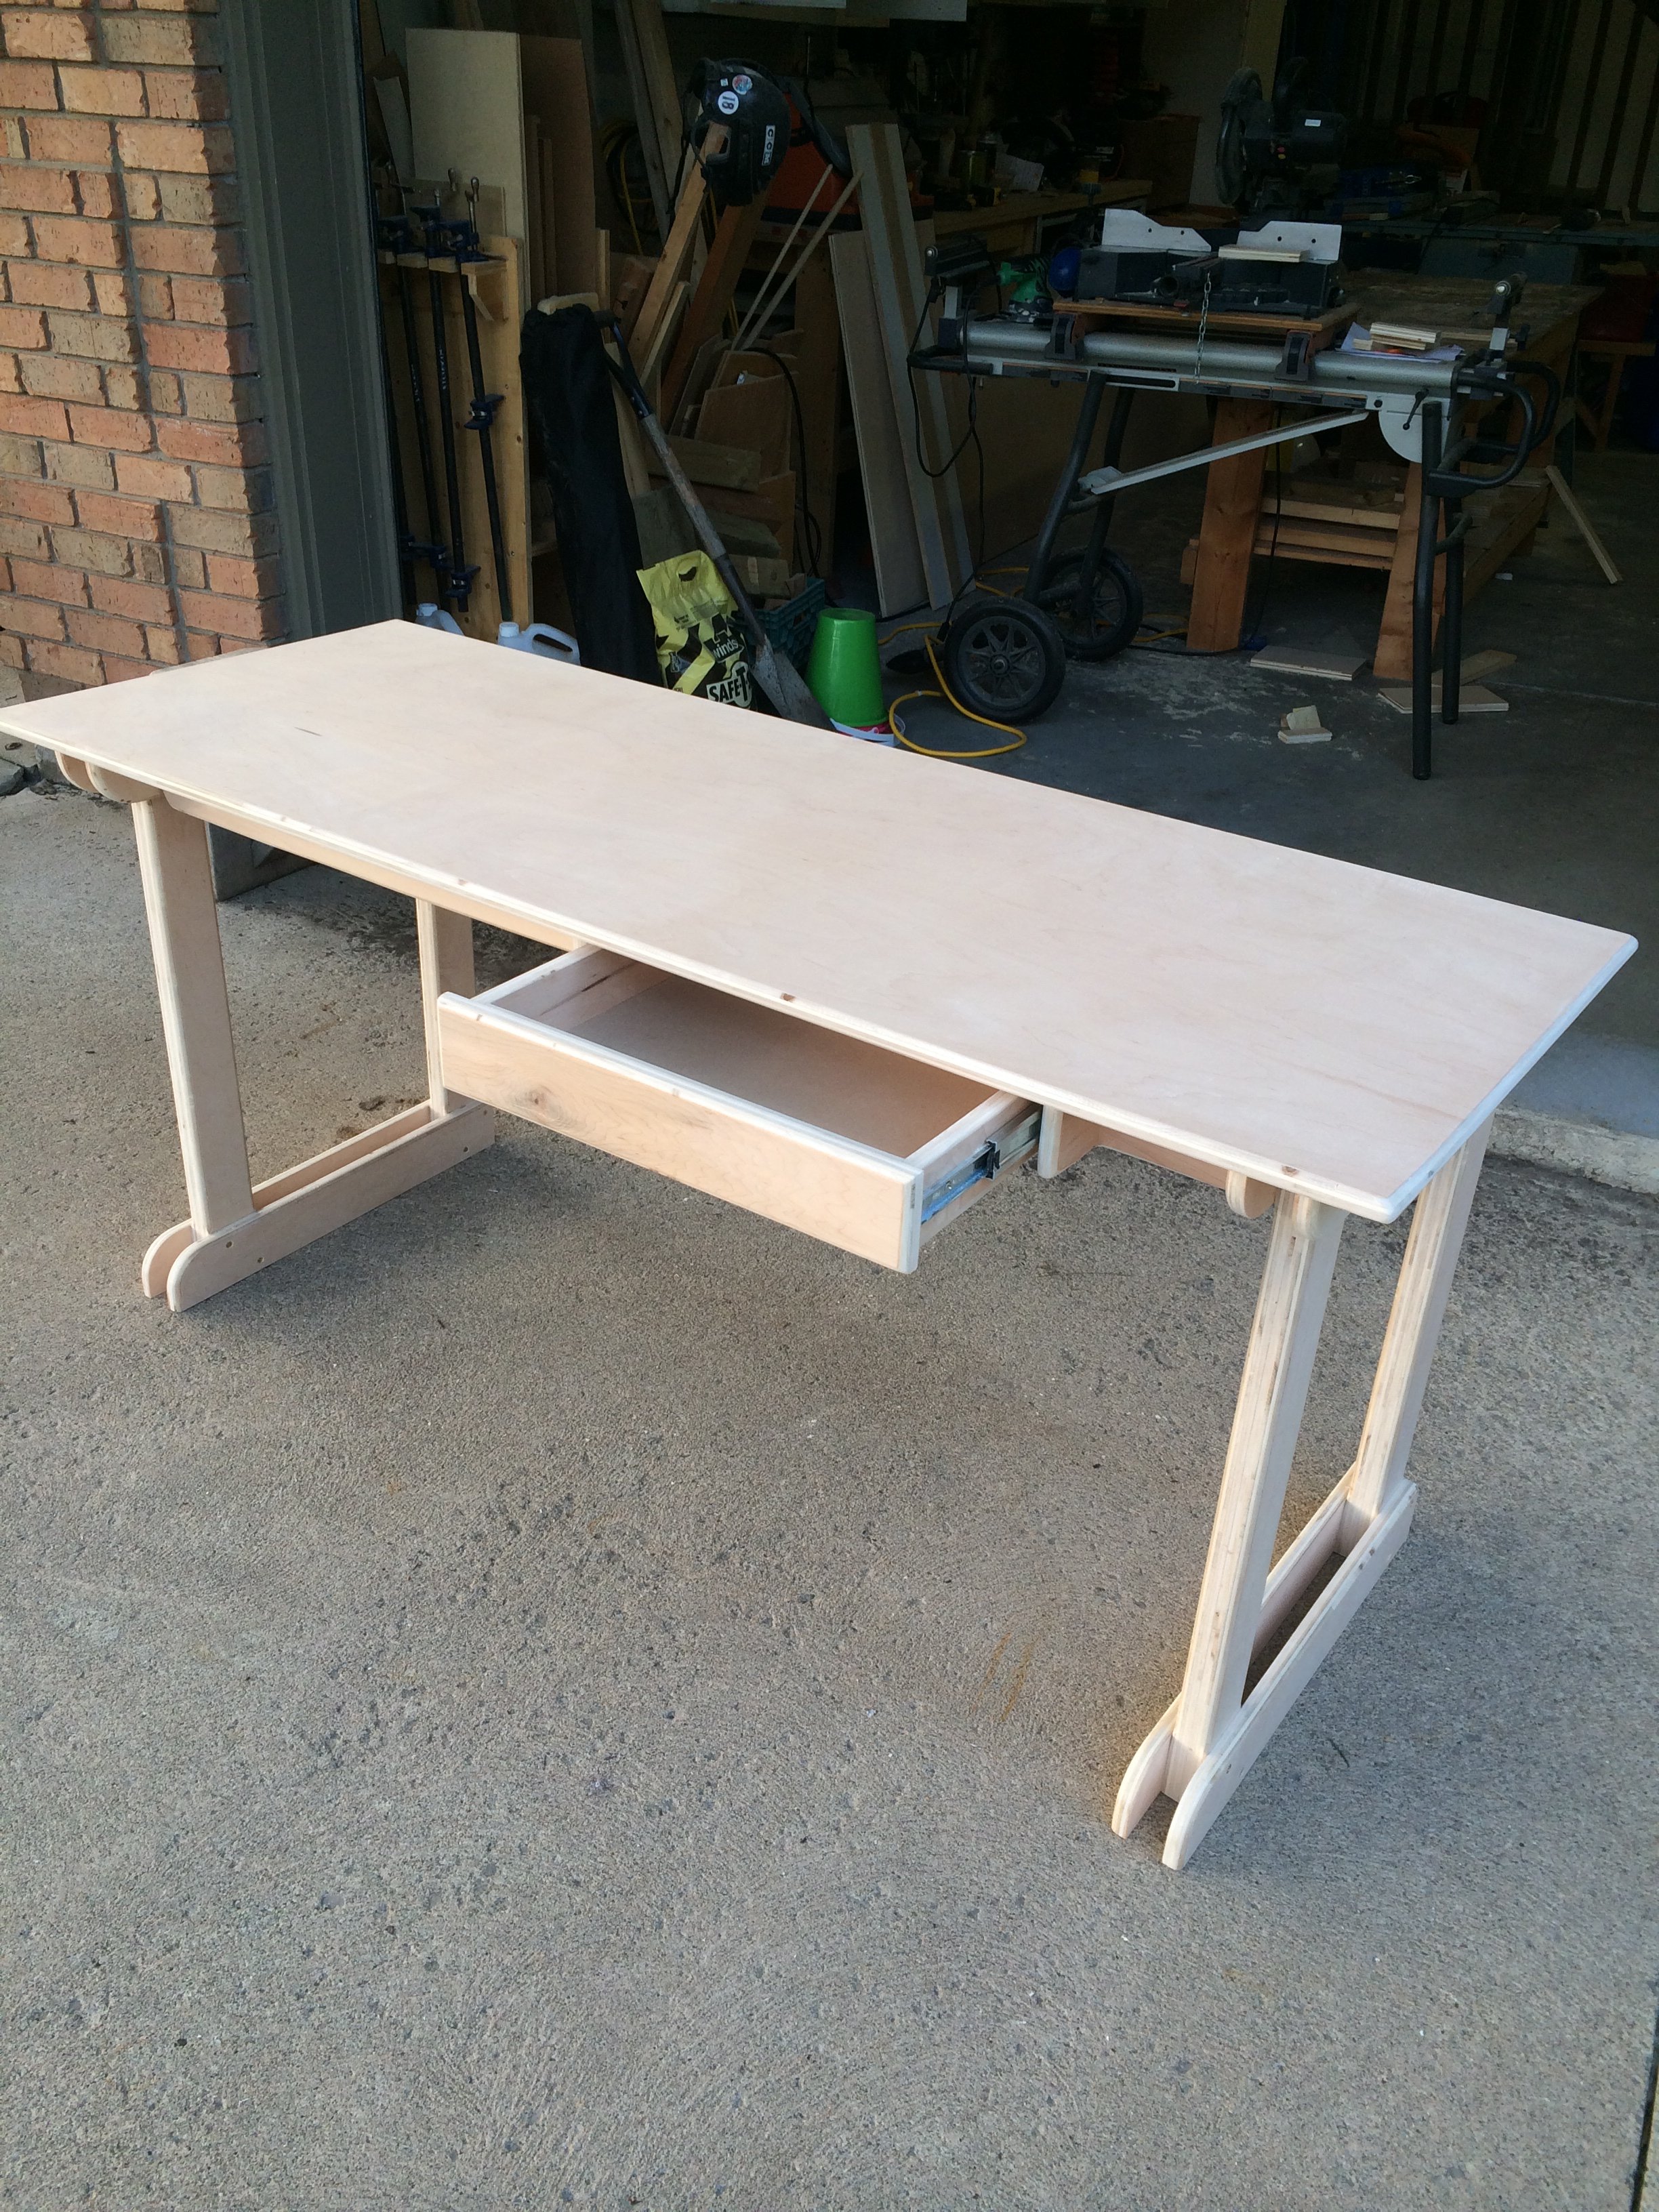
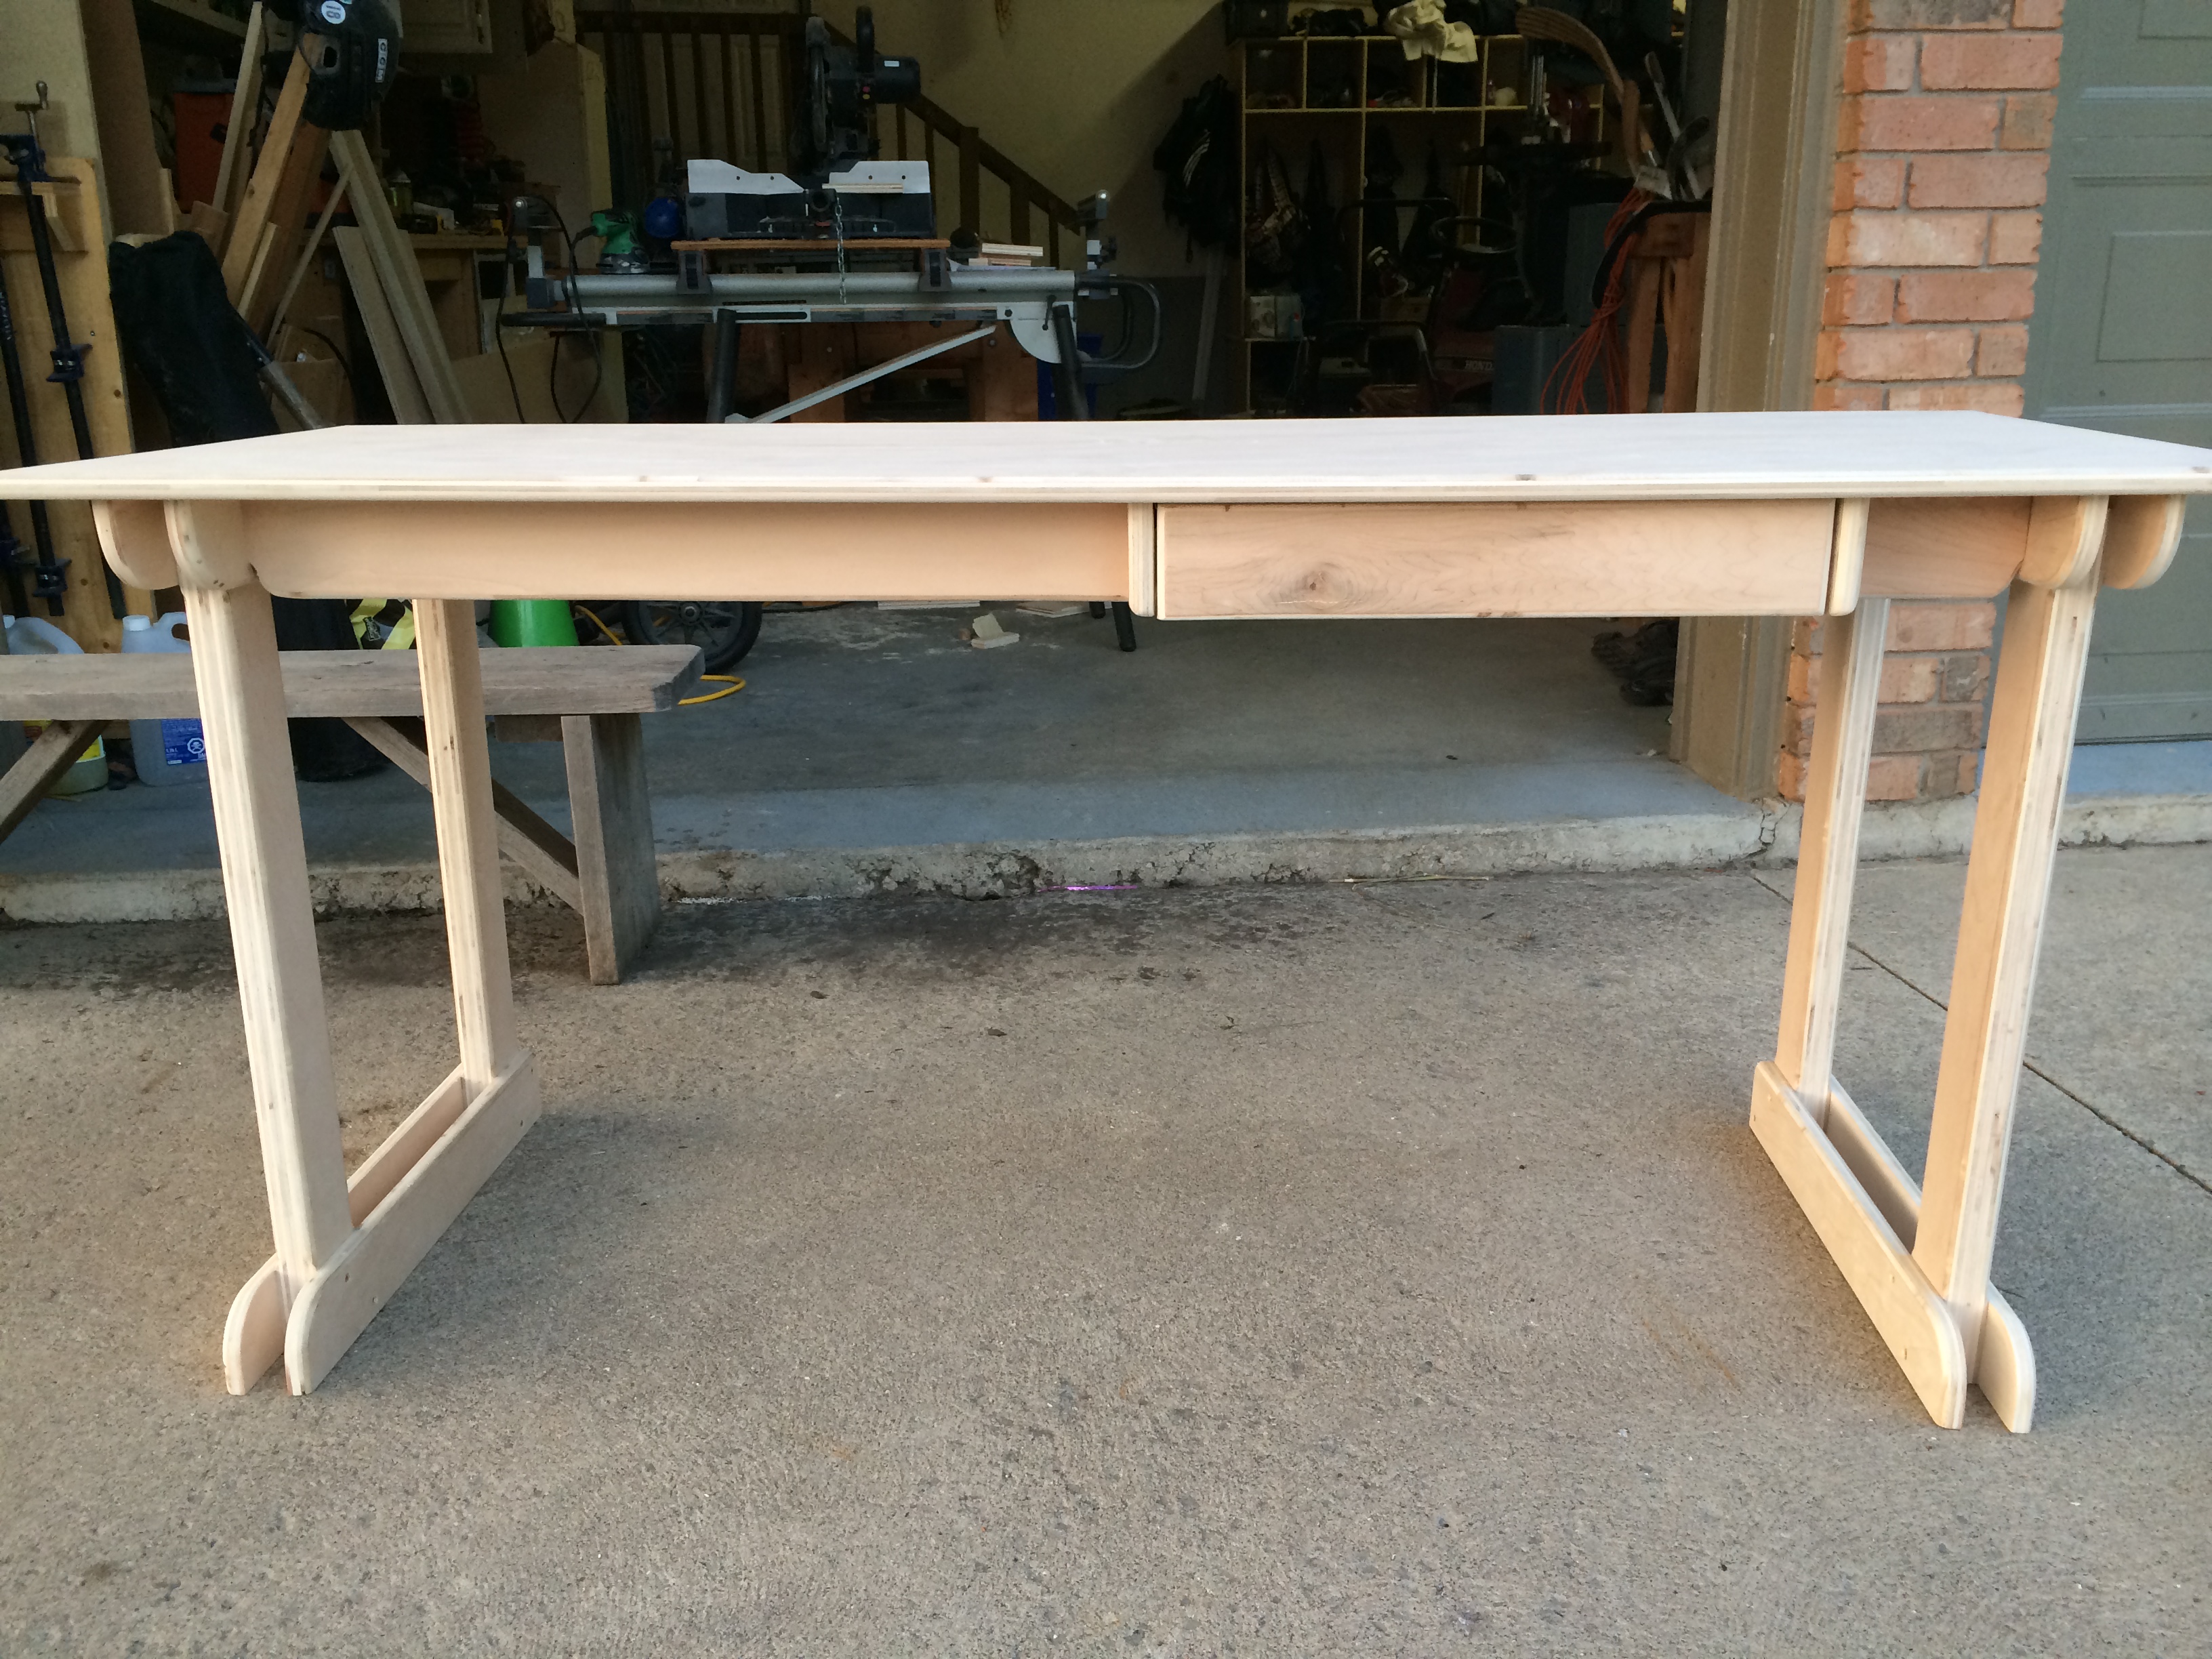
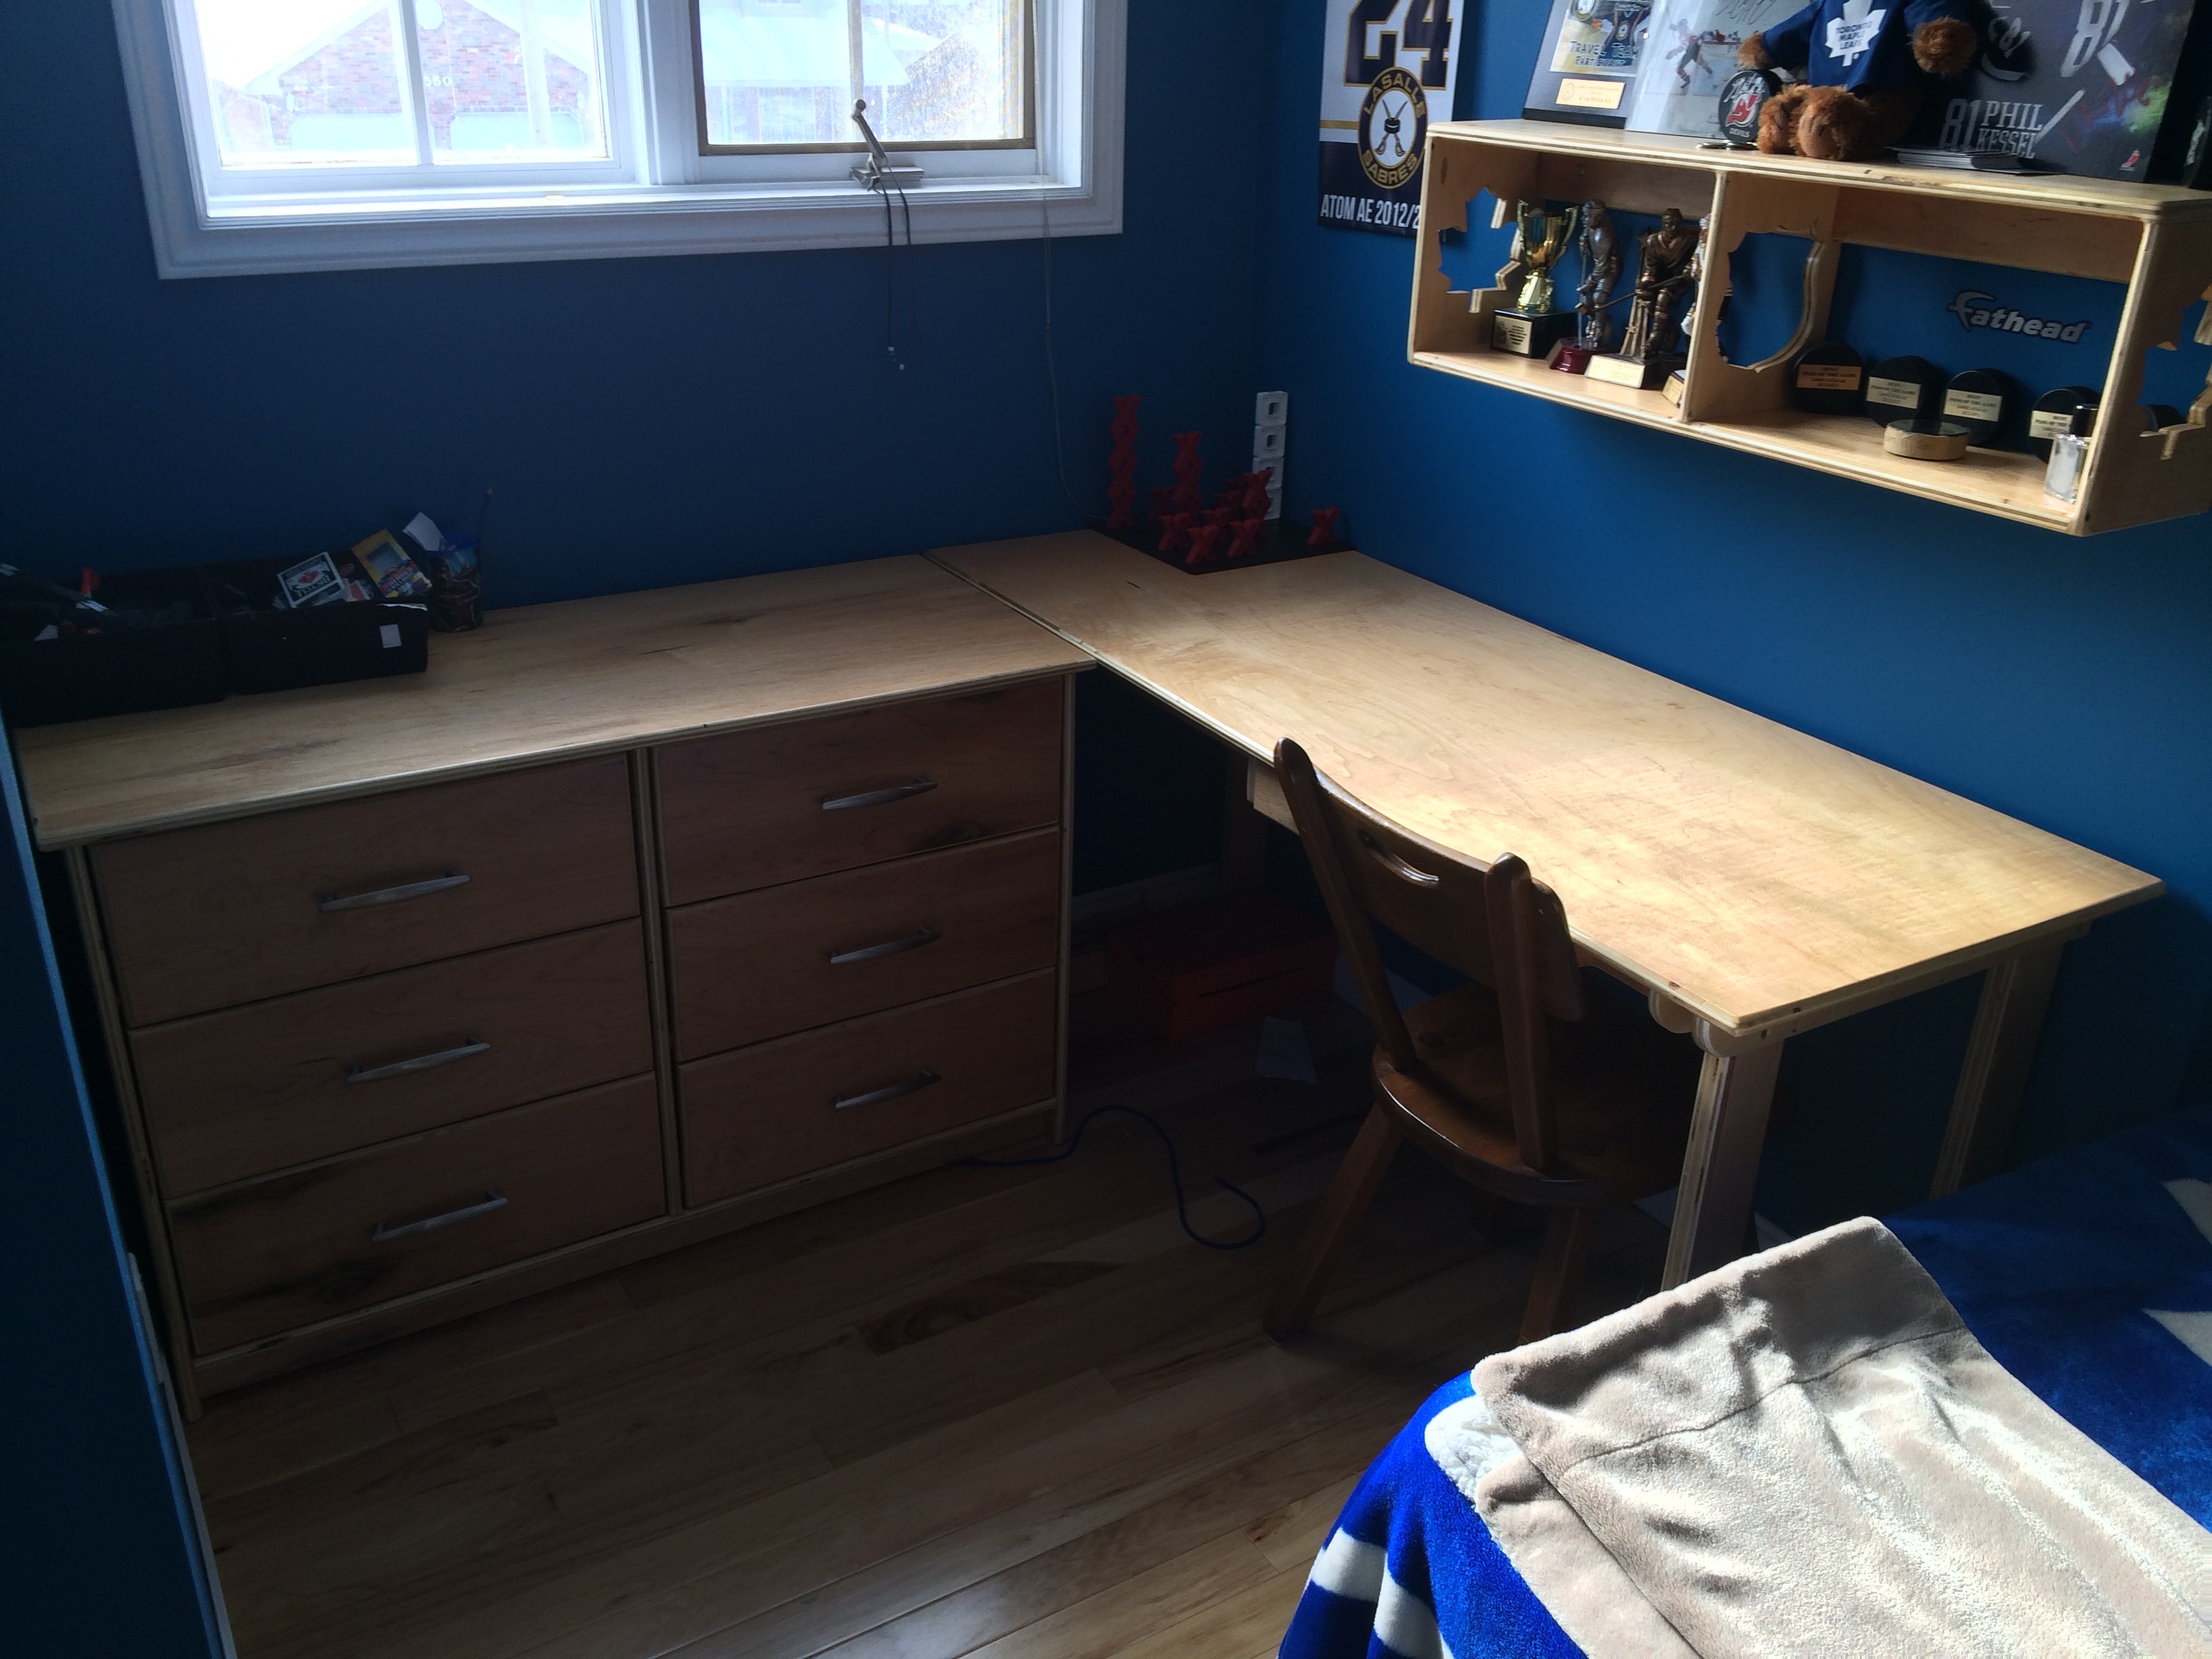
Simple desk made from maple veneer paint grade plywood. It's very sturdy and looks great. The last photo shows a matching dresser that I made as well. So far I've made two of these identical desks and another with 3 large drawers underneath to one side. You don't have to have alot of fancy tools and expensive wood to make great looking, sturdy, and functional furniture. As always, sketchup plans available!

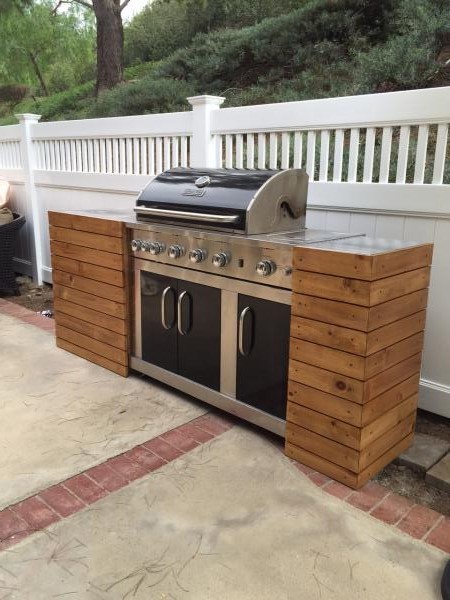
This was just a standard BBQ with an attached folding table. I used a combo of Ana's plans to add a little character and style to the BBQ and it made a huge difference in not only the BBQ, but also the backyard.

Mon, 05/23/2016 - 12:29
Hello: Very interested in which plans you used to build the BBQ Built In. Thank you.
Wed, 06/08/2016 - 09:22
Hello dbryant1977, please share the plans. Also, what's brand/model of BBQ? Very nice.
Thu, 04/09/2020 - 18:27
This is my guess on the plans used! https://www.ana-white.com/woodworking-projects/diy-grill-island-featuri…
Fri, 08/30/2019 - 09:50
Are there plans for this project or at least some pictures from while you were building it?
Thu, 04/09/2020 - 18:27
This is my guess on the plans used! https://www.ana-white.com/woodworking-projects/diy-grill-island-featuri…
Wed, 04/22/2020 - 15:52
Can you provide us with the plans for this? I would love to build one.

Mon, 03/04/2024 - 14:49
Hello: Very interested in which plans you used to build the BBQ Built In. Thank you.
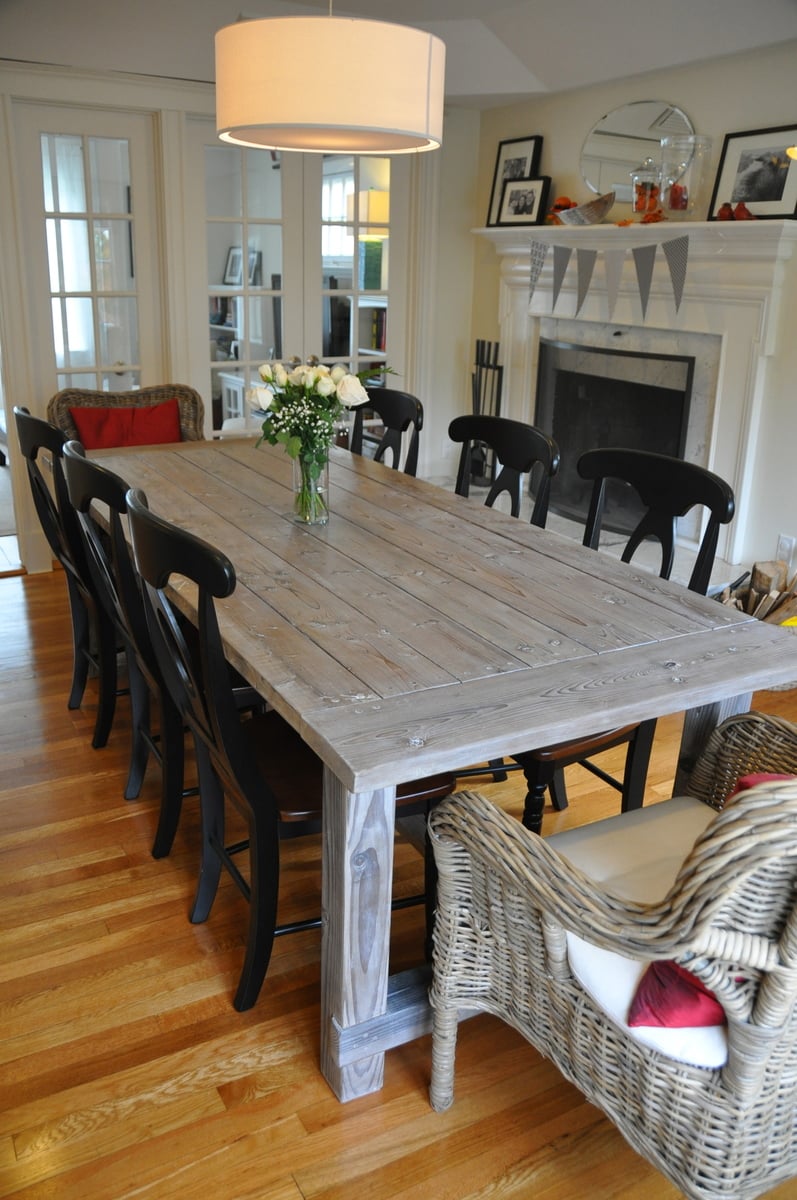
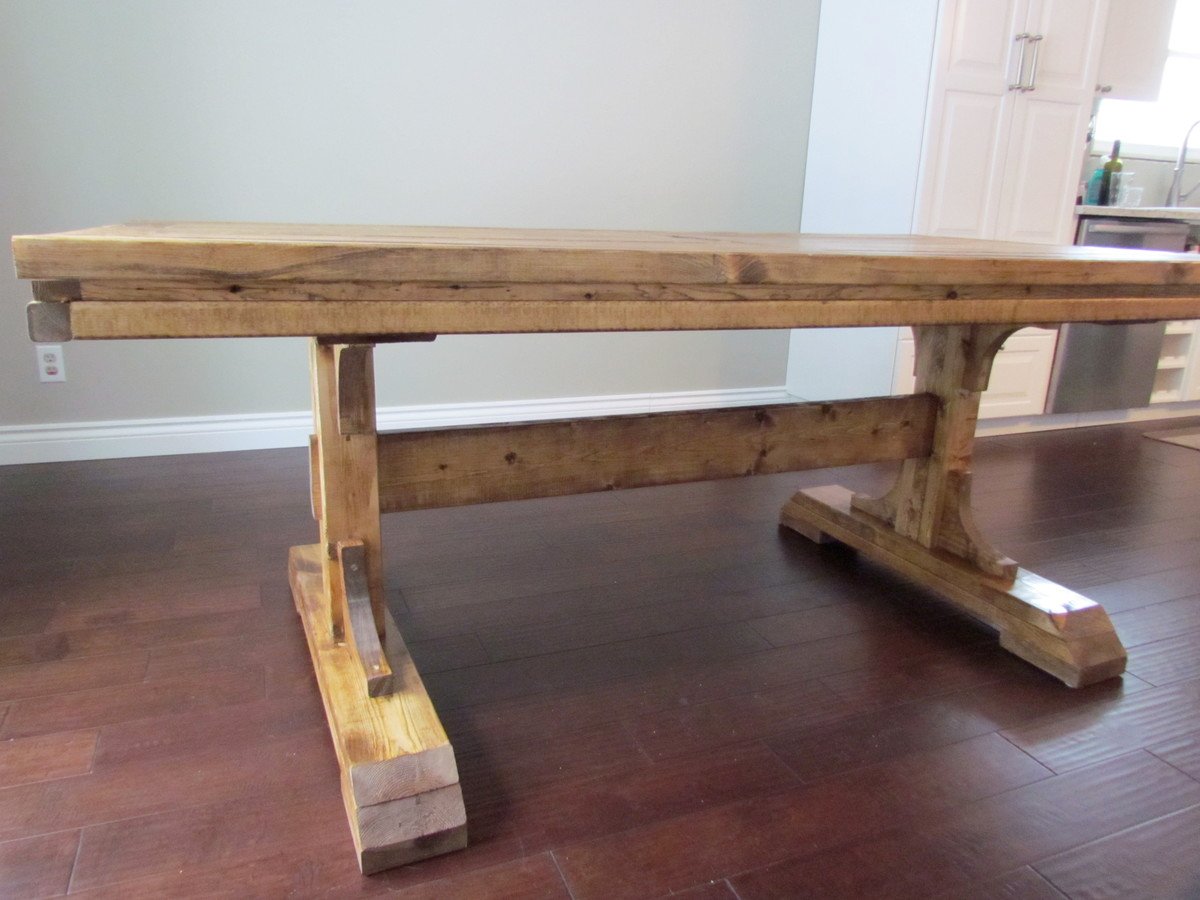
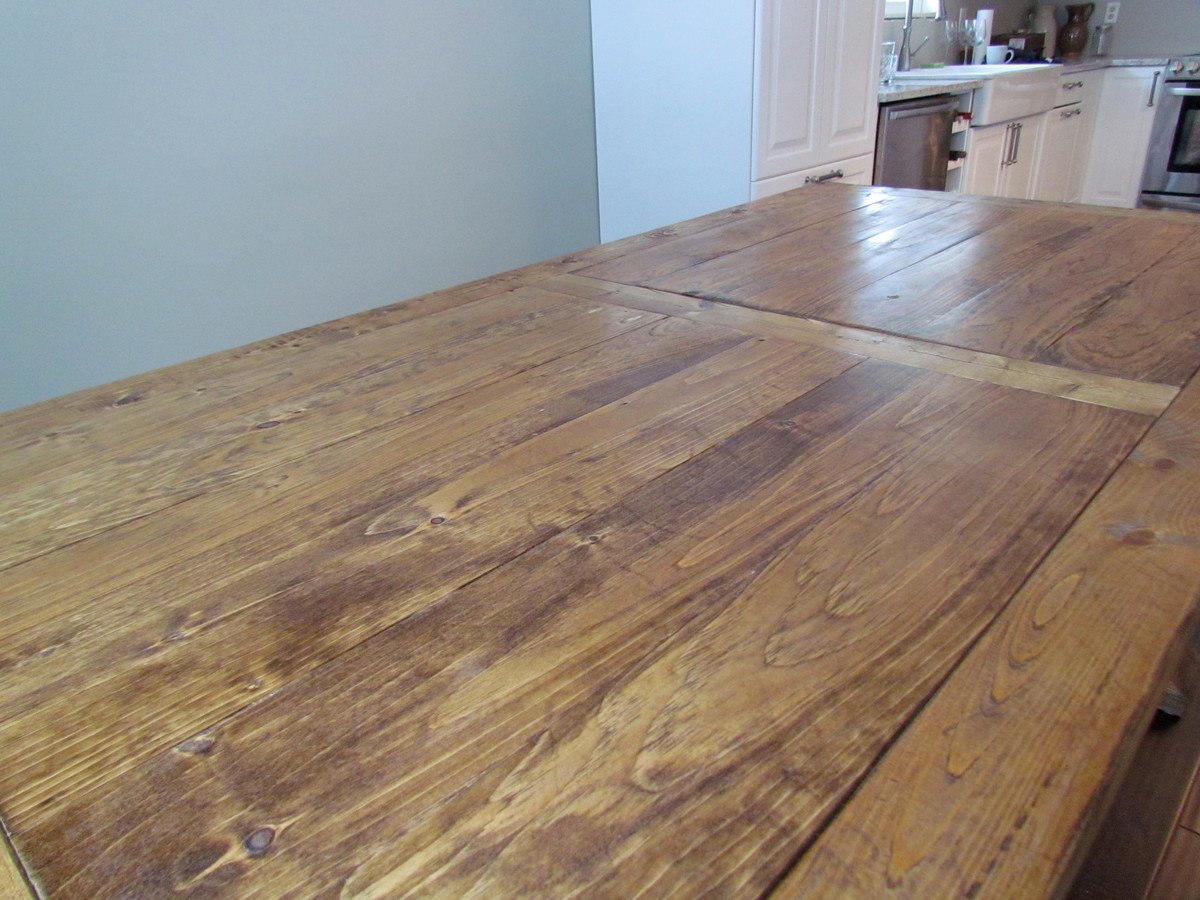
This was my first build and I learned A LOT and watched A LOT of youtube diy videos. The main take-away from this project is not to build in the freezing cold if the finished project is for inside. I finished this project in below freezing temperatures and I noticed that the wood expanded (increasing slightly the gap between the finished boards on the top) when it was brought inside.
I built this from the original farmhouse table plans with no kreg jig although I did buy and use a pocket kreg jig to make the extensions. The main modifications were using 4x4s such as were used in the Country Living magazine spread that inspired this build and also making modifications to allow the addition of 15" extensions at each end of the table's bread boards.
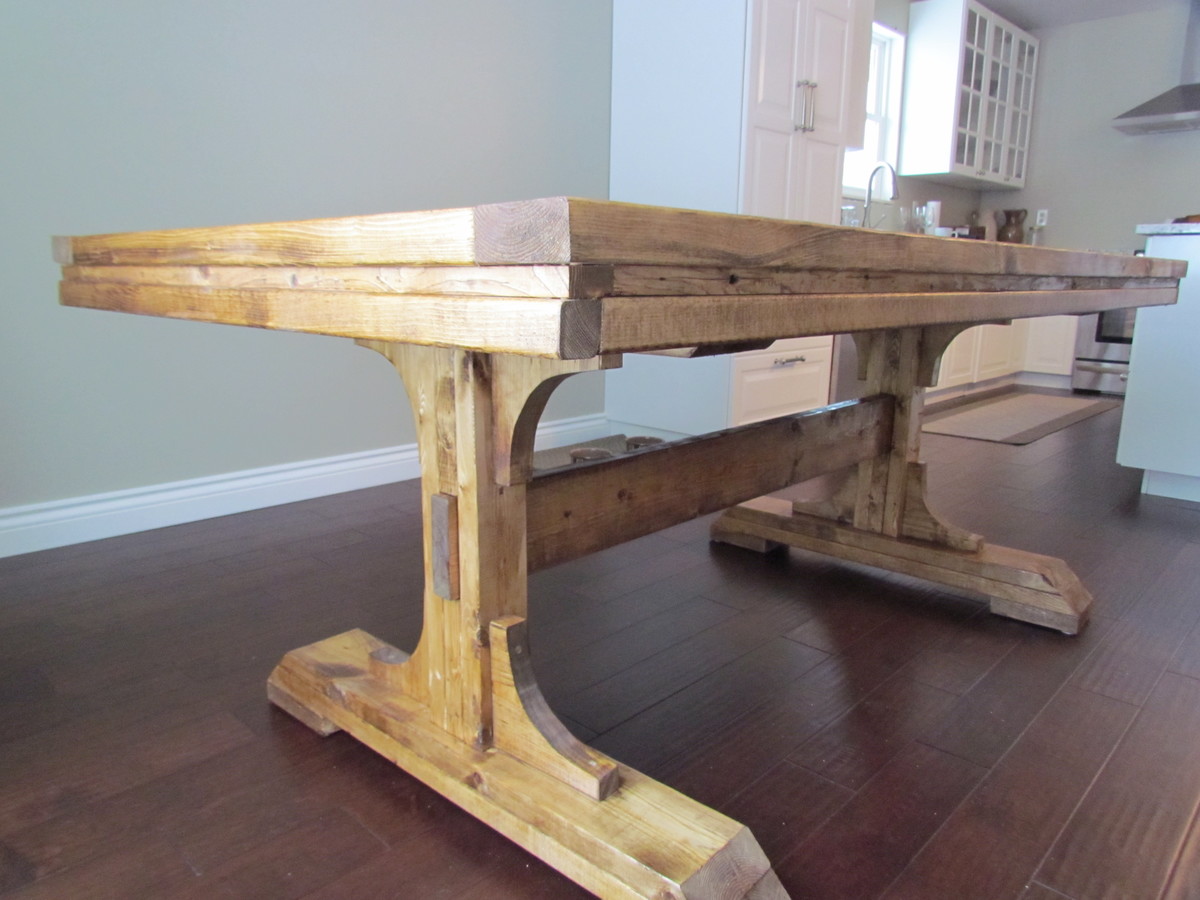
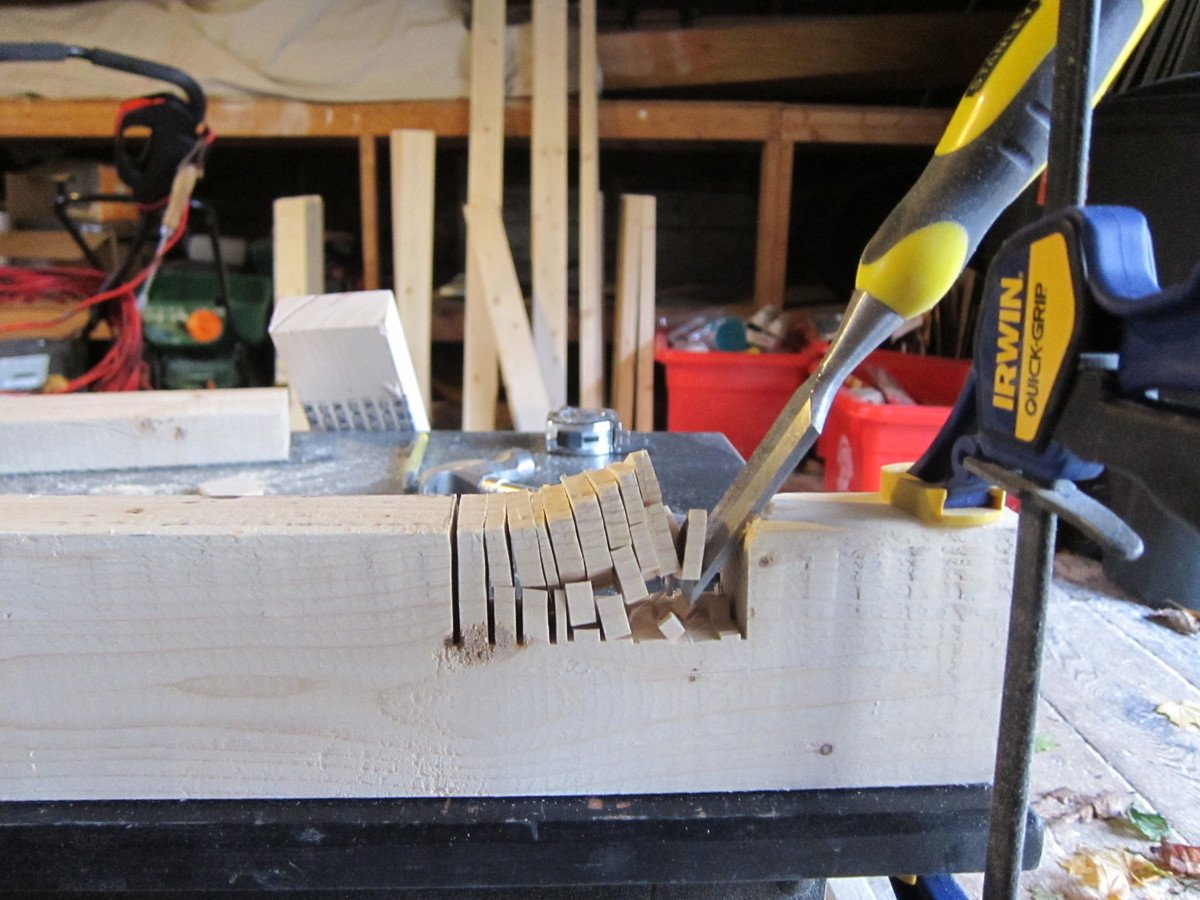
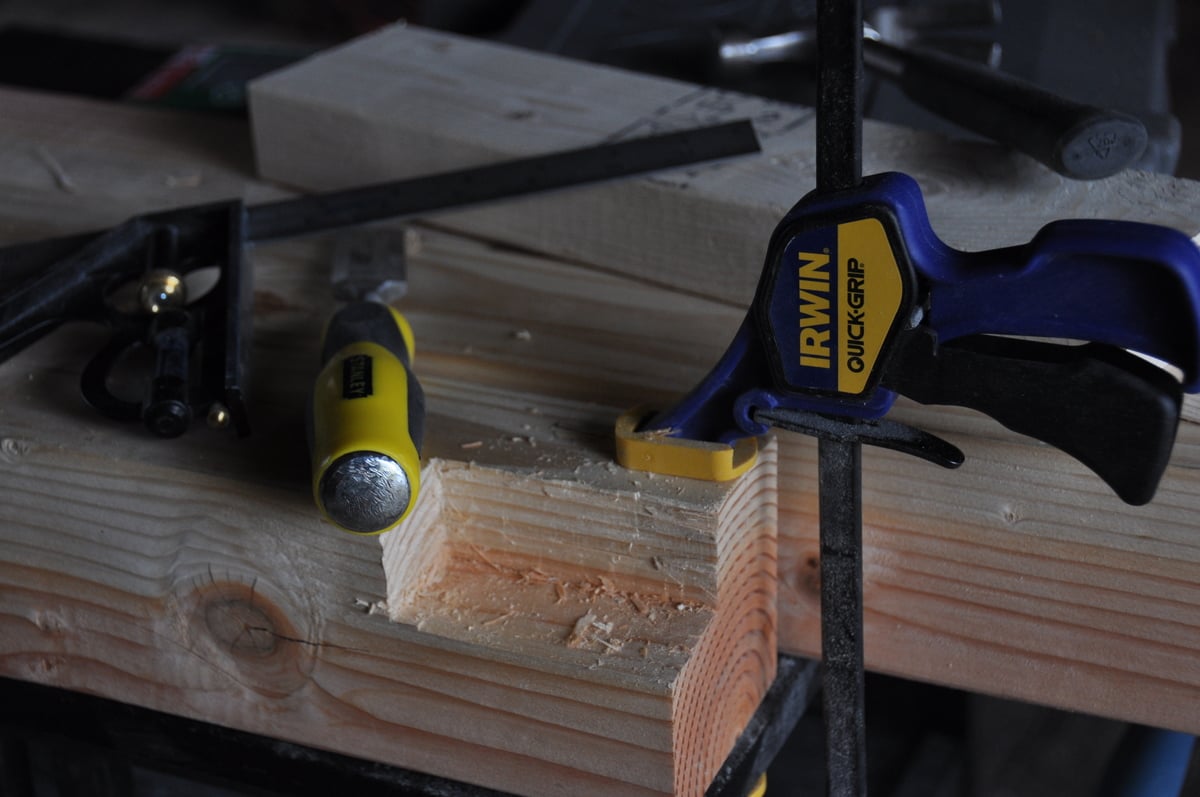
My first challenge was figuring out how to build with the 4x4 legs instead of the 2 2x4s screwed together. In order to accomplish this i had to use a chisel to create the corner lip that the table top frame would sit on. I added photos of this so I hope it will help someone. Chiseling these 4 corners (one on each post) only took an hour or two and was so worth it for the look of the 4x4s. Just measure carefully and work carefully with a sharp chisel. I actually removed half the wood by sawing off the corner at a 45 degree angle. Remember when cutting your boards for the table ends that a 4x4 has different dimensions than 2 2x4s screwed together. Compensate for this in your cuts.
Another challenge was hiding the screws on the table legs and table top. I was leaving the finish natural so didn't want to use wood fill. I accomplished this by getting a countersink bit and then buying wooden dowels the same diameter. For these screw holes, after finishing screwing, I put a dab of wood glue in the countersink hole, inserted the dowel as far as it would go, used a fine hand saw to cut off the dowel flush with the table and then used a hammer to make sure the dowel was in tight and flush.
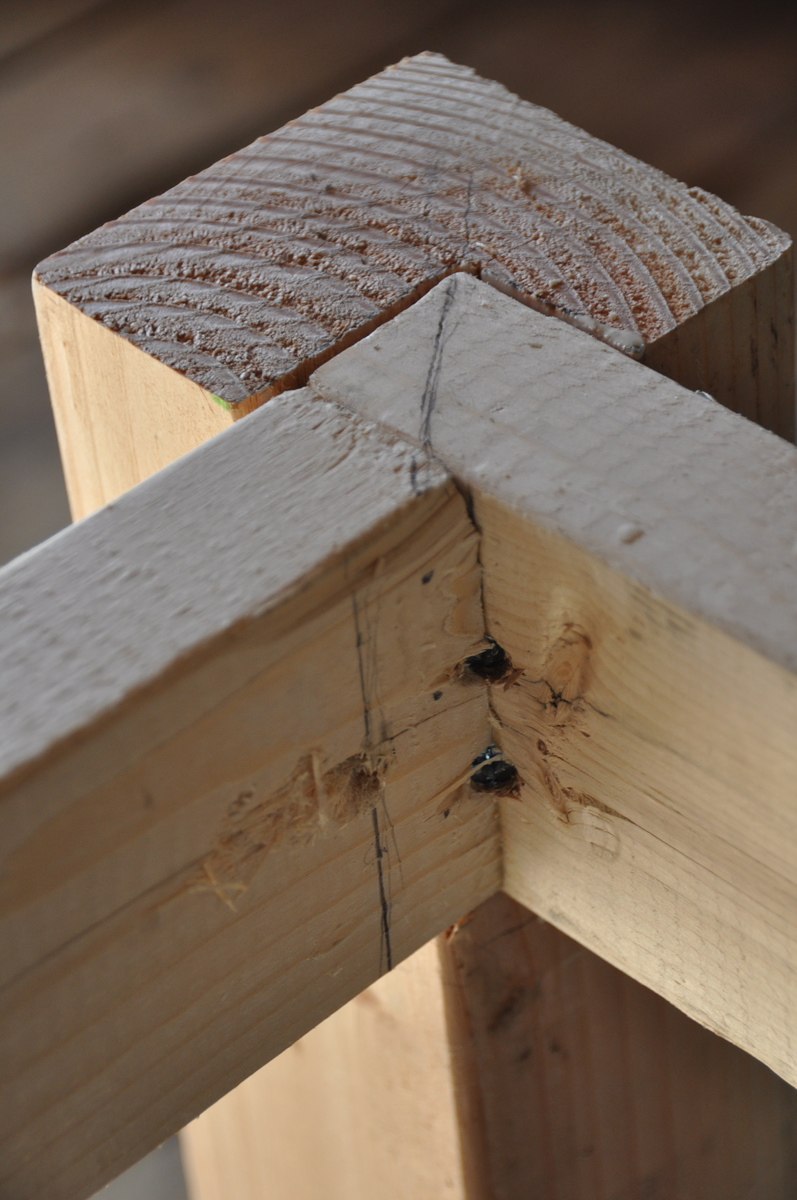
I had trouble figuring out how to attach the table top frame to the table legs with the long screws from the plans so I included a picture of this step. Its really easy but I was not able to use three screws as the plan calls for. I used two instead and it has been very solid. I used the long screws as proscribed.
Finally, I wanted to build extensions (2 2x8 boards kreg jigged together) so I could increase seating up to a max. of 12 persons, so I needed to cut out 2x2 gaps on the table ends. I also included a picture of these in place. To make room for the 2 2x2s that extend under the bread boards and table top to brace the extensions, I left out one of the 2x2 cross beams at each end of the underside of the table (the boards that the table top boards screw into).
I hope this is helpful to you!


Mon, 02/10/2014 - 11:55
Great job on the table! I love...I had visions of this table before I saw it. I wanted to use the 4x4's for the legs as well, the same finish. I am concerned now about the 4x4's because I am an amateur and I think that may throw too many wrenches into my plan. I started with the bench, finished in 3 hours I have patted myself on the back. Plotting on a Kreg jig right now.
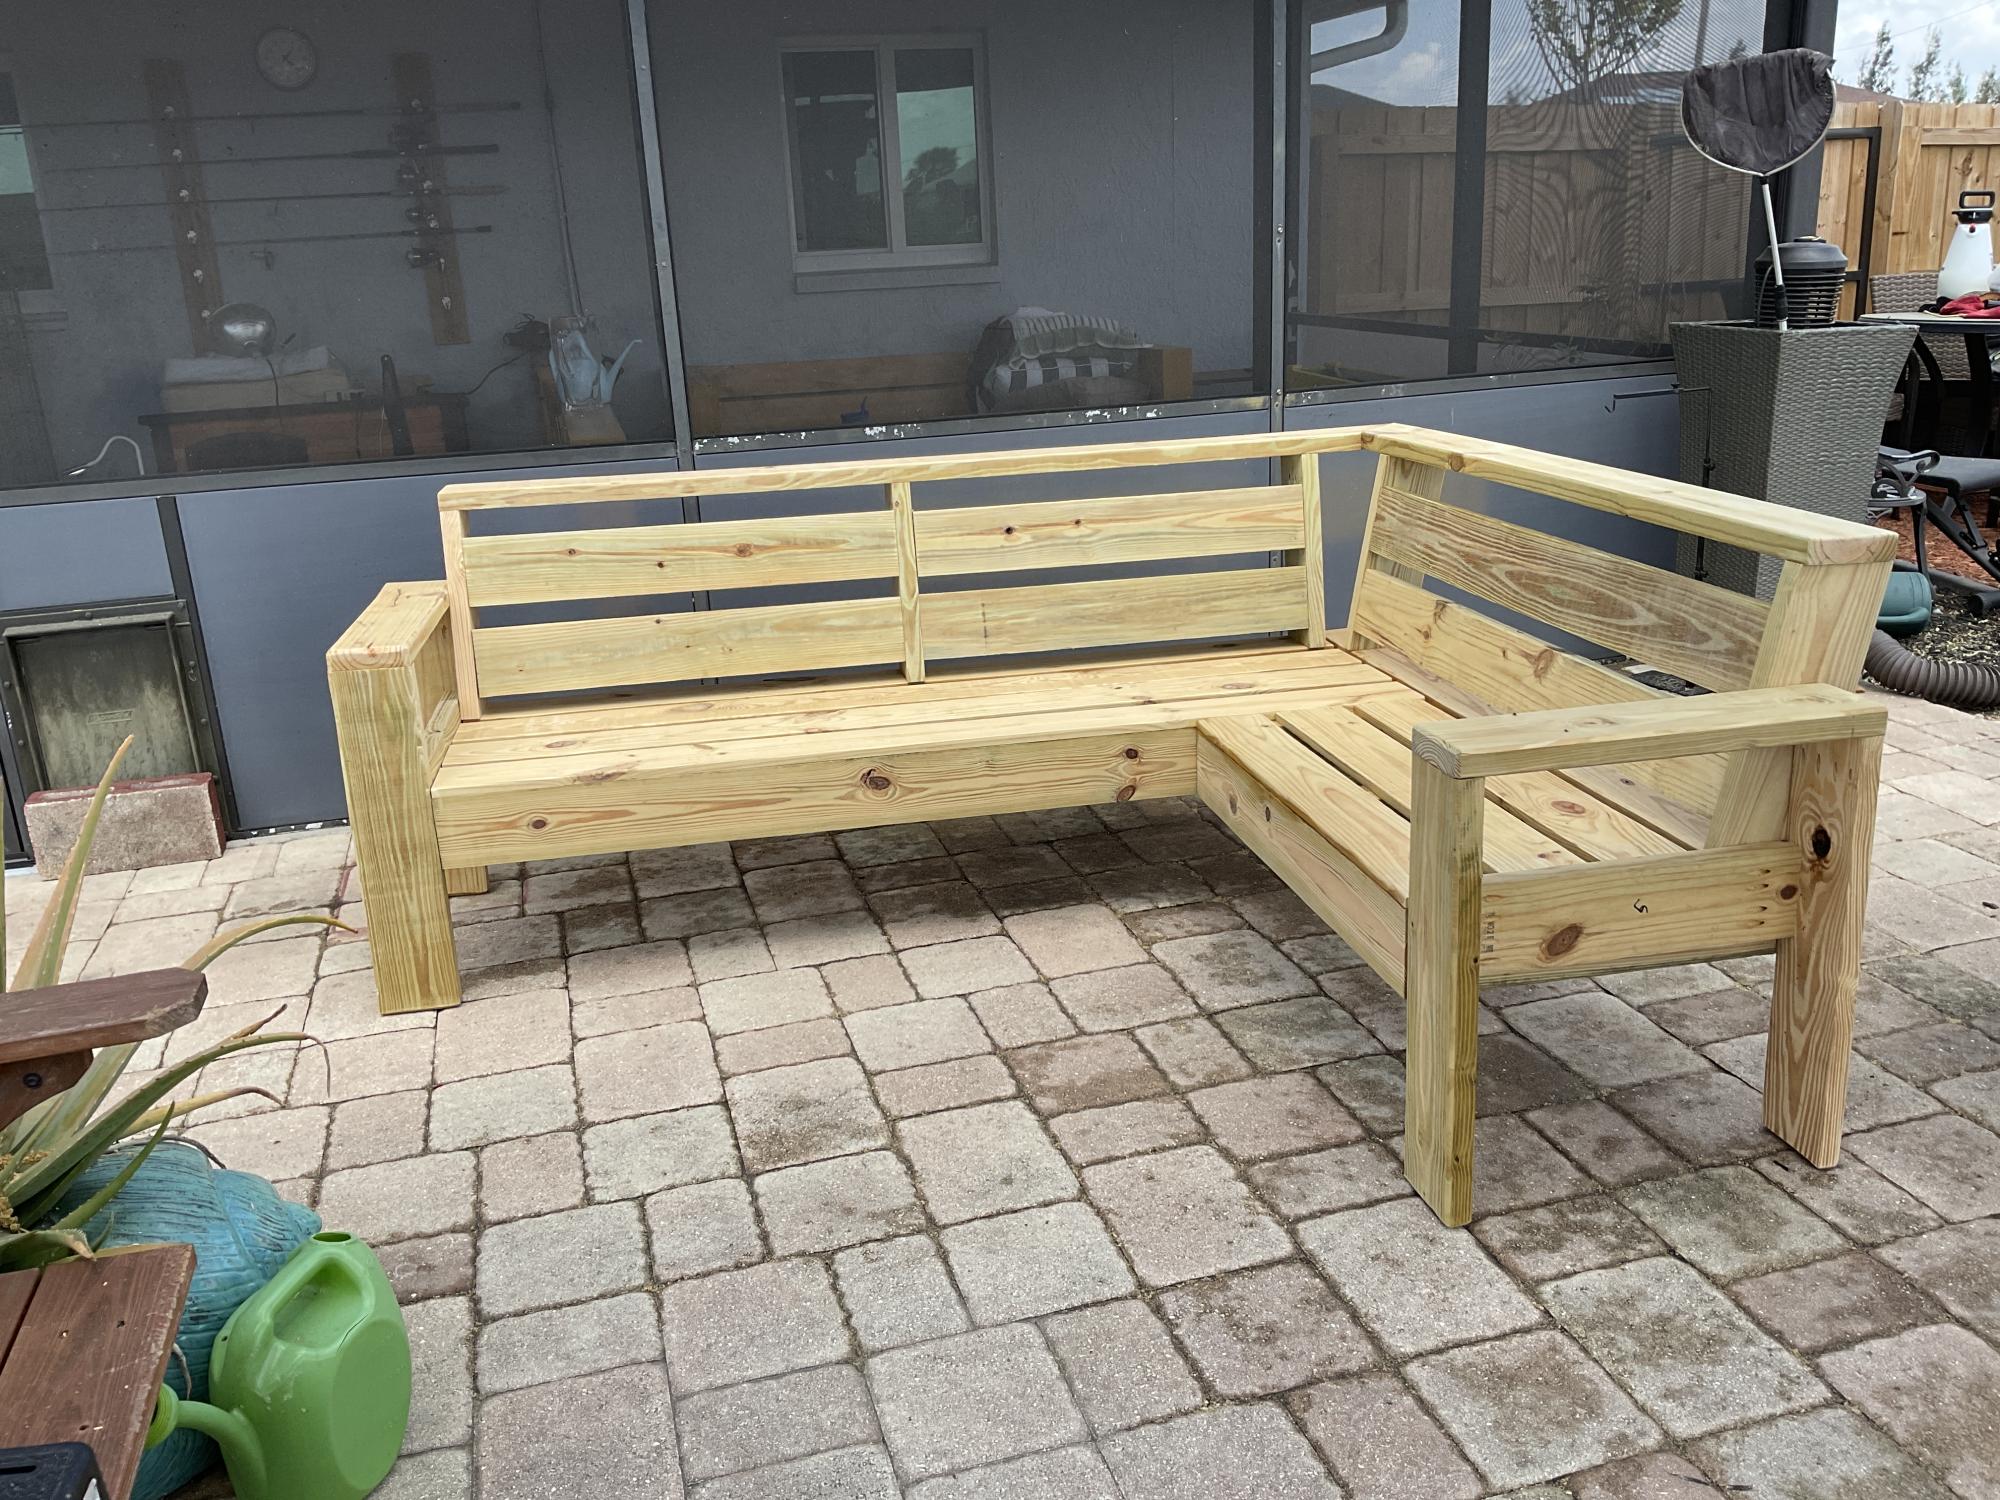
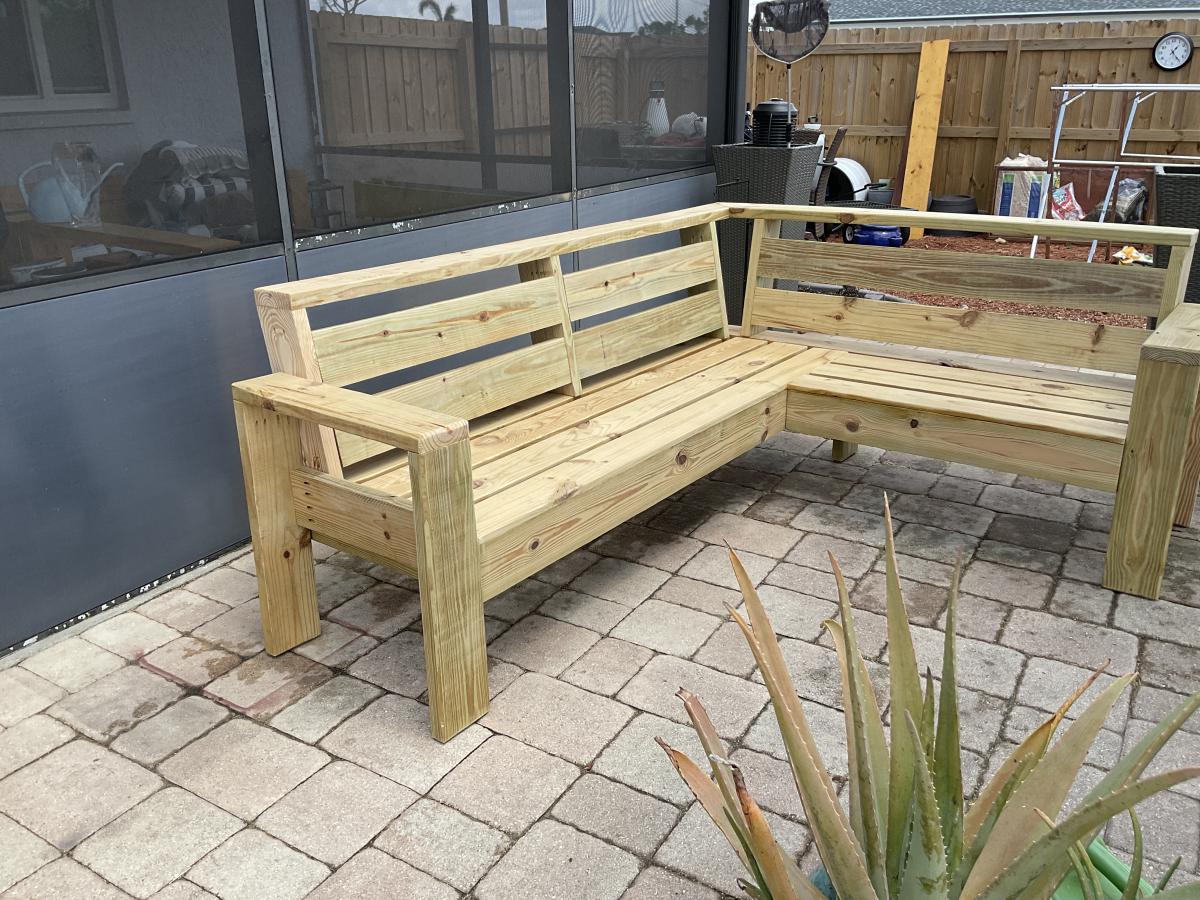
This was my seventh outdoor couch but my first sectional. My very first couches were all inspired by Ana White's plans and I have gotten so much better with my skills that I building other things as well. Thanks Ana for all your inspiration!

I've been planning on building a patio table for this coming spring and summer, but didn't know where to begin. I found Ana's wonderful site and now I don't know where to stop! So many great ideas.
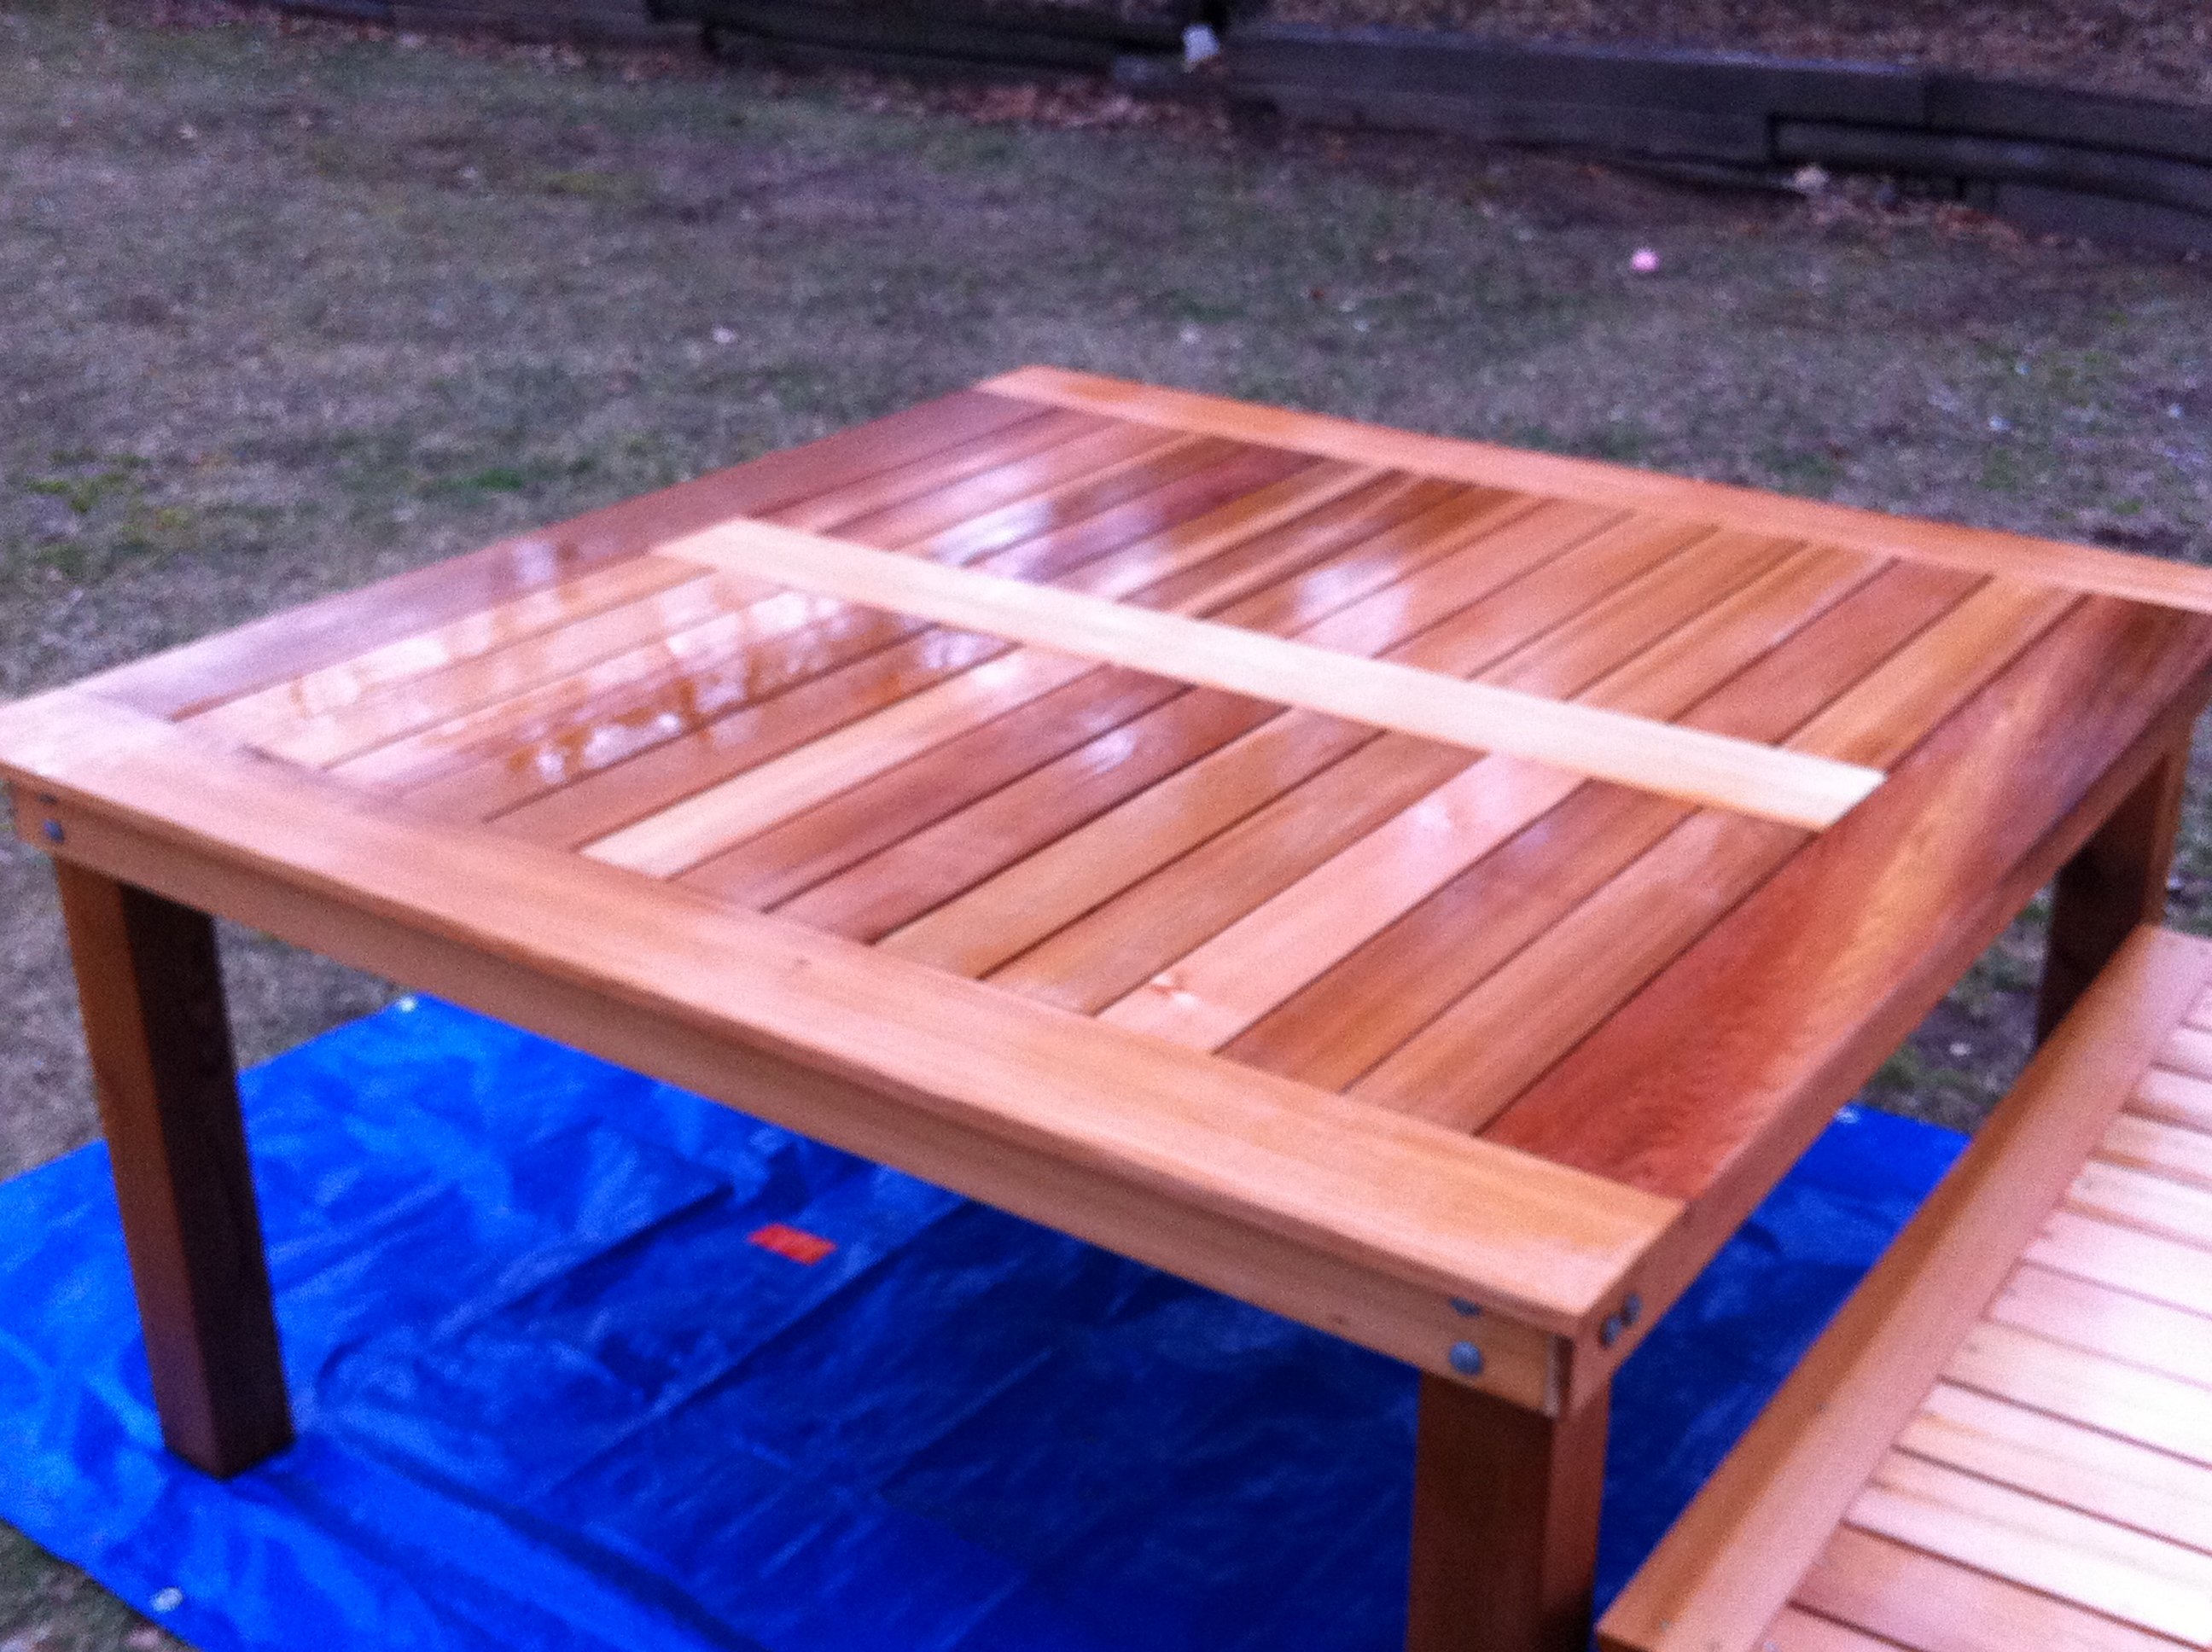
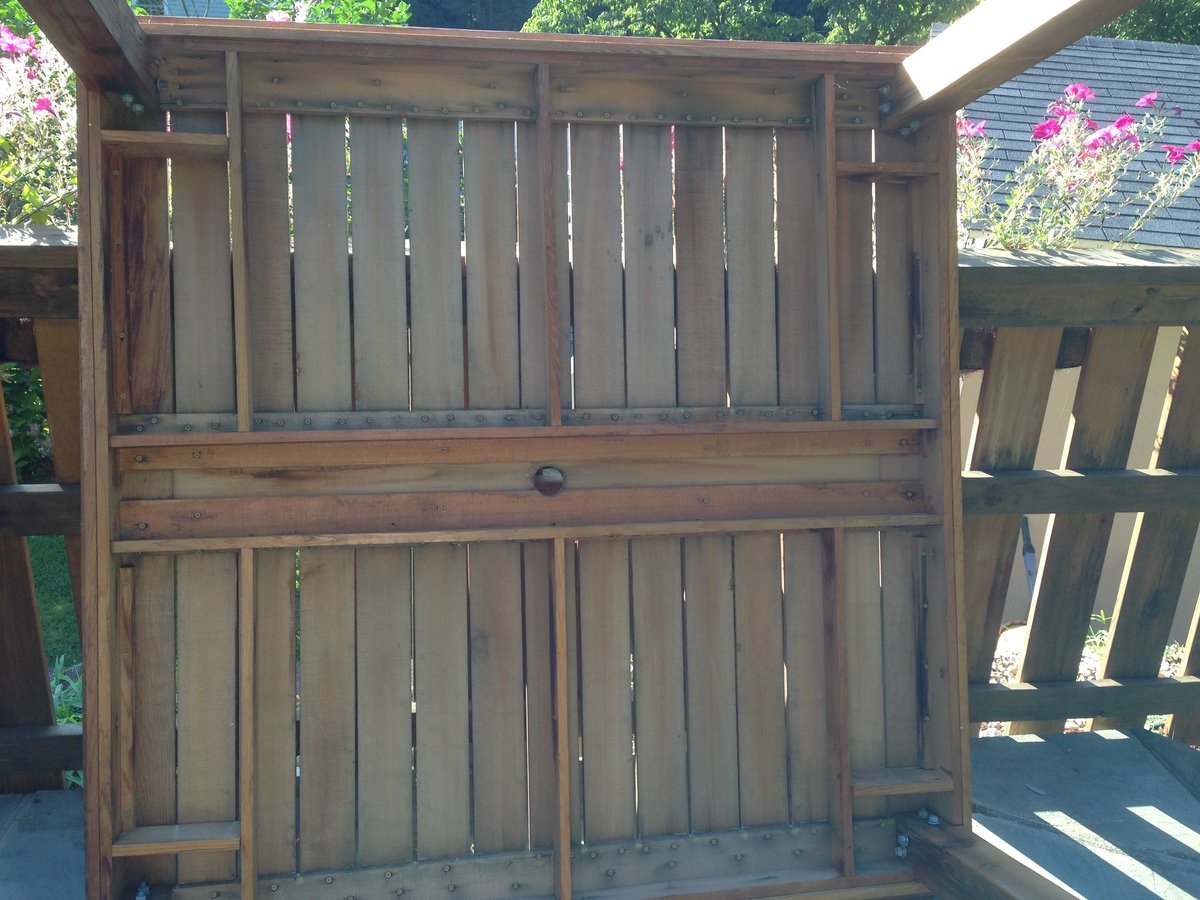
After seeing ewood's great table I decided to make one similar. I made my square table based on Ana's and ewood's basic designs. Thank you both. I also made a bench based on Ana's design.

Sun, 03/18/2012 - 16:36
That looks like it could handle a big and boisterous group. The cedar and the finish are beautiful.
Thu, 03/29/2012 - 07:37
I have a family of 7 (soon to be 8, I hope), and was trying to figure out how to fit us all on the rectangular table. This is the solution! I can simply make 4 benches to go with it! Thanks for the idea and the picture!
Mon, 04/09/2012 - 07:24
Love this table and your modifications to ewood's table. I was wondering what size are the legs on your table - I can't tell if they are 4x4s...which is sort of what I'd like to have on mine. And they are under mounted, which I love because I want to make ours with the ability to remove the legs for reduced storage space in the winter. If you could would you mind putting a few close up photos of how the outside corner came out and the underside of the corners. It would be much appreciated.
Mon, 04/09/2012 - 07:27
Love this table and your modifications to ewood's table. I was wondering what size are the legs on your table - I can't tell if they are 4x4s...which is sort of what I'd like to have on mine. And they are under mounted, which I love because I want to make ours with the ability to remove the legs for reduced storage space in the winter. If you could would you mind putting a few close up photos of how the outside corner came out and the underside of the corners. It would be much appreciated.

In reply to Questions :) by K_W (not verified)
Sat, 04/14/2012 - 13:35
Hi - sorry it took a little while to get back to you. Yes the legs are 4x4's. I used knotted cedar 4x4's for the legs and made them 29" tall. I wanted to be able to disassemble the table and put it away for winter, so I attached the legs using carriage bolts, 2 per side (4 total per leg). I drilled holes using a pilot bit, then used a spatter bit to make the larger holes for the carriage bolt.
I didn't bother to counter sink them, but if I made another I think I would try that to make a more polished look. The legs are sturdy, the table doesn't wobble at all, but I am sure that someone with more furniture building experience might have a different/better idea.
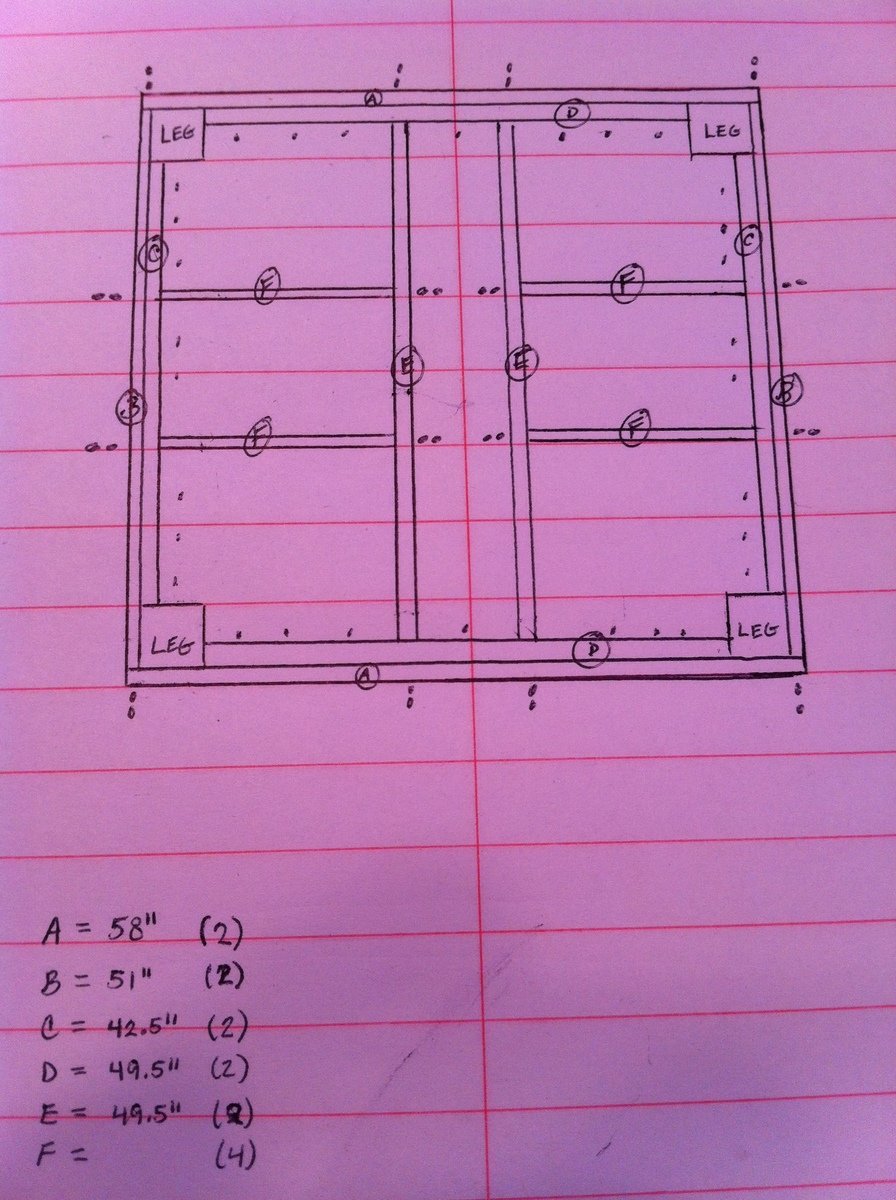
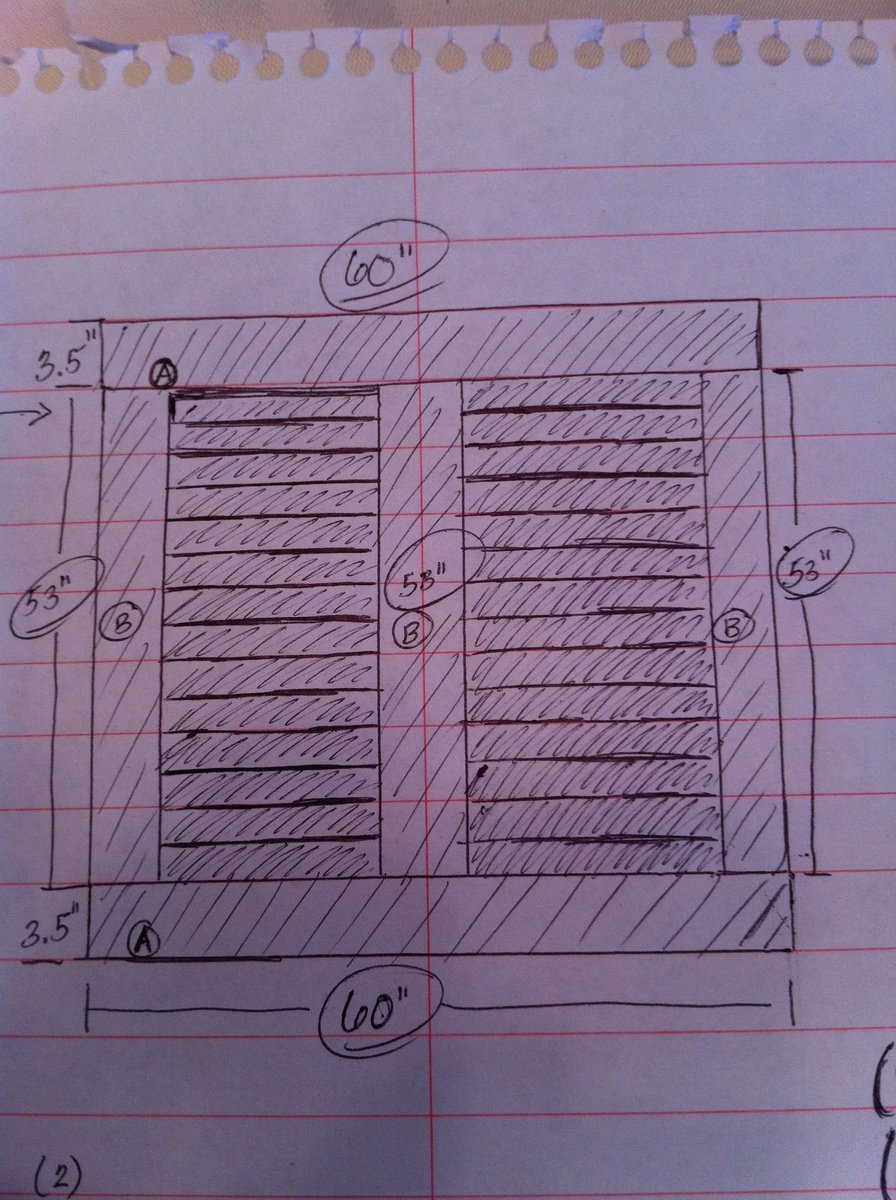
I've added a couple more photos showing the corners, outside and underneath. I've also added my very basic plans that I used to make the table, one of these days I will study Ana's post of how to use sketch-up, until then this is what I worked with.

Wed, 06/06/2012 - 09:26
Can you tell me what size (width) boards you used on the frame pieces of the table, and what size on the inner boards? From your diagrams, it looks like the frame is made of 1x4s, but the inner pieces look smaller. Thank you !!!
Your table is absolutely beautiful. It looks like a very high-end piece of furniture. One of my favorite things is how the carriage bolts are installed -- I wouldn't change a thing on them!
Tue, 07/30/2013 - 16:36
Sorry it took so long to reply - I didn't see your post. So far the table is holding up well.
You're right, the top is made from 1x4's, including the inlaid slats. To support the top, I cut 1x4's down to 1x3's so they remain hidden by the side 1x4's of the frame.
Tue, 10/16/2012 - 18:02
Love the table - looks absolutely fantastic! I have been looking for a decent square outdoor table for ages and this one certainly fits the bill.
Can you please add a photo of the underside of the table and advise how you fastened inner boards on table top. Thanks.
In reply to Question by Aussie Paul (not verified)
Tue, 07/30/2013 - 16:40
I added a new photo of the bottom. Hopefully this will help show how I attached the top. I have a number of additional photo's I can send to you if you like - this site limits the number of photos I can add.
Everything is attached from the bottom to hide the screws. I used a kreg jig and it helped so much - i really recommend it.
Wed, 08/14/2013 - 12:35
I love the look of this table, man - I think I'm gonna steal some ideas from this.
I have a question about your top, though. The slats look to be 1x4s, which I can understand, but the edges seem to be a bigger size.
Did you use 1x6 boards for the edges? 1x8s? Something else?
Thanks for your help.
Mon, 09/02/2013 - 11:03
Thank you - please take any ideas from it that you can. That is what I love that about Ana's site. You can take these great ideas and make them fit your own style...
You're right - the table top is made of 1x4's and 1x6's. When i put the top together I made the frame first. Then I added the exterior 1x6's. Next I added the center 1x6. Lastly I cut each 1x4 to size and added them.
Sat, 05/17/2014 - 07:15
This is an amazing table, it is beautiful! I am somewhat new to wood working and was wondering if there was a material list? I plan on creating this in AutoCAD first, so I have a visual to work off of. Also what did you use for spacing in between the boards or what was the allowance of space.
Thanks again, your work is beautiful!
Wed, 06/17/2015 - 11:48
Great table…any chance you can share the plan and material list? Cheers

Wed, 04/22/2020 - 20:37
In looking at the plans and the underside of the table, there are some measurements missing that make it a little hard to decipher. It would be good to know the lumber sizes e.g. 1x4x8 etc. the underneath side seems to have some additional boards that don’t seem to be in the drawing. I was just wondering if it might be possible to get some additional details?
Sun, 05/24/2020 - 08:05
This is a beautiful table and I'm going to try and replicate in a rectangular version. Primary question I have is what length screws you used to affix the framing pieces underneath to the top side so that the wood doesn't split and that the screws don't pop thru the top. Any help you can provide would be appreciated, if even you still look at this page. Thanks in advance!