Community Brag Posts

Raised Bed Garden Enclosure

Submitted by Anonymous (not verified) on Thu, 05/28/2020 - 17:08

We perviously had a larger garden farther back in the yard, it was on the ground which is very hard and rocky. It was tough to till and maintain, so it was taken down a few years ago.

My wife and teenage daughter have green thumbs and have planted herbs and tomatoes in pots over the past few years, but this year they wanted something more substantial. After an online search we found this plan.

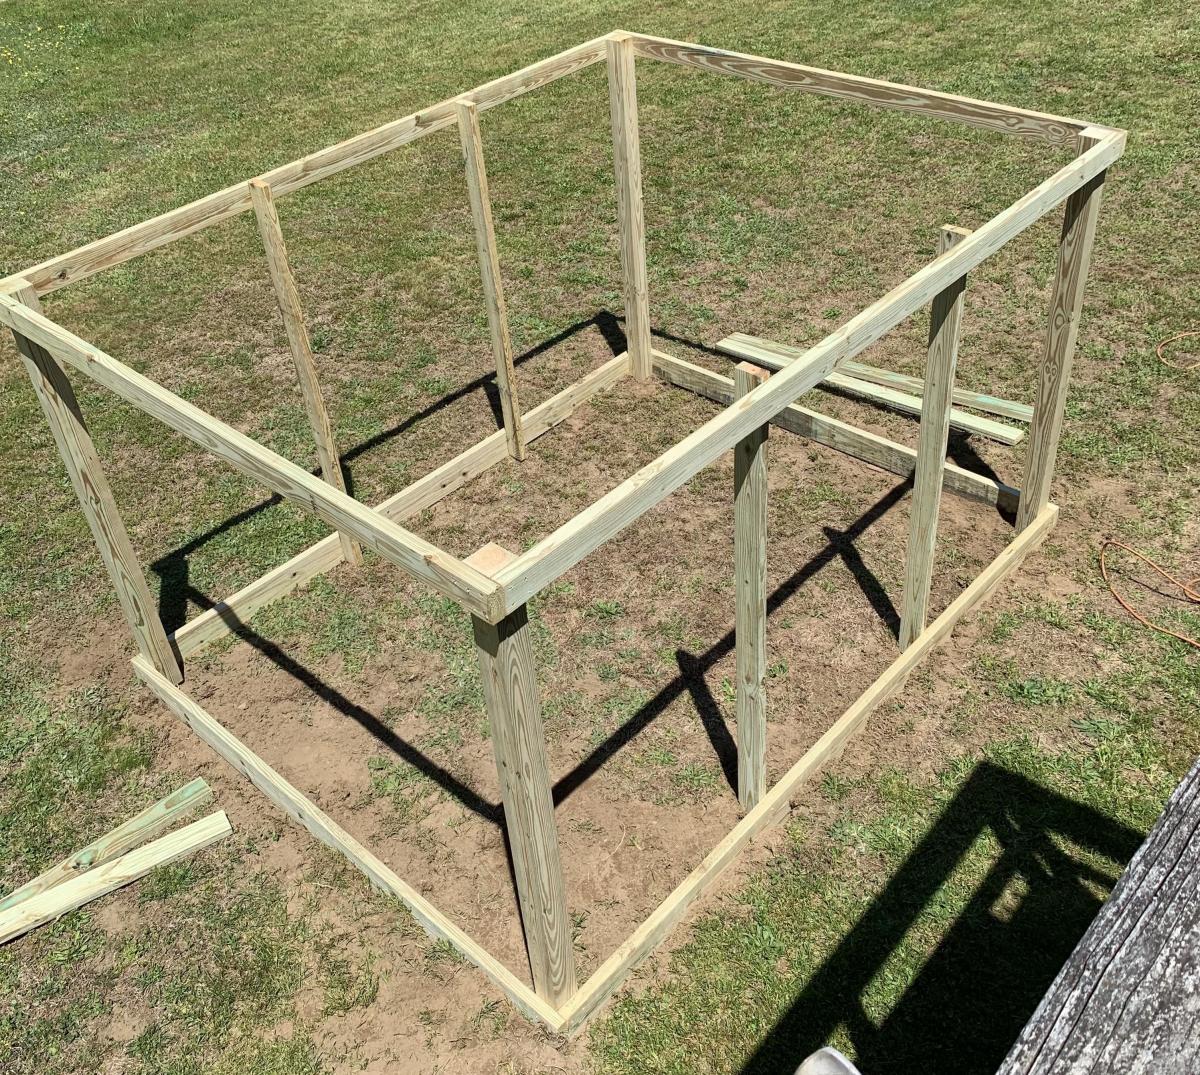
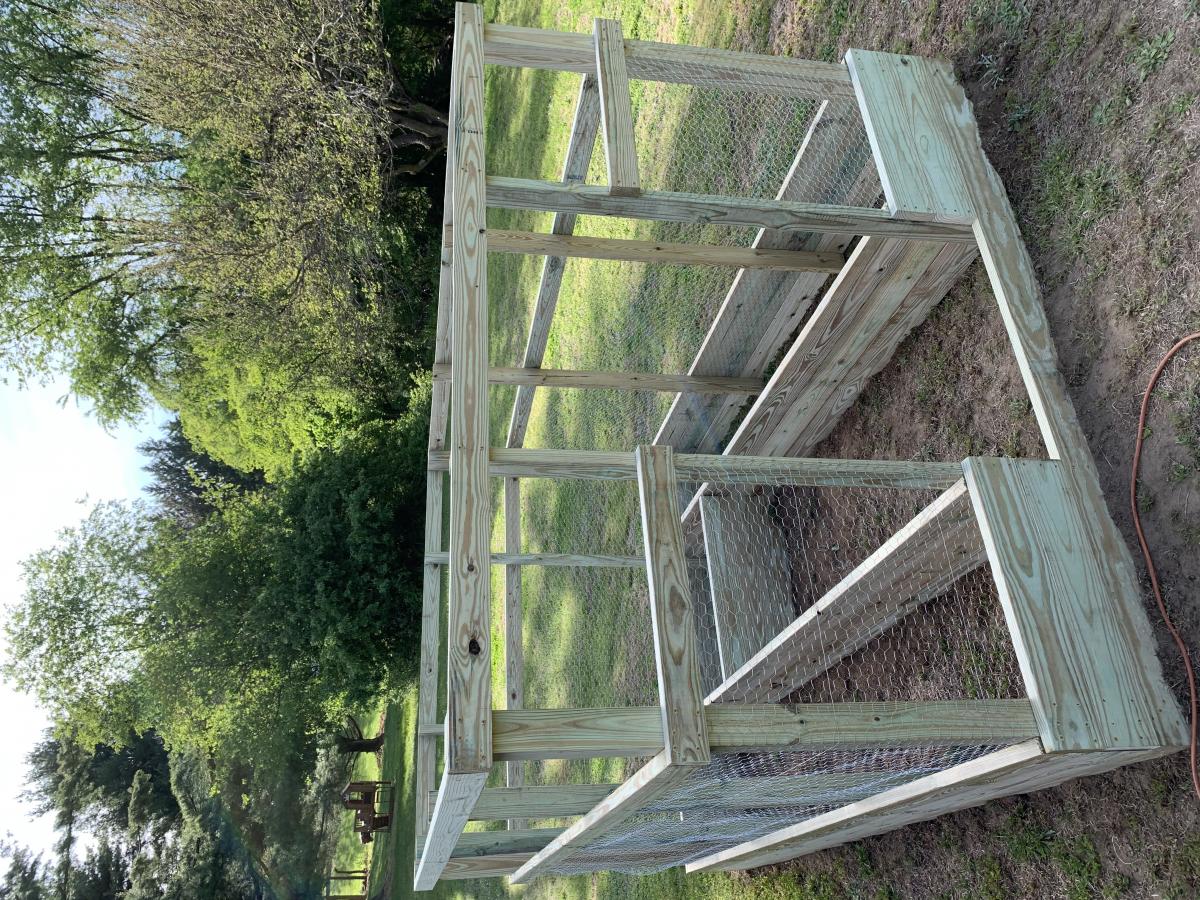
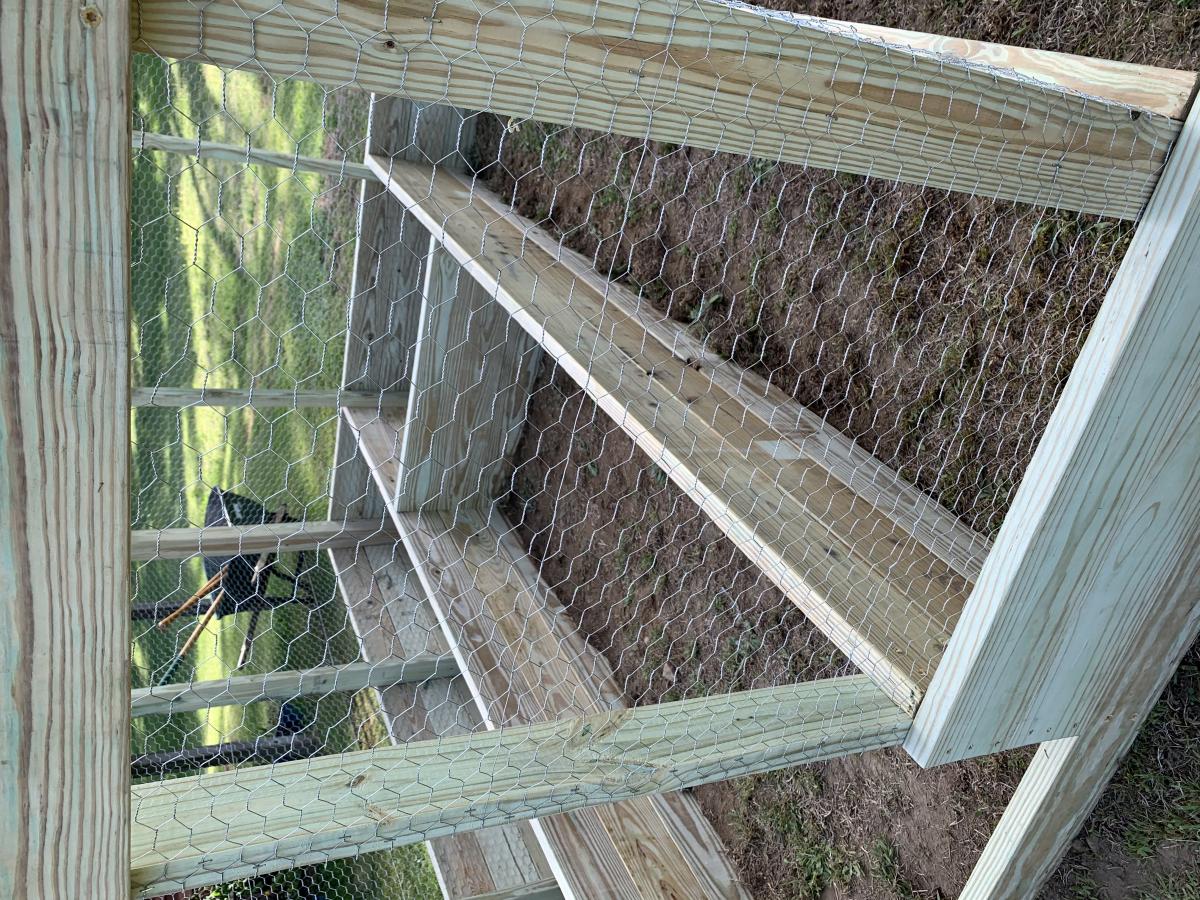
It was a bit small for what the girls had planned, so with a little bit of tweaking, we changed the depth of the enclosure to 10'. It was pretty easy to do. Also the girls wanted the beds to be a bit deeper, so we made them three 2x6's deep instead of two

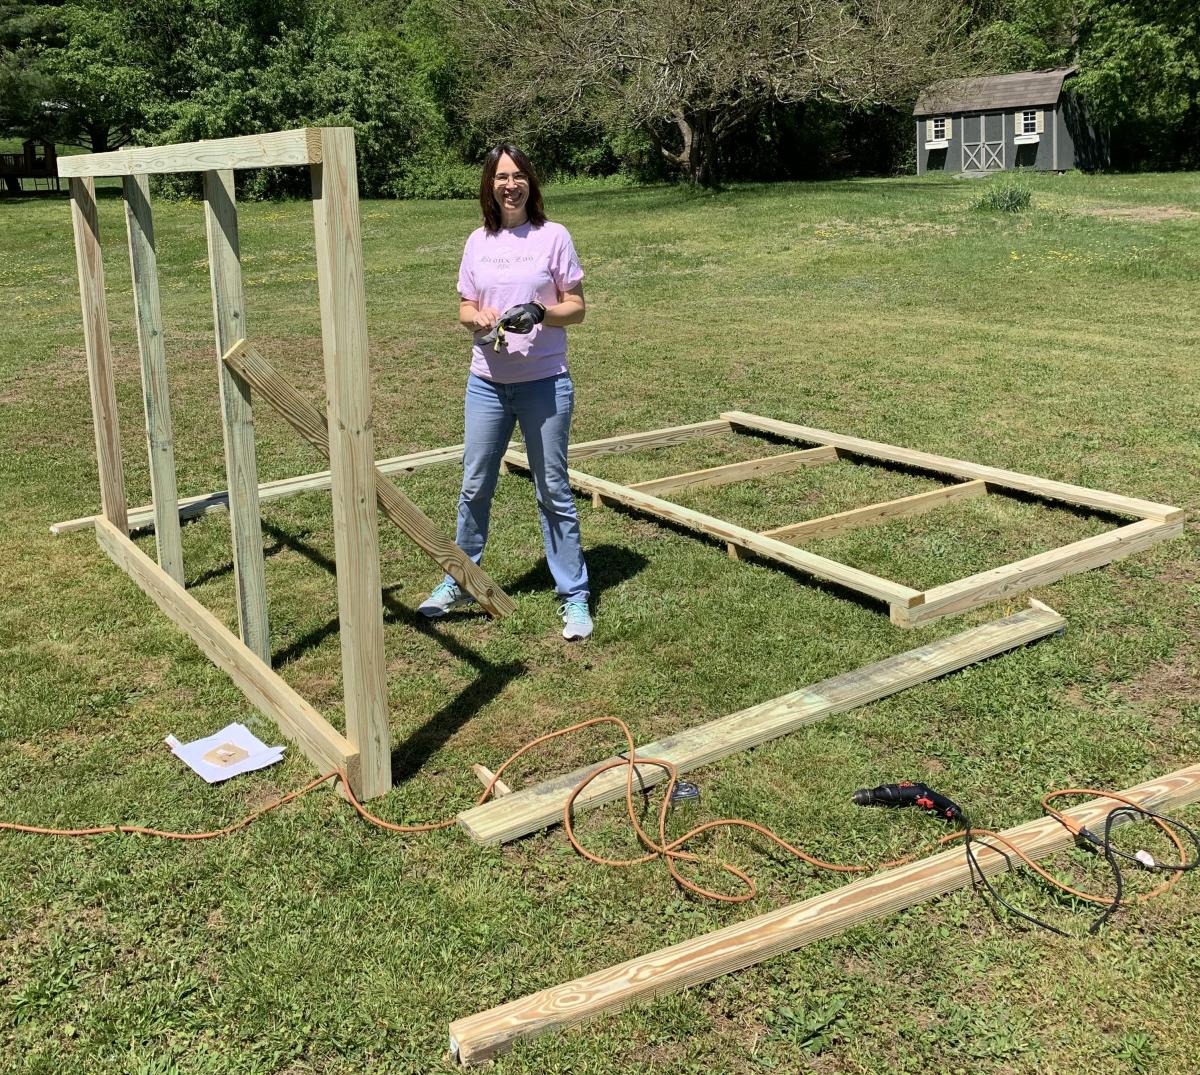
It was built by my wife and I in one weekend, well actually the truth is we built the entire enclosure, minus the door on Saturday about 10am and finish up about 5:30pm. I built the door the next day and we hung it together.

Just an FYI, I have quite a bit of woodworking experience and have a workshop with table saw, band saw and much, much more. I did use the table saw for most of the cuts, with the exception of the gate support which I cut using the band saw.

One caveat, if you have the lumber yard cut any pieces for you, make sure all the lumber is the same length. It's kind os a nit picky thing, but none of the lumber was exactly the length shown on the labels. If you want all the joints to be "perfect" I suggest measuring and cutting all the pieces to the correct length to match the plans.

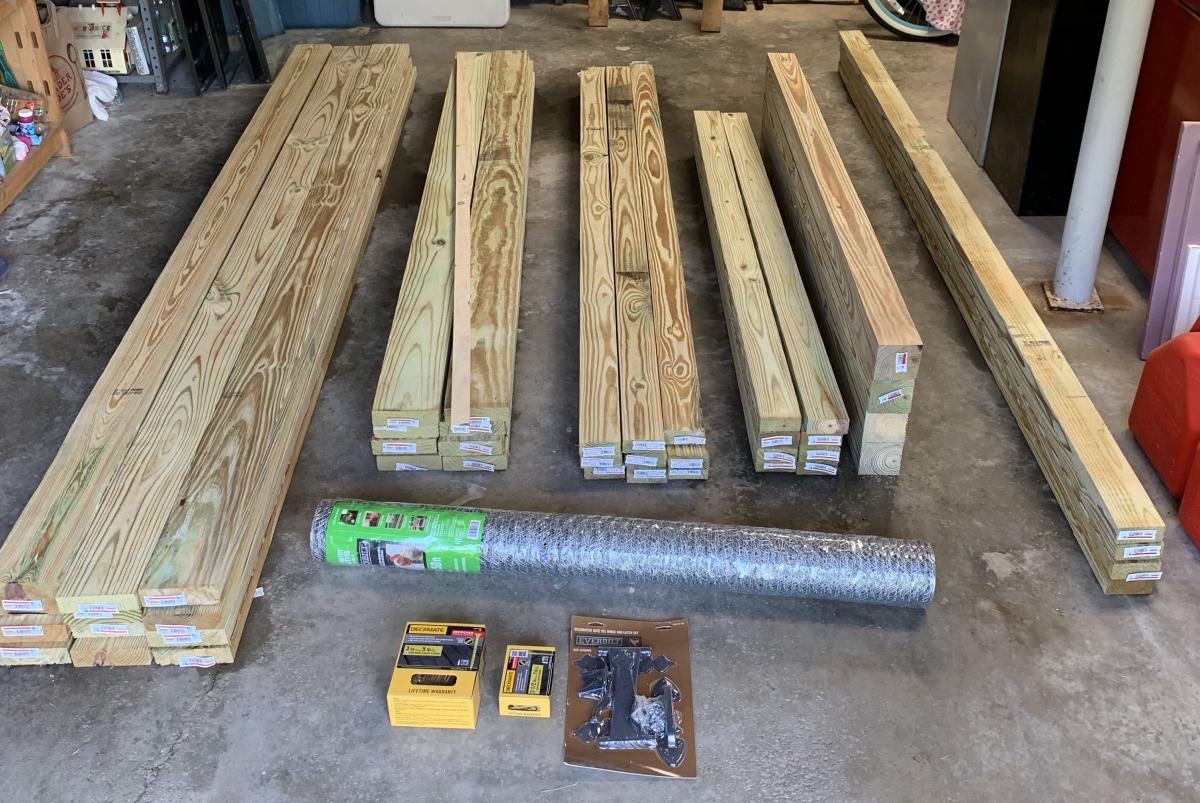
We also used an industrial hand held staple gun to fasten the chicken wire.

The cost of all the materials, including two sets of work gloves came out to $447.92 from Home Depot in 2020.

We are now waiting for a delivery of the top soil to fill the beds. Since we used weatherguard lumber, we are going to gat plastic sheeting and line the beds.

It was a fun project and my girls are looking forward to planting all their seedlings.

For fun we made a time lapse video, which I have uploaded to Youtube. If you watch closely, you will see that we started the build in one area of the yard and moved it because the ground sloped much more than we originally thought.

https://www.youtube.com/watch?v=h7vvBLy034U&list=WL&index=112&t=0s

I hope that our experience may help others in some small way.

Thank you Ana for making these plans available!!
Built from Plan(s)
Estimated Cost
$447.92
Estimated Time Investment
Weekend Project (10-20 Hours)
Finish Used
None.
Recommended Skill Level
Intermediate

Comments

DIY Garden Box with Trellis

Submitted by JenFarrell on Mon, 06/30/2014 - 07:13

We wanted a small garden to fit on the back patio stones and this plan fit well. We reduced the height because we have 3 small children to "help" water the plants. The trellis was hoping that we could extend the amount of produce we could grow. They're very heavy, sturdy and straightforward to build. Thanks very much!!

Estimated Cost
$120
Estimated Time Investment
Weekend Project (10-20 Hours)
Recommended Skill Level
Beginner

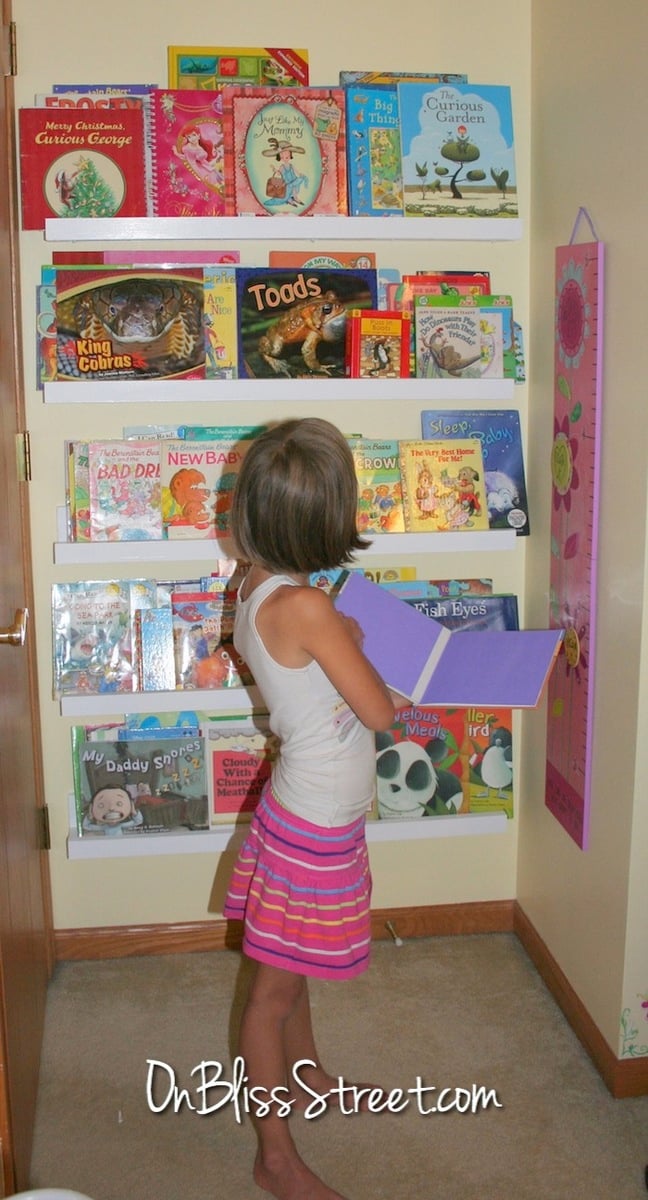
Book Ledges

These ledges are incredibly versatile and will easily grow with any child.  Books for the younger ones and then a gallery wall for when they grow.  They are so easy to build that literally, a child can do it, as you can see.  This was her first build that she completed by herself.  After the boards were cut of course.  Thanks Ana, this is a great plan and it was an AWESOME  day for the girls!

Built from Plan(s)
Estimated Cost
$25
Estimated Time Investment
An Hour or Two (0-2 Hours)
Finish Used
sanded and painted white.
Recommended Skill Level
Starter Project

DIY Breakfast Nook with Storage

Submitted by jfelker on Wed, 10/23/2013 - 08:54

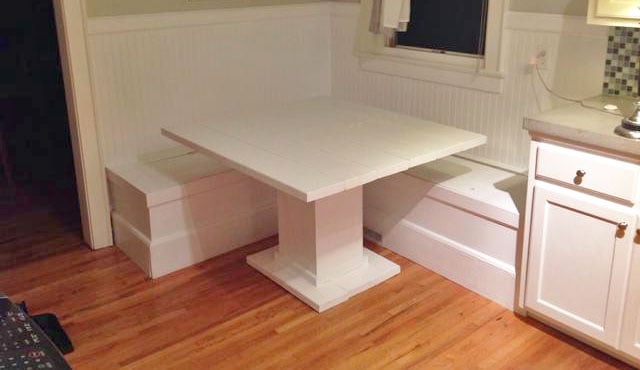
DIY Breakfast Nook

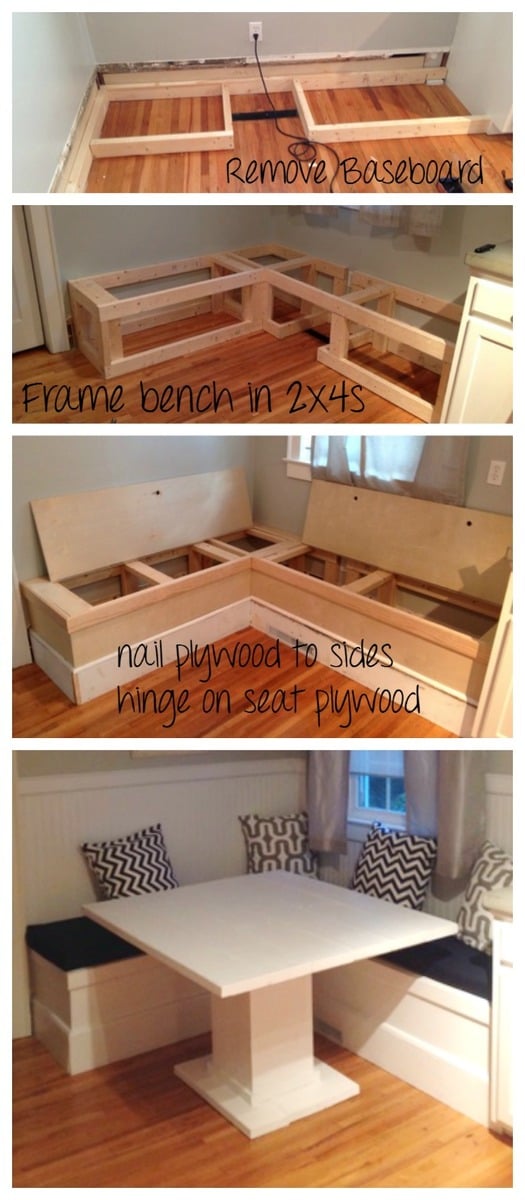
I completed this project in a weekend, over 2 days. The space was an empty void in the corner of our kitchen, so I decided to fill with a functional seating and eating space.

I first removed the trim from the wall, so I could reuse it on the front of the box later, to make the bench match the rest of the kitchen. One challenge I came across was rerouting the a/c vent through the front of the box so we didn't lose that circulation.

My sister-in-law chipped in to make the cushions and pillows to soften it up. I added the DIY table, and further defined the space with wainscoting and trim.

Estimated Cost
$500
Estimated Time Investment
Weekend Project (10-20 Hours)
Finish Used
Semi-gloss trim paint was use, to have the ability to clean later after meals, etc.
Recommended Skill Level
Intermediate

Comments

homeideas5099

Wed, 10/23/2013 - 10:10

Looks fantastic. Love how you reused the trim to have the whole unit blend in with the rest of the kitchen. Well done.

PDubs74

Sun, 01/09/2022 - 16:45

Hey there,
Absolutely love your DIY breakfast nook. Unfortunately the additional blog/info link is no longer working as I'm trying to gather more information. Would anyone be able to send the instructions and/or new link?
Thank you

Farmhouse Chairs

I found a picture of this style of chairs, and I really wanted to make them for my table. I created my own plans and adjusted them until they were perfect. I’ve since made several sets of chairs for other people including this set of 6. 

Built from Plan(s)
Estimated Cost
$25
Estimated Time Investment
Afternoon Project (3-6 Hours)
Finish Used
After sanding down the chairs, I apply a coat of Preston by minwax. To get the color I wipe on the stain gunstock by winwax. After letting it dry for about an hour, I then wipe on a coat of espresso stain. For the finish, I apply coats of a gloss polyurethane by Minwax.
Recommended Skill Level
Intermediate

Comments

Board & Batten Inspired Headboard

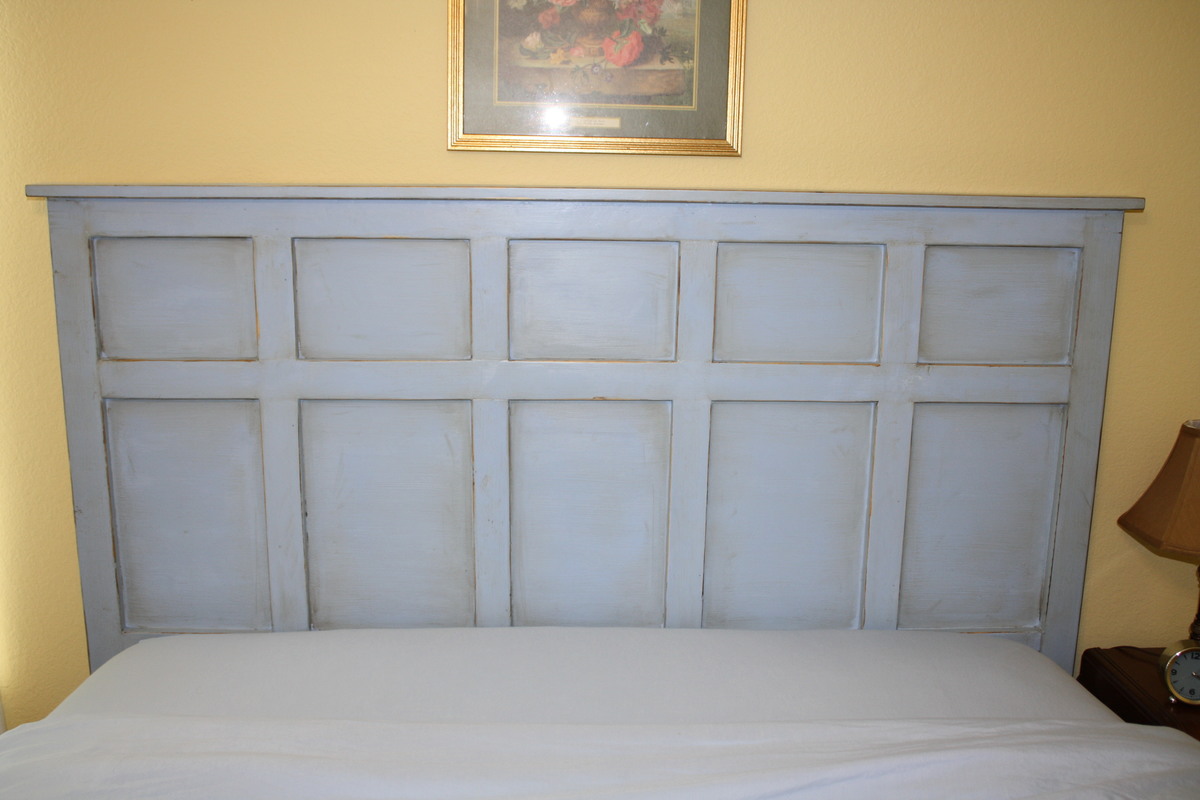
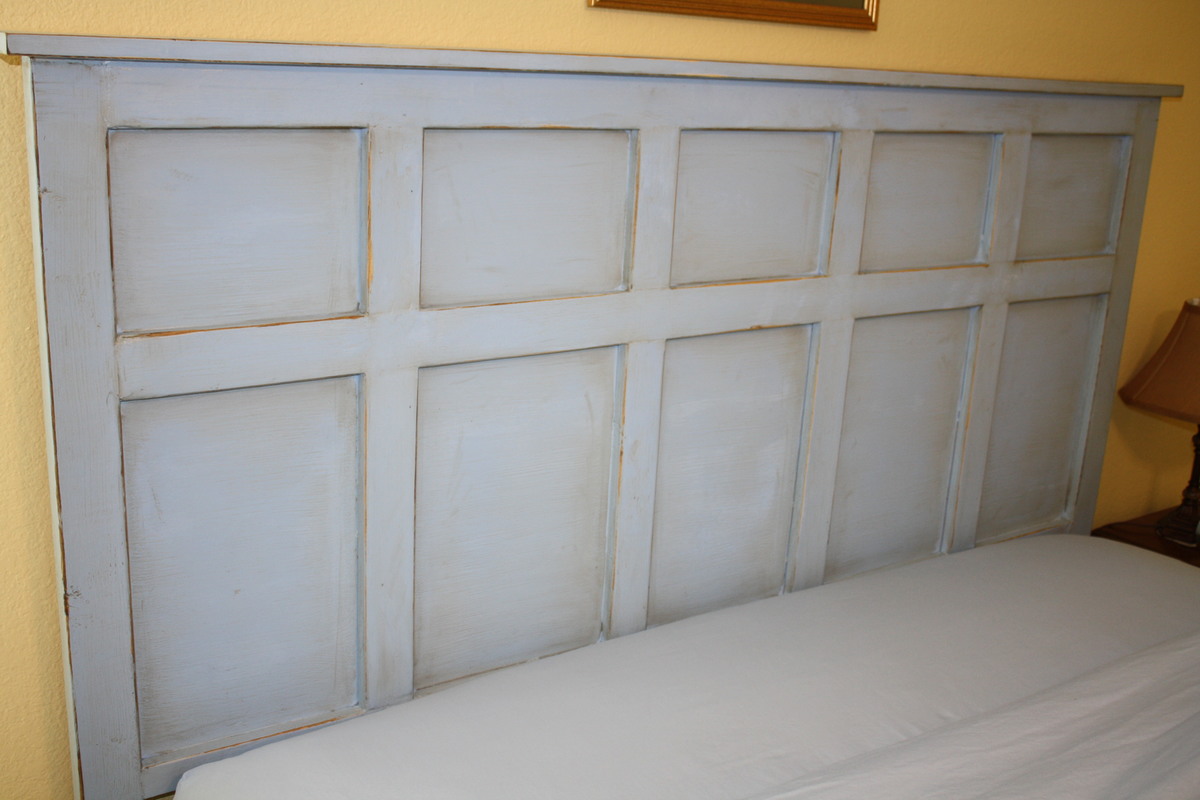
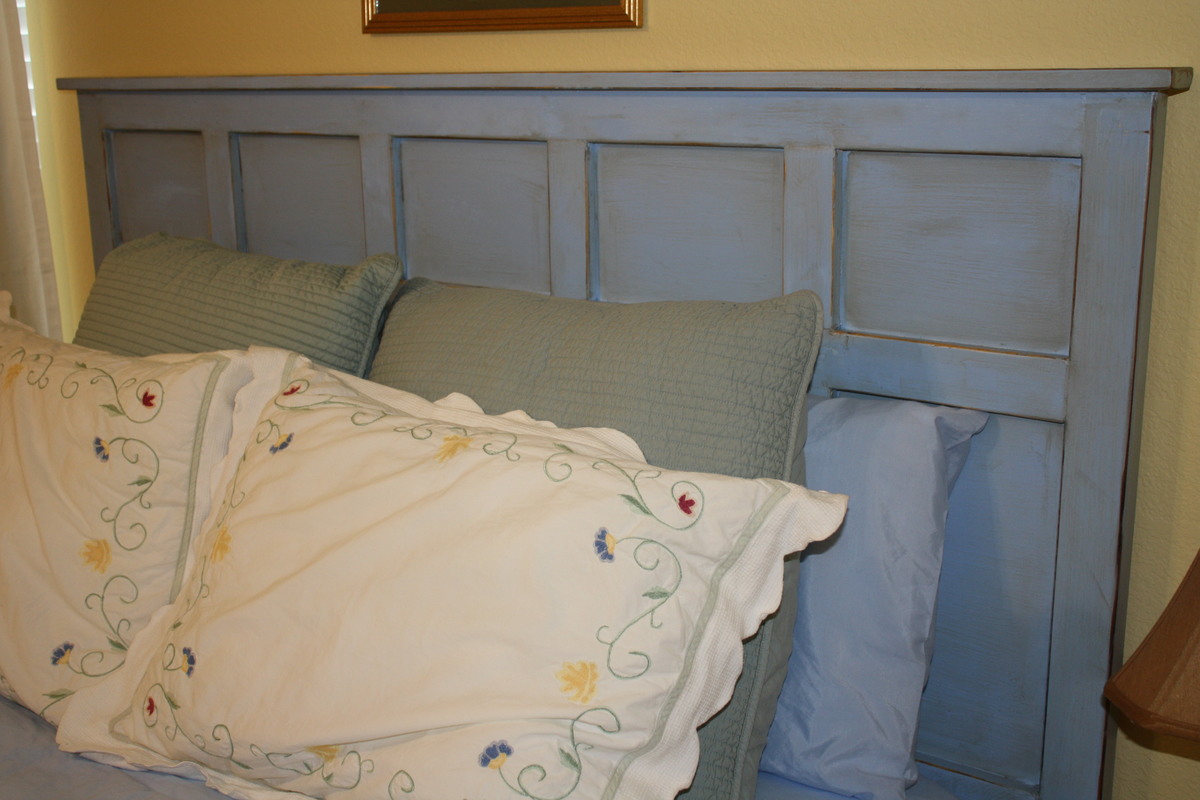
Our guest room finally has a headboard! I put together this queen size headboard using what I had learned building my daughter's headboard (and consulting the plans for the Reclaimed Wood Headboard) using the remainder of the plywood sheet from her headboard project, 2x3s for the legs, a 2x4 to join the legs (and connect to the metal bed frame), furring strips, and a 1x3 to top it off.

Our plywood had been cut to fit our car, so the first vertical furring strip was placed to hide the seam where I joined the two pieces back together. Then we evenly placed them from center as just looked right to us.

We had a great time seeing this come together as we didn't follow a specific plan, but were able to be a bit more creative inspired by various plans.

Estimated Cost
$45 including hardware & paint
Estimated Time Investment
Afternoon Project (3-6 Hours)
Finish Used
We painted with Martha Stewart's Stratosphere in a flat finish, distressed and rubbed on Minwax Provencial stain. Unfortunately, the stain gave the headboard a very green tint, so after a lot more sanding, we were able to finish the project with two quick coats of Minwax water based Poly.
Recommended Skill Level
Beginner

Comments

double loft bed

Submitted by smckeand on Fri, 03/23/2012 - 13:01

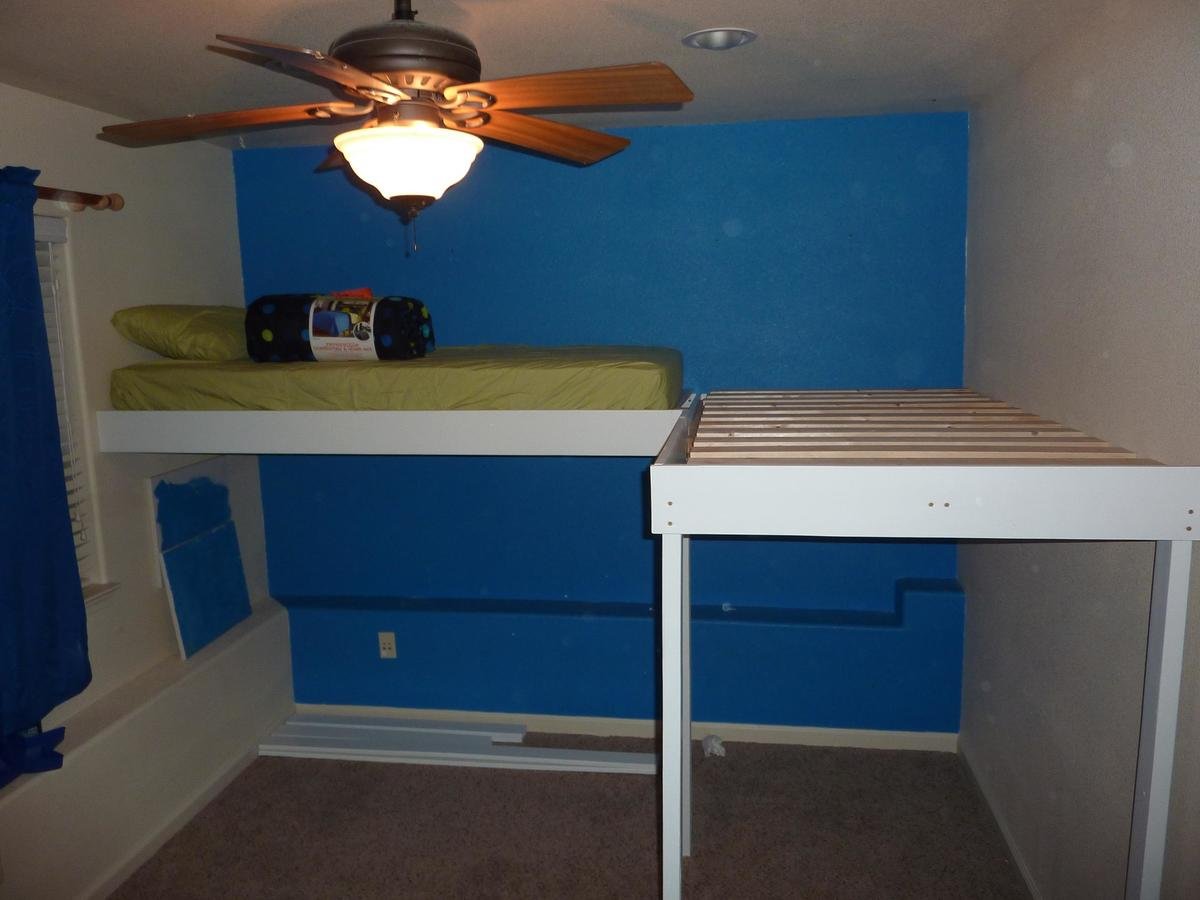
This is my extremely altered double loft bed. My sister needed a custom sized double loft bed, I figured I could use this plan and make two beds in an L shape, but the space I had to work with was smaller than these plans so I had to re-design most of the bed all together, I ended up attaching two sides of each bed to the wall with legs only on the outer pieces. She wanted a "fun" looking bed so I added a splash of color, just simple enough for me to make.

Built from Plan(s)
Estimated Time Investment
Week Long Project (20 Hours or More)
Finish Used
sanded with 220 grit, primed, painted with sherwin williams pro classic
Recommended Skill Level
Intermediate

Comments

taslytoo

Wed, 08/01/2012 - 18:04

Might incorporate this idea into my girls room bed. Thanks for sharing.

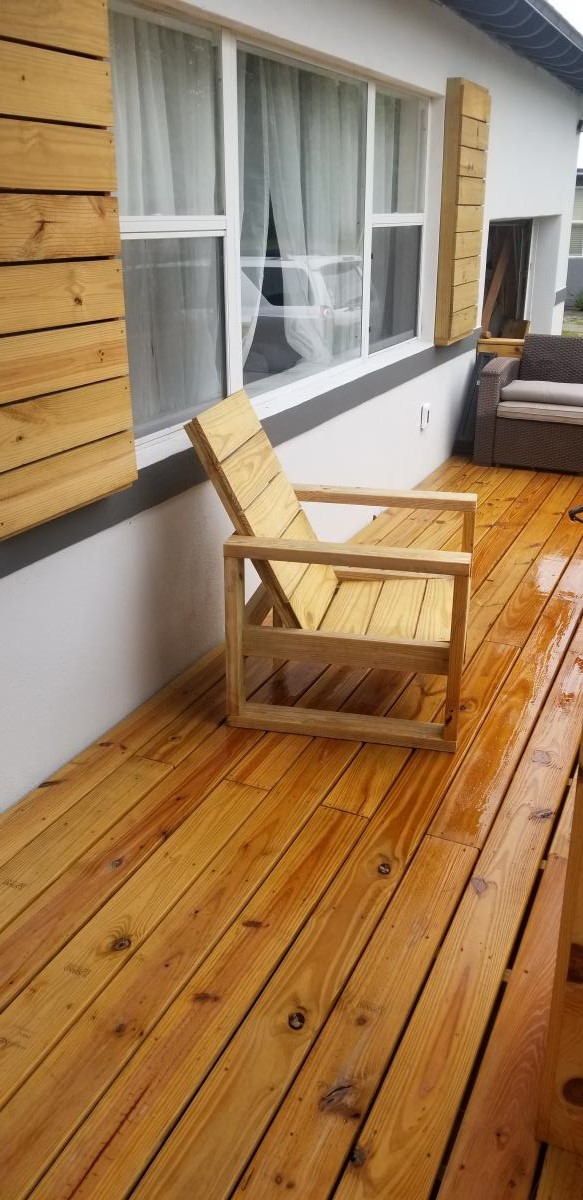
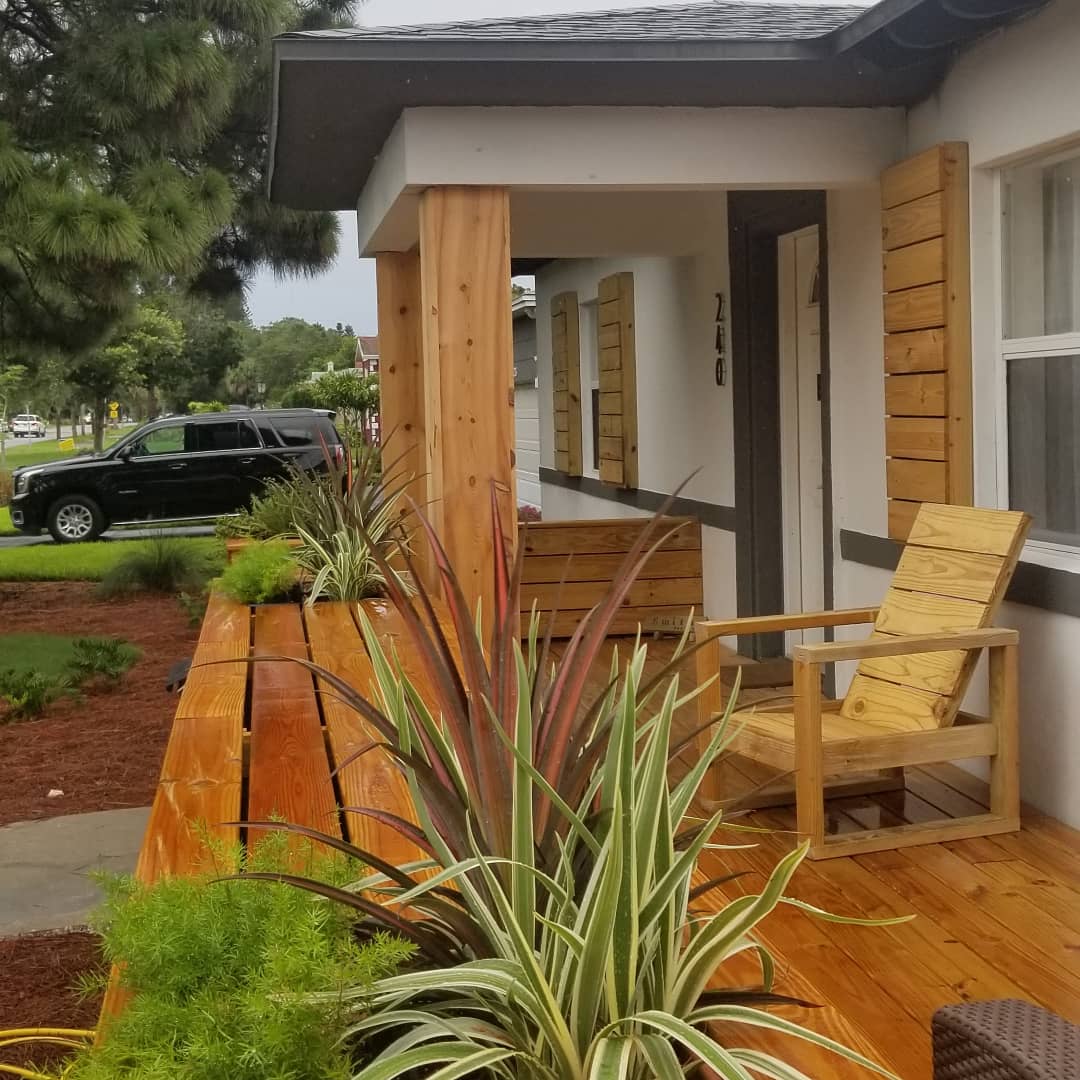
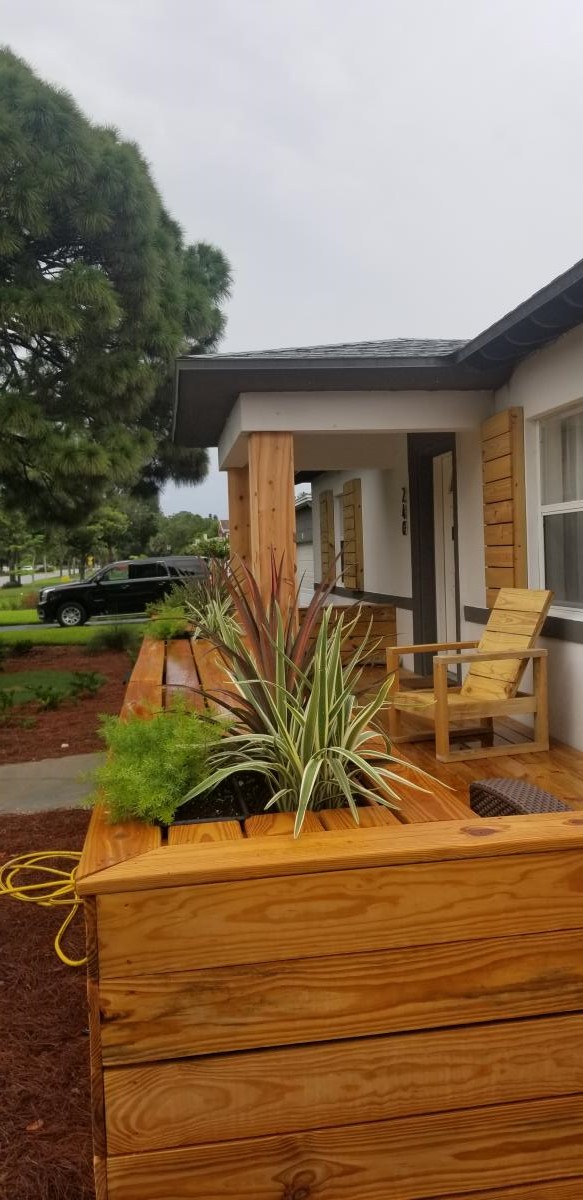
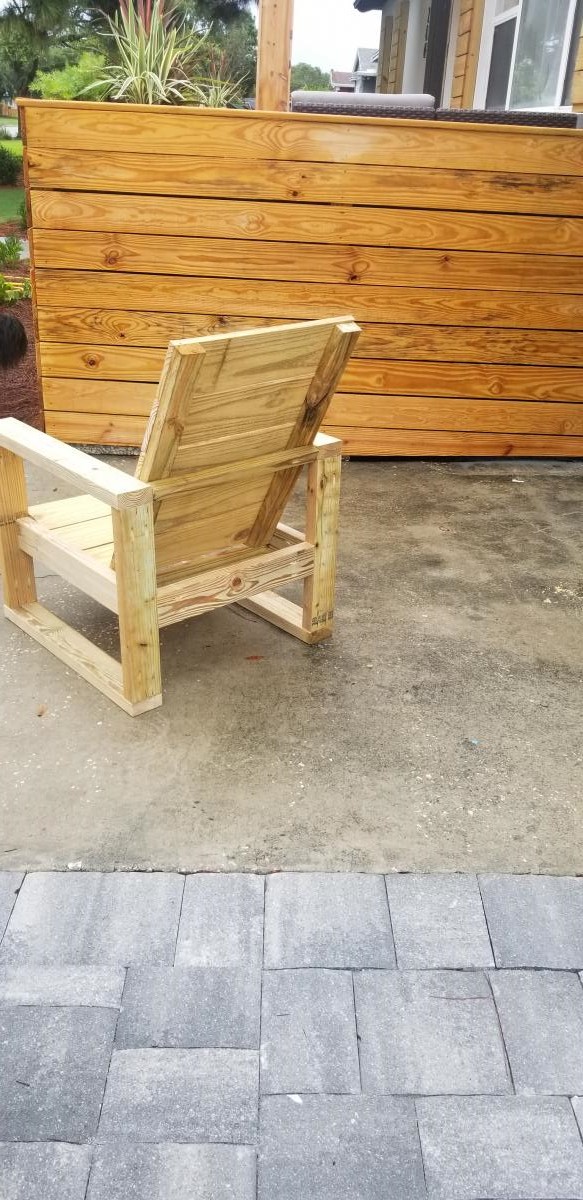
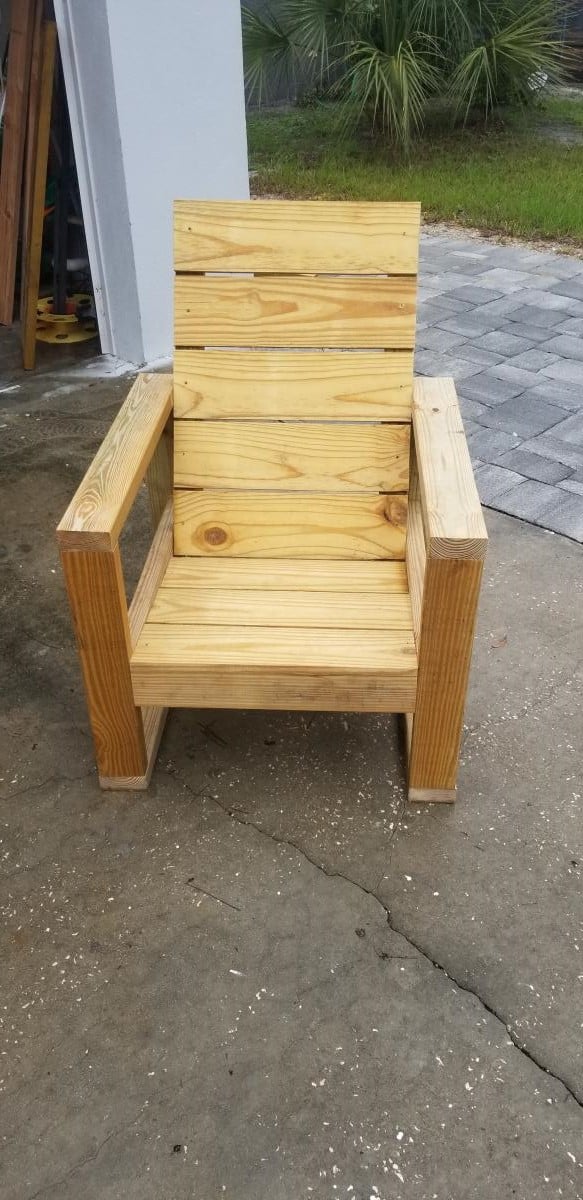
Simple modern outdoor chair modified to match my porch.

I built a set of these chairs based on Ana's simple modern outdoor chair. I wanted it to match my front porch which I built a few weeks ago. Thank you for the plans.

Estimated Time Investment
Weekend Project (10-20 Hours)
Finish Used
Still waiting for it to dry, then I will use a oak stain and outdoor polyurethane.
Recommended Skill Level
Intermediate

Comments

boneill

Wed, 07/29/2020 - 19:24

Looks awesome. Would be great to see how to do this step by step . What size seat slats did you use ?

Seasonal And Holiday

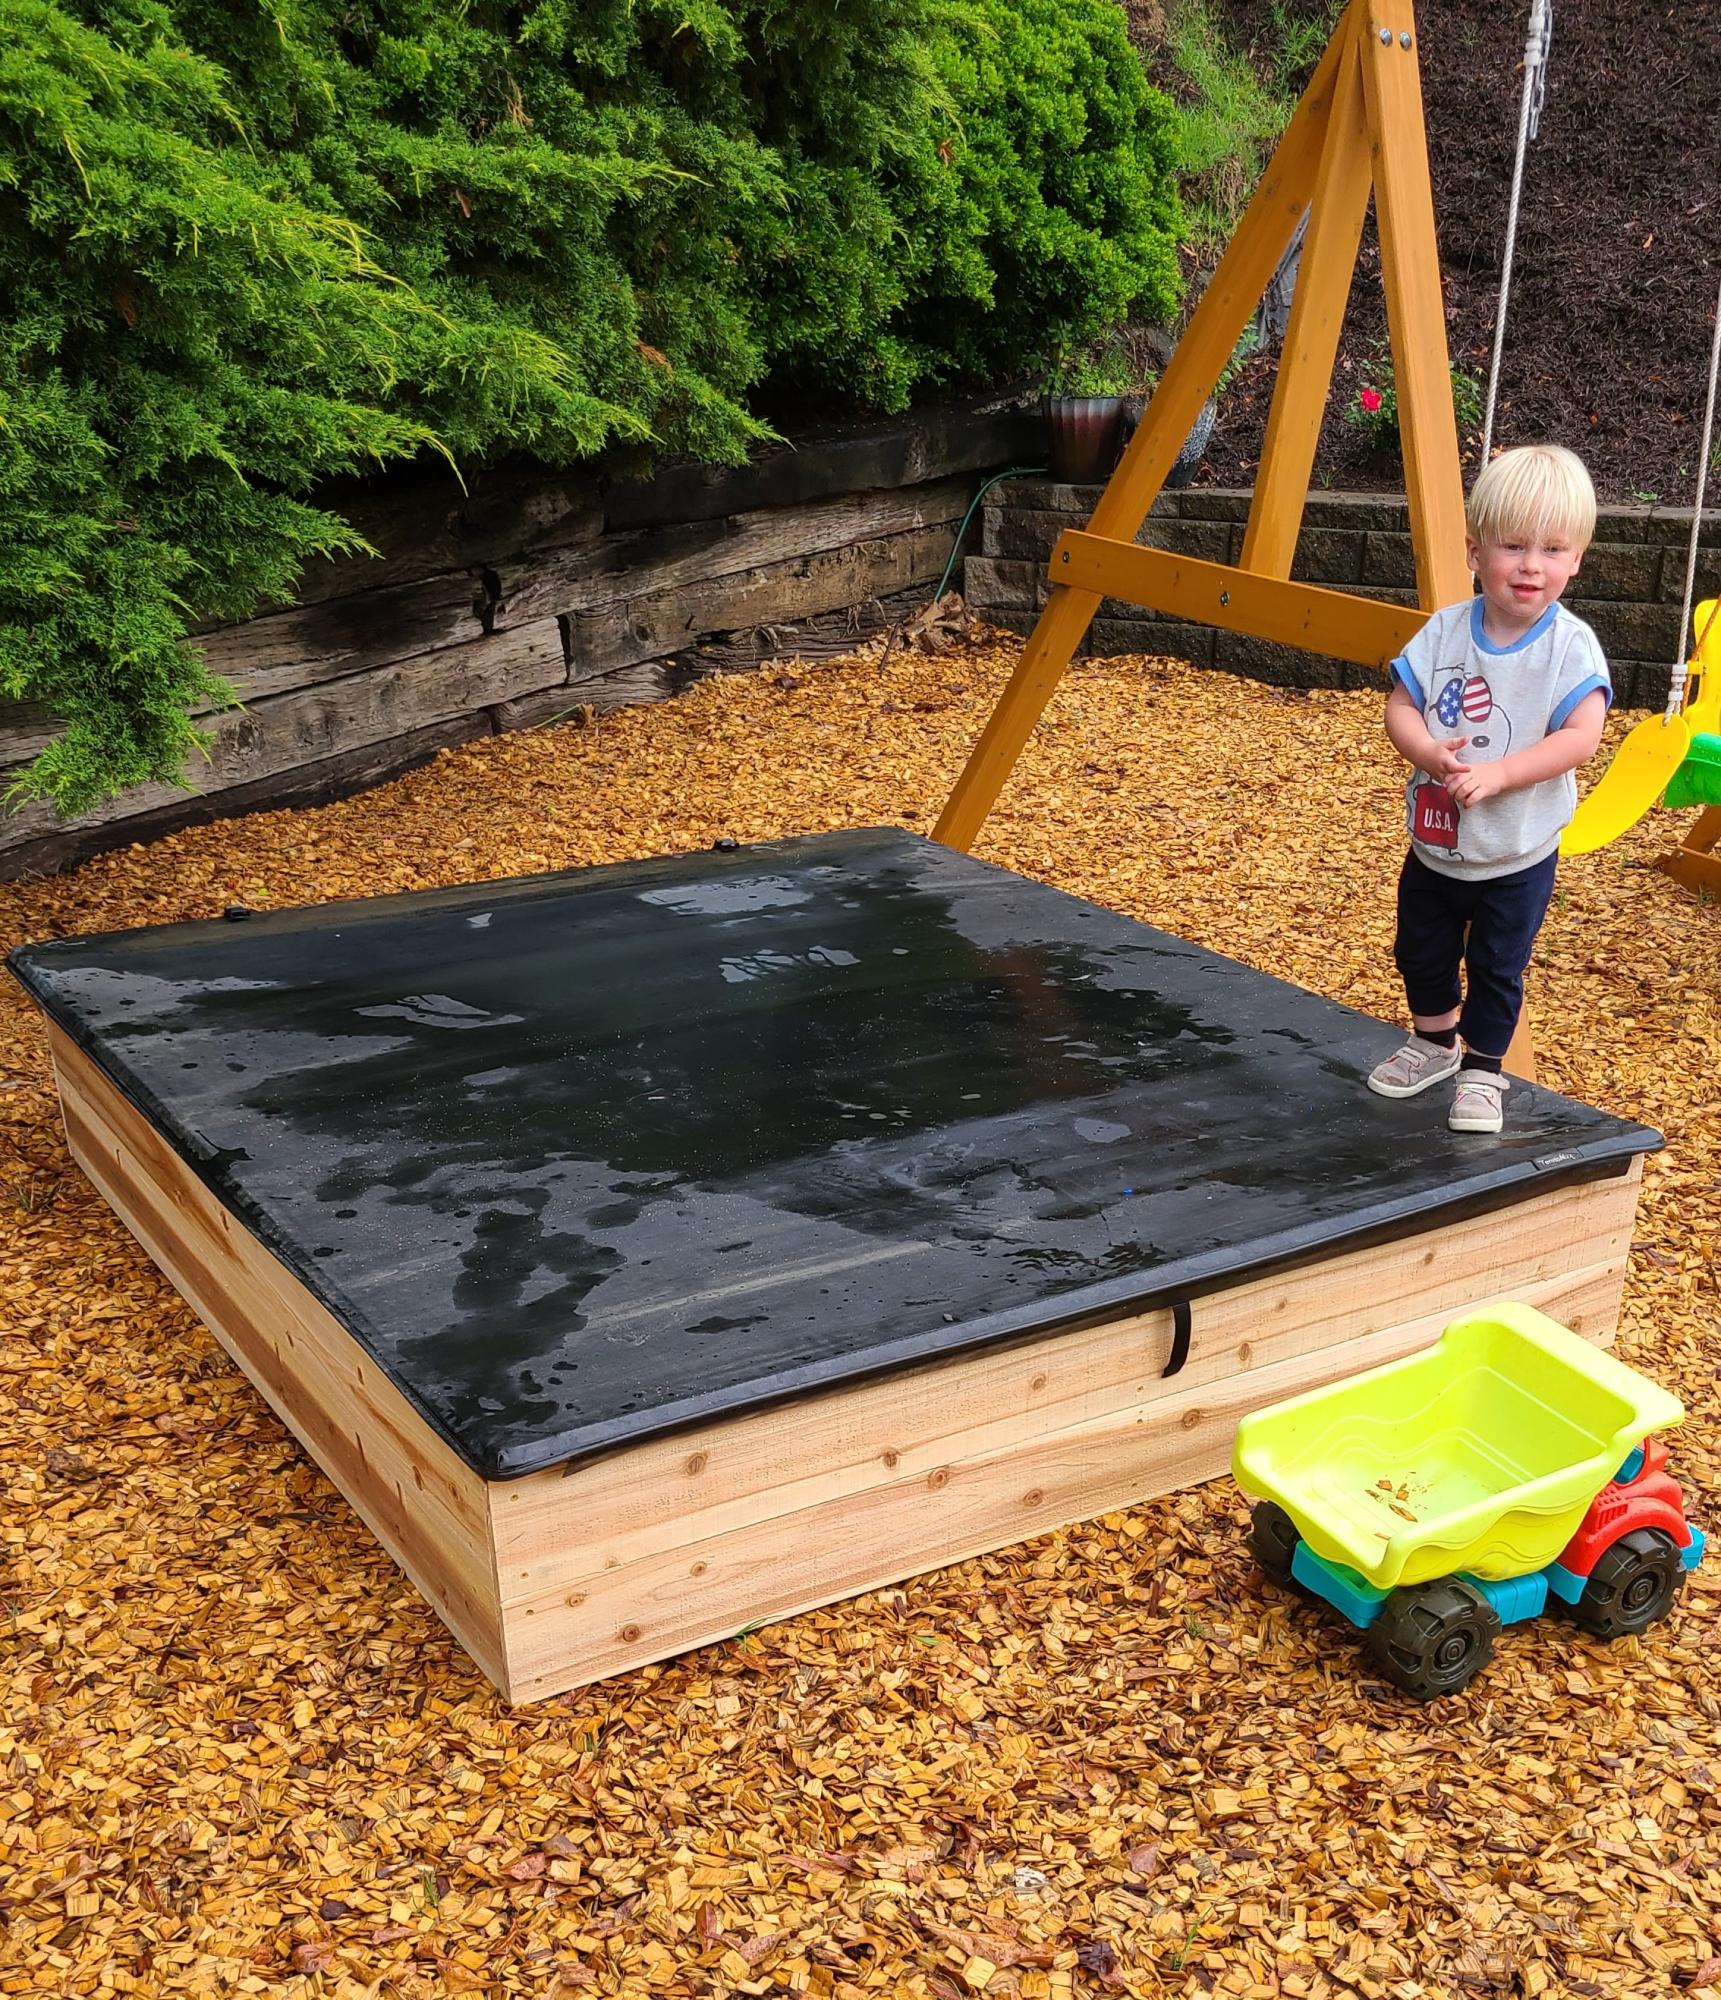
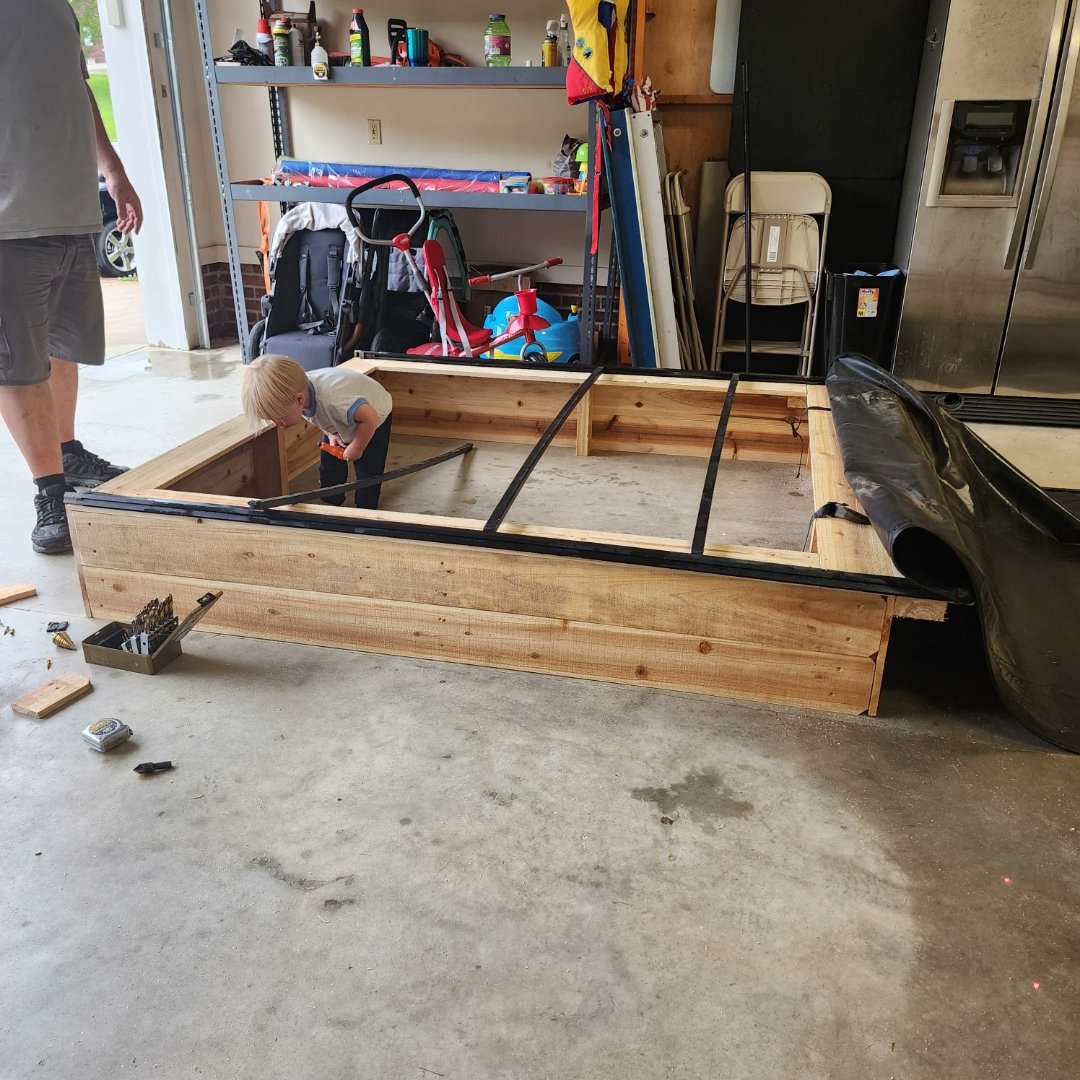
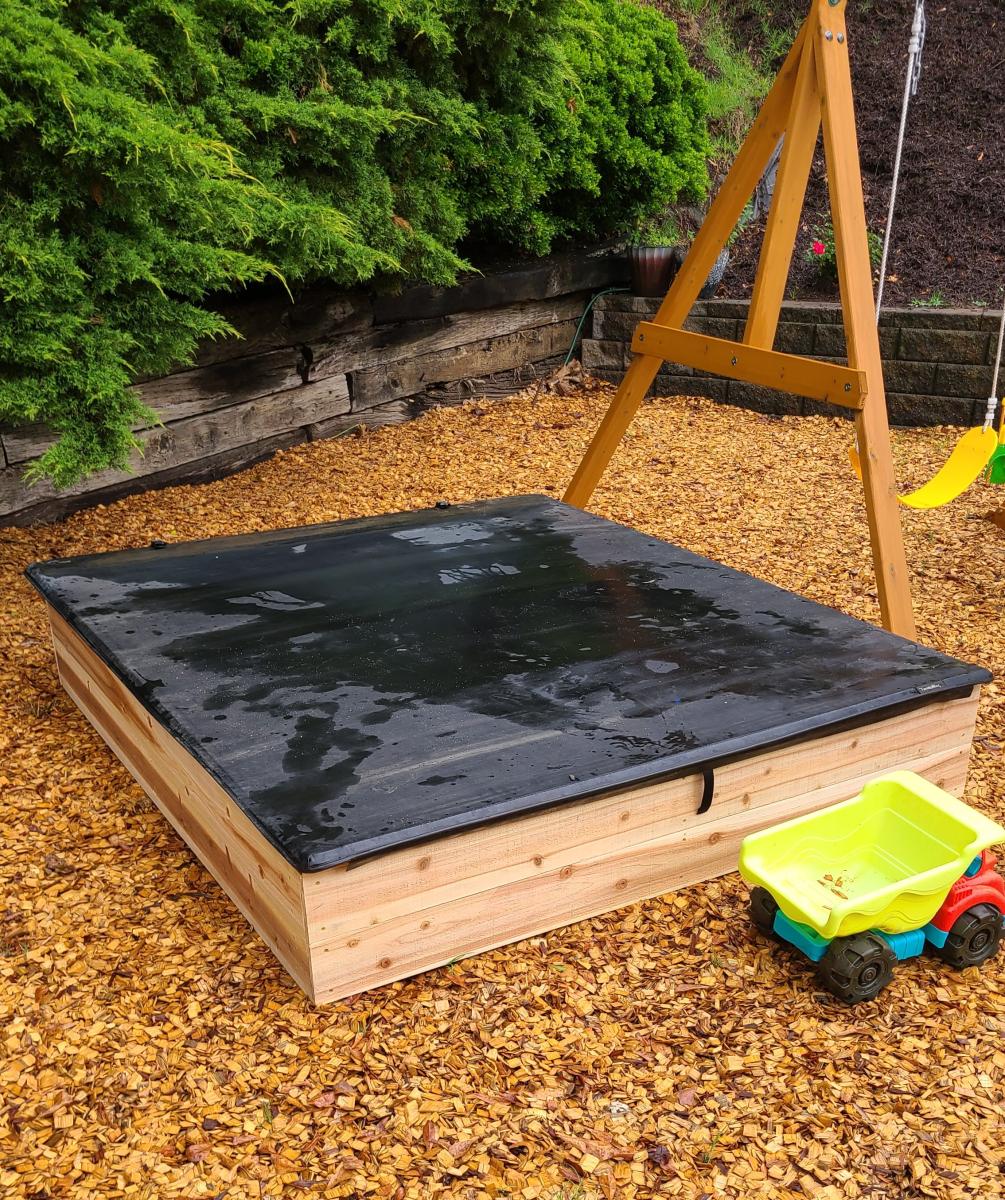
Sandbox with Cover

The cover is a tonneau cover for a pickup truck. It's for a 6.5' truck bed so if you notice, I had to ad a 2x4 and one more picket on top to accommodate the extra length. 

The cover would add a ridiculous amount of money to the project but it was repurposed.  I found it on a truck that was in an accident and going to the scrap yard. I think it it came out great and my grandson loves it.

John

Built from Plan(s)

Rustic Queen Sized Wall Bed

Submitted by ldo2626 on Wed, 06/25/2014 - 09:09

Expecting our second child, my wife and I decided to do away with our guest bedroom and combine it with our office. The only problem was our queen bed took up way too much space and it didn't get enough use to justify the sacrifice. We looked at the wall bed options available for purchase and decided they were way too blah and very expensive. I then found the "A MURPHY BED YOU CAN BUILD, AND AFFORD TO BUILD" post on Ana's website (thanks for the inspiration)! 

 Using cheap pine boards, plywood, door hinges, vinyl upholstery and stain I constructed the wall bed you see here. It really wasn't that difficult but facing it took the most time. To give the boards a more rustic look I used a utility knife to shave off the edges/corners and stained them with the Minwax American Walnut water based stain and the Minwax White Wash Pickling. When this started we thought we were going to have to settle for something unattractive and less than desirable. Seeing it in our office now, we love our new bed and actually think it makes the room look much better!  I didn't keep track of costs, but it couldn't have been more than $150.


Estimated Cost
I didn't keep track of costs, but it couldn't have been more than $150.
Estimated Time Investment
Weekend Project (10-20 Hours)
Finish Used
Minwax American Walnut water based stain and Minwax White Wash Pickling
Recommended Skill Level
Beginner

Comments

jwm816

Tue, 07/08/2014 - 08:08

Looks great! May I ask what the final outside dimensions were? Curious to see if this would work for me.

Thanks!

ldo2626

Wed, 08/06/2014 - 09:23

I would have to measure it when I get home... at work currently. Looking back, I think the best approach is to take the measurements from the plan, find the difference between standard mattress and queen mattress dimensions (check wikipedia for standard sizes), then add that difference back to the plan. I cut it real close on mine and could use a little more space. It would be nice to make it a bit deeper and with some head room to store comforters and pillows.

lopixy

Sun, 11/30/2014 - 18:10

I love this!  Could you give more details about how you did the facing?  Are the pine boards just nailed onto the plywood? 

chefrgk

Sun, 12/28/2014 - 12:59

I am dying to get started on this wall bed project. I keep getting this message when trying to open the Plans.

The page you are looking for is temporarily unavailable.
Please try again later.
can someone help me find them.

chefrgk

Sun, 12/28/2014 - 12:59

I am dying to get started on this wall bed project. I keep getting this message when trying to open the Plans.

The page you are looking for is temporarily unavailable.
Please try again later.
can someone help me find them.

nicolanala

Tue, 08/09/2016 - 15:24

Hi. I would love to try this. Looking to build in the next month before parents in law come over. Is there any working links to the plans??

josheli

Thu, 01/25/2018 - 13:06

click on the bed picture above and it will take you to the plans


Barbecue/BBQ Quick Built-in

This was just a standard BBQ with an attached folding table. I used a combo of Ana's plans to add a little character and style to the BBQ and it made a huge difference in not only the BBQ, but also the backyard. 

Estimated Time Investment
Weekend Project (10-20 Hours)
Finish Used
Golden Oak
Recommended Skill Level
Beginner

Comments

mdwstgrl

Mon, 05/23/2016 - 12:29

Hello:  Very interested in which plans you used to build the BBQ Built In. Thank you.

Simple 2x4 Bench

Submitted by jennibee on Sun, 09/14/2014 - 17:03

I made this in an afternoon. Loved this project. It is made with 2x4's using a Kregs Jig and mitre saw (plus additional tools like a drill and square).  This was my frist time using the Kregs Jig and I am sold!!

The free plans were taken from another website. They are very detailed and there is even a video (I recommend it as he gives a great tip for making sure the back stays equal/level to each other before putting the back on). Even though you can build this by yourself, I did have help for the heavier sides once they were assembled.  I plan to build the additional side table soon and finish them both with sanding and staining when the weather seems less iffy for rain.

If you are looking for a good beginner project that doesn't take forever or have complicated steps, this is your project.

Built from Plan(s)
Estimated Cost
Around $50
Estimated Time Investment
Afternoon Project (3-6 Hours)
Recommended Skill Level
Beginner

Twin over Full with Trundle, storage stairs

This project took a week to build.  Working during my boys' nap time and late nights, I was able to complete everything in about 7 days.  I used cedar, and sealed with Cabots Bleaching Oil.  The cost of wood for the beds and stairs and drawers came to about $700.  The extra cost came from the additional side rails on the top bunk and the stairs and drawers.  Still comes in about $500 less than if bought commercially.  The famiy loves the bed and as my kids are 2 and 3, I expect to get many years out of the bunk bed.  Side note:  I had to add quite a few brackets and angle joists to secure and minimize wobble due to the additional weight of the top bunk.  (2 2x4s from the 4x4 to the side of the cleat and side rail of the bottom bunk, on the back side only, made a world of difference)

Estimated Cost
$700
Estimated Time Investment
Week Long Project (20 Hours or More)
Finish Used
Cabots Bleaching Oil
Recommended Skill Level
Intermediate

Comments

Ms.Bungalungalow

Mon, 12/11/2017 - 14:28

Hey there, I absolutely love your bed. The $700 scares me a little but i will not be using cedar. I will be doing everything else just like you. Thanks for sharing.


Simple Outdoor Table

Submitted by Kingsamui on Tue, 07/24/2018 - 17:24

Modifications to the simple outdoor table plan thanks to Finn’s dad. 

Built from Plan(s)
Estimated Cost
$200 -Found a place that had Cedar shorts “B quality”, but very few knots for an unbelievably cheap price. I ran all to boards through a planer to start and saved a bundle.
Estimated Time Investment
Week Long Project (20 Hours or More)
Finish Used
3coats Spar Urethane. I’ve heard the Spar doesn’t hold up well, so would have used something rlse if I knew that at the beginning.
Recommended Skill Level
Intermediate

Outdoor Grill Trolley

Submitted by angiemicn on Sun, 07/24/2011 - 05:39

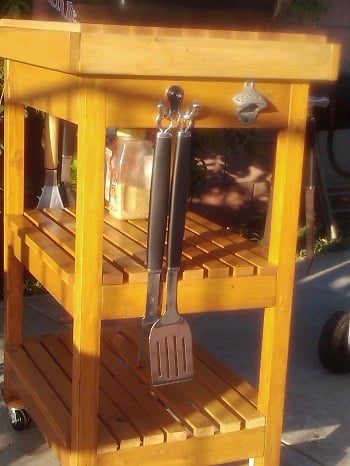
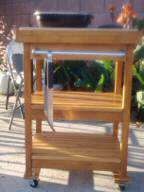
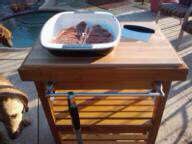
This started out as the Outdoor Multipurpose Cart....and after my hubbies evergrowing wishlist, it quickly become THE GRILL TROLLEY EXTRAVAGANZA!!!! I added the bulk and the height which he wanted, a John Boos butcher block 24x18, which is removable. Funny thing is, I also sampled Ana's Farmhouse frame to cradle the butcher block! I didn't want to put any holes in the 100 clam butcher block so it has it's own little bedframe. It's totally waterproofed and stained since it's new home will be beside the pool. I used all Kreg joints, so you could sit on this it's so sturdy. I also added 2.5 inch locking casters for the bottom. There's a stainless steel bathroom towel rack which doubles as a handle, lots of hooks for his BBQ paraphenelia, and the most important addition...The Guinness bottle opener. Totally hubby customized. And the best thing> I did it myself, setting it aside whenever a problem arose, but always coming back to it. This was originally a Papa's day present

Estimated Cost
150. (100 of it was just for the upgraded John Boos outdoor reversible butcher block! well worth it!)
Estimated Time Investment
Week Long Project (20 Hours or More)
Finish Used
Thompson's Waterseal, Minwax Puritan Pine, 2 coats, but wiped it off very quickly, didn't want it too dark. I didn't want a uniform appearance, so I wet it down, heavier in some areas than others, with water, wiped the stain on, and was taking it off with the other hand.
Recommended Skill Level
Intermediate

Comments

Screen door with built in dog door

Our old screen door wasn't cutting it anymore, so I built a new one, and to kill two birds with one stone, I included a built-in dog door. Now I just need to find the motivation to close off the old dog door.

I have the plans to build this screen door with a built-in dog door posted via the blog link below for anyone interested.

Estimated Cost
80
Estimated Time Investment
Afternoon Project (3-6 Hours)
Finish Used
white exterior paint
Recommended Skill Level
Intermediate

Poolside Towel Cabinet from Benchmark Cabinet Plan

Submitted by Anonymous (not verified) on Thu, 03/23/2017 - 11:21

My father and I made this awesome poolside towel cabinet using the Benchmark Cabinet plans. A super easy 1 day build and it looks amazing on the patio. Bring on the pool weather! 

Estimated Cost
$60
Estimated Time Investment
Day Project (6-9 Hours)
Finish Used
Chalk paint/Poly topcoat
Recommended Skill Level
Beginner

Garage shelves with doors

Submitted by CarolinaL on Thu, 01/11/2018 - 03:59

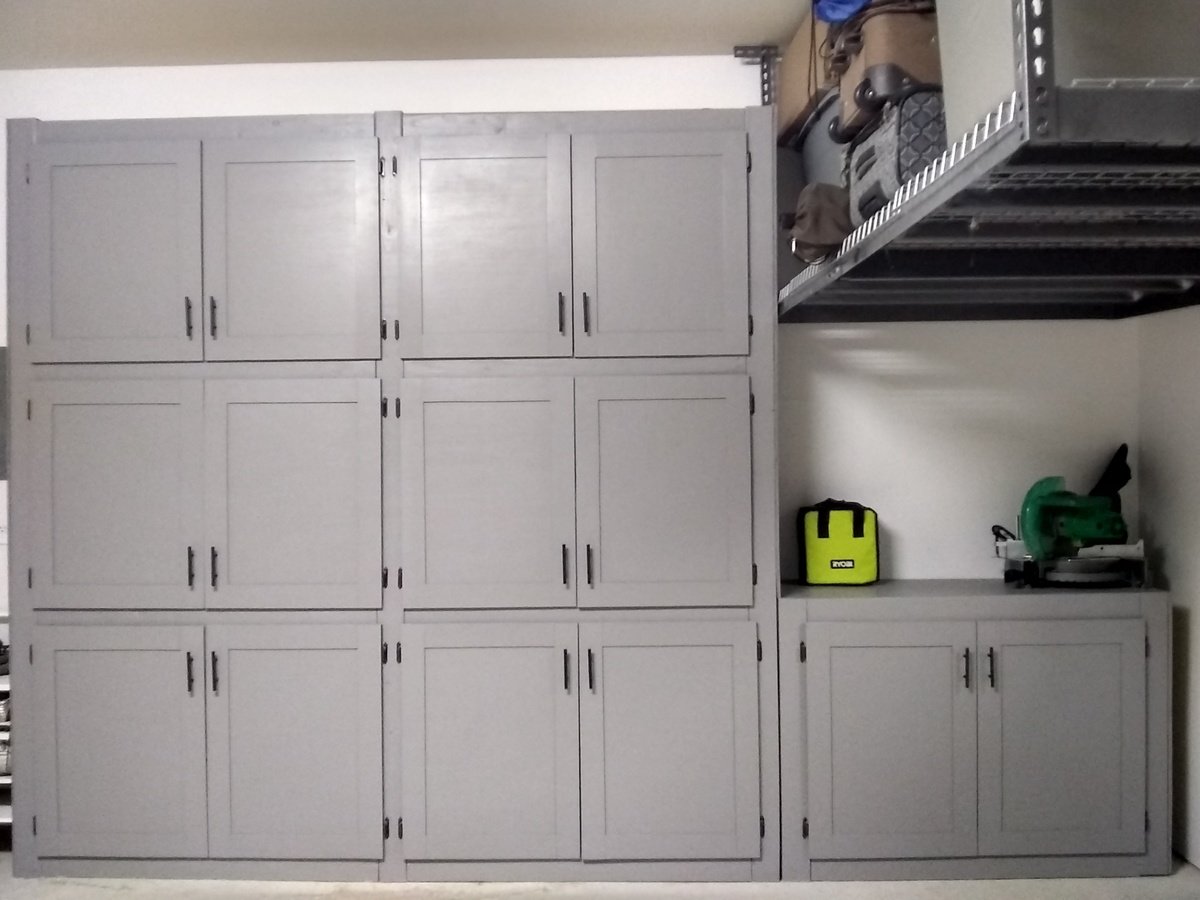
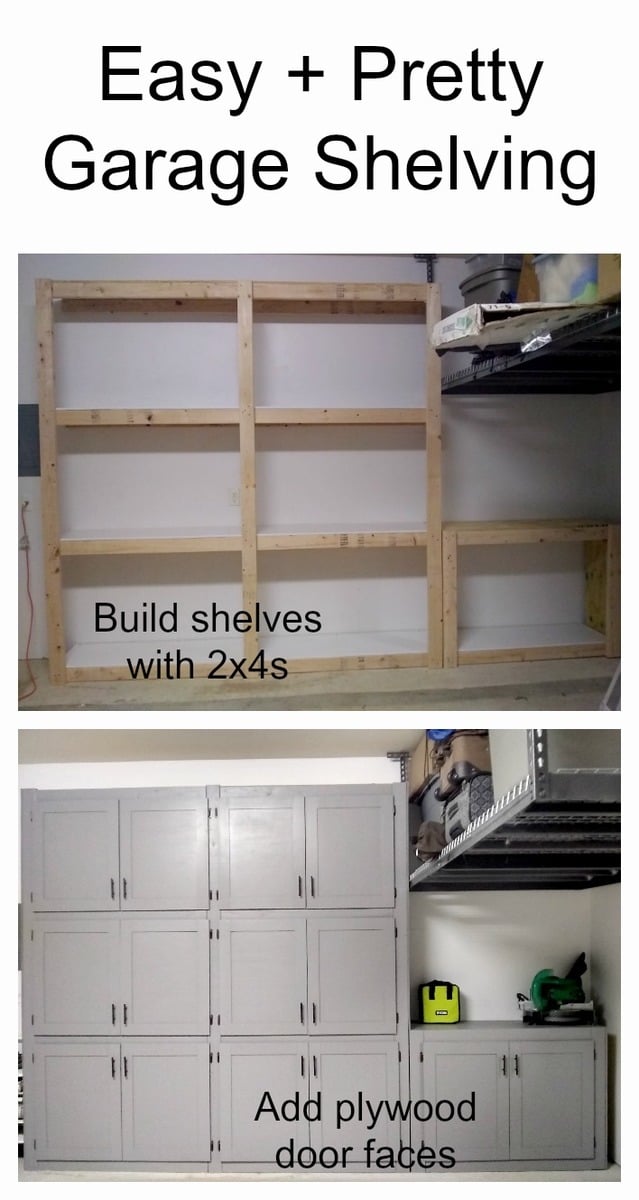
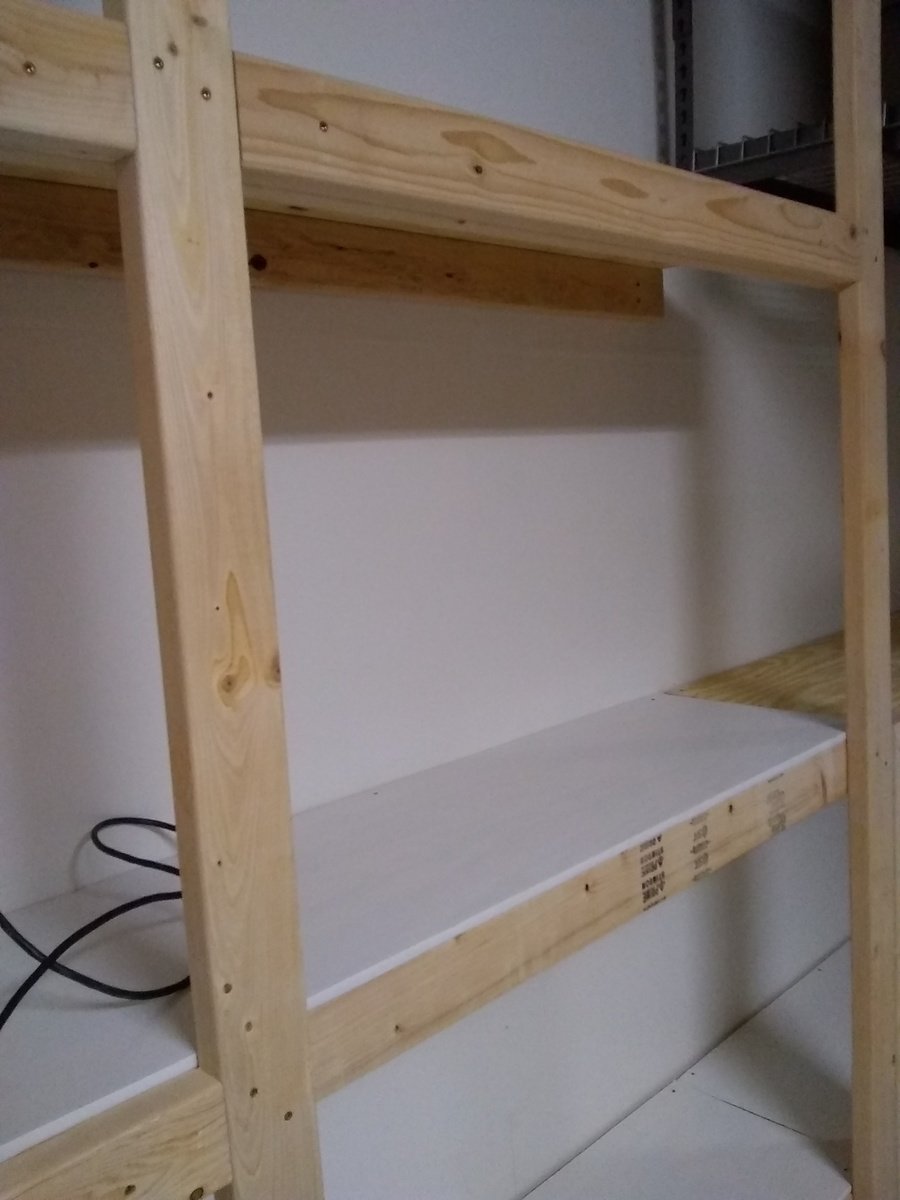
I have been wanting garage cabinets for a long time but couldn't afford them. When I saw these shelves I knew it would be easy to add side panels and create doors for the sections. The size is 8'x8' with the 4'x3' under the ceiling rack. I put a 2"x4" in the middle to divide each section, measured and cut doors from 5mm lauran plywood. I also cut the stiles and rails from the same material to give it interest but mainly to make it thicker to avoid warping as much as possible. I added 2"x4" to create a facing for the doors to rest on. Also used overlay hinges to simplify the hanging as much as possible. I was able to follow the design plan and the only thing I did was add a shelf at the bottom. The cleats were definitely not necessary, it's very sturdy. 

Making the doors

The first thing is to learn how to measure for cabinet doors. There are plenty of sites and YouTube videos showing how to correctly measure. If you are doing the same type of doors like I have, with no middle divider, then be sure to pay attention how to correctly measure for those instead of a single door.

The easiest way to make the doors will be getting 1/2 in sanded plywood and use a table saw to cut each door to size. Skip the shaker style trim and put the hardware on and be done. Make sure the hinges will be able to hold the weight of the door.

Unfortunately, I didn't have a table saw but I did have a router and a jig saw, and found a great video on YouTube on how to use a router to cut straight edges without a table saw. I measured out one door and used that outline to cut two identical doors. It turned out that each section was slightly a different width so I had to do two at a time. However, if you have a circular saw you can rig it to make a table saw and make a guide to rip the doors. It all depends on what tools you have available to you.  

I have a compact plunge saw and was able to cut the 3 inch strips for the shaker style with it. Honestly, that was the most tedious part and most time consuming by far. That also had to do with the fact that because the plywood is only 5mm thick I cut strips for both the front and the back to make it over 1/2 inch thick to help minimize warping and give the hinges something to grab.  

I used the miter saw to cut the stiles and rails to size and a 23 gauge nailer with 1/2 nails and glue to get them on the door. I glued and nailed the front and the back of each side at the same time because the nails are a bit longer than two pieces of plywood. I then turned it over and nailed the other side. The great thing about using a 23 gauge is that I didn't have to fill any holes because they are so small you can hardly see them at all. 

The last thing is to use your sander to ensure all of the pieces are even. I used a 60 grit and then followed it with a 220 where needed. 

If you want to avoid cutting the strips but still want to have the shaker style, Home Depot sells 1/4 thick Polystyrene flat moulding that will add vertially no weight to the door but the cost can easily add up if you have a lot of doors.

Lastly, if you are wondering why I got such thin plywood that ended up creating more work. The reason is because I wanted to save money on hardware and I didn't trust the inexpensive hinges I got off eBay would hold a heavy door for many years.


Estimated Cost
About $300 not including some tools I needed to buy anyway.
Estimated Time Investment
Week Long Project (20 Hours or More)
Finish Used
Interior satin
Recommended Skill Level
Beginner

Comments

Corner Cupboard

Submitted by Anonymous (not verified) on Sat, 11/26/2022 - 06:16

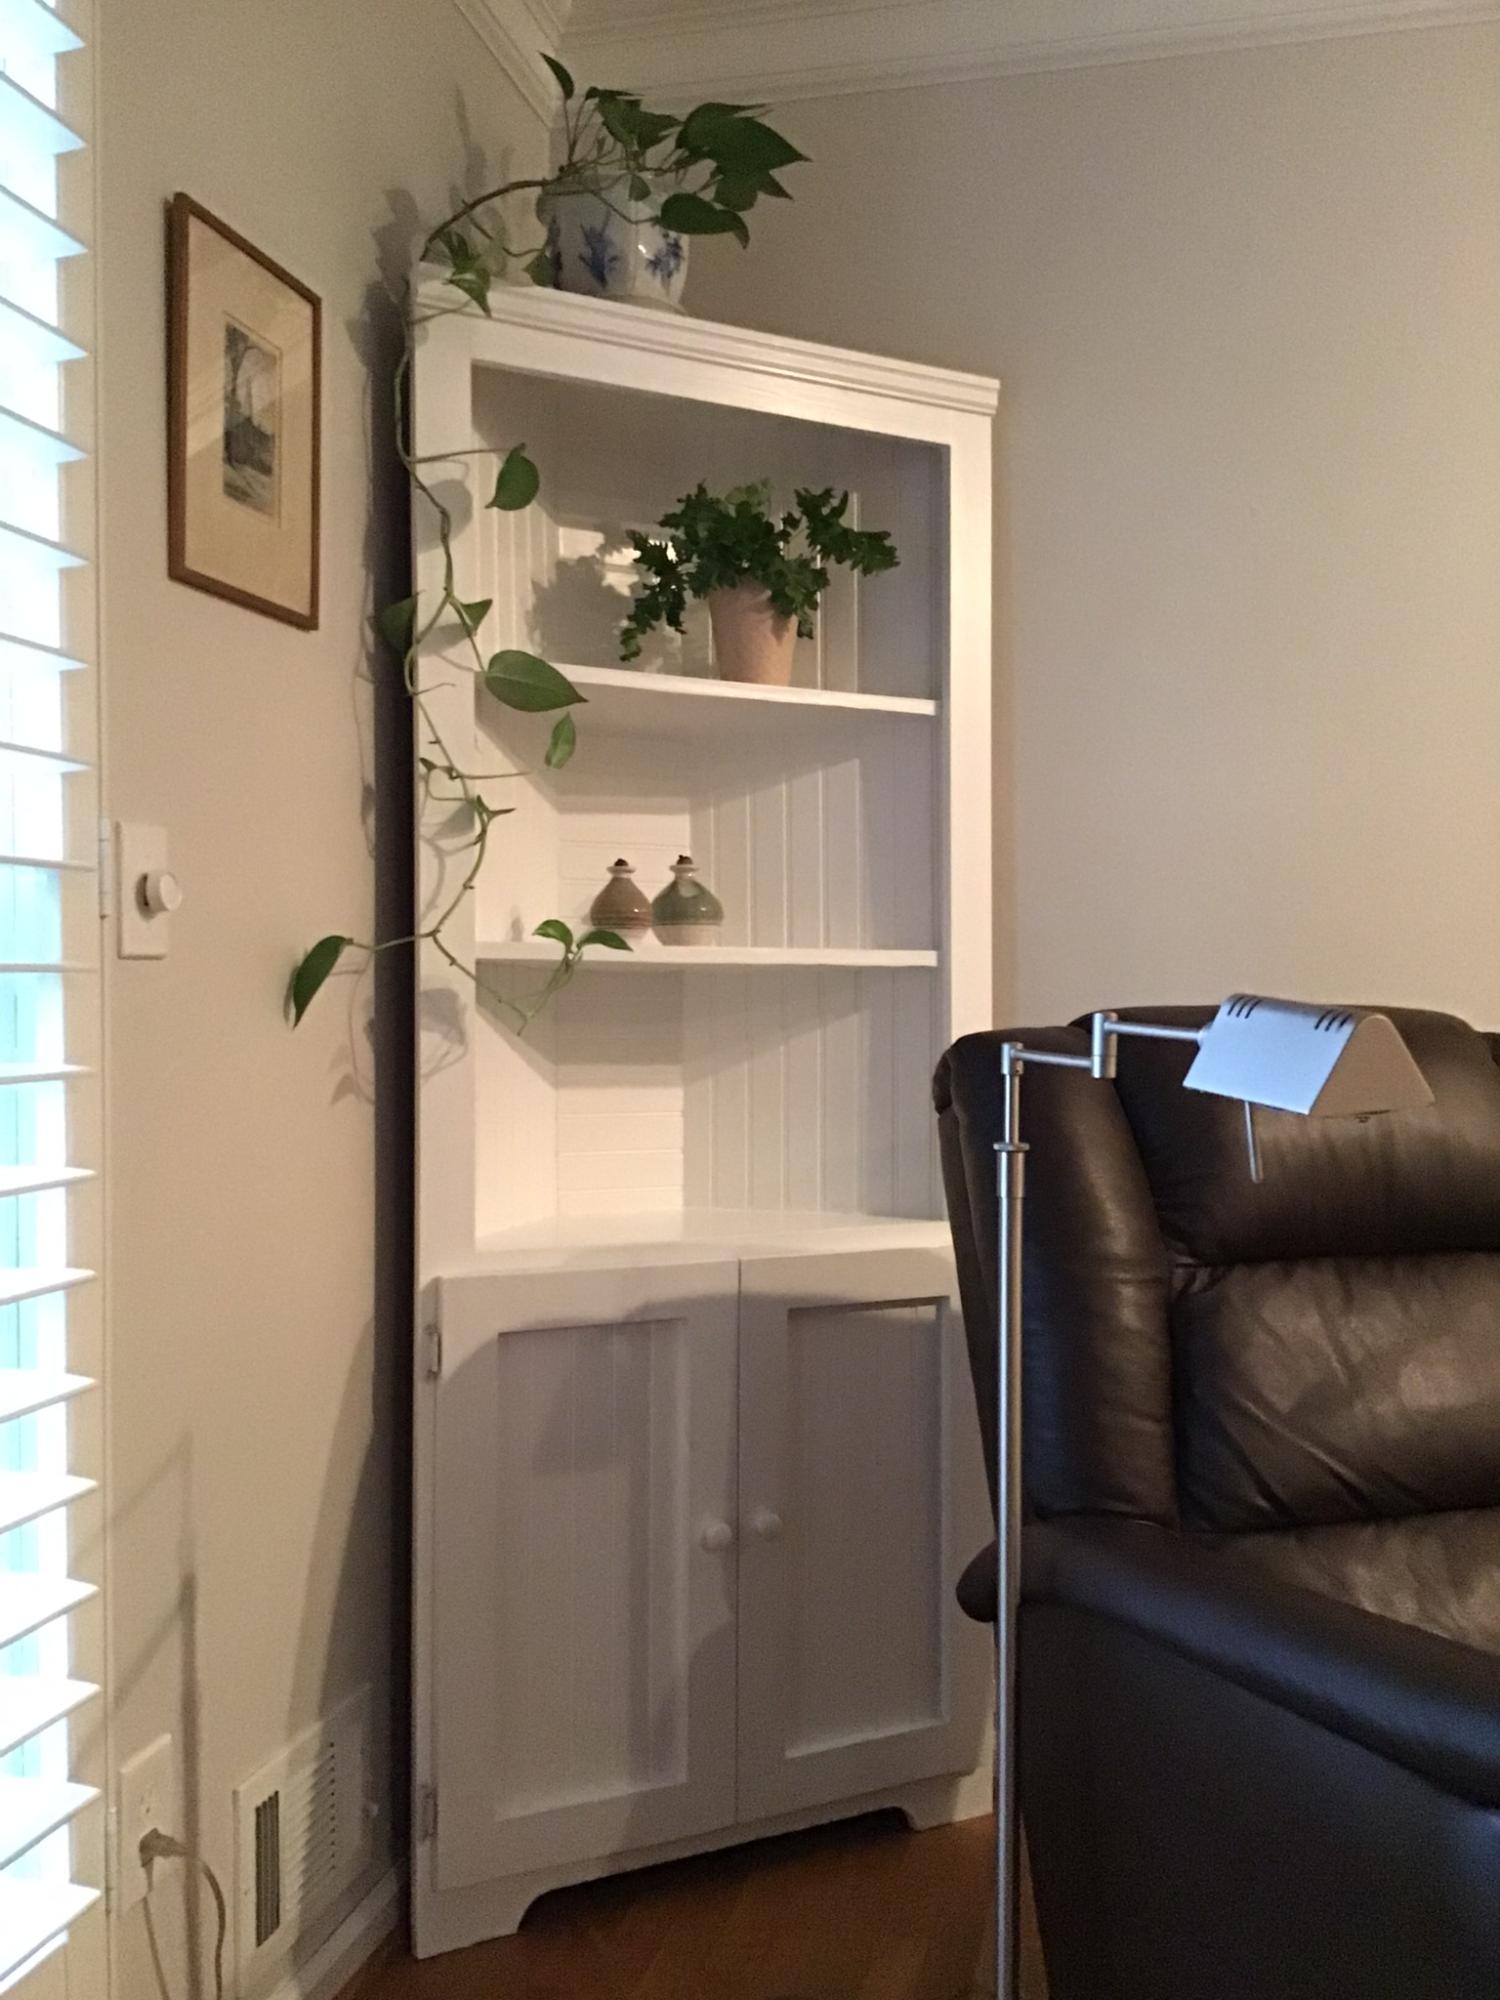
Finally I have made a project that is nice enough for our living room. Now I am so i spired to build more!

Built from Plan(s)

Comments