Sturdy Workbench Sink

Used sturdy workbench plans with 2x6 cedar top for outdoor sink. Turned out much better than I expected!!
Built from Plan(s)
Used sturdy workbench plans with 2x6 cedar top for outdoor sink. Turned out much better than I expected!!

Using just basic tools, I was able to build this super comfy outdoor chair for the fraction of the cost. With a couple of modifications, Ana White's design plan made for a perfect fit for the new deep seat cushions I had found on fb marketplace.

I absolutely love this build. I did end up using pocket holes for the carts to make them slightly stronger. I also had to do custom work on the top of my table saw cart due to rack and pinion fence. I routed the the plywood tops with a slight round over and waxed them smooth. I plan to add a dust collection hood around the miter saw and then install an inset stop block for the miter fence.


Fri, 07/24/2020 - 16:08
Very nicely done! It never even crossed my mind that the cart would need modifications to fit that table saw. That's the exact same table saw I've had my eye on, and I plan on purchasing any day now; so that is definitely good to know! My project is still a work in progress. I currently only have one cart built.
Do you have enough room to adjust your miter saw to make 45 degree cuts from the position pictured? Or do you have to move it forward in order to clear the work bench frame? I only ask because that's what I have to do with mine at the moment. I have to have it all the way forward on the shelf. I am considering making the miter saw shelf a little bit wider to remedy that minor issue.

My wife and I were tired of the cheap plastic chairs but not wanting to spend a fortune. I came across Ana’s site and these great plans so I gave it a shot. Everything was pretty straightforward. I decided to use 1x6’s for the seat and back slats instead of 1x10’s. I also used dowel rods instead of wood filler to close all of the screw holes and I Roy fed the edge of the front seat slat one the router. I’m currently working on a partner for this chair with some adjustments (Making it 2” wider and using pocket hole and other techniques to hide the screws).


The base of our playhouse felt like the perfect spot to use the sandbox plan with built-in seats. The bench seats actually fold flat to create a lid for the sandbox when it’s not in use. I followed Ana’s plans exactly and used the list of materials she provided. The only modification I made was eliminating the back supports. It was not necessary for me to add the back supports since we have the playhouse posts to support the back of the bench.


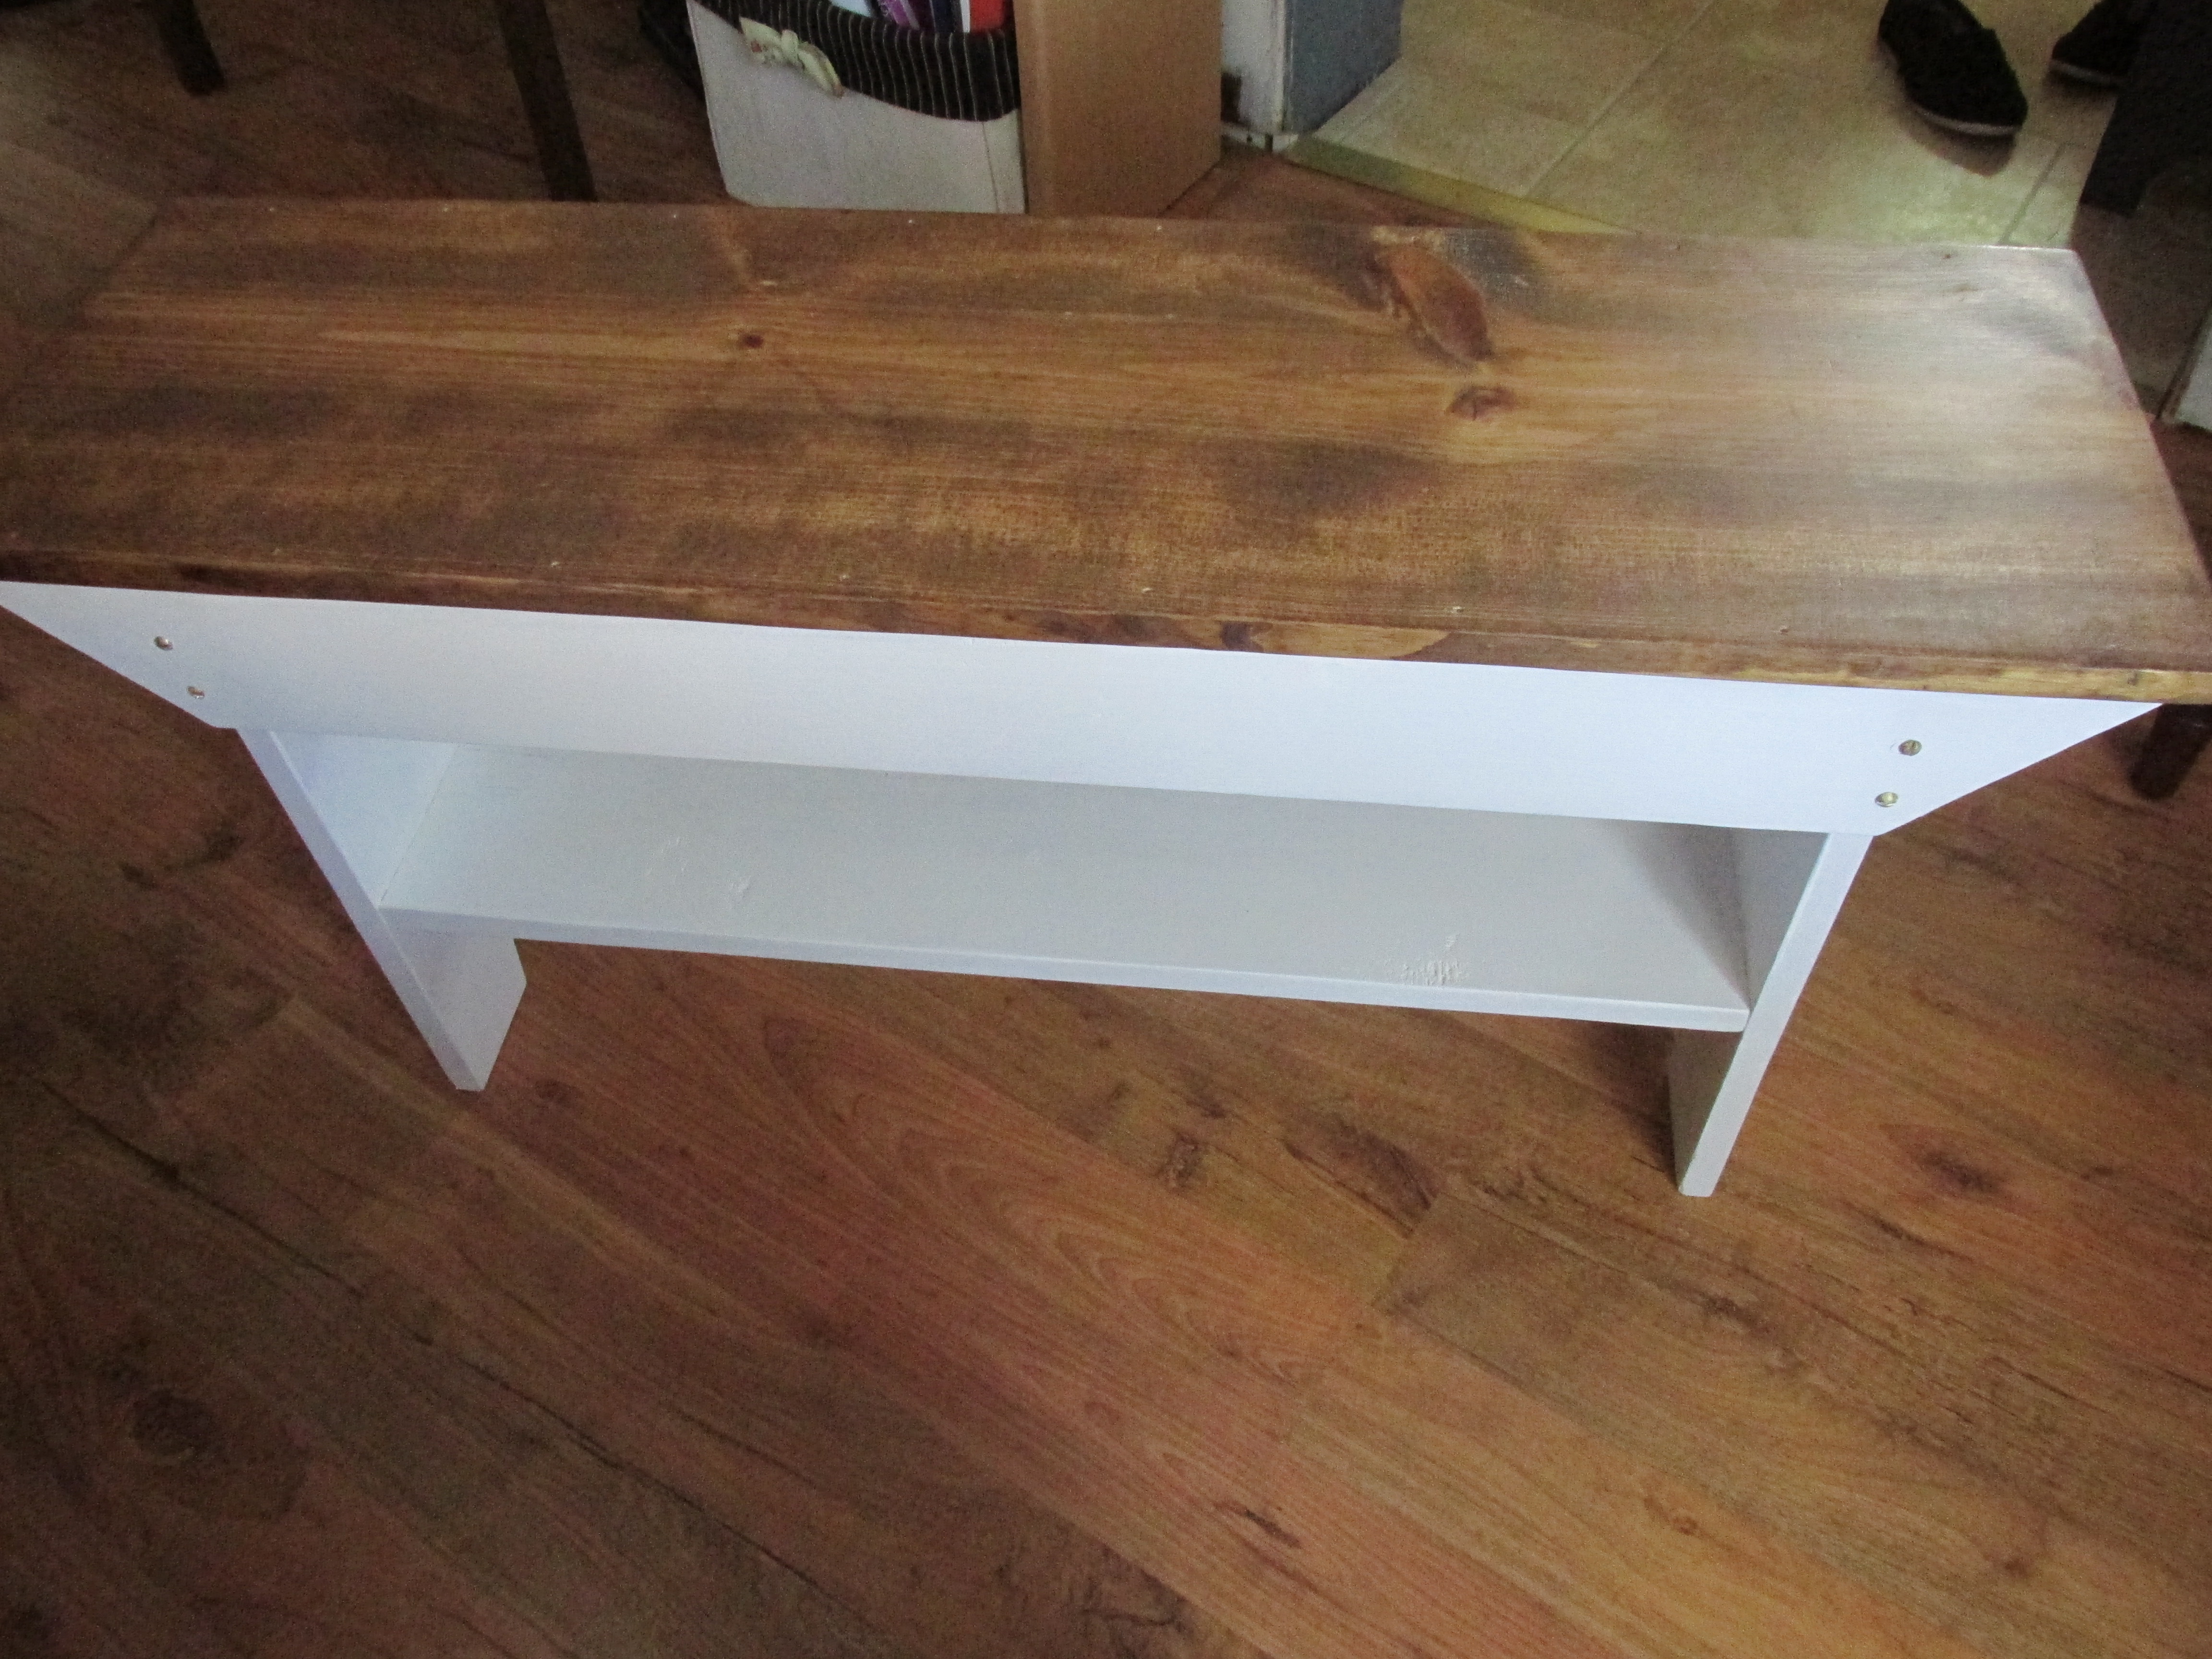
I built the above corner bench based off of the frameless drawer bench plans (they are on the shelf help site) which are very similar to the essential entryway bench plans, but the drawers are included. The long bench is 60", the shorter side 42".
For the carcass i did use the shelf help pre cut plywood.
When I started the project beginning of 2021, there was no tutorial for the corner part yet, so I was very glad to see I did the right way when the corner 'add on' came out, also found on the shelf help site).
The shaker fronts were shown in the barn door console plans, so I adopted that.
I get loads of compliments and obviously even more when people hear I built it myself.
The hardest part about this project were the drawer slides and getting them to line up and work as expected. The I broke the soft close on one of the big drawers during final assembly and still didn't bring myself to exchange the slide to a working one... 😊
But overall I'm really proud of it!
Tue, 10/05/2021 - 12:03
Thank you so much for trying out Shelf Help, what a grand project!

I love this workbench! I added casters so I can move it around the garage, outside, wherever it's needed. I just took 4 inches off the bottom of the legs. My hubby is admiring my handy work and planning on making one for himself.
Wed, 01/25/2023 - 14:31
Love this with the casters! So beautiful. I'm new here and wondering at what point you took 4 inches off the legs. Did you build the table and then just cut off the legs? Or did you adjust the measurements of the cuts? Thanks in advance! :)
Mon, 01/30/2023 - 02:32
The overall height of a 4-inch caster wheel is a little over 5 inches with the mounting bracket, so that also needs to be taken in to consideration. 2nd photo shows the overall dimensions, but to me the bracket and brake area appear to be a bit more than 1.03 inches. https://amzn.to/3DkMKzB
I think the best bet would be to have and measure the overall wheel height, prior to measuring and cutting the lumber.

I modified this chair with 2x4's as the base and 2x2 for decoration on arms, this is prior to sanding and finishing


The Gíaffe Free Standing TV Mount. Handcrafted and engineered to use its center mass to deliver strength and balance for tv sizes 30-60". Display your television without detracting from your home's decor. The Gíaffe Free Standing TV Mount is the perfect solution and its rich finish will be perfect for any house/office room.


Wed, 03/11/2020 - 07:16
I absolutely love this!! Are there plans available?

When my wife and I moved we sold our old table and was in need of a new one. We've shopped around and didn't like anything we were seeing. She insisted that I build one but I never had any time due to my job. In the past it would've been easy because that's what I did was woodworking. So she researched and came across ana's plan and she loved it. Keeping the wife happy I made time. I made my material list & cutlist but was concerned with using construction grade lumber for the tabletop due to over time it likes to cup and warp in the right conditions. Instead I went with 8/4 Poplar which will make a solid tabletop and last forever. I was only able to work weekends on the project so it was finished in a month which I added the total hours & it equaled 1 week. She loves her new table and is now shopping for 5 canvas chairs to go with it. With her posting on social media I now have requests to build more. Where will I find the time?


Loved these plans! Was my first project I tackled trying my hand with a new hobby of wood working to stave off quarantine craziness :-) finished project looked awesome and got me started working on other plans on the site.
**note**
Side table was just sanded and refinished, wasn't built just tried to match.

I honestly think Ana is a mind reader. Whenever I need plans for a particular piece of furniture, they magically appear on her site. Of course if she was a true mind reader, everything will be exactly as I need it requiring no modifications. That's what makes her plans so amazing. I can build bigger and better because I've learned to modify her plans to fit my current needs.
This Cart was no exception. I had to make mine a few inches deeper and change the height of the legs and it was a piece of cake. I put this together in less than 2 hours and finishing was easy too.
I did a blog post all about what I did differently including how I constructed a towel bar instead of the pipe. Check it out at www.thepursuitofhandyness.com


With six people in our household, we were in desperate need of easily accessed storage for our off season clothes/gear. This ended up being a perfect solution. We customized shelf heights to fit the bins that we use for storage as well as made an area for our cat box (at the bottom right). It's such a relief to finally have everything tucked away but easy to get at when we need it.


I modified the plans slightly to go taller so it could fit a standard propane tank. I also added a hinged lid based on an image I found on Pinterest that did something very similar. I still need to sand and stain it next weekend.
Like others, I had a little trouble keeping the fence planks from splitting when screwing them to the 2x2 legs, since there was about an 1/8” gap between. I tried to find some scrap to fill in the gap and didn’t overtighten the screws. The lid was made entirely of 1x3”.


Needed a new console that would match other living room furniture. We had inherited the electric fireplace and previously didn’t know what to do with it. I adjusted the plans slightly to fit it in and am happy with the results
I built this bench in one afternoon and did the finishing work on the other. Tools used were a handsaw, jigsaw, Kreg Jig Mini and electric sander.
I modified the plan to use 10 inch lumber for the sides so that it would fit in the space where it would be used. Overall length was increased to 30 inches. Most of the wood was already on hand, but a 12"x4' piece was purchase for the top (instead of reclaimed pieces)
Bottom shelf was joined with the Kreg screws. Aprons were fastened with brass screws. The top was put on with finishing nails.

After finding the build plans for this while browsing Ana White's site, I knew I had to convince my husband to help me create this. I'd been drooling over certain high-end decor store's version for a while now, but refused to pay the costly price tag. This is now one of my favorite pieces in our home, and I love saying that we built it ourselves :) See the full post at: http://www.fromourhidingplace.com/2011/07/how-to-get-your-husband-to-bu…

Mon, 08/01/2011 - 10:19
Mind sharing where you found your casters? I am having a hard time finding anything I like. Thanks!

This was the second piece of furniture that my husband and I ever made. We had built a coffee table that had a lift up top so that we could eat dinner on the couch and store all of our board games. Once we tackled that, I thought we could conquer the world (even though the table was pretty basic). So when my now-husband was about to move into his first apartment without a roommate and I saw it as an opportunity to decorate my own place (even though I wasn’t living there). Luckily,he agreed it was time to get rid of his tiny Ikea TV stand that was probably 2ft off the ground and not a great height for a TV, and agreed to build this awesome TV console with me. To this day, it’s still my favorite piece of furniture in our house.
Sat, 11/09/2019 - 14:12
Love this, needing one in my front entry way. How long did it take?
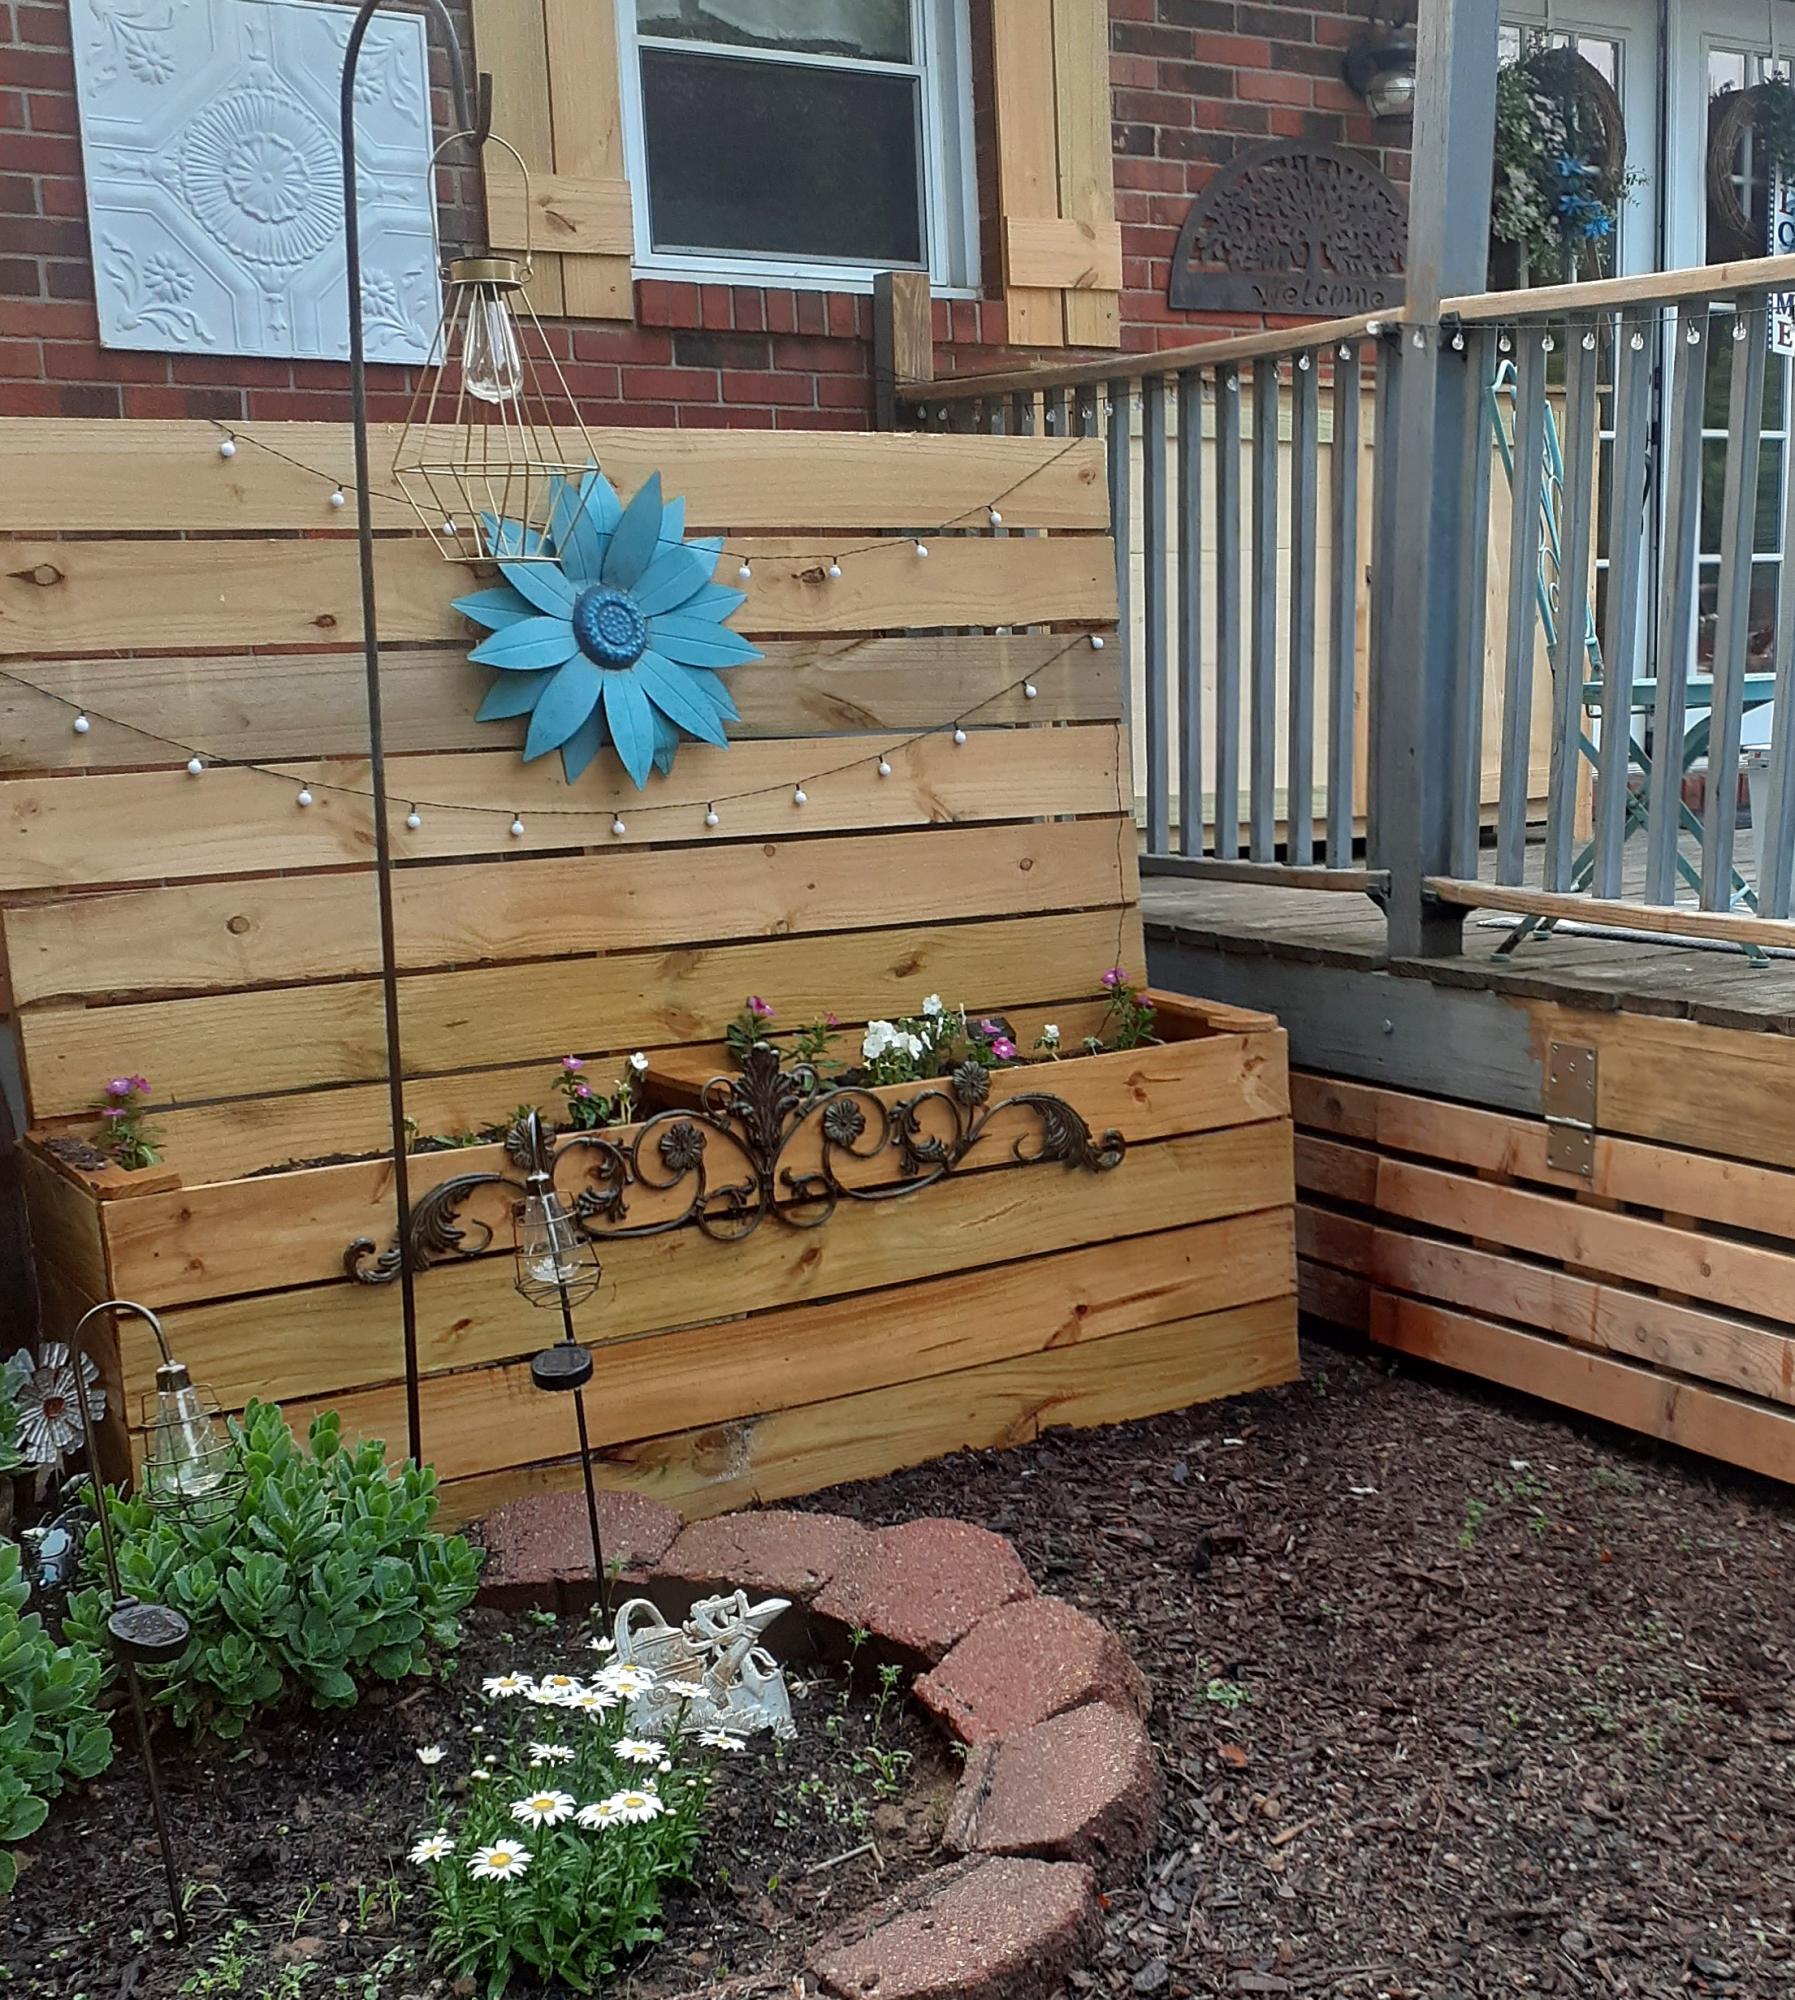
In the middle of a much needed makeover on our back deck! We did not have skirting around the deck and decided that we would like to close it in for extra storage(ladders,compost bin...) and we came up with this little something as a bonus. We are always hosting backyard get togethers and seating is a challenge. Setting up and putting away chairs,ugh. This has been the perfect solution. This was completely an "as we went" plan but the biggest need to know is, heavy duty hinges! (As I said,the deck is getting a makeover so go easy on the appearance:)
Jodi and Matt B.


Used part of the Ultimate Roll Away Workbench with Miter Saw Stand to just build one of the roll-away workbenches to work with my miter saw and table saw. I'm very happy with how it turned out.


Sun, 04/28/2024 - 12:57
Hi, I am planning on getingt a dewalt 10 inch table saw as well. I am wondering what you did to adapt it for extending the rails with the fence? Curious if there were more photos. I would very much like to adapt my station to be similar to yours. Thanks. .

Comments
Ana White Admin
Tue, 05/02/2023 - 07:09
This is so great!
Way to go, it is beautiful and functional! Thanks for sharing.