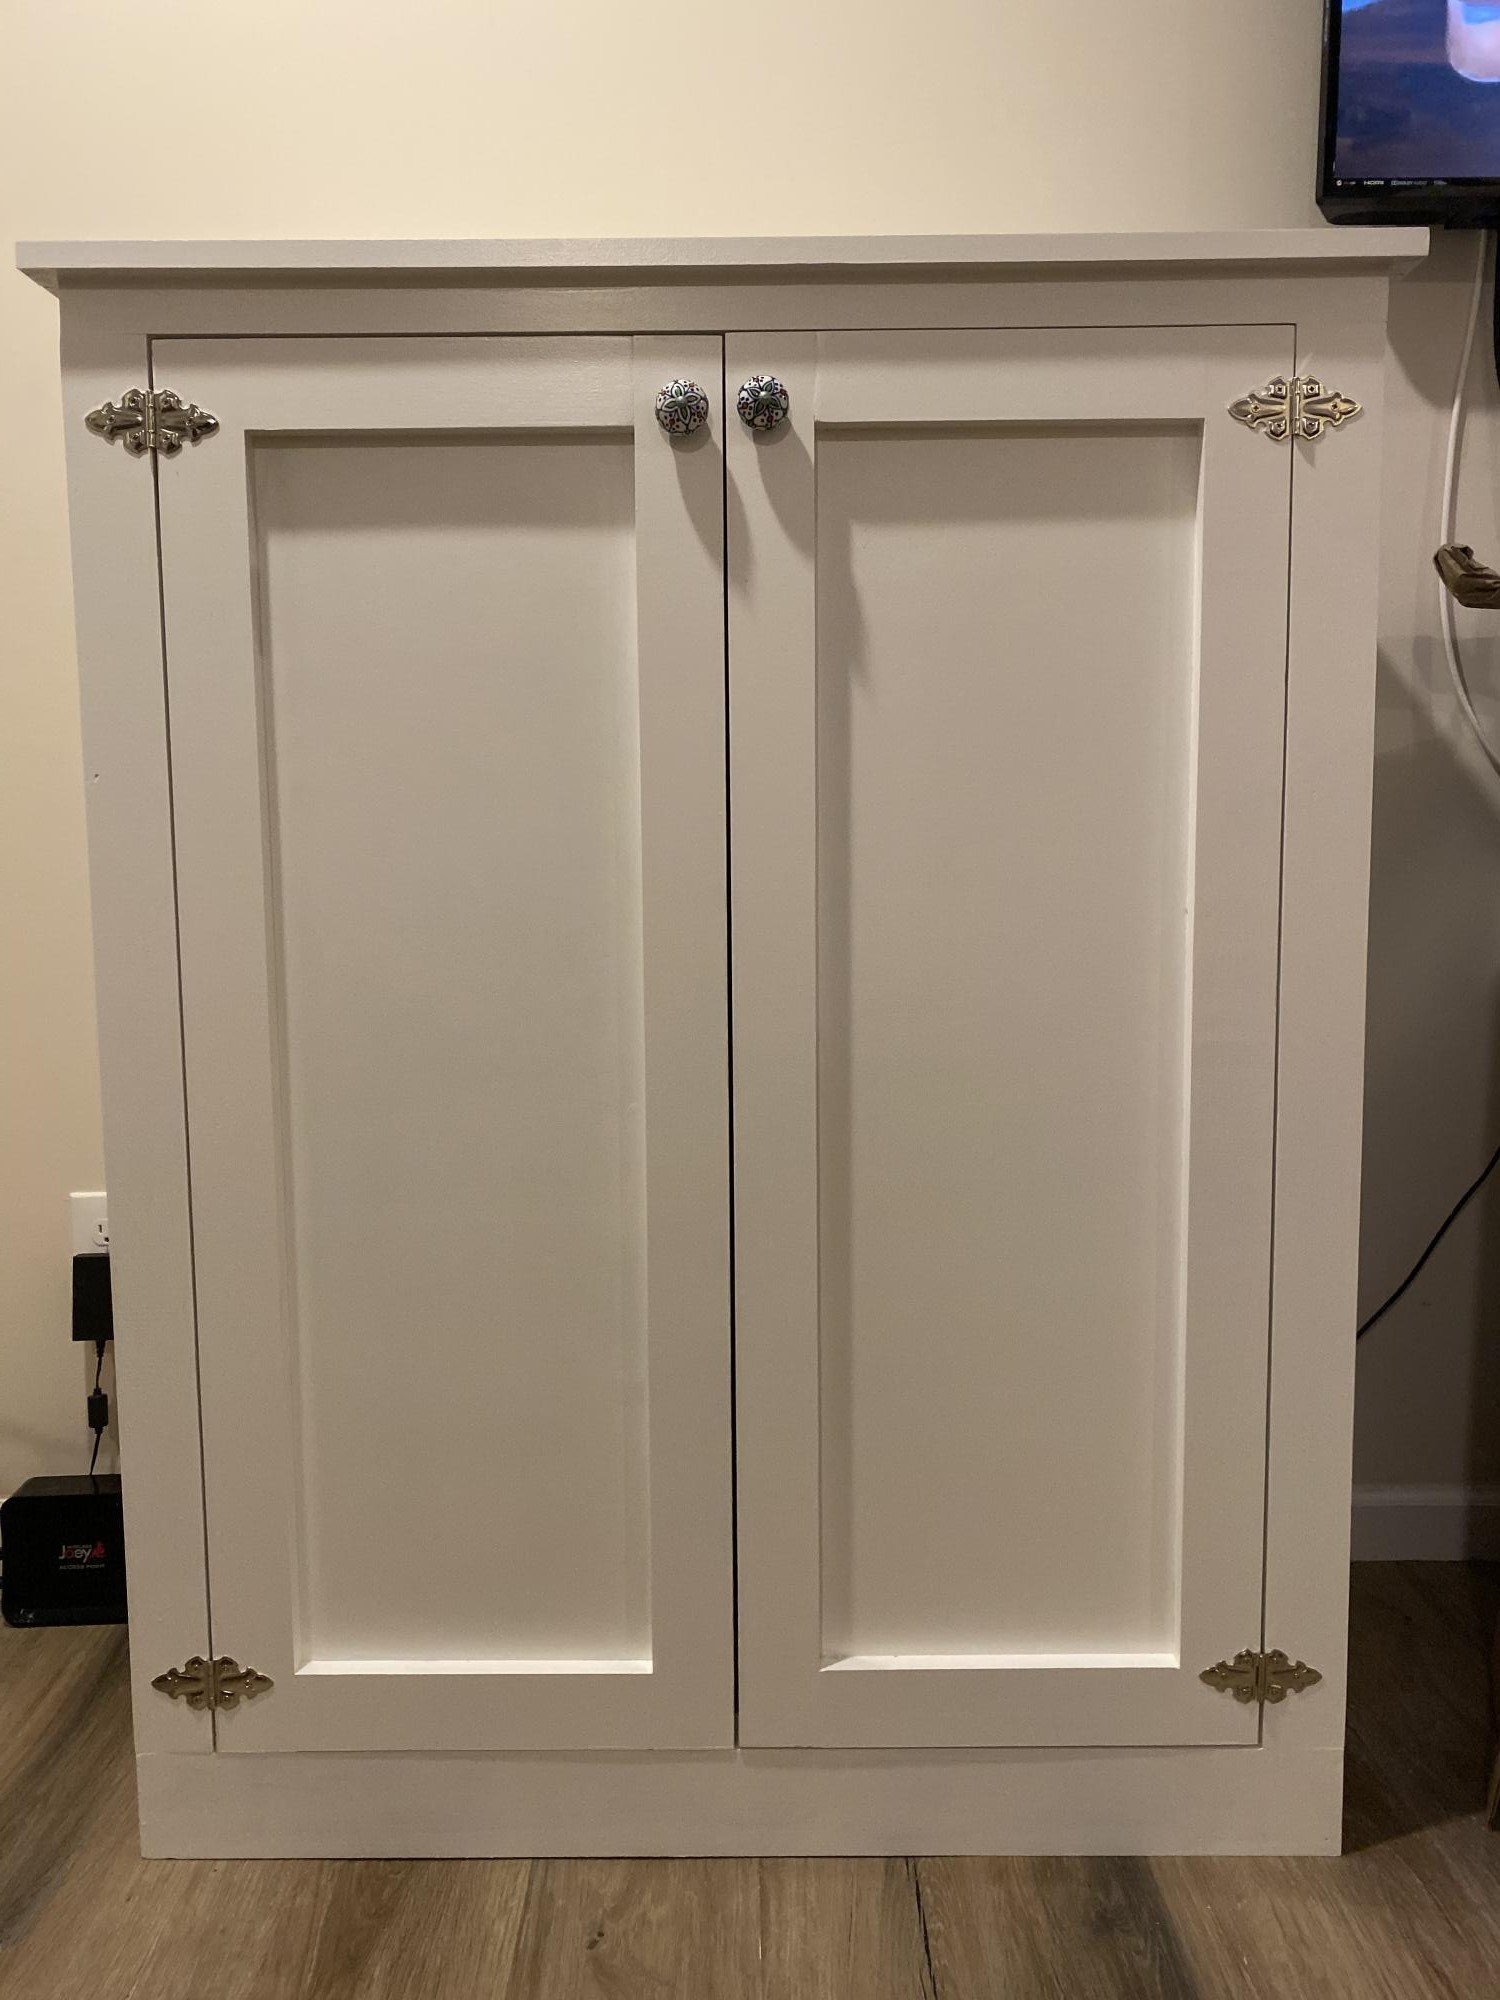
Queen Murphy Bed
Not too bad of a project but had to a good bit of guess work so I could changed the plans for a queen size bed and flip in on its side.
We like to fly the flag in our family so 4th of July is a big deal for us. I built three sets of crates to share, each with a little difference but all three with red white and blue stain from HD.
Easy to build and the instructions/plans were perfect. Nine crates required four cedar picketts.
We needed extra storage in the living room and I didn’t want to pay mega bucks for our cabinet guy to make something I thought I could do.
Its four ft tall, 3 ft long and 16 inches deep. I added 1x3’s to the sides and 1x4’s to the bottom.
I bought the Kreg shelf pin jig and it was super easy to use. Plan to use it again on a bigger project.
Next is a fireplace and TV surround.
Thanks Ana for the easy to follow plans!
Entry table made with poplar and stained with General Finishes Graystone. Applied GF high performance flat topcoat.
Laurastodolist
The enclosed garden plan.
I made mine 12x12 and added a middle The instructions were very easy to follow. I also had old paver stones, sand and gravel kicking around from a project from last year so created a floor to help with weed control. I used screws and fender washers instead of staples to attach the caging. I added two tiny beds to the inside for sweet peas to grow up the caging to attract pollinators. Let the growing begin!
Barb
This was made using Ana's "Garage Shelf" plans. I modified it for a corner spot between two exiting cabinets, so it took a bit of thought, but the Ana's technique for the build made it so easy.
AND I used up scrap wood that I'd been hording in the garage for the build.
Thank you Ana!
The pergola is finally complete! I'm sure I'll be adding some more things, but for now....I'm happy. I can not take credit for the Pergola, my husband built that, but there are lots of projects inside to tell you about. I built the sofa, coffee table, 2 chairs and 2 planters. It's a great spot for entertaining or just sitting with glass of wine. I really loved the Rectangles Daybed , but I really had no use for a Daybed, so with a few modifications, I came up with the sofa version. To make it more comfortable I used the slanted back idea from the simple outdoor sofa plan.I love how it turned out and it was fairly inexpensive too. Lumber cost was around $50. I used 2x 6′s, 2×2 furring strips, 1×2 furring strips and 1×4 furring strips. You really have to pick through the furring strips, with some patience I was able to find pieces that would work well for my project. Using the more expensive would would make things much easier, because there would be much less sanding and filling involved…but I love a bargain!! When I first built the sofa for this collection, it was for our covered porch. I was not intending to build any matching pieces. When we moved it to the pergola, I decided to build these 2 chairs. I used plan from the simple outdoor chair and modified the back to match the sofa. The lumber for the chairs cost about $25 per chair. I bought some 2X2 quartz tiles from the Habitat ReStore for $3 each! I thought they would work perfectly for the tabletop. I sketched up a quick design to match the other pieces and came up with this. I used 2×3′s and 1×2′s. The lumber cost was about $15. I also used the Square Planters with Finials plan. I love these planters do much and they were so simple! Thanks for all the fantastic plans and inspiration!!
Tue, 06/10/2014 - 11:05
Thank you so much Ana! I really love your work and can't thank you enough for all the fantastic plans!!
Thu, 05/12/2016 - 21:30
What a lovely space! Including the water feature behind the pergola. I'd love to pull it straight from your photos and drop it into my yard! (I'd better get to work!!) Thanks for sharing.
I built this table for a friend who wanted a rustic, plank-top kitchen table. She wanted a square table with 4x4 legs. Since I don't have clamps, I used pocket holes and wood glue for the table top. Also, I only have a 7&1/4" miter saw, which means the 4x4s were too thick to cut. So I made one cut in the legs, then flipped them and made another. It worked! :) I sanded down the sides of the table top with 80 grit. They needed to be evened up since some of the planks were a little longer than others. I back braced underneathe the top with (3) 1x3s. Then, I sanded all over with 120, vacuumed, then wiped it down with a damp towel. Fun build!!
Saw this clever side table on Pinterest. It's made out of 1 1x8x8. I was able to figure out how to build a jig for the table saw to suit the project and then it was easy peasy lemon squeezy from there.
Mon, 12/21/2015 - 09:41
This is so clever and would make an inexpensive yet first-rate gift! I love it...thanks for sharing.
Fri, 10/28/2016 - 08:40
I would love to build this unique table, but can't seem to find some actual plans with dimensions and jigs
Fri, 10/28/2016 - 08:45
Would you please email me the plans for this table. Thanks so much
Bought enough lumber for one sofa but ended up using old fence boards for the decking so had enough lumber to make the sectional and a shortened coffee table.
Great way to save some cash even if u have to buy the fence posts.
Added a reinforcing piece to the one armed sofa between the legs using a kreg jig to stabilize the legs a bit more.
Waiting on my foam from Amazon to finish off this project!
Used inspiration from the beer/wine cooler patio table and made the middle of the table removable to add a buck underneath later.
Note the 5 year old patio set, also an ana white project from back in the day!
Super quick build!
I did find that the measurements for customizing it for your cushion size seemed about 1.5 inches too big for all the depth pieces so I sized down but I haven't received my foam yet so maybe I'm wrong but Smth to think about. I didn't want my cushions to slide around so I took that into consideration when building.
Modified with a high back and modern adirondack arms.
The base of the chair is built exactly to the plan except that the arms are done in a modern adirondack style.
The back was made independently to fit inside the base and then attached to the plan base.
Very comfortable but very heavy chair even without the modified back.
Not stained yet obviously.
Cushions are hard to find I think I would make it slightly smaller next time and maybe even find the cushions first and alter the plan to fit.
Tue, 06/09/2020 - 09:11
Stained with Saman: Urban Grey mixed with some left over brown 4:1 and now has a companion side table
Wed, 06/24/2020 - 07:33
Do you have the plans for the table you built? Im a brand ne beginner. I am trying the modern outdoor chairs and live this table with them.
I’m a first year teacher of construction class at Waterloo High School in Illinois. We recently used your Small Cedar shed instructions with some modifications for a class project. It’s a bear getting cedar right now, so we used T1-11 for the outside and 2x4 for the frame.
Sat, 03/25/2023 - 09:14
Very fun and job well done! Thank you for sharing.
Plan modified to be built on stringers due to hight.
Fri, 07/07/2023 - 15:22
Do you have an illustration or instructions on the exact modifications you used for this project?
We had just moved into our new house and were using an end table for our TV stand I just didn't like it. I found this and modified it so it's shorter and fits in our room better. I also opted to not put doors on it and use it to display items instead. This was a relatively easy build and I'm learning new things with every build I make. It took about 2 days to complete not including filling holes/paint/stain. I love it, it looks so great in our room and I am planning on building end tables to match as well as replacing our buffet with movies in it to match also. Thanks for the easy-to-follow plans!
I had some left over wood from pallets and I really liked the look of the simple outdoor bench. One pallet was made out of some type of red colored wood and I decided the slats for the seat would look good in the red colored wood. The rest of the bench was from a lighter colored pallet. I used nails and glue to attach the seat slats so that my daughter could help. She loves to help, but does not like my drill even if she has hearing protection. See more at http://www.makeitlovely.com
I used 1 x 10s to make the bookcase a little shallower, and left the back open. Thanks for the great plan.
I had very little clearance on the long side of the shed, so I opted to put the door on the short side. Thanks for the plan, it was a great starting point for my project.
Tue, 09/10/2013 - 10:15
Thanks for posting! I plan to make this shed. Yours turned out beautiful!
This was a modification to an Ana White design and another brag.
Designed on sketchup. It holds 4 laundry baskets sideways. Because I wanted it to be counter height I have a 6 inch shelf.
3/4 reconditioned plywood for the base assembled using Kreg pocket screws.
The top is a low cost pine 11.5 wide.
I jointed them using a 14 inch hand plane. First time for that. Cut the top to 22 inches wide.
Prestain conditioner. Minwax dark walnut stain and 6 coats of minwax poly wipe on.
Attached using Kreg screws.
Randy Eby
Was my first project from Ana White's designs. I enjoyed making it, and plan on following up with the outdoor loveseat this spring.
We are getting a puppy in a couple weeks and we want to crate train her. We have a small house so the only place we have to put the crate is in the living room. Needless to say, we needed a way to make the crate look good in our living room. That's when I found the plans for the rustic x-end table. The dimensions were almost the same as the dog crate. I only had to change the dimensions by a couple inches and wallah! Now the crate doesn't look out of place and I have a place to put my laptop and phone! I ended up ripping the 2x6's just a saw blade width down to get rid of the rounded edges and that made the top come together smoother. I also planed down the top a bit as well. In some spots, you can hardly tell they were 2x6's laminated together! I used two different stains on it. The first coat was a tudor stain but I wanted to warm it up a bit so I put a coat of antique walnut on it as well. I am very very happy with how this turned out. Now my husband would like me to build a coffee table to match!
Thu, 02/25/2016 - 08:59
This entire site is click bait. yet to see one actual plan. its like all stolen data from pinterist. which is equally as bad
My second build from Ana's toy box plan. I had my son use his CNC machine to carve boy's name into the front. Depth of the letters is about 0.25". Looks really good.
Comments
Arilie
Sun, 05/29/2016 - 18:50
Measurements
Good evening!
I am new at wood working, and would be very interrested in knowing the different measurements you changed to get from a twin to queen murphy bed. If it is posted on this page, I tried but couldn't find it. Thank you for your help. Have a good day.
Marie-Julie
whitepawn
Sat, 05/30/2020 - 09:09
Blueprint?
Are there plans available for this bed?