Community Brag Posts


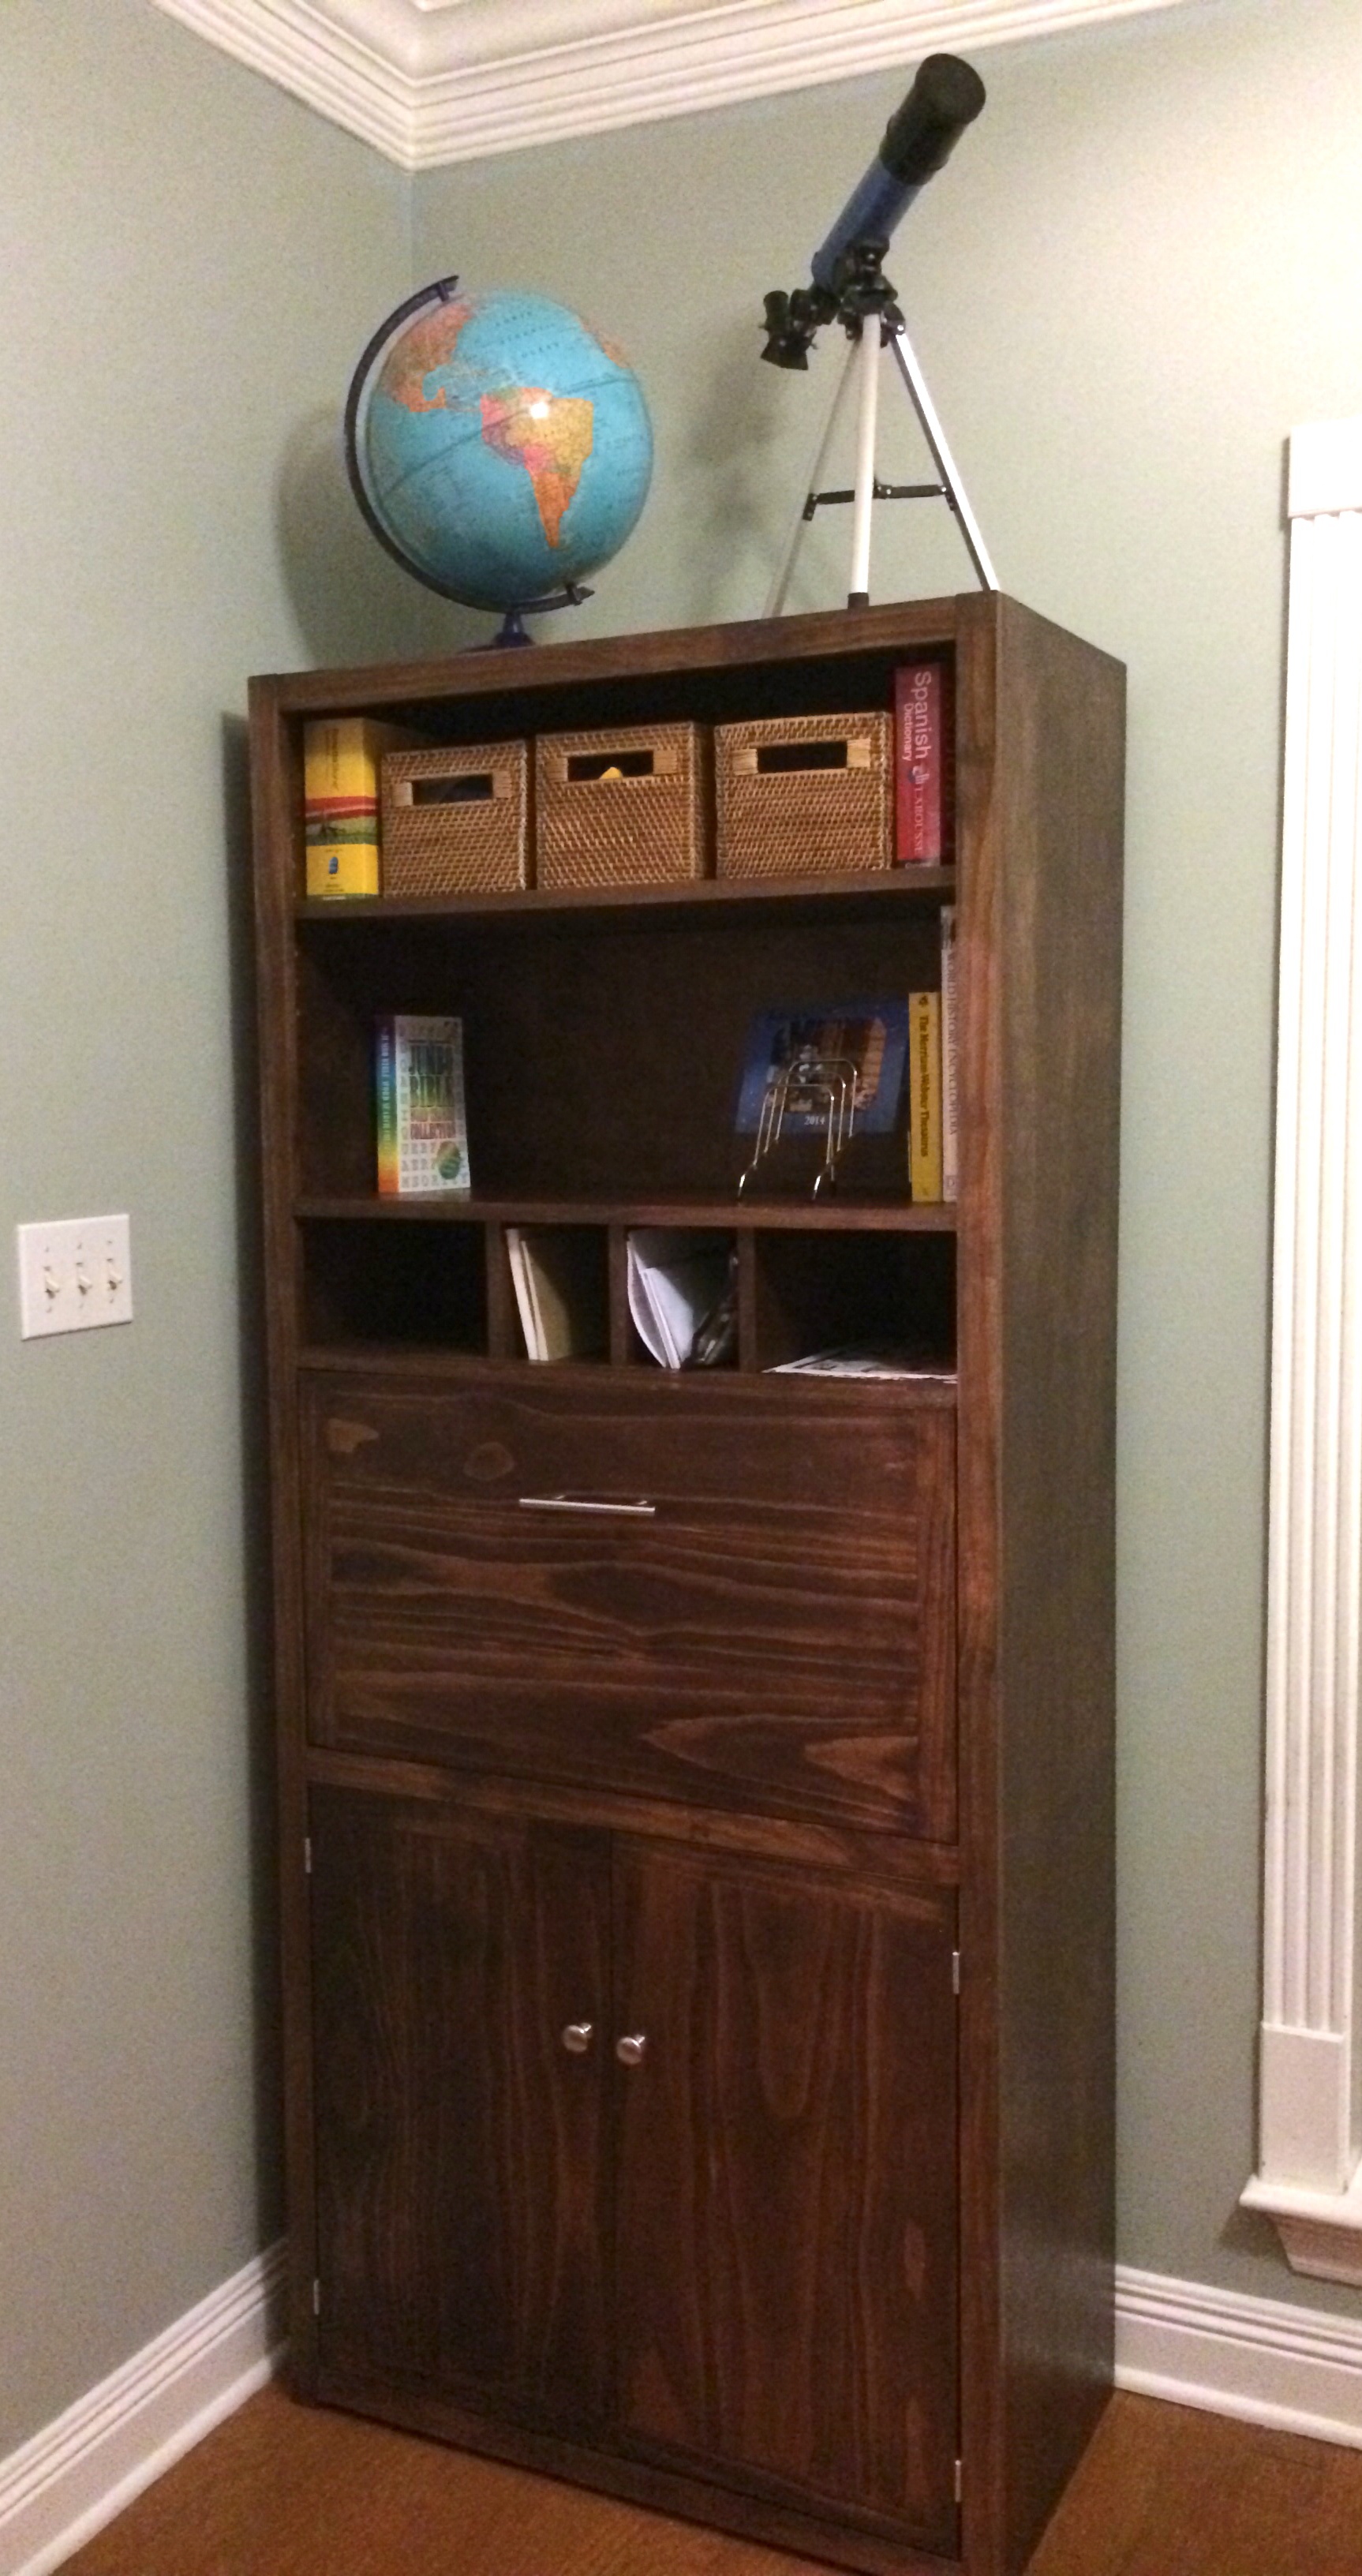
Tall Secretary Cabinet with Modifications

I built this desk as part of redesigning my homeschool room, and made a few customizations to better fit our needs. It's taller and deeper than the plans, which allowed for a larger work opening for a larger computer. It also gave me much needed extra storage space.
The cabinet is made from 3/4" and 1/4" PureBond birch plywood cut down to size using my Kreg Rip-Cut. The frame is built from pine 1x2s and 1x1s. The three cabinet doors are pine 1x6s and 1x2s joined together with biscuits, and trimmed to the correct size on the table saw. Because the secretary desk is deeper than the plan and the mail slots are small, I finished with stain and polyurethane prior to assembly. This saved a lot of frustration of trying to stain in tight spaces.
Thank you for the plans, Ana!

Built from Plan(s)
Estimated Time Investment
Day Project (6-9 Hours)
Finish Used
Rustoleum Dark Walnut, Minwax Polyurethane
Recommended Skill Level
Beginner
Comments
Rustic x console

I used 2x3 and 2x2 because I had a lot laying around. The finish is steel wool vinegar mixture and tea. Dry brushed the chalk paint on than finished it with a satin poly.
Built from Plan(s)
Estimated Cost
$70
Estimated Time Investment
Week Long Project (20 Hours or More)
Finish Used
Vinegar with steel wool and tea.. Artminds chalk paint- sea glass and Varathane water based poly-satin
Recommended Skill Level
Intermediate
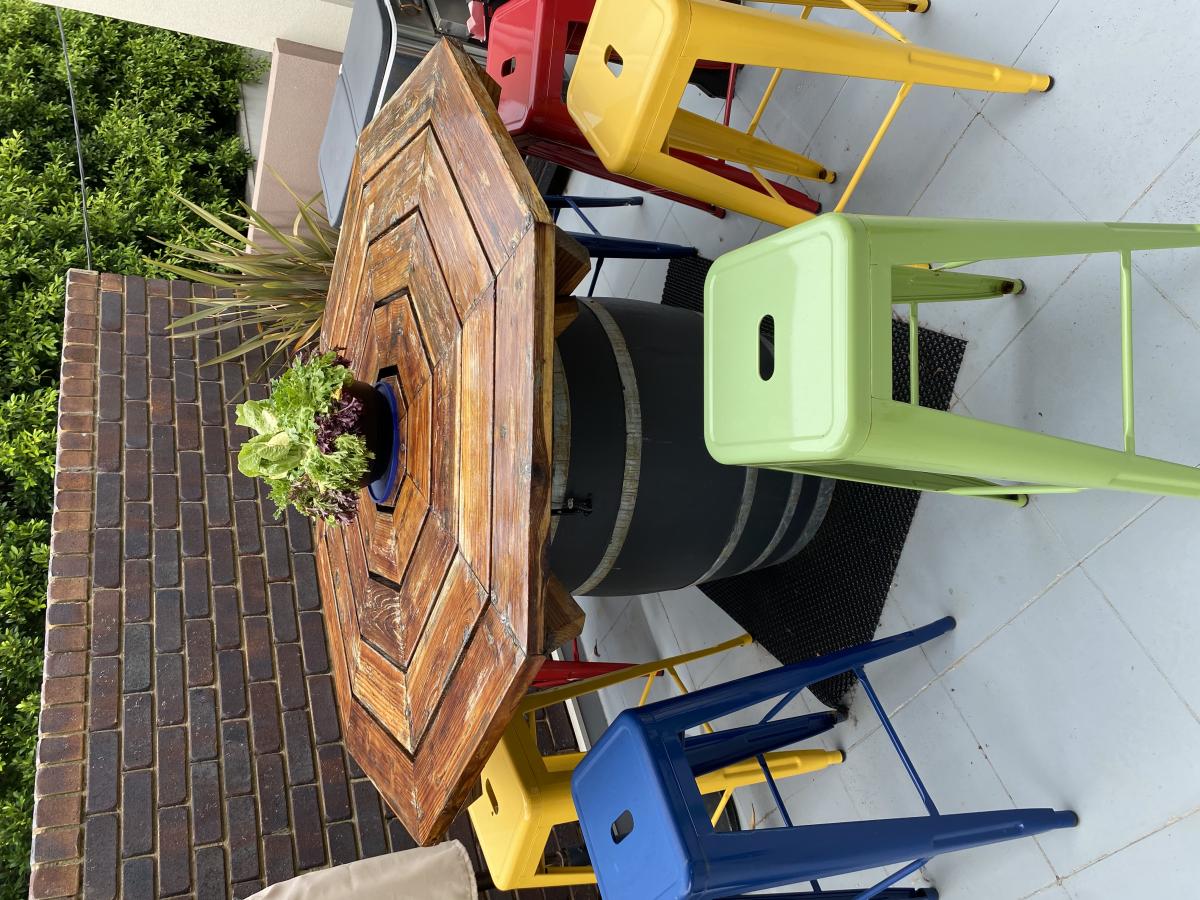
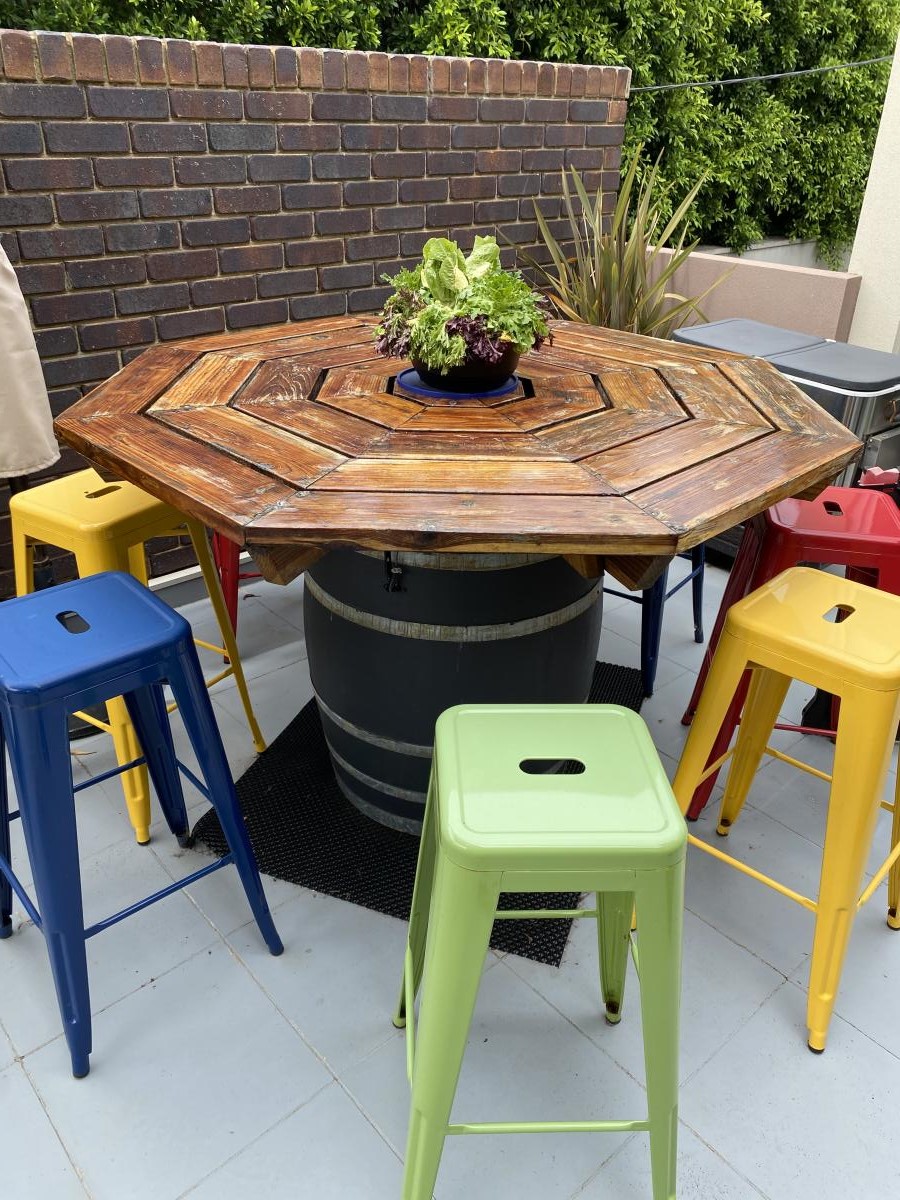
Octagon picnic table, made from redwood. Modified after eight years.
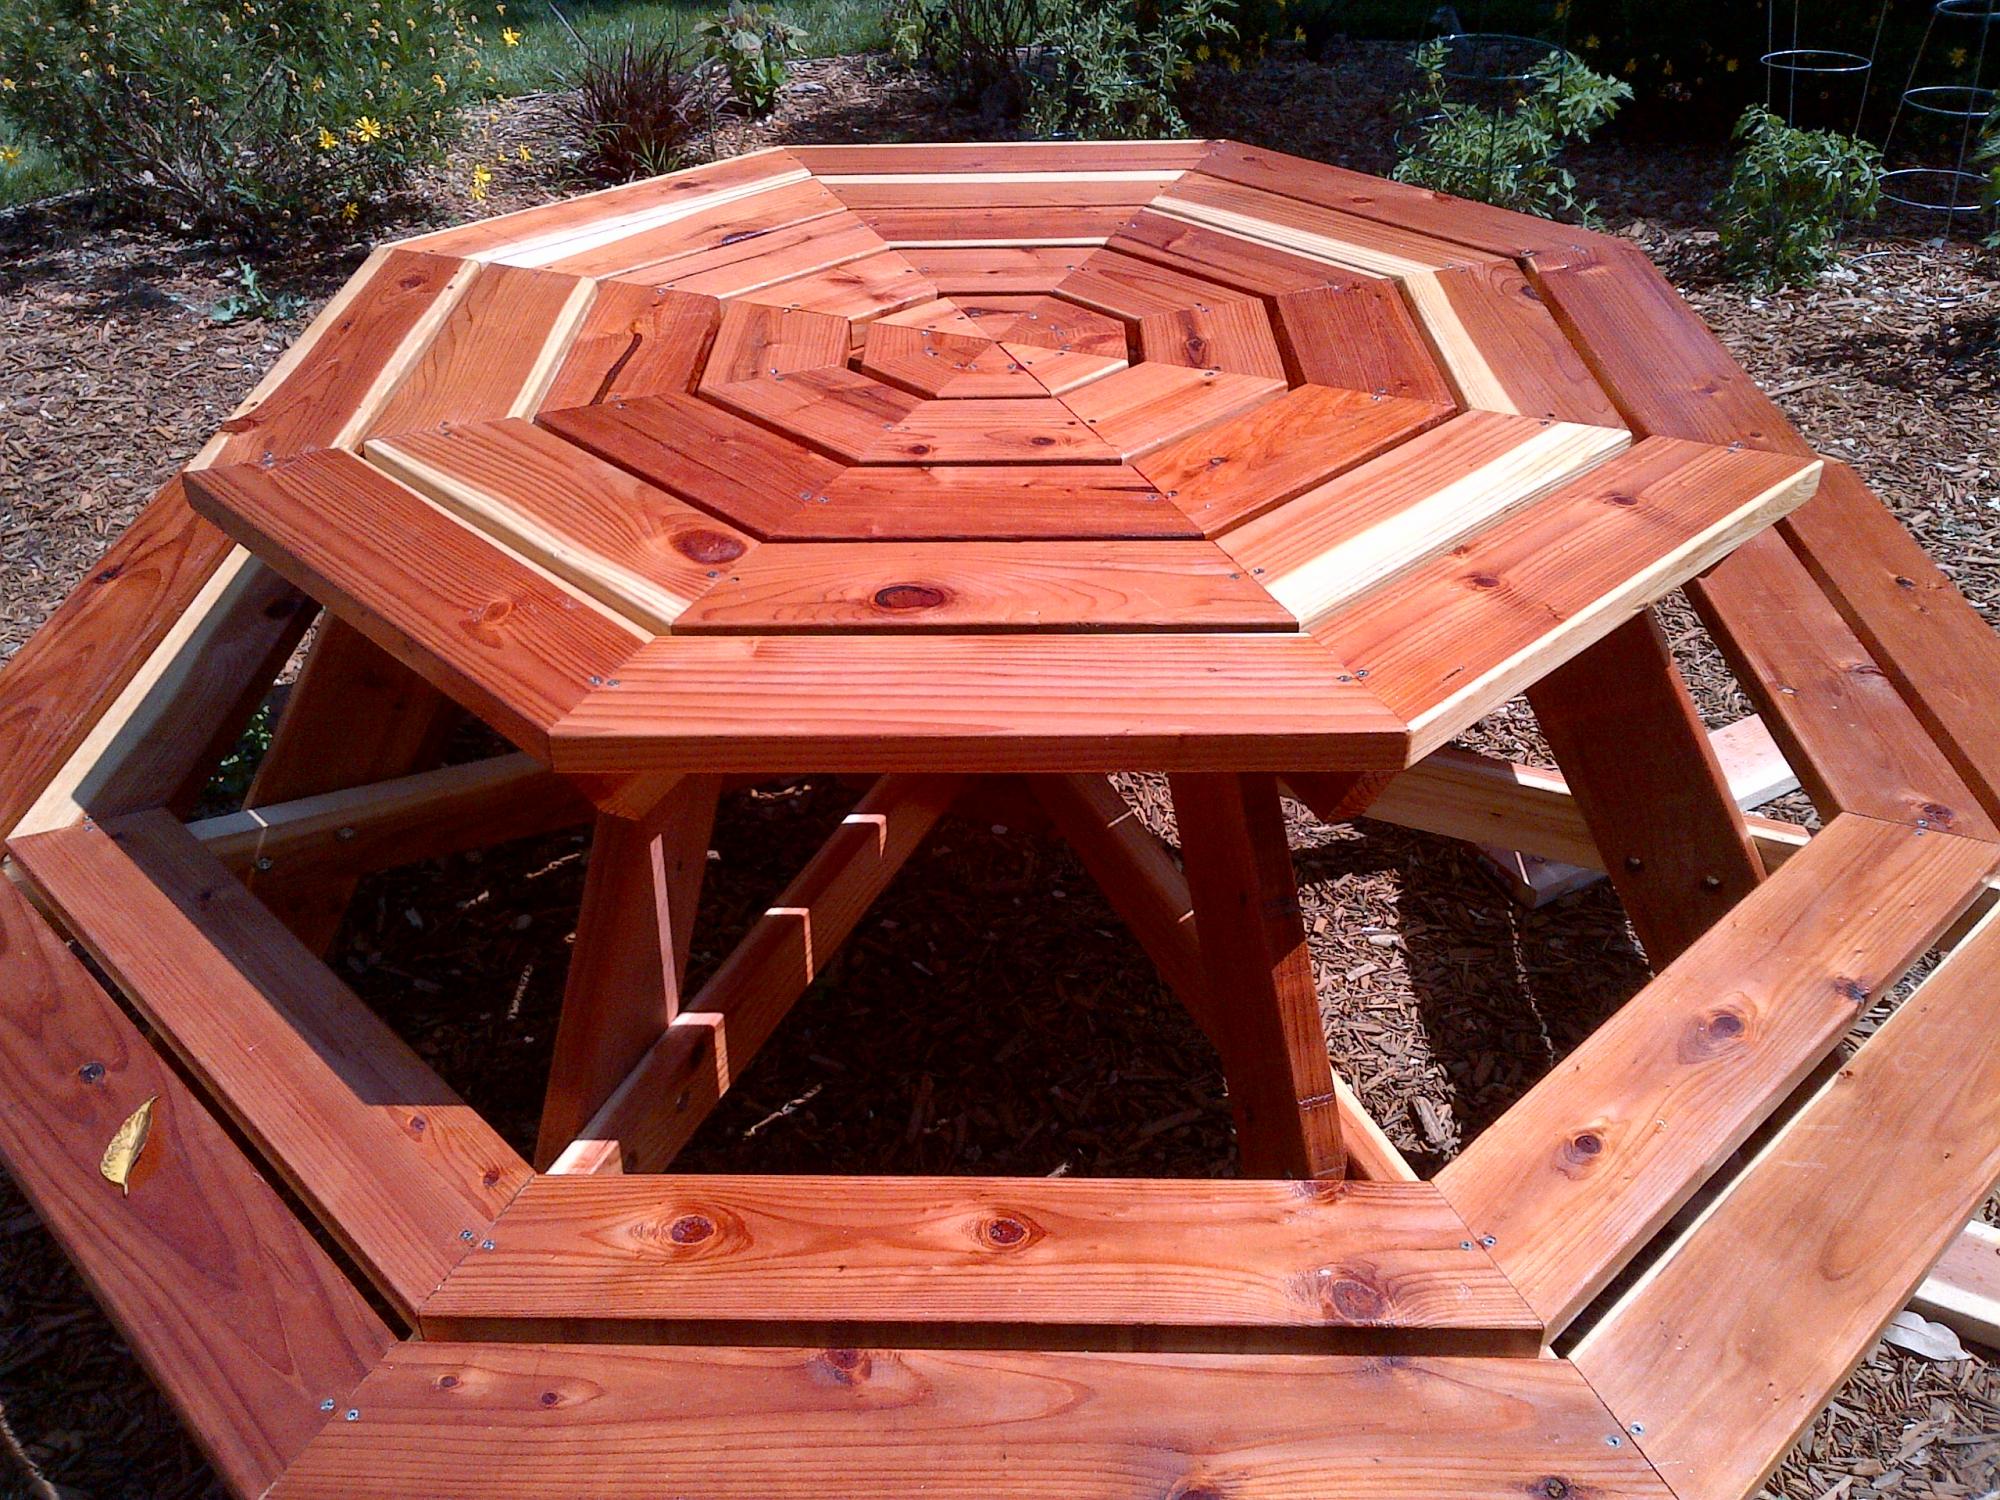
I made the octagon picnic table in 2012, using redwood. We lived in California, then in Asia, and now in Australia. In 2020 I modified the table using a wine barrel, because the original legs had rotted.
Built from Plan(s)
Estimated Time Investment
Week Long Project (20 Hours or More)
Comments
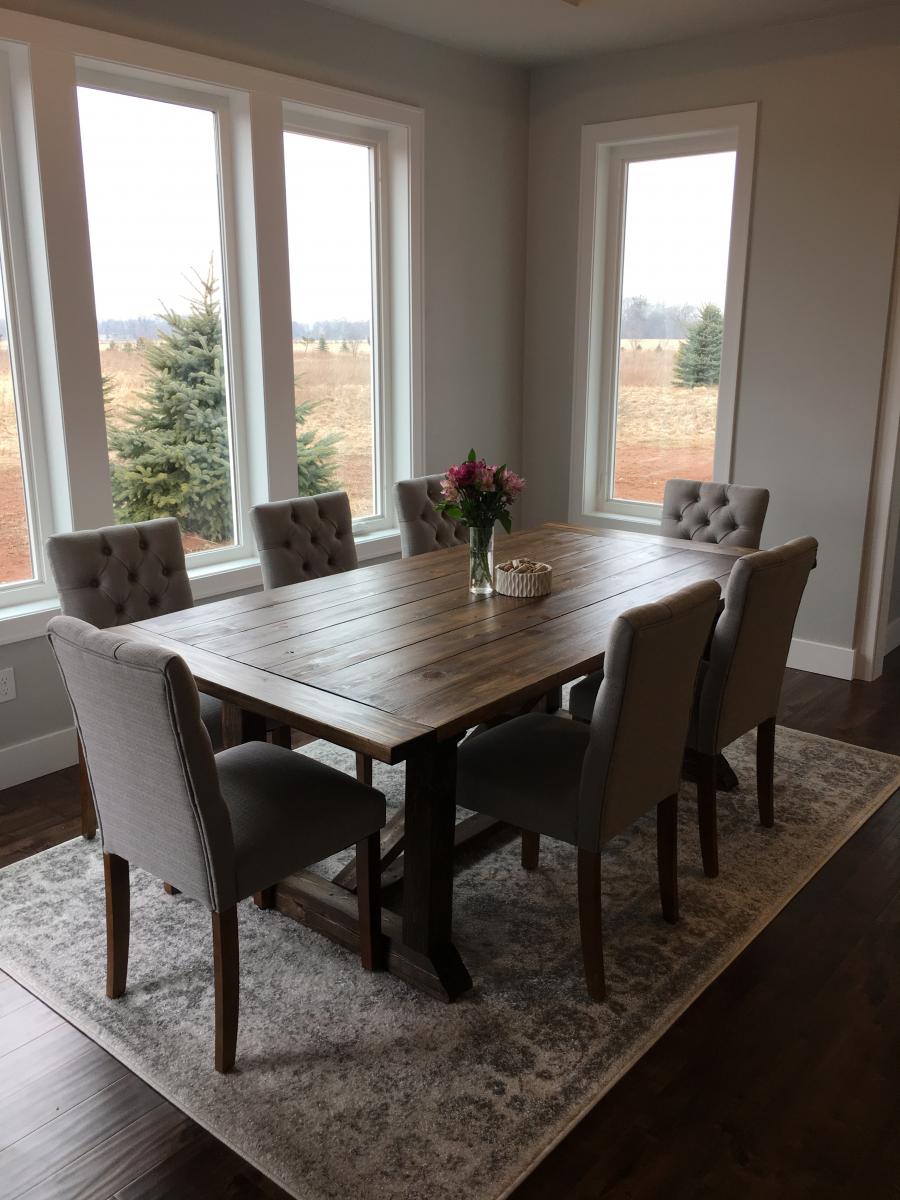
Shanty Farmhouse Table brag

We were in need of a dining room table--we were hosting Thanksgiving and finally wanted a "grown-up" table! We are huge fans of Restoration Hardware, but not their prices. The Shanty plan was exactly what we were looking for! We love the table, the size is great for our dining room--we left the top at 8 ft. The finish is also what we were looking for; it is something like a weathered barnwood look, though now that the dining room is painted it comes across more steely blue-gray. Still, it is exactly what we were looking for.
We also made an accompanying bench, which you can see peeking out from behind. That has not made its way to the staining process yet, but we are now in the process of building the sideboard and hutch, so we'll just stain everything at once.
It was our 3nd project using Ana's plans and we love it!
Estimated Cost
$125
Estimated Time Investment
Day Project (6-9 Hours)
Finish Used
1 coat Minwax Jacobean, followed by 2 coats Minwax Classic Gray. Polyurethane (2 coats)
Recommended Skill Level
Intermediate
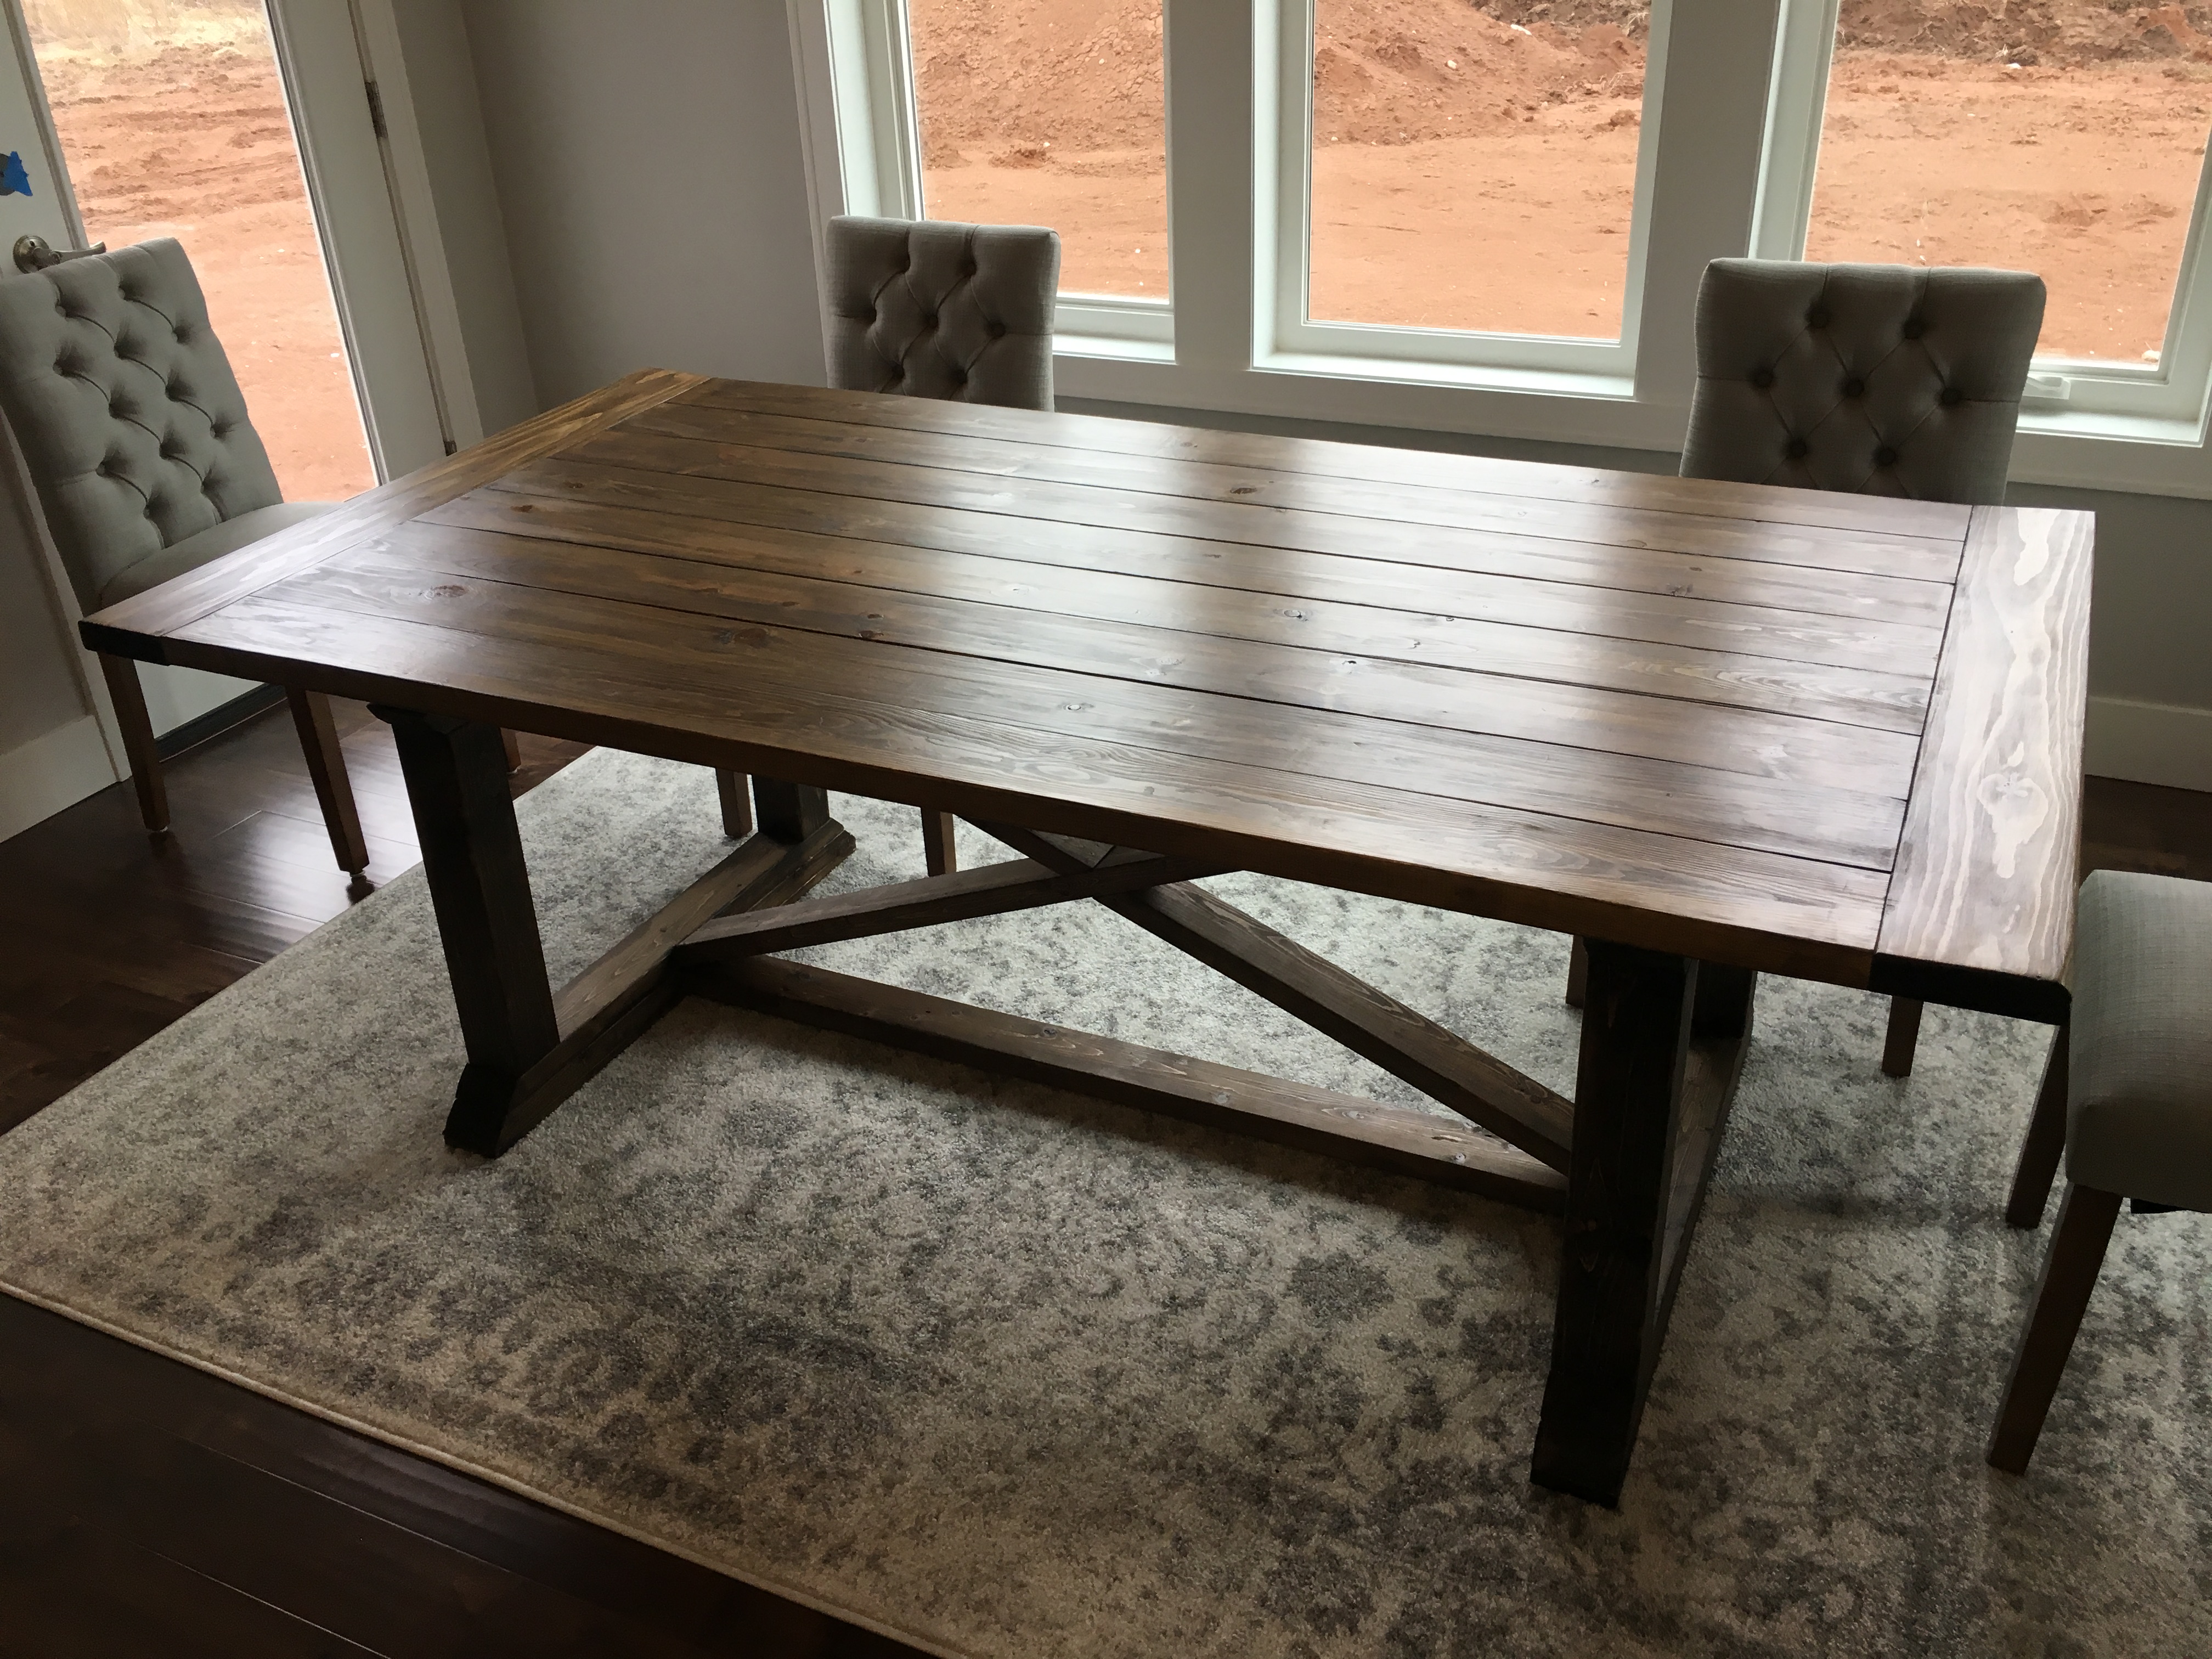
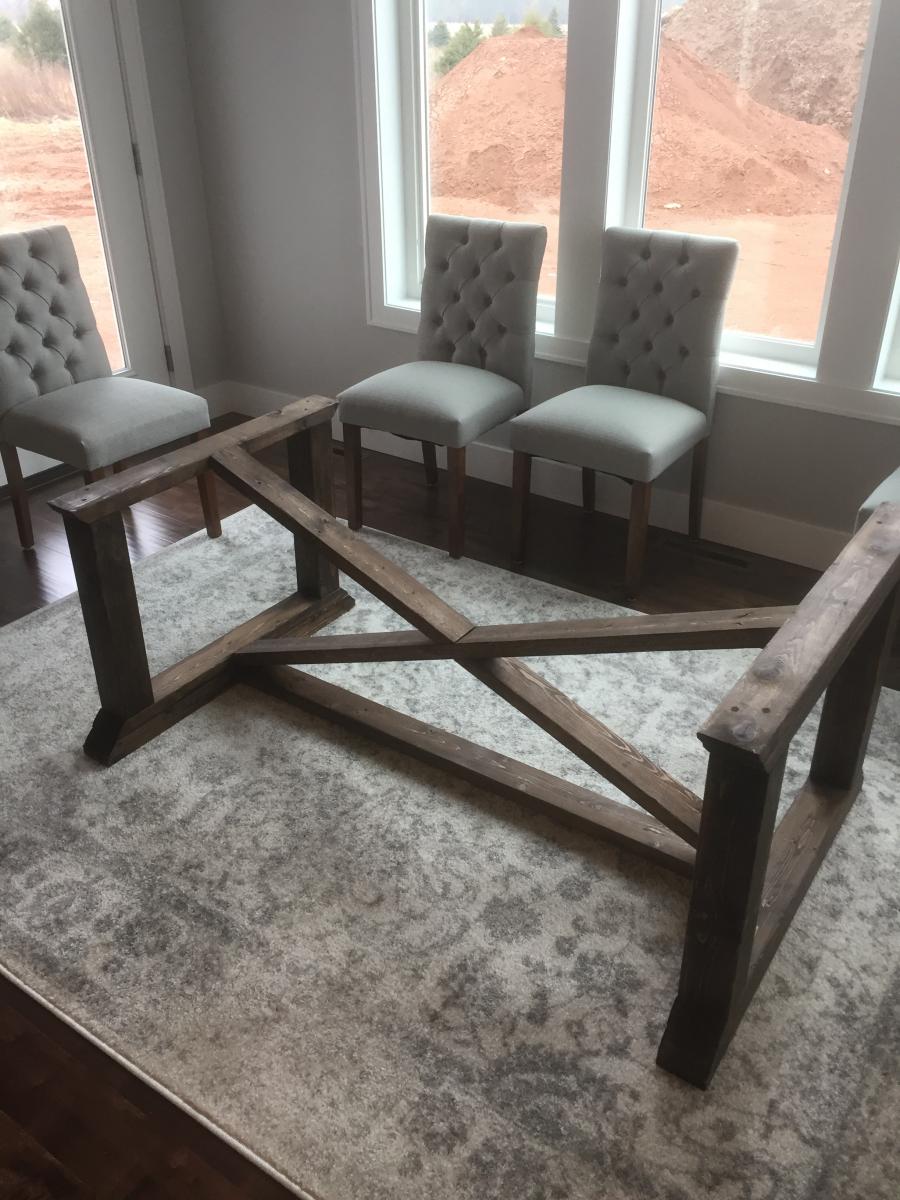
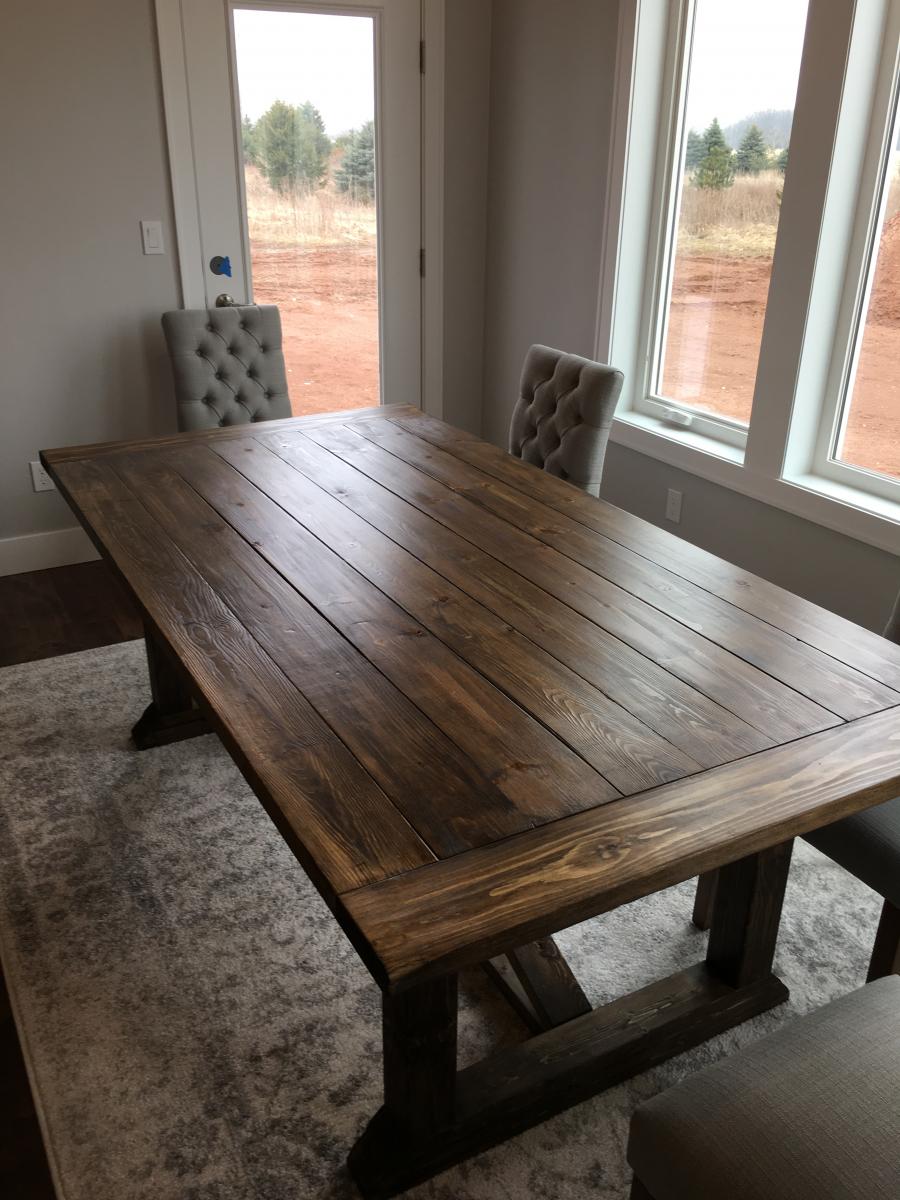
Rekourt table build
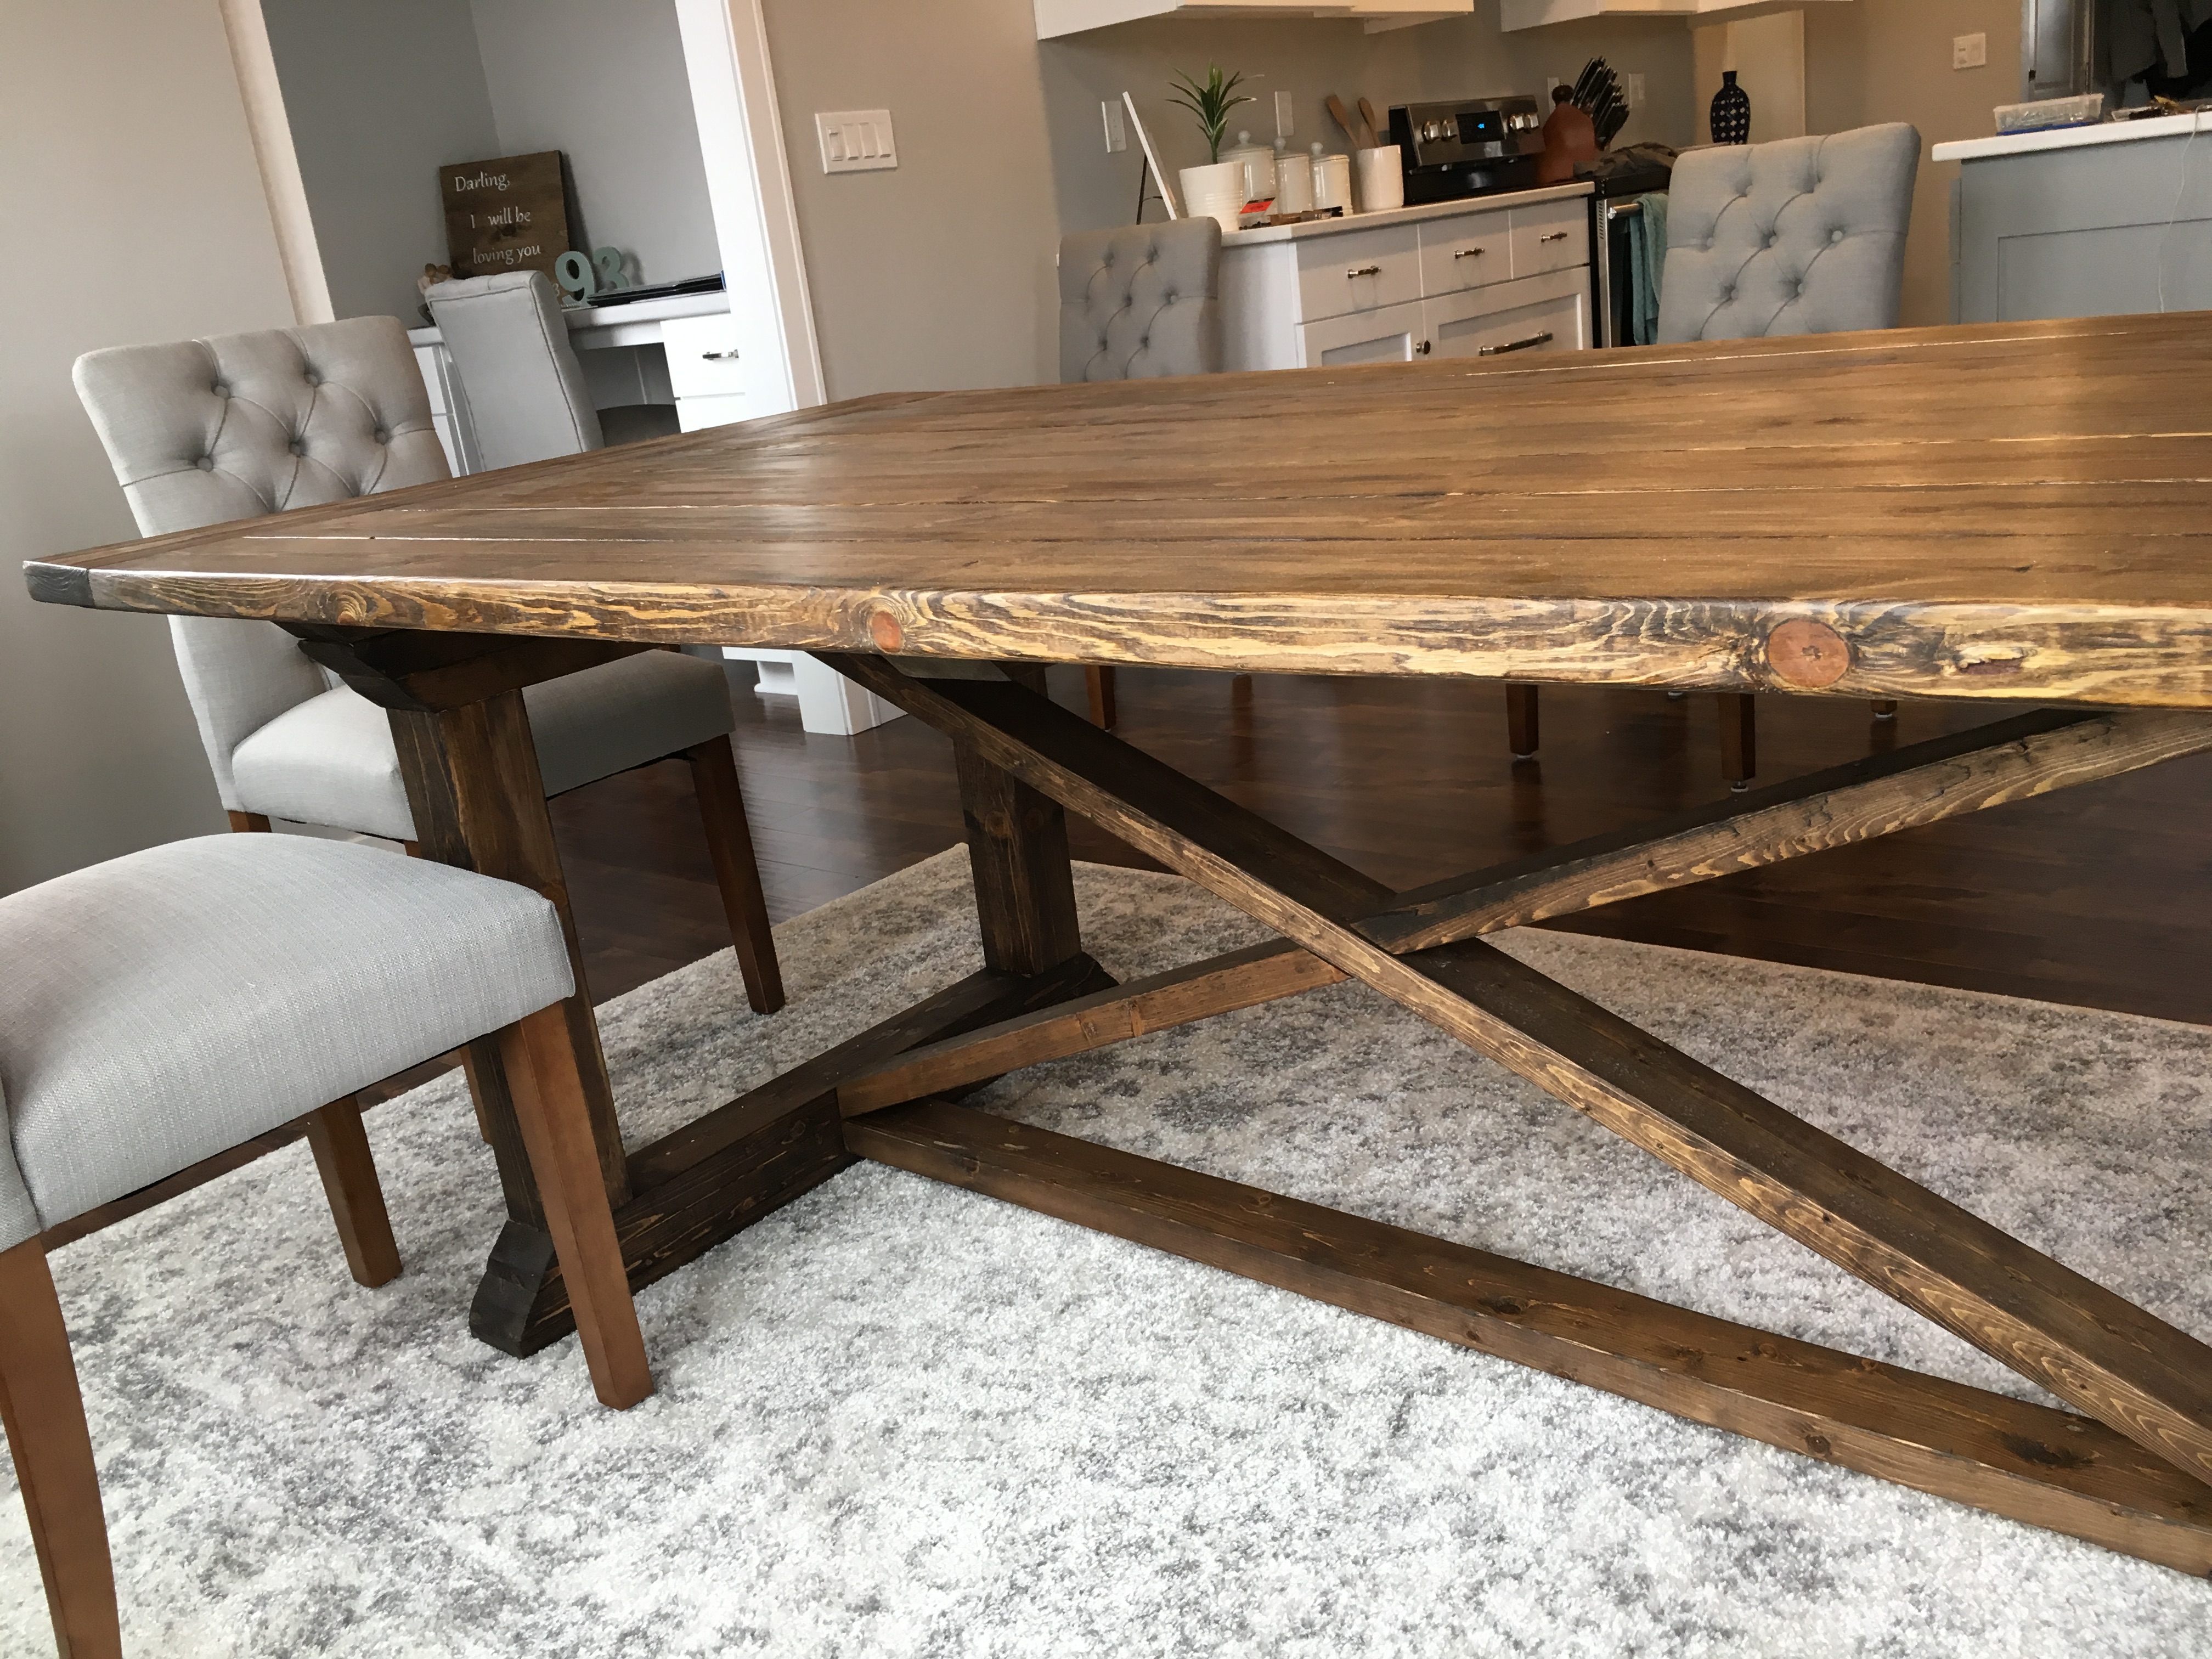
Adjusted the plans to 7' length to fit room size.
Built from Plan(s)
Estimated Cost
$200
Estimated Time Investment
Week Long Project (20 Hours or More)
Finish Used
Dark Walnut Minwax stain, Clear Satin Polyurethane Minwax
Recommended Skill Level
Intermediate
Comments
Sat, 07/18/2020 - 11:00
new dimensions
What dimensions did you adjust to get this at 7 feet? It looks beautiful! We are new to building and 7' is what size we were looking for our dining room table.
Ana's Adirondack Chair and side table

Been looking for a while for some simple looking Adirondack chairs. I found these and they turned out great. Will be finishing them with a white paint. Thanks for the plans Ana!
Estimated Cost
65 dollars for 2
Estimated Time Investment
Afternoon Project (3-6 Hours)
Recommended Skill Level
Beginner
Shop Cart with inserts

After browsing through forums I came up with this idea...a versatile shop cart that I can insert my kreg jig and miter saw into...a stable base at a great working height.
I created this design in sketchup as well and will work on posting it as a plan if people are interested.
basically, the top is inset 3/4" to make room for the inserts. I created a work table insert (well two I split in half, so the kreg insert can take up the front half if I wanted to insert that.
Then I made the kreg jig insert
and the Miter saw insert
let me tell you...this came in handy right away as each of those inserts I made can be used without the cart as well and both inserts work tremendously!
I am really really happy with this and it is so useful. Started making the loft bed playhouse last night and the miter say and kreg jig were extremely useful at a good working height.


Built from Plan(s)
Estimated Time Investment
Weekend Project (10-20 Hours)
Recommended Skill Level
Intermediate
Comments
Mon, 02/25/2013 - 08:07
uses for shelves
My intention for the top shelf is to hold small tools that I am working with while using the cart and the bottom is to store the cut pieces of lumber I am using for the project
Mon, 02/25/2013 - 10:33
Post the plan
Please post the plans. This thing would make a great shop cart or miter saw stand.
I have one other suggestion: you could also use it as a small assembly table. You have a 3/4" inset. Stick a piece of plywood inside the exactly fits inside. Then screw a larger piece of plywood to that one. (DON"T screw it into the top of the cart.) The larger sheet of plywood would overhand the shop cart edges by maybe a foot on each size, so you'd have a "small" mobile assembly table that might 3x4 feet or 3x5 feet across at the top.
Mon, 02/25/2013 - 11:20
Please post
I would also like to see the plans for this cart. It looks nice and compact and versatile.

Mon, 02/25/2013 - 12:10
Thanks everyone
@ david...I did make a workbench type top for it as well, just didn't post a pic of that.
I will get the plans together for this then and post it for everyone...I enjoy sharing with everyone so we all can learn and make quality things. I'll start working on that tonight.
Tue, 02/26/2013 - 10:55
Plans are done...check them out :)
here is the link to the plans
http://ana-white.com/2013/02/plans/versatile-shop-cart-workbench-inserts
Gift wrapping cart

Put this together after Christmas. Not too difficult of a project. Decided not to put casters on to save a little money. Can always add them later if needed. I think if I created it again I'd make more space for the rolls of wrapping paper and smaller space for the trays. We have a lot of wrapping paper.

Built from Plan(s)
Estimated Cost
Cost about $50 because I bought some of the better 1x2's instead of the cheap ones just because I was trying to get straighter boards for the trays so I didn't have to work as hard.
Estimated Time Investment
Afternoon Project (3-6 Hours)
Finish Used
Used Early American stain just because we had some around. Not my favorite stain though but it sits in the closet 99% of the year.
Recommended Skill Level
Beginner
Vertical planter
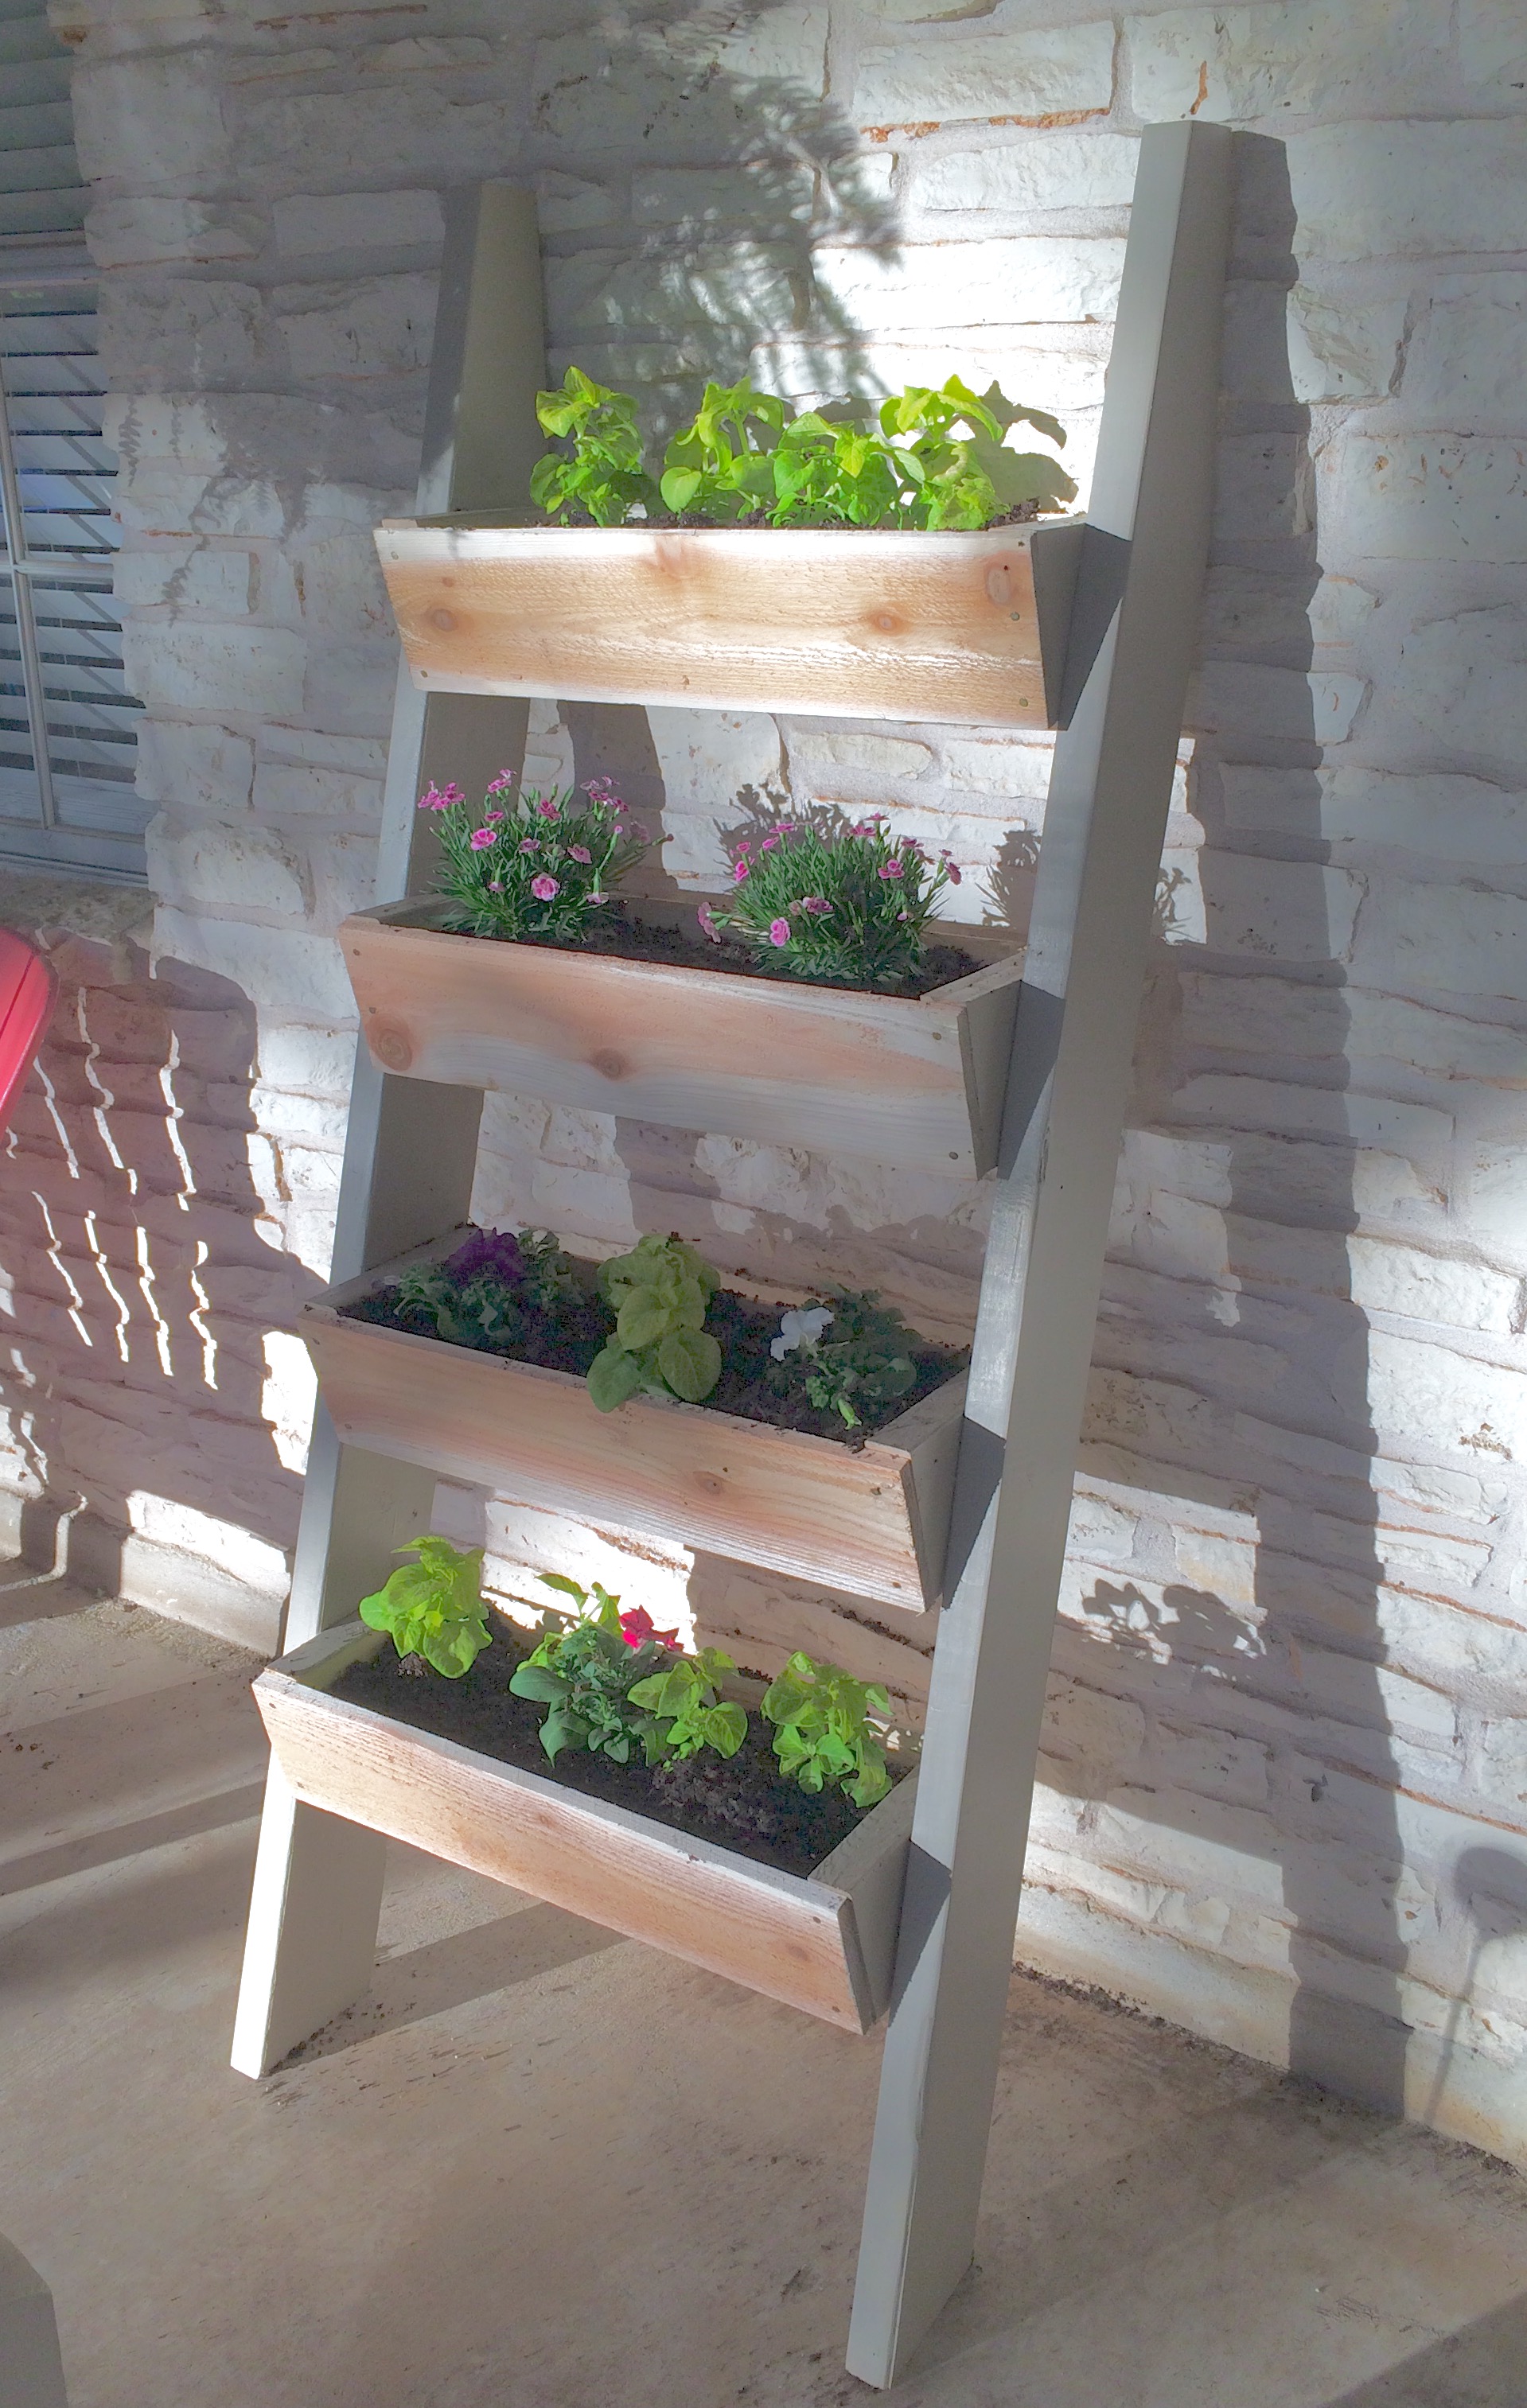
This planter was so easy to build! super cute, fun, spring project.
Built from Plan(s)
Estimated Cost
$30.
Estimated Time Investment
An Hour or Two (0-2 Hours)
Finish Used
I Painted the 2x4's. I left the cedar as-is.
Recommended Skill Level
Beginner
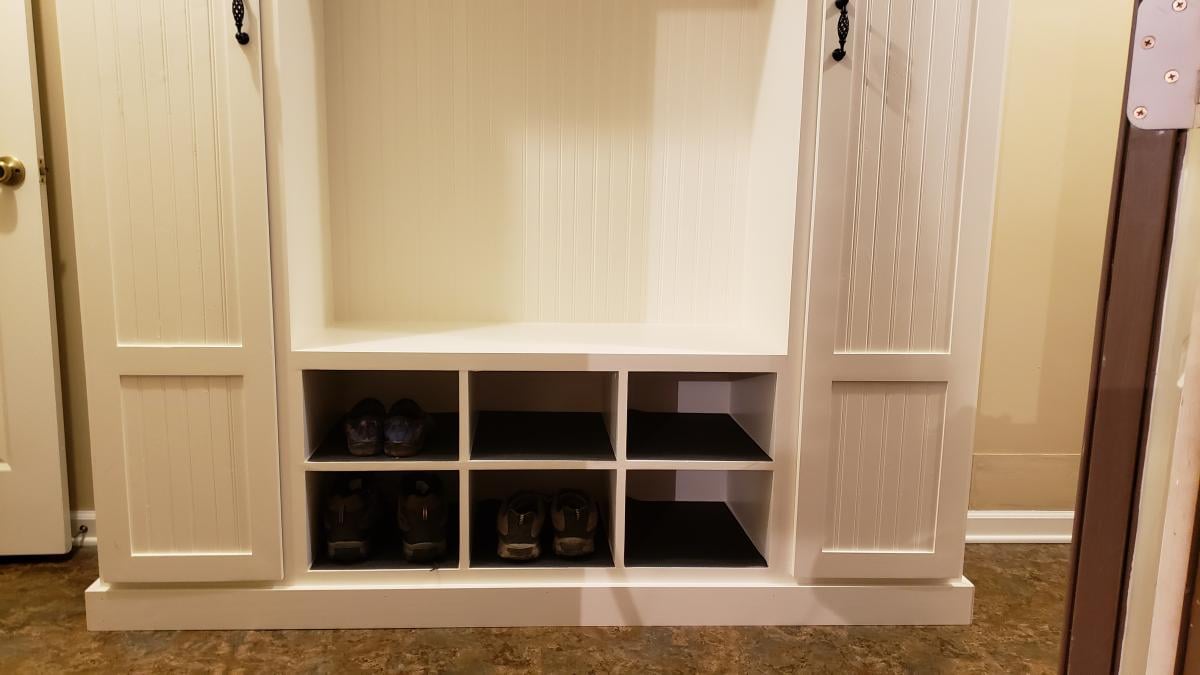
Hall Tree for Mudroom

I made this to fit the room and to help organize and cleanup the laundry / mud room. After searching for plans online I just sat down with pencil and paper and drew up my own plans, cut sheets and design from a combo of numerous projects I found in Pinterest.
Estimated Cost
500.00
Estimated Time Investment
Week Long Project (20 Hours or More)
Finish Used
All wood primed with Sherwin Williams Preprite Problock Primer and finish painting with SW ProClassic Waterbased Acrylic-Alkyd Satin finish in Dover White
Recommended Skill Level
Intermediate
Comments
Thu, 02/18/2021 - 15:43
Very cool design and build!
Love the option of open and closed storage, it looks amazing!

In reply to Very cool design and build! by Ana White Admin
Fri, 02/19/2021 - 08:44
Thanks! We have some items…
Thanks! We have some items like a steam mop and electric broom that go in one of the enclosed storage areas. I can post plans, construction pics and cut sheet if there is a place to do that.
Sewing Caddie

Thanks for the inspiration! This was my first full blown creation and my wife loves it. Cannot wait to do more!
Built from Plan(s)
Estimated Cost
$50 for birch plywood
$30 for wheels, hinges, paint, and accessories.
$30 for wheels, hinges, paint, and accessories.
Estimated Time Investment
Weekend Project (10-20 Hours)
Finish Used
White paint with primer
Recommended Skill Level
Beginner
Rustic Crib

This is my Son's crib that I built about a year ago. I have the plans for them but I need to get on my desktop to get the plans. But it's built to be a convertable crib like the expensive cribs you can buy. If i remember correctly I had less that $150 in material. With all the sanding and it being the first time I had made one I had about 100 hours into it.
Estimated Cost
$150
Estimated Time Investment
Week Long Project (20 Hours or More)
Finish Used
Ebony with Satin coat. Rubbed on not brushed.
Recommended Skill Level
Intermediate
My first ever project!
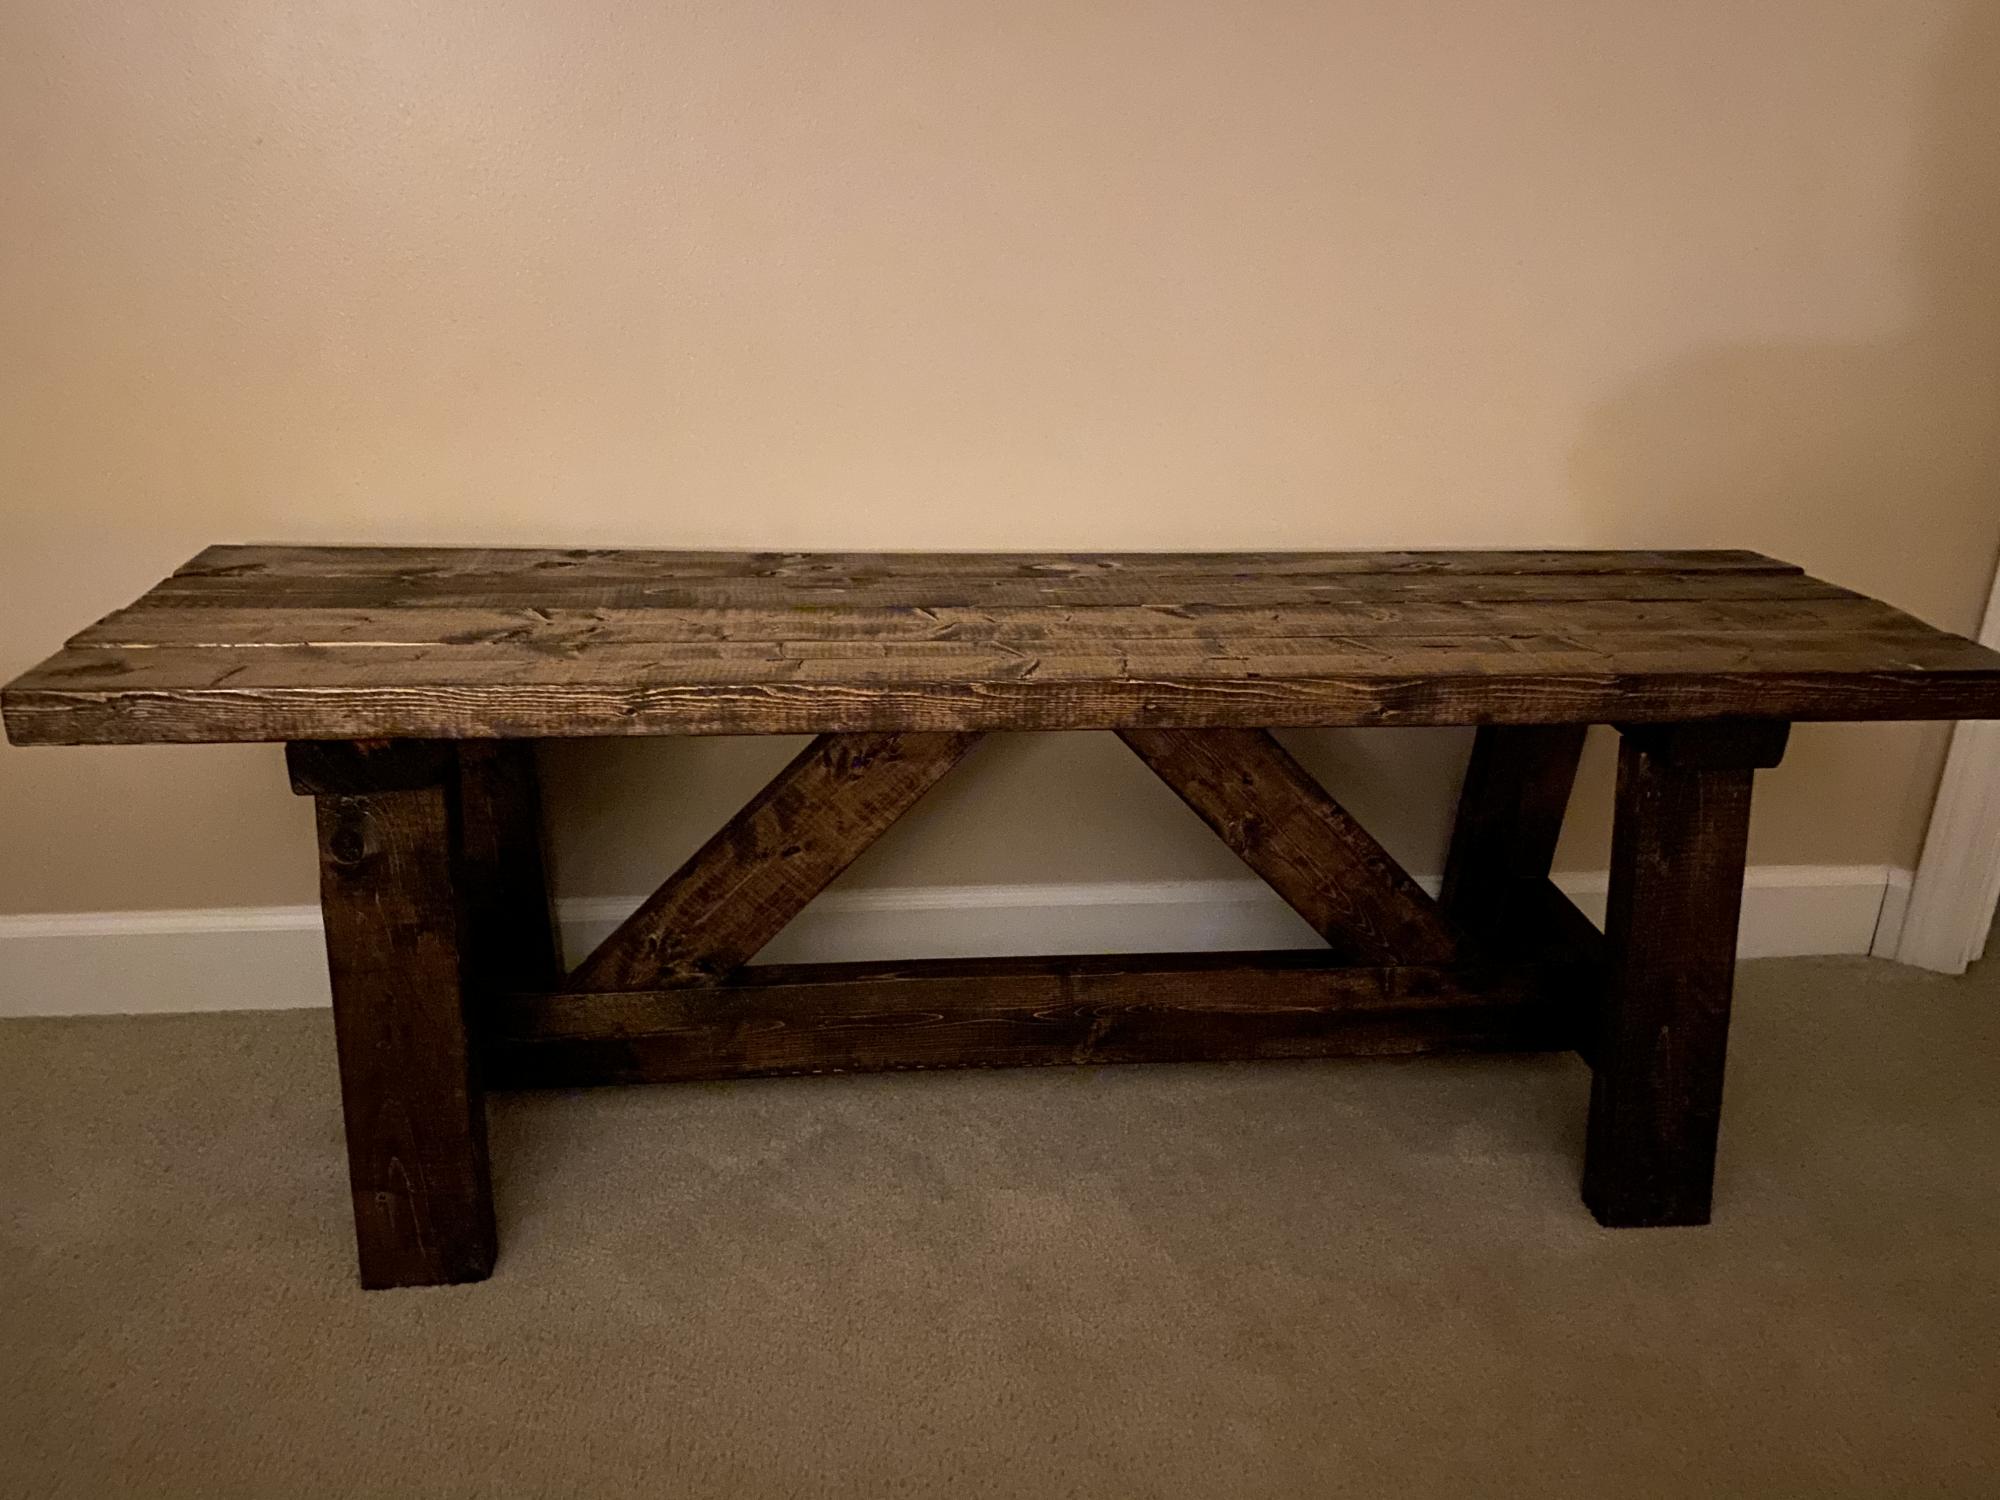
This was my very first experience ever building anything. I’d barely used a saw before this! I probably did a few things wonky, and it has some flaws. BUT it’s level and doesn’t wobble!!

Estimated Cost
$50 (for wood and screws)
Estimated Time Investment
Day Project (6-9 Hours)
Finish Used
Minwax Dark Walnut with a glossy clear coat.
Recommended Skill Level
Beginner
Comments
Convertible Shoe Rack

A few weeks ago I was getting ready for work and was excavating my shoe collection in search of my brown wingtips. Although I had managed to curate a pretty respectable collection of dress shirts, slacks, suits, and shoes, I still relied on a cheap coated wire shoe rack that could likely double as a grilling grate for my bbq. This was amplified by the fact that is was meant for about half the number of shoes I was using it for. I know, first world problems. It’s tough out there. So, I decided to build a two piece unit that I could stack atop one another or use it side by side in the future.


Estimated Cost
$50
Estimated Time Investment
Afternoon Project (3-6 Hours)
Finish Used
Minwax Red Mahogany Stain with Robin's Egg Blue stripe (in eggshell finish). Finished with three coats of Minwax Wipe-On Poly.
Recommended Skill Level
Beginner
Comments
Tue, 03/05/2013 - 09:12
That looks great! I need
That looks great! I need something like this in my front entry closet. I could probably use some in the master closet too. Thanks for posting!
Family Tree Nesting Birds sign

Hello There!
This was my attempt at the Family Tree Nesting Birds sign that Ana made. I ended up painting everything instead of doing the foam for the leaves, but I just love how it turned out! I used old pallet wood instead of new lumber and gave it a really good sanding before staining and painting.
Gave it to my brother and sister-in-law for Christmas, and it was a huge hit!
Thanks Ana!

Built from Plan(s)
Estimated Cost
Free Pallets and already had the paint!
Estimated Time Investment
Day Project (6-9 Hours)
Finish Used
Used Minwax stain for the base, then used primer and latex for the tree and birds.
Recommended Skill Level
Beginner
Farmhouse Table and Bench

I used the Ana White Farmhouse Table plans. I made the matching bench with a backrest. For the top of the table and the bench seat I used a royal plum stain. I'm female, 54 years old and I do woodworking "Like A Girl". Enjoy

Estimated Cost
Materials for the Table and Bench were under $150.
Estimated Time Investment
Week Long Project (20 Hours or More)
Finish Used
Royal Plum Stain for the top of the table and the bench seat. I used a steel wool/vinegar solution for the legs. High Gloss Polyurethane (2 coats on base and 4 coats on table top and bench seat) 220 sandpaper in between coats. I used the pocket hole plans.
Recommended Skill Level
Intermediate
Winter chairs

A nice blanket of snow on the Adirondack chairs in Texas
Comments
Fri, 03/05/2021 - 11:02
That's something you don't see everyday!
Looks refreshing, lol! Thanks for sharing, love the color choice!
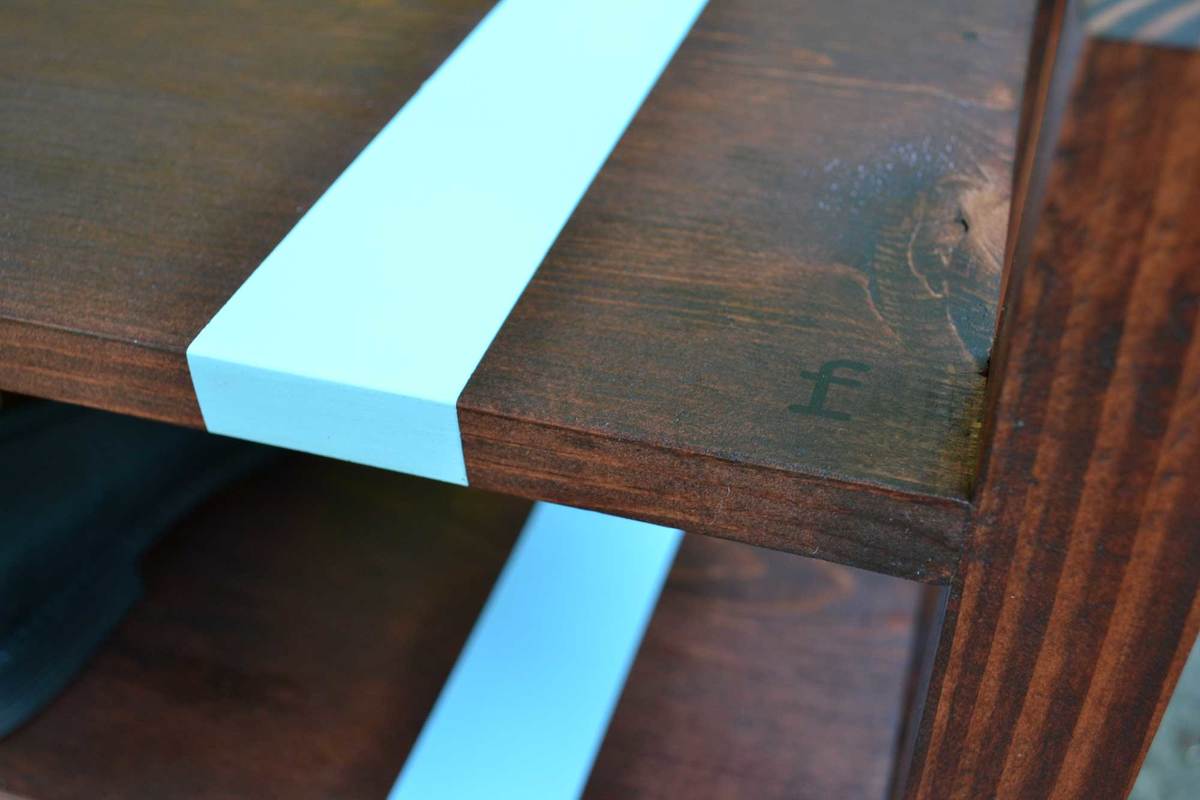
modified version of X Desk with Drawer

I was looking for a desk with sort of a "campaign furniture" style feel to it, and came across Ana's plan for the X Desk with Drawer.
I made a lot of changes from that starting point, some of which worked well, some of which didn't. In the end, my desk varies pretty drastically from the original, but I definitely have to give credit for lots of helpful tips and inspiration from Ana's plan!
It's a little rough, but it's one of my first real builds, so I'm pretty happy.
Note: picture does not show spreader on back legs, added afterwards. Drawers are out while guides dry, they normally sit flush with front face.
Made from pine, with poplar edging on front. Mostly pocket hole joinery. Finish is a light version of the Minwax Dark Walnut (looks lighter in picture than real life.) Lacquer coating. Pulls are from Home Depot.
To give it an antique, campaign look, the edges are roughed up a little, the finish is left a little streaky/worn, and the holes for the drawers were cut out of the board by hand, and then hand-fit to the drawers.
Built from Plan(s)
Estimated Time Investment
Weekend Project (10-20 Hours)
Recommended Skill Level
Beginner
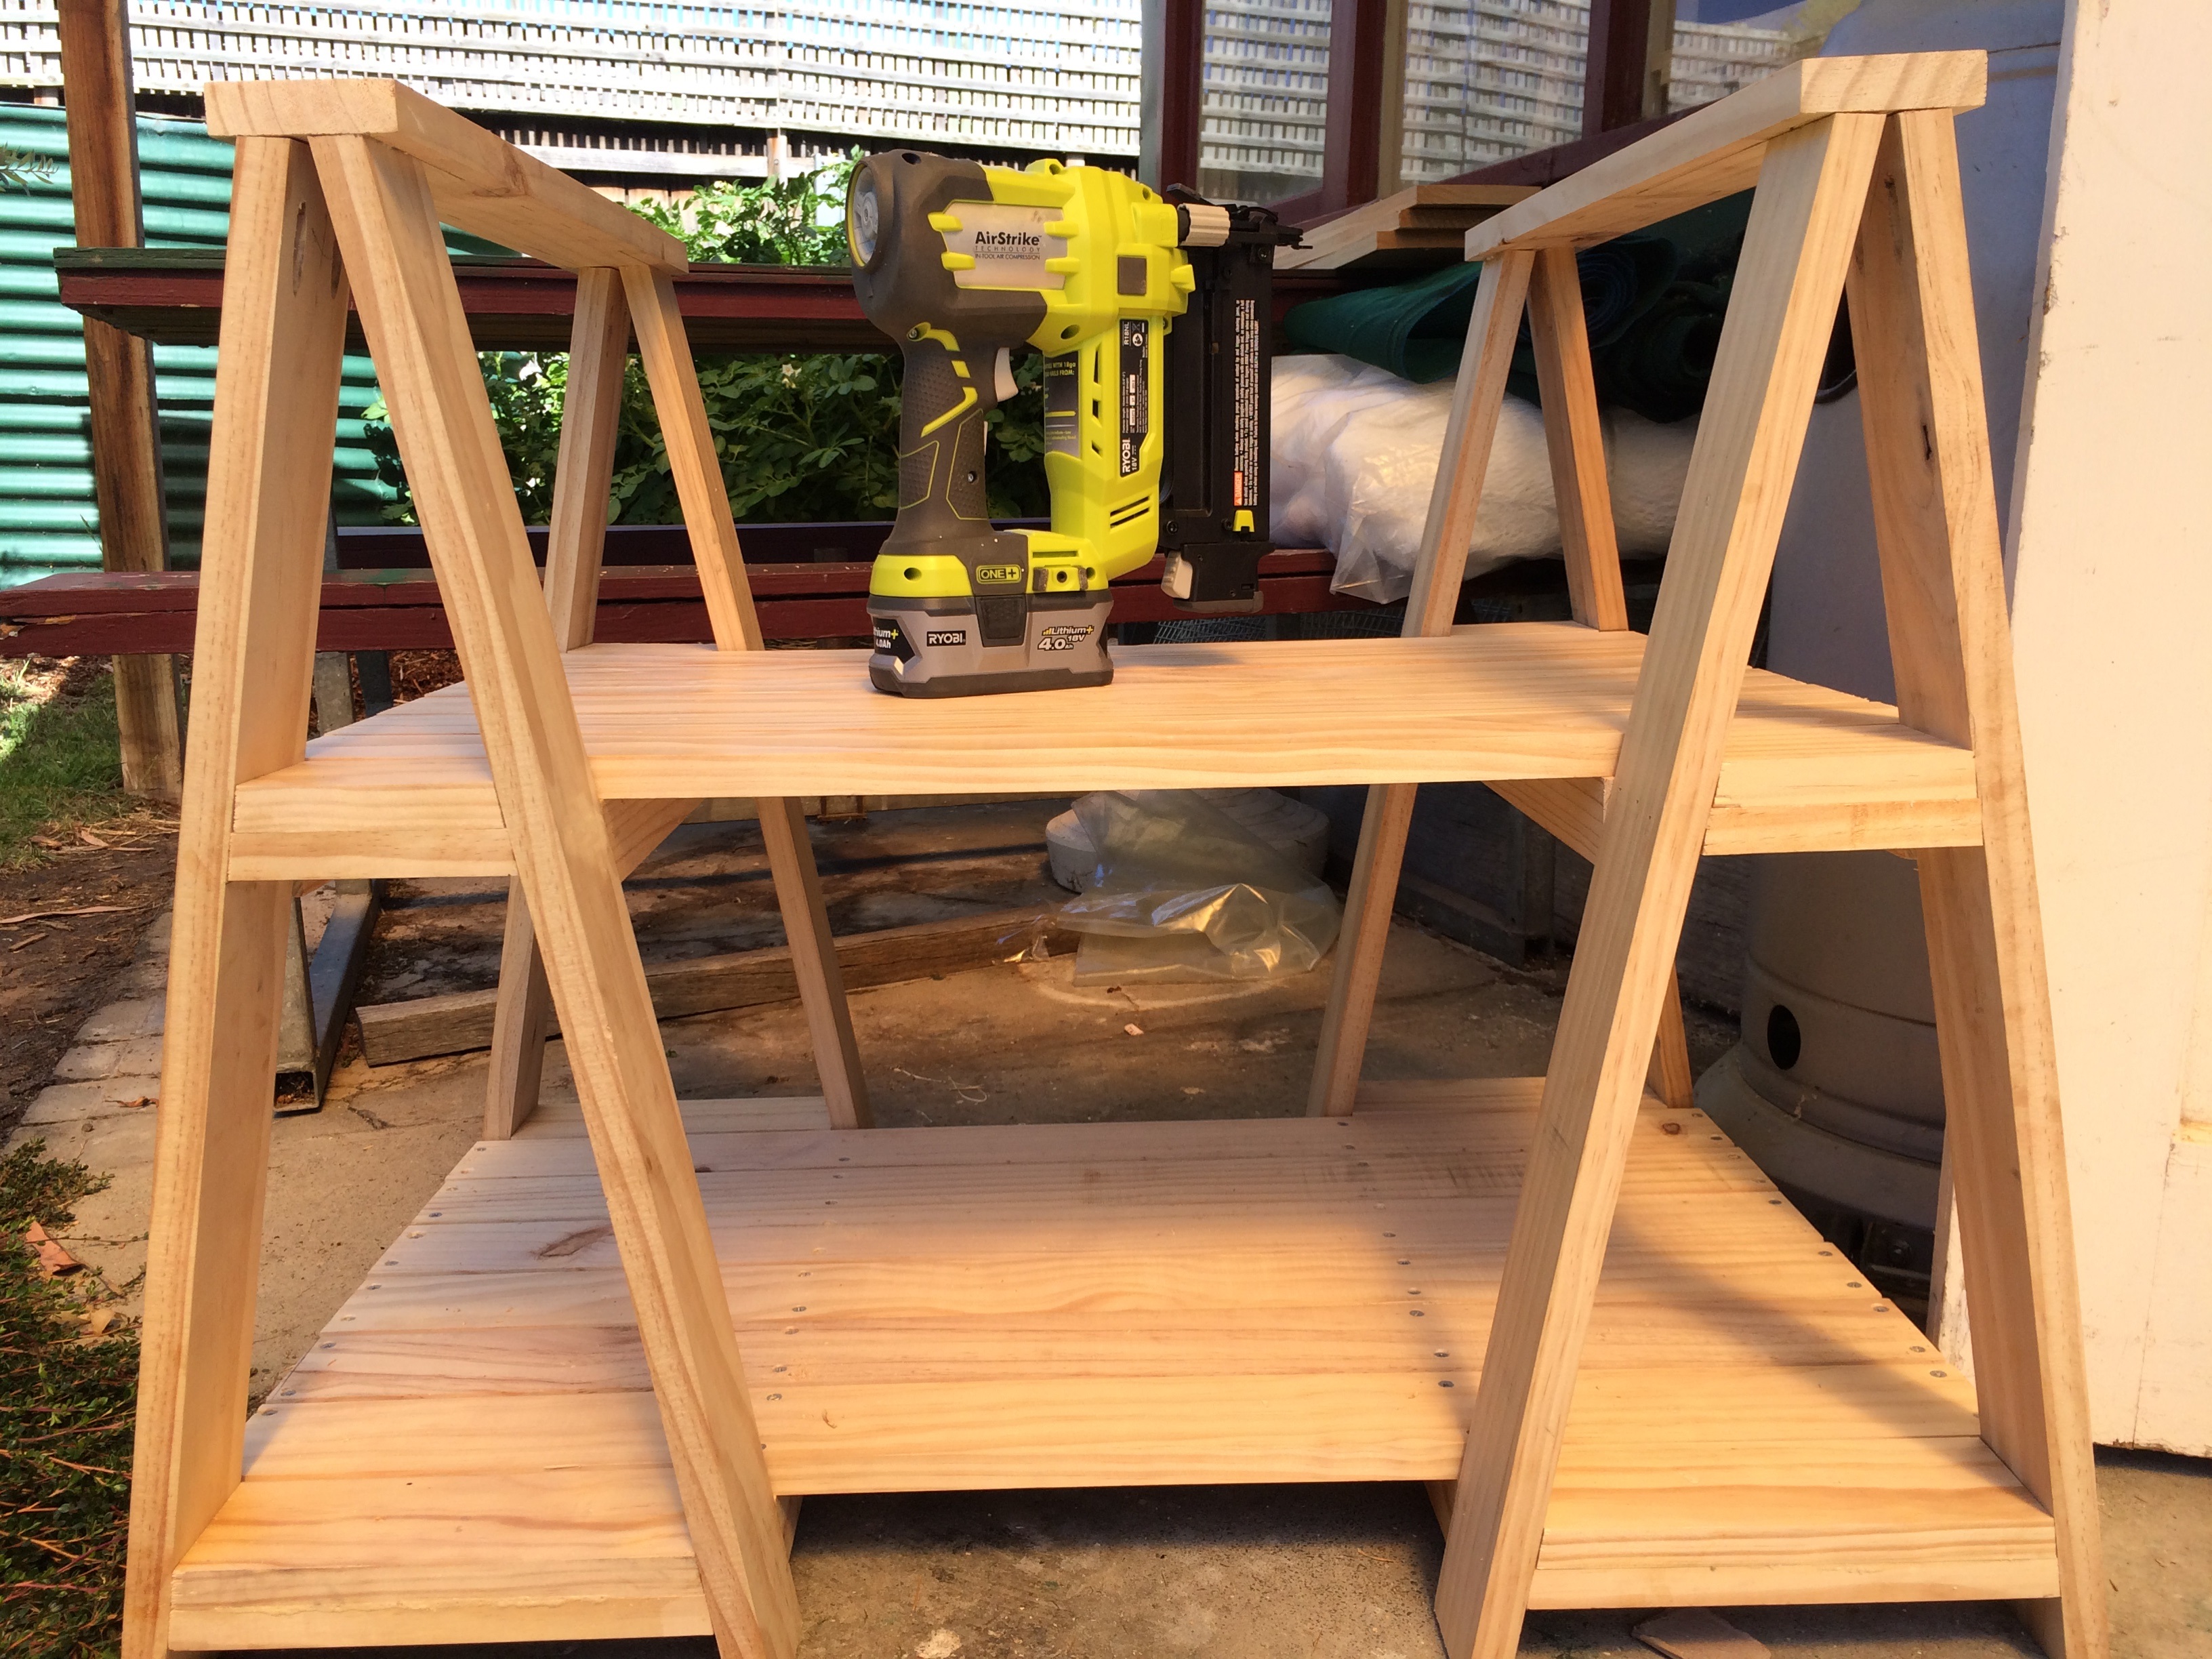
A Long Desk for My Beautiful Sister
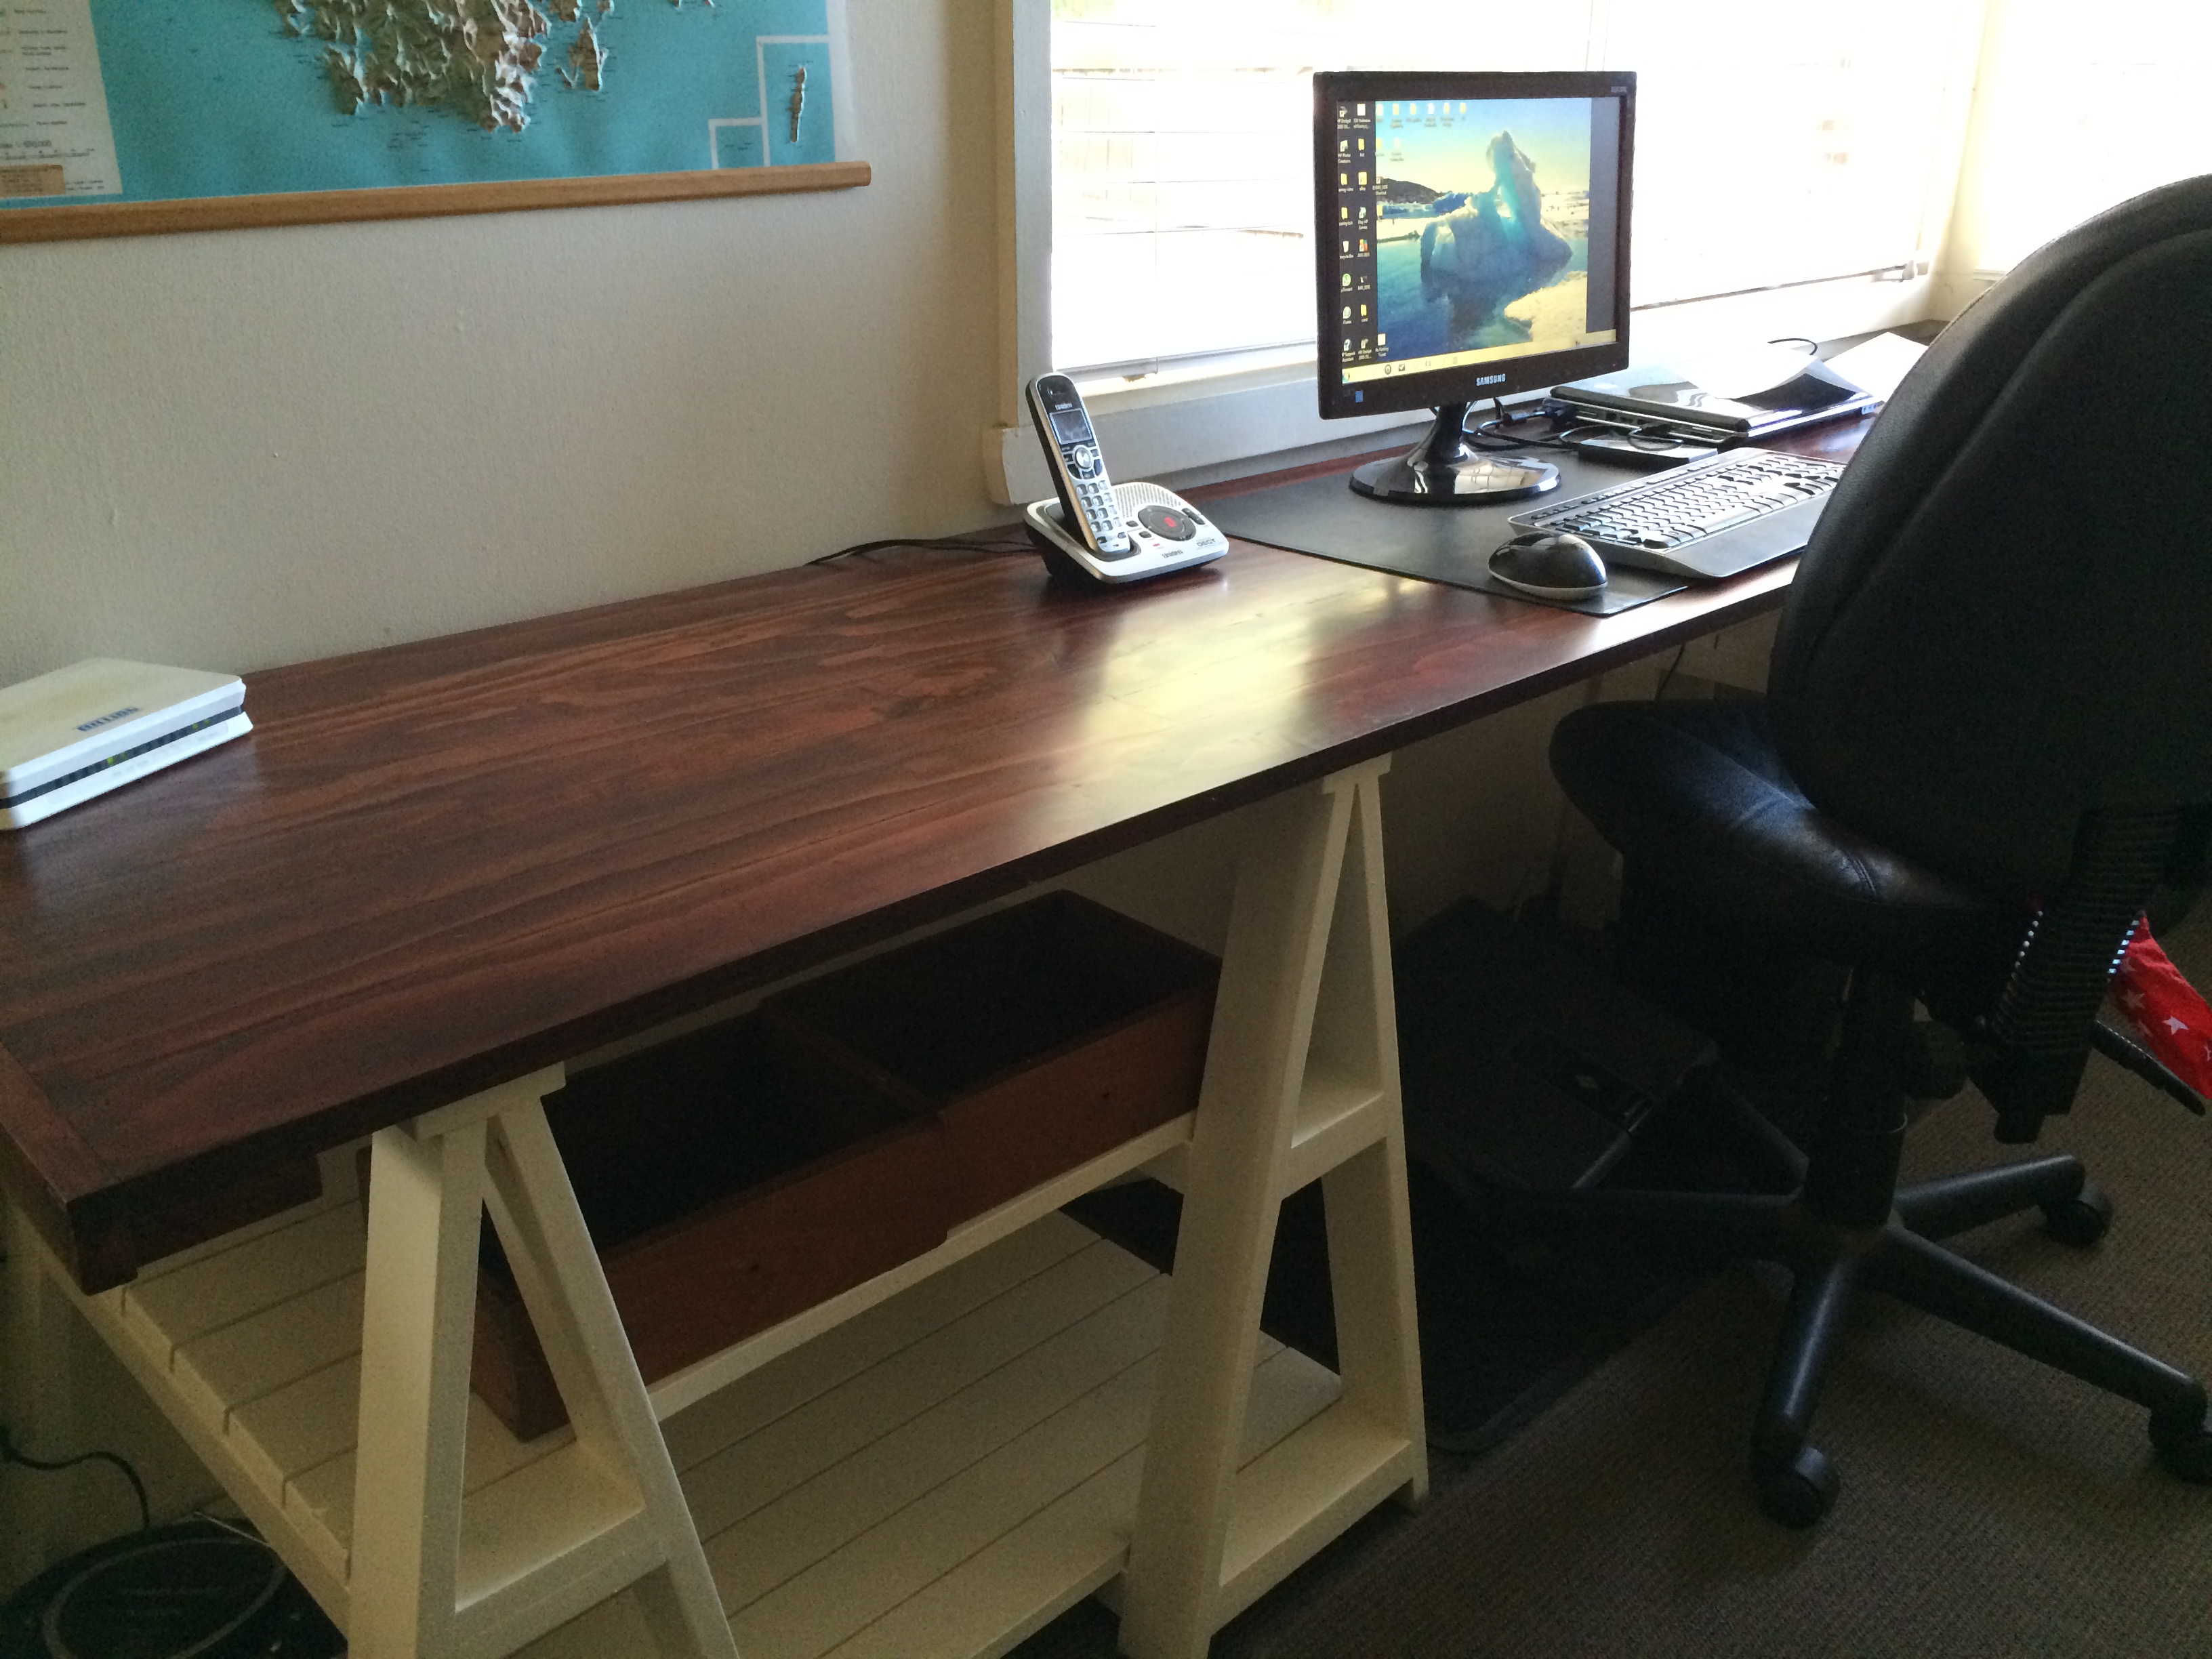
I made this desk for my sister ( it is 3 metres long - sorry I am an Aussie dont know what that is in inches).
I glued 3 metre radiata pine together, planed, sanded, stained and varnished with polyurethane.
I made 4 sawhorses and then joined two of them together to make shelves.
Very happy with the result


Built from Plan(s)
Estimated Cost
$250 AUD
Estimated Time Investment
Week Long Project (20 Hours or More)
Finish Used
Wattyl Cedar Stain and Varnish
Recommended Skill Level
Beginner
Comments

Tilt out trash can cabinet

Wood tilt out trash can cabinet made from this plan, with some changes. I did a fancier cabinet door, along with a top that overhangs on the sides as well as the front.

Built from Plan(s)
Estimated Time Investment
Weekend Project (10-20 Hours)
Finish Used
Old Asphalt stain
Recommended Skill Level
Intermediate
Comments
Pam the Goatherd
Wed, 02/20/2013 - 21:37
Lovin' the red!
Lovin' the red!