Community Brag Posts

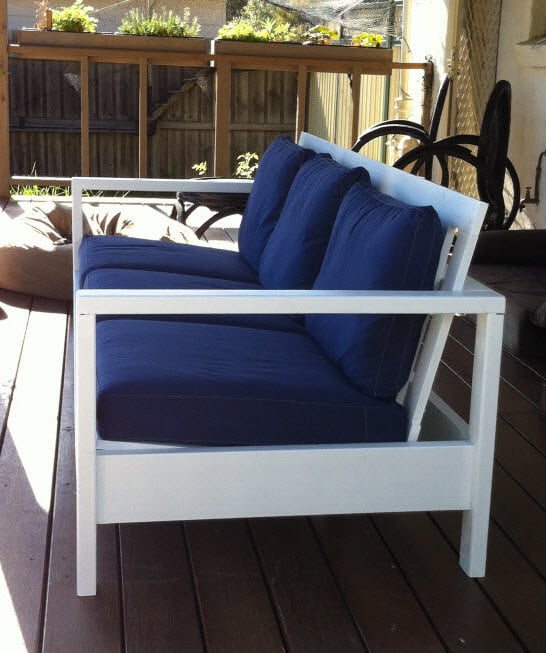
A not so modern version

Submitted by BJ D on Tue, 05/08/2012 - 10:14

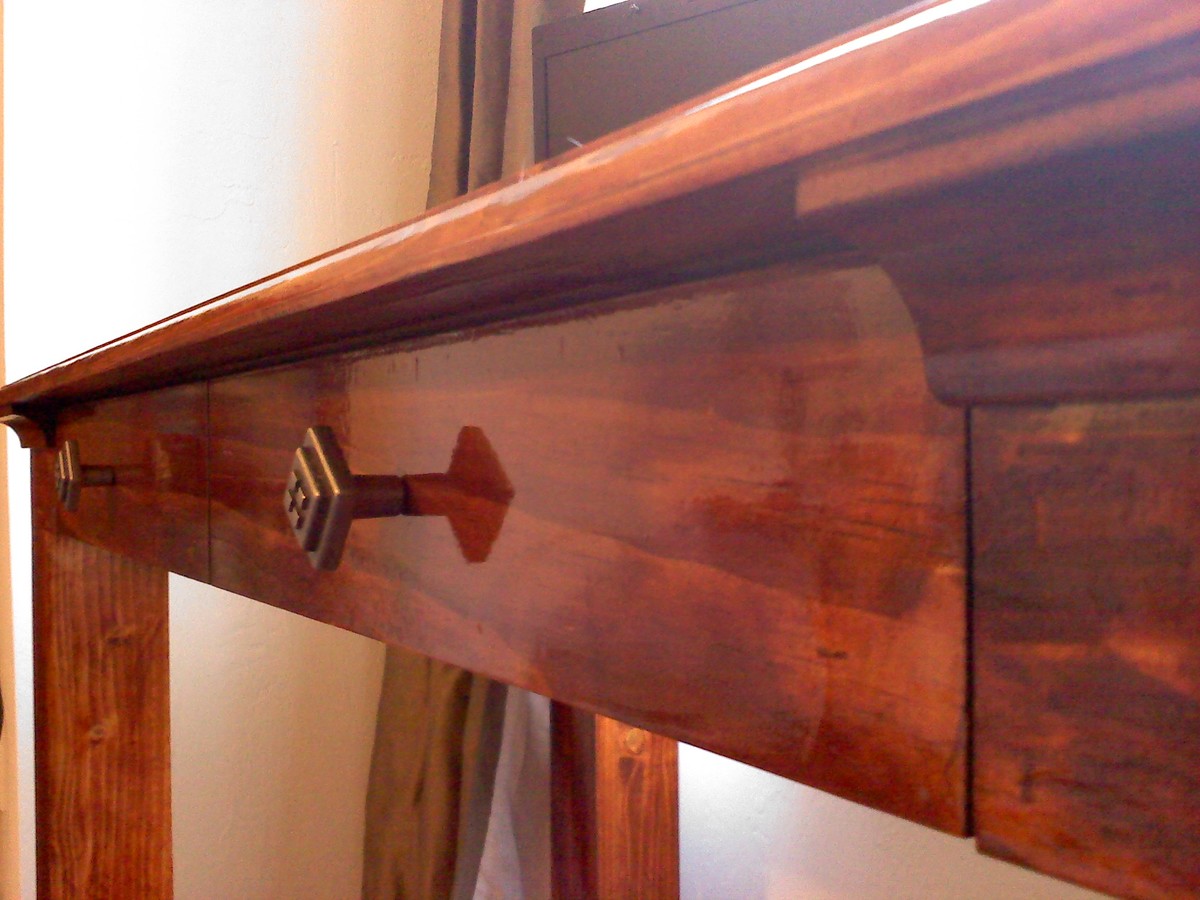
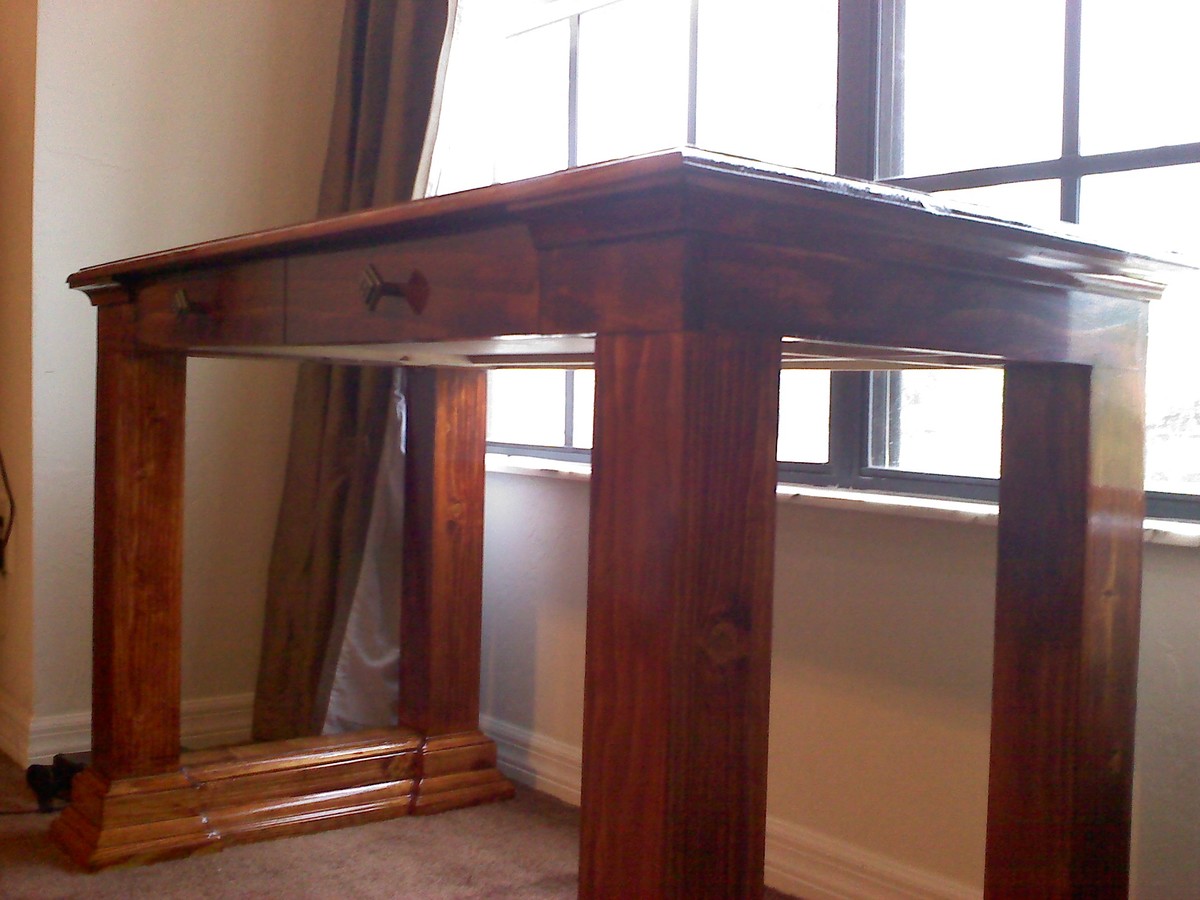
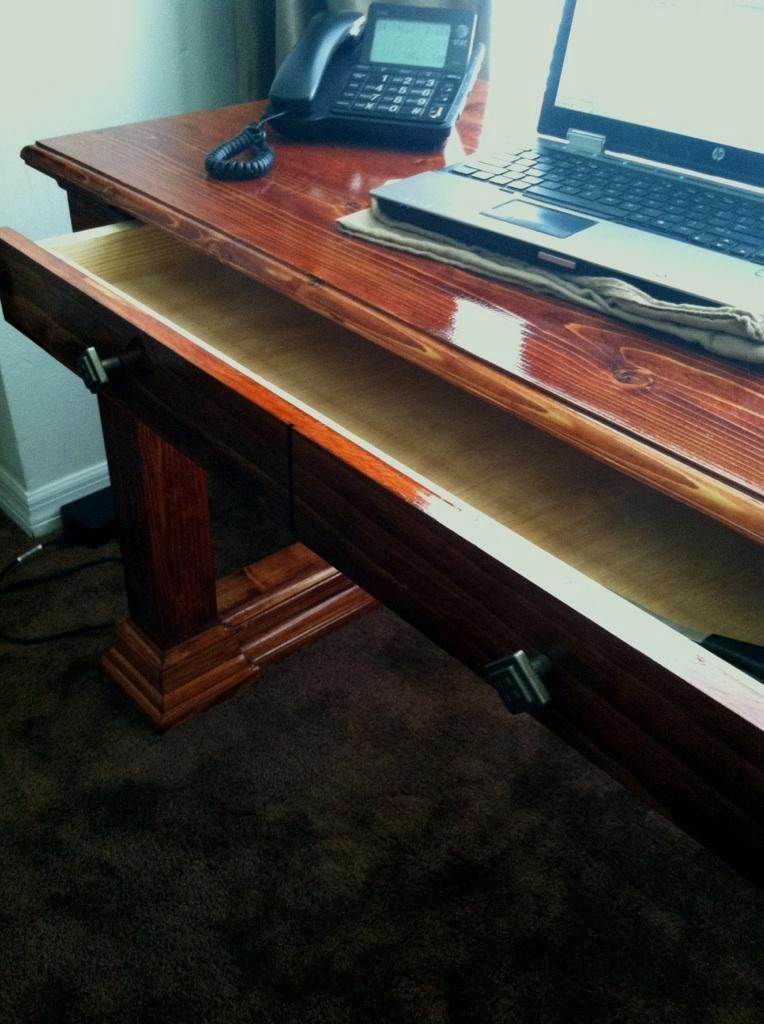
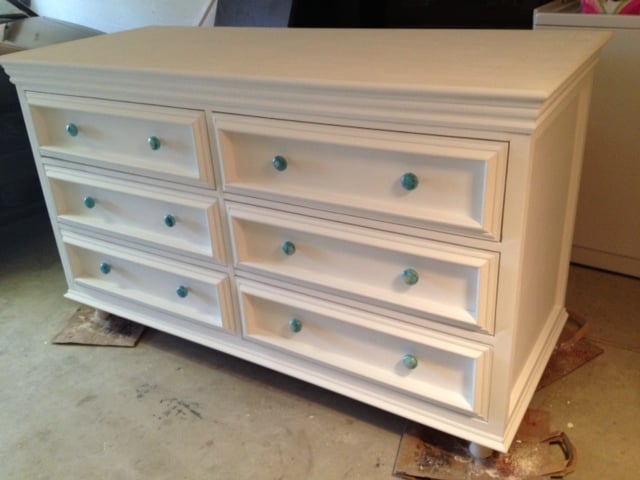
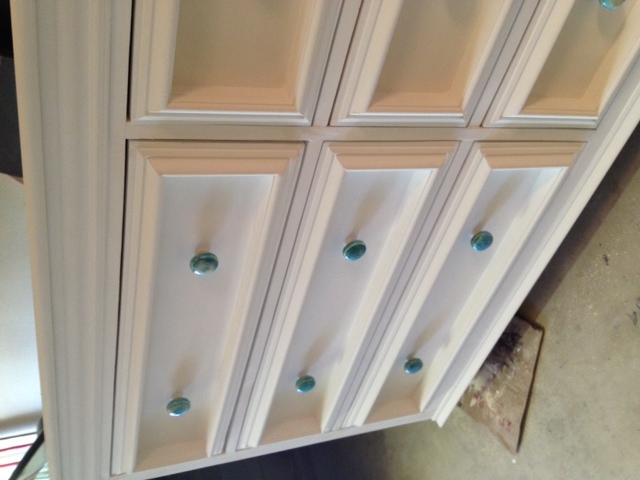
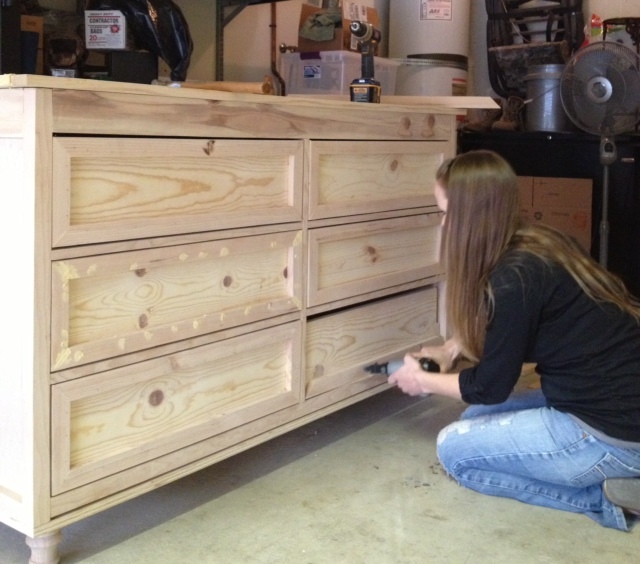
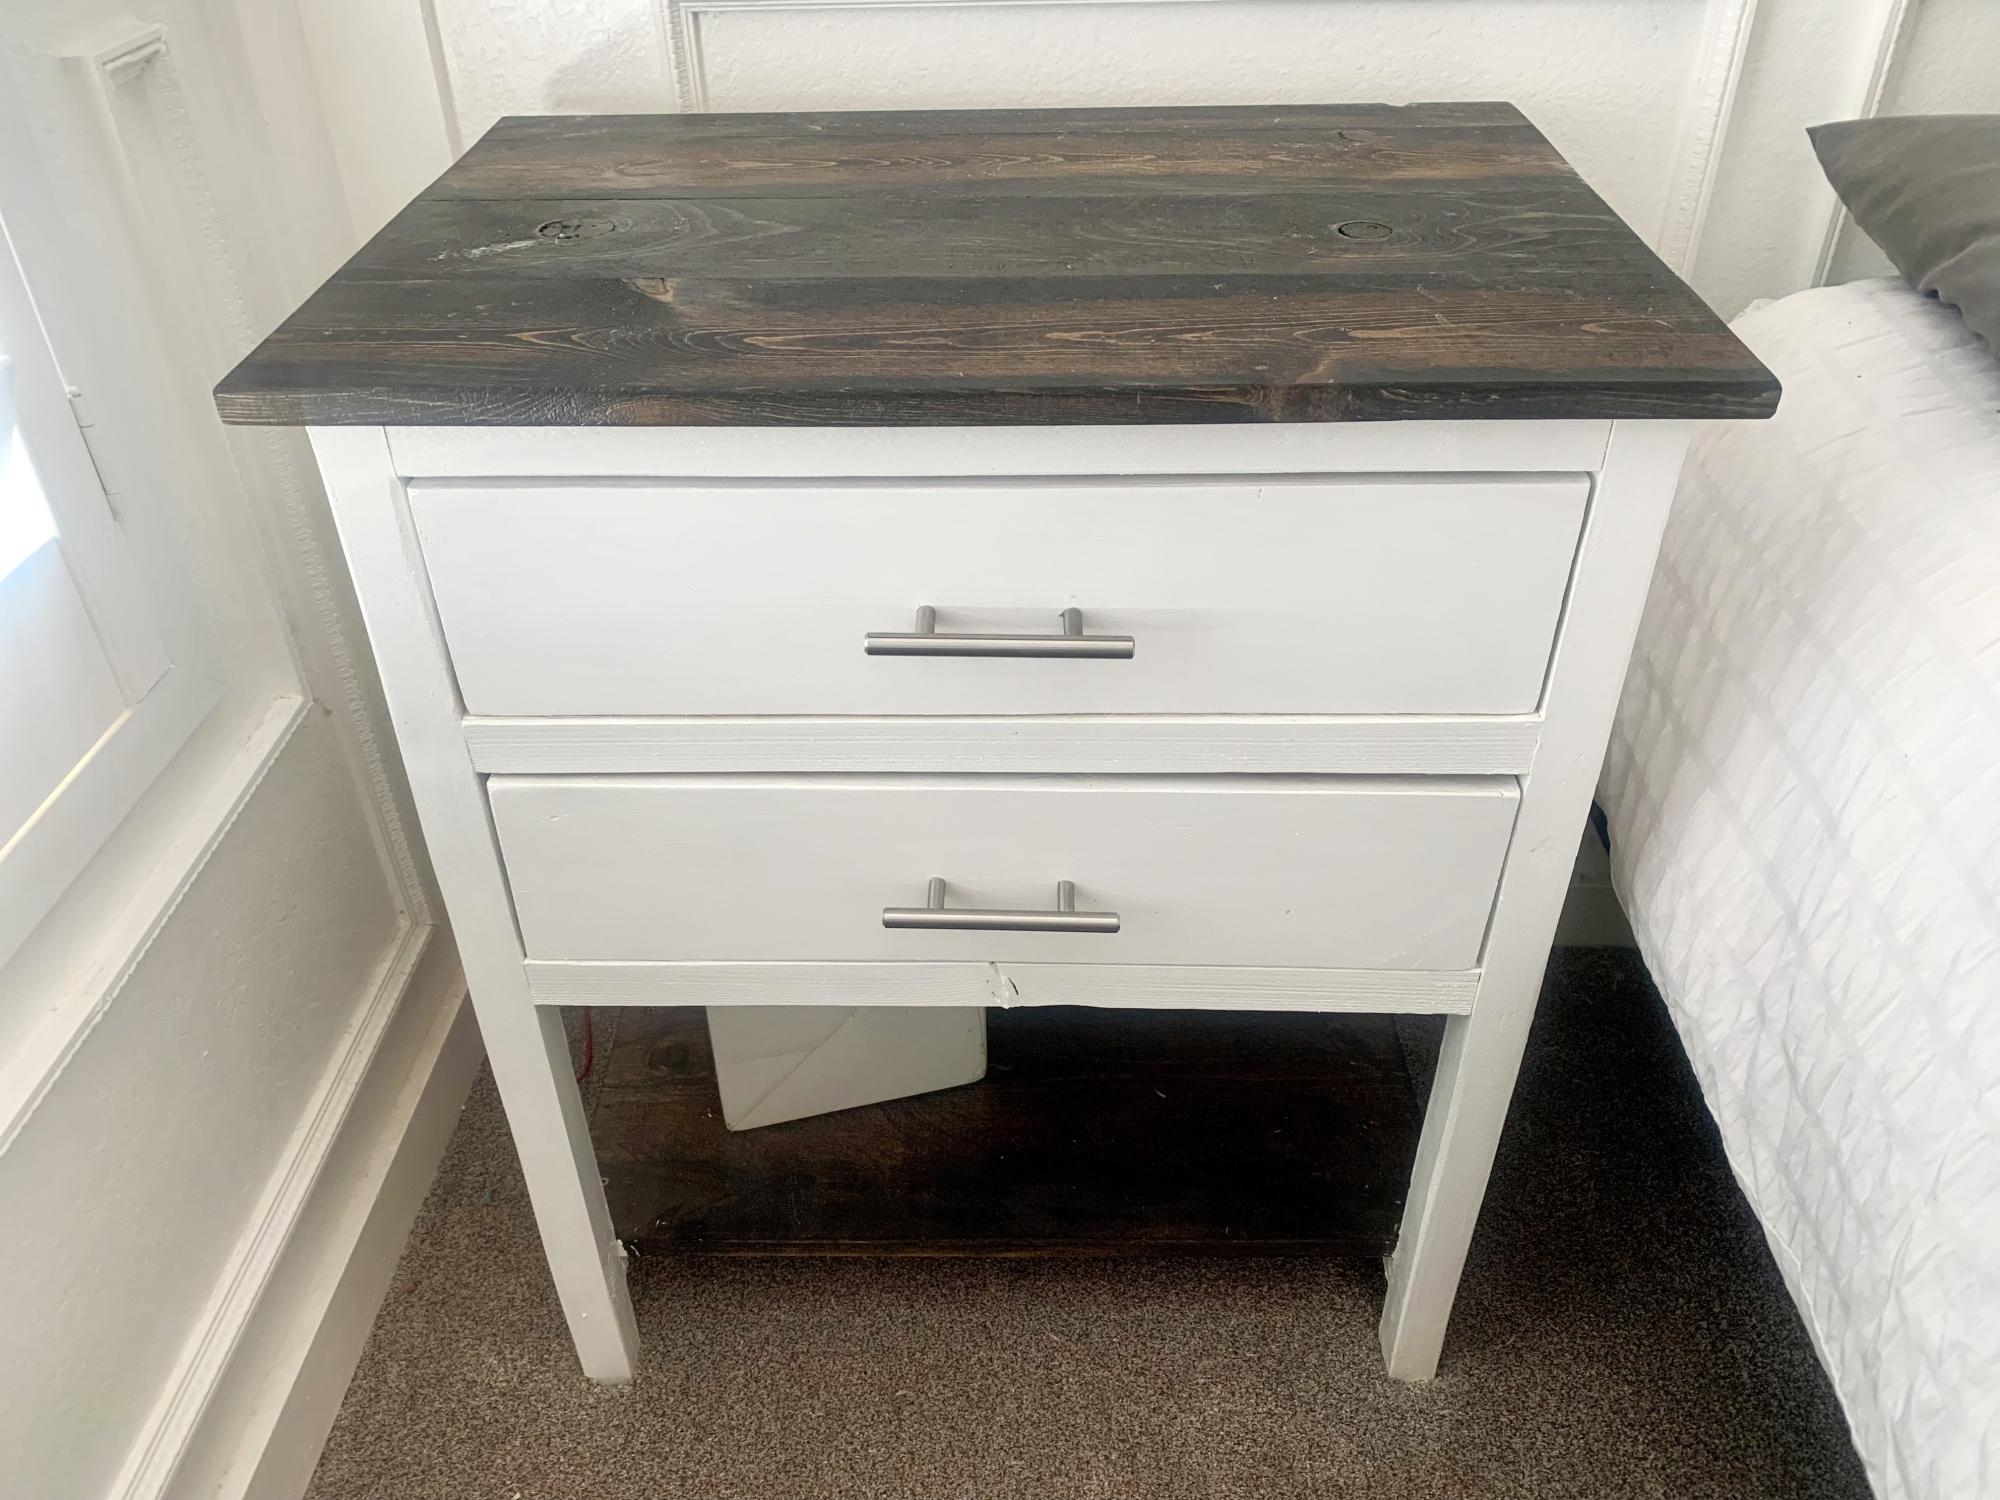
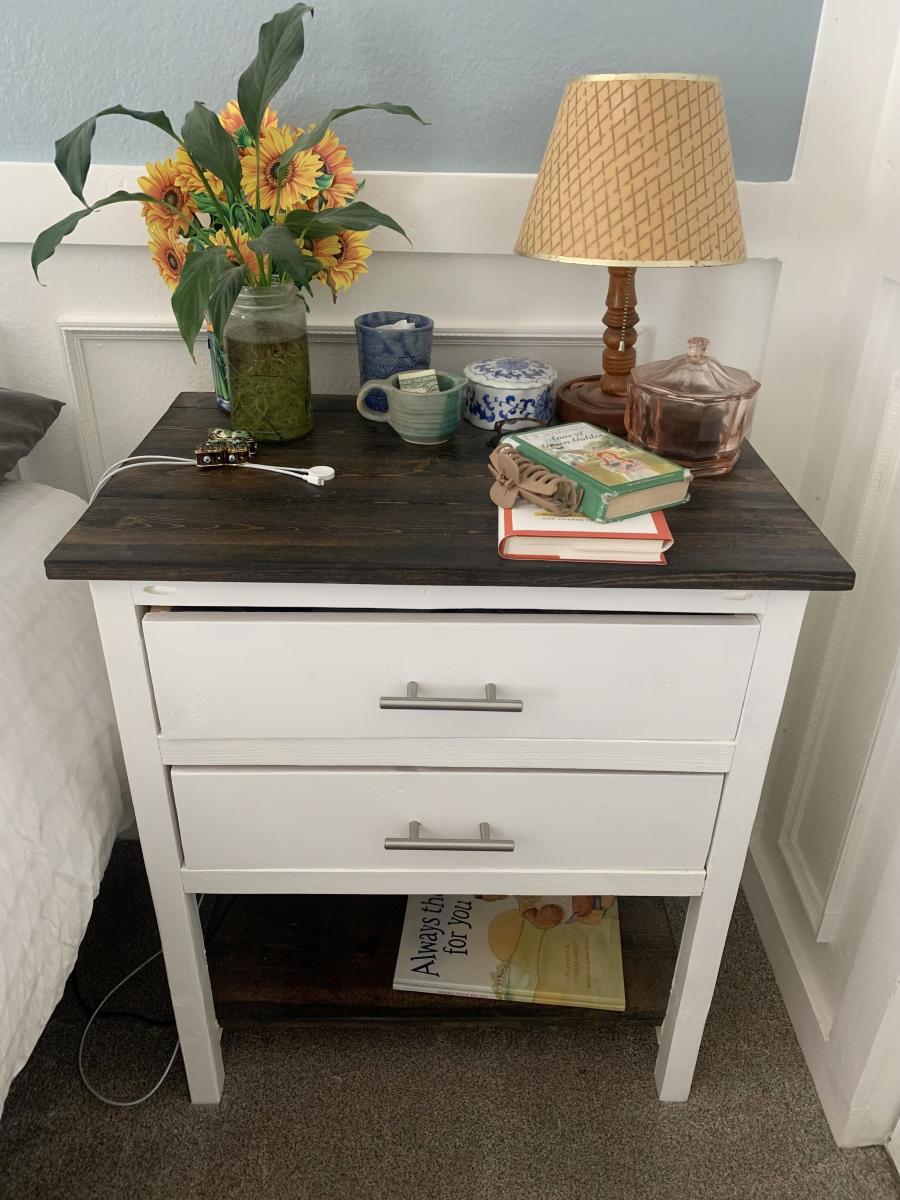
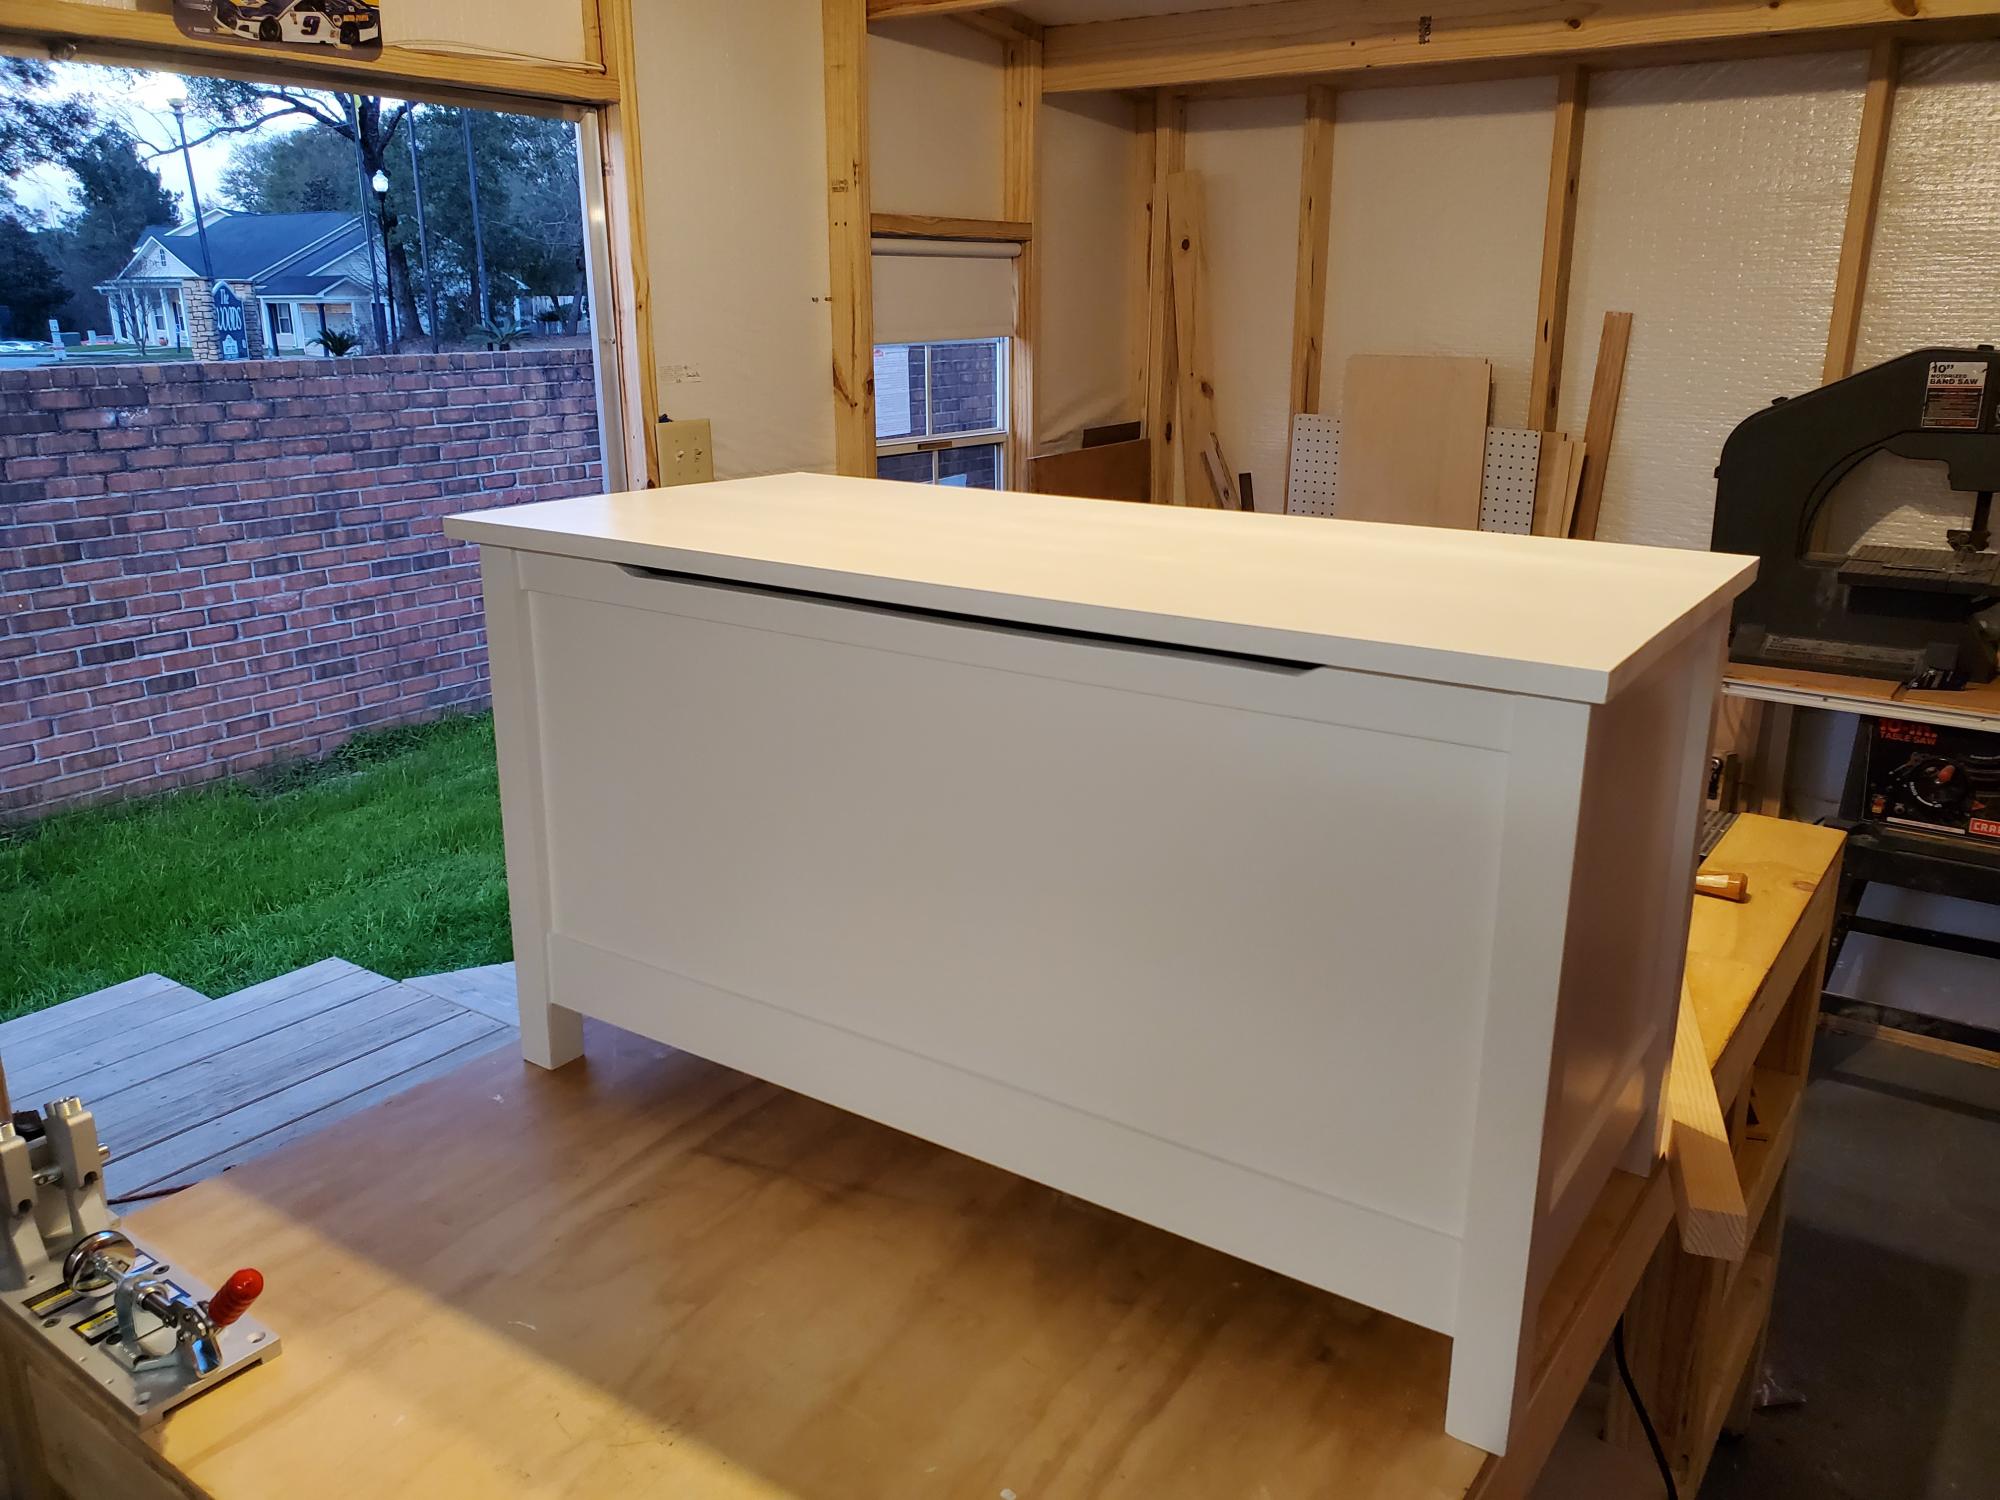
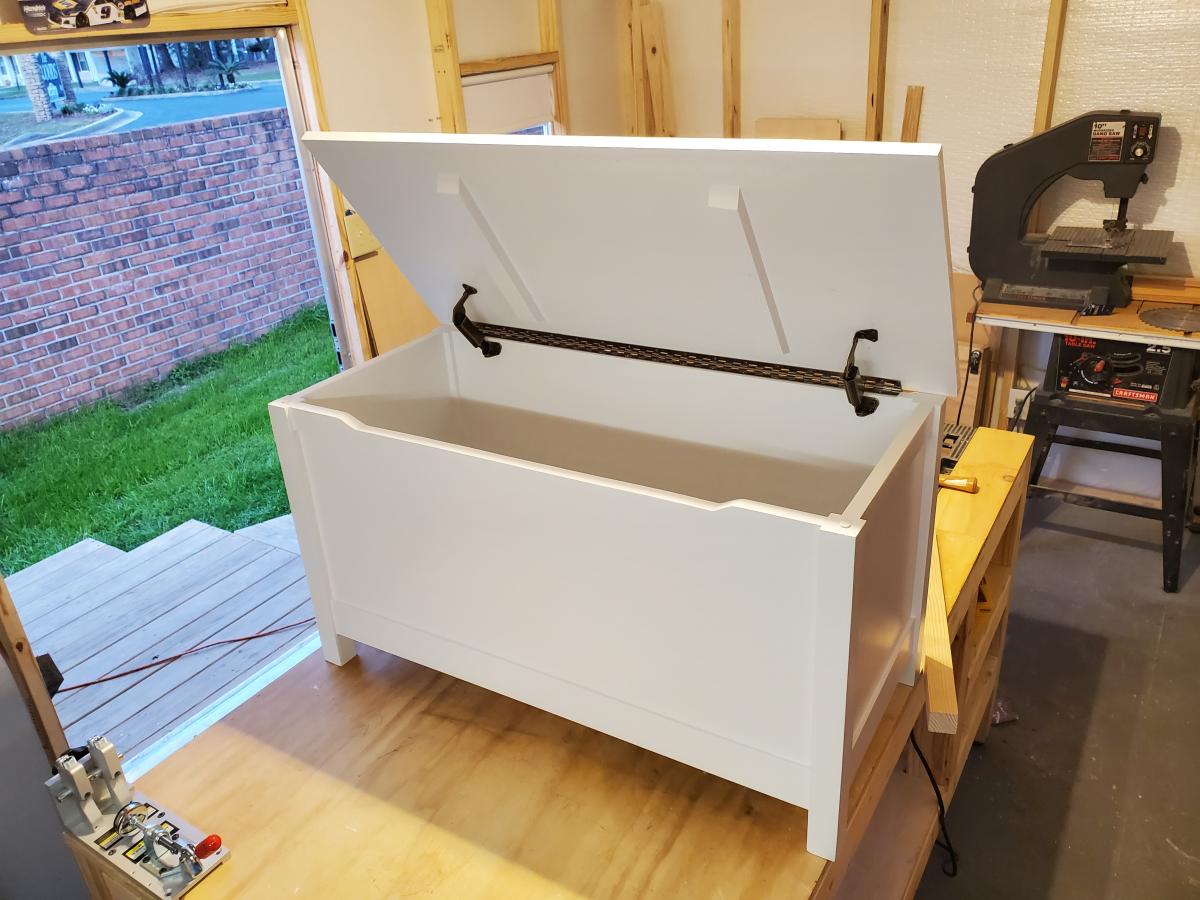
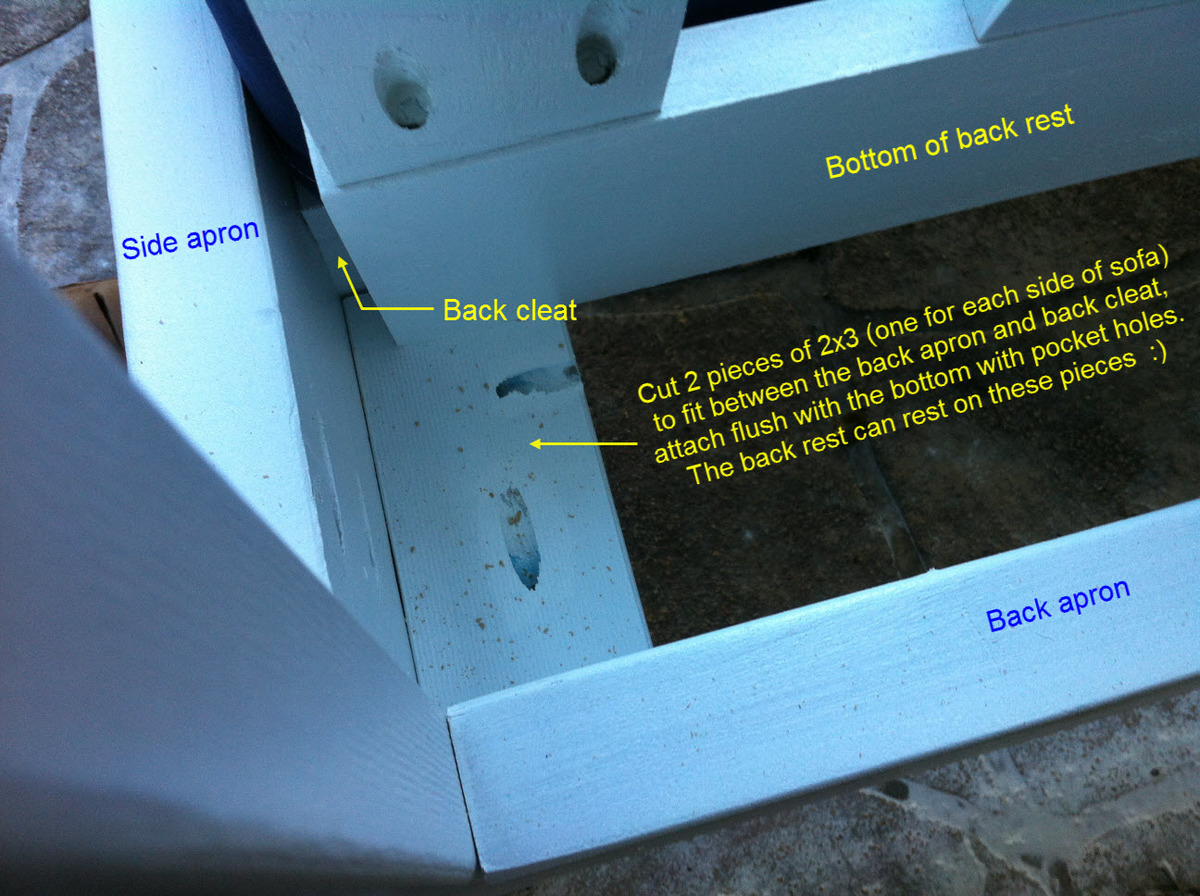
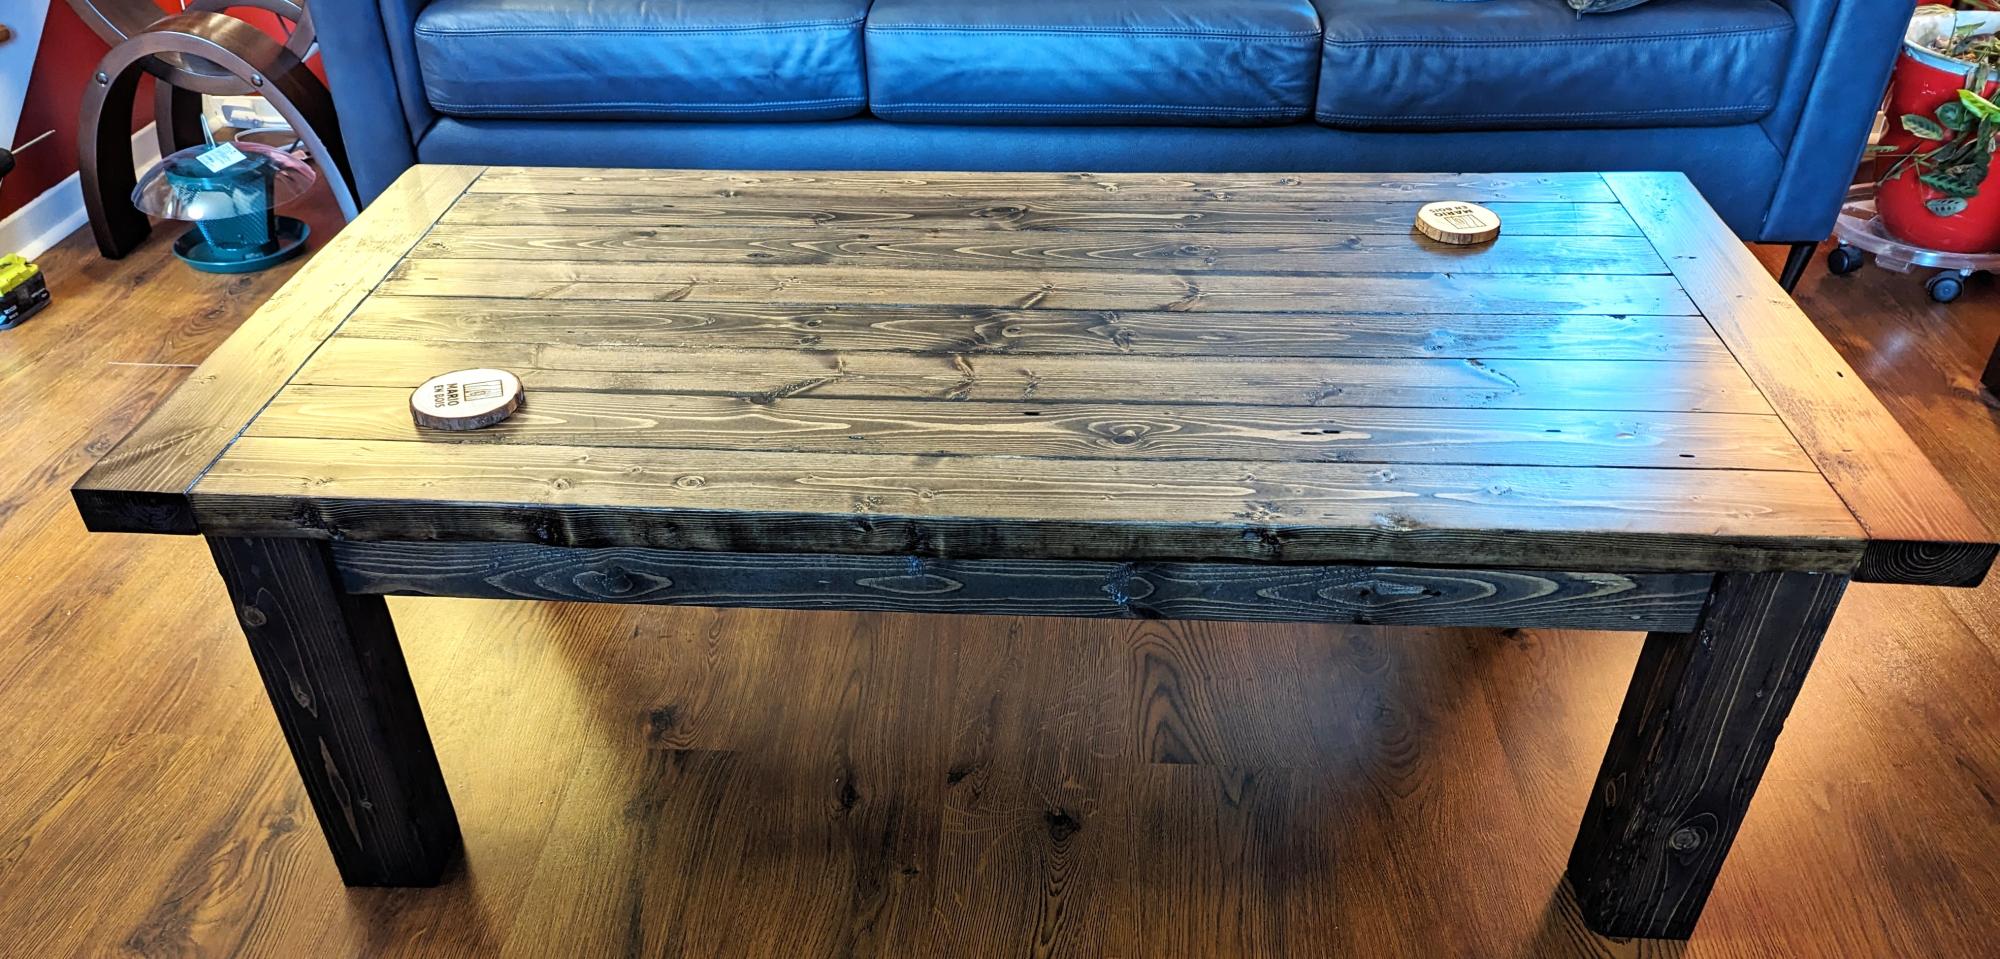
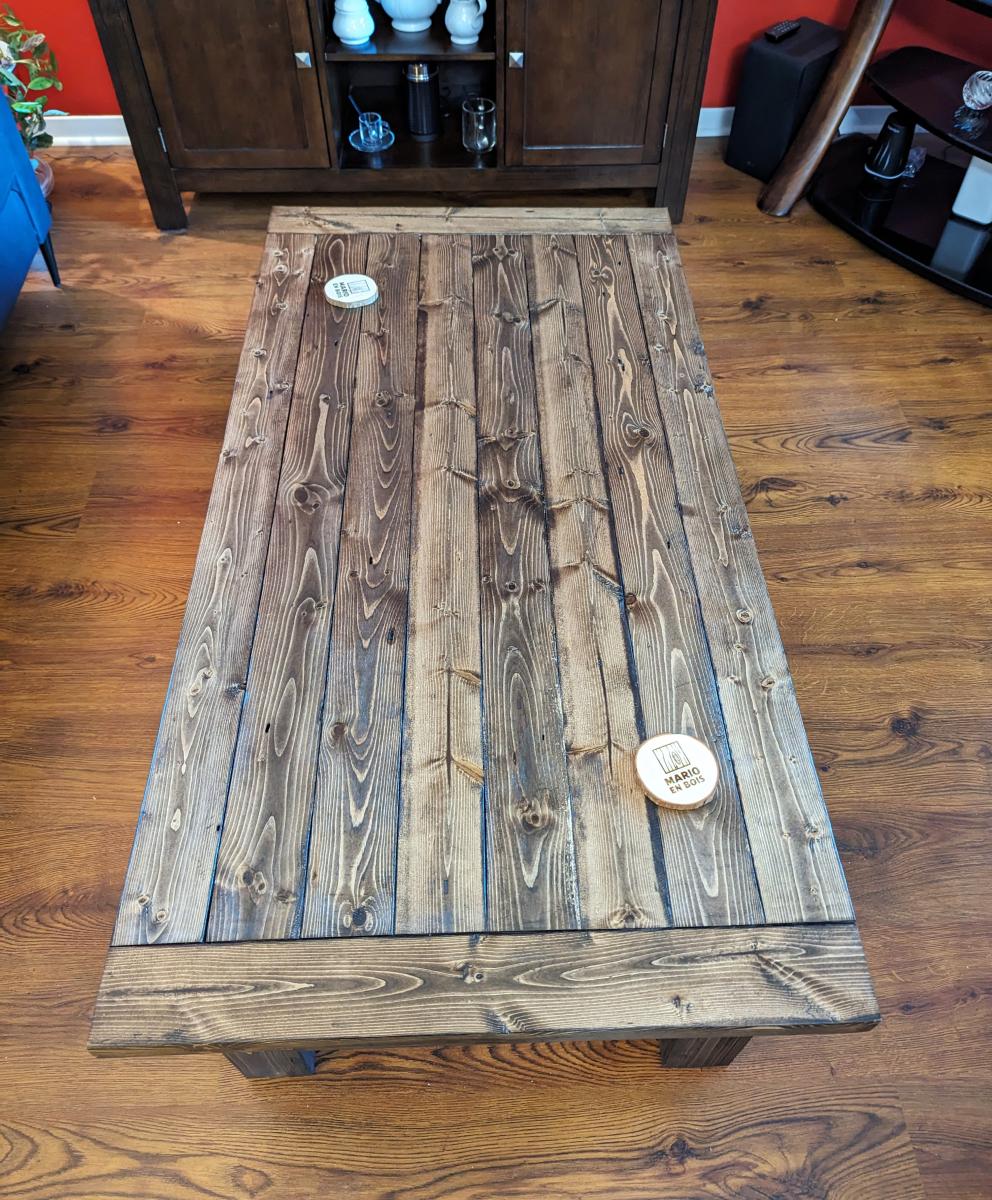
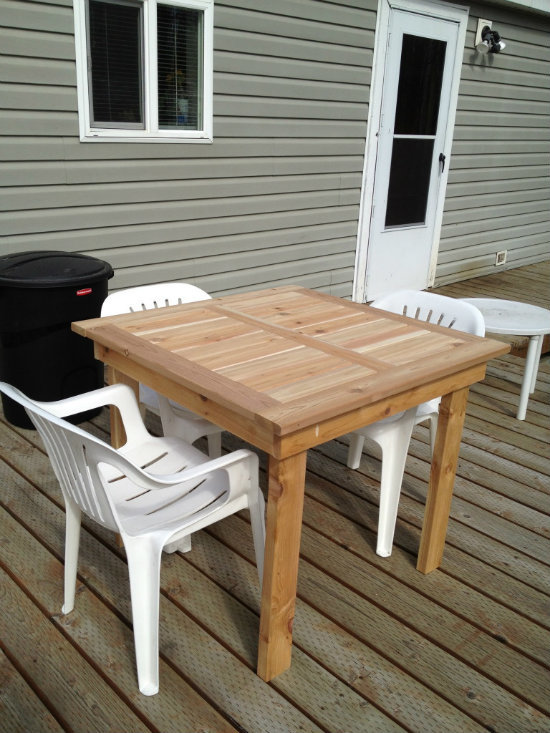
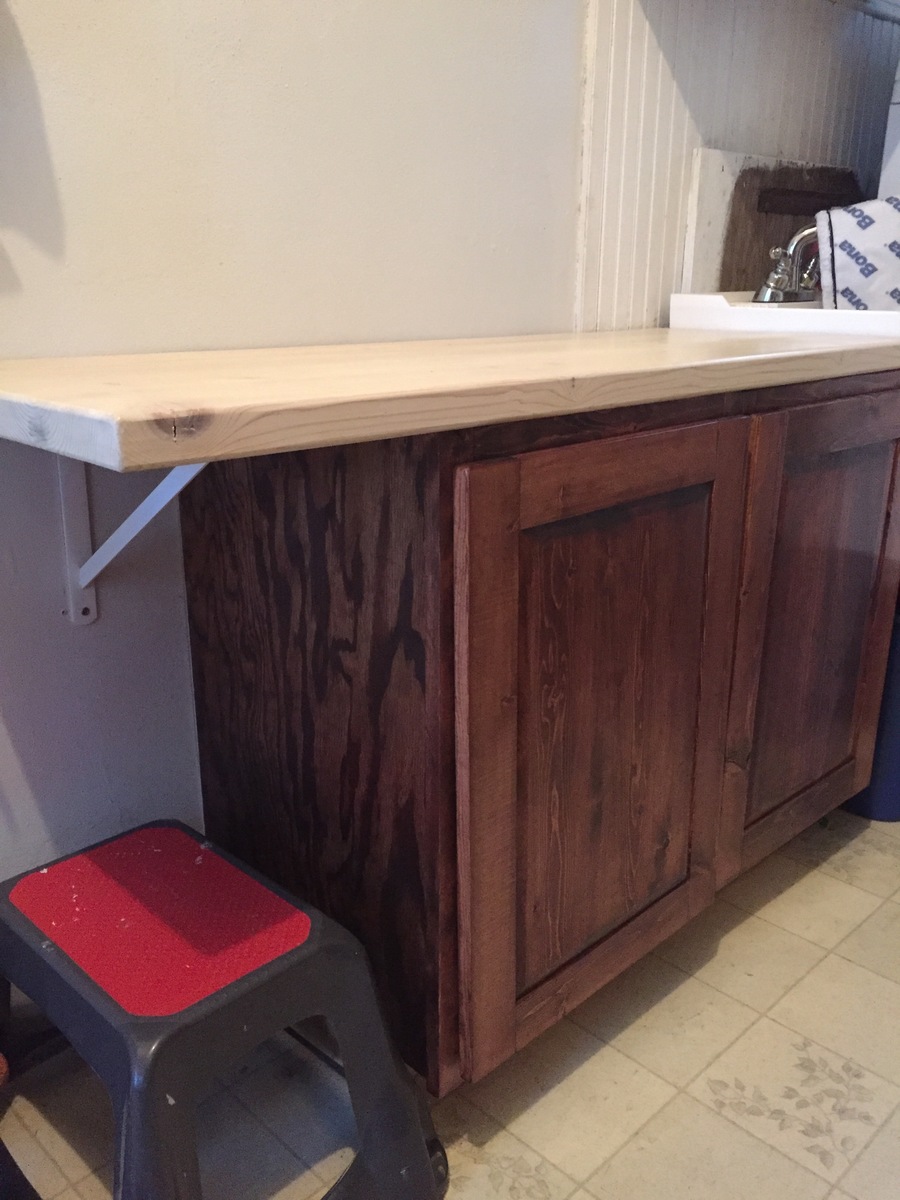
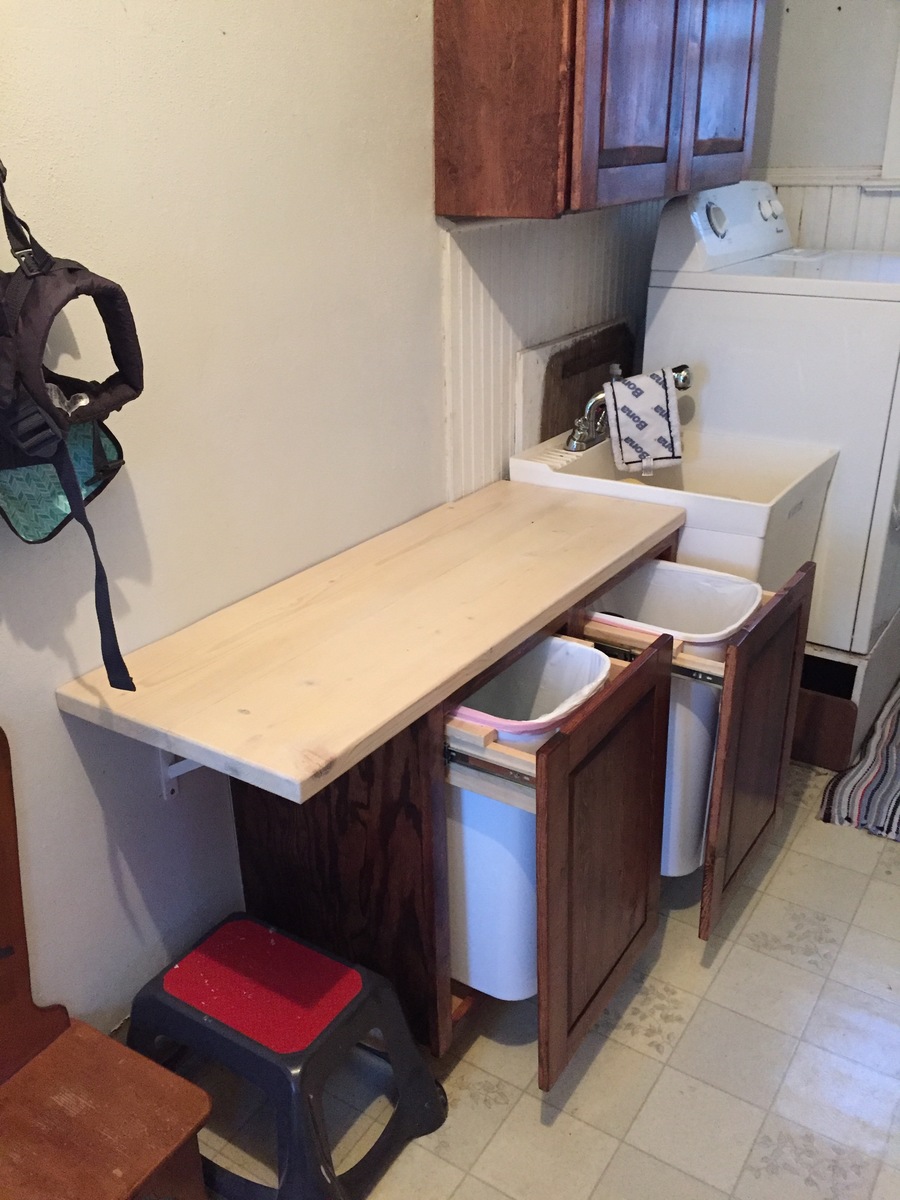
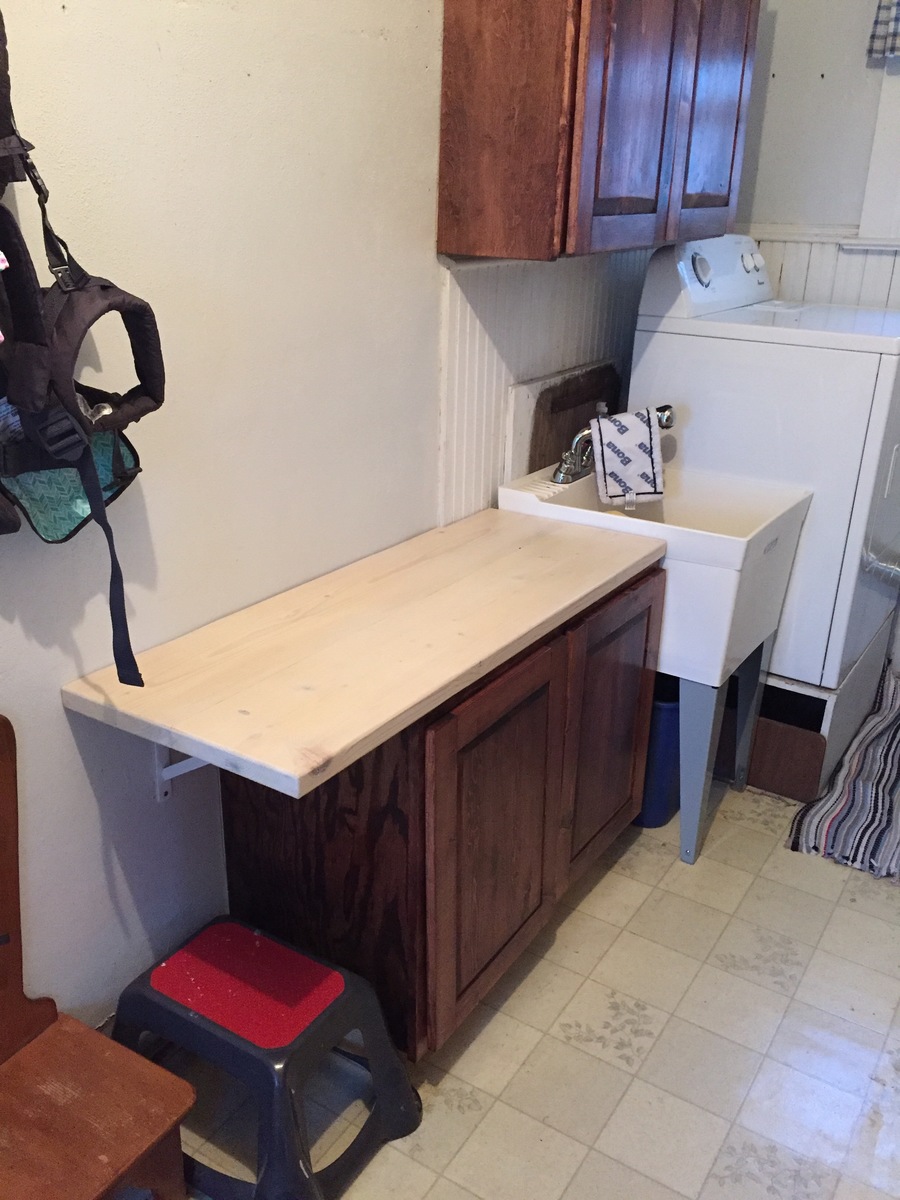
A friend contacted me about building a custom sized desk to coordinate with a set of dressers that she purchased used (I refinished them years before). We started with the Simple Modern desk (more in overall look), but made some changes away from "Modern" such as the bases, overhanging and routed top and trim on the side aprons. The legs of the desk aren't solid 4x4, but1x4s and 1x3 furring strips kreg jig'd and sanded till nearly seamless. The support under the desktop was redesigned to create a large, single drawer faced as two. The top is made from pine boards edge joined together. The two "bases" combined, have 96 pieces of trim to create this look. It was alot of work to get some tiny pieces just right, but well worth it in the end.

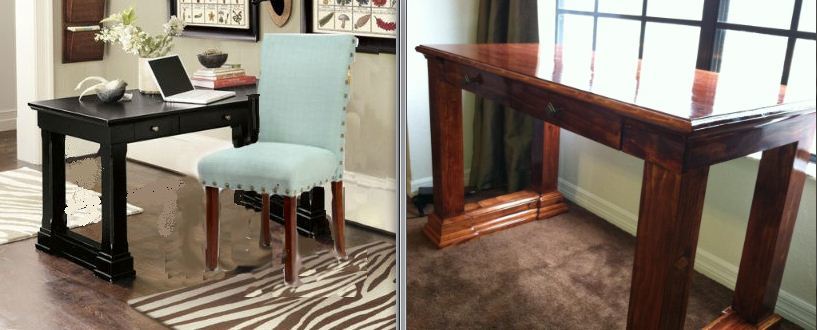
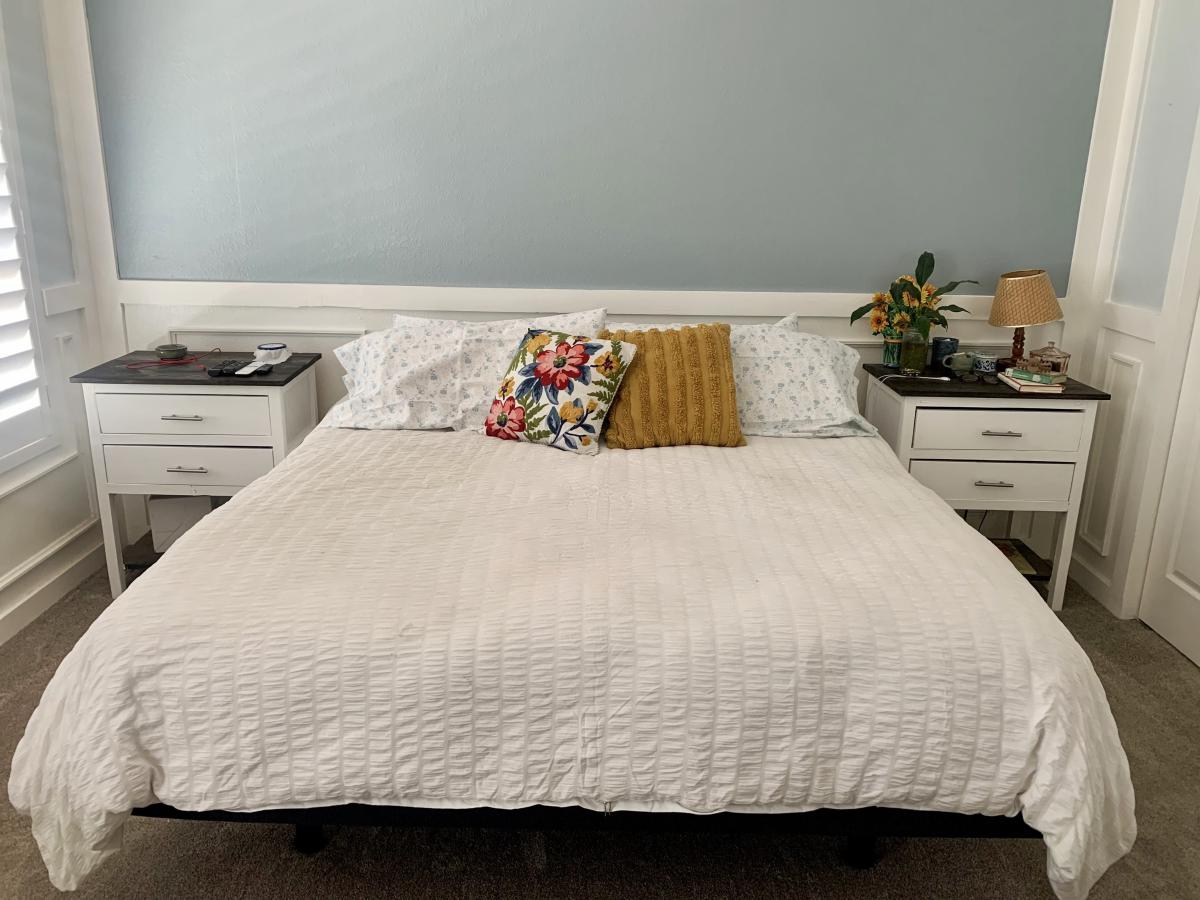
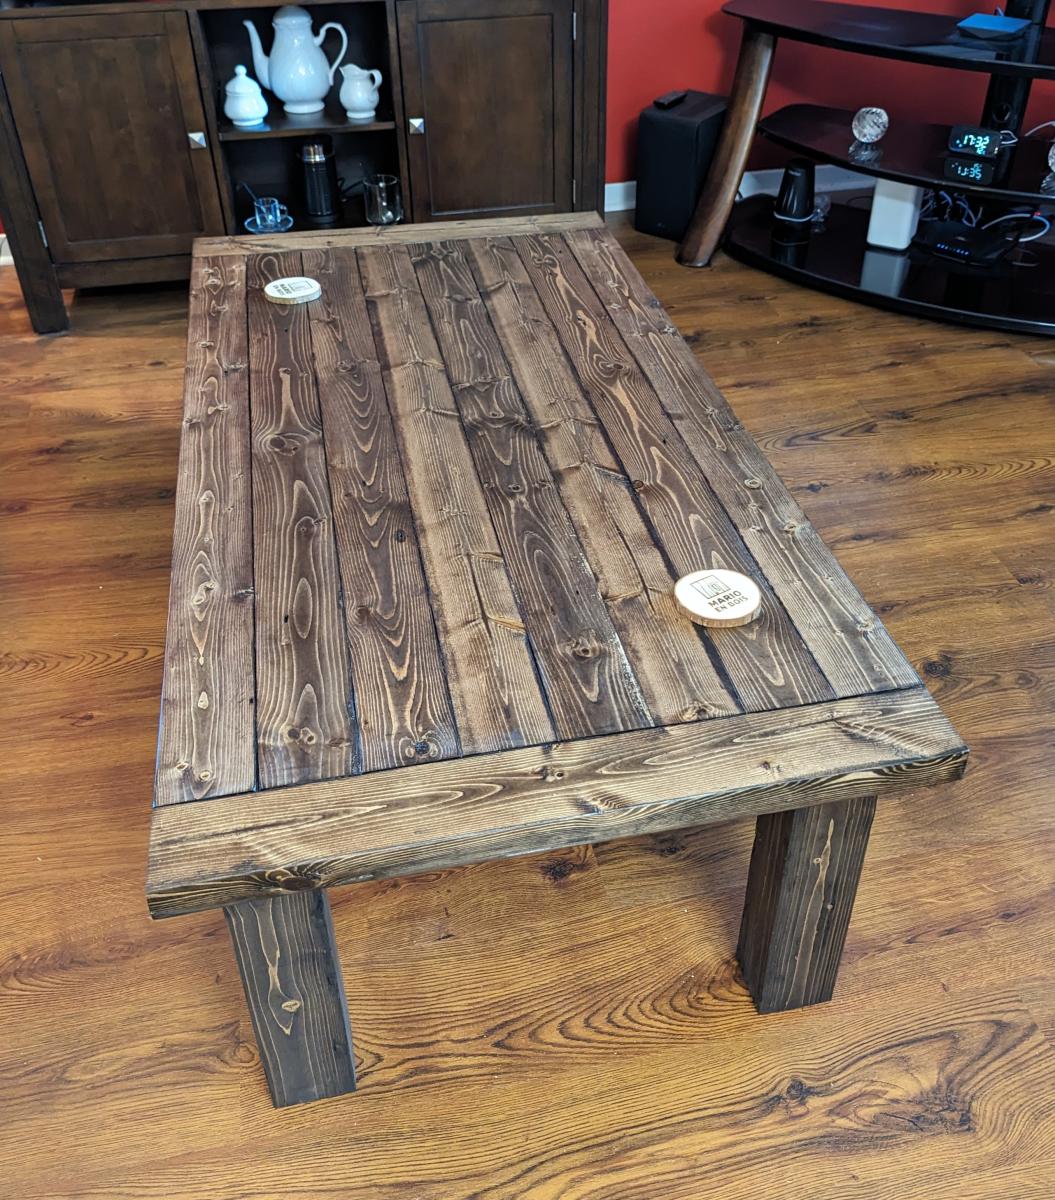
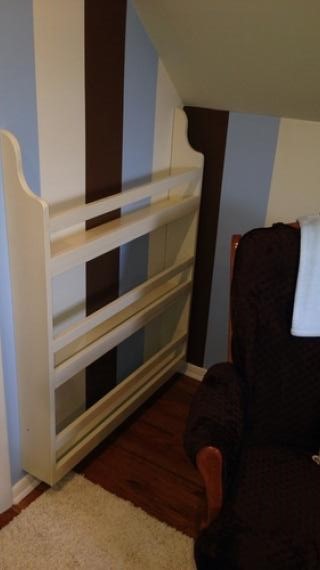
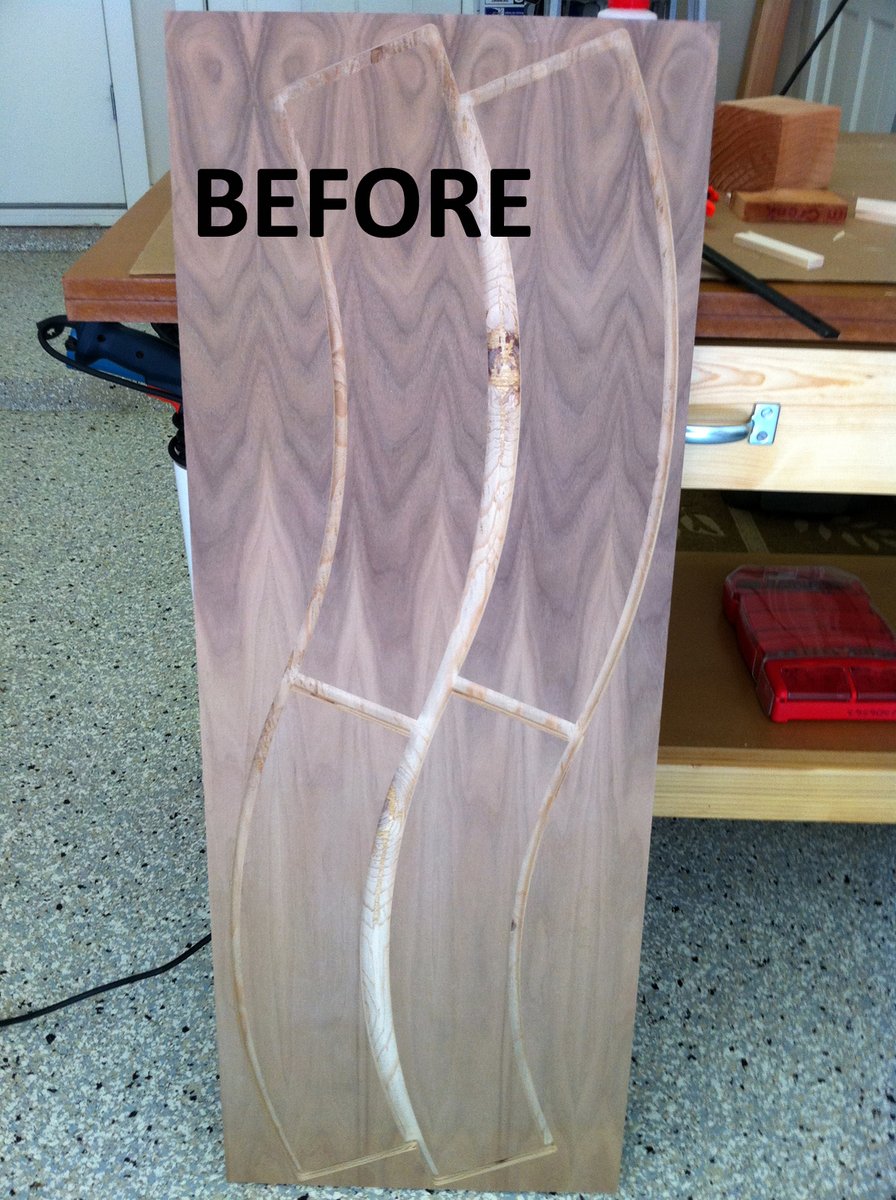
There are two comparison pictures uploaded. the photoshopped photo is the inspirational photo that came with the "Can you build me one of these?" and the second is the side by side with one of the dressers I was asked to compliment.

At 4 ft by 2 ft, she says its the perfect size for her home office laptop.

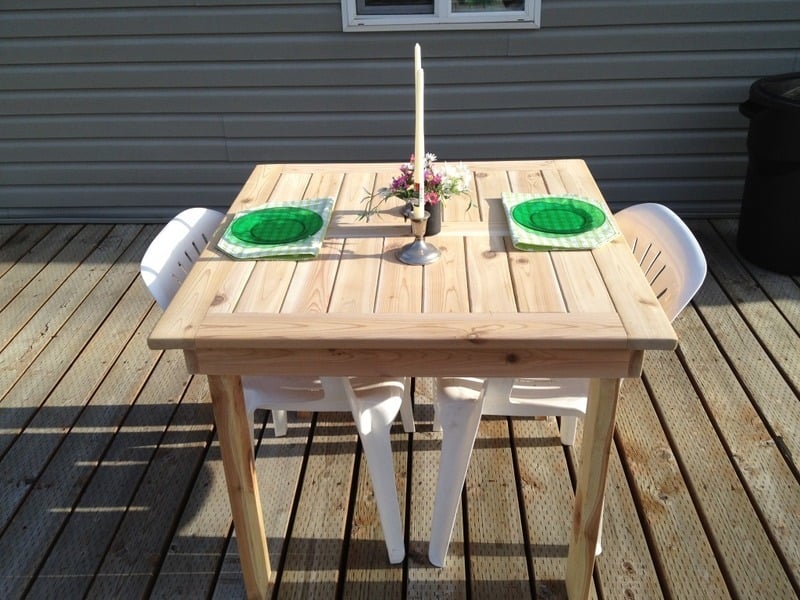
Overall, I was pretty surprised about how different of a turn this desk could take in style as I went from bare to adding the trim. Perhaps it can inspire others as well.

Built from Plan(s)
Estimated Cost
Materials were around $130
Estimated Time Investment
Week Long Project (20 Hours or More)
Finish Used
The stain is a combination of Minwax Gunstock and Golden Oak with 6 coats of Semi-gloss poly on top.
Recommended Skill Level
Intermediate

Comments

washington4x4

Tue, 05/08/2012 - 12:49

I have been looking at some different design ideas for a desk. I love what touches you put on the table legs. I might have to try something like this when I start building.

Patrick Hosey (not verified)

Tue, 05/08/2012 - 17:13

Gorgeous finish. What's your method? Pine has been killing me. I put 6 coats on my last table top or polyurethane. Time after time the wood just soaked up the finish. I could never get a smooth surface. Maybe if I would have applied 10 more coats...

BJ D

Wed, 05/09/2012 - 05:22

Washington- keep in mind the size of the trim pieces if you do a base like this. Some of those trim pieces are 1/2 wide and angled... not the easiest to get to fit right. If I were to do it again, I would cut in more to make the cuts a little easier. However, I loved this result.

These legs are hollow also, a definite idea to keep in mind for anyone wanting to do a 4x4 leg project but unable to find treated 4x4's.

Patrick- everything was well sanded in advance. then a coat of wood conditioner. Then the stain (2 coats of the gunstock and 2 coats of the Golden Oak). With the Poly, In between coats, I buff with 0000 Steel Wool then wipe clean. That surface, minus the places where I left the charachter in the wood on purpose, is VERY smooth.

BJ D

Wed, 05/16/2012 - 05:40

Patrick.. you apply poly, give a very light sand with the 0000 steel wool (A little more than running over the surface with minimal pressure) until the surface feels smooth with no drag. Then wipe down with tack cloth and apply a new layers of poly.

Keep in mind that with polyacrylic.. the water based stuff, you can't use the steel wool. I'm told it will rust. This is strictly for polyurethane.

BJ D

Wed, 05/16/2012 - 05:42

Washington- the middle layer of trim is on top of spacer to raise it up. It provided a great look.

s2miller123

Wed, 03/27/2013 - 21:25

The desk looks great. I was trying to figure out how you attached the four pieces of wood that make the legs. You indicated a Kreg jig, but it would seem that there would need to be some pocket screws on the outside. I don't see any...what am I missing here?

Dresser/Changing table

Similar to a previous poster, I was inspired to build this project to use as a combo dresser/changing table for our first child's nursery. It took quite a few days worth of work (spread out over a couple of months altogether) but I finally finished the bulk of the work a few days before entering the third trimester of pregnancy, phew! I think we'll enjoy this piece for years to come, thanks Shane and Ana for the plans! (Please excuse the poor lighting and ugly garage, we haven't set up the nursery yet so the dresser may be living in the garage until we do!)

Built from Plan(s)
Estimated Cost
$300ish
Estimated Time Investment
Week Long Project (20 Hours or More)
Finish Used
Annie Sloan Chalk Paint in Pure White. Love this paint but it has a very matte finish on its own and will need to be waxed for protection that I'm waiting until the pregnancy is over to finish.
Recommended Skill Level
Intermediate

Comments

4x4 Farmhouse Table (unfinished for now)

Submitted by Anonymous (not verified) on Sun, 05/22/2016 - 12:40

Found these plans and fell in love! Opted to use 7 2x6's for the top with 2x8's for the breadboard! Knocked it out between Saturday and Sunday. Planning on doing the steel wool and vinegar agingtechnique after distressing the table with various tools. Ended up being 7ft 1/2 in by 3ft 2 1/2in. Definitely looking forward to searching through the plans and trying other projects! Was my first time building a furniture piece from scratch!

Built from Plan(s)
Estimated Cost
Roughly $120 in materials
Estimated Time Investment
Weekend Project (10-20 Hours)
Finish Used
Nothing yet...
Recommended Skill Level
Intermediate

Outdoor tables

Submitted by knrburch on Wed, 02/26/2020 - 07:00

I built these for outdoor. Made them narrower than actual plan. Love them! Thank you for the plan!

Estimated Cost
$150
Estimated Time Investment
Weekend Project (10-20 Hours)
Finish Used
Black gel stain and Sherwin Williams Alpaca paint
Recommended Skill Level
Beginner

2 Drawer Farmhouse Nightstand

Submitted by Anonymous (not verified) on Wed, 10/18/2023 - 09:28

I have always wanted to build some furniture. So, when we were looking for some nightstands for our bedroom and couldn’t find any we liked I found your Farmhouse Nightstand plans and decided to build them as a surprise gift for my husband for Valentine’s Day. I personalized them by adding an extra drawer and making them a little taller and wider to fit the space we had. We absolutely LOVE them! Thank you, Ana, for helping to make a dream of mine come true!

Toni Imlay @ toniimlay.com

Built from Plan(s)

Craftsman Frame

Submitted by pde00311 on Mon, 02/24/2014 - 22:24

Had an old concert poster that I had been looking to frame. Glad I found these plans.

Built from Plan(s)
Estimated Time Investment
Afternoon Project (3-6 Hours)
Finish Used
Minwax Provencial stain with two coats glossy polyurethane
Recommended Skill Level
Starter Project

Bench from my old barn wood

Submitted by srenzello on Wed, 05/25/2016 - 11:23

I used old barn wood I had out back its not a perfect fit all across the top but I made it that way on purpose I like the things that don't look perfect! Great project did it all in about 2 hours! 


Estimated Time Investment
An Hour or Two (0-2 Hours)
Recommended Skill Level
Beginner

Great Toy Box Plans

Submitted by dkakridge on Sun, 03/01/2020 - 18:55

So proud of how this turned out.  Plans were so easy to follow.  Thanks for such a wonderful site. 

David Akridge

Built from Plan(s)
Estimated Cost
$120
Estimated Time Investment
Weekend Project (10-20 Hours)
Finish Used
Rustoleum painters touch white gloss, Kilz Primer
Recommended Skill Level
Intermediate

Simple outdoor sofa for the pool!

Submitted by monster on Wed, 02/26/2014 - 18:03

An easy build! Thanks for the plans, Ana. This was a housewarming gift for some friends and it now sits nicely by their pool. I got the cushions from Ikea (Arholma range) and sized the sofa around them. I used 2x3s for the frame and added a couple of 2x3 support legs under the back cleat for extra support. I also attached a couple of 2x3 pieces between the back cleat and the back apron for the back support to rest on. Now for the table... :)

Estimated Cost
$250 including timber, cushions and paint
Estimated Time Investment
Weekend Project (10-20 Hours)
Finish Used
Dulux Weathershield paint, 2 coats. Cushion covers were dyed navy blue with Rit.
Recommended Skill Level
Beginner

Cedar Raised Garden Beds

We made two $10 raised beds last weekend and can't wait to get them in the yard!

The cedar fence pickets ended up costing us about $15 per bed with another $15 for screws, so total cost was about $30 per bed. 

We found it tricky to do the 1x2 pieces in the order recommended and when we make these again, will form the full box and then add on the 1x2s for support. 

We made a YouTube video detailing the process - hope you'll check it out!

Estimated Time Investment
An Hour or Two (0-2 Hours)
Finish Used
None
Recommended Skill Level
Beginner

Coffee Table with 4x4 Legs

Submitted by Anonymous (not verified) on Sun, 10/29/2023 - 19:13

My own version, made from this nice plan, from cheap material, ( construction wood ). Tinted with Minwax Dark Oak color, finished with 3 coasts of Polycrilic.

Mario

modified outdoor dining table

My wife has been wanting new patio furniture so here is my version of the simple outdoor table, I shortened it to fit our needs. Next is the chairs to match.

Built from Plan(s)
Estimated Cost
$55
Estimated Time Investment
Day Project (6-9 Hours)
Recommended Skill Level
Beginner

Comments

Flat book rack

Submitted by Morrell272 on Mon, 03/03/2014 - 08:37

Built this for my son's nursery. Cutting and assembly was a snap. Took under four hours. Painting however took forever. I'm a slow and careful painter. Each coat took two hours, then sanding in between. I'm happy with the result. I bought the kreg r3 pocket hole jig and I love it.

Estimated Cost
45.00
Estimated Time Investment
Weekend Project (10-20 Hours)
Finish Used
Paint and then water based semigloss clear coat to protect the finish from sticking to the books
Recommended Skill Level
Starter Project

Recyclable Pull-Outs

Submitted by mtsandager on Wed, 06/01/2016 - 13:25

We are trying to tidy up our laundry/mud room and needed a place for the recyclables. I ran across Ana's plans for these pull out cabinets and raised panel doors, adjusted the measurements to fit our space, and had at it! It's kind of a tight fit in that room but these seem to help with the clutter. I also added that little table on top for folding laundry.

Estimated Time Investment
Weekend Project (10-20 Hours)
Finish Used
I used Minwax Red Oak stain and applied with a rag, wiping excess off with a clean rag. I then sealed everything with a semi-gloss polyurethane, which I applied with a bristled brush. I believe I put on three coats, lightly sanding and removing dust before each application.
Recommended Skill Level
Intermediate

Retro Style Wall Hanging

Submitted by Joni on Mon, 05/21/2012 - 14:40

This piece began with finding a unique piece of walnut that had been discarded by a custom cabinet manufacturer. When I saw it, I thought I could make a beautiful wall hanging out of it. The walnut wood is absolutely beautiful; pictures don't do it justice. The majority of the piece is not stained; the natural color is enhanced with a clear polyurethane designed to give a hand-rubbed finish. The darker walnut section was lightly stained for contrast. The frame is made of pine 2x2s. I built a platform in the grooves with shims, and embedded earth-toned glass and stone tiles (as well as river rocks) in the grooves around the "waves".

While this didn't come from any specific plan, most any inspiration and techniques come straight from what I've learned on ana-white. Ana's site has really changed my life and given me a passion for building.

Recommended Skill Level
Beginner

Comments

hammertime

Tue, 05/22/2012 - 10:15

Joni, I've been admiring your work all along, but this one takes the cake! You have such imagination and vision. I think this is an outstanding piece.

Cottage Side Table with Vintage Label Painting

I modified the plans just a tad bit, i.e., framed the top and used 1" x 4"s on the top and bottom horizontal planes... painted a vintage citrus label on the top and now I have a one-of-a-kind side table for my porch.

Estimated Cost
$40
Estimated Time Investment
Weekend Project (10-20 Hours)
Finish Used
Ebony stain with a white milk paint dry brush on top of stain. Art work is done with acrylic then sanded and distressed. Finished the table with semi-gloss polyurethane.
Recommended Skill Level
Intermediate

Comments

Farmhouse Bed - Standard King Size

Submitted by jusgre on Wed, 03/25/2020 - 19:47

Really loved these plans and they produced a beautiful product.  The only minor change I'd make is to double the number of support slats.  Our Casper mattress requires gaps less than 3" between each slat.  Thank you for the plans!

Estimated Cost
$430
Estimated Time Investment
Weekend Project (10-20 Hours)
Finish Used
Minwax Honey Stain + Minwax Wipe-On Poly
Recommended Skill Level
Beginner

Stacking cube

Submitted by Joleene24 on Thu, 05/24/2012 - 13:41

Hi all,
This is my second project I have build from plans I have found here. I'm a novice at woodworking and only get a couple hours on the weekend to work on projects. So it takes a while to finish one. My daughter loves her new toy shelf. The hardest part for me was to attach the doors straight. I'm sure there is a secret I just haven't figured it out yet.
I primed the whole piece, applied three thin coats of latex paint and sanded with 320 grit sandpaper in between coats. I applied two coats of finish after 48 hours and sanded with 400 grit sandpaper in between.

Built from Plan(s)
Estimated Cost
$40
Estimated Time Investment
Weekend Project (10-20 Hours)
Finish Used
2 coats of polycrylic
Recommended Skill Level
Beginner

Loft bed Black with monster high colours.

Submitted by moka58 on Sat, 03/08/2014 - 20:18

My wonderful hubby built this bed in a short amount of time and I did the sanding and staining. We made it for my 6 year old daughter for her 6th birthday surprise. Her reaction… a high pitched scream of excitement.

Estimated Time Investment
Weekend Project (10-20 Hours)
Finish Used
Minwax Polyshades. I don't recommend this since it's oil based and it took a long time for the smell to dissipate. Go with a water based product.
Recommended Skill Level
Intermediate
Back