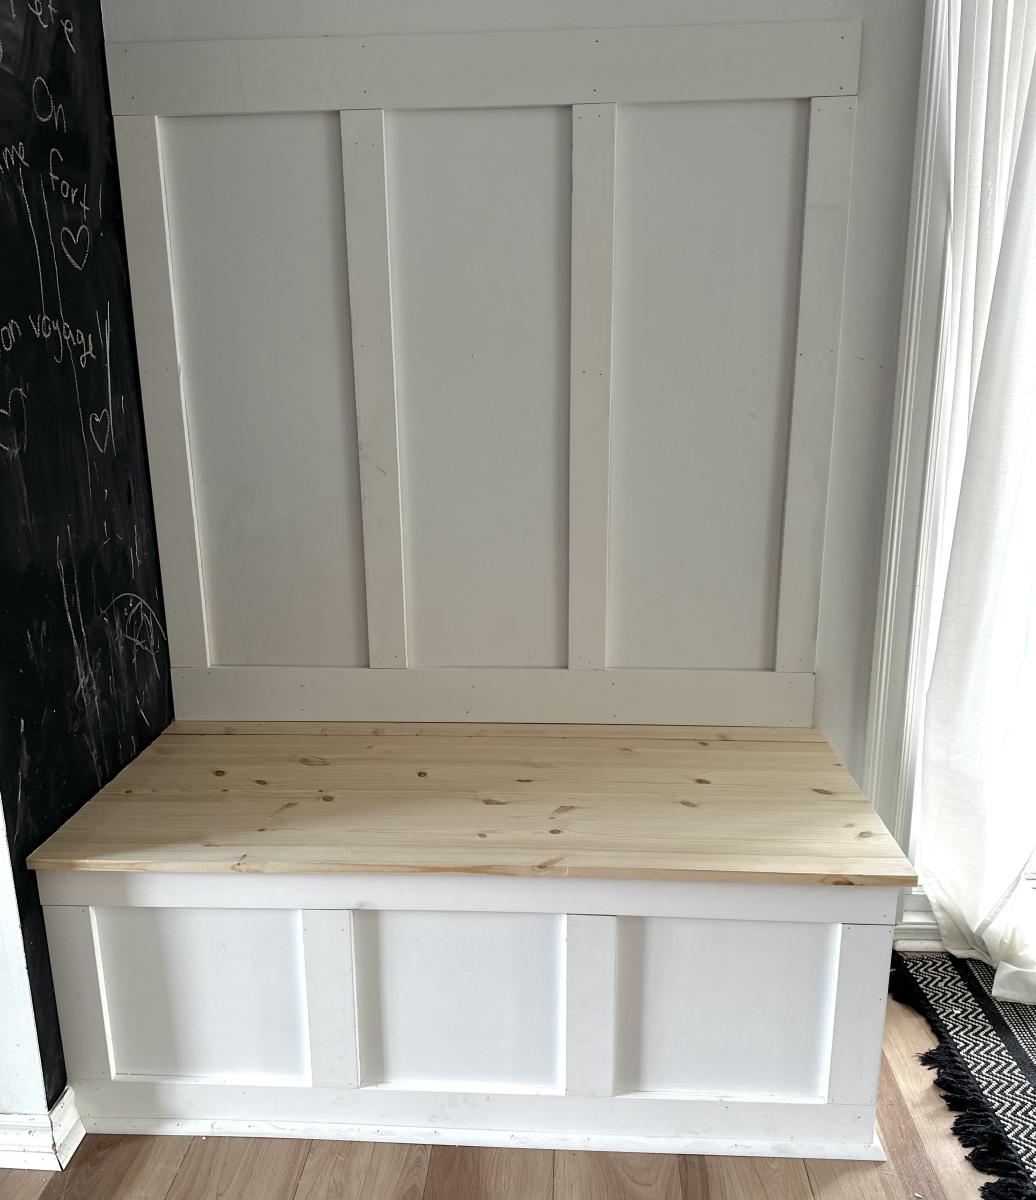
Banquette Bench Used as Hall Tree Bench
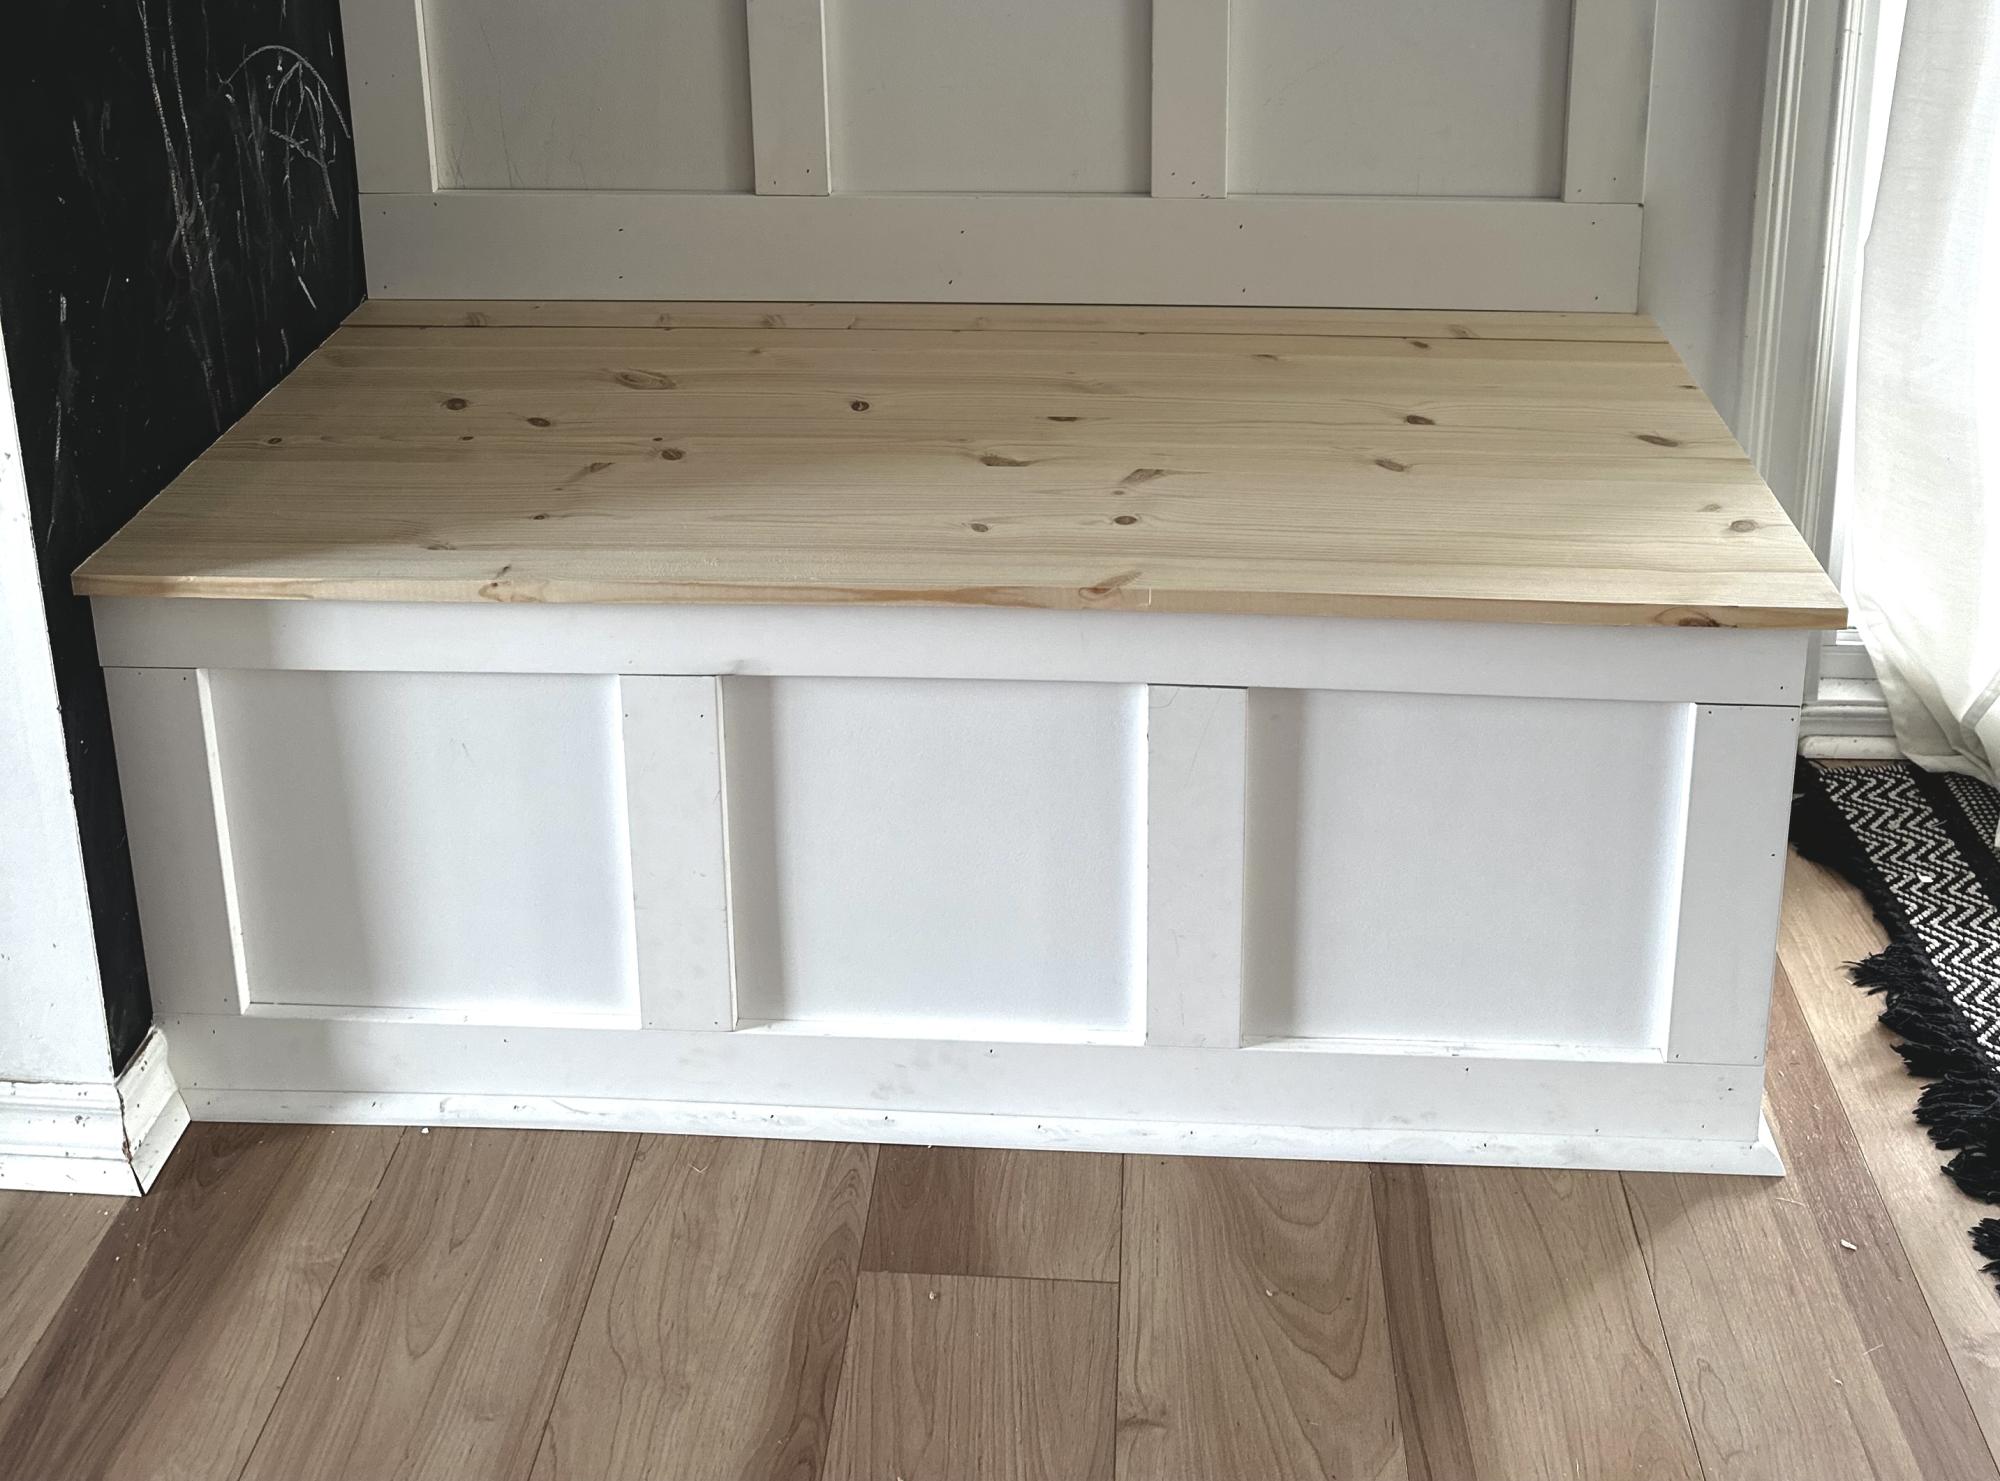
A nice bench with storage!
Built by Sylvie
Built from Plan(s)
A nice bench with storage!
Built by Sylvie

Saw the Outdoor sectional on your website and I just had to build it! Made some variations to the original plans, one being making it higher off the ground and the other was a necessity because Home Depot didn't have the right size wood and I wasn't about to go running around from store to store, so I used scraps to make a corner piece that fits perfectly. The most timely aspect was the sanding and removing all the rough edges. Also used Bondo to fill in all the holes that were on the outside to give it an all around smooth finish. The end result is just about the same though and the family and friends are in love with it! Thank you so much for the plans! Really could not even come close to justifying what it would cost to buy a sectional like this. Cushions were a huge concern and rightfully so. After building, I started searching and was mostly getting prices in the plus $800 range. It was breaking my heart knowing I was going to have to pay more than double what the entire sectional cost me. In the end though, was able to land some 25 x 25 x 6 cushions at Lowes for 50% off ($50 a piece).


Tue, 06/17/2014 - 14:11
You sure have outdone yourself, love the space! Thanks for sharing!

Mon, 03/16/2015 - 09:06
I love this modification. Did you use 2x8s or 2x10s for your base? It looks like you angles the back. How did you go about doing that? Thank you for posting this?! Great work!
Mon, 06/29/2015 - 18:00
nice build, when you get some time can you put up your modifications please:) would love to build this! Love the colours you used and how it looks!Me too..you cook like me, i make it my style...thats how i do my salsa ..my way i like it...
Mon, 06/29/2015 - 18:00
nice build, when you get some time can you put up your modifications please:) would love to build this! Love the colours you used and how it looks!Me too..you cook like me, i make it my style...thats how i do my salsa ..my way i like it...
Mon, 06/29/2015 - 21:50
sorry about the end of my comment, must of pasted a message in their somehow? My bad.

Traditional Farmhouse Table
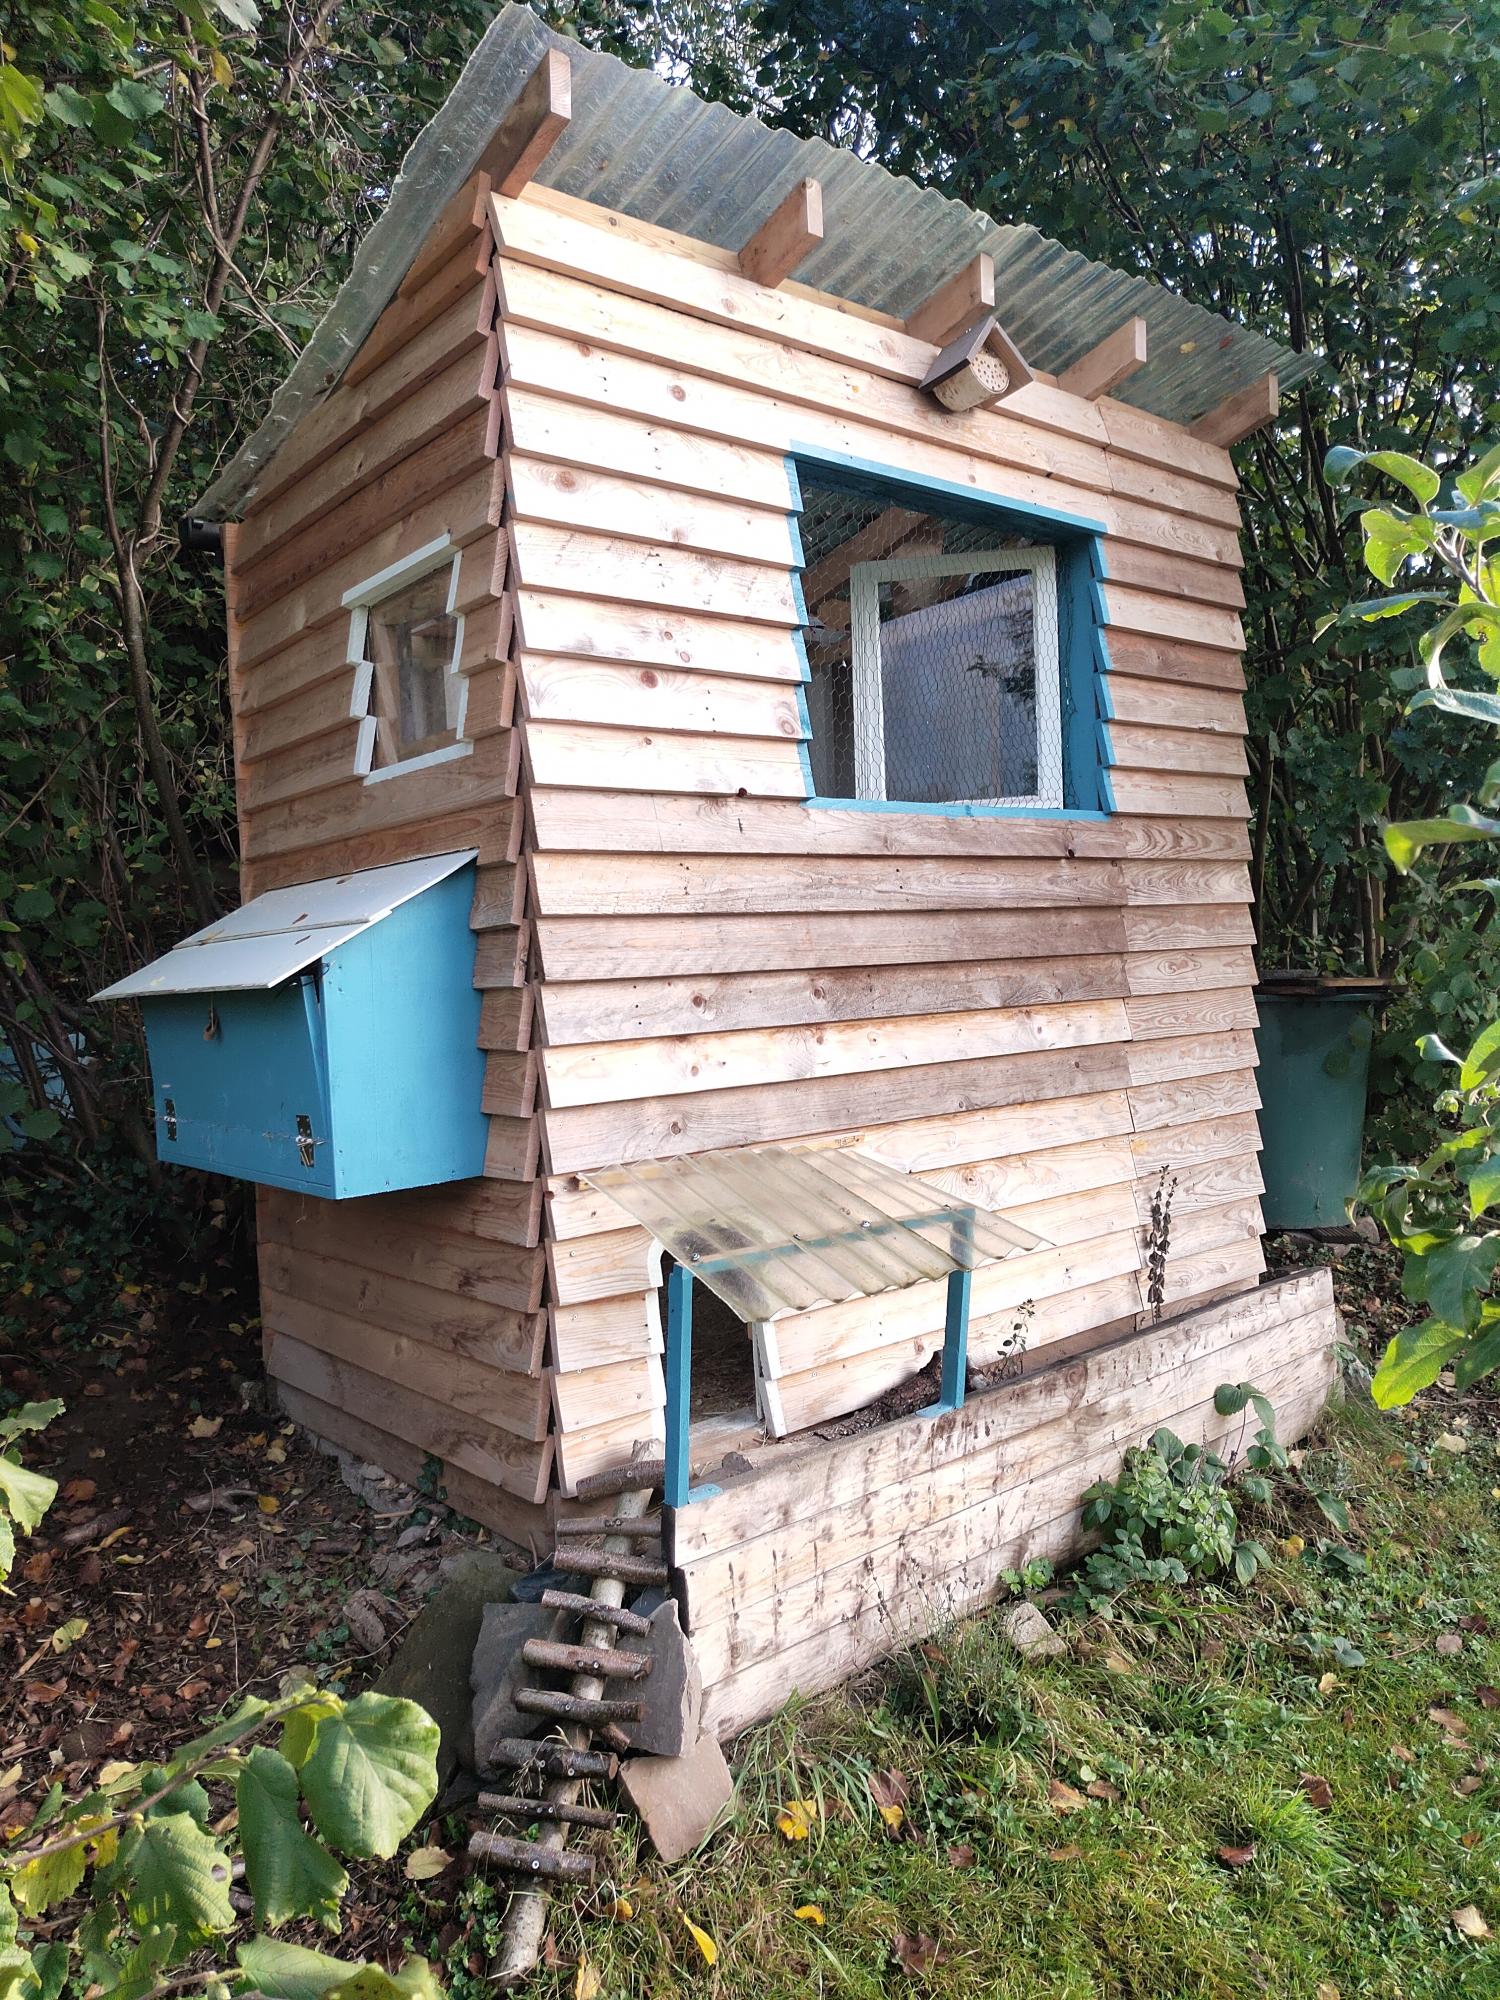
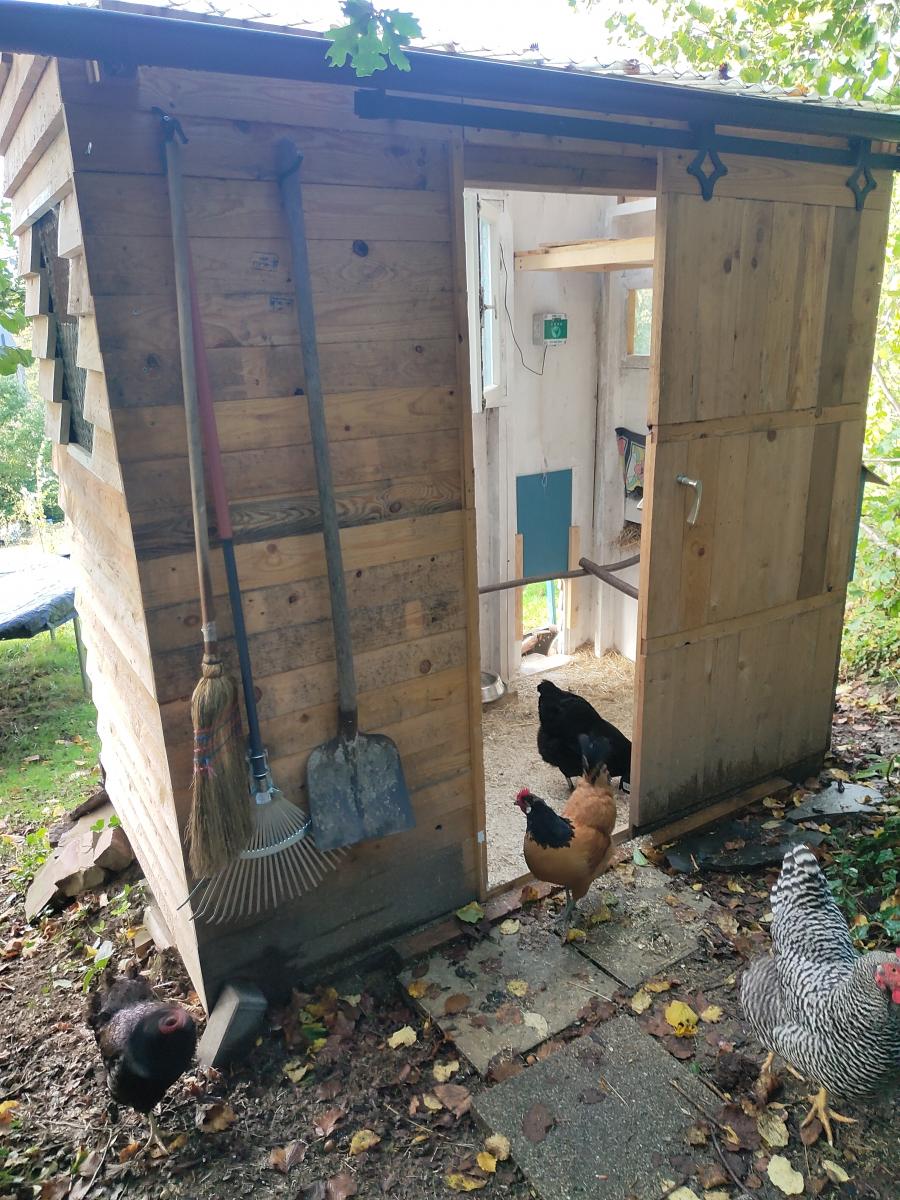
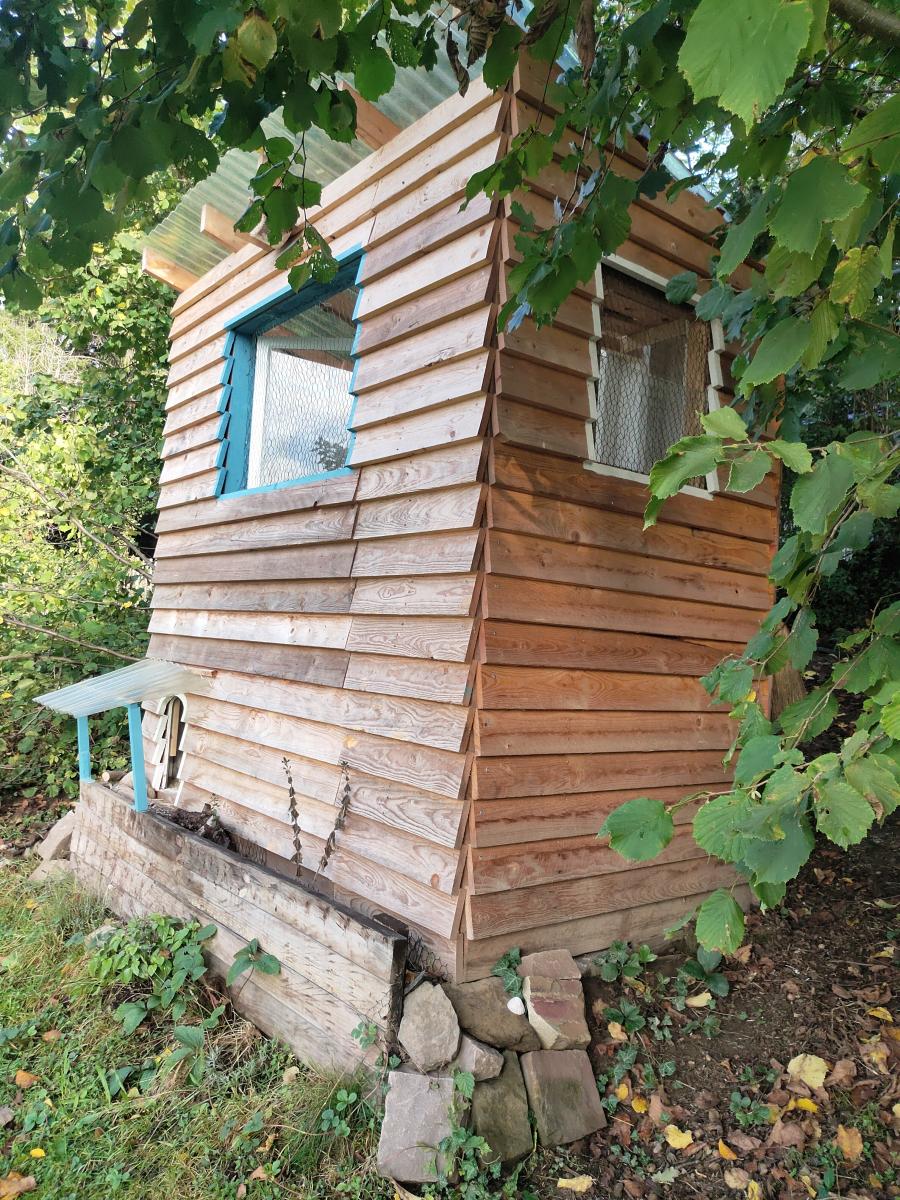
I had started this project last year in September and finished it finally 2020 in March because I get my chicken then.
I did modify the chicken coop a little bit due to the material I got.
The instructions and most of all the cutting list I like best!
Antje

This was a fun project. Easy instructions great piece of furniture. It is very sturdy. I'm a beginner at DIY wood projects so this was a rewarding project.


A quality table big enough for the whole family without costing a fortune! I was able to tailor this to be the perfect size for our family’s house in the country.

I had built a few of these chairs a year and a half ago similar to the red ones that you have on the step by step instructions. That was my first time at customer building and painting anything. Needless to say, my skills have improved over time.
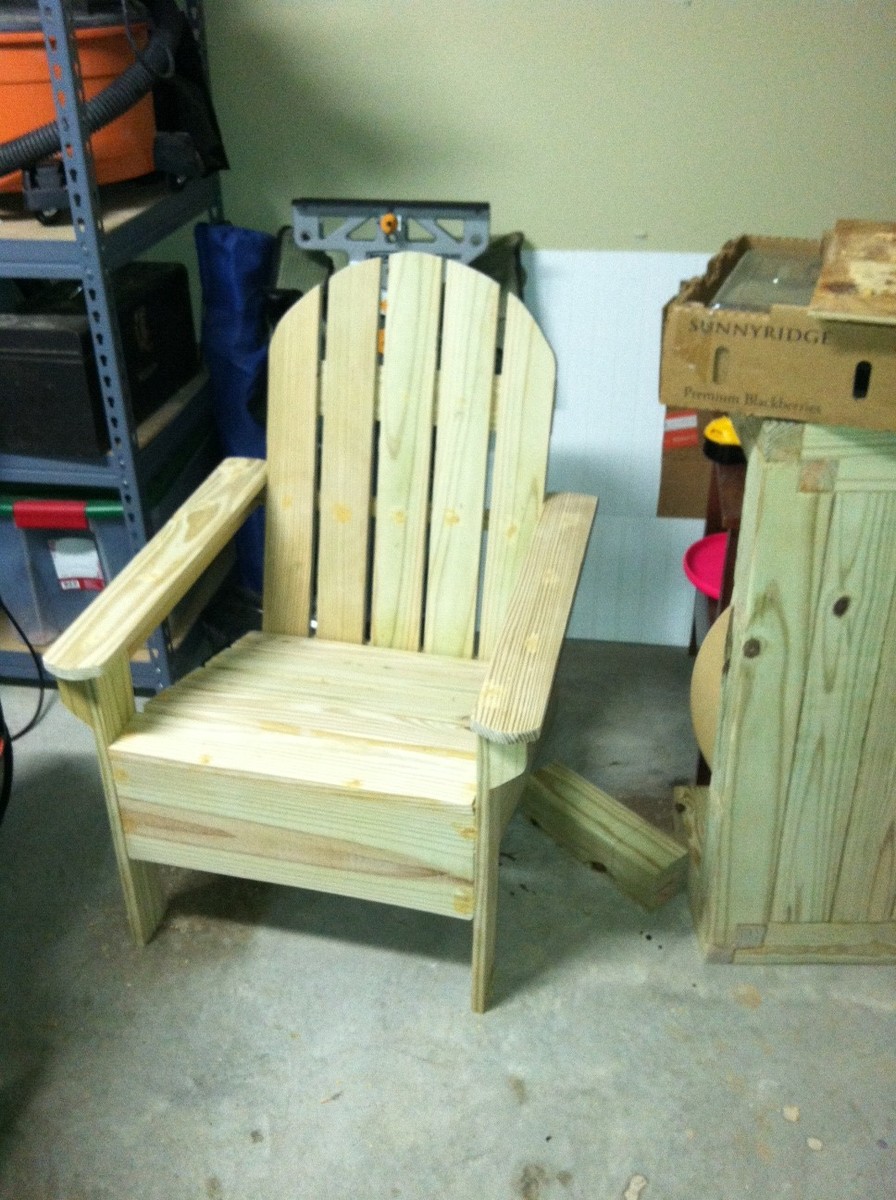
So, I wanted to build this chair for my dad for fathers day. He had an old plastic Adirondack chair sitting in his backyard that was really gross. I wanted to replace it with something nice. So he is obviously a UK fan and I wanted to see if I could paint the logo on correctly while also giving myself the opportunity to build something and see if I can make this chair a lot better than the ones I had previously built.
So I decided to curve the back of the chair and curve the ends of the arms. I recently got a nice dewalt random orbital sander which helped out alot in getting it nice and smooth. I made my own wood putty using the leftover sawdust and glue mixed together. I also fastened the wood together using glue and polymer coated screws. Which are supposed to last alot longer than regular wood screws when using pressure treated pine.
I took my time to make sure the pieces were all square when assembled which was better than previous building projects. Also, as far as finishing the chair, I primed it and then put 3 layers of the Kentucky blue Outdoor paint with a brush (which seems like it took forever). I made the stencil by just printing the logo on a piece of cardstock paper. Then I cut out the logo with a razor, then I wrapped the paper in duct tape to make the stencil it a little stronger and to fix the areas that ripped when cutting the card stock paper. Then I cut out the duct tape where the logo is. I made a couple of test paints using the stencil on some scrap to make sure my technique was good. Then once I felt comfortable, I painted 4 coats of very thin paint on the chair where the logo is. After all was dry, I did a light by hand sanding to make it smooth and then sprayed some clear coat on it for an extra level of protection and to make it shine a little.
It was a fun project and my dad really liked it.
Some things I would have done differently for next time would be to use a router to flush cut the seat slats and also use the router to give a nicer rounded edges for the arms and all of the slats as well. Also, It would be nice to mount a stainless bottle opener to the chair to open your drinks (maybe on the outside of the arm of the chair.
Thanks for the plans. I check your site all the time for ideas.


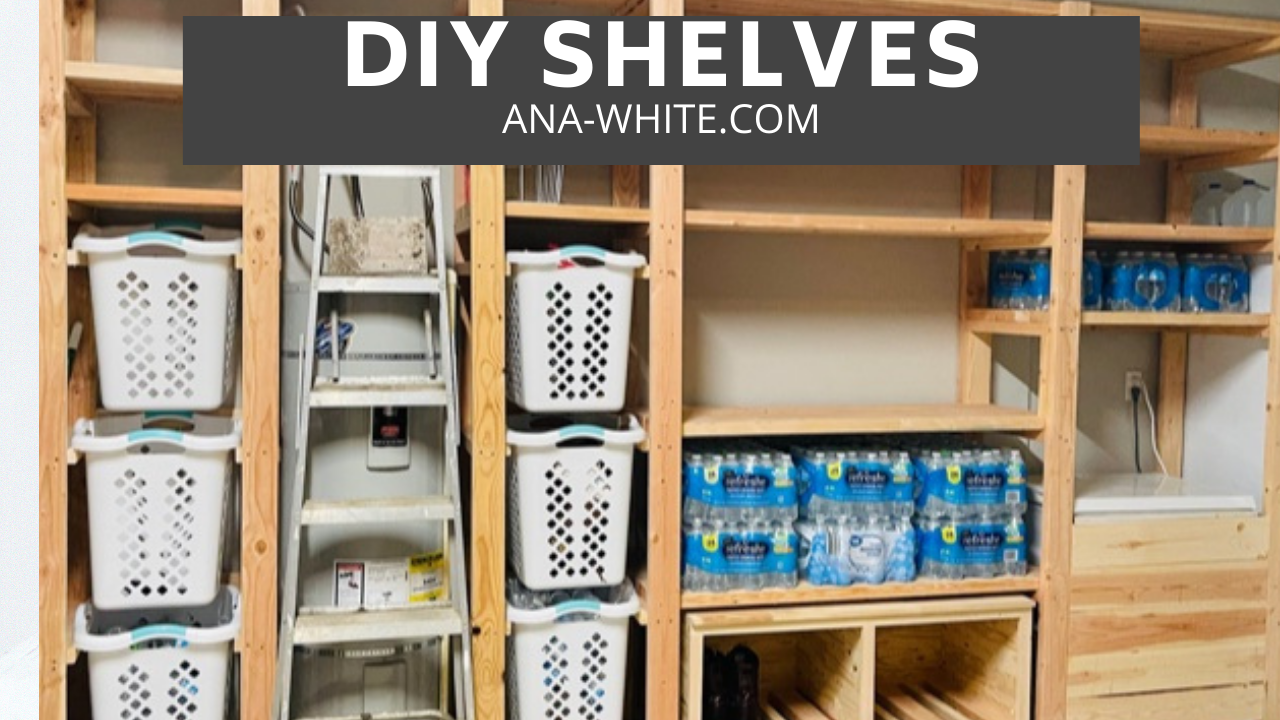
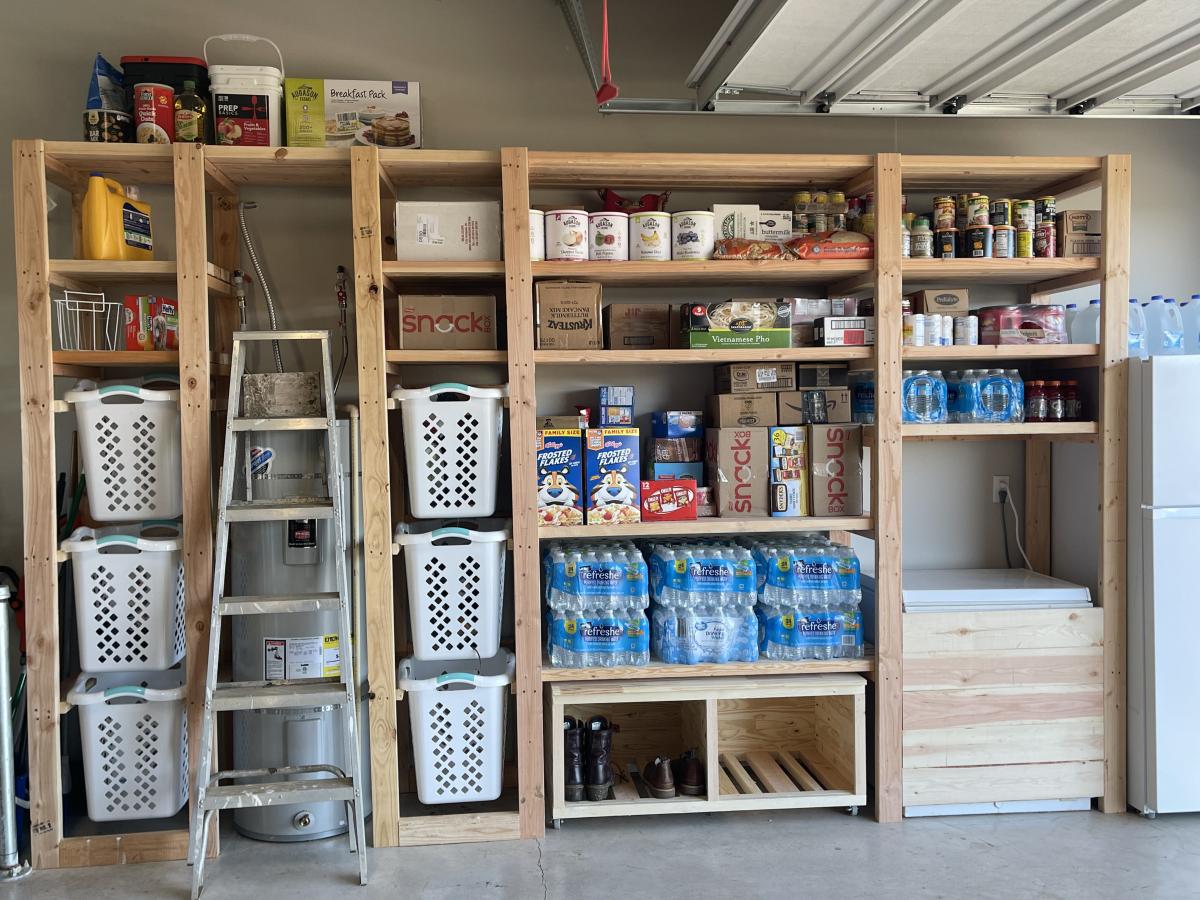
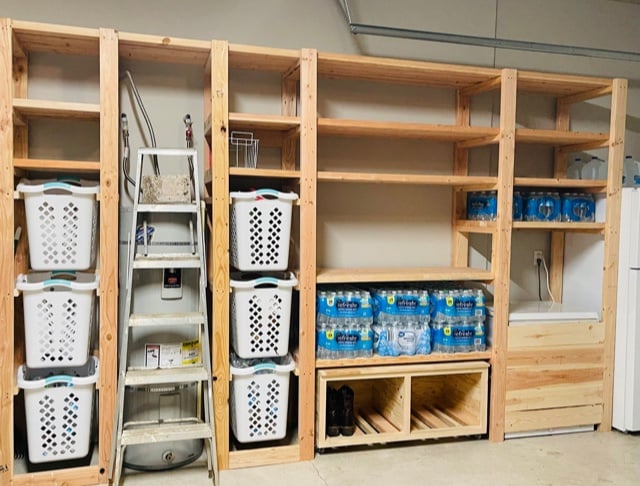
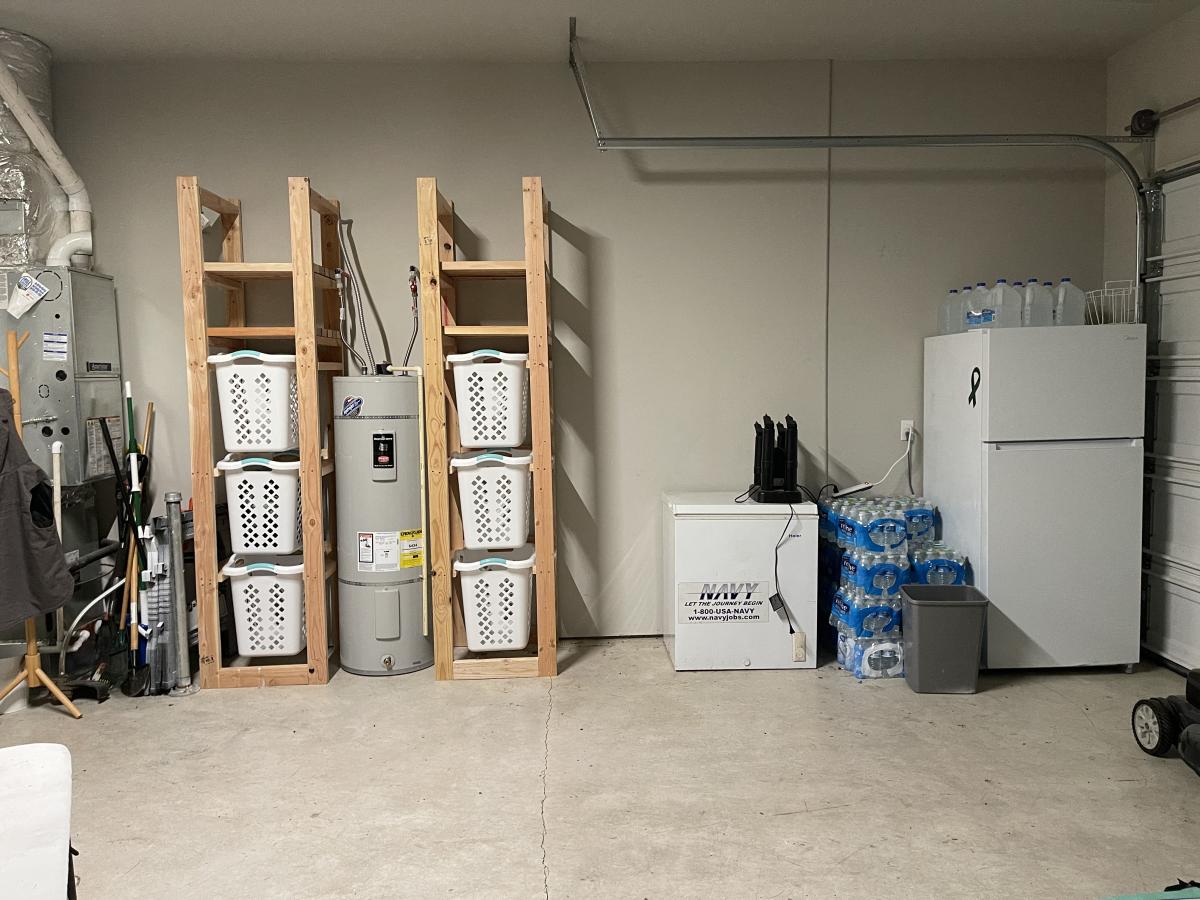
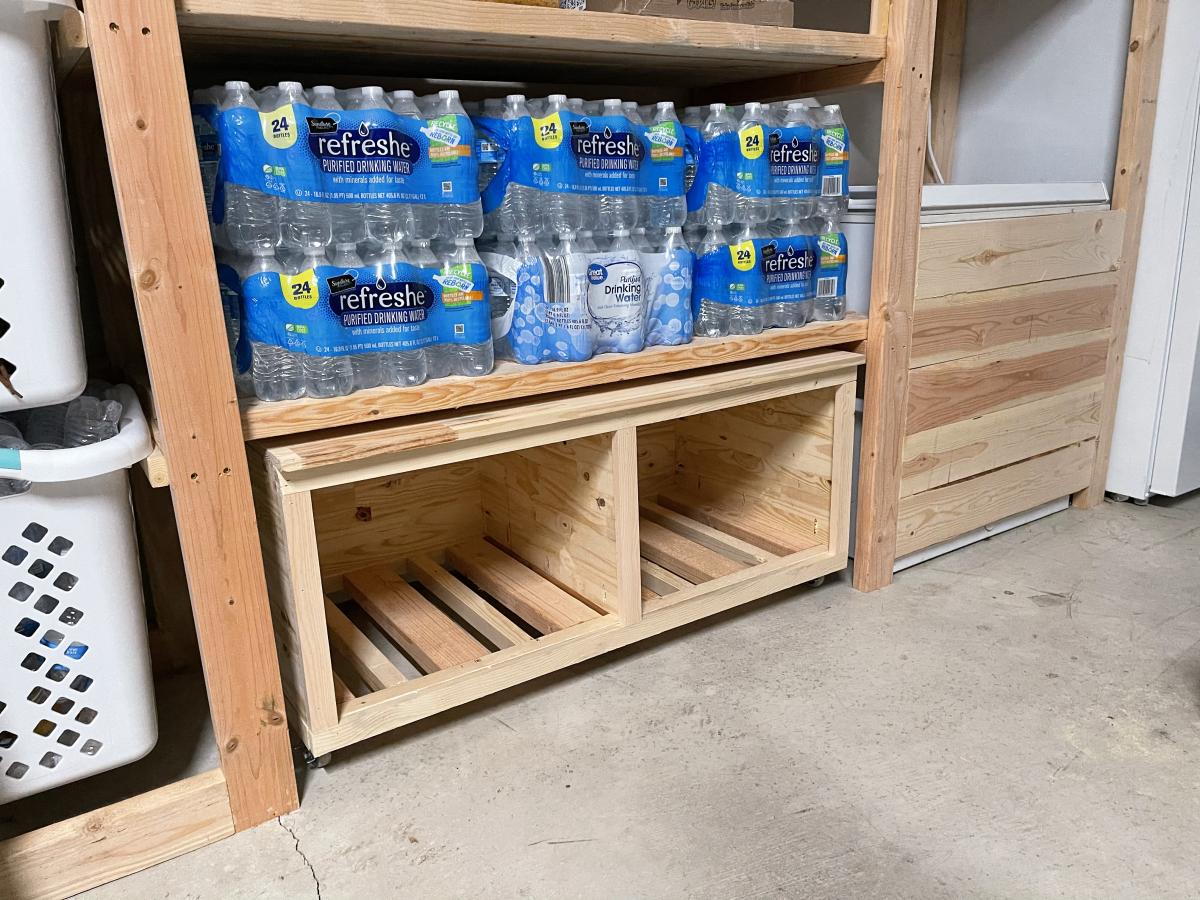
I used Ana's Freestanding Shelf plan and customized it to fit my needs. I incorporated laundry and recycle storage, a rolling bench and built in for our chest freezer. If you want to see it being built with some added tips, that video is available here https://www.youtube.com/watch?v=N8w7XGiVMbs&t=258s
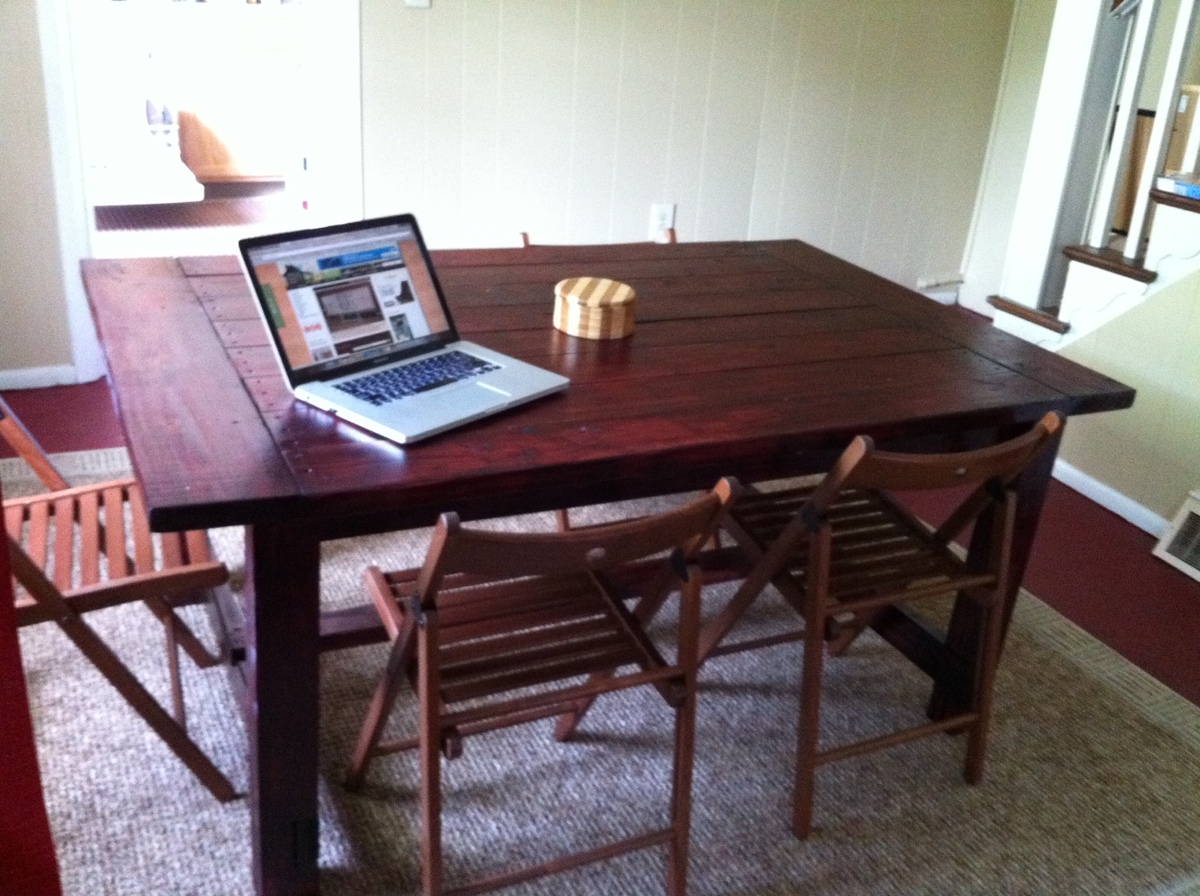
I just bought a new house and this table was my first project for it. I'm so happy with how it turned out!!!! Thank you for the plans!

Wed, 06/08/2011 - 14:00
Thank you for the smile! I see we have share some web browsing habits! Congrats on the house and love the table finish! Great first project, really appreciate you sharing! Ana

This was my first project with the kreg jig and I love it. Pretty easy once I got the hang of it. I used beadboard in place of 1/4 ply to dress it up a little but more. The hardest part was attaching the sides to eachother, I used 'L' brackets so it could be taken apart.
My dogs love this kennel! It is large enough for my weimaraner and my lab/pitbull mix to stay in it together. Most mornings they are laying in there waiting on us to lock the door.
I purchased a vinyl covered stress mat from 'Blue', it fits really well inside and just pulls out to be wiped down. I haven't needed to but it can be hosed down also.
Wed, 05/02/2012 - 06:57
I am wondering what type of latch's those are and were you got them. I am also wondering were you purchased this mat from. I tried searching blue but could not find anything?

this project it was nice and easy to do it I had make the farm house bed then I saw this night stand and I had to have it

Mon, 08/12/2013 - 20:31
Oooh, I love the finish you applied to it! It looks so cool. Great job!

Beautiful, practical and afternoon naps are so comfortable!
Made from cedar 2x4s and semi transparent stain. I mixed and matched new cushions with ones I already had. I will be adding the matching coffee/end tables soon.

Inspired by the Tall Secretary with mail slots but with my own twist/needs incorporated in it. Finished with pure white satin paint.


Found the plans on Ana’s website, not to hard to build and only ran about $200. Bed is made from white pine with the exception or the 4x4 post which are cedar because that’s all I could find that was untreated. I used an age excelerator instead of stain. It took me the weekend to build but I have 5 kids so there where lots of distractions. I added 5 inches to the height because my wife likes tall beds, and a 2x4 to the bottom of the headboard and footboard for added strength and I liked the way it looked. Get help moving head and foot boards around as they are heavy.


We used flooring from Homedepot for the middle boards. My decorator suggested that I make it longer and that worked well with this flooring. We did discover that our Lowe's has the post for only $10 - we paid too much at 84 lumber - only to discover that they were warped - we had to use corner brackets to fix it.
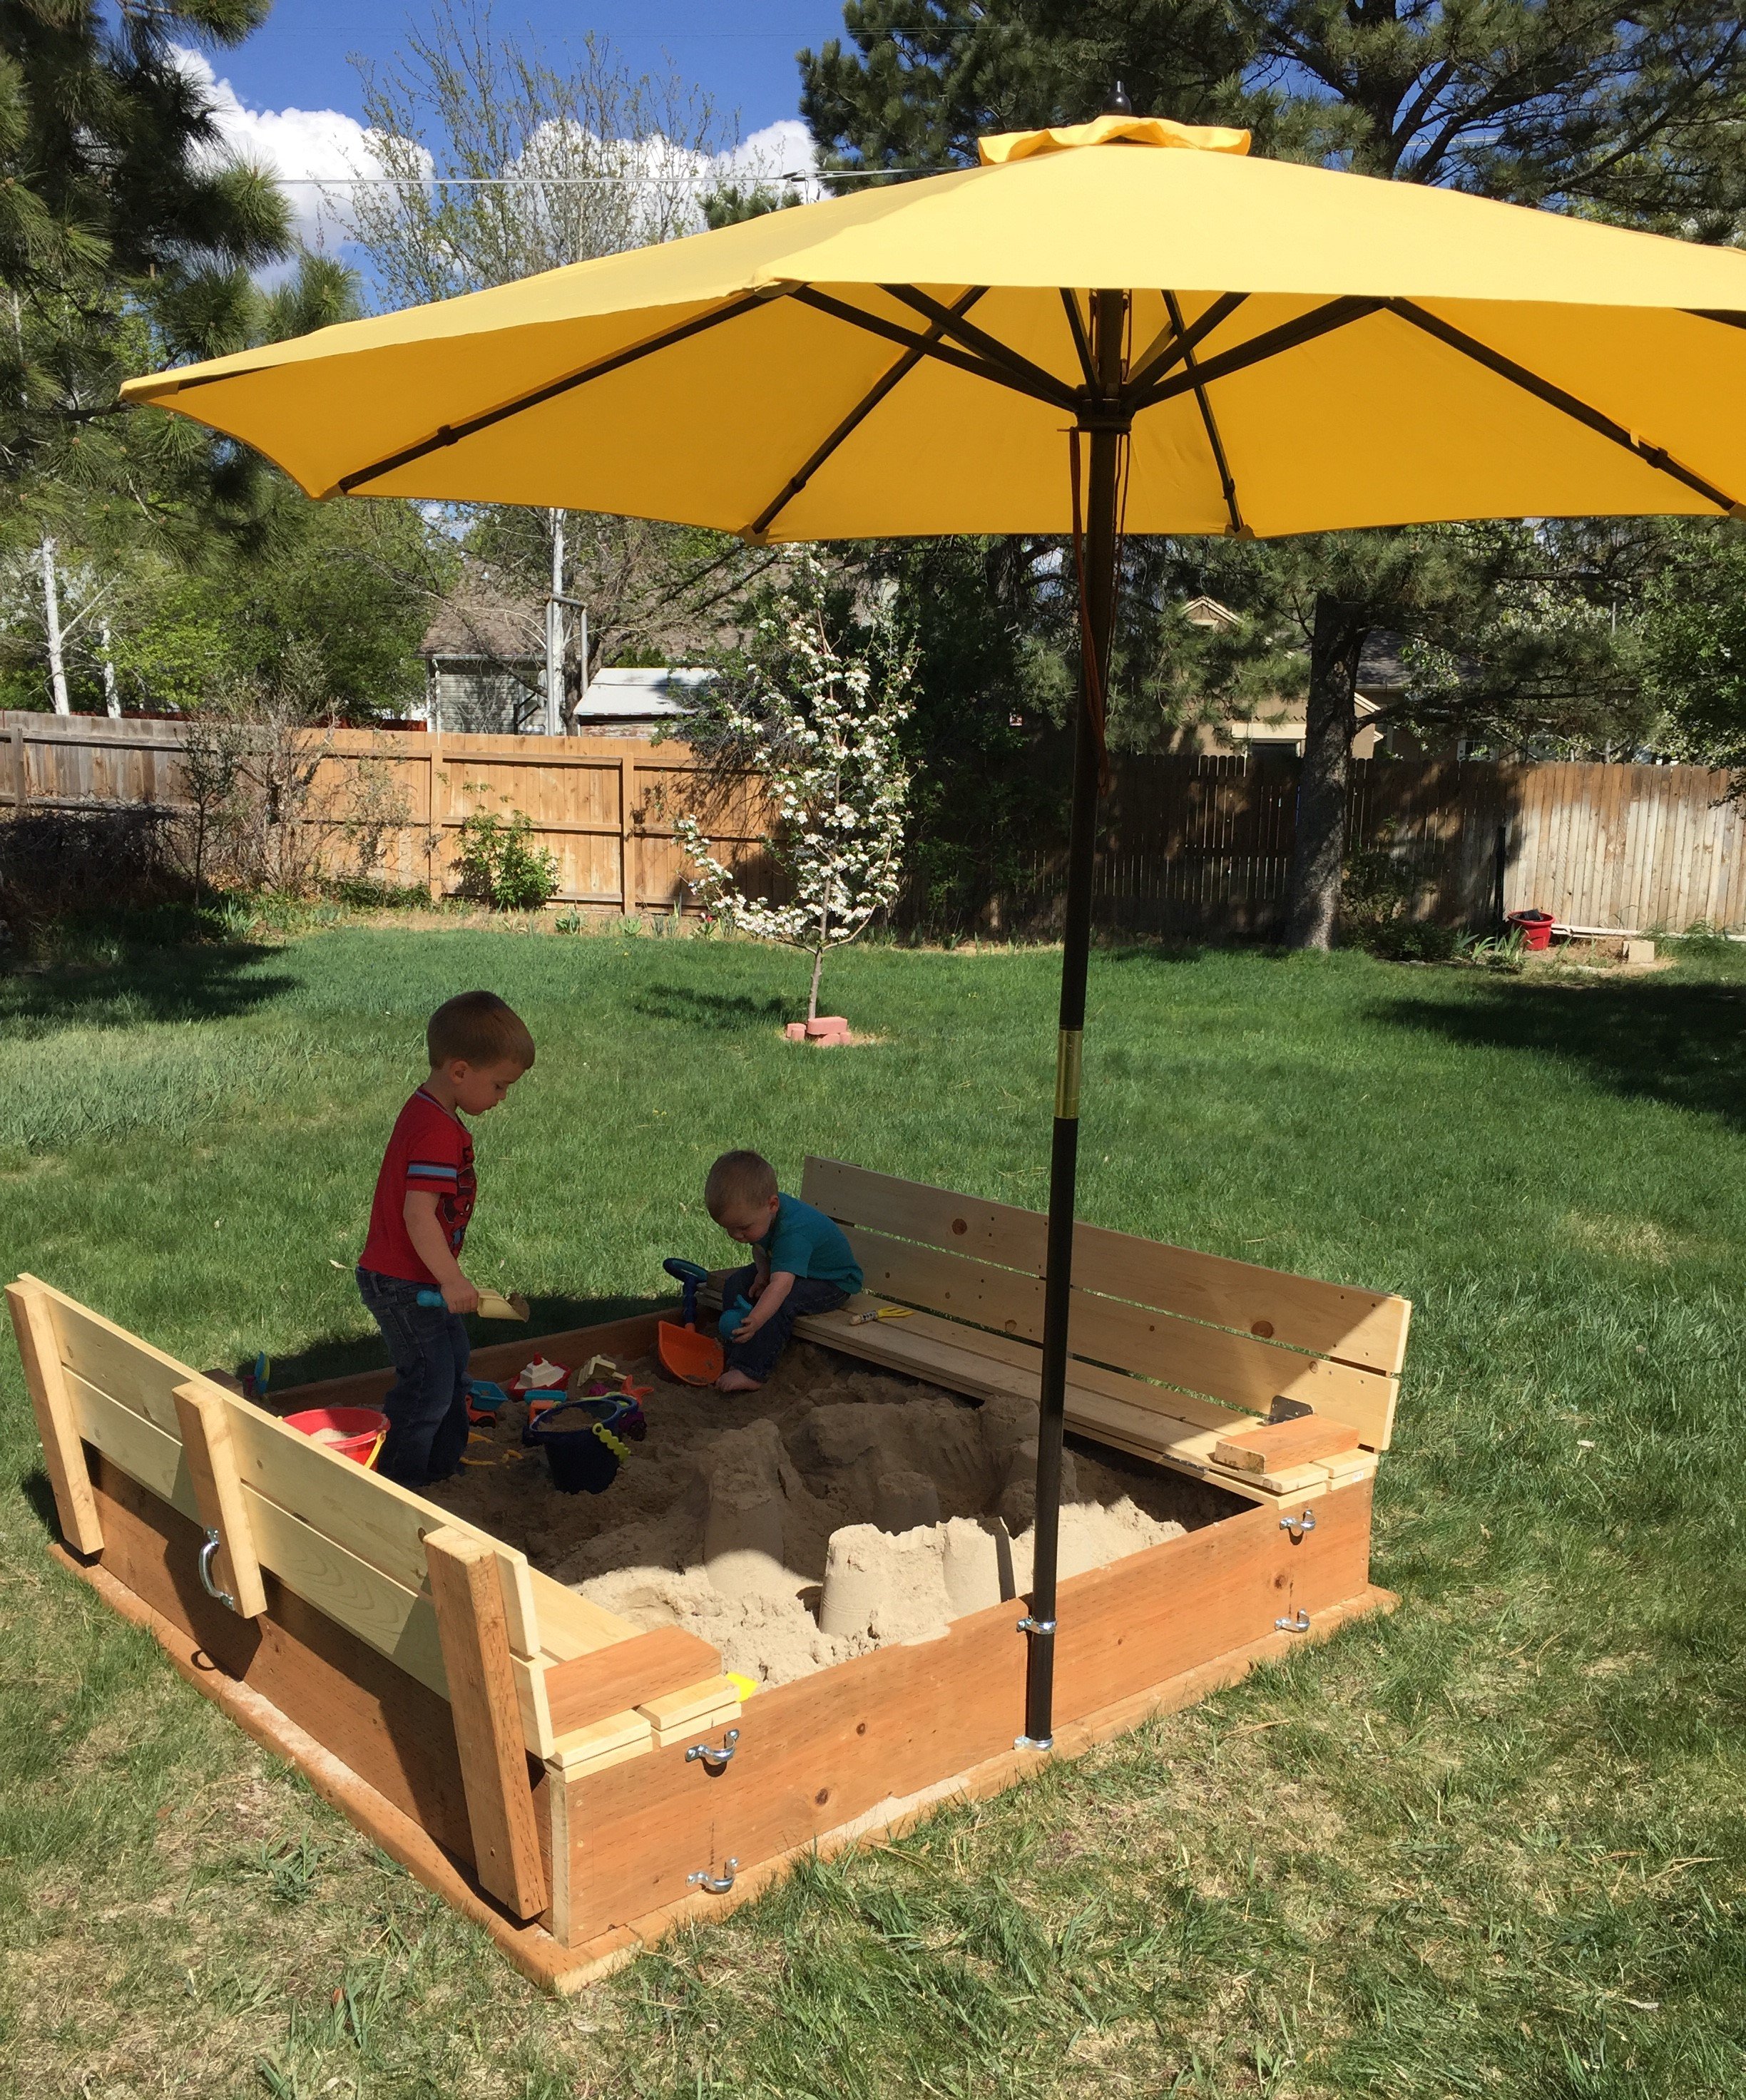
I found these plans online and was just waiting for the kids' grandpa to come out and build it. Could be built in one afternoon (depending on how many trips to your local Home Depot, and availability of the correct tools)
Modifications from original plan:
6x6 instead of 4x4
Brackets to hold patio umbrella for shade
Added seat gussets for additional support
Added "wooden flange" around bottom of box to run lawnmower on
One additional center back support on each bench
One centered handle (instead of a handle on each end)
Stapled landscape weed barrier fabric onto the bottom
Sanded all exposed edges
Materials:
4@2x10x8'
12@1x6x6'
2@2x6x12'
8 hinges
2 handles
3 1/2" decking screws (for attaching 2"x boards)
1 5/8" decking screws (for attaching 1"x boards)
2+ 1 1/4" 2-hole straps for metal conduit (for attaching patio umbrella*)
*Our patio umbrella pole was 1 1/2" diameter, but 1 1/2" straps had too much play, so we used 1 1/4" straps and misc flat washers to adjust the snugness to the pole
Cut lengths:
2@2x10 cut to 72" (long sides of the box)
2@2x10 cut to 69" (short sides of the box)
Cut one each of the following out of a 12 footer:
2@2x6 cut to 75" (long side "flange")
2@2x6 cut to 64" (short side "flange")
No cuts were made to the 12 1x6's
Used one leftover 2' from the 2x8x10's ripped in half cut to 11.5" for arm rests
Used two leftover 2' sections from the 2x8x10's ripped in half cut to 21" for back supports
Used the last 2' cutoff to make two seat gussets (cut about 9 1/2" off and then ripped it at 45 degrees)
Used the remaining piece (ripped in half length-ways) to attach to the center of the backrest for additional support and as the attachment point for our handles
We decided to do one handle in the center of the backrest so one reasonably strong adult could open the lid
The bottom "flange" was assembled with the box upside down. Basically a 2x6 screwed to the bottom edge of the box allowing 1 1/2" overhang all the way around
After making cuts, but before assembly, we recommend using a quarter-sheet pad sander (or similar) with 60 grit paper to break all of the edges and round over any ends or corners that will be in contact with sandbox users
Followed other general assembly instructions

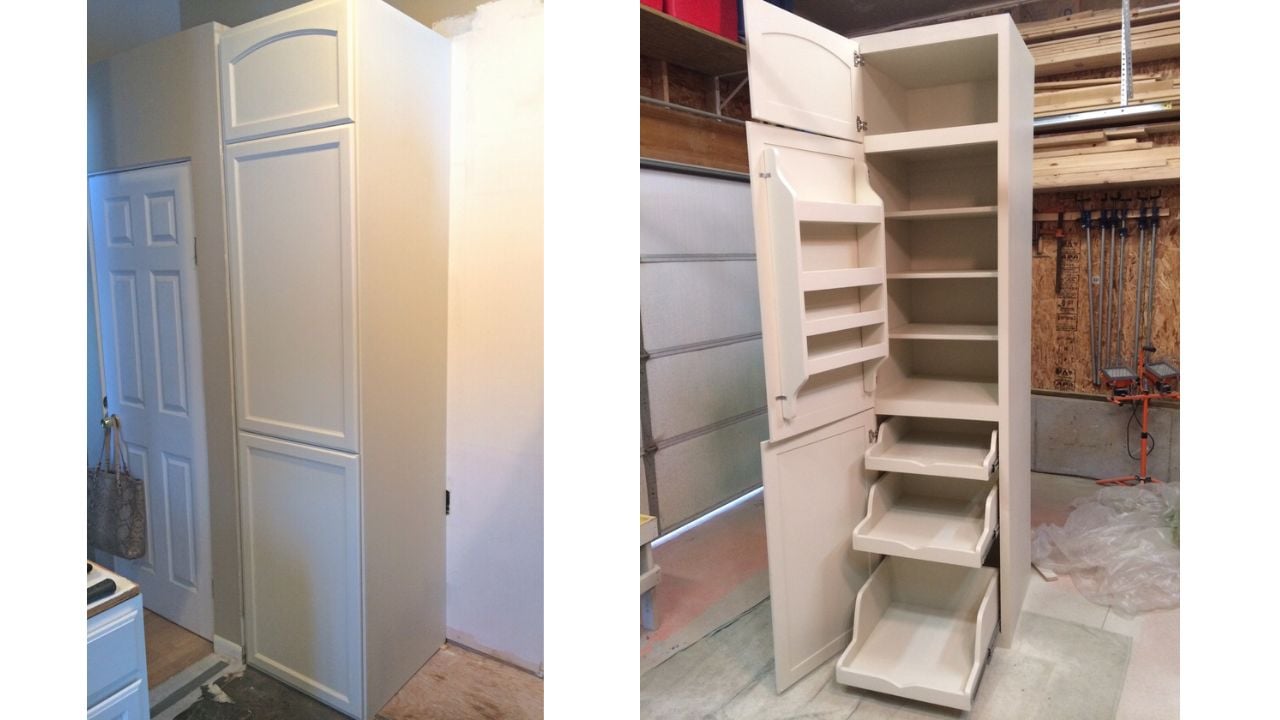
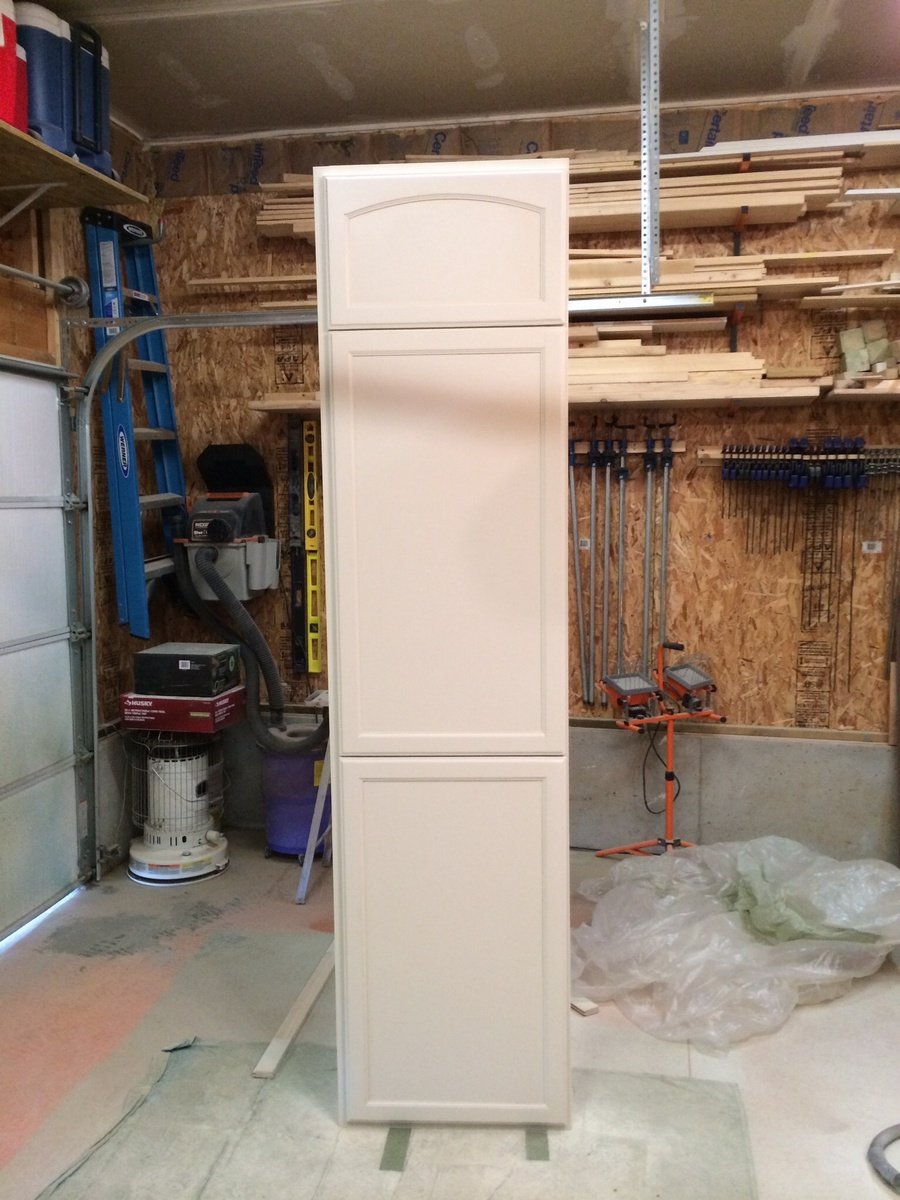
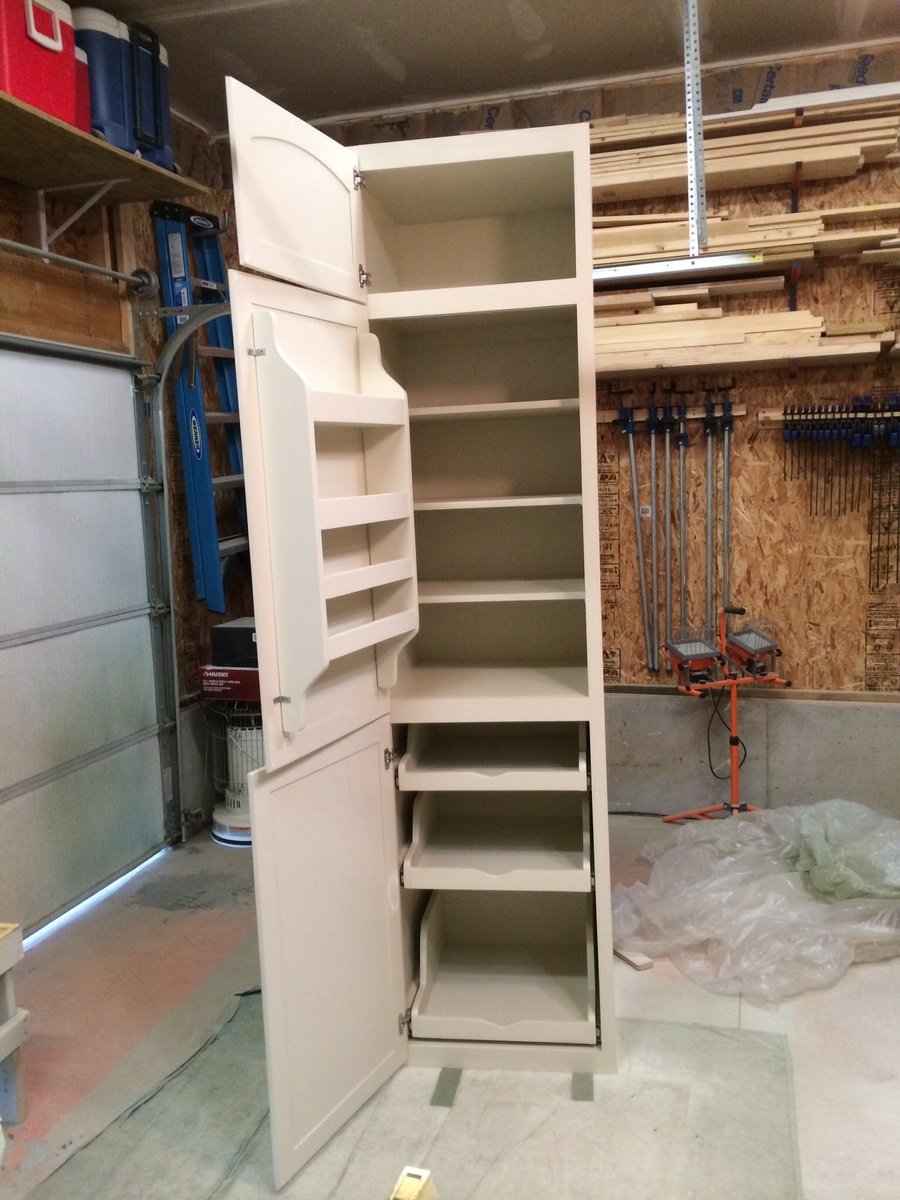
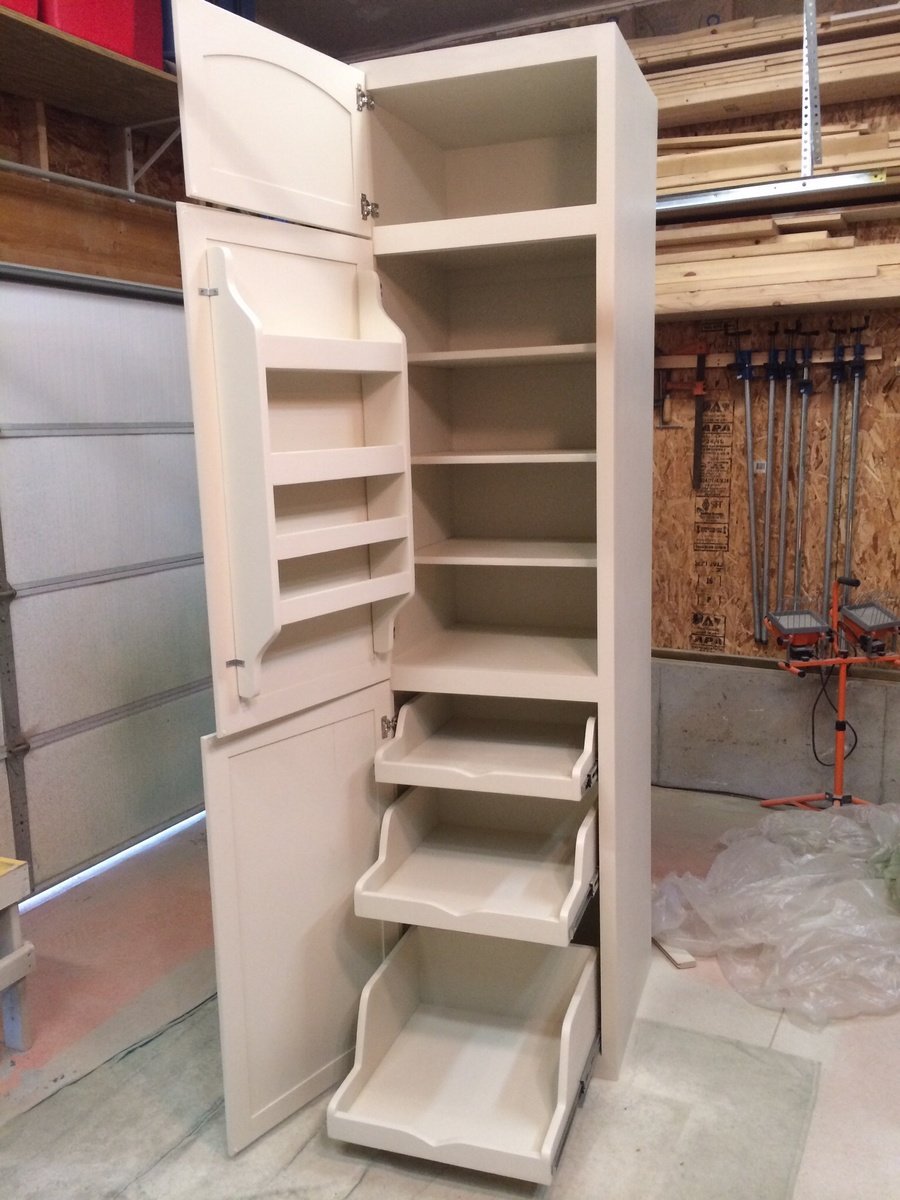
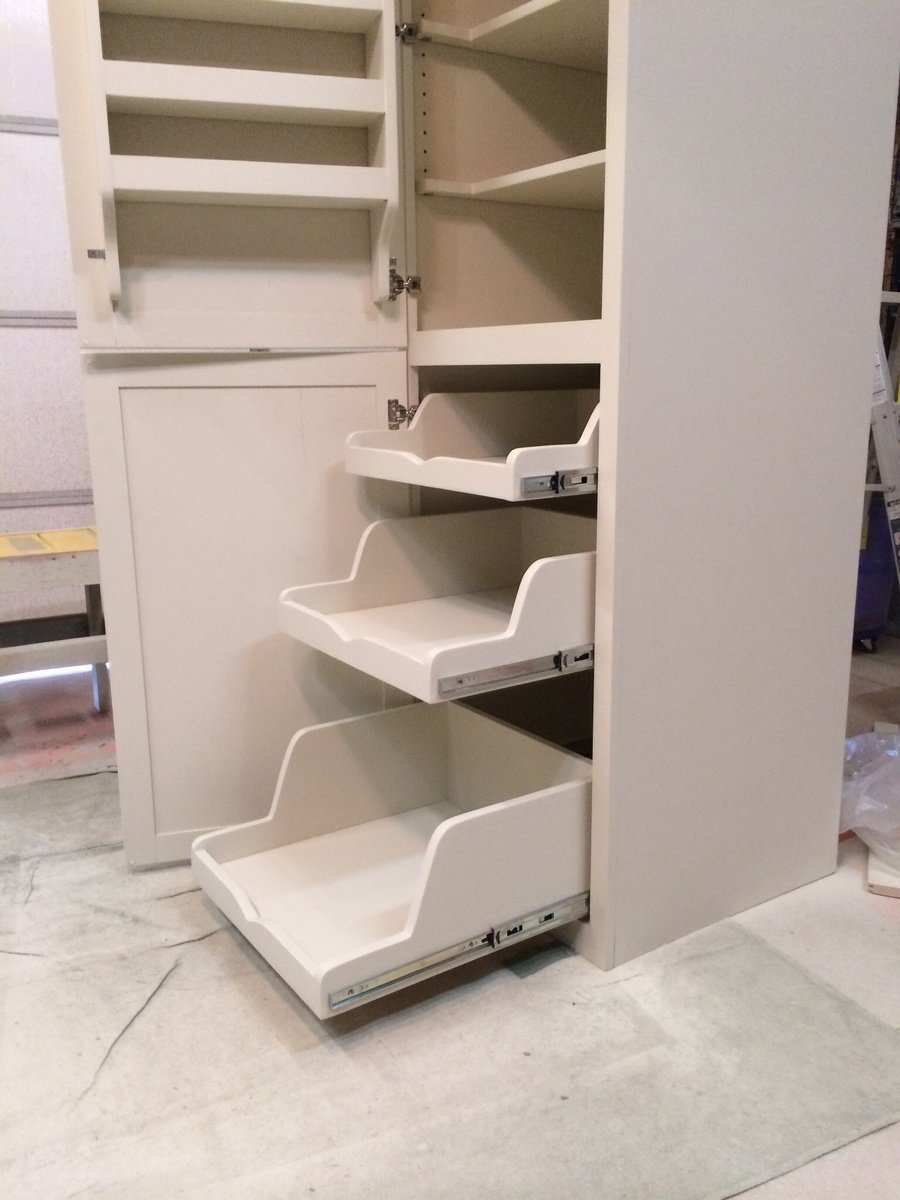
I made this pantry to match some new kitchen cabinets that my friend ordered from lowes. He wanted me to make all of his cabinets but unfortunately I didn't have enough time, it was kind of one of those things hey I'm redoing my kitchen can you make this. This was all built and designed from a picture his wife found on pinterest with just the measurements for the space it needed to fit in.

Mon, 02/10/2014 - 10:25
Great job! We're planning a pantry build in the near future and yours is just lovely! I love the pull out drawers!
Mon, 02/10/2014 - 10:25
Great job! We're planning a pantry build in the near future and yours is just lovely! I love the pull out drawers!
Fri, 06/17/2016 - 18:39
HI -
My husband and I have been trying to find a DIY Pantry for our kitchen. We've looked everywhere and finally came across this! We love it and would like to try and build it. Do you have the plans available to share? I look forward to hearing back from you.
Fri, 11/27/2020 - 21:33
I tried the link for crafted perfection in attempt to get the plans for this. It led me back to this website. Is there ANY chance of getting the plans for this pantry PLEASE?
Thu, 12/24/2020 - 07:18
Where can I get the plans for this pantry -- Please advise.. Love your work..
Fri, 08/06/2021 - 14:55
Please send me the plans for the kitchen pantry!!
Wed, 09/01/2021 - 13:59
Okay, Ana, where are the Plans? You're killing me with this teaser! I'm not smart enough make something this great without serious plans like you usually produce. Help this old guy, please.
Wed, 03/23/2022 - 12:03
I would love to get these plans. We are in a new house and I need extra storage and this is perfect.

Thu, 08/11/2022 - 18:08
Hi Ana! Do you have plans? My daughter is moving and could always use more kitchen cabinets. She loves kitchen gadget everything!

My wife had the idea for us to give our girls a babydoll bed each this year from Santa. She wanted me to make them so it could be something that they could take with them and hopefully hand down to their girls one day. These were simple and fun to build. I used 3/8” dowels instead of 1/4” just because I felt it would be more durable in the long run. Overall this was a fun little project and the girls absolutely loved the beds that Santa brought them.
Kevin


This is my banquette bench I made over the past few weeks after I saw your pictures and plans on your website. I absolutely love it. I am refinishing a table and chairs to use with it. Now I have room for lots of guest. Thank you for your great ideas.


