Community Brag Posts

Nesting Grill Station

Submitted by Anonymous (not verified) on Sun, 08/16/2020 - 18:26

My husband and I built this Grill Station. We made the table top wider and out of 1 solid piece of mahogany. I wanted a wider table so we made it 30 inches wide. We sealed the table top with marine grade sealer and the rest with exterior clear sealer.

Estimated Cost
$150
Estimated Time Investment
Day Project (6-9 Hours)
Finish Used
Marine grade varnish on table top and valspar exterior clear sealer.
Recommended Skill Level
Intermediate

Comments

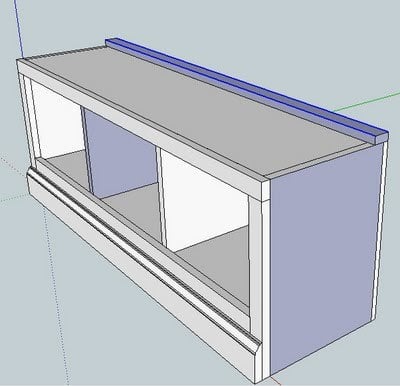
ENTRYWAY bench with drawers

Submitted by Anonymous (not verified) on Fri, 10/16/2020 - 13:31

Built from scratch. First DIY build ever! Thank you for your plans. I customized it for my space 💜 instagram @onefortyfour_

Built from Plan(s)
Estimated Cost
250.00
Estimated Time Investment
Weekend Project (10-20 Hours)
Finish Used
Behr white paint. Polycrylic seal
Recommended Skill Level
Intermediate

Comments

Firehouse Playset

Submitted by vic b on Fri, 05/03/2013 - 19:03

I love making thing for our son. i document most of it at http://madeatthisplace.blogspot.com.au/

Our son has a lot of Lego, especially fire engine Lego.
It was spread out everywhere and we needed to contain it.

This fire station playhouse was perfect.

I added a ramp so the cars and trucks could get up to the top level and garage doors on one side as our house is more like a garage then a fire station.

I used scrapbooking paper on the upper level walls and painted a H on the roof for the helicopter. (or in our case a plane).

Built from Plan(s)
Estimated Cost
$20
Estimated Time Investment
An Hour or Two (0-2 Hours)
Recommended Skill Level
Beginner

Comments

rhonit

Mon, 05/06/2013 - 04:31

Awesome job!!! I don't see much built for boys and this is just an awesome playset, I will defiantly be doing something like this for my grandson. I especial like that it's up off of the floor.

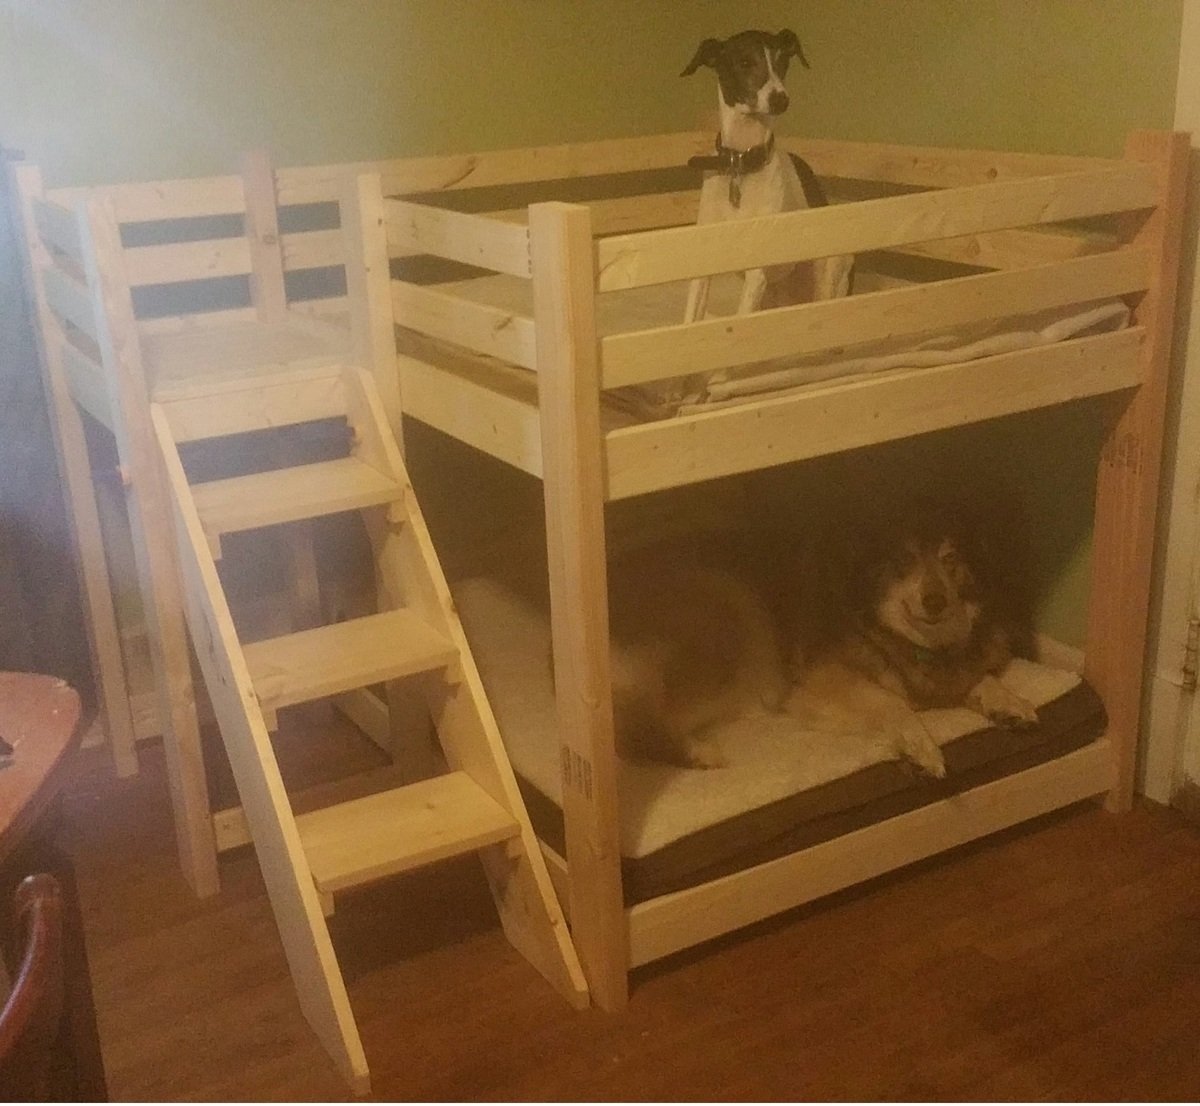
Dog Bunk Bed

We’ve been looking around for some plans for a doggy bunk bed for a while now, but couldn’t find anything that we liked so I decided to build it from scratch. This is a huge bunk bed that was built based on the size of our larger dog’s bed which is 44 x 35. This was pretty simple to build although the stairs we’re quite challenging as I have never done them before so if I can make it, anybody can.

I must stress that before I found Ana’s website about 6 months ago I could barely cut a piece of wood straight. Over this time I have made several things based on the easy to follow plans on this website which ultimately gave me the confidence to go it alone and build this bunk bed. Friends and family are shocked at some of the furniture I’ve made and some don’t even believe I made them and think I’ve bought them from IKEA. My wife has got a list of furniture she wants to make now including a TV console, an armoire and a twin bed for one our daughters. Every spare second I have now is spent is making furniture and I LOVE it.

For anybody who has never built anything and is apprehensive to do so I would just say, do it. Grab what you need and dive right in. You may get frustrated and scream a bit at first, but the reward at the end is well worth it and each project you do will get easier and easier. Be warned though. The better you get, the more people will pester you to make things for them.

Thank you, Ana.

This was made using cheap 1 x 3 and 1 x 4 furring strips for the railings and bed slats, 2 x 4s for the posts and 1 x 10 board for the stairs.

Estimated Cost
$75 - $100
Estimated Time Investment
Weekend Project (10-20 Hours)
Finish Used
I haven't sanded or finished this yet as we are still deciding on what to do with it.
Recommended Skill Level
Beginner

Comments

Outdoor Sectional

I scaled back the length of the sofa by a few inches and I made the sectional only one seat to fit my space on the deck. This was my first woodworking project that I did by myself. I got the cushions for more than 1/2 off at Ikea so the whole project cost about $150 ($80 for the cushions). It took me about a week to complete but the total time was less than 10 hours to build and stain. I'm pretty happy with how it turned out.

Estimated Cost
$150
Estimated Time Investment
Weekend Project (10-20 Hours)
Finish Used
Pittsburgh Paints Stain & Sealant in One for Decks, Fences, & Siding in Walnut. I brushed on the exterior stain just like a paint. I did the top part of the sofa first, then flipped it over and stained the bottom. Read instructions on the label.
Recommended Skill Level
Beginner

Comments

Easy night stand!

Submitted by Medickep on Thu, 10/15/2015 - 08:33

I made this fast and easy table, I was using as a small night stand in a small bunk room at my work for a coworker.  I used scraps that I had and had him choose a paint I had on hand! Covered the top with polyacrylic to add some protection!

Estimated Cost
Free, since I used stuff on hand, otherwise 40-50???
Estimated Time Investment
Afternoon Project (3-6 Hours)
Finish Used
I used two coats of an old based primer and than two coats of paint, which was Renaissance Alkyd paint. 3-5 coats of polyacrylic on the top surface.
Recommended Skill Level
Beginner

Comments

Wood Frame Outdoor Sofa with Backrest

Submitted by Anonymous (not verified) on Fri, 05/24/2024 - 09:37

What a pleasure it’s been to build this! Hope you don’t mind but I added a simple backrest…
Incidentally I made a pair of them, but run out of time so the other is in kit form waiting for the weekend!
Hope you like what we achieved! Keep the great ideas coming!

Graeme Jobey

Roll Out Grill Station

Submitted by Anonymous (not verified) on Fri, 05/31/2024 - 16:41

I used Ana White’s plan for Grill Nesting Table for my inspiration. The dimensions were altered to accommodate my electric smoker and small Weber grill. I also revised the design so that my pile of recycled wood could be used. I made the “open” side to the back.

Billie Corbin

Seasonal And Holiday

Large Old English Style Farmhouse Dining Table

My wife and I were wanting a large outdoor farmhouse table that looked stylish, and like it could have been bought at Pottery Barn or another high-end furniture store. We found this plan that Ana white had made "Small Old English Style Farmhouse Dining Table". We often host groups from our church and will have 15-20 people on our patio or around our pool area, so we needed a bigger table... I just made some modifications to make it longer (7ft) in length to better fit our space and allow for more people to sit.

To make this plan longer, I simply adjusted the cut-list on the long 1x2s, 1x4s, and 1x6; and added a crossbar to prevent the longer tabletop from sagging. I also added the diagonal corner struts to make the table a little sturdier.

Adjusted Shopping List:
4 - 1x2 @ 8ft
5 - 1x4 @ 8 ft
6 - 1x6 @ 8ft
Waterproof 1 1/4" Kreg screws (for outdoor use)
Minwax Weathered Oak
Minwax Vintage Grey

Adjusted Cut-List
• 2 - 1x2 @ 26.5"
• 2 - 1x2 @ 76.5"
• 2 - 1x2 @ ~33.25"
• 2 - 1x4 @ 26.5"
• 2 - 1x4 @ 76.5"
• 4 - 1x4 @ 7.25" w/ 45º miter (diagonal corner supports)
• 1 - 1x4 @ ~28" (Crossbar - I forget the exact measurement)
• 6 - 1x6 @ 82"

For seating we just bought some inexpensive farmhouse weather resistant chairs from Walmart:
https://www.walmart.com/ip/Yaheetech-Metal-Dinning-Chairs-Stackable-Cof…

Estimated Cost
$170
Estimated Time Investment
Day Project (6-9 Hours)
Finish Used
Minwax Early American (base), Minwax Weathered Grey (2nd coat)
(See more on outdoor use of stains: https://ana-white.com/blog/2019/05/outdoor-wood-furniture-finishing-secrets)
Recommended Skill Level
Beginner

Comments

Sandbox with Benches

Submitted by cscottrun on Mon, 04/13/2015 - 10:33

We altered the original plan by enlarging the sandbox (approx 5' x 6') which made for wider benches that can comfortably seat an adult.  The benches and back rests are three boards deep instead of two.  We added 2x12 supports under the benches for additional support, as well as another 2x4 support in the middle of the backrest.

Built from Plan(s)
Estimated Time Investment
Day Project (6-9 Hours)
Finish Used
None
Recommended Skill Level
Beginner

Comments

Seasonal And Holiday

Outdoor Sofa

Submitted by dionneds on Sun, 04/10/2022 - 07:16

This was our first big project with our Kreg Jig. We adapted the plans to make the sofa 8' long. On Friday night, my husband did all the cuts and I pre-painted everything. With the help of our son, we had the whole sofa built in a few hours on Saturday morning. I puttied the visible holes, did a second coat of paint, and made custom cushions. The plans were very easy to follow. I followed the others' advice about pre-painting and assembling the back on a perfectly level surface. It came out better than I expected and it's super comfortable!

Built from Plan(s)

Comments

kdykes08

Mon, 04/11/2022 - 07:44

I want the plans for this one! I like this style a lot better. I really like how the bottom cushions are at a slant. I suck at modifying plans.

Seasonal And Holiday

Blanket Ladder

Submitted by Liz Miller on Sat, 04/14/2018 - 08:10

I've been eyeing blanket ladders in Pottery Barn and other stores for a while. No way was I paying over $200 for one, so I turned to Ana! I had some supplies on hand so this project only took me 20 minutes to make (minus staining) and cost $12! I set the rungs higher up because it's going behind my couch so I left the bottom open. I didn't bother with wood filler for the screws because I was going for rustic and the blankets would be covering it anyways. I used 1 x3's instead of 2 x 4's since I wanted it to be a little thinner. I stained it with Minewax Dark Walnut and used a little water on the wood before I stained to bring the woodgrain out.  I'm going to make a few more as gifts now that I know how easy it is!

Estimated Cost
$12 (I already had stain and screws on hand)
Estimated Time Investment
An Hour or Two (0-2 Hours)
Finish Used
Minewax Dark Walnut. I did use a papertowel to brush some water on it first and let it dry (very very little water) to bring out the wood grain. I also sanded it before staining.
Recommended Skill Level
Starter Project

Comments

Back to school desk

Submitted by bhoppy on Sun, 08/25/2013 - 09:09

I made this for my 6 year old who just started the first grade. The only modification I made to the plans was to make a couple cutouts in the hutch for cords. I also added cork which comes in a 24 by 48 inch roll.. I ordered all the hardware from the same place that Jaime from That's my Letter suggested in her build post. This was my first drawer and it was intimidating but it was fairly easy and cute as it can be:-) The plans were very easy to follow! I got the idea for the peg board organizer from the Shanty 2 Chic website. It's just 1x4 frame around the pegboard. The chair was a craigslist find I painted and made a cushion for with some foam and cute fabric. I'm really happy with how it turned out and look forward to the day when my daughter will actually use it. LOL

Estimated Cost
100$
Estimated Time Investment
Weekend Project (10-20 Hours)
Finish Used
The paint is Olympic satin white with the primer already in it but I also used Kilz oil based primer since the wood was bare. I really thought it made a huge difference. The tealish color is actually just oops paint from Lowes I already had. I used 3 coats of satin Polycrylic on the top.
Recommended Skill Level
Intermediate

Comments

Fire Place and TV Surround

We needed a surround for the TV and really wanted to have a fireplace underneath. I took the Shanty Hutch/Sideboard plans and made some modifications. Took about 2 weeks to complete.

Built from Plan(s)
Estimated Cost
We bought the fireplace for the project, so with all included about $600
Estimated Time Investment
Week Long Project (20 Hours or More)
Finish Used
I used Varathane American Walnut on the interior surfaces. I used a paint/stain blend for the exterior. It is a color match tint for my house.
Recommended Skill Level
Intermediate

Comments

Double Loft Bed

I saw the idea for this bed on Pinterest originally. It linked to a blog that had the step by step plan (http://www.thehandmadehome.net/2011/08/how-to-build-a-loft/). However, I would have never even approached the idea or project without a few of Ana's plans under my belt first. I have gained so much confidence in my building on this site, and will always be a HUGE fan here :) Thank you Ana for all the fantastic plans you continue to share!

I still want to finish out and make the under bed area more fun and creative with curtains and such, but we LOVE having the full floor in the room for our play area. My boys absolutely love their bed!!

Estimated Cost
Less than $150 (a little higher than usual because of where I live)
Estimated Time Investment
Afternoon Project (3-6 Hours)
Finish Used
The hardest part about this project was lifting the bed platform up onto the legs in order to secure them in place. We built it with very little room to spare against the wall, and it made it very tricky to get up into place with some of the window frames and such. Be sure to have friendly neighbors or friends helping out when you get to that part, and lift with your legs...not your back ;)
Recommended Skill Level
Intermediate

Comments

sgilly

Wed, 10/02/2013 - 13:07

I'll bet the boys are thrilled with this. It's great to have that extra play room!
I am curious, though, how the center of the loft bed is supported.

In reply to by sgilly

exuma_momma

Wed, 10/02/2013 - 18:38

Hey Sue, I went and found the old link to the plans for this and added it to the brag post. Or here it is also: http://www.thehandmadehome.net/2011/08/how-to-build-a-loft/ Underneath is a bunch of 2x4's spaced to support the platform, but the big 2x8's are the main strength. They are monsters! We've had a bunch of kids and adults up there for story time, and never once has it felt unstable or wobbly. Hopefully the link will help. It has way more photos that I have here.

bhoppy

Thu, 10/03/2013 - 16:24

Reminds me of the bed my dad made for my sis and I when we were little:-) SO sweet!

Ramholmes

Thu, 07/28/2016 - 15:47

I am going to attempt to make this bed in a couple of weeks for my daughters. The handmade home directions only show the rope ladder. We want to make the ladder similar to your pictures above. Could you tell me how you made yours please and thank you?

Cedar Outdoor Side Table First Project

Submitted by Amy.Mapes on Sat, 05/04/2019 - 09:35

This was my first attempt at making anything out of wood.  I was thankful for guidance from my husband but I did it myself!!!

Built from Plan(s)
Estimated Time Investment
Afternoon Project (3-6 Hours)
Finish Used
Minwax Colonial Maple Stain
Recommended Skill Level
Starter Project

Comments

Seasonal And Holiday

Simple Potting Bench, customized!

Submitted by Jilljb on Mon, 04/14/2014 - 05:32

These potting benches were so fun to make! The plans are well-written and easy to follow. My friend and I had a blast!

Built from Plan(s)
Estimated Cost
$75
Estimated Time Investment
Afternoon Project (3-6 Hours)
Finish Used
No finish plied as of yet, but probably will use a chalk paint in a bright fun color!
Recommended Skill Level
Intermediate
Back