Community Brag Posts


Nathan's Montreal Canadians bed

Our nephew Nathan really wanted a captain's bed like his friend. We built him one even better for Christmas this year. I couldn't find one plan with everything we wanted to I used the plans for the Storage Daybed for the base, and used the plans for the Cozy Corner twin bed collection wide bookcase unit. We combined both the headboard and sideboard into one unit (by extending the top to the short end) giving him an L shaped headboard for all his hockey stuff :) The only thing we messed up on was the height of the bookcase. He wanted it higher so it's on blocks for now to raise it. My sister did all the final painting to match his room and it looks AWESOME!!!
Steve had everything cut at work and we put it together in one 12 hour day! Nathan LOVES his new bed. Thank you Ana!


Built from Plan(s)
Estimated Cost
about $125
Estimated Time Investment
Weekend Project (10-20 Hours)
Finish Used
Nathan is a HUGE Montreal Canadian's fan. He applied 2 coats of wood primer, then his mom, my sister did the finishing paint with the official Montreal Canadians colours to match his room. A couple of little touch ups to be done but it looks great.
Recommended Skill Level
Beginner
Comments
Fri, 01/06/2012 - 16:52
Very cool, Great work
That is one nice, cool looking bed. Interesting colors, is it his school colors? I've never thought of painting plywood, you've given me some ideas.
Fri, 01/06/2012 - 21:24
The colors are the official
The colors are the official Montreal Canadiens hockey team's colors, My son is a HUGE fan! Nathan LOVES his bed. and it is very solid.
Fri, 01/06/2012 - 20:29
Ummm... The bookcases were
Ummm... The bookcases were too short because you didn't take the mattress height into account. Looks really good though.
Rustic Triple X BookShelf

This was a super easy build - the only thing that took forever was getting all the angles perfect.

Built from Plan(s)
Estimated Cost
120.00
Estimated Time Investment
Afternoon Project (3-6 Hours)
Finish Used
We used unbleached Oak from Varathane & Two coats of matte polyurethane
Recommended Skill Level
Beginner
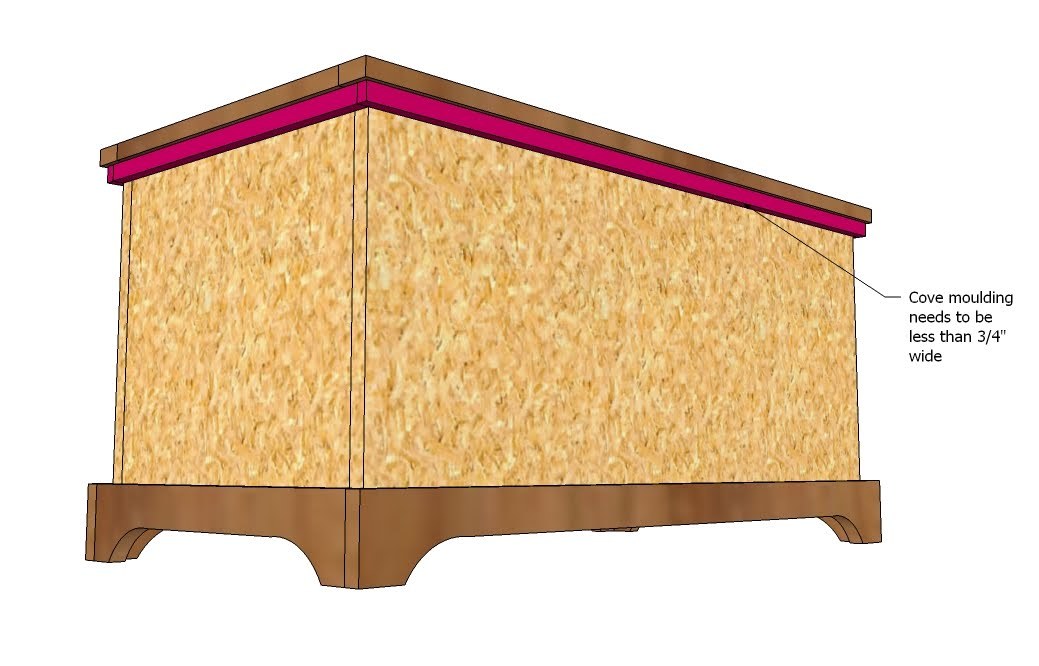
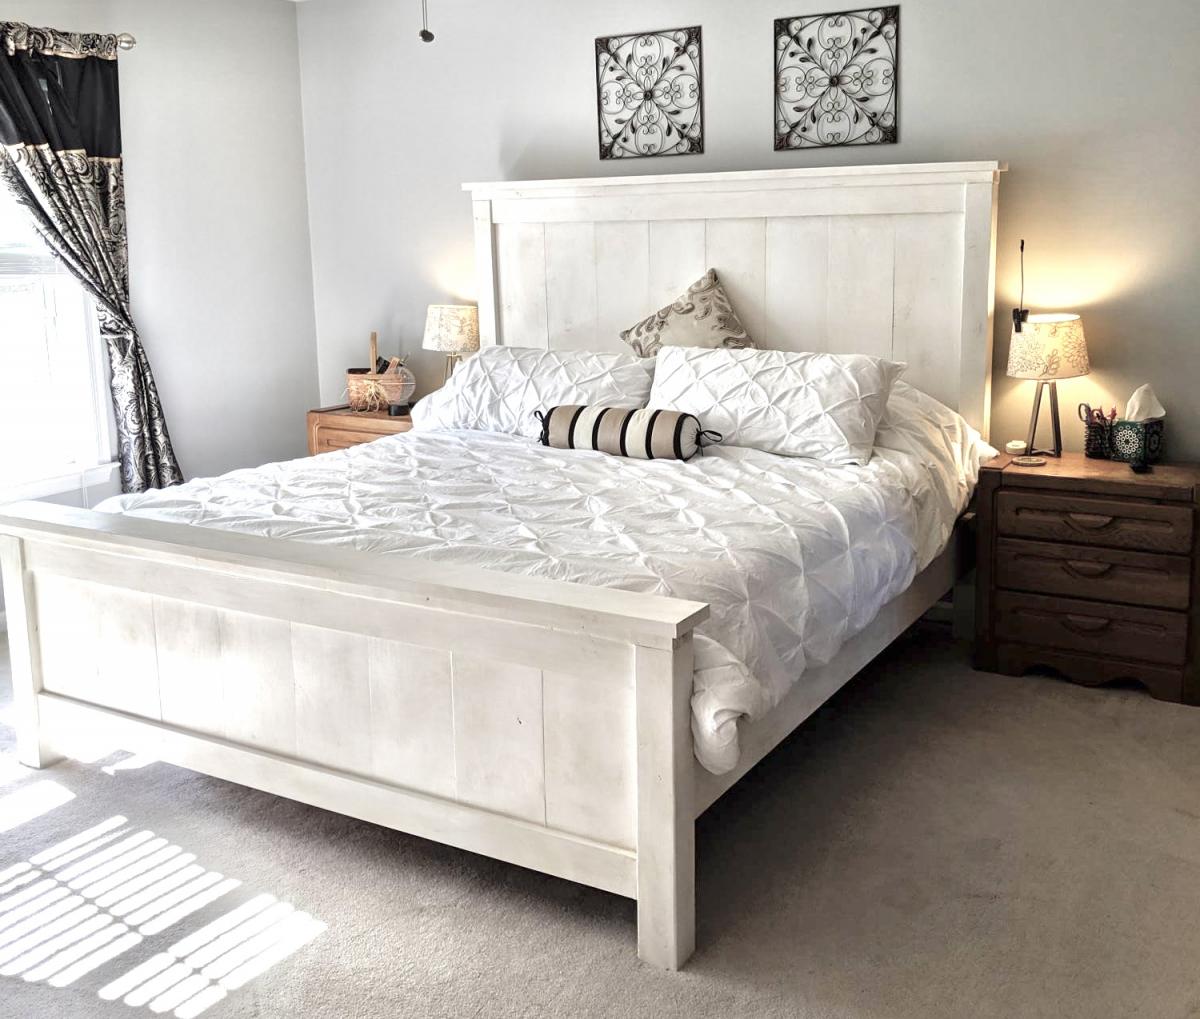
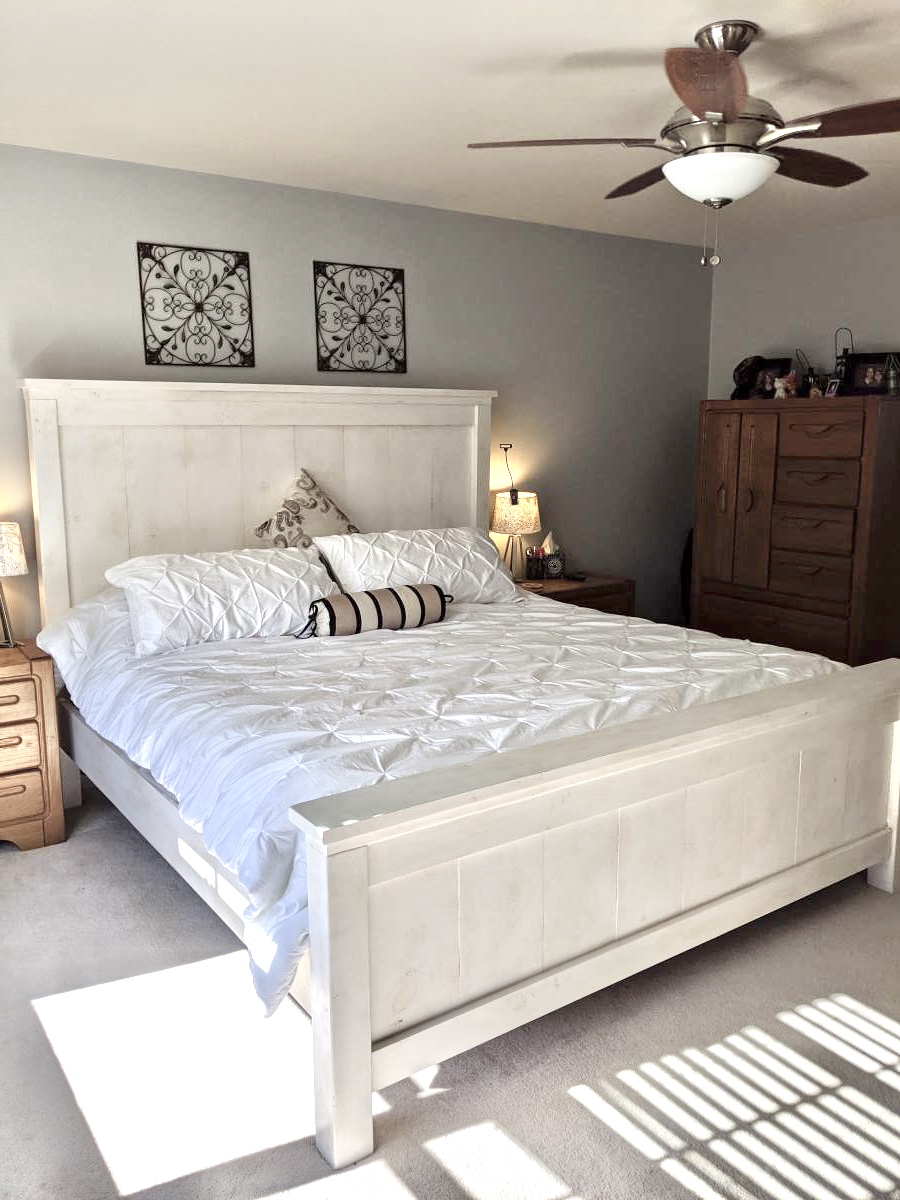
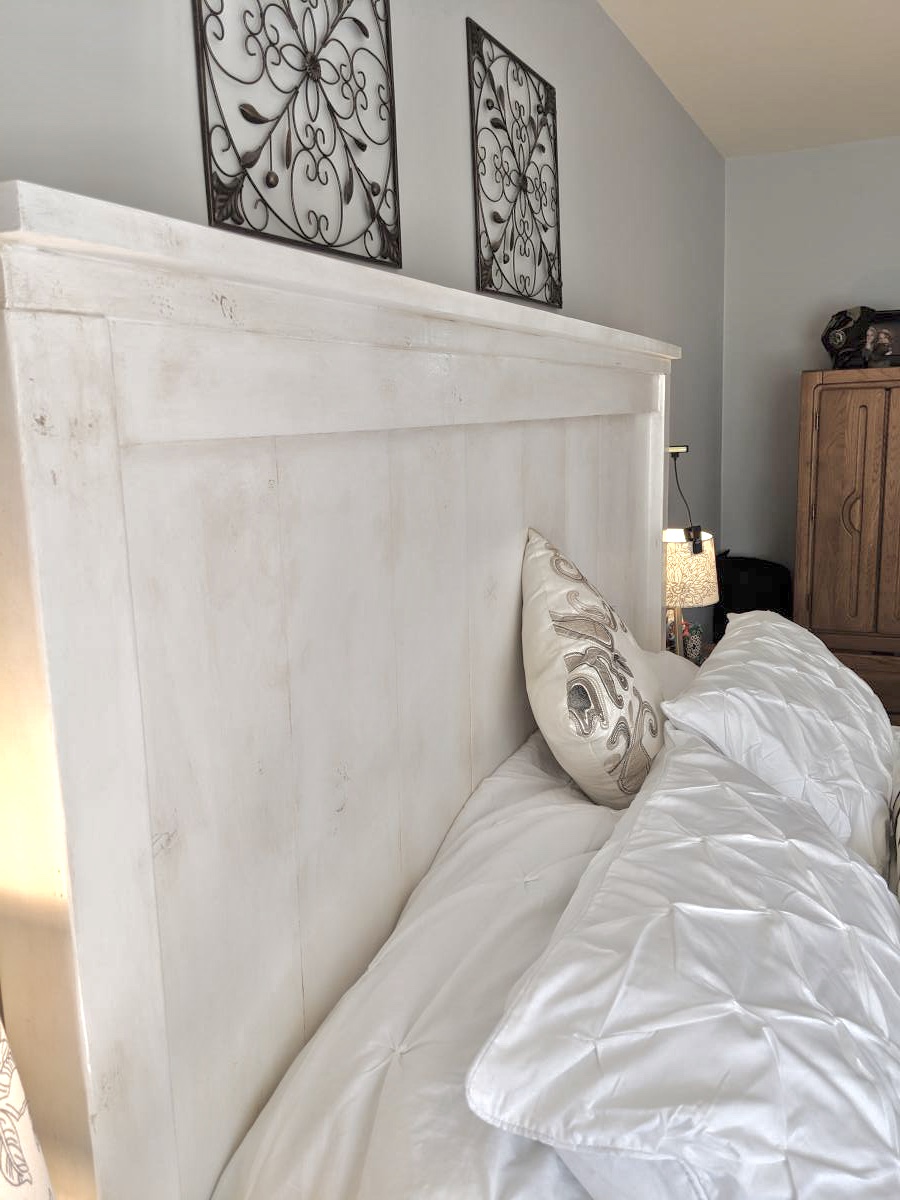
King Bed Frame for adjustable base
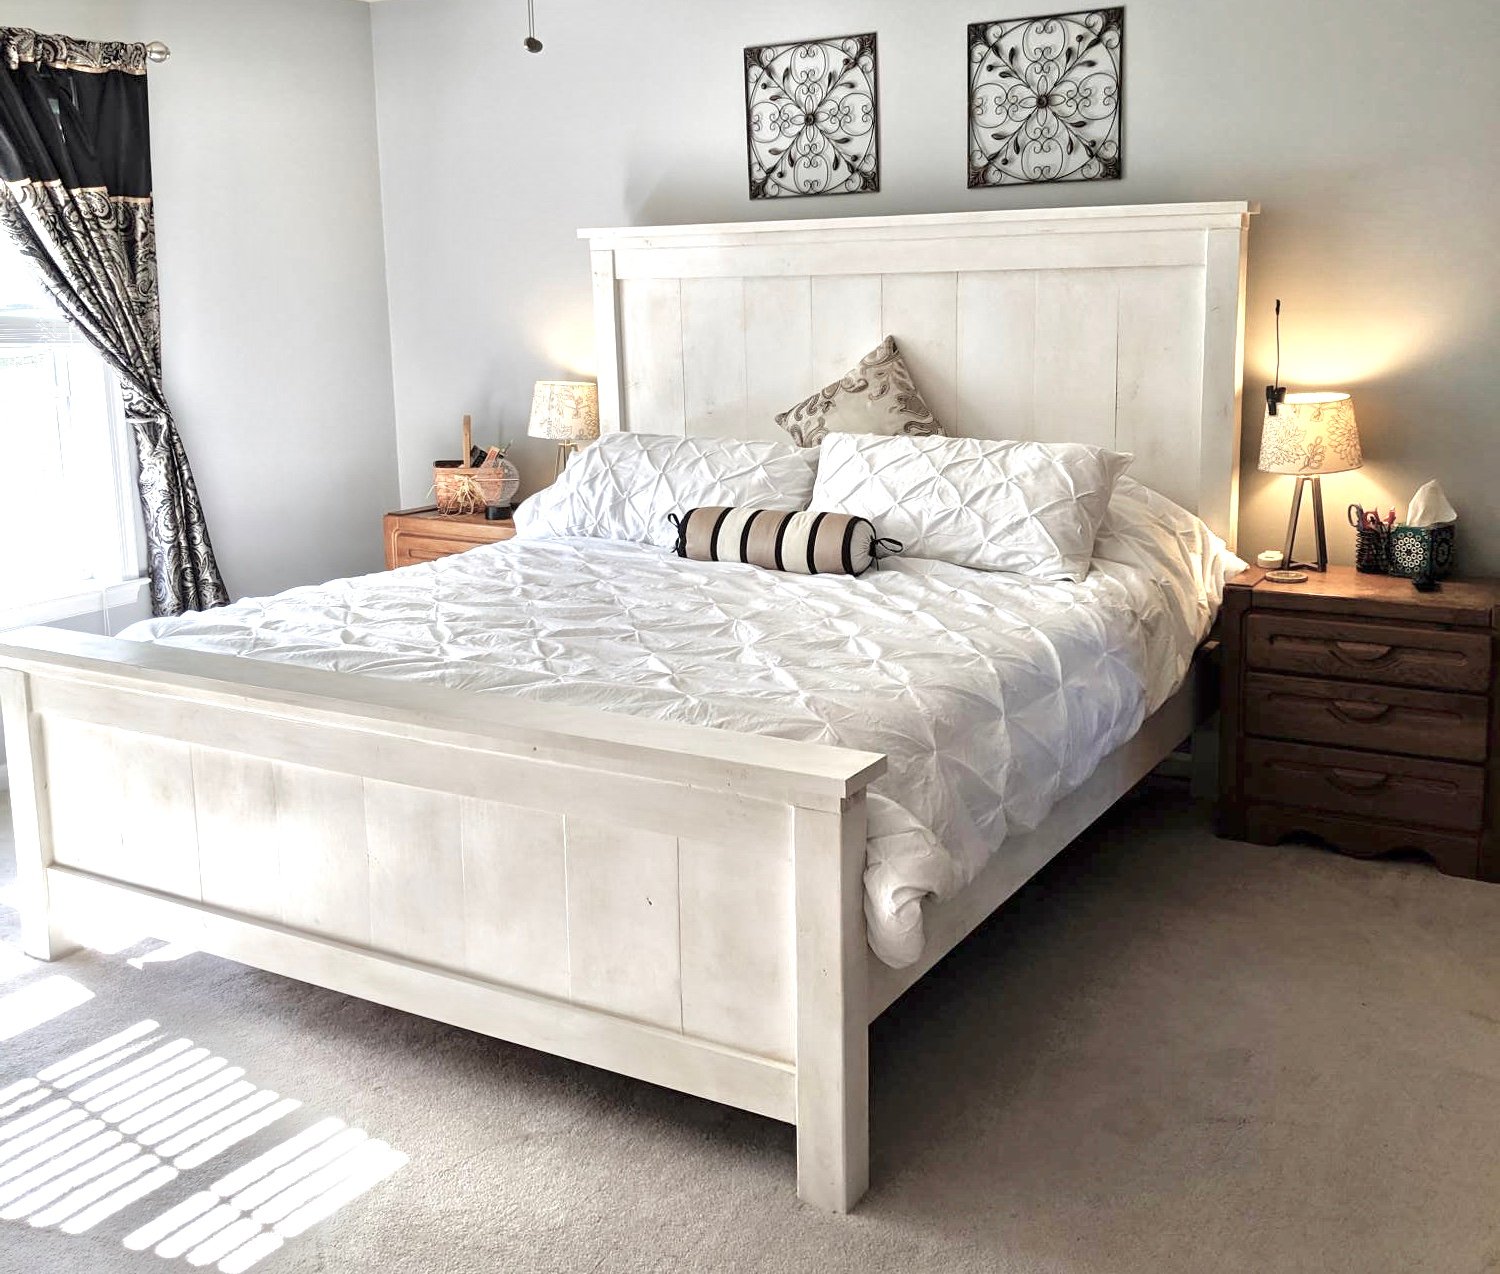
I could not find a frame which would accommodate my new adjustable king base. Modified Anna's plans by increasing the height of the headboard and footboard. Finished with chalk paint and antique finish for a rustic look. Side rails attached with mortises to allow for moving bed in 4 pieces if needed. Love my new bed
Built from Plan(s)
Estimated Cost
$300
Estimated Time Investment
Weekend Project (10-20 Hours)
Finish Used
Chalk paint (purchased from Habitat for Humanity re-store) using recycled paint. Finished with three coats of Annie Sloan wax
Recommended Skill Level
Intermediate
Comments
Sat, 11/30/2019 - 03:31
Hi! We are making this…
Hi! We are making this headboard this weekend. We want to increase the headboard height and footboard as well. Do you happen to know the cut measurements or how you adjusted the height of the 1x6 (or 1x8 as others used) to make it work? Yours looks perfect! Thank you in advance for any feedback!
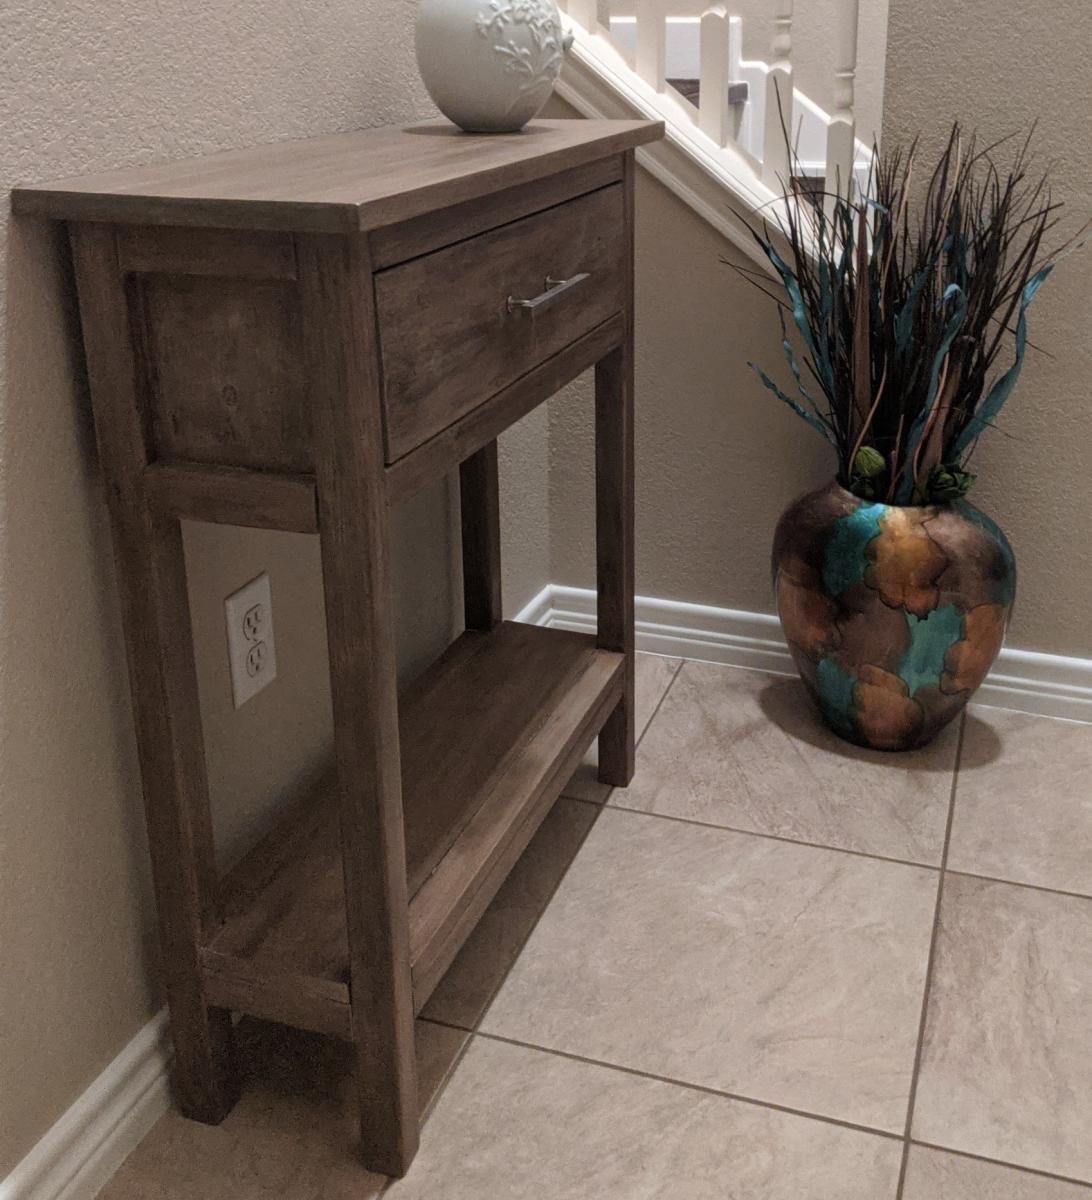
Farmhouse side table

I changed the 1x12 for 1x6 to better fit the space. I also made it several inches taller. It was a very easy and quick project. Actually, the rustic look stain took longer than the actual build. Thank you Ana for another awesome design.
Built from Plan(s)
Estimated Cost
Under $100 including 3 stains to achieve the look.
Estimated Time Investment
Weekend Project (10-20 Hours)
Finish Used
Rustic style tutorial from YouTube.
Recommended Skill Level
Beginner
Twin Farmhouse with Trundle
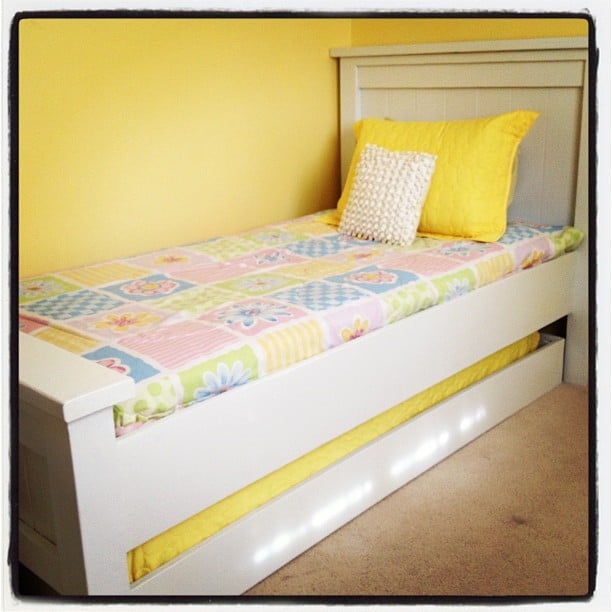
This is the twin farmhouse bed and the matching trundle. We chopped about 8 inches off the headboard since we were not using a boxspring for our mattress. Other than that it's as written. I'm so thrilled to free up space in our girls' room!
Built from Plan(s)
Estimated Cost
$200 - 250 give or take for both
Estimated Time Investment
Weekend Project (10-20 Hours)
Finish Used
Primer, 2 coats of basic white semi-gloss paint, and poly.
Recommended Skill Level
Beginner
Comments
Fri, 08/22/2014 - 16:27
Beautiful!
This is exactly what I'm looking for!
My husband and I would like to begin building this ASAP. Could you please clarify for me that the original measurements for the Twin Farmhouse bed and the trundle bed will certainly be able to accommodate one another? I just want to make sure it'll fit! I think I saw someone else comment that they changed some of the measurements to make a trundle bed fit underneath, but they didn't go into detail.
We also won't be using a box spring.
Thank you for your help!
Storage Daybed with Trundle Drawers + Storage Headboard and Hutch

I combined Ana's plans for Daybed with Storage Trundle Drawers and a Storage Headboard with a Small Hutch.
This is my 3rd daybed with storage drawers. It's such an easy build and gives so much extra space. The entire project took about 40 hours. I used Minwax stain in Classic Grey and three coats of polyurethane. For the drawers, I used 1.5" casters. I drilled a hole through the back of the headboard to feed cords through. Then I put the whole thing in the back of my truck and drove 500 miles for the final assembly. :) In the provided photos, some of the pieces are flush because I hadn't permanently attached them.


Built from Plan(s)
Estimated Cost
$450
Estimated Time Investment
Week Long Project (20 Hours or More)
Finish Used
Minwax Classic Grey
Recommended Skill Level
Intermediate
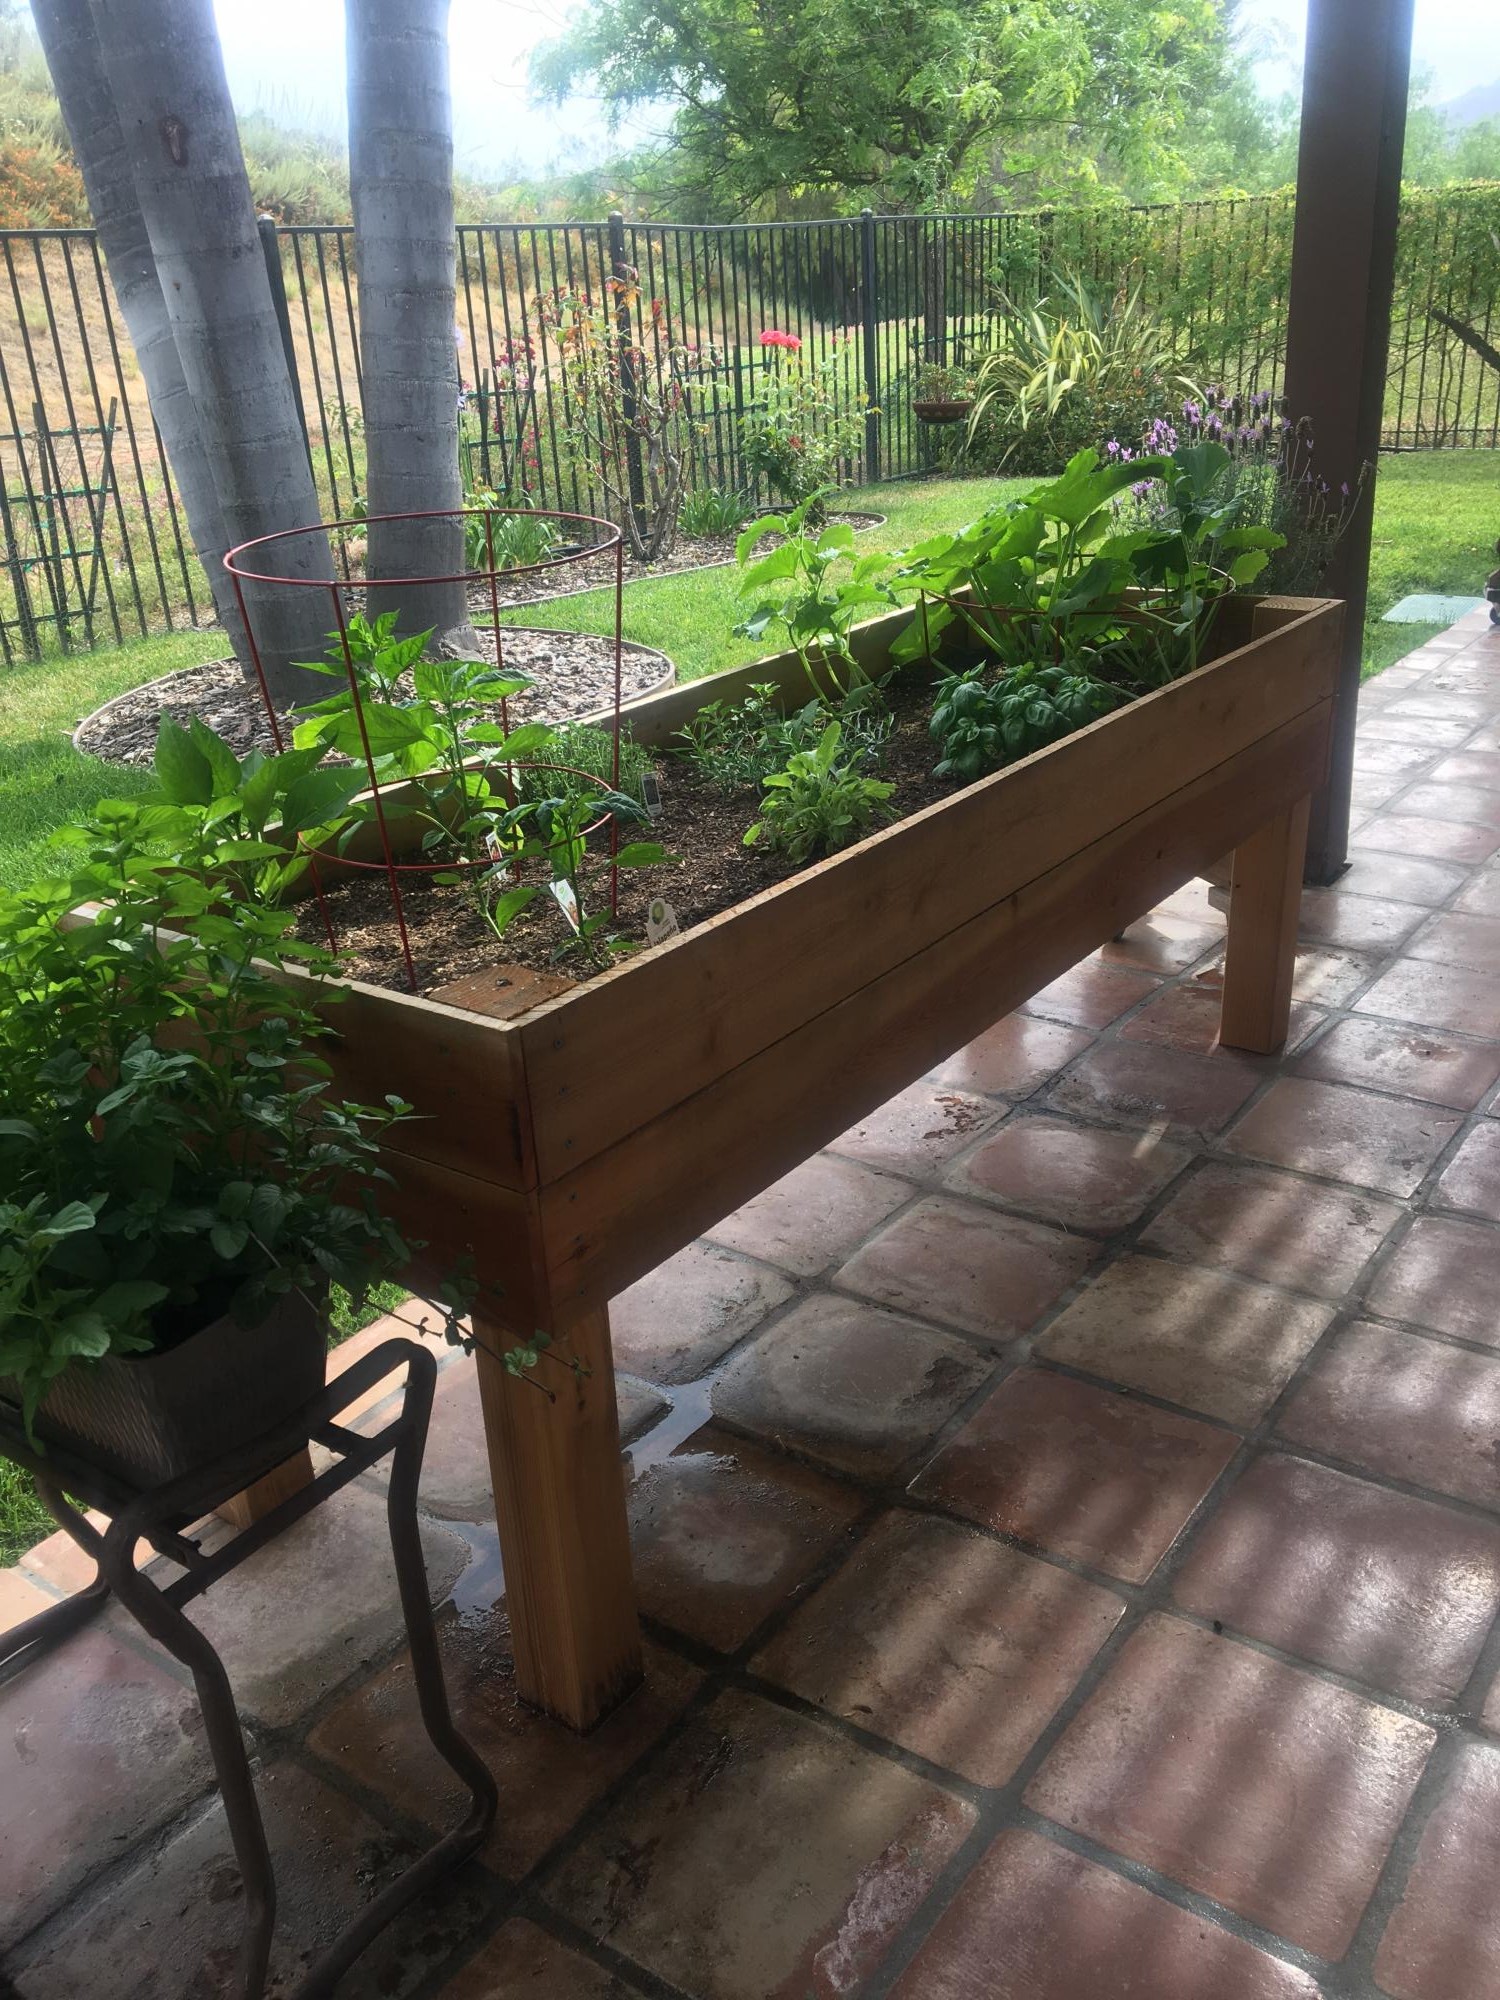
Raised bed planter
Hey Ana,
I saw your raised bed planter and decided to tackle it for ourselves. It measures 2'x8' and stands 28" to the bottom of the planter. I used redwood fencing for the sides and bottom at a cost of $1.79 each. I didn't use the wire mesh for the bottom but drilled 1/4" holes in the redwood fencing for drainage.
Thanks for the idea!!
Mike Howell
Built from Plan(s)
Estimated Cost
$45
Estimated Time Investment
Afternoon Project (3-6 Hours)
Finish Used
I left ours in it's natural state
Recommended Skill Level
Intermediate
Toddler Bed

I made this without the fancy headboard, but I'm very happy with how it turned out! See my blog for complete details.

Built from Plan(s)
Estimated Cost
$40
Estimated Time Investment
Afternoon Project (3-6 Hours)
Finish Used
Stain and poly
Recommended Skill Level
Beginner
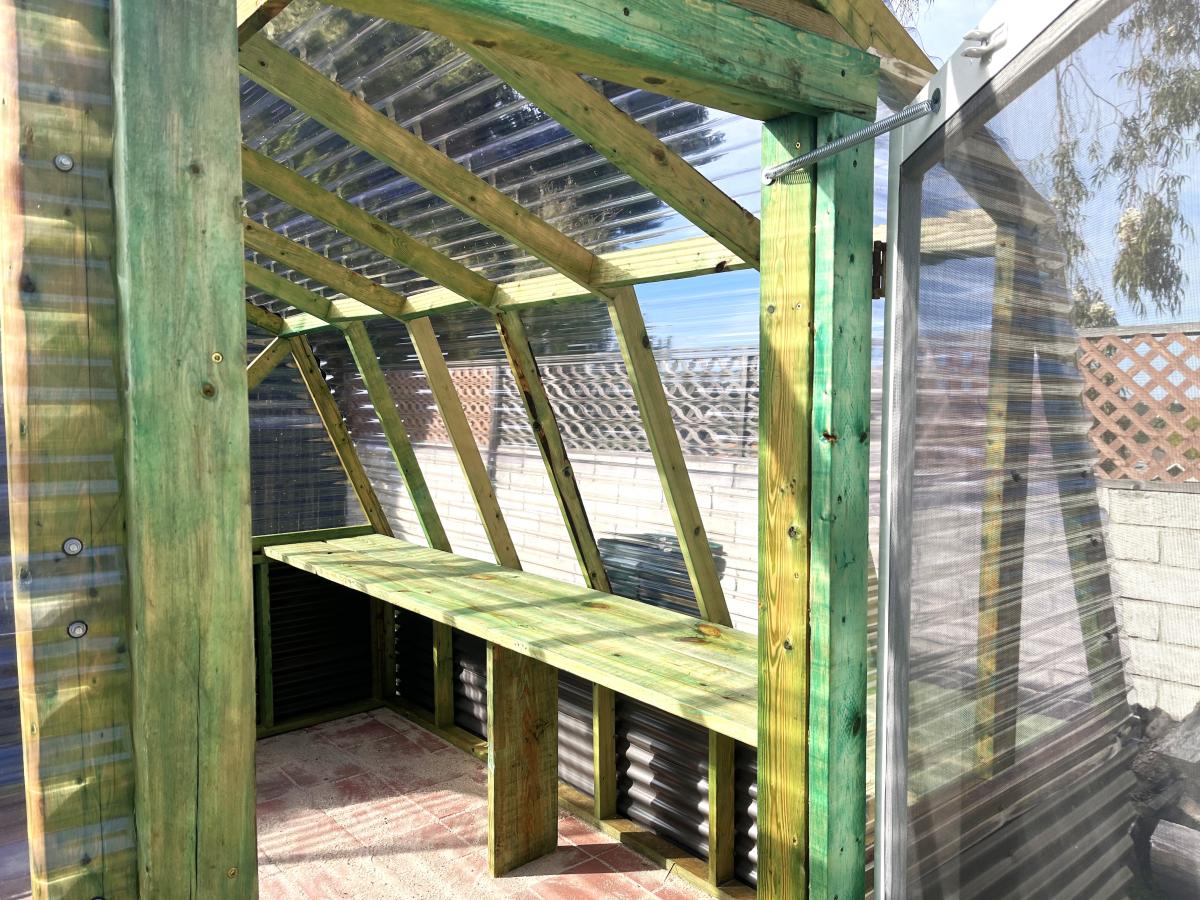
Barn Style Greenhouse

Fun project!
Hesasmoothoperator
Built from Plan(s)
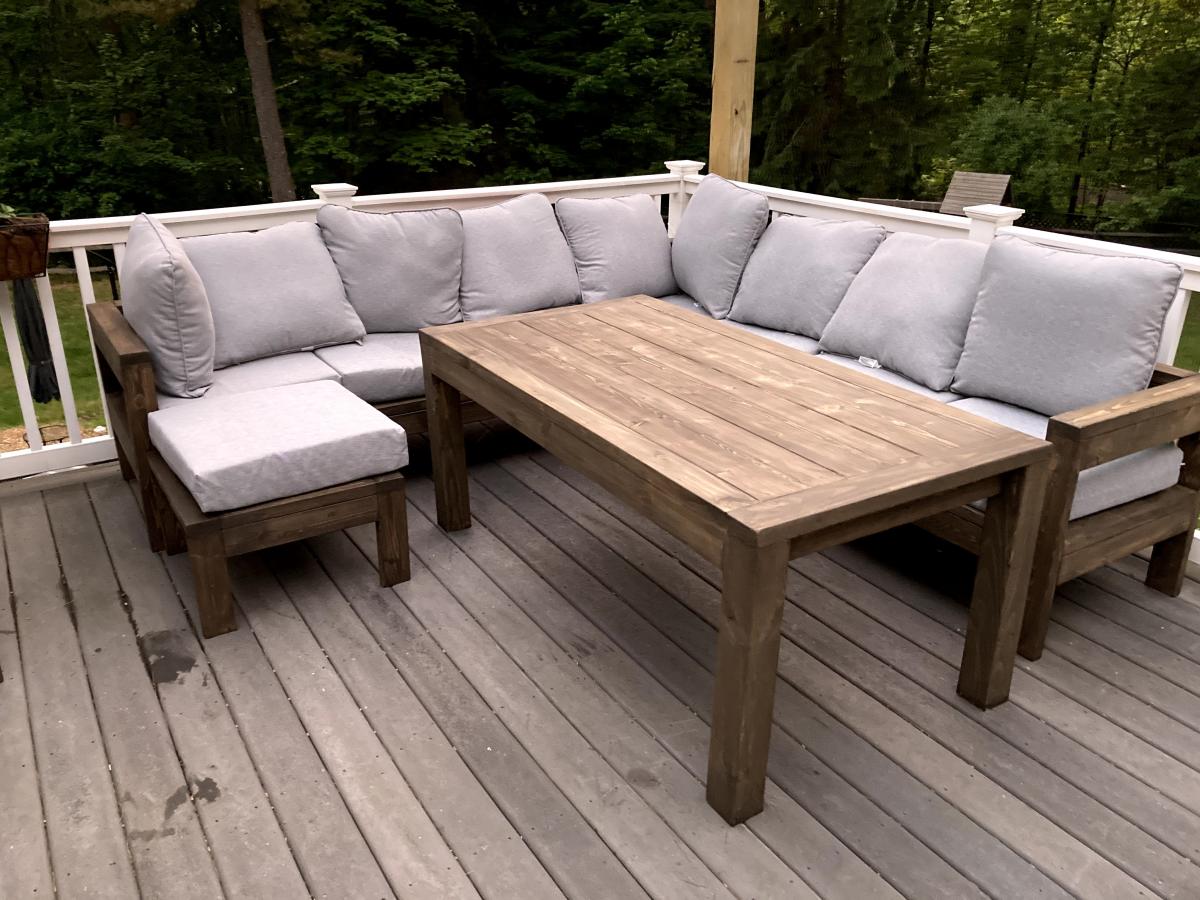
2x4 Outdoor Sectional with Matching Chairs, Ottomans and Table

We were looking for outdoor furniture for our deck, and for the size and amount we needed it would have cost us at least $2000. We really like the idea of having an outdoor sectional that we can also use for dining, and we had trouble finding a set we liked. We found Ana's plans for the 2x4 Outdoor Sectional, and i loved the look. After seeing what others have done with the plans, I thought I would be able to modify it to get everything we needed for much less cost than buying a set.
We ended up extending the size of the 2x4 outdoor sofa by one 24" section, for a total length of 96". I then used the same design to make two outdoor chairs, just reduced the length to 24". I modified the 2x4 outdoor coffee table plans to create two ottoman's that can be moved around to make the seating more lounge style Finally, I modified the coffee table plans to make a 5 foot outdoor dining table. All in all, it took about a week and I couldn't be happier with how it turned out!


Built from Plan(s)
Estimated Cost
$800 Total ($200 for the wood, $600 for the cushions)
Estimated Time Investment
Week Long Project (20 Hours or More)
Finish Used
Valspar Semi-Transparent Antique Oak Stain
Recommended Skill Level
Beginner
Simple Composting Toilet Outhouse

We built this composting toilet as one of the first things we did on our piece of vacant land. (How can you build anything else without somewhere to go when nature calls?)
An eco-friendly design was important to us, so we used cedar fencing instead of plywood. Otherwise, we followed Ana White's simple outhouse plans. It came out perfectly! It even has a rain barrel for hand washing.

Estimated Cost
800
Estimated Time Investment
Weekend Project (10-20 Hours)
Finish Used
We stained the outside with a semi-transparent stain and varnished the inside with an outdoor varnish.
Recommended Skill Level
Beginner
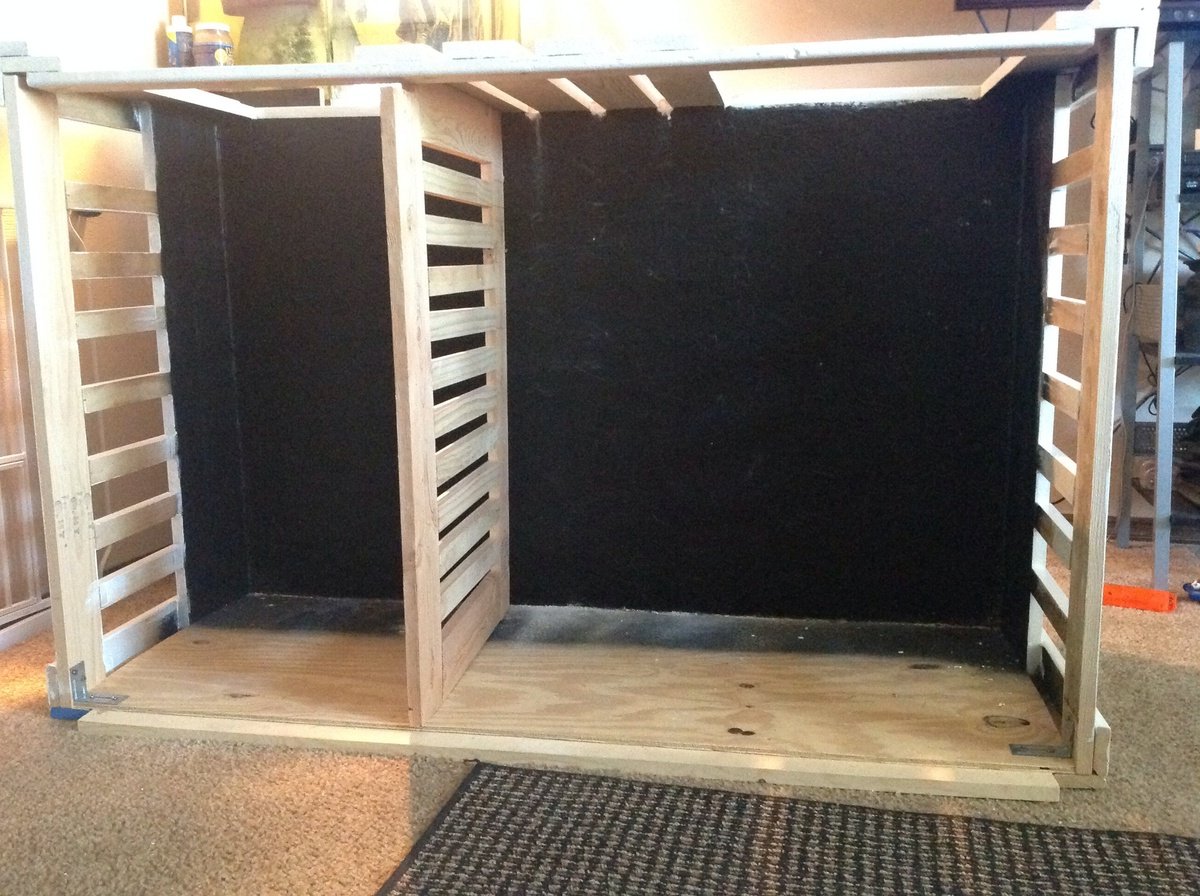
Double dog coffee table crate

I LOVE the way this turned out! I used truck bed liner for the floor and the sides because one of the dogs is still a puppy and truck bed liner is TOUGH and waterproof (in case of accidents)! I made one side of the crate huge and one side small to match the size of our dogs. The really nice thing is that you can't tell by looking at it that it is two different sizes inside. This looks so much better than those ugly wire or plastic crates.
Built from Plan(s)
Estimated Cost
$85
Estimated Time Investment
Weekend Project (10-20 Hours)
Finish Used
I primed all of the wood except the lid. On the interior I sprayed truck bed liner over the primer. On the outside I used Beyer high gloss "parchment paper" color. (I used high gloss so dog dirt, dander and fur would be easy to wipe off). I used Minwax wood prep first and then I stained the top with Minwax espresso. It took about 3 coats of stain to get the color I wanted and 2 coats of paint after the primer.
Recommended Skill Level
Beginner
Comments
Fri, 01/23/2015 - 08:44
Beautiful - how big?
I plan to do a crate/table similar to your design - how big are your dogs and compartments??
Thanks a lot!!
Misti
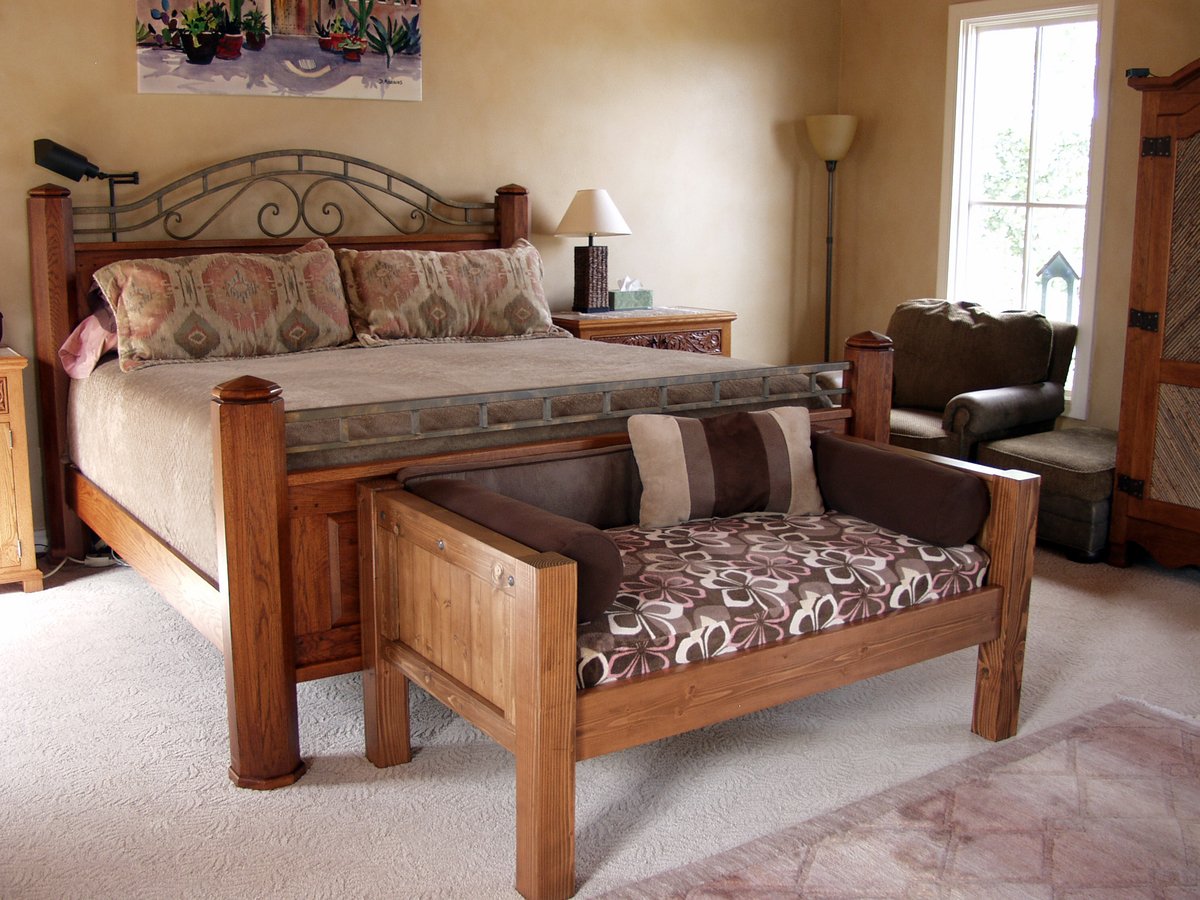
Petra's Doggie Day Bed

Yes, my husband and I share our bedroom with 6 dogs and an occasional cat (or 4). Our older dog (Petra) has slept on our bed for over 10 years, and she's getting too old to jump anymore. We didn't want her to feel like she was getting kicked off the bed, so I made Petra her very own bed at the end of ours so that she wouldn't feel left out. I was inspired by MurdaRae's dog bed (http://ana-white.com/2012/06/doggie-daybed), and thought it was genius to use a toddler/crib bed. So I went looking for plans on Ana-White, and came up with a mixture between a couple of twin bed plans. I love that the plans are easy enough to modify my sizes, and come up with exactly the custom solution that I need. This was my first big project using Bri-Wax. The last one was kind of a disaster when the wax changed the stain color to something not-so-great. With this project, I learned to wait at least 2 weeks before attempting to wax it. I was blown away with the results. It is a beautiful subtle satin finish that feels great to the touch. Plus, I can easily touch up all the dog fingernail scratches that will inevitably occur. When I re-assembled the bed in my bedroom, I actually nicked it in a few places. No problem -- slap on some more Bri-Wax! My Bri-Wax was 11 years old, and pure liquid. I tossed it in the fridge (per Bri-Wax's recommendation), and it was as good as new. The only real problem I had with this project was leaking sap from one of the 4x4s. I'm still fighting this today. In talking with Rustoleum/Zinsser reps, they said that no sap could penetrate their "Seal Coat" shellac product. After 5 coats, the sap is still penetrating, but only if I turn it on it's side or upside down. I'm still baffled. I made the mattress cover out of a dog blanket, and made the cushions from some remnant fabric (suitable for dogs and weekly washing), so this was a fairly inexpensive project. It was a success because Petra slept in her bed from the fist night and loved that she had all the room to herself, and no boston terrorists (I mean terriers) attempted to bother her.


Built from Plan(s)
Estimated Cost
$65 for Wood, $60 for Crib Mattress, $7 for stain, $9 for Decorative Clavos
Estimated Time Investment
Weekend Project (10-20 Hours)
Finish Used
Combination of Minwax Water-based stains: 6 parts Colonial Pine: 1 part American Walnut, followed 4-5 Coats Bri-Wax (Light Brown)
Recommended Skill Level
Beginner
Comments


Sun, 08/26/2012 - 10:24
Looks great!
It matches the woods in your bedroom so well and looks great! Also, I love the bolster pillows around the edges. That is something I need to make for our dog bed. Thanks for sharing.
Lemonade Stand

Lemonade stand built from plans here
Built from Plan(s)
Sandpit with built in seats and lid - metric
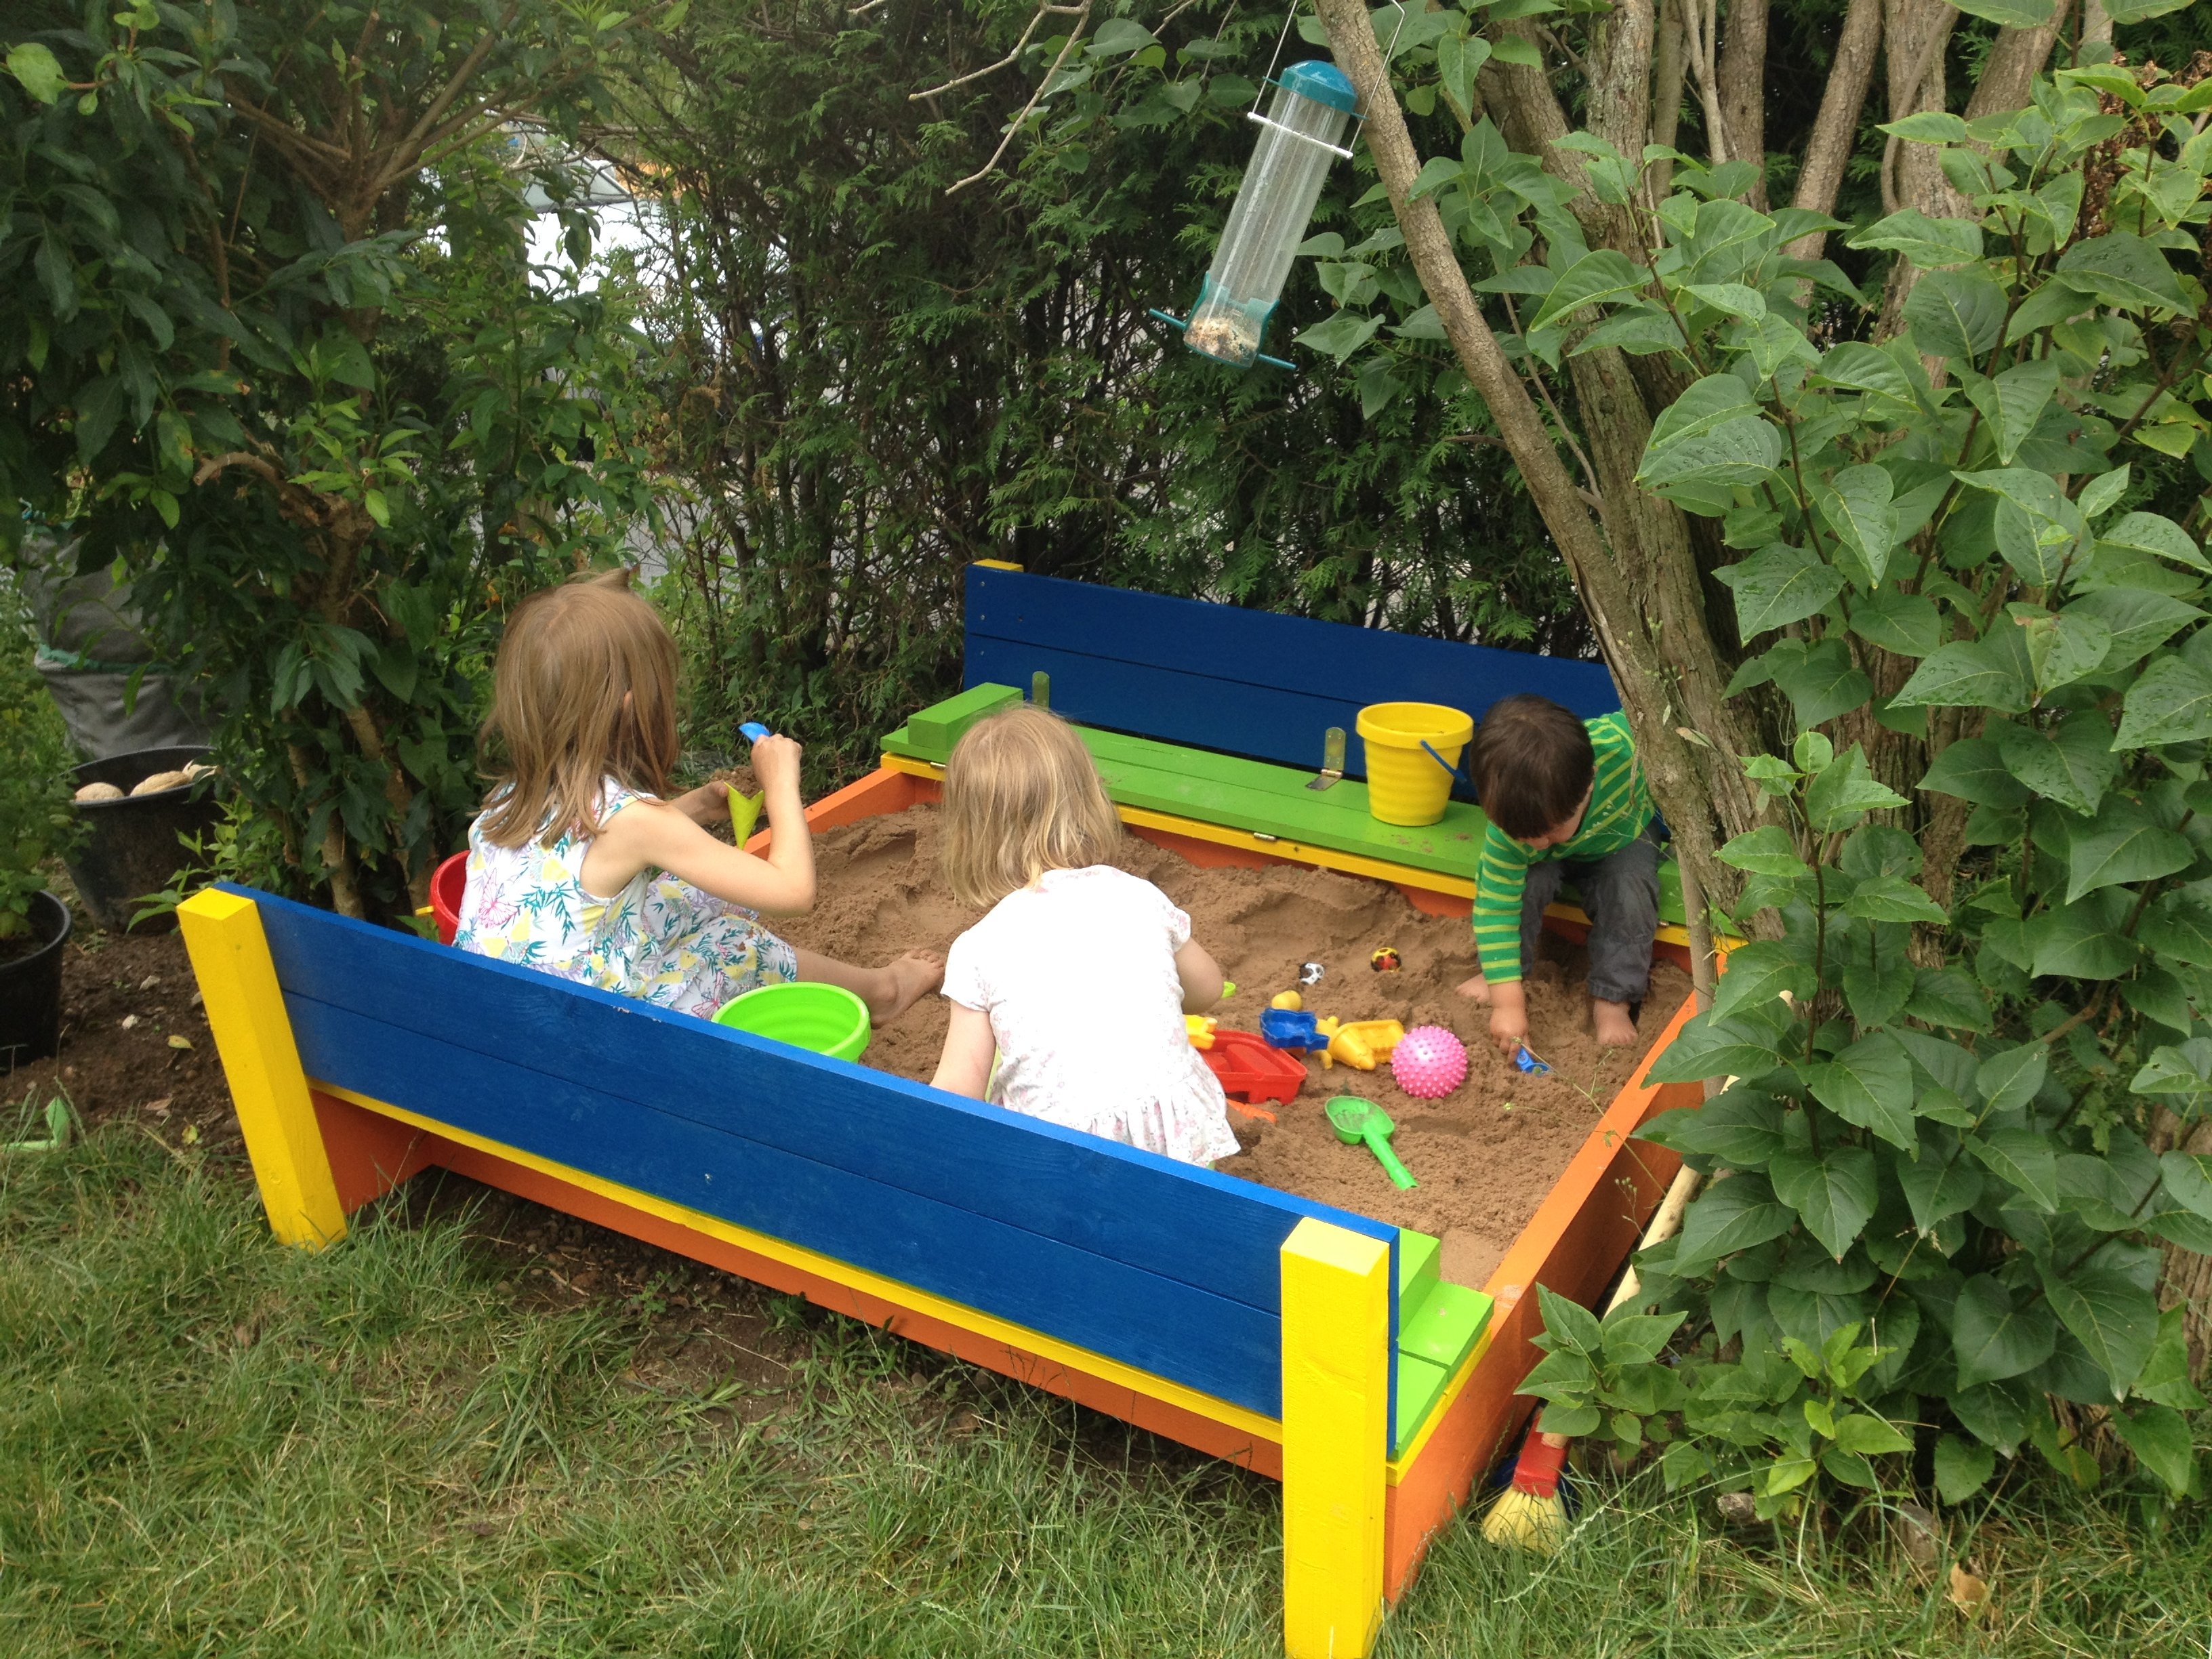
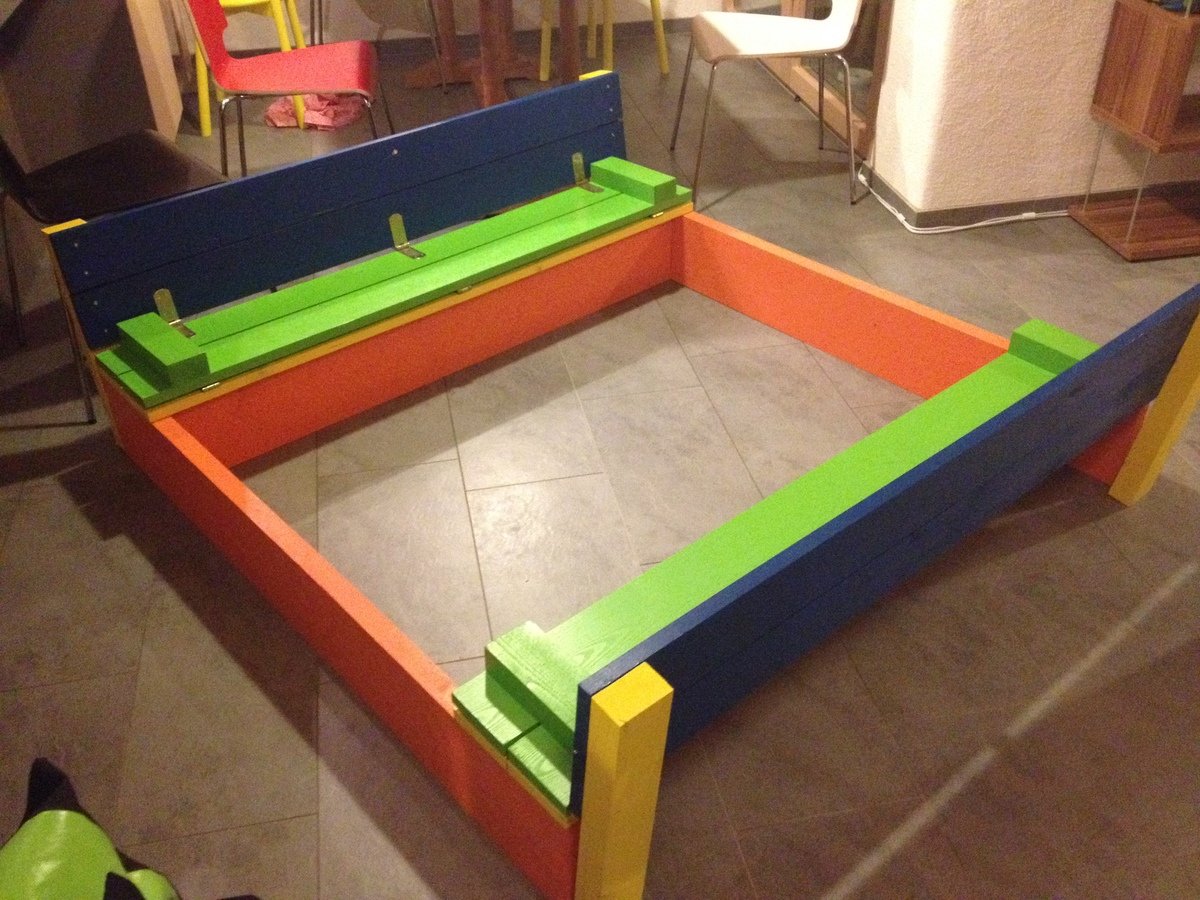
This was our first build from this website and we are so pleased! Having seen very involved plans on an Australian website for a similar sandpit, I was so pleased to come across this version, with its far simpler design!
We wanted a slightly bigger sandpit, so I needed to do some modifications, and while I was enlarging it, I also converted to metric sizes, and designed specifically for the timber I knew I could buy locally (very obscure and inconsistent seeming German sizes). So the end result is a 1.5x1.5m sandpit, that has so far had 6 kids playing happily in it at once!
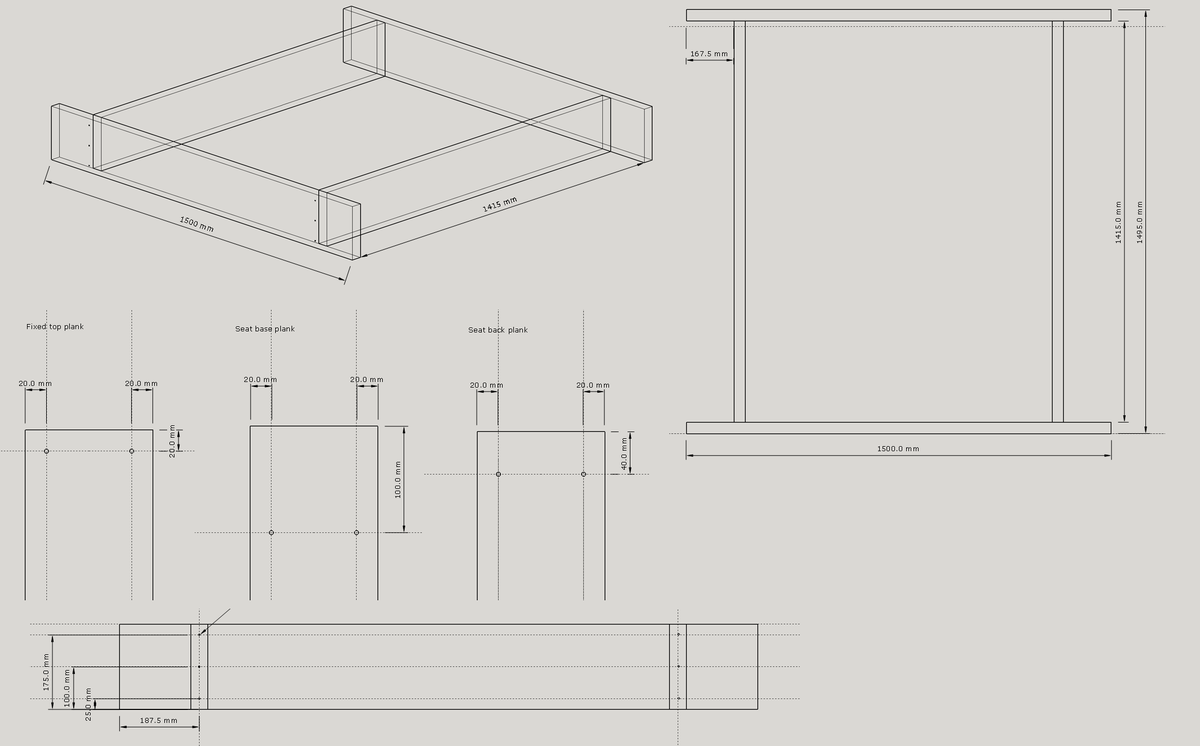
I've put in the drawings I used, and the cutting list for larger sizes in case anyone else is working in metric, or wants a bigger size!
Our other modification was to offset the shorter sections of the base to run along the front plank of the bench seat - there were two main benefits for this - we need a lot less sand, as there is none wasted under the seat, and the seat is supported and can't bow downwards!
The dimensions and layout we used are in the images.
Supplies
Timber
2 - 200 x 40 x 3000mm
6 - 120 x 24 x 3000mm
1 - 80 x 50 x 3000mm
Hinges
12 - 140mm long (the original design had 8, we went with three per edge to allow for the extra width)
Self tapping decking screws
18 - 5 x 80
48 - 5 x 50
96 - 3 x 20 (or enough for your hinges, depending on the design)
Paint
3 - 375ml PU Acrylic Paint, suitable for exterior use (top planks and seat supports)
1 - 750ml PU Acrylic Paint, suitable for exterior use (base)
Weed matting and staple gun
Sand
I calculated I would need 20 x 25kg bags - in the end we needed 11 - don't ask me where we went so wrong!
Cutting list
2 - 200 x 40 x 1500 (long sides of base)
2 - 200 x 40 x 1415 (short sides of base)
12 - 120 x 24 x 1495 (top slats - just under half a plank, to allow for waste)
4 - 80 x 50 x 245 (armrests / seat braces)
4 - 80 x 50 x 495 (back supports of seats)
I gladly paid 5 Euro for the wood to be cut in Hornbach - it should have been more than this, but the guy was generous!
12 hinges (the original design had 8, we went with three per edge to allow for the extra width)
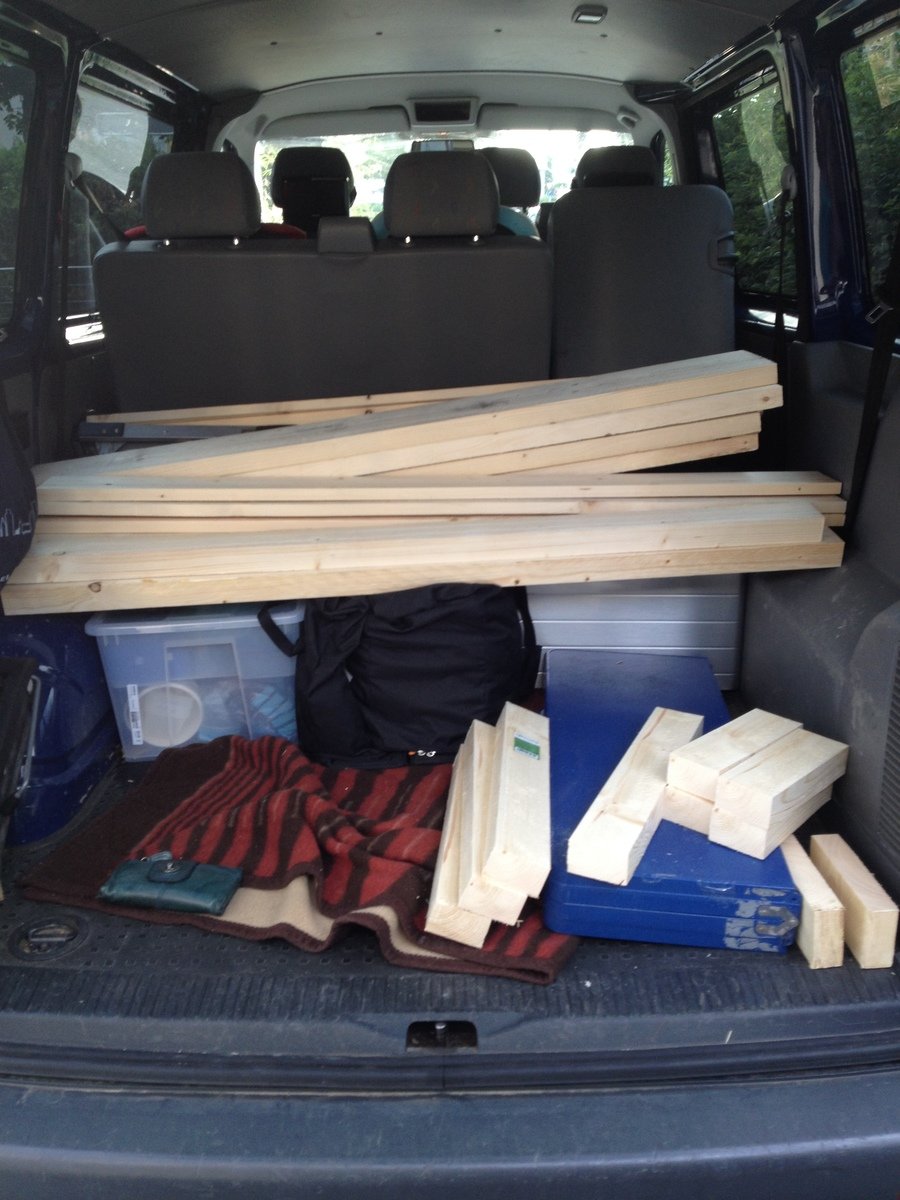
On Sunday we had the idea, on Monday I drew up the plans, on Tuesday I went shopping! Once all our wood was home safely, we sanded it down - most edges weren't badly finished, but there were a few splinters that needed getting rid of!
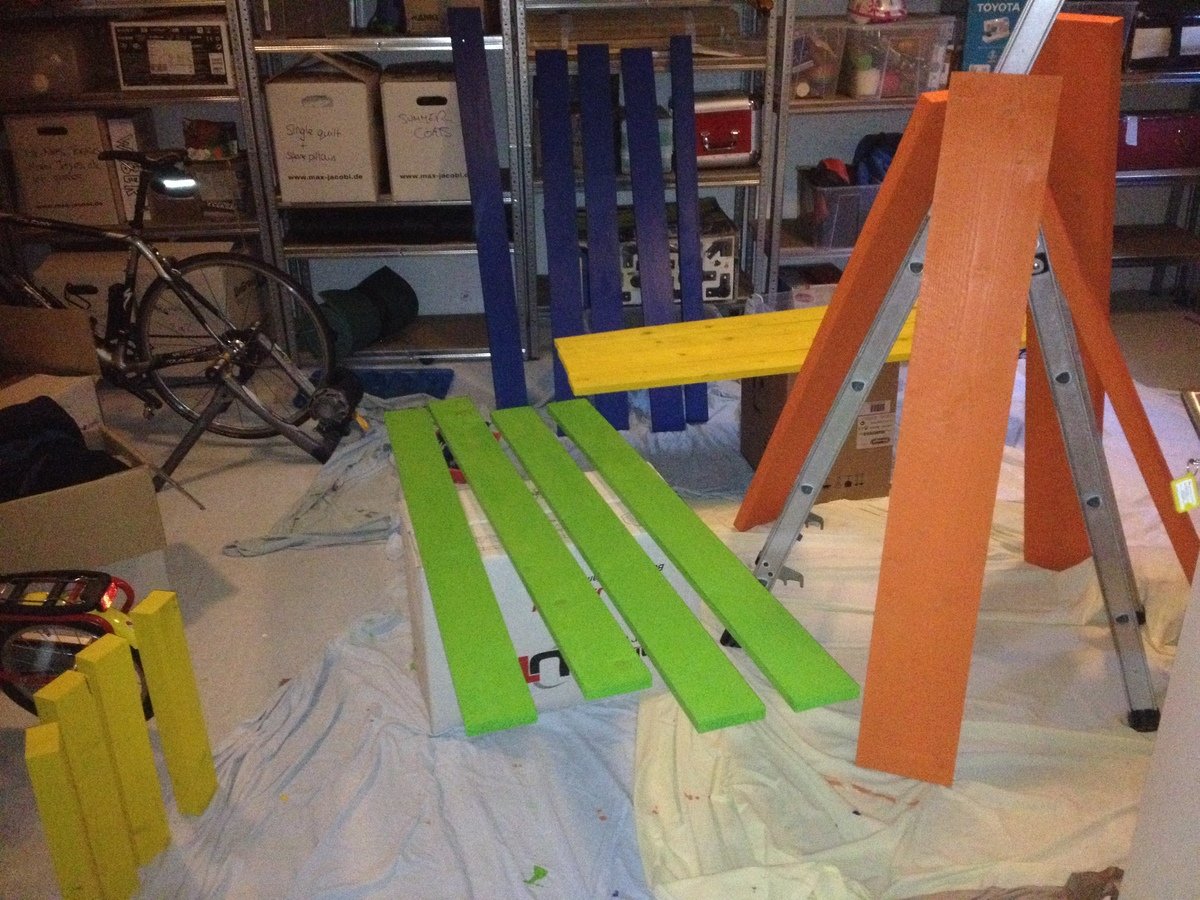
The next two nights Mr W gallantly set to work with the paint brush. After two nights, the wood all had two good coats of paint and we were ready to start assembling on Friday.
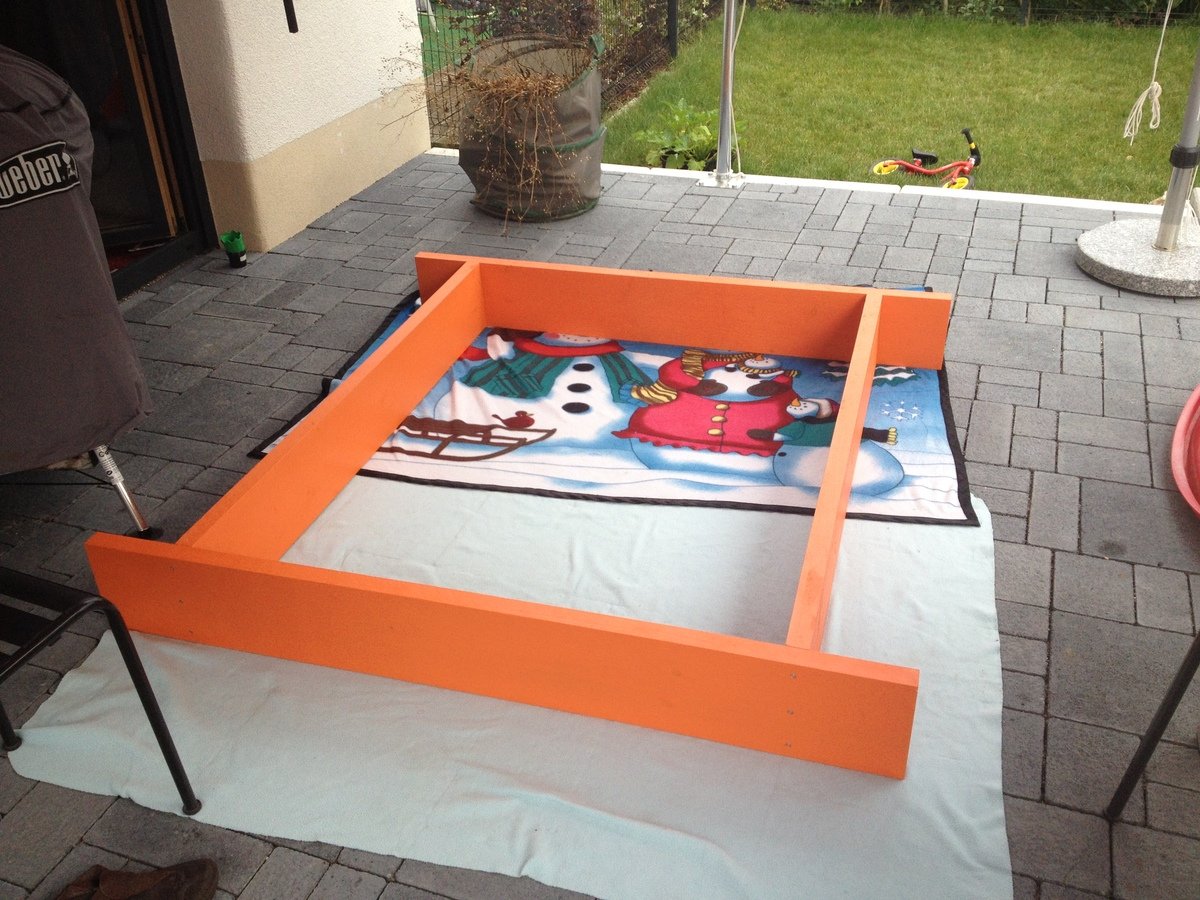
I pre-drilled the base of the bench before the second coat of paint - three holes for each butt joint - with some careful measuring this made screwing the base together really easy!
The top planks were also pre drilled, but there unfortunately my tiredness made me make mistakes, and some had to be re-drilled! Spacing the planks out took a lot of time, but I am glad I made the effort. I used cereal box, and experimented with different numbers of layers - I knew I wanted a theoretical 5.4mm gap, but it took some time to get the right number of layers of carefully creased and concertinaed card!
Having got our spacing wedge sorted, we screwed the blue planks in place at either end of the base. We then assembled the green seat section, and the blue/yellow back rest. Following a tip from the comments section, we added the hinge to the seat/back combo first, as this ends up being on the underside. Once those two hinged sections were made, they were then laid in place on the base (card wedge spacers in place) and then the final hinges added. The final assembly took about 5 hours - but this was partly because we started outside, then had to move everything inside when a huge thunderstorm rolled in!
The next morning we got busy with the staple gun and tacked weed matting over the base, then it was hauled in to position and filled up! For us getting this done and dusted was important, otherwise it could have dragged on a lot, but we are terribly proud that it was done in less than a week from being fist conceived!
I hope the metric/enlarged plans are of use to someone else too. One other idea we had, which we didn't get round to building in, was a support bar to be fitted when you close the pit, so the kids can play on top as a stage when it is not being used for a sandpit!
Built from Plan(s)
Estimated Cost
150 EUR
Estimated Time Investment
Weekend Project (10-20 Hours)
Finish Used
Painted with two coats of Polyurethane Acrylic paint
Recommended Skill Level
Beginner
Custom Potting Bench/Serving Station


2x4 outdoor sofa sectional

Still needs stain and cushions. Will post finished product once complete.
Built from Plan(s)
Floating Corner Shelf

I wanted to do floating shelves in my bathroom but I have very limited space so I decided I was going to do floating shelves in a corner where I did have space. This is not going to be the only shelf, I will make another one to go above it. I was tired of having no storage space for things like toilet paper and towels so now we can use these floating shelves to do that for us :) Tomorrow I'm going to build the second one to go above this one. Making it for a corner is really no different than making it straight. The sleeve fit right over the frame I built and it looks beautiful I think :)


Estimated Time Investment
Afternoon Project (3-6 Hours)
Finish Used
White semi-gloss paint
Recommended Skill Level
Intermediate
Comments
Loft bed with desk...
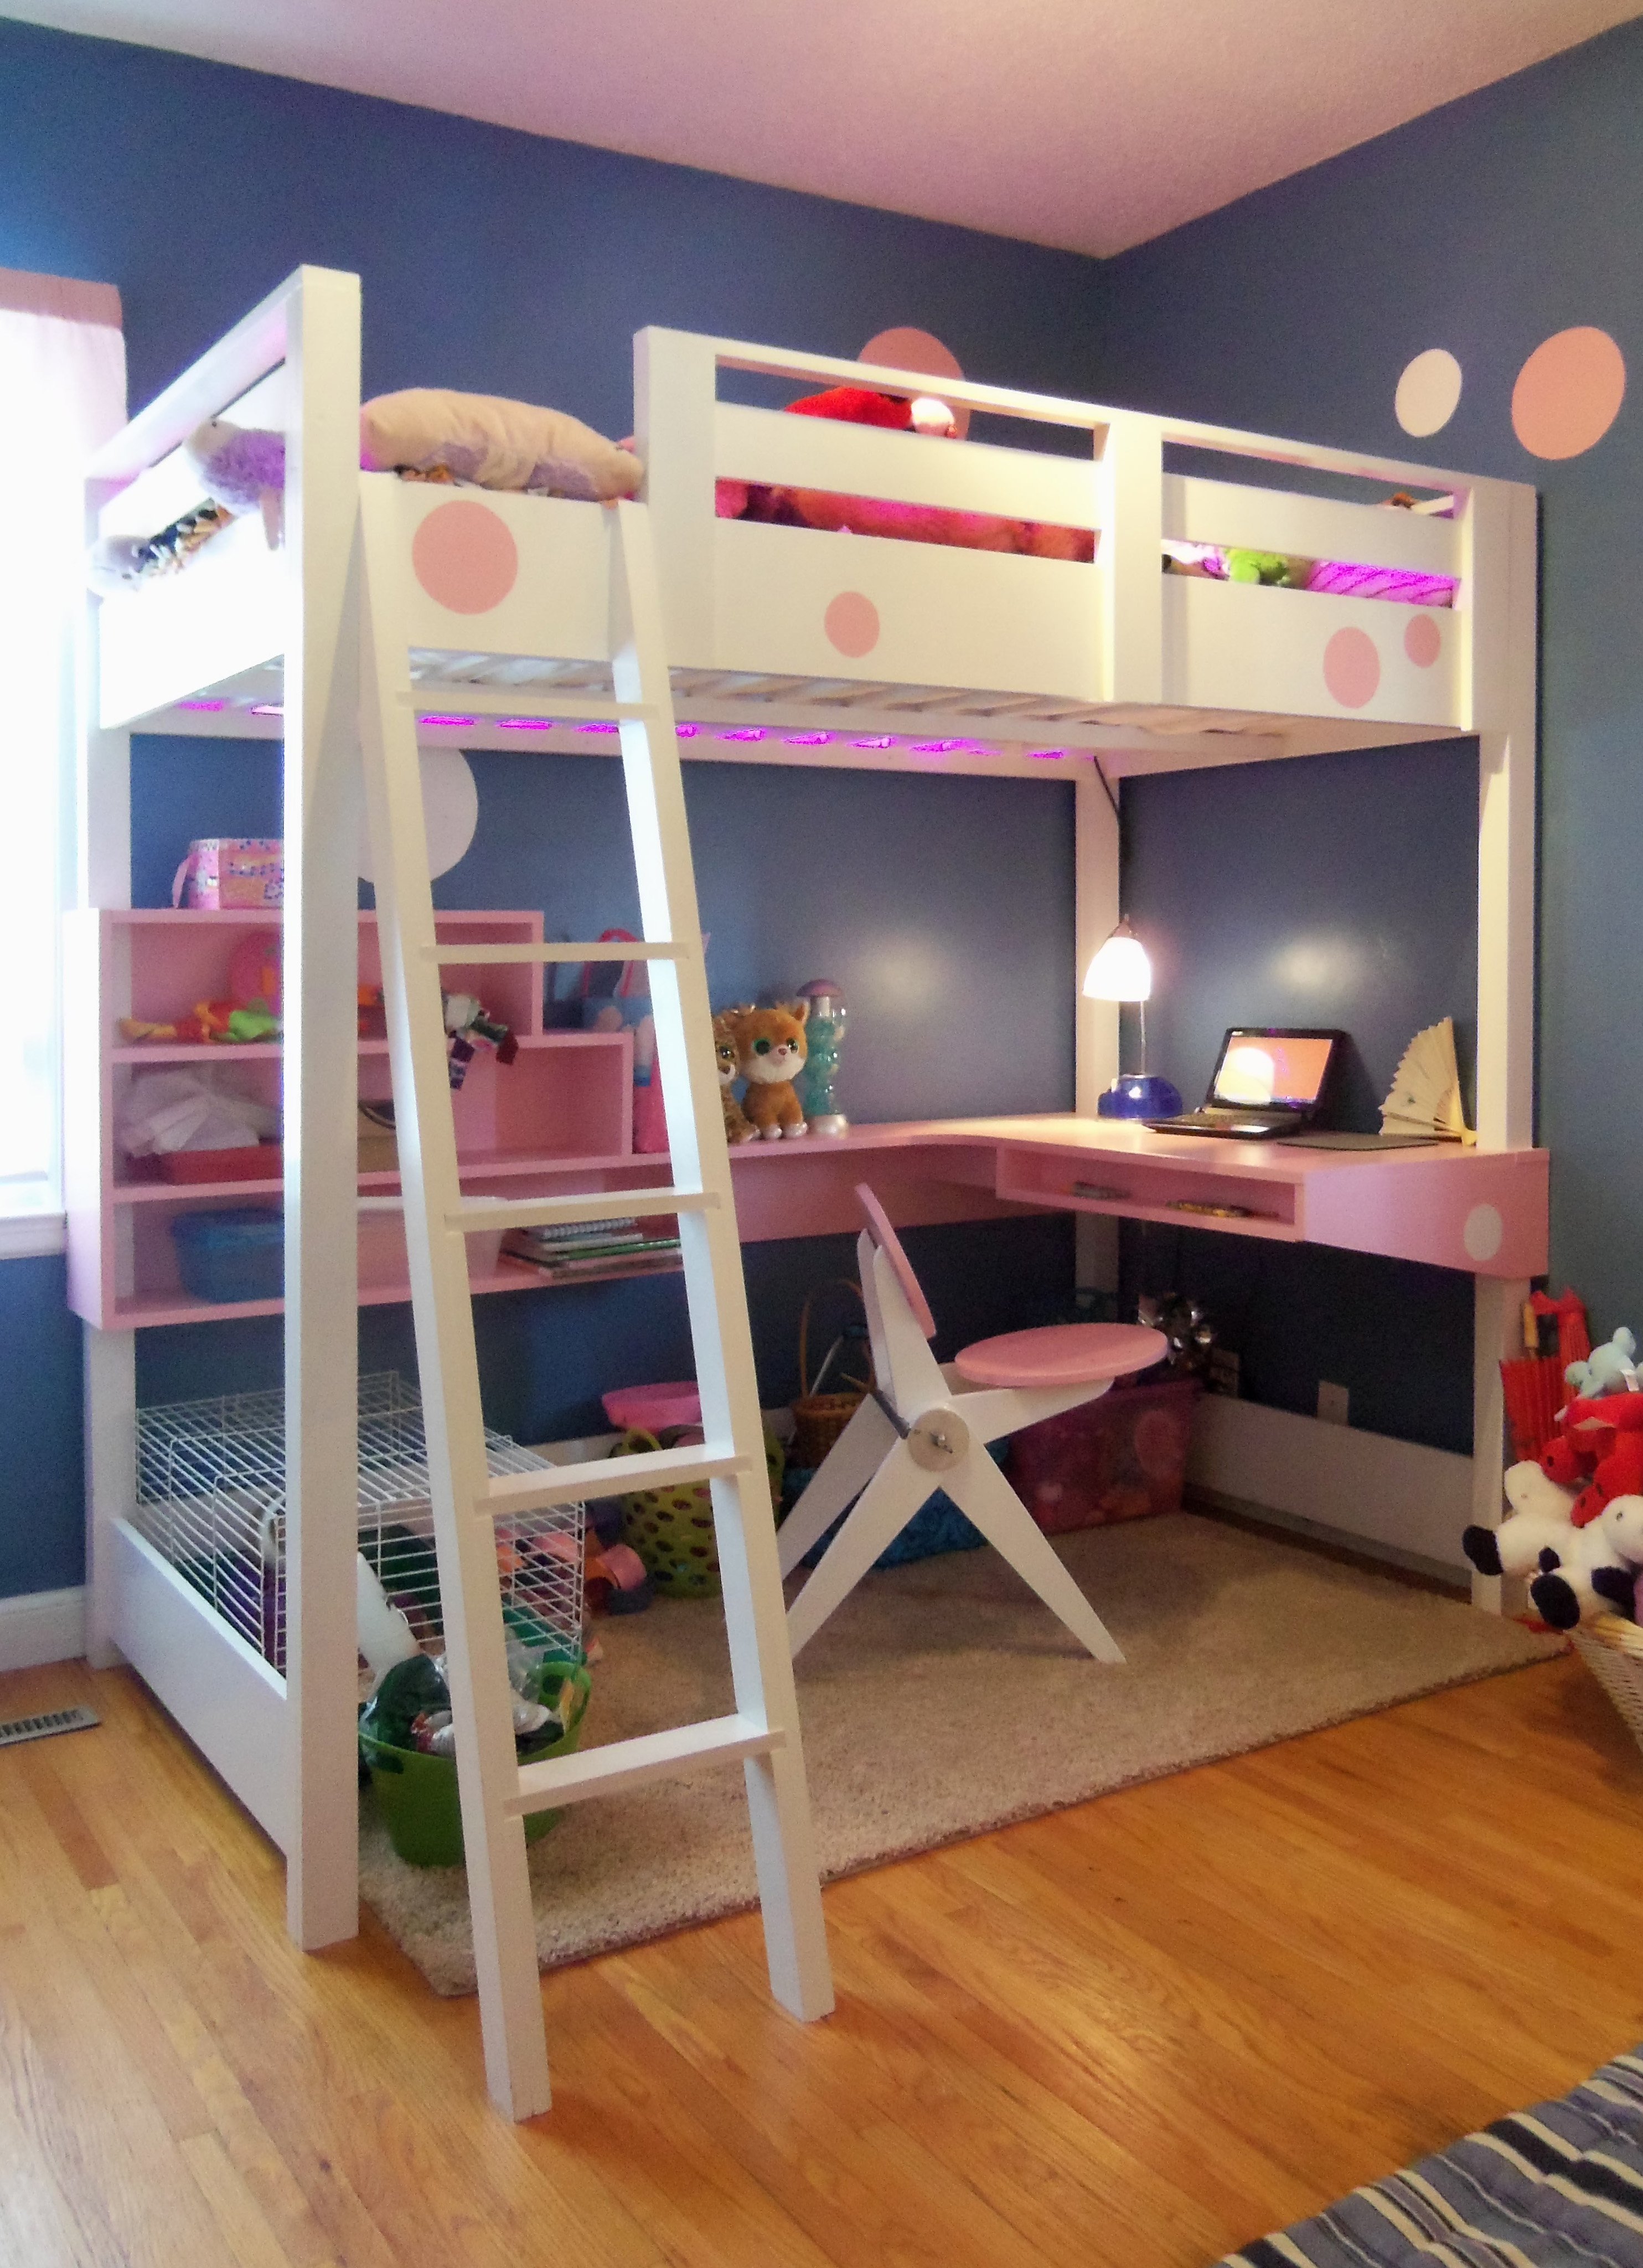
I just wanted to share the loft bed I built for my daughter based on the plans available here. I added a desk, painted an existing chair I had built to match and included pink LED lights around the inside of the bed. Thanks for everyone sharing their ideas, plans and pics..!
Built from Plan(s)
Estimated Time Investment
Week Long Project (20 Hours or More)
Recommended Skill Level
Beginner
Comments
Fri, 08/14/2015 - 21:39
Beautiful Loft
Awesome! Do you have plans up for the desk area? I would like to incorporate that similar style. Thank you.
Wall mounted can organizer

Added a backing of thin plywood to prevent the cans marking up the walls. I knew how many types of canned goods I wanted this to fit and adjusted the width to meet our needs. Love how this is going to save space in the pantry and with just a glance I can see what we have on hand.
Thanks Ana for another great plan!

Built from Plan(s)
Estimated Cost
About $150.
Estimated Time Investment
Day Project (6-9 Hours)
Finish Used
Spray paint
Recommended Skill Level
Beginner