Community Brag Posts

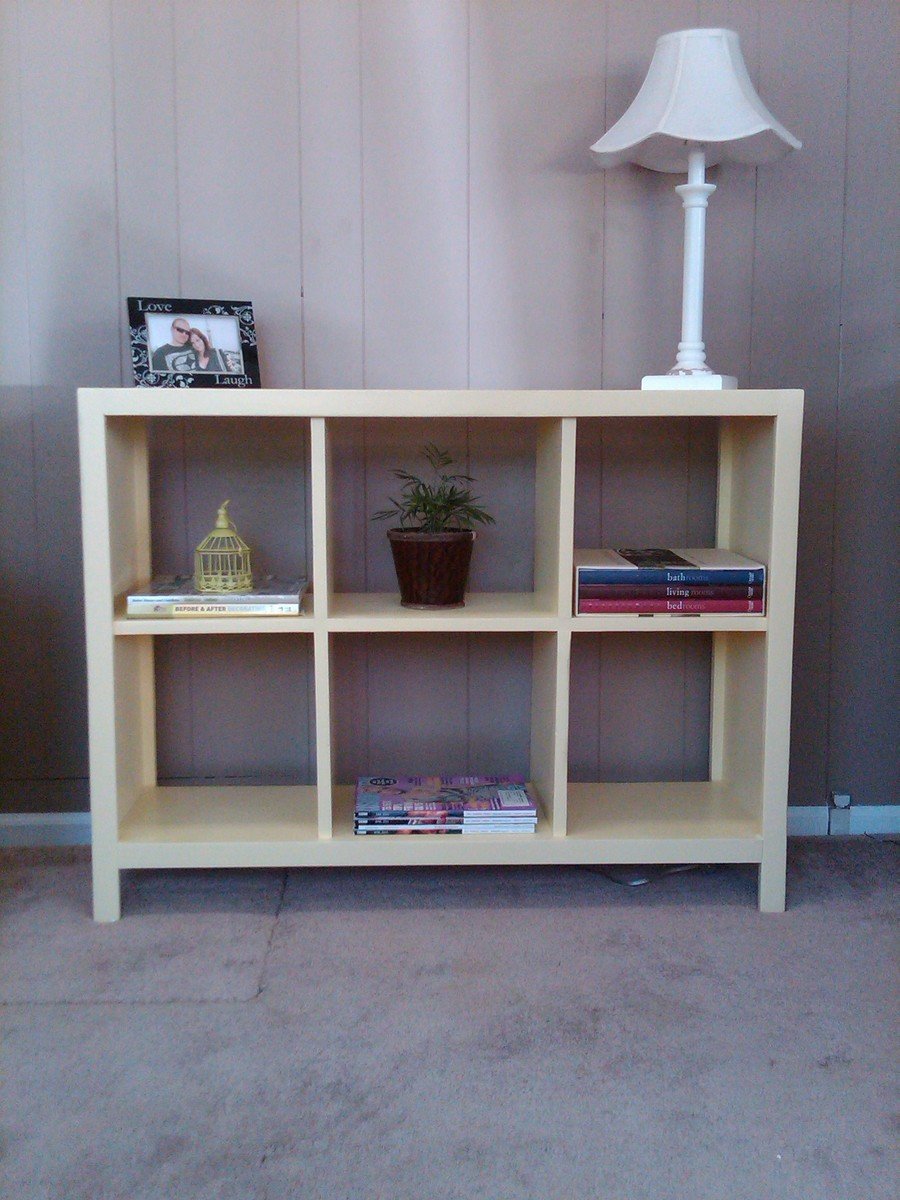
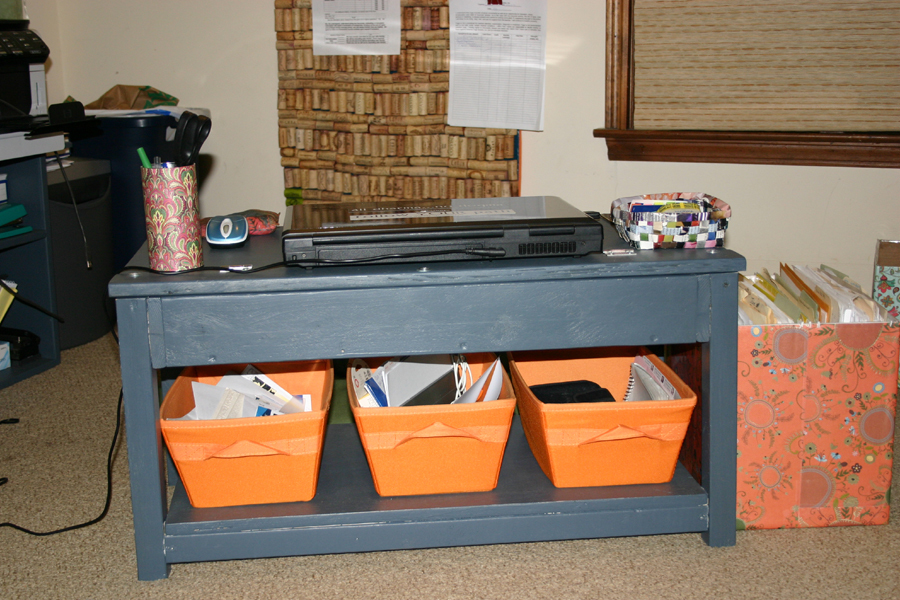
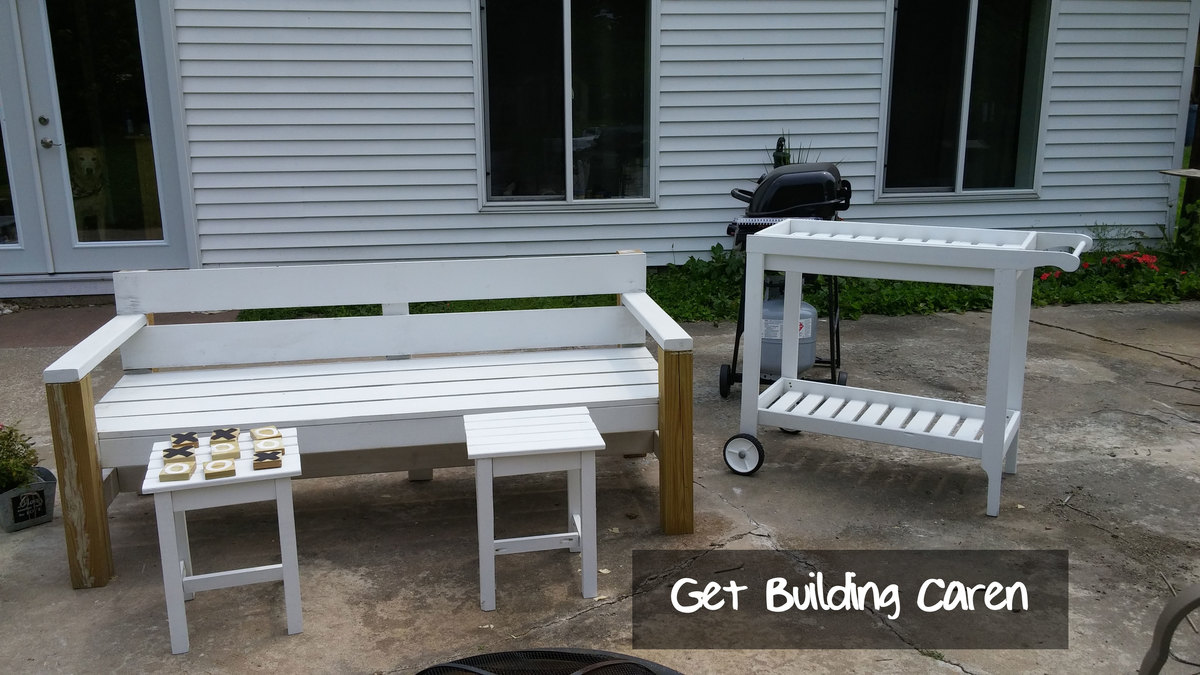
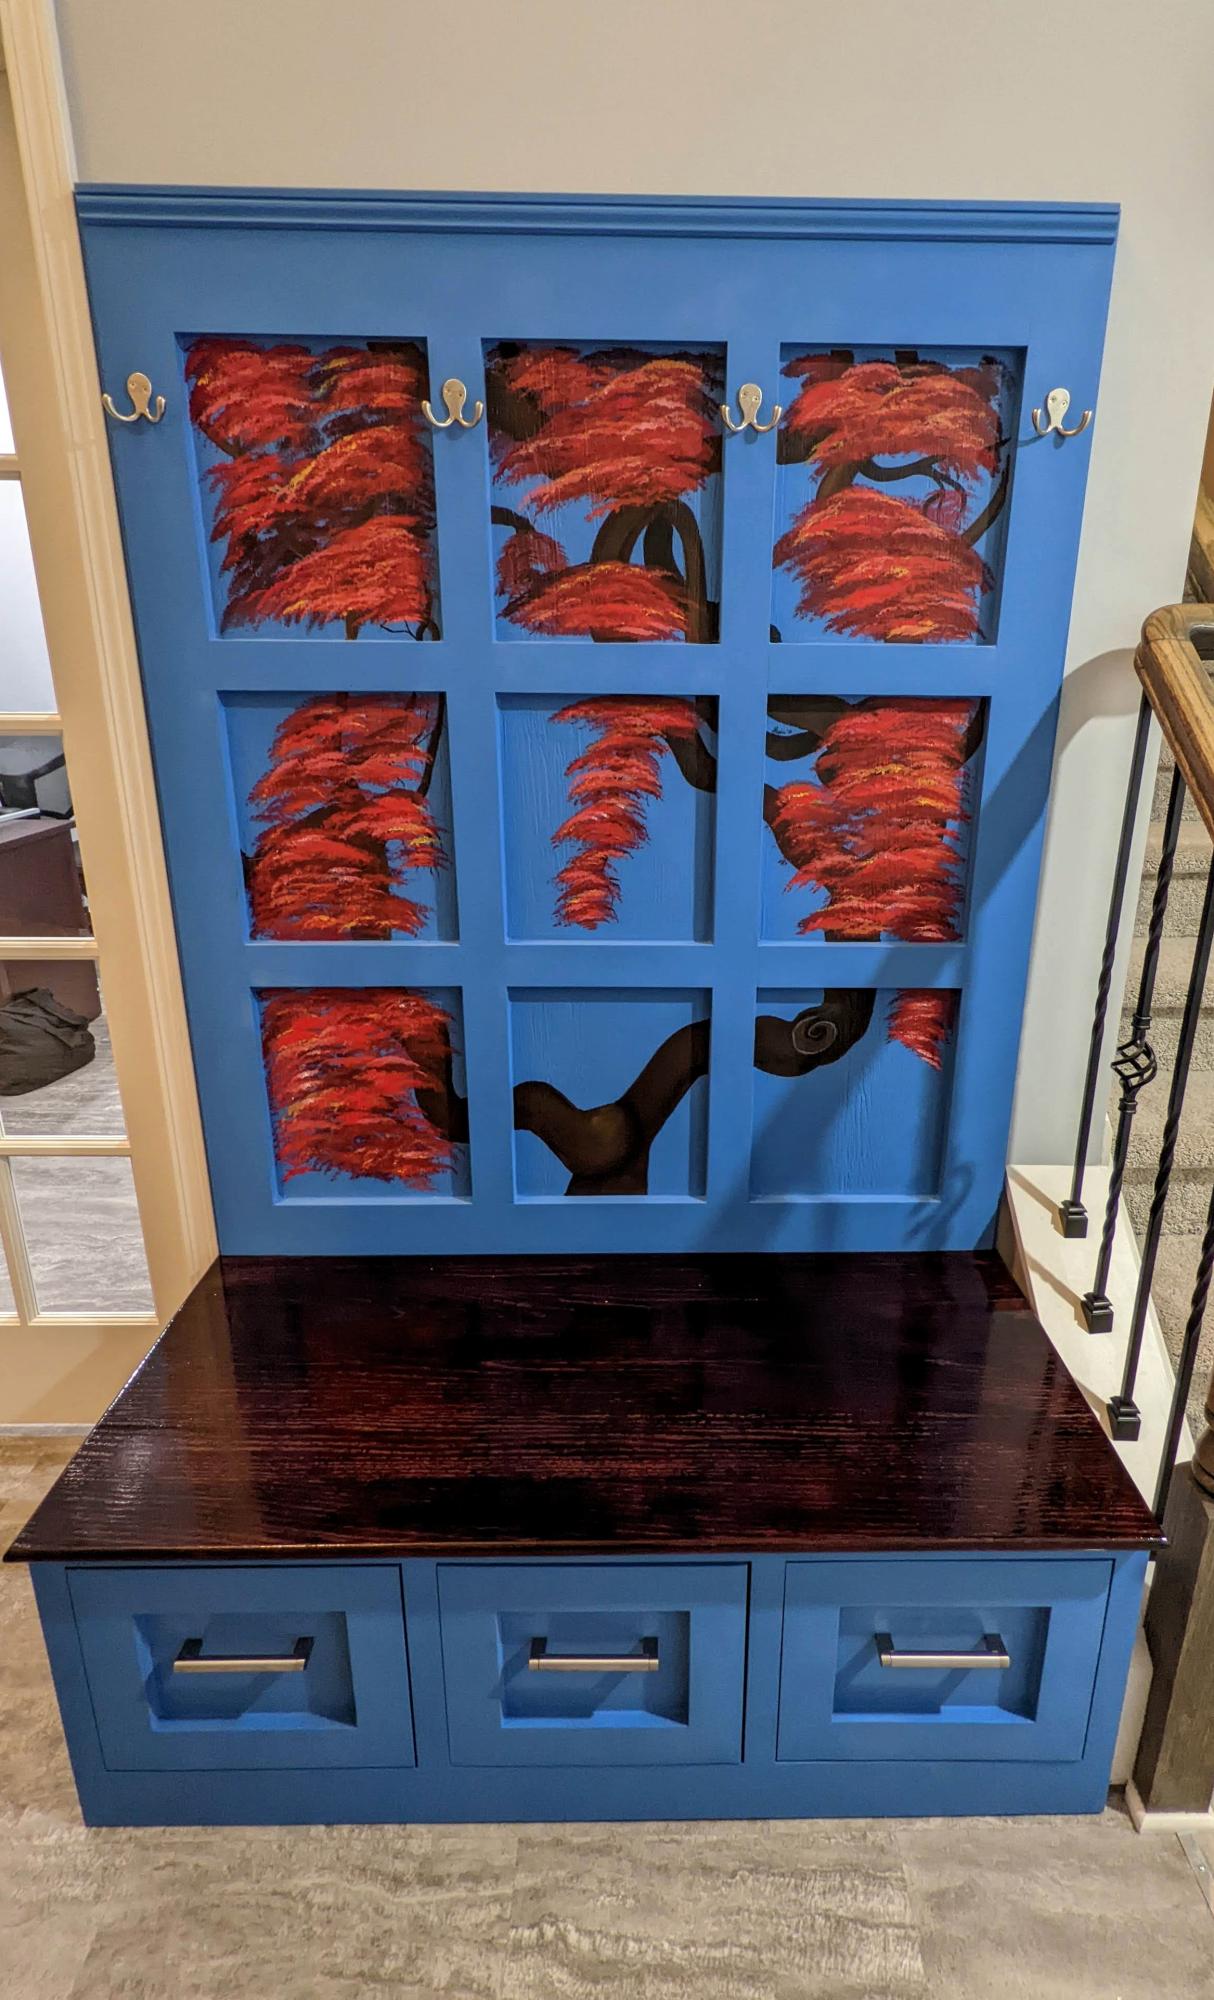
Library Cart - First Build

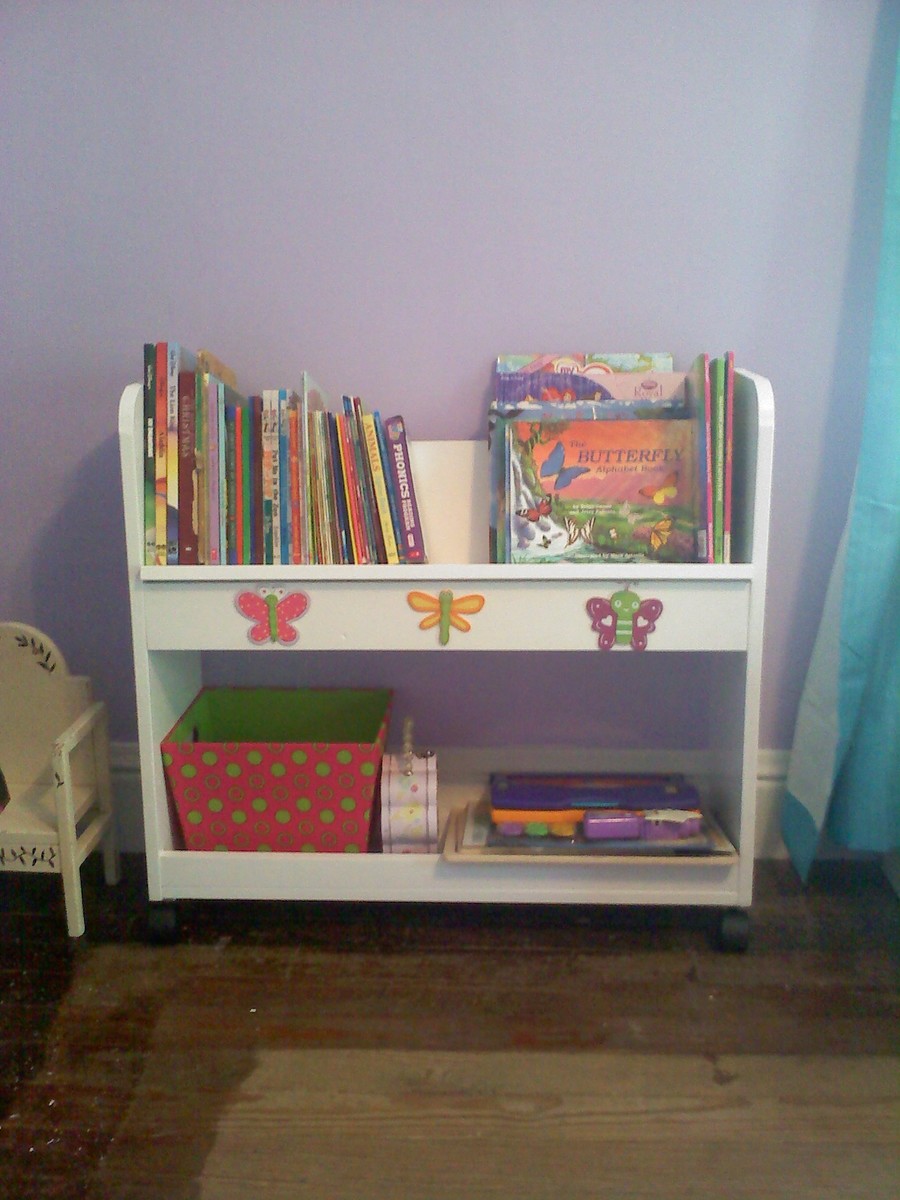
This is my first build from ana-white.com and it was a success. I am glad that I started out with a beginner project as my carpentry skills were a bit rusty but eventually everything came back to me, the step by step plans certainly helped! According to my daughter, I am the best mom ever!

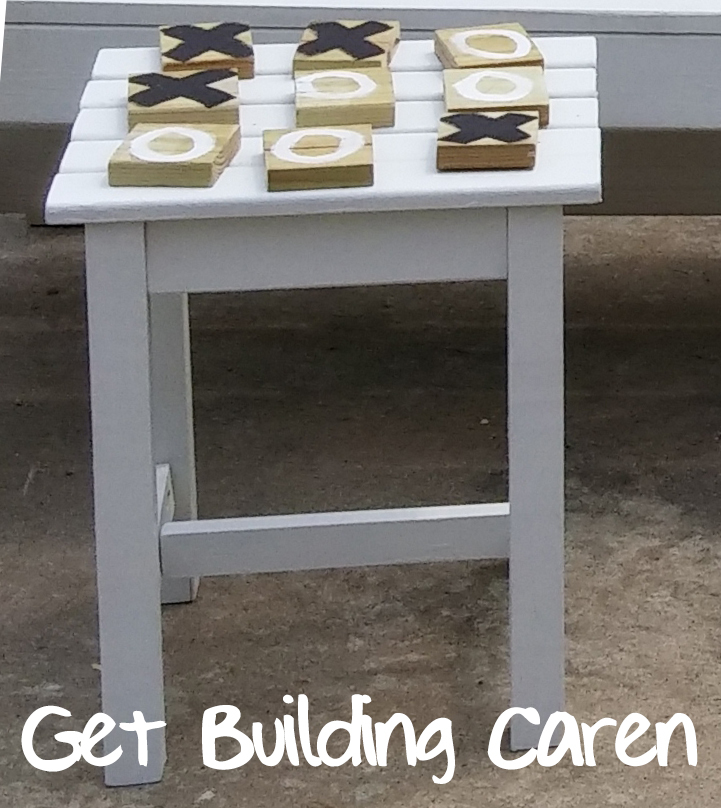
The dragonfly/butterflies I found at Hobby Lobby for 67 cents a piece, what a steal!

Built from Plan(s)
Estimated Cost
$30.00
Estimated Time Investment
Afternoon Project (3-6 Hours)
Finish Used
Ultra White Satin Finish
Recommended Skill Level
Starter Project

Charging Station supersized

Submitted by eande03 on Tue, 06/25/2013 - 21:09

We wanted a side piece for our kitchen so we followed the revised plans to make it a little taller. My wife is really happy with how it turned out. Easy, fun project that was finished quick.

Estimated Cost
$40-45
Estimated Time Investment
An Hour or Two (0-2 Hours)
Finish Used
Minwax weathered oak base coat topped with Minwax Polyshades Mission Oak Gloss. Used chip brushes, and Minwax pre-stain wood conditioner too. The gray from the weathered oak pops through just enough for our tastes.
Recommended Skill Level
Intermediate

Table and Chair for my Daughter "Hannah"

Submitted by toddh5902 on Wed, 06/10/2015 - 07:18

Such great and easy to follow plans. Even for a beginner like me. I did both projects in stages at my own pace and time. It probably could have been finished in a weekend, if I worked steady and straight through. Also if you are good and know exactly what you are doing, definitely in a weekend(haha). I just took my time and worked in baby steps, working through both plans. I am very pleased with the outcome. I did change a few things but that was my preference. I attempted to contour the chair seat, not bad but definitely not great. I used a handheld grinder with about 60 grit sandpaper to make the mold. If you are good and have a very very steady hand this can work. I have a router but not a jig for that type of pattern. All in all though I was very pleased with the outcome and so was my little Hannah. Thanks for this great website and keep up the great ideas.

Estimated Time Investment
Weekend Project (10-20 Hours)
Finish Used
No finish used yet at this time.
Recommended Skill Level
Beginner

Rustic table

Submitted by jdawn1988 on Mon, 01/01/2018 - 16:05

We built our table from the rustic table plans and I am in love. I am a beginner and I was so scared but it turned out amazing!! Thank you for giving me the courage and confidence to start building my own furniture! 

Built from Plan(s)
Estimated Time Investment
Weekend Project (10-20 Hours)
Finish Used
Minwax stain in slate
Minwax polycrylic
Recommended Skill Level
Beginner

My new yellow cubby shelf

Submitted by kylihoot on Sun, 05/01/2011 - 11:59

Totally lovin' my new cubby shelf. I painted it bright yellow, but I may paint it a more nuetral color after noticing it does not math anything haha! This is a super sturdy shelf...LOVE IT! Thanks ANA!

Built from Plan(s)
Estimated Cost
$30
Estimated Time Investment
Afternoon Project (3-6 Hours)
Finish Used
Primer and Satin Paint. I sanded it with 120 grit, then primed and painted with two coats each.
Recommended Skill Level
Beginner

Treehouse Bunk Bed

Submitted by Maymer on Thu, 06/27/2013 - 12:18

My kids are very into the "Magic Treehouse" books so my version of the Sweet Pea Bunk Beds is called The Treehouse Bunk Beds!
I made a few modifications, mostly for ease of access and airflow. I added windows for each bunk on the non-stair side of the bed because my kids room tends to be really hot so I thought they would appreciate more cross ventilation.
I made the side panel on the upper bunk removable (so that I would have access to put the fitted sheet on that end) by using pocket hole screws to hold the boards together, which make it one solid panel then I put 1x2s behind where the panel would go so it wouldn't fall in and used 4 slide bolts to hold it in place so it wont fall out. Also I made the two front panels on the lower bunk hinged doors so I could just lean in to change the sheets. The method for these was basically identical to what I described above but I attached them with non-mortised hinges.
I'd love to get the storage boxes made on of these days. Maybe after they start kindergarten!

Estimated Time Investment
Week Long Project (20 Hours or More)
Finish Used
I used primer and two coats of low-voc interior paint on the light brown and dark brown areas. The green trim and stairs I decided to experiment and I really liked the results. I just put one very thin (practically dry-brushed) coat of paint and it came out really interesting. You can still the grain of the wood so it almost looks like colored stain. For the stairs, I was worried about durability so I put 3 coats of clear satin polyurethane on top and it seems like it will hold up just fine,
Recommended Skill Level
Intermediate

Comments

Letter A shelf

Submitted by Knathu121 on Fri, 01/05/2018 - 20:14

I made this Letter A shelf for my daughters nursery with scrap wood I had.

Built from Plan(s)
Estimated Cost
Under $10 due to the fact that I only need to buy screws.
Estimated Time Investment
An Hour or Two (0-2 Hours)
Finish Used
Spray painted white and then lightly spray painted pink.
Recommended Skill Level
Beginner

Farmhouse Bed- Queen Sized - Self milled wood.

Submitted by Anonymous (not verified) on Sun, 12/26/2021 - 19:46

All of the wood used in the project was milled in our yard, from trees on our land. The 4x4 uprights are poplar, and the rest is spruce, all originating within 500m of our house. The wood was sticker stacked for 2 years prior to planing down to the required size( last picture shows a not yet planed 1X6.)

Was a great project we have had many compliments on as it is the bed in our guest bedroom and has been used plenty during the Christmas season.

My only change up was using 1x6 for the side rails instead of 1x10 due to availability. Turned out amazing!

Built from Plan(s)

Comments

Office makeover

It was time for an office makeover(at home). Sitting on the floor makes for a strong back and works those core muscles, so it was time to change things up. About a year ago or so I modified Ana's Flip Top Storage Bench / Coffee Table for my husband to use as a desk, as he needed to sit on the floor due to a back injury. Now it was time for mine. I instead modified Ana's Scrap Lap Desk. and it was truly built of scraps, with the exception of the hinges(which is odd, because I always have hinges lying around!)
I made the desk larger, and adjusted the height to fit me. I also omitted the side boxes and instead added a shelf on the bottom. Construction was simple and straightforward. Primed with whatever primer I had around, and even painted with a can of oops paint. The edges were lightly distressed, and will naturally distress even more, I am sure.
I had a green bookcase already, and the orange bins with I got on clearance at blue some time ago, and suddenly my color scheme was set--in the 70s. But I like it, as I need more color in my life. The printer stand I cobbled together out of scraps as well--essentially a box. A few boxes covered in paper, a rug from old tshirts, and two light fixtures-one a polyhedron from milk jugs, and the other a flower pot from the bullseye store, and I am set. Oh, and I finally got around to making my corkboard from all of the wine corks I've collected throughout the years. Or some of them, anyway.

Built from Plan(s)
Estimated Cost
free
Estimated Time Investment
Afternoon Project (3-6 Hours)
Recommended Skill Level
Beginner

My First Build - Modular Bar

Submitted by SaraLodise on Sun, 06/30/2013 - 08:36

My first build from ana-white.com was maybe more intricate than I should have done for a first project, but we needed a bar so that's what I did. In the end I was able to learn so much: using the kreg jig, the saws, building doors and drawers, getting things square (or not and redoing it). Mistakes were made but I learned so much! In the end the thing stands up straight and looks pretty dern good in our dining room. I was able to complete this project in 6 weeks while working full time (my many learning experiences added to the time, lol).

Estimated Cost
Oak Boards: $600, Hardware: $30, Finish: $40
Estimated Time Investment
Week Long Project (20 Hours or More)
Finish Used
Minwax Gel Stain in Aged Oak (1 coat) + Miniwax Satin Poly
Recommended Skill Level
Intermediate

Comments

terdickison

Mon, 07/01/2013 - 10:17

Would you come to my house and build me a bar? This easily looks like something you'd have to pay $1000 or more for at Pottery Barn or Restoration Hardware. Nice job. Go have a drink.

Aubrey

Tue, 01/07/2014 - 08:30

This settles it. Woodworking is my new skill for 2014. I pick something every year to build upon. Last year was sewing and I love that. But this is the piece from pottery barn i've been salivating over for a few years. It will be mine!

End Tables

I built 2 end tables to go with my park bench. I had a lot of trouble with splitting wood, because the 1x2s where so thin. I'm used to more robust lumber. I tried something new. I drilled pocket holes, sanded, primed and painted everything before I assembled. I don't like painting as much, because I love using power tools. I psyched myself out by thinking I was giving it an elegant finish. Sounds so much nicer than slapping some paint on wood.

My son made some tic-tac-toe pieces from scrap treated lumber, by painting black X's on one side and white O's on the other. Now we can play on the end table!

Ana White's site is wonderful with downloadable, step-by-step shopping list, cut list and instructions.

#AnaWhite #GetBuilding2015

Built from Plan(s)
Estimated Cost
less than $20 for 2 end tables
Estimated Time Investment
Weekend Project (10-20 Hours)
Finish Used
White exterior latex paint.
Recommended Skill Level
Beginner

Farmhouse Table

Submitted by debbB78 on Sun, 01/07/2018 - 14:26
Build this table with provided plans but tweaked them a little to make the table a little wider. I used (4) 2x10's and (1) 2x12 in the middle to make the top. I build the base wider to accommodate the larger top. It's a beast but I love it! Brought the base in the house and attached the top in the dining room.
Estimated Cost
I honestly didn't keep track of what I spent but I'd sat around $250
Estimated Time Investment
Week Long Project (20 Hours or More)
Finish Used
Stained it with one layer of Minwax Special Walnut, let that dry over night then added a layer of Minwax Weathered Oak. 
Recommended Skill Level
Beginner

Step Stool

I love this step stool!! My daughter uses it EVERYDAY! This was the first thing I built and I think it turned out pretty good. I did a different design on the bottom sides to make it a little girly since I was painting it blue (girls can have blue stuff too!)

Built from Plan(s)
Estimated Cost
$10
Estimated Time Investment
An Hour or Two (0-2 Hours)
Finish Used
I dont know what color of blue this was because it was a "mis-tint" that I got for $3, then I sanded to distress it.
Recommended Skill Level
Starter Project

Variation on the Charging Table

We loved Ana's charging table, but didn't think we needed the holes for charging - what we really needed was just a side table to go next to our couch, but one with storage capacity (hence the shelves behind the doors on the bottom) and a place to put the remotes and game controllers for the TV (hence the shelf at the top). We decided to keep the "secret" compartment on top that flips up, like in the original plans, for storing messy things with cords like the headphones that you can see in the picture.

We also decided to replace the solid wood doors with a glass pane, and used glass paint to paint a square in the middle of the glass.

This was our very first - ever! - furniture-making project and we both really love how it came out. :-)

Estimated Time Investment
Weekend Project (10-20 Hours)
Finish Used
Golden Pecan Stain and three layers of a polyurethane finish
Recommended Skill Level
Starter Project

Lawn Chairs

Submitted by Anonymous (not verified) on Tue, 12/28/2021 - 12:06

Built these for my daughters new home

Built from Plan(s)

Comments

Reclaimed Wood Desk Caddy

Submitted by melaniesue on Tue, 05/10/2011 - 12:11

I wanted to build something fun and challenging for me. I was inspired to do more caddy things because of Anas fun plans for her Soda Caddy. I often try to design my own plans, (the old fashioned way, because skechup hates me!). I LOVE to look at pictures online, and just see if I can replicate it somewhat. So this Desk Caddy is what I came up with. I used all old wood that I had in the shed, and was begging to be made into something fun! I think this would be cute for so many different areas. Outside, you could organize your gardening items, seed packets, shovels and pots. It could be an awesome message center, mail area. Whatever!

If the dimensions are with the image, it's much easier for me to figure out, this one had dimensions, so I just went with my gut and I think it turned out ok. It sold in my booth, at our local antique mall in 2 days.

Without the Kreg Jig, I would not have had the confidence to build this, and sell it. I love the Kreg Jig!

Clearly I need to get a new camera, and need to take better pictures, SOON!

Built from Plan(s)
Estimated Cost
Free
Estimated Time Investment
Afternoon Project (3-6 Hours)
Finish Used
Steel wool/vinegar mixture, slight dry brush in an oops white I had on hand, 2 coats of satin poly.
Recommended Skill Level
Beginner

Bookshelf wall unit

I fell in love with a set of bookshelves from a big box store (ahem, T@#get) but was disheartened to find that they would not help me get the corner shelf ordered to Canada from their website.

With inspiration from Ana, I decided to design and build the whole thing myself. It cost 1/3 the price, and as my first wood project, I'd say it turned out pretty well.

I made my design to work best with the wood available local to me, and to fit specifically in our room. The biggest challenge wasn't wood-related at all, but was actually dealing with the electrical outlet that I needed to attached to the base of one shelf.

Check it all out at my blog; http://projectjumanji.blogspot.ca

Built from Plan(s)
Estimated Cost
$350
Estimated Time Investment
Weekend Project (10-20 Hours)
Finish Used
Minwax Jacobean
Recommended Skill Level
Beginner

coffee table

this is a coffee table that i had build just by looking at a picture and taking measurements of my previous coffee table that i had, I'm very glad to show the table off!

Estimated Cost
roughly $80-$90
Estimated Time Investment
Week Long Project (20 Hours or More)
Finish Used
polyurethane
Recommended Skill Level
Intermediate

Farmhouse Bed

Submitted by mwg10 on Mon, 01/15/2018 - 07:57

I made a few modifications. 

I used shiplap instead of tongue and groove, raised the footboard by adding an extra 2 x 6 & used jacobean stain.

Thanks Ana for putting the plans and video on your site.


Built from Plan(s)
Estimated Time Investment
Weekend Project (10-20 Hours)
Finish Used
minwax jacobean
Recommended Skill Level
Beginner

Hall Tree with Drawers using a combination of 2 plans

Submitted by Anonymous (not verified) on Fri, 12/31/2021 - 19:40

We had an empty area at the bottom of our stairs that was just calling for a hall tree. I love watching and learning from Anna's videos. I really liked 2 of her plans: the Farmhouse Hall Tree and the Mudroom Bench with Easy Drawers. I decided to combine them to make my own unique hall tree. Our teenage daughter used the "window panes" in the back to paint a Japanese Maple tree. I think it turned out beautifully. This is the first of Anna's plans that I've used, but I plan to use many more! Thank you, Anna for your amazing videos and desire to share your knowledge. We appreciate it so much!

Comments