XL Modern Craft Table

I modified this plan so I could have 4 total work areas. Total Size: 48" x 96"


I modified this plan so I could have 4 total work areas. Total Size: 48" x 96"


I made this in an afternoon. Loved this project. It is made with 2x4's using a Kregs Jig and mitre saw (plus additional tools like a drill and square). This was my frist time using the Kregs Jig and I am sold!!
The free plans were taken from another website. They are very detailed and there is even a video (I recommend it as he gives a great tip for making sure the back stays equal/level to each other before putting the back on). Even though you can build this by yourself, I did have help for the heavier sides once they were assembled. I plan to build the additional side table soon and finish them both with sanding and staining when the weather seems less iffy for rain.
If you are looking for a good beginner project that doesn't take forever or have complicated steps, this is your project.

Modifications to the simple outdoor table plan thanks to Finn’s dad.


I found these plans online and was just waiting for the kids' grandpa to come out and build it. Could be built in one afternoon (depending on how many trips to your local Home Depot, and availability of the correct tools)
Modifications from original plan:
6x6 instead of 4x4
Brackets to hold patio umbrella for shade
Added seat gussets for additional support
Added "wooden flange" around bottom of box to run lawnmower on
One additional center back support on each bench
One centered handle (instead of a handle on each end)
Stapled landscape weed barrier fabric onto the bottom
Sanded all exposed edges
Materials:
4@2x10x8'
12@1x6x6'
2@2x6x12'
8 hinges
2 handles
3 1/2" decking screws (for attaching 2"x boards)
1 5/8" decking screws (for attaching 1"x boards)
2+ 1 1/4" 2-hole straps for metal conduit (for attaching patio umbrella*)
*Our patio umbrella pole was 1 1/2" diameter, but 1 1/2" straps had too much play, so we used 1 1/4" straps and misc flat washers to adjust the snugness to the pole
Cut lengths:
2@2x10 cut to 72" (long sides of the box)
2@2x10 cut to 69" (short sides of the box)
Cut one each of the following out of a 12 footer:
2@2x6 cut to 75" (long side "flange")
2@2x6 cut to 64" (short side "flange")
No cuts were made to the 12 1x6's
Used one leftover 2' from the 2x8x10's ripped in half cut to 11.5" for arm rests
Used two leftover 2' sections from the 2x8x10's ripped in half cut to 21" for back supports
Used the last 2' cutoff to make two seat gussets (cut about 9 1/2" off and then ripped it at 45 degrees)
Used the remaining piece (ripped in half length-ways) to attach to the center of the backrest for additional support and as the attachment point for our handles
We decided to do one handle in the center of the backrest so one reasonably strong adult could open the lid
The bottom "flange" was assembled with the box upside down. Basically a 2x6 screwed to the bottom edge of the box allowing 1 1/2" overhang all the way around
After making cuts, but before assembly, we recommend using a quarter-sheet pad sander (or similar) with 60 grit paper to break all of the edges and round over any ends or corners that will be in contact with sandbox users
Followed other general assembly instructions
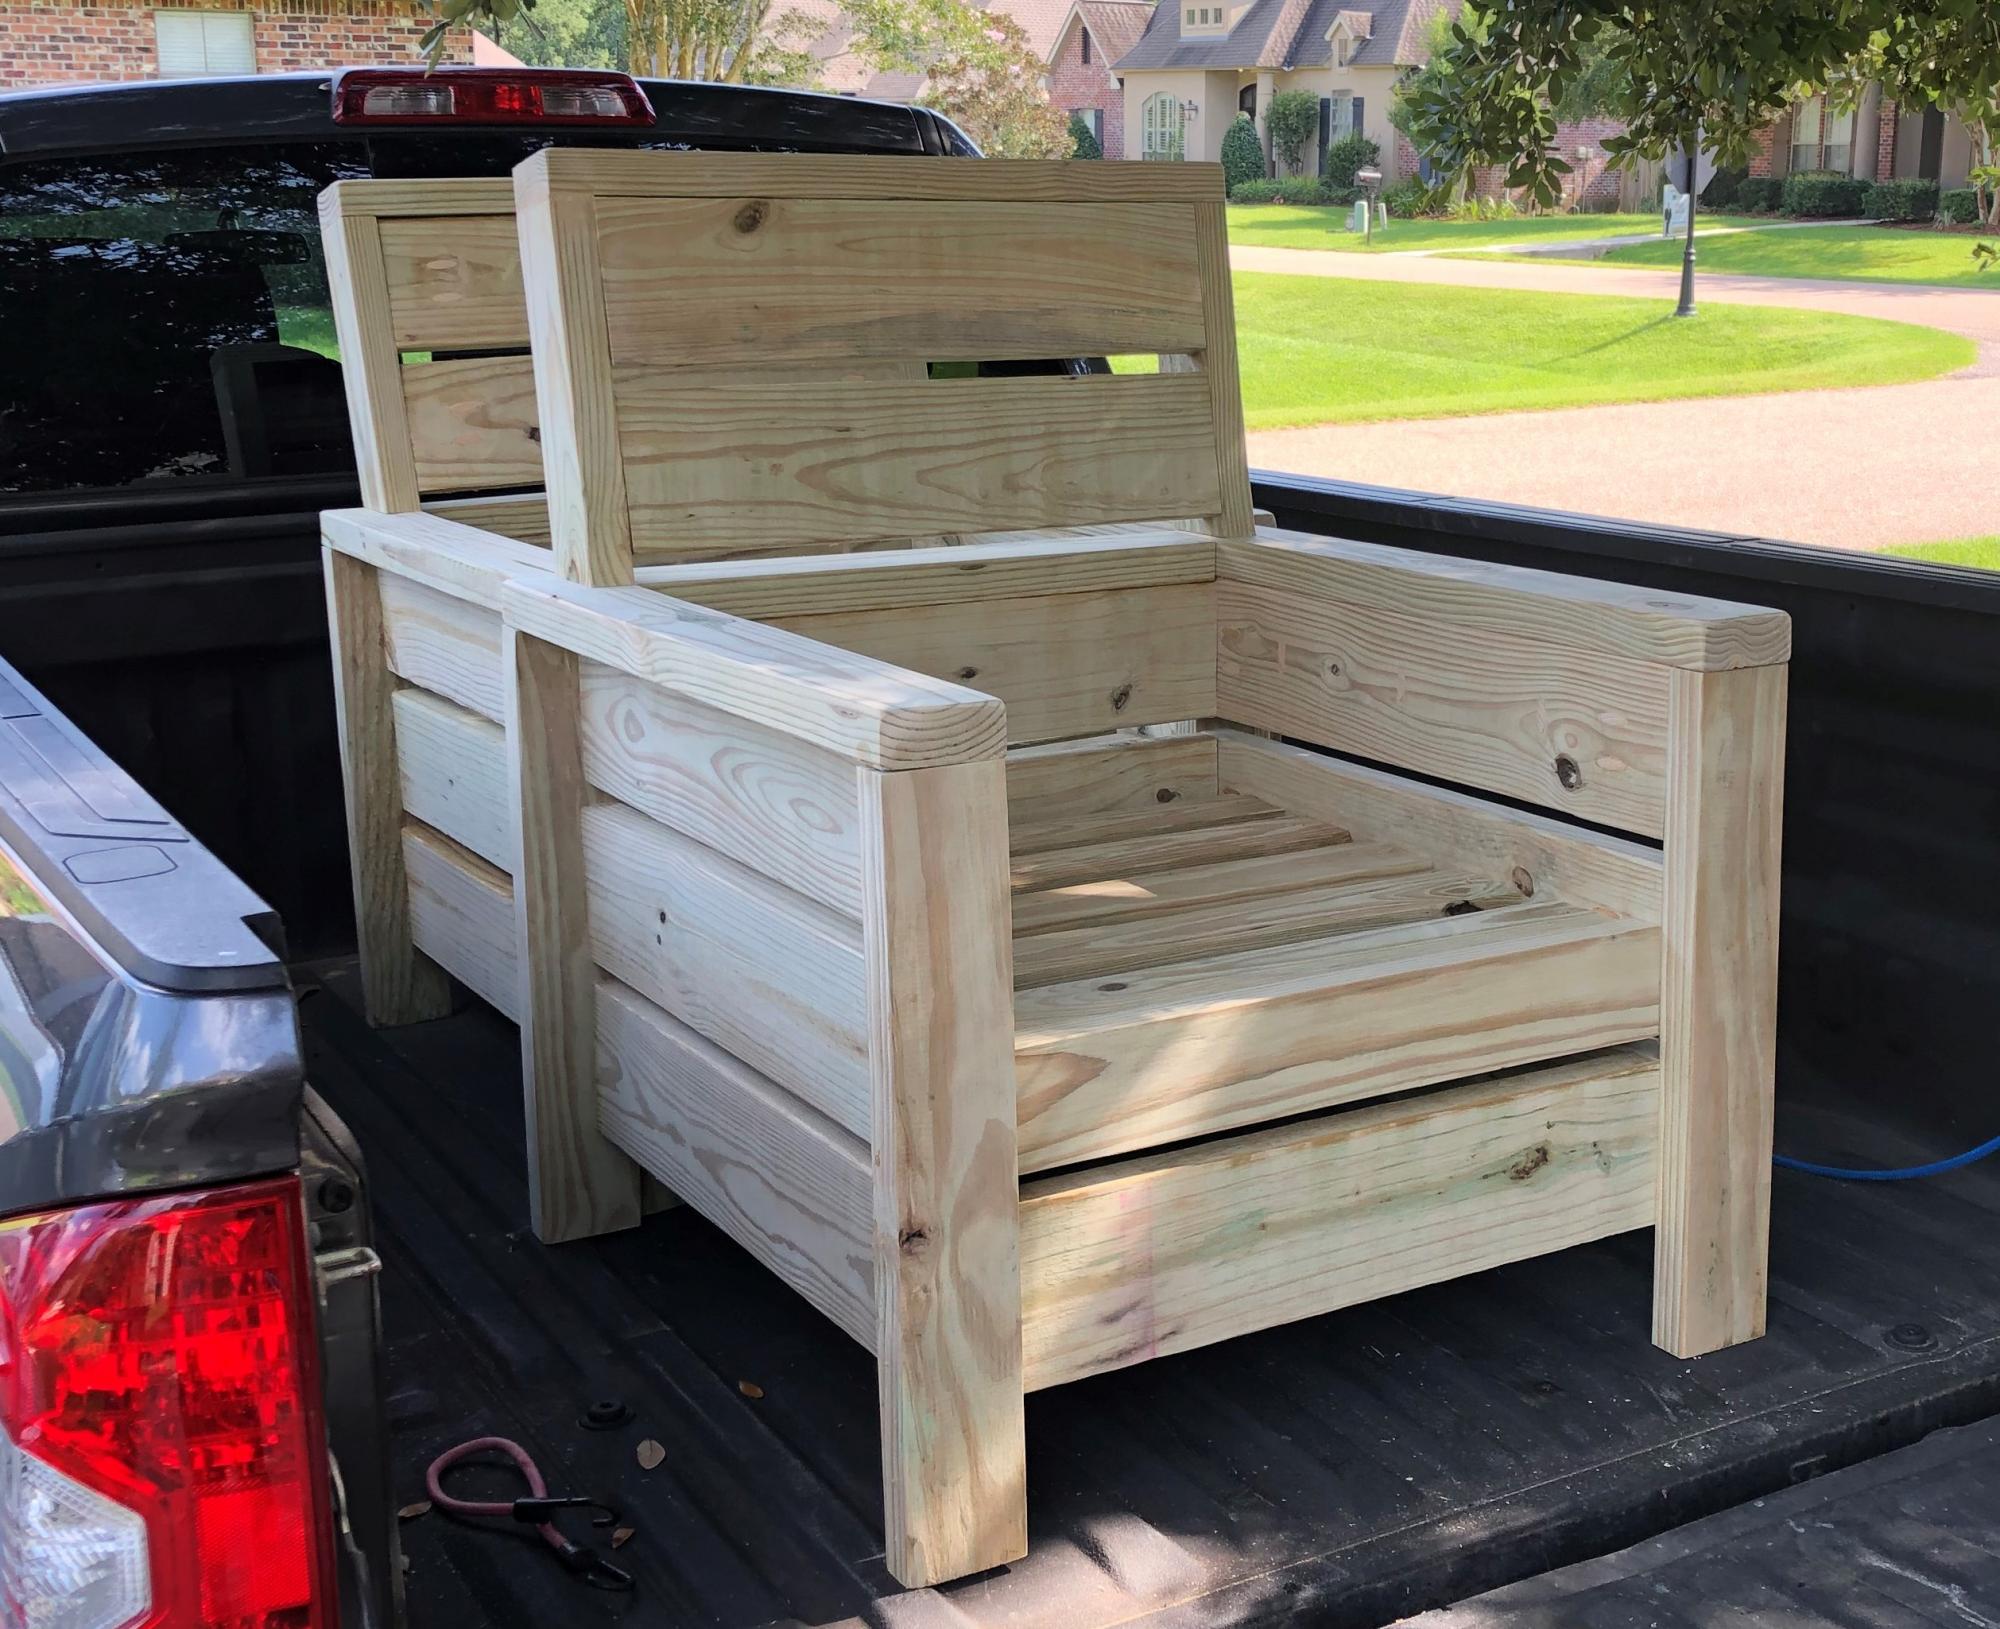
Per request of my wife, I opted to add a backrest to the chair. I feel as though my backrest design keeps with the style of the original build. I accomplished this by cutting the 2x4 vertical arms of the backrest at 13 inches with a 10 deg miter cut at the base. This allows you to keep with the 3/4" on the 2x6 backrest slats. I finished it off with a 2x4 top plate. I'd also note that I made slight modifications to the plans to accommodate 24" cushions.
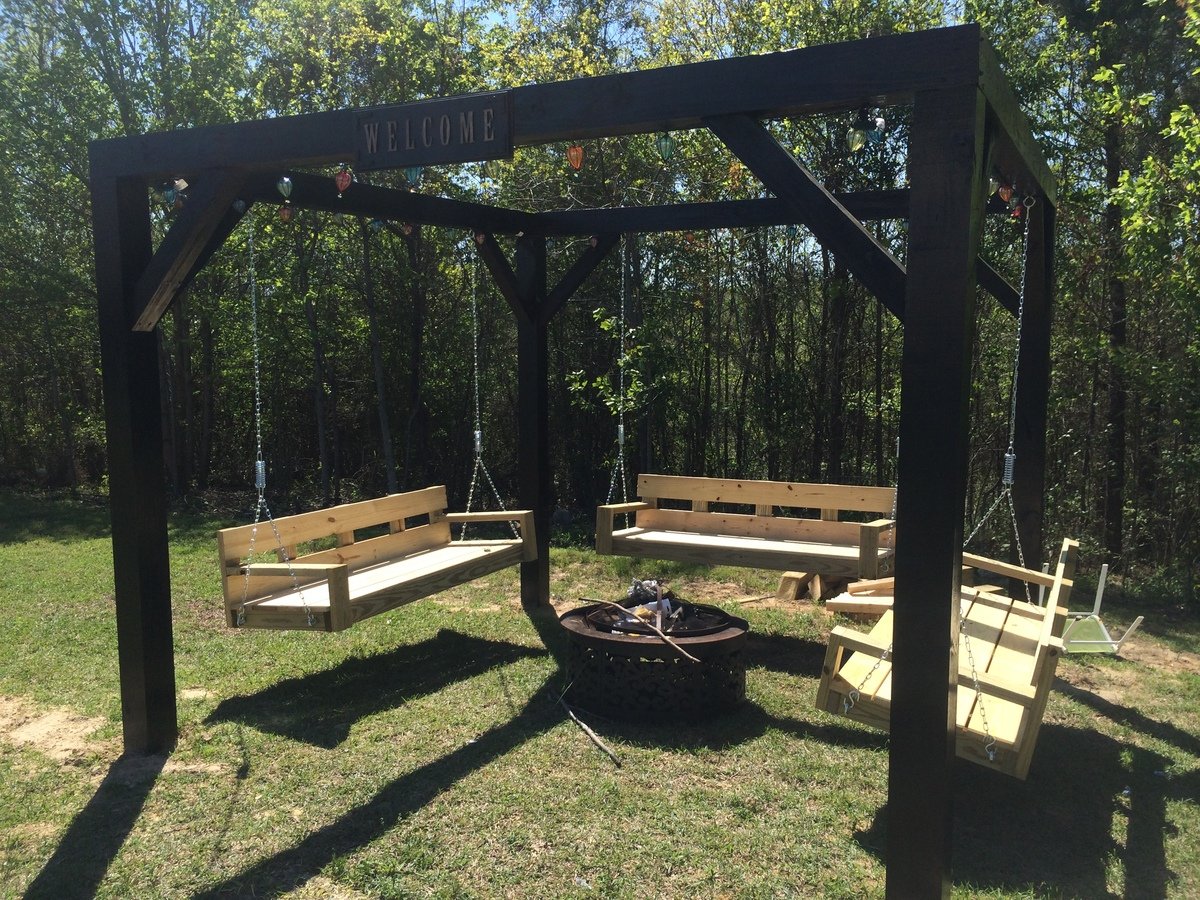
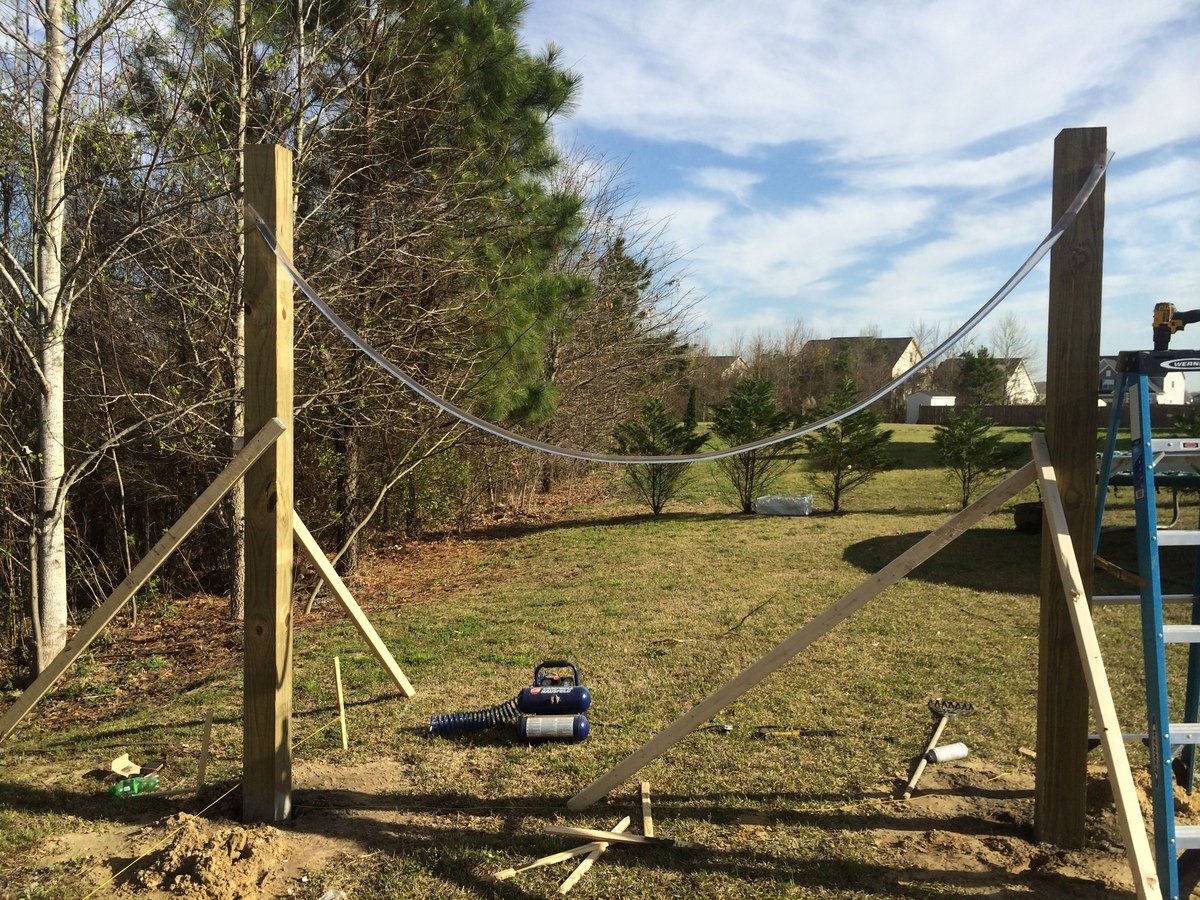
My wife saw something like this on Pinterest and desperately wanted one. The one she saw was hexagonal in shape. We didn't need as many swings so we went with just a plain square shape. We used 6x6s for the legs and posts across the top and used 4x4s for the angled support pieces. We built the swings using the plan from this website. All the materials can be picked up at the blue and orange stores. However when it came to the springs for the swings, the blue store was 1/3 of the price of HD. The legs are 12' long and buried 4' under the ground and cemented in for strength. Luckily I am retired military and was able to rent an auger for 1/2 the price of HD or the blue store. You could do it by hand but it saved us hours and lots of back pain. We found our dimensions for the size we wanted and spray painted dots on the ground where the posts were going to go. We dug the holes and stuffed the 6x6s in them. Using a post level we made sure they were plum. We braced them and added the quickrete and left them to setup over night. The next day we had to make sure all the tops were level with each other. This is where having some knowledge of physics paid off. I took clear tubing and screwed it above the height that I wanted on one post and then screwed the other end to another post. Fill it with water until the water level on the first post is where I wanted it (8 feet high) and it will automatically fill it level on the other end. There is a picture of this above. Water will always level itself out. I had to do this because my yard is at a slight down hill grade. We marked it and cut the tops off to make it level. After attaching the 6x6s on the top with 8" lag bolts it was time to paint. After painting was done we built 3 swings from Ana's plans. We shortened them by 6" to give room to walk between the legs and the swings. All in all it was a great project that only took two dedicated weekends. My wife still has to paint the swings though.


Wed, 05/27/2015 - 07:42
How did you attach the 6x6's to the top? Is it a miter cut at 45 degrees and then put together with the lag bolts. I'm kinda confused. Thanks.
Wed, 05/27/2015 - 22:38
It sounds and looks like the top 6x6s are mitered and sit on top of the end of the vertical posts. I'd say at least one lag bolt each way to hold the mitered corner together and then at least one in each piece down into the vertical to hold it in place.
Sun, 07/19/2015 - 16:26
I have looked at several versions including the hexagon pergola's, but this is exactly what we want. Do you have plans that you can email me? [email protected]
Sun, 04/19/2020 - 12:33
If you recurved plans can you please send to me?
[email protected]
Sun, 04/19/2020 - 12:33
If you recurved plans can you please send to me?
[email protected]
Wed, 04/29/2020 - 16:18
I was looking for material list and plans if you have any please send to [email protected] thanks
Mon, 04/27/2020 - 10:24
WOW, LOVE!!! This is simply gorgeous! What a warm and welcoming addition to your yard. And thanks for sharing your method of finding level for your posts on your sloped yard. I absolutely love it!
Thu, 10/22/2020 - 06:53
Love this, can you please email me the plans @ [email protected]
Fri, 03/26/2021 - 05:58
This is beautiful. Would love to see the plans for this. How small can it be made?

"I don’t consider ourselves experts at all and your plan was so easy to follow. We can’t wait to introduce our chicks when they’re old enough to transfer outside."


I used Western red cedar to build my chairs. The build was a little more expensive but well worth it. The chairs were stained with Cabot’s Australian Timber Oil ( Jarrah Brown). Thanks for the plans Ana, your site is awesome and you do a great job! Mark


Mon, 11/16/2020 - 12:31
Thanks for sharing Mark, definitely worth the extra investment!

Great Plan! Loved how easy it was to build and how little the cost was.
Tue, 07/28/2020 - 09:52
Did you use decking screws or pocket holes for the visible portion of the couch?
Sun, 08/01/2021 - 18:40
Looks amazing! What method did you use (pocket holes, dowels, deck screws, etc) to join the visible portions like the arms?

DIY Greenhouse by Trenton Kirby on Facebook!

The cover is a tonneau cover for a pickup truck. It's for a 6.5' truck bed so if you notice, I had to ad a 2x4 and one more picket on top to accommodate the extra length.
The cover would add a ridiculous amount of money to the project but it was repurposed. I found it on a truck that was in an accident and going to the scrap yard. I think it it came out great and my grandson loves it.
John


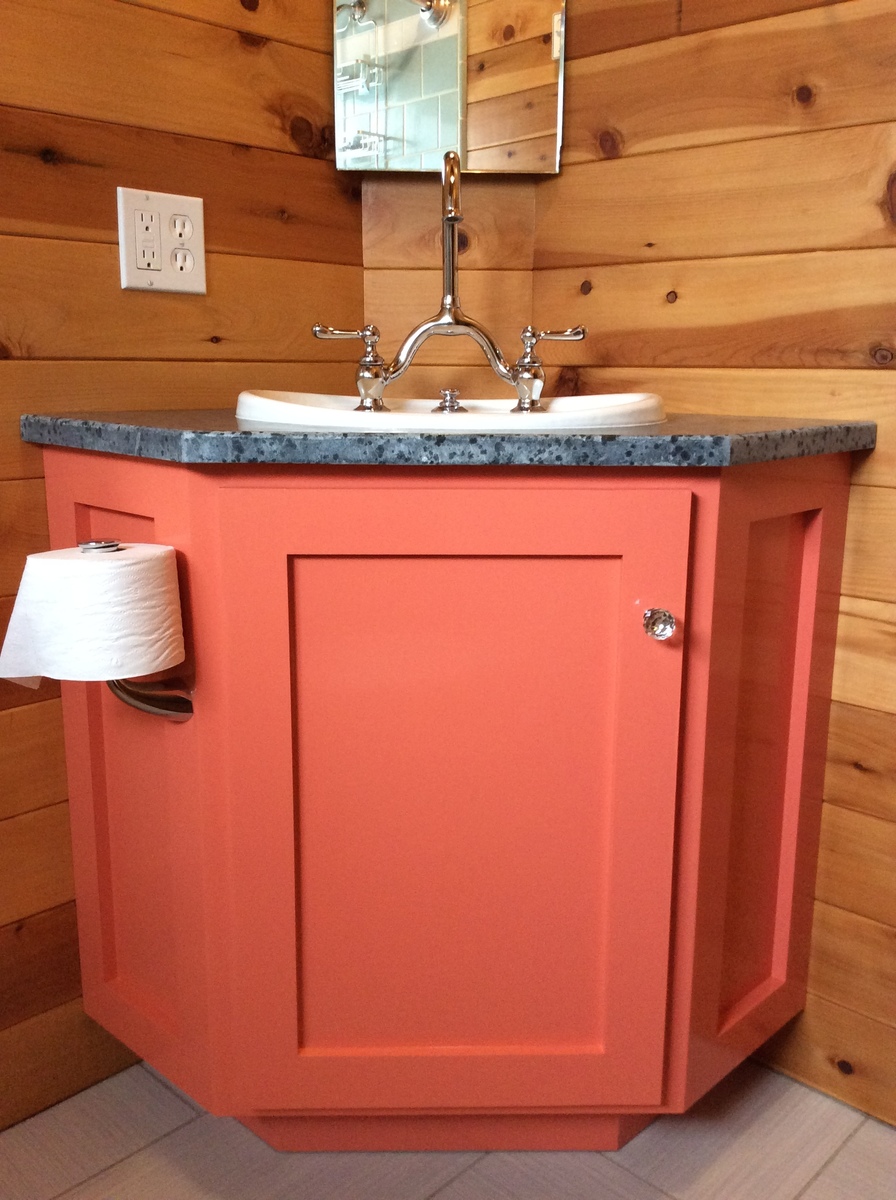
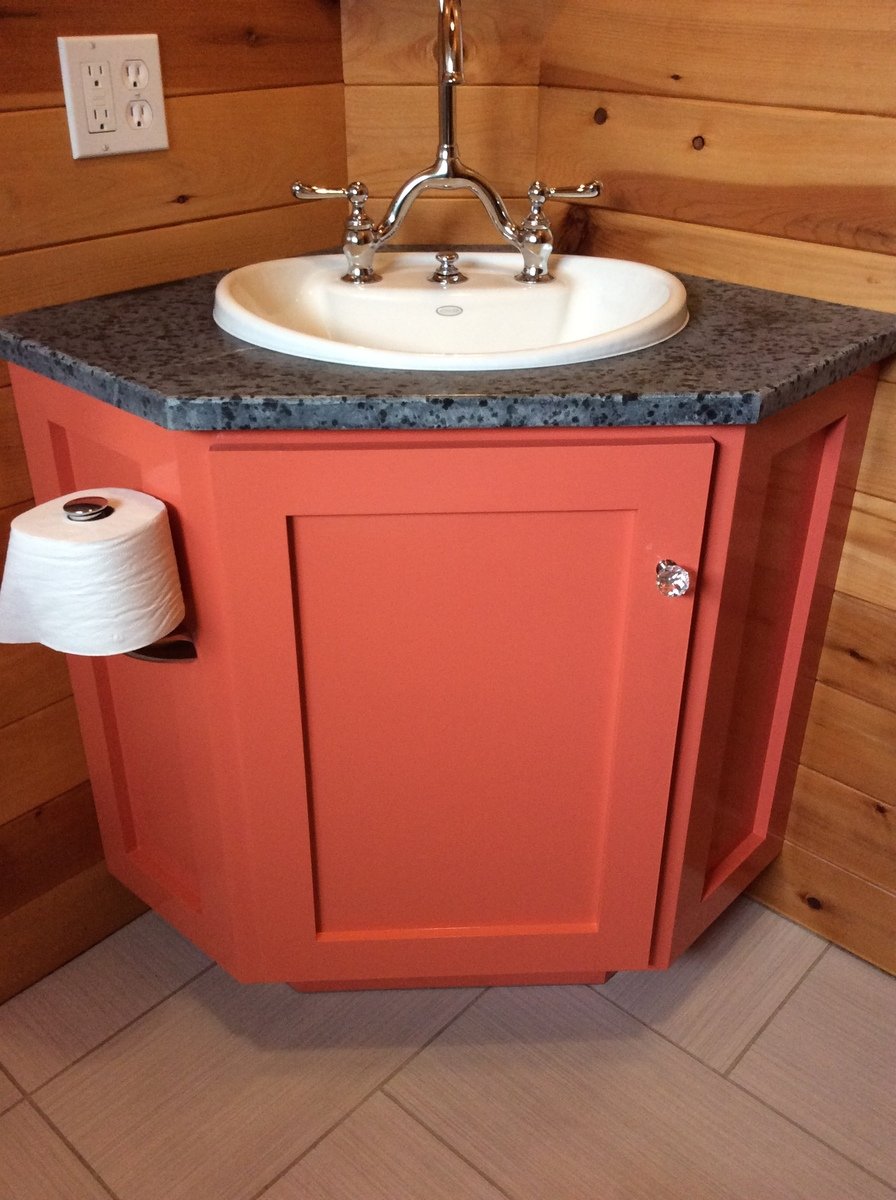
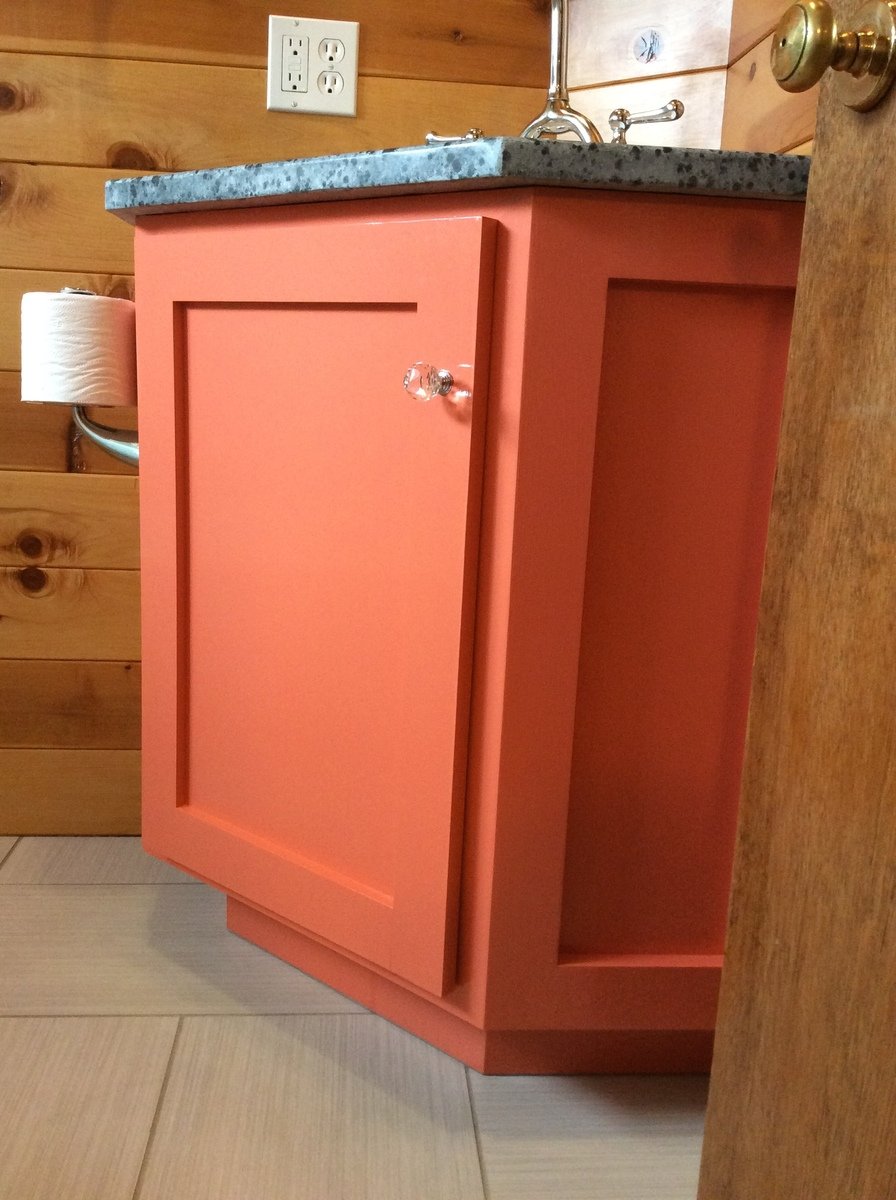
This project started because a corner bathroom vanity that fit my space requirements and budget did not exist. A plan specific to what I exactly needed also did not exist. After combing through what plans I found online, the Wall Kitchen Corner Cabinet best matched what I wanted. I modified it with the Momplex Sink Base Kitchen Cabinet in order to turn it into a sink base.
But, there was a problem. I hadn't actually built anything before. In order to get at least one project under my belt, I built the Vintage Step Stool. It turned out great, so I figured I was ready to go! Strangely enough, after spending about $100 and several weekends picking away at this project, it was done! It looked great, even. Then, I moved the vanity into the bathroom and realized that, while it may have looked great, it wasn't very square. Lesson learned was that this is a two person project. It is too difficult to keep things square and screw at the same time when there is only one person.
At this point, everyone was tired of having to use the kitchen sink to brush their teeth and wash their hands, so we needed to get this project done. $100 later, we had more material. Since I had figured out what needed to be done with the first vanity, let's call it our prototype, the second vanity went together REALLY quickly.
Within a few hours, it was pieced together. Since it was going to be painted, we used Bondo to cover up our imperfections. Yes, of course there were imperfections. While much better than the prototype, it still was only my third woodworking project. Sanding, caulking, and priming took another hour or so. A few coats of the finish paint went on, followed by a couple more coats of a clear sealer, and it was done.
We moved it into place, screwed it to the wall, put the soapstone countertop on along with the sink and faucet, and it truly was complete. Sink is Kohler, faucet came from our local Habitat for Humanity store and I'm not sure what brand it is, and the soapstone came from soapstones.com. If we had oiled the soapstone with mineral oil, it would be a very dark gray.

We needed a way to get all of the lawn & garden stuff out of our garage and organized. I found Ana's plans for the Small Cedar Shed & adjusted them to fit our space. We used 2x4s as our studs & added front walls on the sides. Our shed measures 9.5'x30". We had a concrete slab poured for our foundation. We are experienced DIYer's but had never taken on a project of this scale from scratch. This project was much easier than I was anticipating, and we were able to complete it in one weekend! Similar shed kits were way more expensive and not the size that we were looking for. Thank you so much for the inspiration!


I used pocket holes to hide the screws. I made an ottoman out of the outdoor coffee table plans to my dimensions that can be used as a coffee table when we need it.


One day project with hubby! Wanted a wood set, but couldn’t find a reasonable price. Bought tools, wood, supplies, and cushions for under the cost of one online!

Great for a small flock of 5 or less.


Easy, fun great project that my husband and I did together. This project cost about $202, and I will take that price over the price that you would have to pay in the furniture store any day. We found some great wood at Lowe's that worked perfectly and gave it the "rustic" look that we like. Thanks Ana for the plans and sharing them with us.
Wed, 05/16/2012 - 19:01
That's a fine quality piece of furniture!
Why can't I get dark walnut stain to look like that?
Wed, 05/16/2012 - 19:45
Debi_G, I've had lots of trouble getting stains to look the way I want too. What I've taken to doing is either mixing my own (see http://claydowling.com), as well as trying out various commercial stains until I find one that satisfies my desires. Good use for your scrap.
So far the best commercial stains I've found are from General Finishes. They're designed to sit partially on top of the wood, which prevents some of the splotchy and washed out look that make some stains unpleasant to work with.

I made these modern Adirondack chairs for our business in Anchorage. GREAT and easy to build design by Ana - we upgraded the arms to tapered 2x6 and they're awesome!


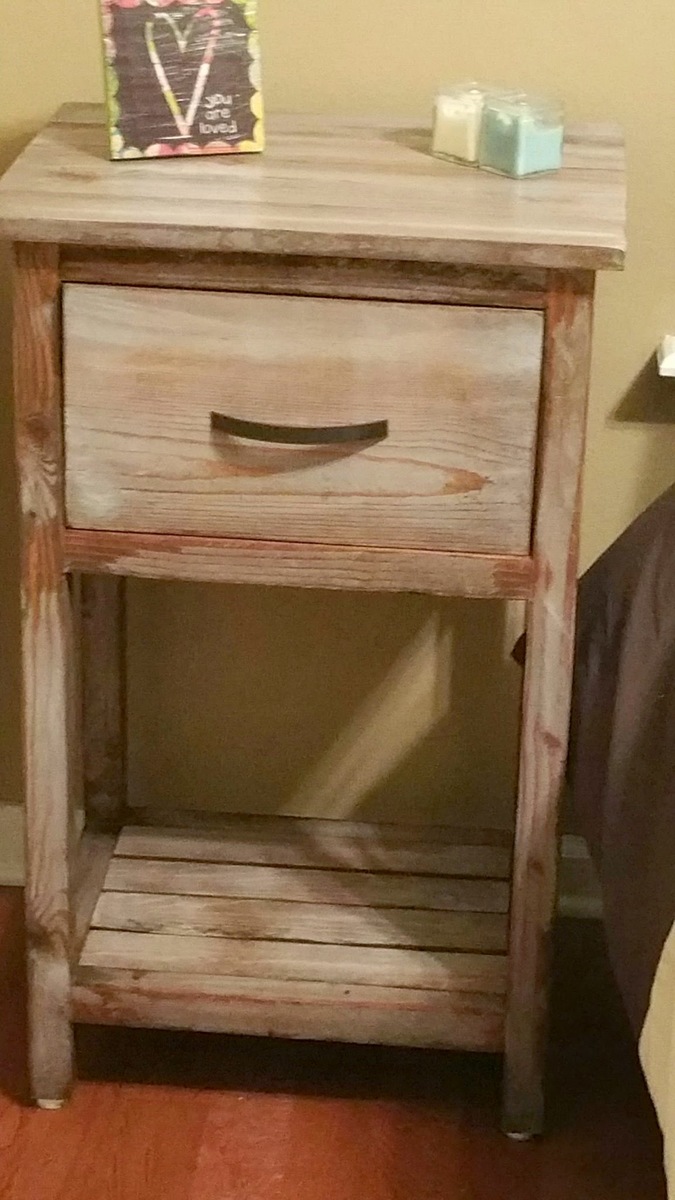
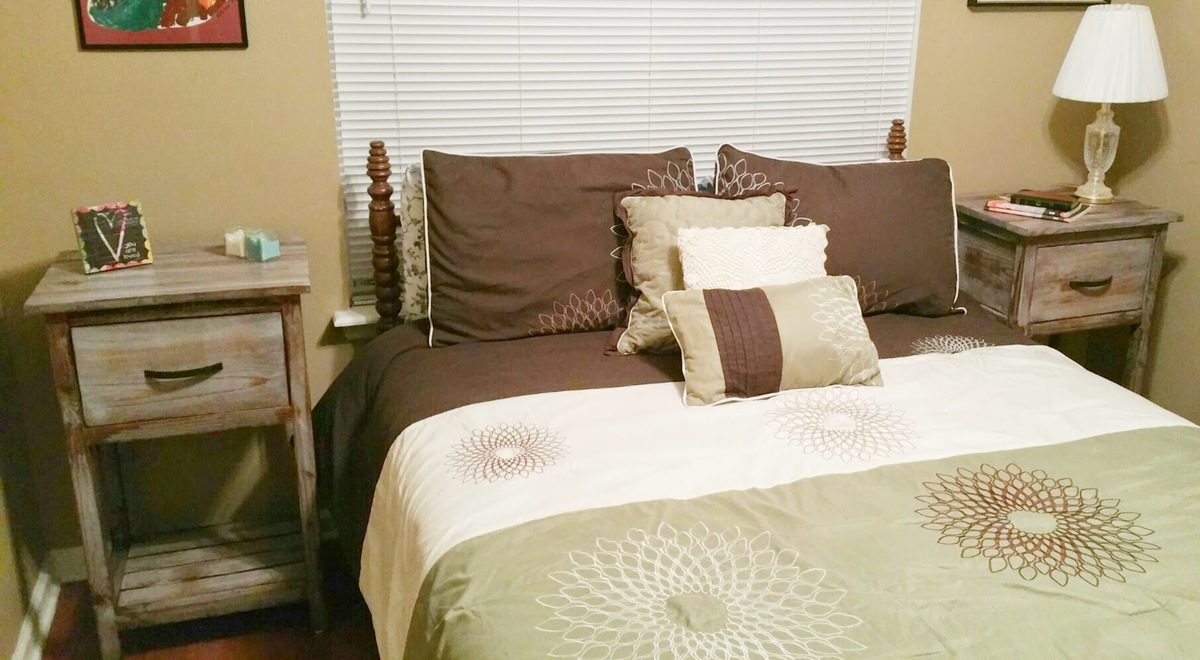
Night Stands custom sized and finished per customer building new home based Ana White's Farm House collection #anawhite
Intentional distressing per customer request with guidance from Ana White plans. Finish contains a mix of paint, removing of paint, staining and restraining. Now to move to a purposeful Mud Room Locker for a new home suited for family.
http://ana-white.com/users/pondrider/
#anawhite #Stain #CustomFurniture #Paint



A frame chicken coop with a few modifications- metal roof, insulation and slightly larger second floor.
By Chrystal

We made the grilling station to keep at our seasonal campsite and it's absolutely fantastic! We have since added some L brackets and 2 shelves, and this is where we store our extra cases of water, soft drinks, outdoor cooking utensils plus an air fryer! Super easy plans, with well written instructions for even the novice (me and hubs) diy builders!
Ali W.
Comments
briannamcelfresh
Tue, 09/08/2020 - 19:42
Love this table!
Is there anyway you can share these plans with me!? I drew out some plans for an identical table but I think my cuts may be off! It would be so helpful.
Erica Hetrick
Fri, 11/06/2020 - 12:47
Is there a full update post…
Is there a full update post with instructions for the table shown?
smbanks75
Tue, 12/20/2022 - 22:03
LOVE this! Just what I'm…
LOVE this! Just what I'm looking for! Can you tell me what you used for the top?