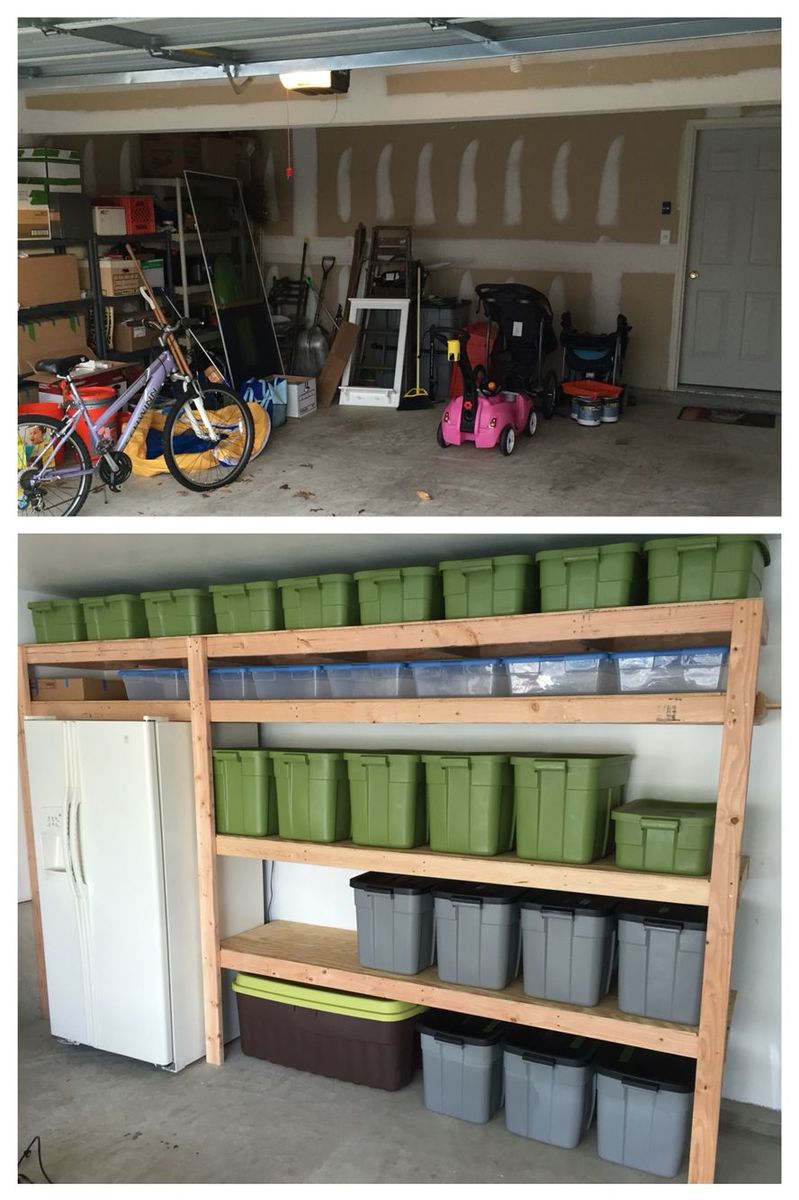
Easy DIY Garage Shelves

Easy to build, easy to customize, perfect for totes
Built from Plan(s)
Recommended Skill Level
Beginner
Easy to build, easy to customize, perfect for totes

I used pocket holes to hide the screws. I made an ottoman out of the outdoor coffee table plans to my dimensions that can be used as a coffee table when we need it.


Created this door with pine wood tongue and groove lumber and pine wood planks. Purchase barn door hardware / track from Jet.com and door handles from Hobby Lobby.
This replaced my Master bath door and I think came out pretty good. Thank you for the ideas!!! Jeff M. Brownstown, Mi


I made these two Ana White outdoor end tables for my patio. Next up will be the matching coffee table

Sun, 01/29/2023 - 16:04
Thanks for sharing, they will be a nice outdoor additon!

For more information and photos see House of Rumors in Instagram www.instagram.com/houseofrumours


I made these modern Adirondack chairs for our business in Anchorage. GREAT and easy to build design by Ana - we upgraded the arms to tapered 2x6 and they're awesome!


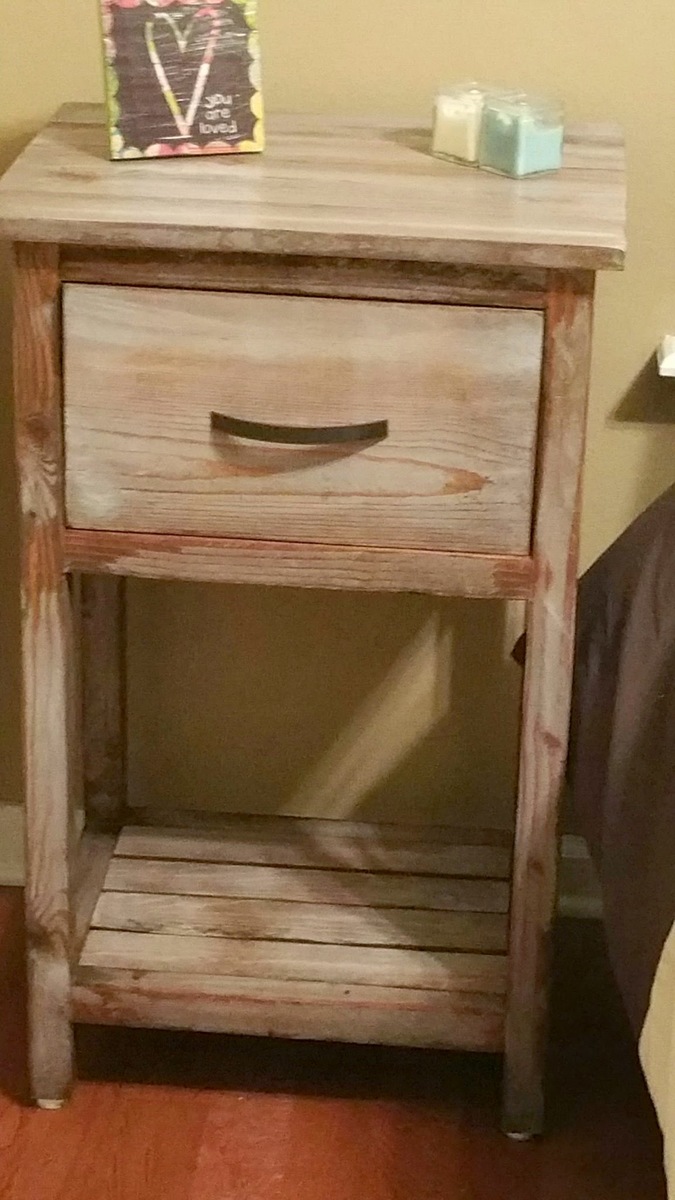
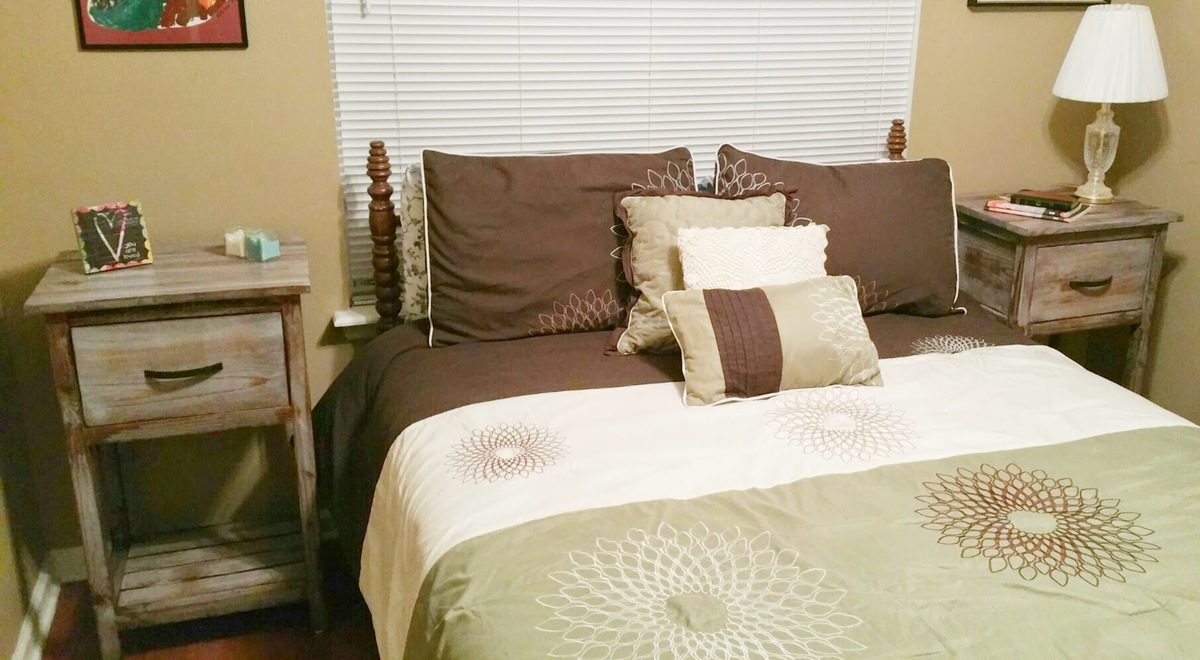
Night Stands custom sized and finished per customer building new home based Ana White's Farm House collection #anawhite
Intentional distressing per customer request with guidance from Ana White plans. Finish contains a mix of paint, removing of paint, staining and restraining. Now to move to a purposeful Mud Room Locker for a new home suited for family.
http://ana-white.com/users/pondrider/
#anawhite #Stain #CustomFurniture #Paint


A frame chicken coop with a few modifications- metal roof, insulation and slightly larger second floor.
By Chrystal

I followed the Rustic X Tall Bookshelf plan to make a set of bookshelves for my husband for Christmas! It was my second ever woodworking project. The plan was really easy to follow and so fun to make! I ended up using an additional shelf piece on the very top for a more modern spin on it. I also bought a pocket hole jig to use on this project. I'm happy with how it turned out!
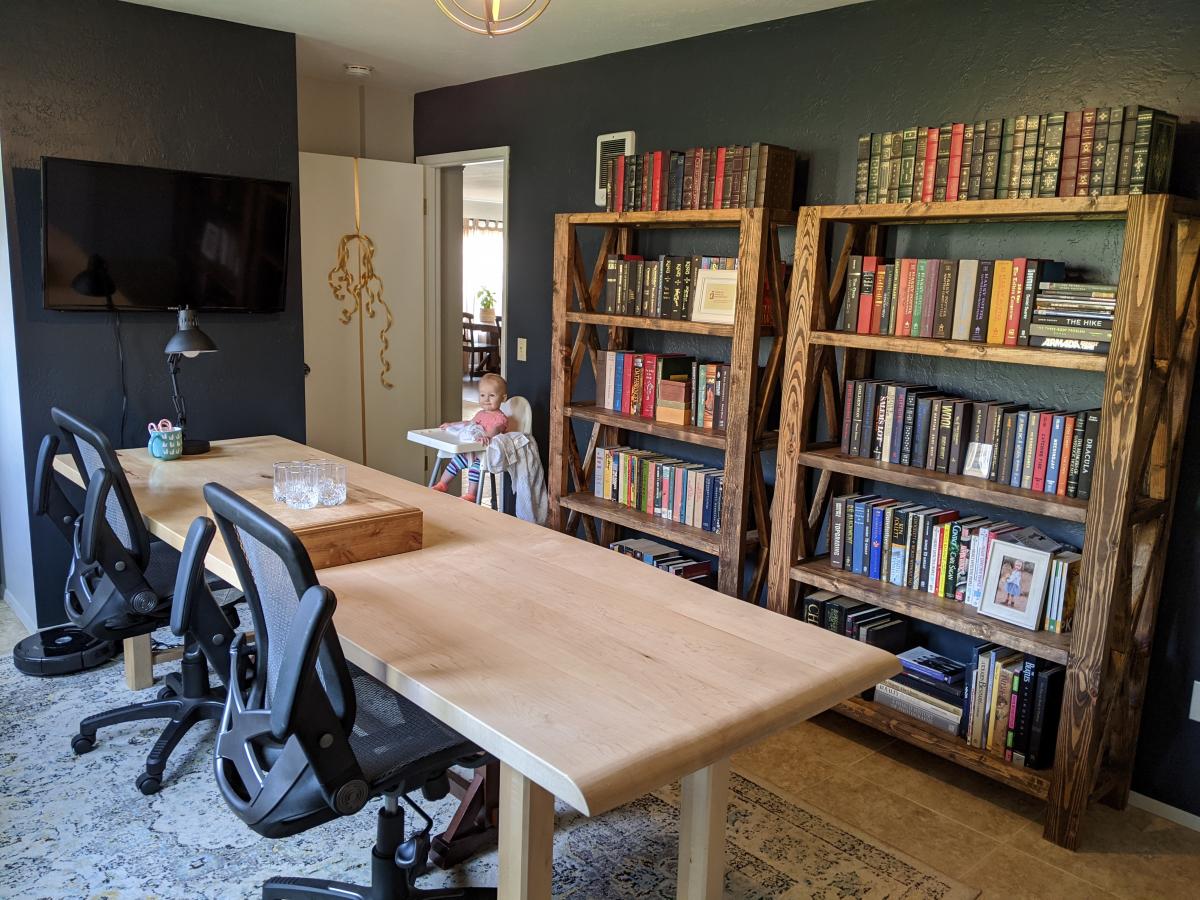


This is a mashup of several plans, combined into one big, bad ass, office desk. I've had a little experience years ago in high school woodworking classes, but haven't really built much since. This reminded me how much I enjoy working with wood. So rewarding to be typing this message at my new office desk!

Wed, 08/19/2020 - 06:25
This is amazing! So amazing could I ask you to share with me what prices from the collection of plans you used and how? I’m looking at your pic trying to figure out how to incorporate the plans you used. I want to build one for myself lol fantastic job!!!!

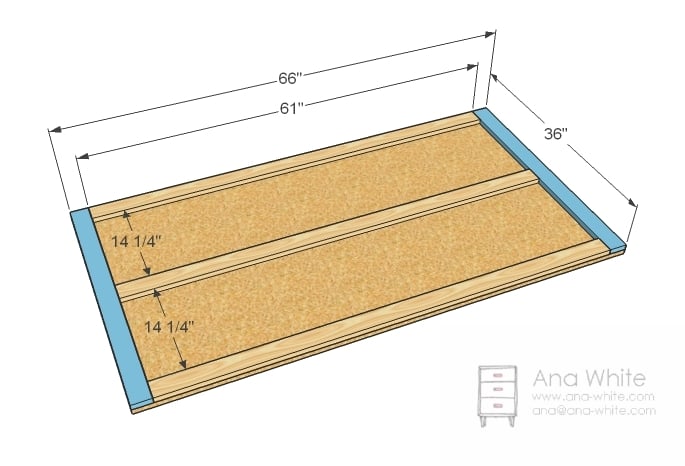
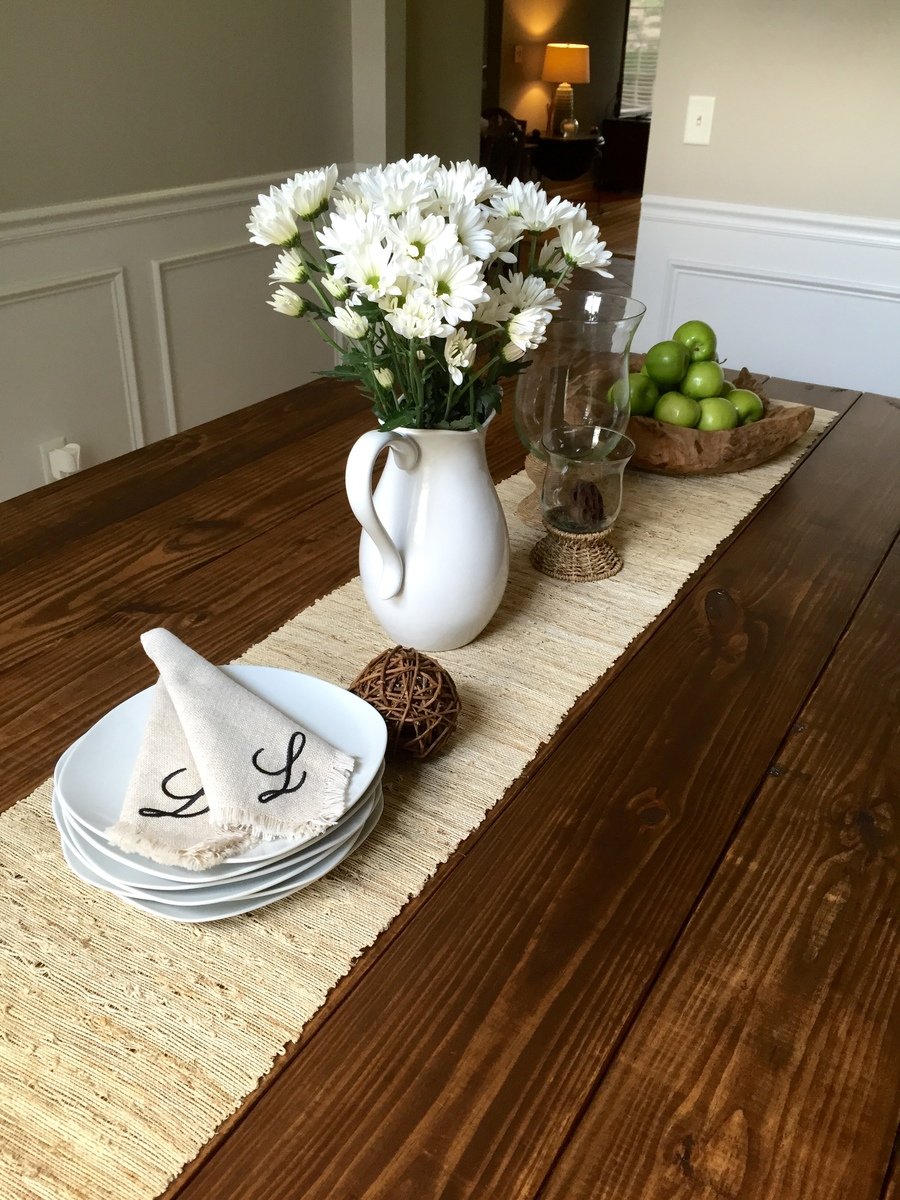
My husband and I love entertaining, but our small kitchen table was just not cutting it for both our space and our hosting abilities. We decided that instead of searching for the perfect table and spending a ton of money, we would just build our own table. We found that Ana's Rustic Table plans best matched what we were looking for, but my husband being the detailed person that he is didn’t just want to take her measurements and run with them. So we taped off the floor around our old table to decide how large we wanted our own table to be.
 We basically followed Ana White’s plans to a T.
  Until it got to the legs. Ana White used 2×4′s for her legs, but we decided we liked the look of chunkier 4×4 legs instead.
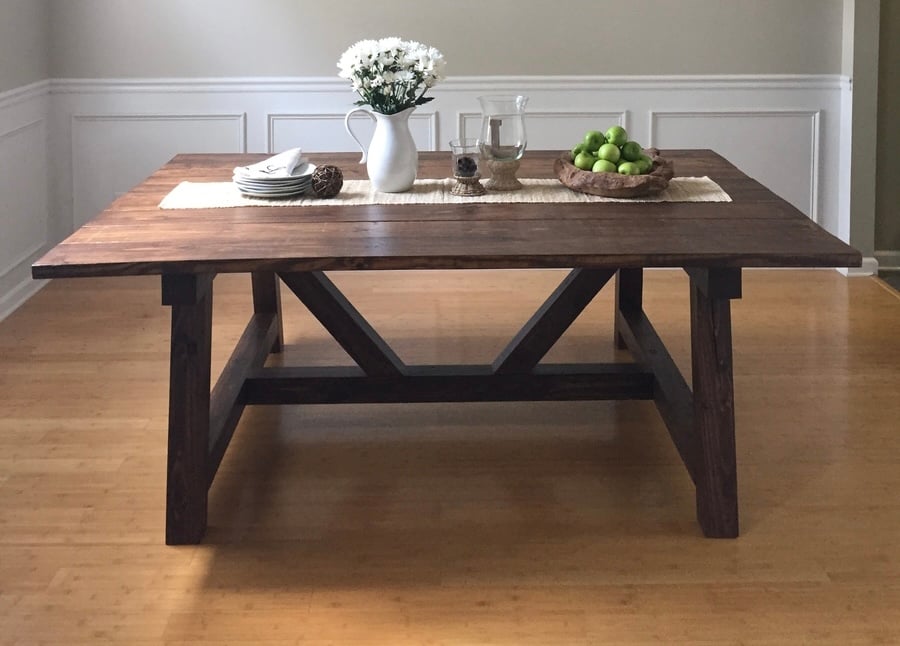
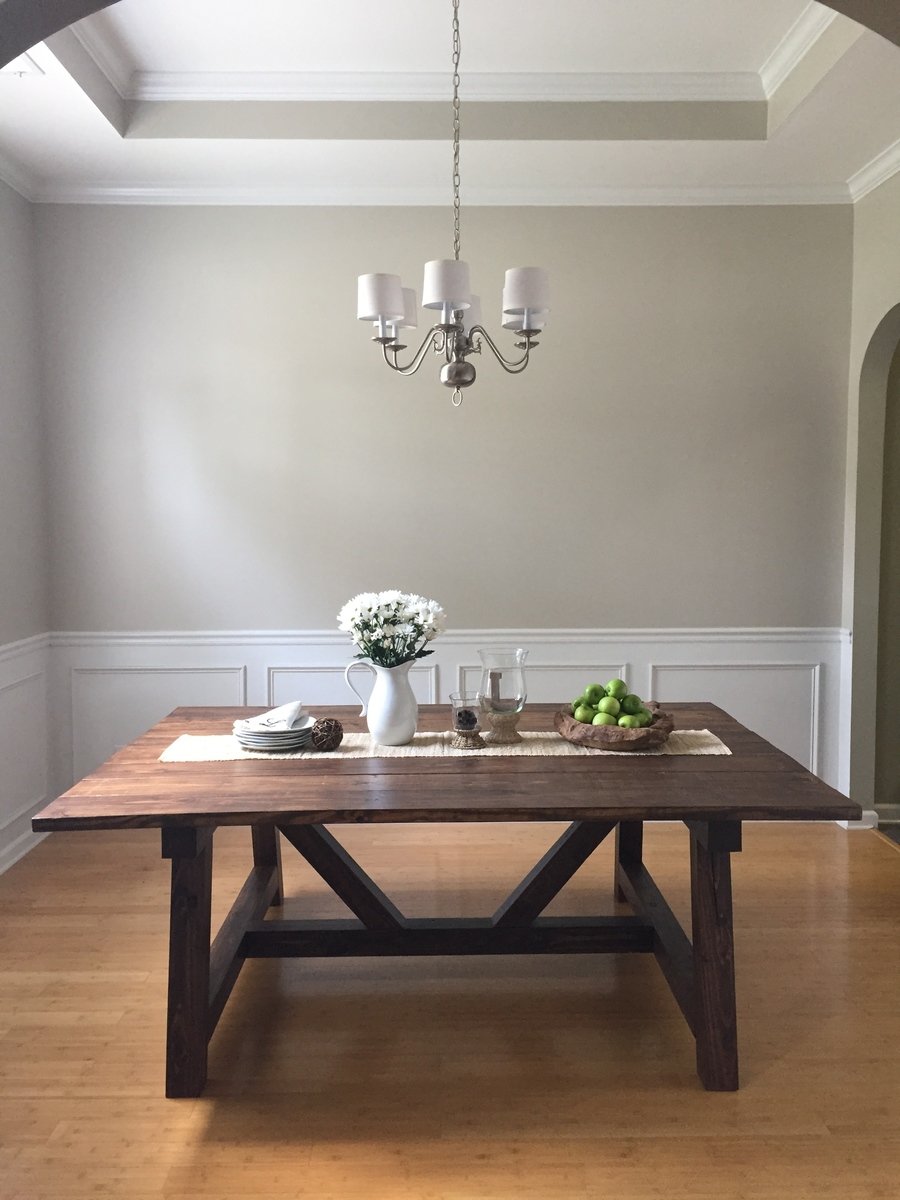
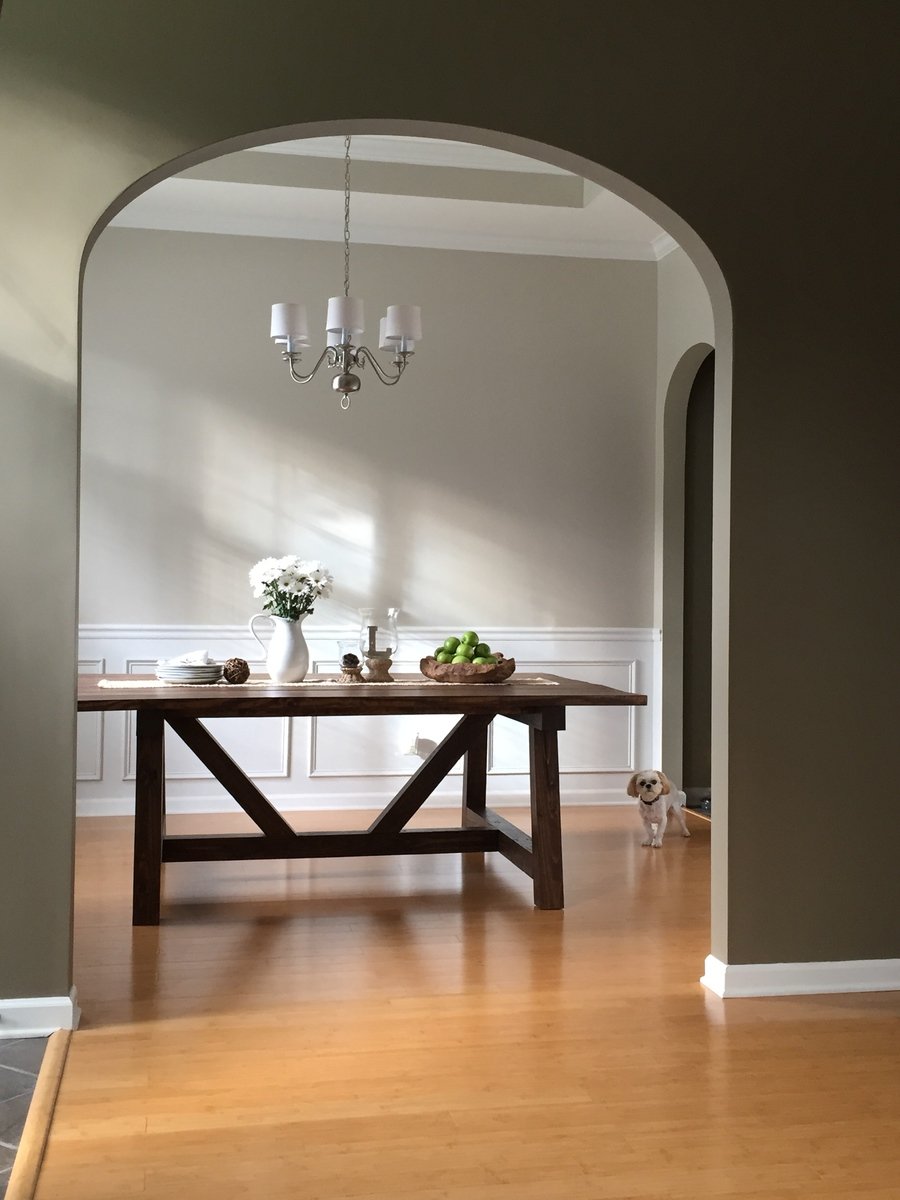
  We also did things in a different order, like attaching the legs to the apron before attaching the table top. This did make everything way easier when it came to painting, no tape needed.
  We also stained the bottoms and sides of the tabletop boards before attaching them to the apron. After the top was attached I stained the top side and applied about 3-4 coats of Matte polyurethane. I like the matte finish because it doesn’t add any sheen and makes things look even more rustic; however, we’ll have to add a regular coat of poly as well because the matte is too soft for something that will see such rough use over the years.
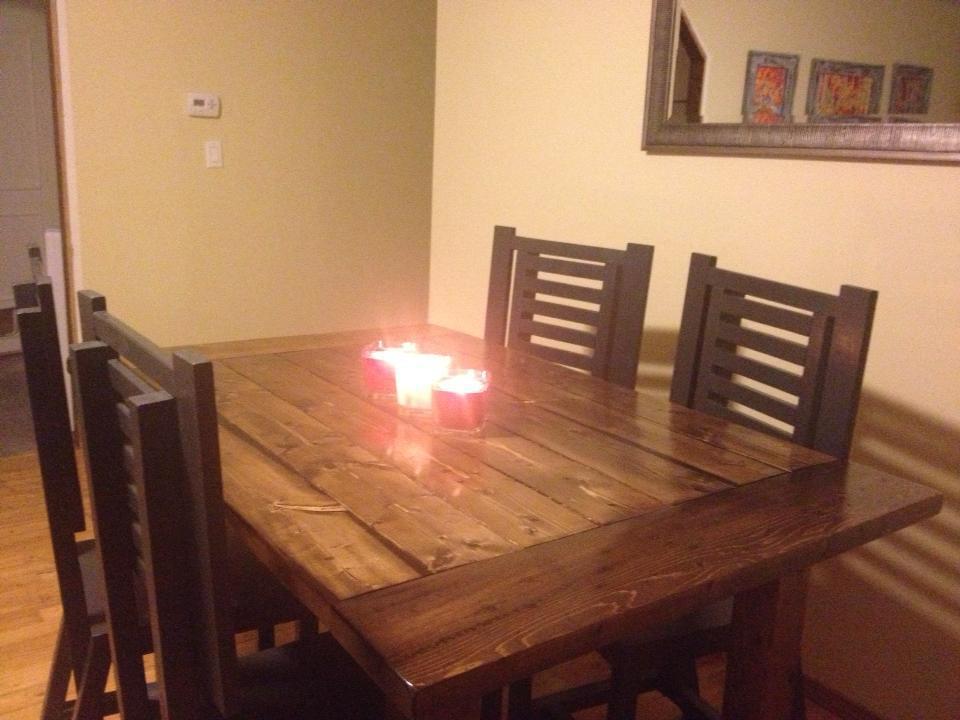
  And now for what you’re all wondering about, how much did this project cost us?


Mon, 12/31/2012 - 09:43
Your table is gorgeous! You did an amazing job.
I am getting ready to attempt my first two projects, bookshelves and a buffet table. I had a couple of questions about how you got such a consistent stain.
1) The Stain - What kind of stain did you use? How many coats did it take? Did you use a conditioner first?
2) Wood filler - How did you get the wood filler to match the stained areas so well? What kind did you use?
Thanks for the advice! I was thinking I would have to paint the buffet but after seeing your table I think I may actually attempt the stain.

I always wanted a cabin-type cat tree where my cats could crawl in and feel safe, but still have a great view of the birds out of a window. I tried to draw my vision on paper, but that had a hideous result. Learning Google SketchUp (at least the basics) was an absolute necessity. I could never have built this without drawing it in 3D first, and seeing how the boards would connect, etc.
For the scratch pad, I built a frame out of 2x4s on top of plywood, covered it with carpet, and dropped the standard size scratch pad in place. This is the cat's favorite feature. I put barn doors on the window with tiny hinges so that I can close for added privacy. The tree sits against a window so that the back side is totally open. I made cozy zippered cushions for the platforms (that can be taken off and washed). I covered the carpeted areas with spare carpeting.


Fri, 07/12/2013 - 09:36
Would you mind sharing your dimensions for this? It is absolutely beautiful!
Sun, 08/25/2013 - 08:10
Do you have the plans somewhere? I really want to build this (even got the okay from the hubby!) but I don't think I could do it without some serious guidelines...

Fri, 08/30/2013 - 15:55
First, sorry for the late notice; I just happened to look and saw the comments/questions.
I don't have plans...all I have is a google sketchup diagram that I created as a guideline for my construction (which is included in the photos), which is not to scale. Actual measurements are:
* Base (green carpeted base): 33.5" x 19"
* 4x4 legs: 35" tall
* 'Mezzanine' scratch pad level: 22" x 17.5"
* Mid-level base: 18" x 32"
* Enclosed cabin: 18.25" x 22.5" x 17" high
* Highest point: 56"
This has turned out to be a fantastic hit with the cats. They use all 5 levels, but the scratch pad and cabin are their favorite spots. If you need anything else or additional pics, please contact me.
Fri, 08/30/2013 - 18:15
Thanks for the dimensions, Joni! I'm trying to learn SketchUp so I can draw up my own plans, also. If I can't figure it out, I'll hand it off to my 12 year old, who is a pro at it (go figure). I know my cats will love it if I can manage to get it built!
Fri, 09/27/2013 - 10:15
I used your pictures and diagram Joni and made one for my friend for her cats! I used 2x4's for the cabin which makes this thing so heavy but so sturdy! It holds my 60 lb child without budging... here's a pic of it almost done. My friend was not finished wrapping the posts with sisel rope though.
https://www.facebook.com/stephanie.brooks1975#!/photo.php?fbid=10151788…
Thu, 10/31/2013 - 14:30
Bhoppy -- I looked at your cat tree on facebook. It's awesome! The sturdiness of it shocked me too. And I was initially worried that my cats might knock it down!!
The worst part of building it was getting that lower scratch pad level on straight with the 3 posts. I'd never want to do that again!
Thanks for sharing, Joni
Fri, 01/02/2015 - 01:18
Funny, almost every time I'm looking for ideas or inspiration when I want to build something, I end up back on this site. I was searching for pictures of cat trees and this was the only one that made me say "Holy crap, that's EXACTLY what I want!" My cat will love it!
Mon, 04/27/2020 - 20:41
Not sure if anyone is still around to see this, but I fell in love with this tree the second I saw it. Wondering if anyone created a detailed plan and might have it handy or possibly a detailed sketchup and wouldn't mind sharing the save file?
In the event nobody has either... I'm planning on having someone else build this for me as I don't have the tools nor skill to do it myself. I have a few questions:
1. The tree base/platform, what's a good recommended thickness?
2. The platform for the scratchpad... is there any certain reason it's so much thicker compared to the other platforms?
Thanks.
Sun, 09/12/2021 - 11:51
Reverse engineering this project, using just 2x4s. None of the photos show the undersides. How are the plywood pillow bases attached for the top and bottom of the cabin? and the base of the top viewing platform?
Sun, 09/12/2021 - 16:42
There are no Minwax water based stain colors with those names that I can find.
My husband and I moved in to our new house last fall and we needed a dining table that would seat at least 8. We picked this plan from Ana's site because I love the look of the 4x4 beams. I used Adobe Illustrator and my math skills to modify the size and scale to fit our dining room with exact spacing all the way around. We had difficulty finding untreated 4x4 beams but were able to special order some for a reasonable price from a local lumber company. It is more expensive than combing 2x4s but I did not like the pieced together look of the 2x4s. We stained with Rustoleum Dark Walnut and Matte Poly just like the blog post from Ana's site. We also used the Kreg Jig HD which is SO AWESOME! We love the table. Now we just need to decide: chairs vs. benches. I hate to block the beautiful truss design of the base. Its so gorgeous!
Mon, 08/31/2015 - 14:18
I love this table. The finish came out great by the looks. My wife and I are moving into a house soon and I think this is going to be the design for our table as well.
Mon, 09/07/2015 - 06:21
What a beautiful table! Is this table square? We are also looking to build a table to sit 8 and love the look of yours. Could you share your cut list or dimensions?
Mon, 08/29/2016 - 06:08
Thank you for all the kind comments! I did not know that I had gotten any and had not checked back over the past year. The jump drive with my dimensions on it got damaged last year shortly after the build and I lost all of my home decor files including the AI with my cut list and dimensions. I know it had been a while since several of your comments but I will see if my husband can help me measure the table and figure out what the dimensions are and post them on here for you. Happy Woodworking!
Tue, 11/15/2016 - 18:01
This table really looks great! I'm about to start making one and would love to know the dimensions you used. I also noticed that you didnt use the bread boards on either end. How many people does this table fit?
Thanks!
Mon, 02/27/2017 - 08:51
No, we did not use bread boards. It seats 8 with plenty of room.
This was my first table - I added extensions by notching out the end 2x4's and making extensions that slide into the pockets. There were a few mistakes I made that will be corrected when I build my next.
I modified the length of the table down to 5 feet long, but with the extensions in it goes up to 8'. The table is also 34" tall due to a giant husband and Great Dane. The chairs were likewise modified in height and I made the backs a bit fancier using 1x2's and a nail gun.

This was my first attempt at making furniture...but it turned out GREAT! My fiance was about to buy a VERY similar dining room set for $1300 before I stopped her and insisted that I could build it myself, finish it to match our kitchen/dining room, and save a TON of money!


We had some leftover granite from an outdoor kitchen build and wanted to maximize the use of it. We loved the look of a rustic table from Pottery Barn and set out to find something that was asking the same aesthetic. I came across the Jilly and Mia workbench console and thought it would work great with some minor modifications. I shortened the overall length and height, went with some heavy duty casters to support the weight of the granite, and reinforced the cross beams that would support the 3/4" plywood sheet and granite. I went with cedar for this build since it was outdoors and I'll finish it with a clear sealant.


I used 8 ft precut boards for shelves and modified the design so there was enough room for two racks on each side. In addition I screwed 1x4 to the studs to secure the shelving to the wall. I have a 5 year old climber so it was best to be proactive and secure it. It was easy project took about 4 hours to complete. I plan to paint the vertical boards a medium gray and stain the shelves a dark coffee color.

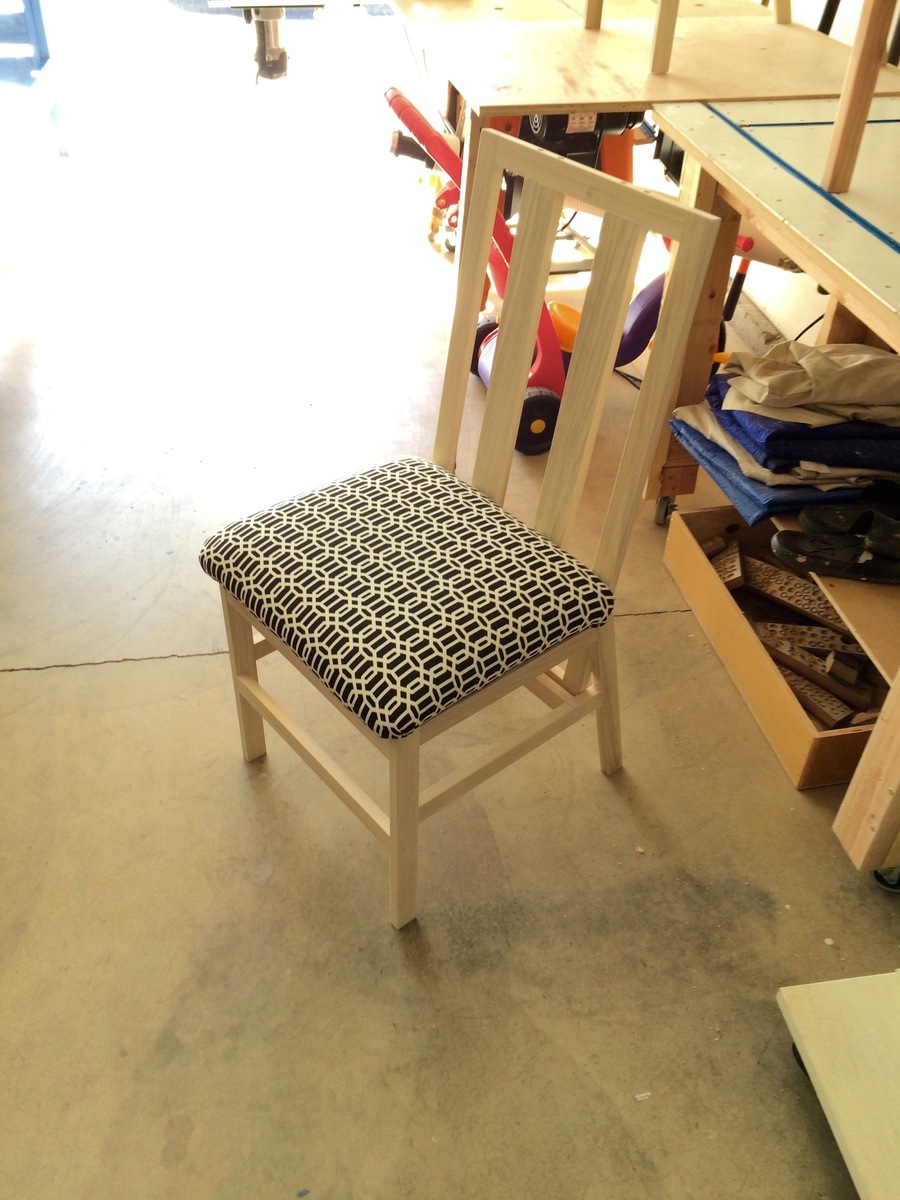
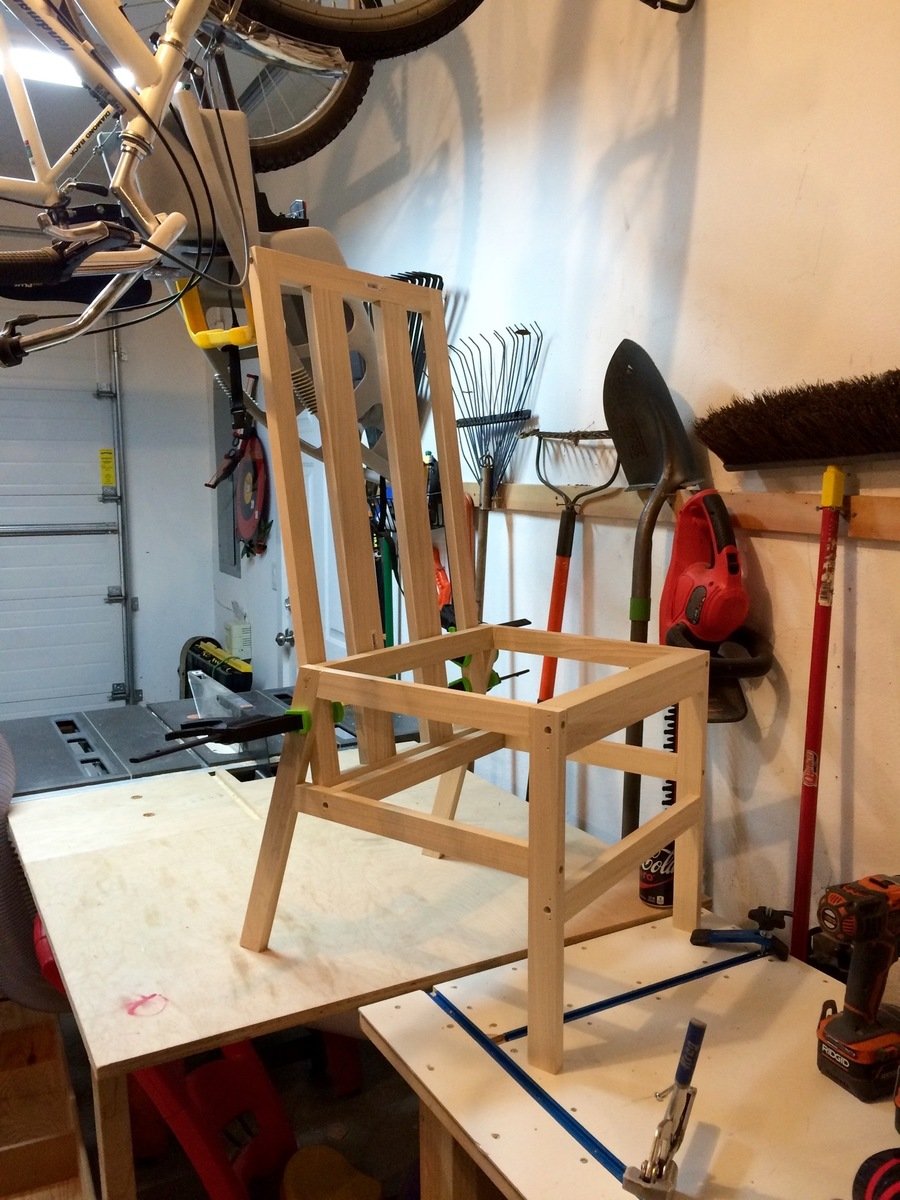
I'm pretty happy with the way these chairs turned out. It was a fun project as I did a few first, which included going to the fabric store (long waits) and got to tackle some upolstery for the first time! I did end up with a few glue drops that did not take the stain, so I'll be researching tips and tricks to prevant that in the future!
Also, I made these out of Popular, which pre stain was a must for cherry stain. Next time, I would use Cherry!
Thanks to Joanne S for the original post and consults regarding the upolserty!!

Fri, 05/01/2015 - 13:29
These are spectacular! Beautiful build! Love the finish and the upholstery. Also I'm super impressed that you can't see any of the filled screw holes. Would love to know the technique you used to hide them so well - I'm going to copy that! :)
JoanneS
Fri, 05/08/2015 - 12:48
Thank you both for the nice comments. I was please with the way these turned out too, despite some glue spots not taking up the stain. I plan on getting more disciplined in this area. For hiding the screws, I finally upgraded to a real countersink like this one: http://www.rockler.com/8-pro-tapered-countersink-bit at Rockler.
Instead of always forcing a dull one in and getting a crooked openings, this razor sharp one cuts beautiful holes with no effort! But watch out, I cut myself just adjusting the depth of the drill bit. I discovered these the last time I made some wine oak barrel chairs!
Fri, 05/08/2015 - 12:53
Since I use Kreg screws for almost everything, (even non-pocket hole stuff)because they are self tapping and won't crack the would I sure my countersink matched the head of the Kreg screws and than purchased a plug hole bit. Can be used on a drill, but better on a drill press. You have to keep the drill perfectly straight or the plug can break and get stuck in the bit!

We wanted an outdoor bench for our front entrance way, this one is just what we were looking for! Thank you for the plans.


Wed, 05/04/2016 - 10:01
I am really a novice. The plans say that the 1x4's should be 18-1/2" high? But the measurement of the vertical legs are 14", and the horizontal piece is 4" high, which adds to 18". It all looks flush in the photo. Could you explain what I am missing? Thank you so much!
Wed, 05/04/2016 - 10:01
I am really a novice. The plans say that the 1x4's should be 18-1/2" high? But the measurement of the vertical legs are 14", and the horizontal piece is 4" high, which adds to 18". It all looks flush in the photo. Could you explain what I am missing? Thank you so much!

In reply to quesion by beardjulie
Wed, 05/04/2016 - 11:30
So from what i see in the plans Each 1x4 board is to be cut at 18" and the 2x4 is to be cut at 14-1/2". Cutting the 2x4 at 14-1/2" will insure the 1x4 and 2x4 are fluish for the end product. It doesnt seem to add up given the demensional names of the lumber hahaha however the actual width of a 2x4 (the one the will be going horizontal) is acutally 3-1/2". so then you cut you 2x4 leg piece at 14-1/2" and then lay the horizontal 2x4 on top the total height will be 18" and should be flush with your 1x4 that is cut at 18"