Laundry Tower

Reader submitted photo
Built from Plan(s)
Reader submitted photo

This was my first attempt at making furniture...but it turned out GREAT! My fiance was about to buy a VERY similar dining room set for $1300 before I stopped her and insisted that I could build it myself, finish it to match our kitchen/dining room, and save a TON of money!


I saw this table and nesting grill station on your FB page. I changes it up a little bit, but the concept is perfect for my back yard deck.
Dharris


My husband and I made the table and chairs for our screened porch. We really like how the project turned out. Many more Ana White projects on the our list!

We wanted an outdoor bench for our front entrance way, this one is just what we were looking for! Thank you for the plans.


Wed, 05/04/2016 - 10:01
I am really a novice. The plans say that the 1x4's should be 18-1/2" high? But the measurement of the vertical legs are 14", and the horizontal piece is 4" high, which adds to 18". It all looks flush in the photo. Could you explain what I am missing? Thank you so much!
Wed, 05/04/2016 - 10:01
I am really a novice. The plans say that the 1x4's should be 18-1/2" high? But the measurement of the vertical legs are 14", and the horizontal piece is 4" high, which adds to 18". It all looks flush in the photo. Could you explain what I am missing? Thank you so much!

In reply to quesion by beardjulie
Wed, 05/04/2016 - 11:30
So from what i see in the plans Each 1x4 board is to be cut at 18" and the 2x4 is to be cut at 14-1/2". Cutting the 2x4 at 14-1/2" will insure the 1x4 and 2x4 are fluish for the end product. It doesnt seem to add up given the demensional names of the lumber hahaha however the actual width of a 2x4 (the one the will be going horizontal) is acutally 3-1/2". so then you cut you 2x4 leg piece at 14-1/2" and then lay the horizontal 2x4 on top the total height will be 18" and should be flush with your 1x4 that is cut at 18"

Our tiny cottage pantry is complete! We followed Ana-White's 2x4 Storage Shelving modified to fit.
Materials:
Paint: Behr Whisper White
Vinyl tile: Armstrong Terracotta Clay
Ceiling: Beadboard
Plans: Ana-White 2x4 Storage Shelving (modified)


My cousin recently got married and wanted a beer wall at her wedding. I quickly searched Ana's site for the perfect plan and chose the Tall Panel Headboard for my starting point. With a few modifications it became a beer wall in no time at all. I love how Ana's plans can be easily modified to make a totally different project.
No fancy wood was used here. Just regular wood from the big box store. A jockey box was attached to the back side of the wall. It worked awesome!
Since I discovered this site in January, I've made close to 30 items from her plans. I'm ridiculously addicted and not just with Ana's site but also with her blog friends. For Valentine's Day I asked for a Air Strike gun and got it. It was better than jewelry and chocolates! I'm well on my way to collecting my own tools and learning how to save money by making it myself. Oh, and I can't even begin to tell you how impressed everyone is with my finished products.

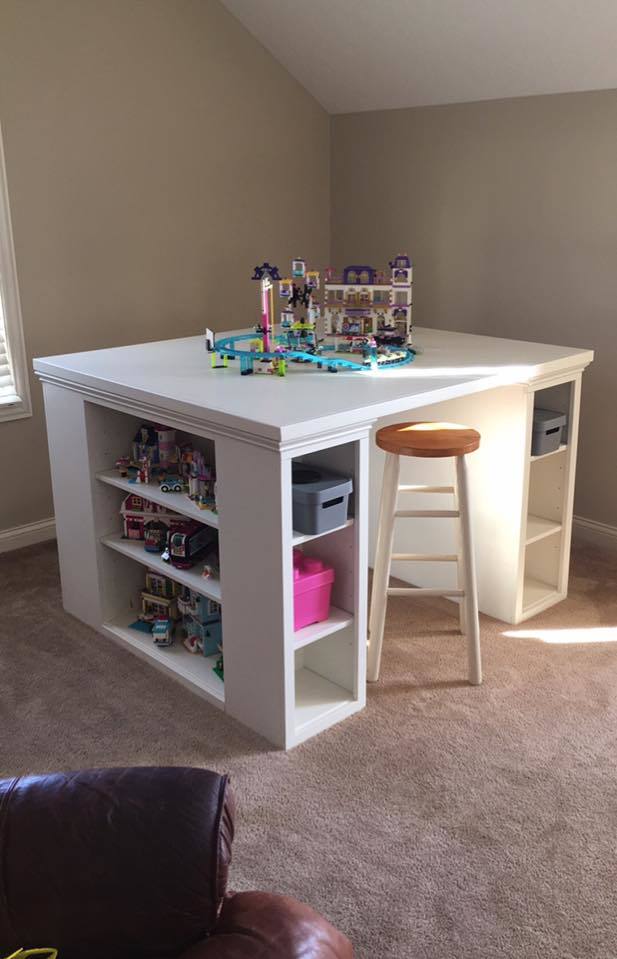
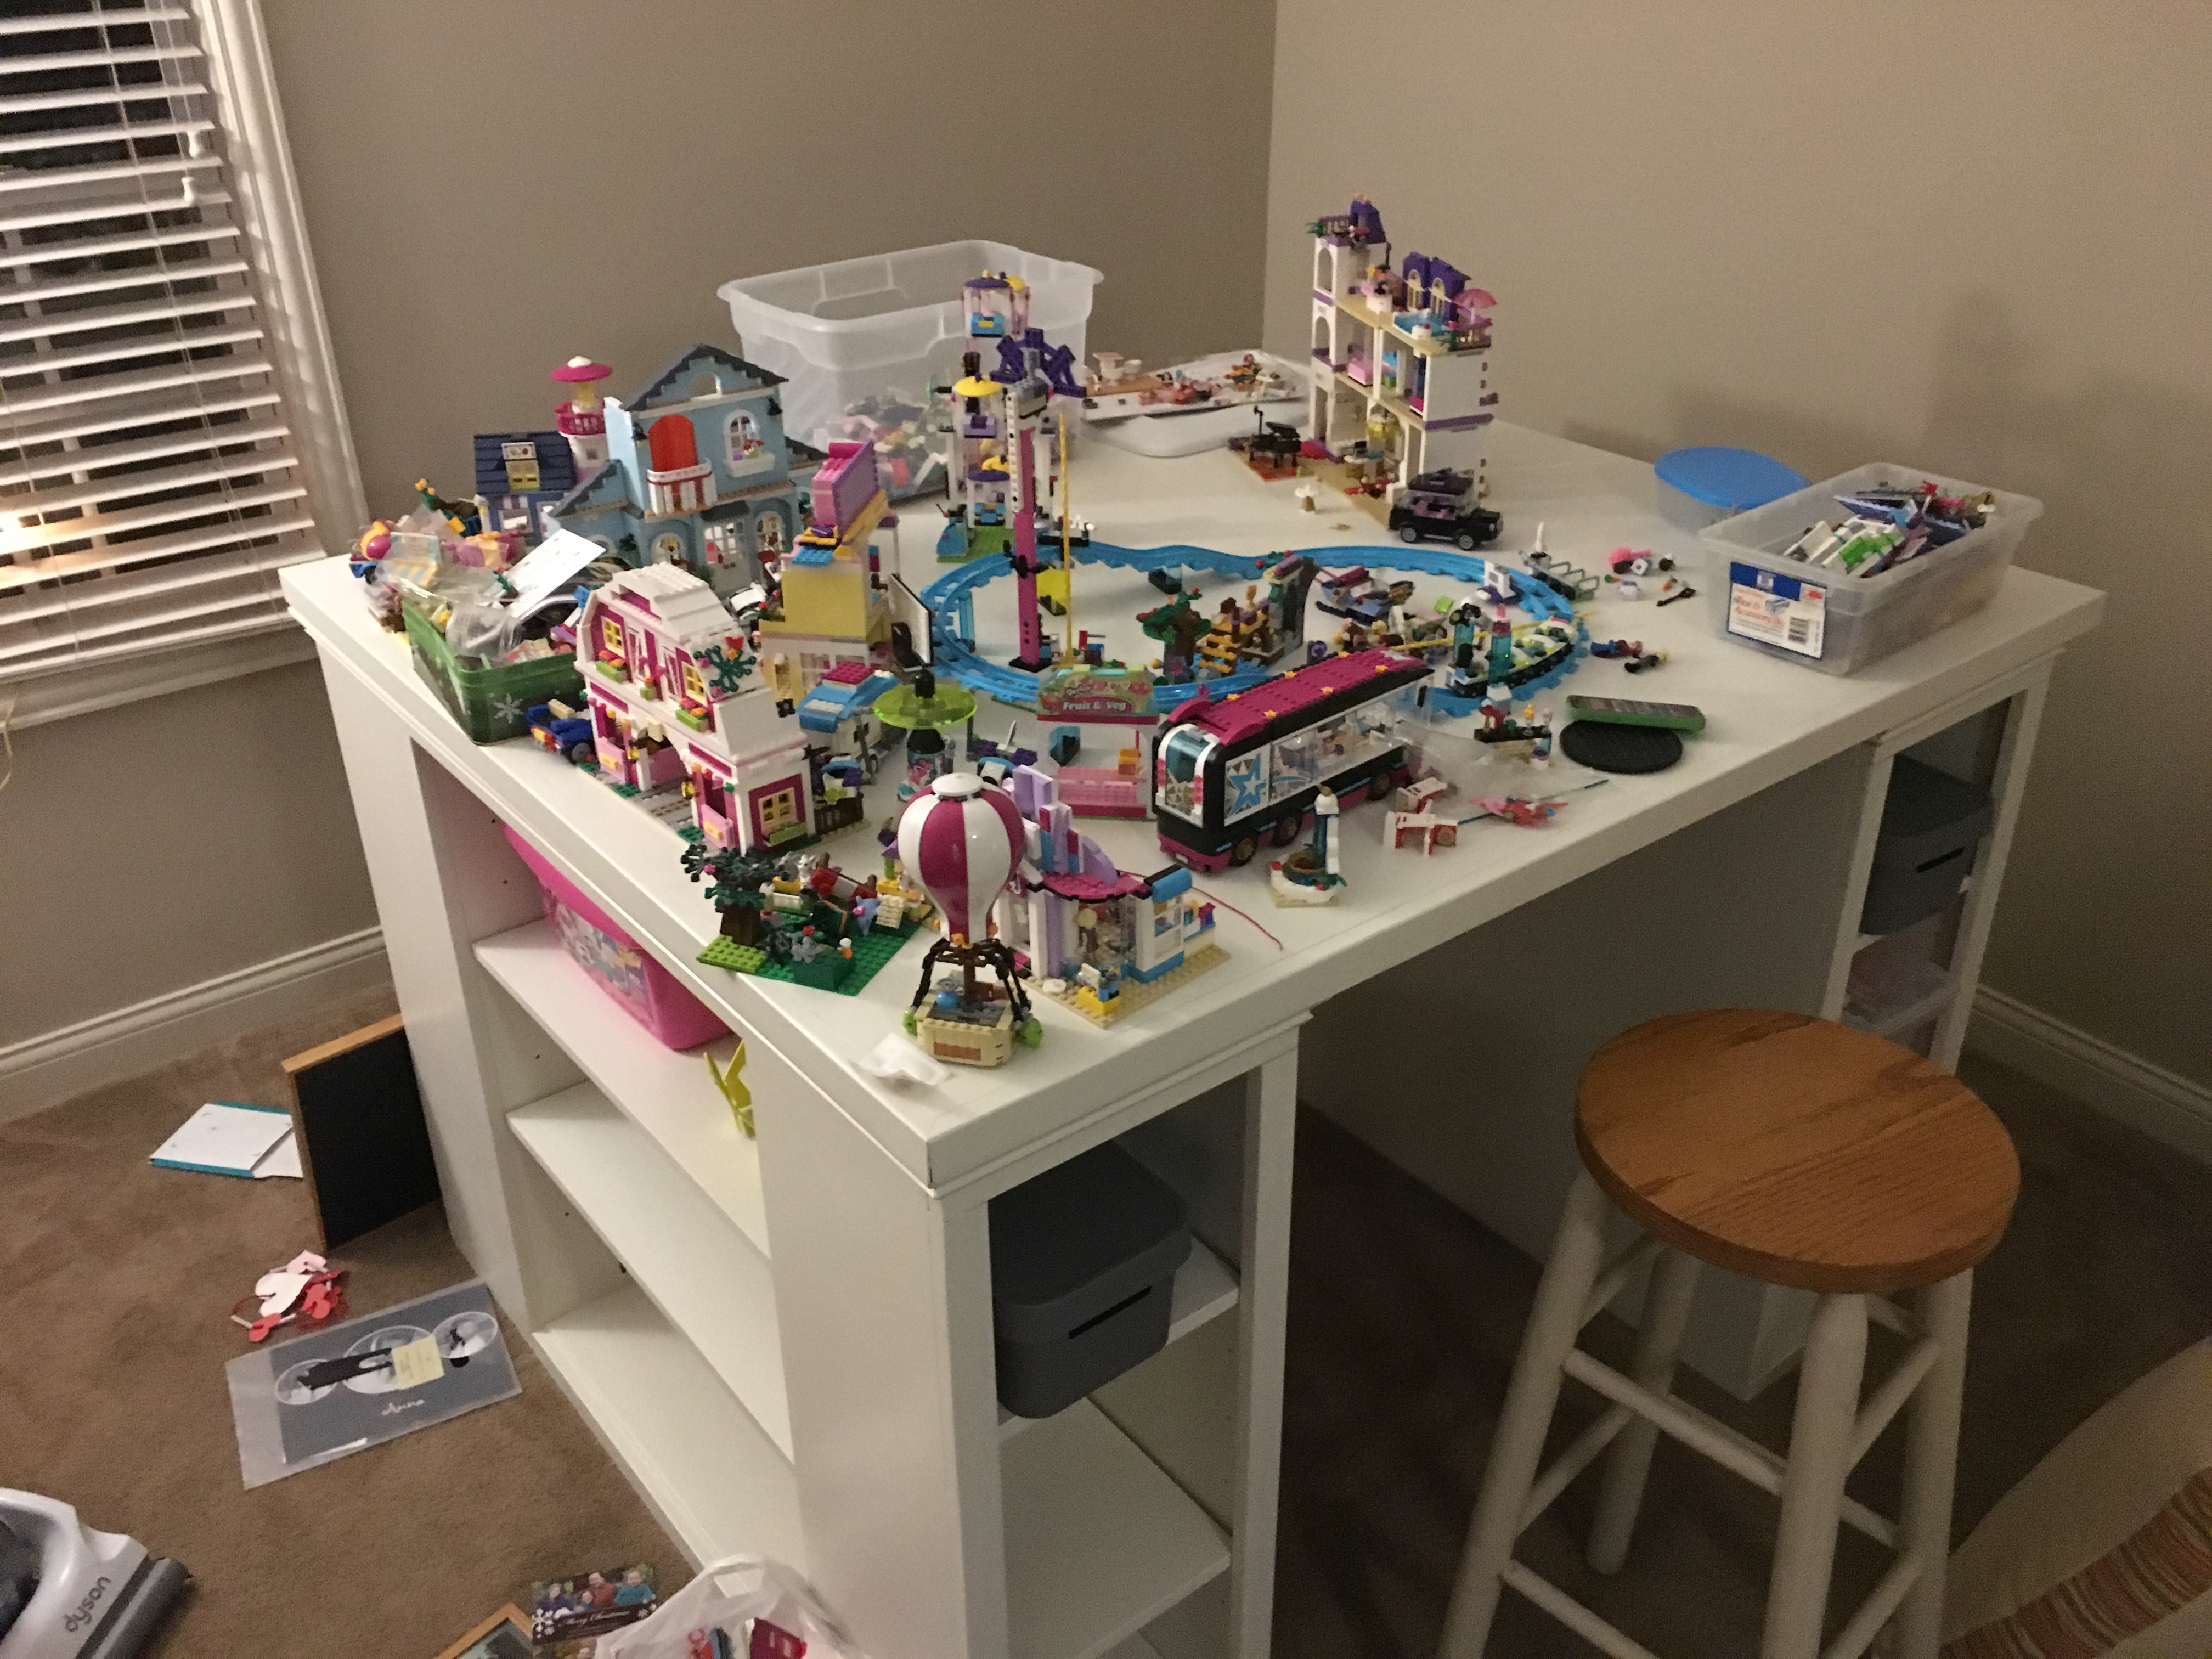
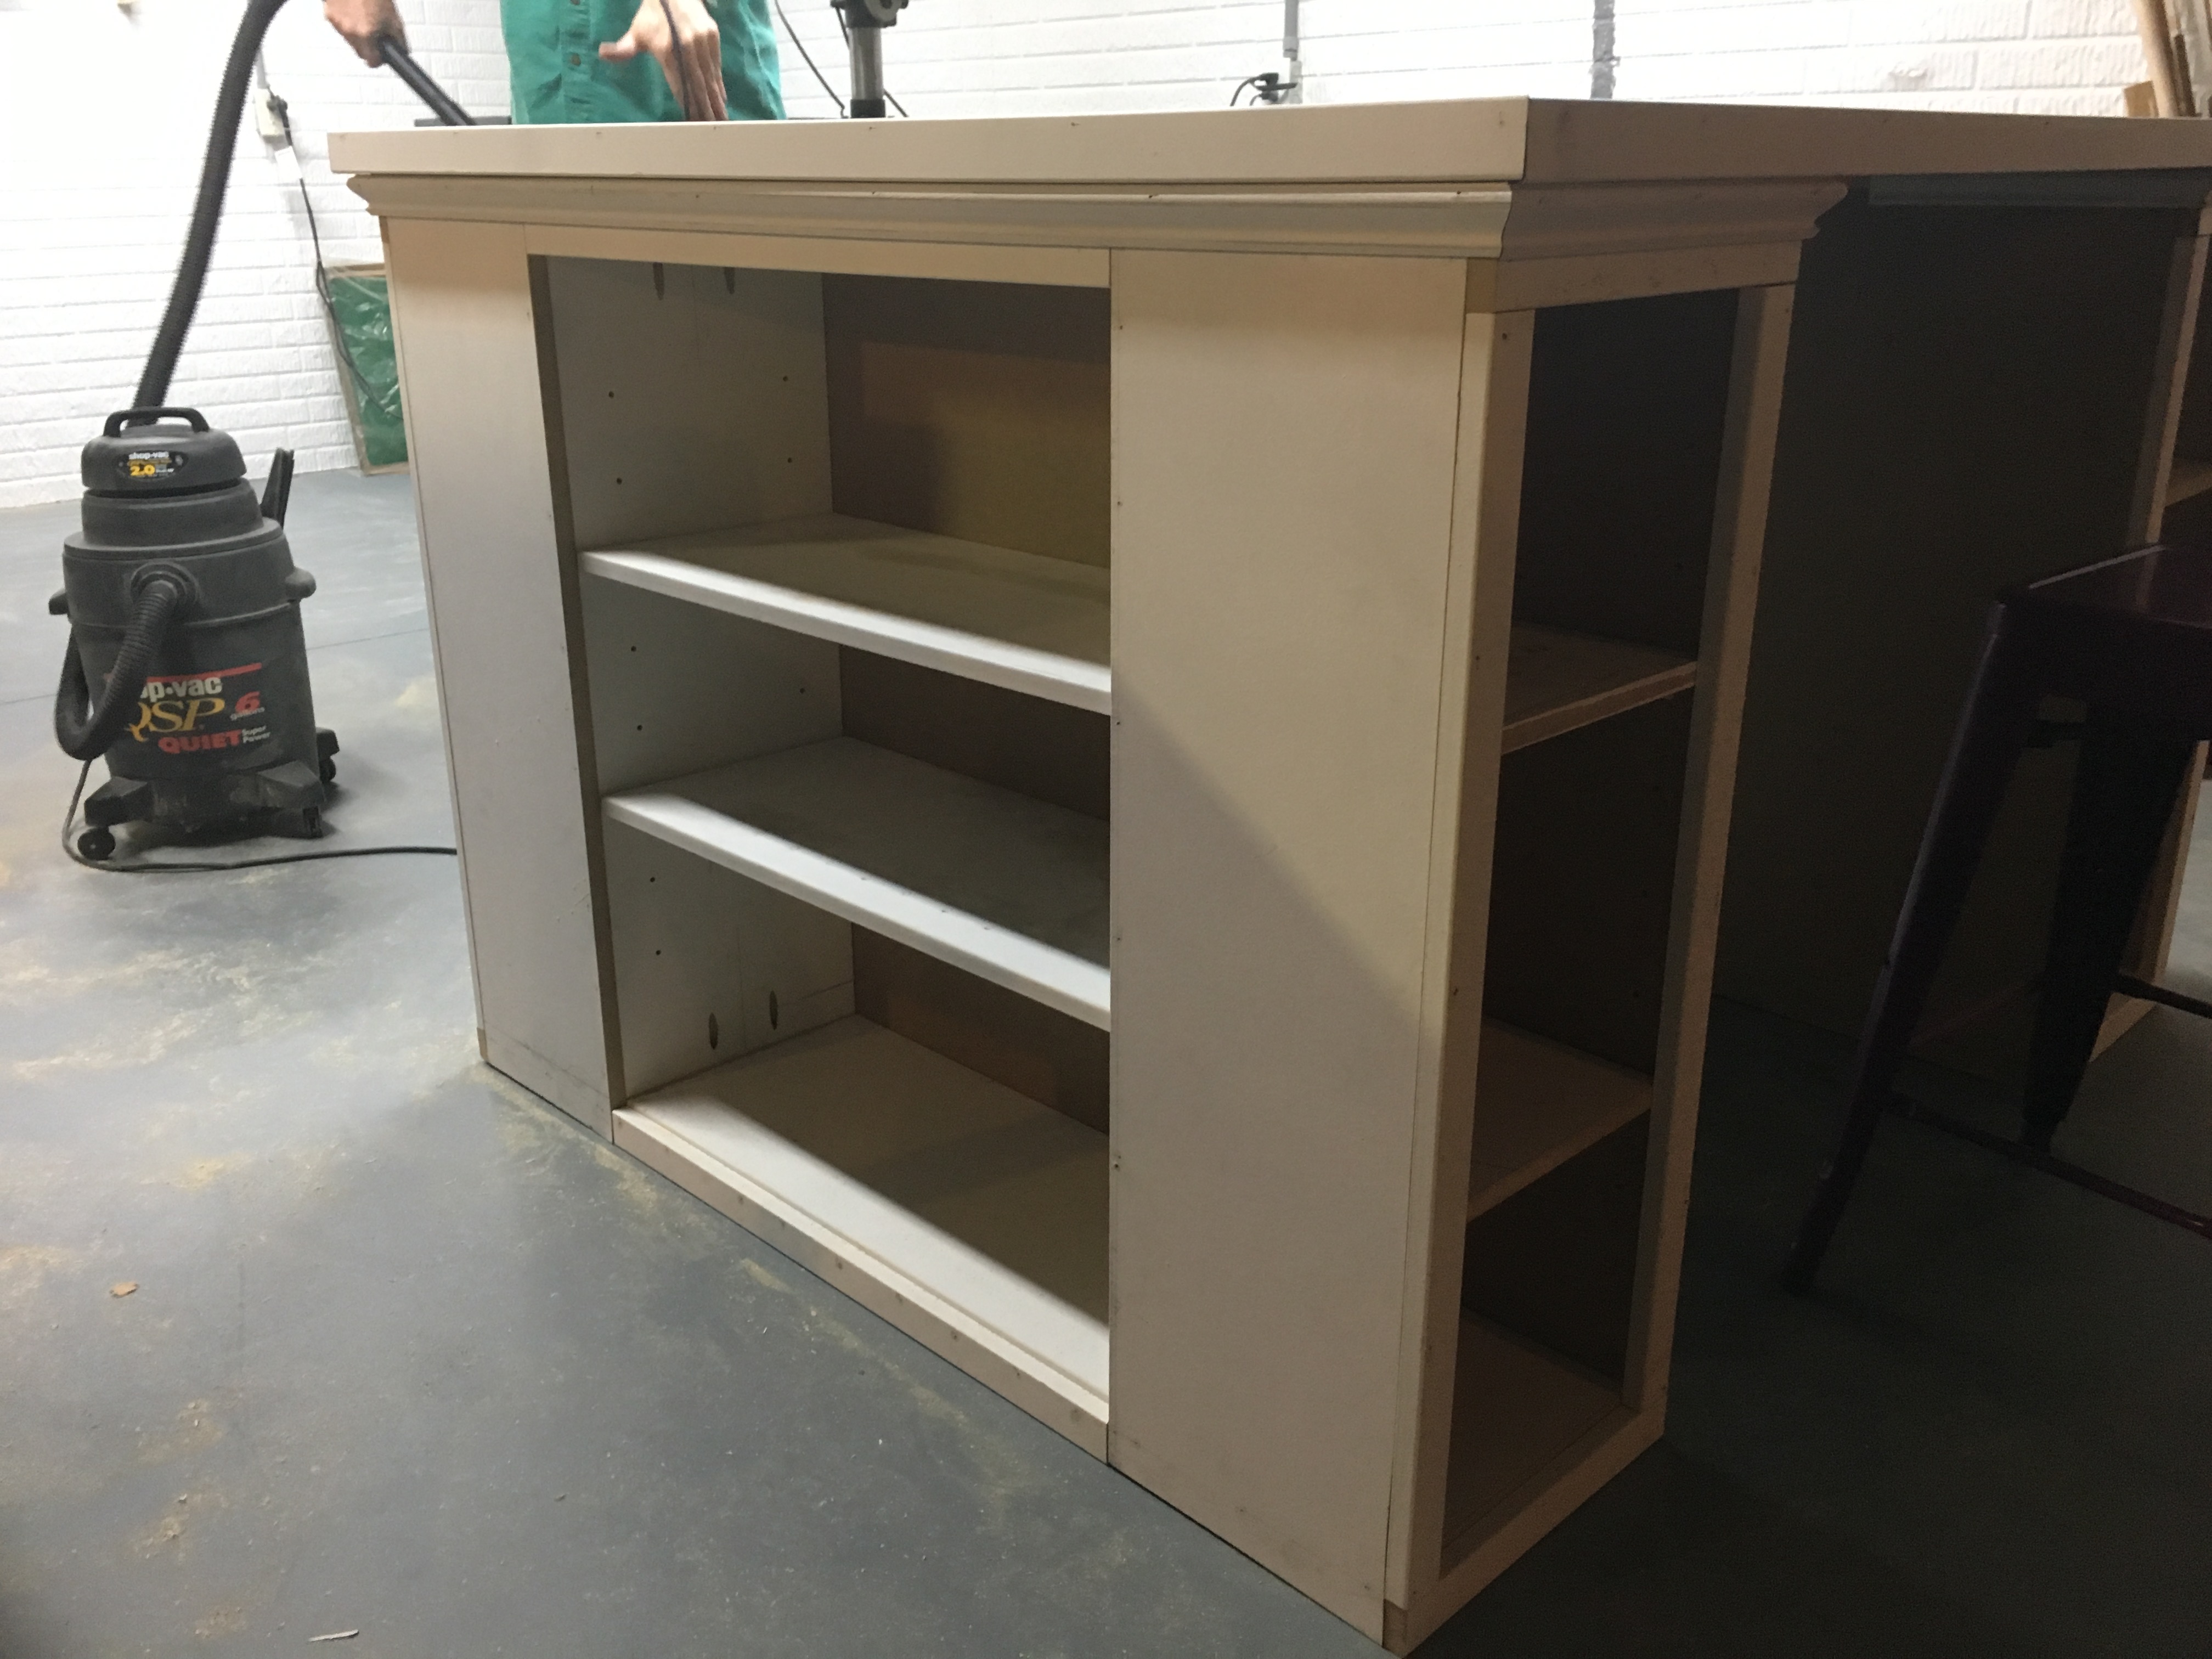
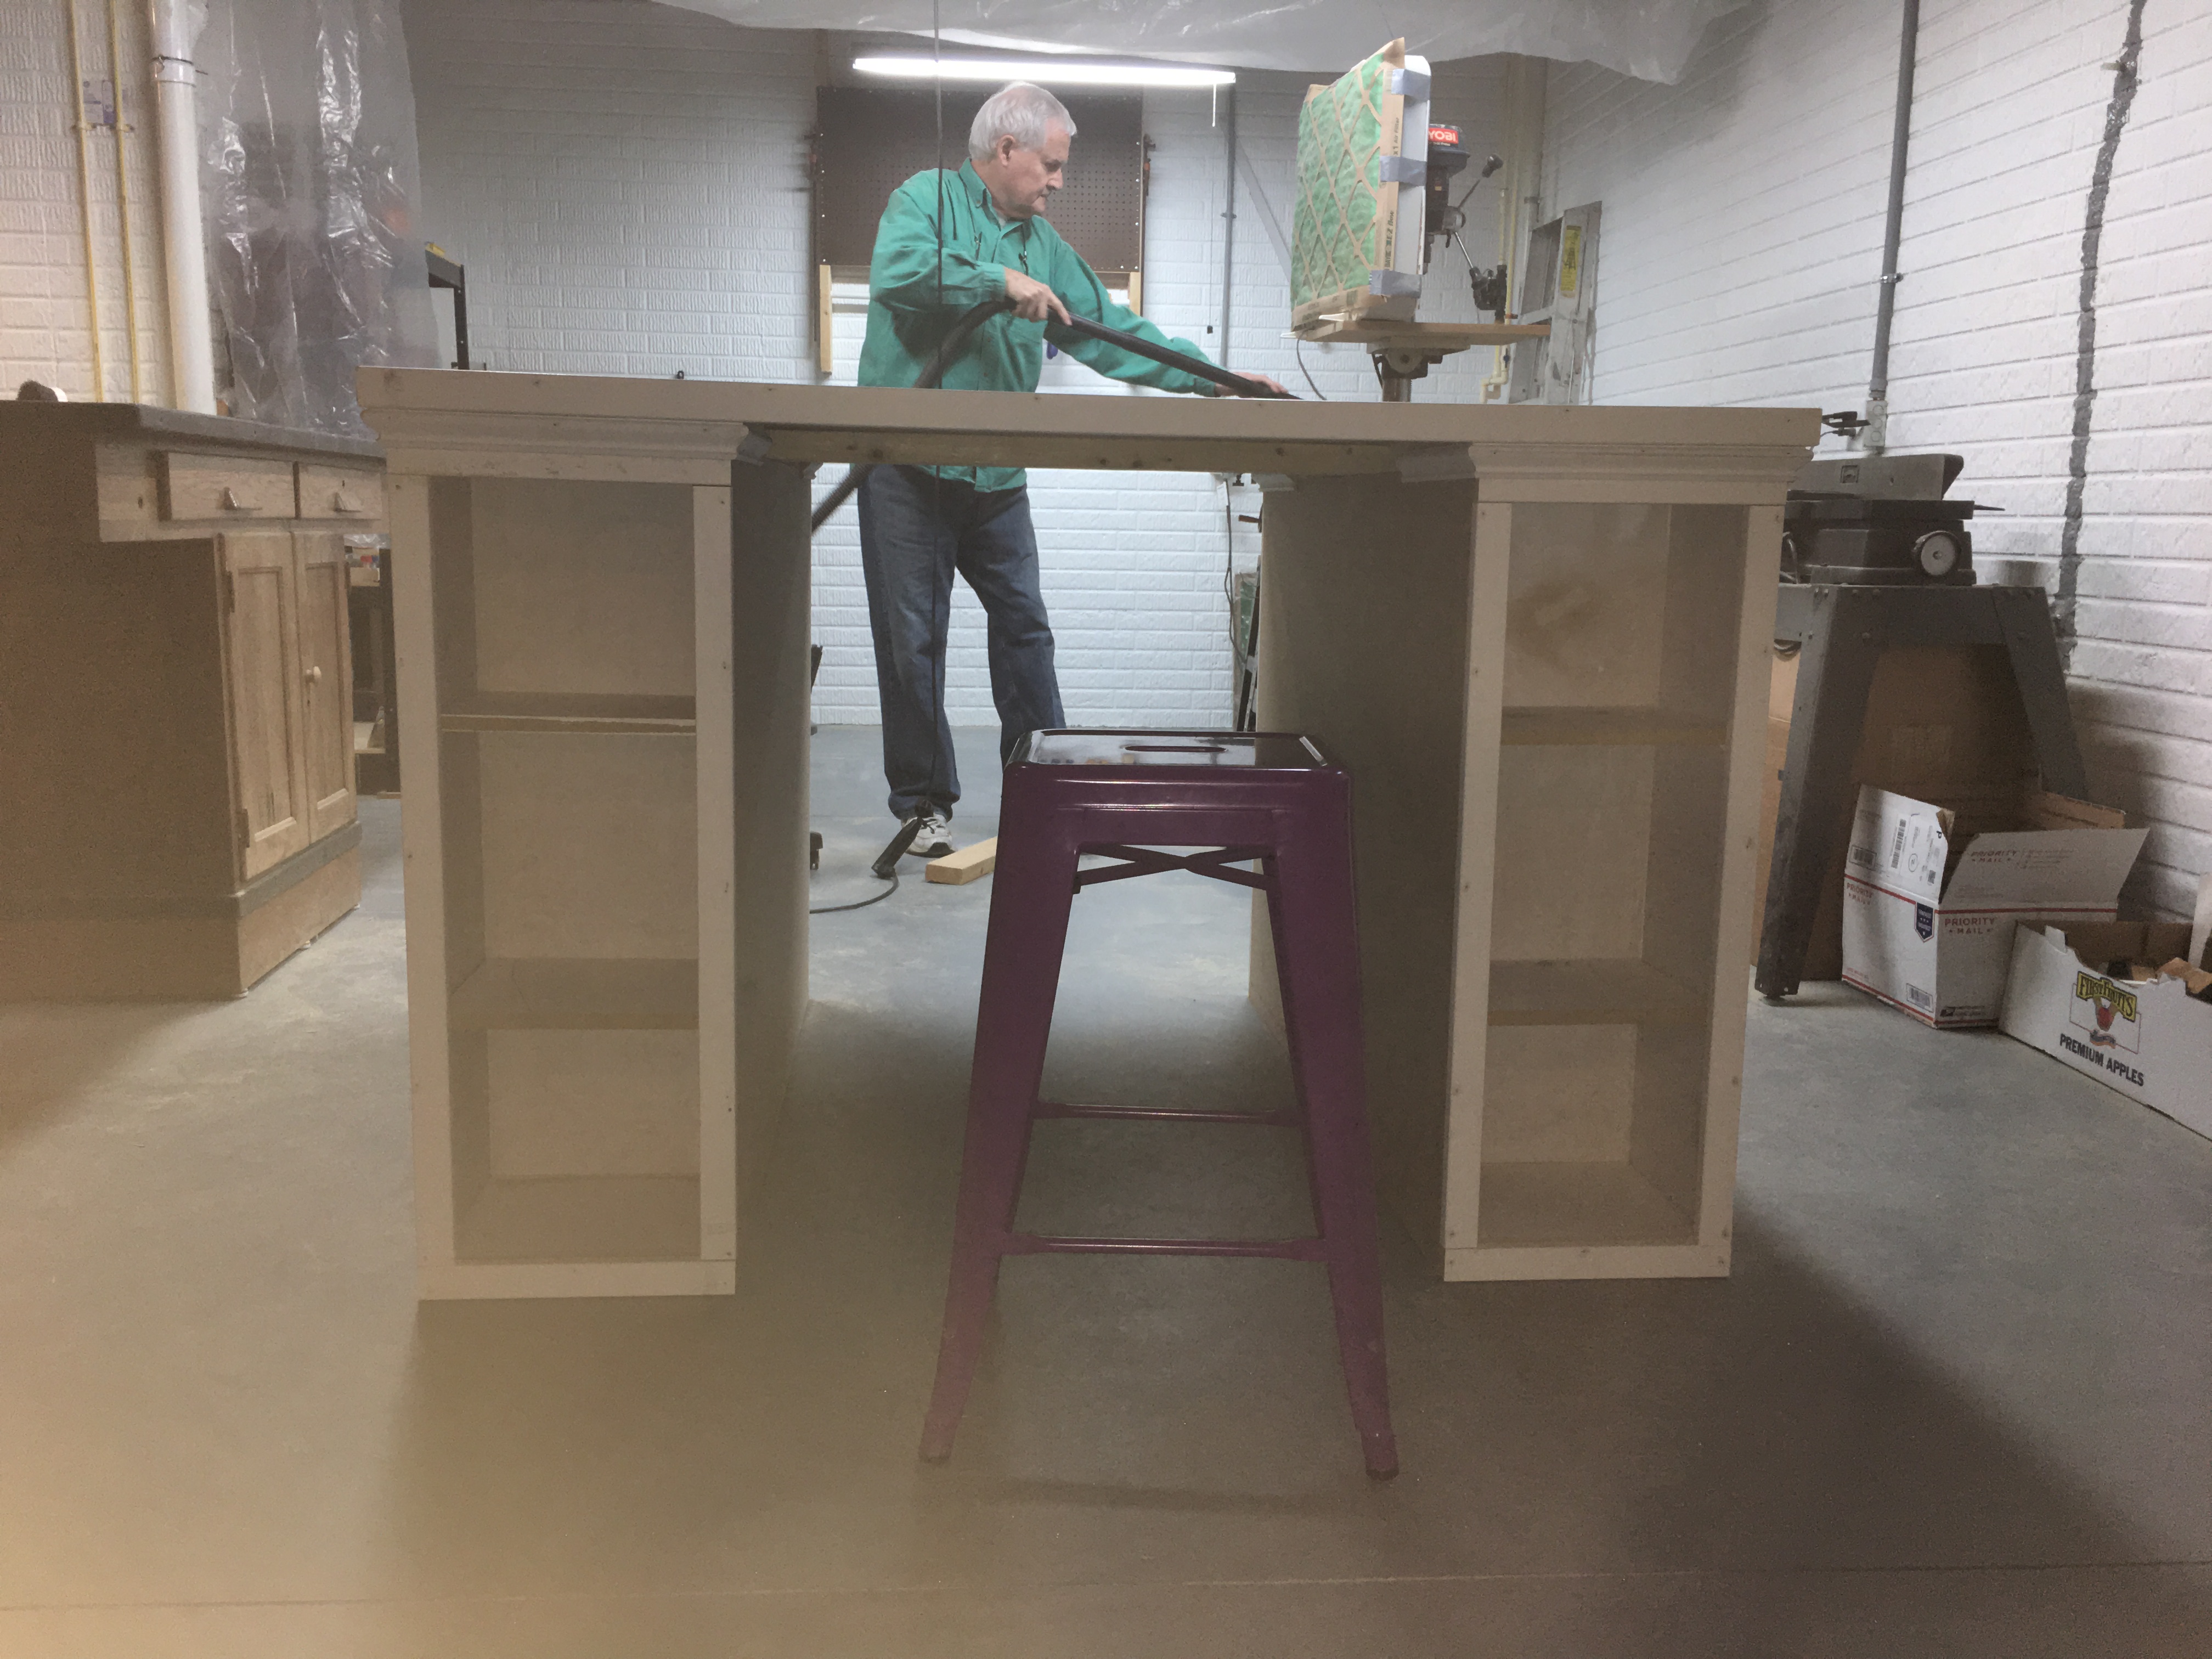
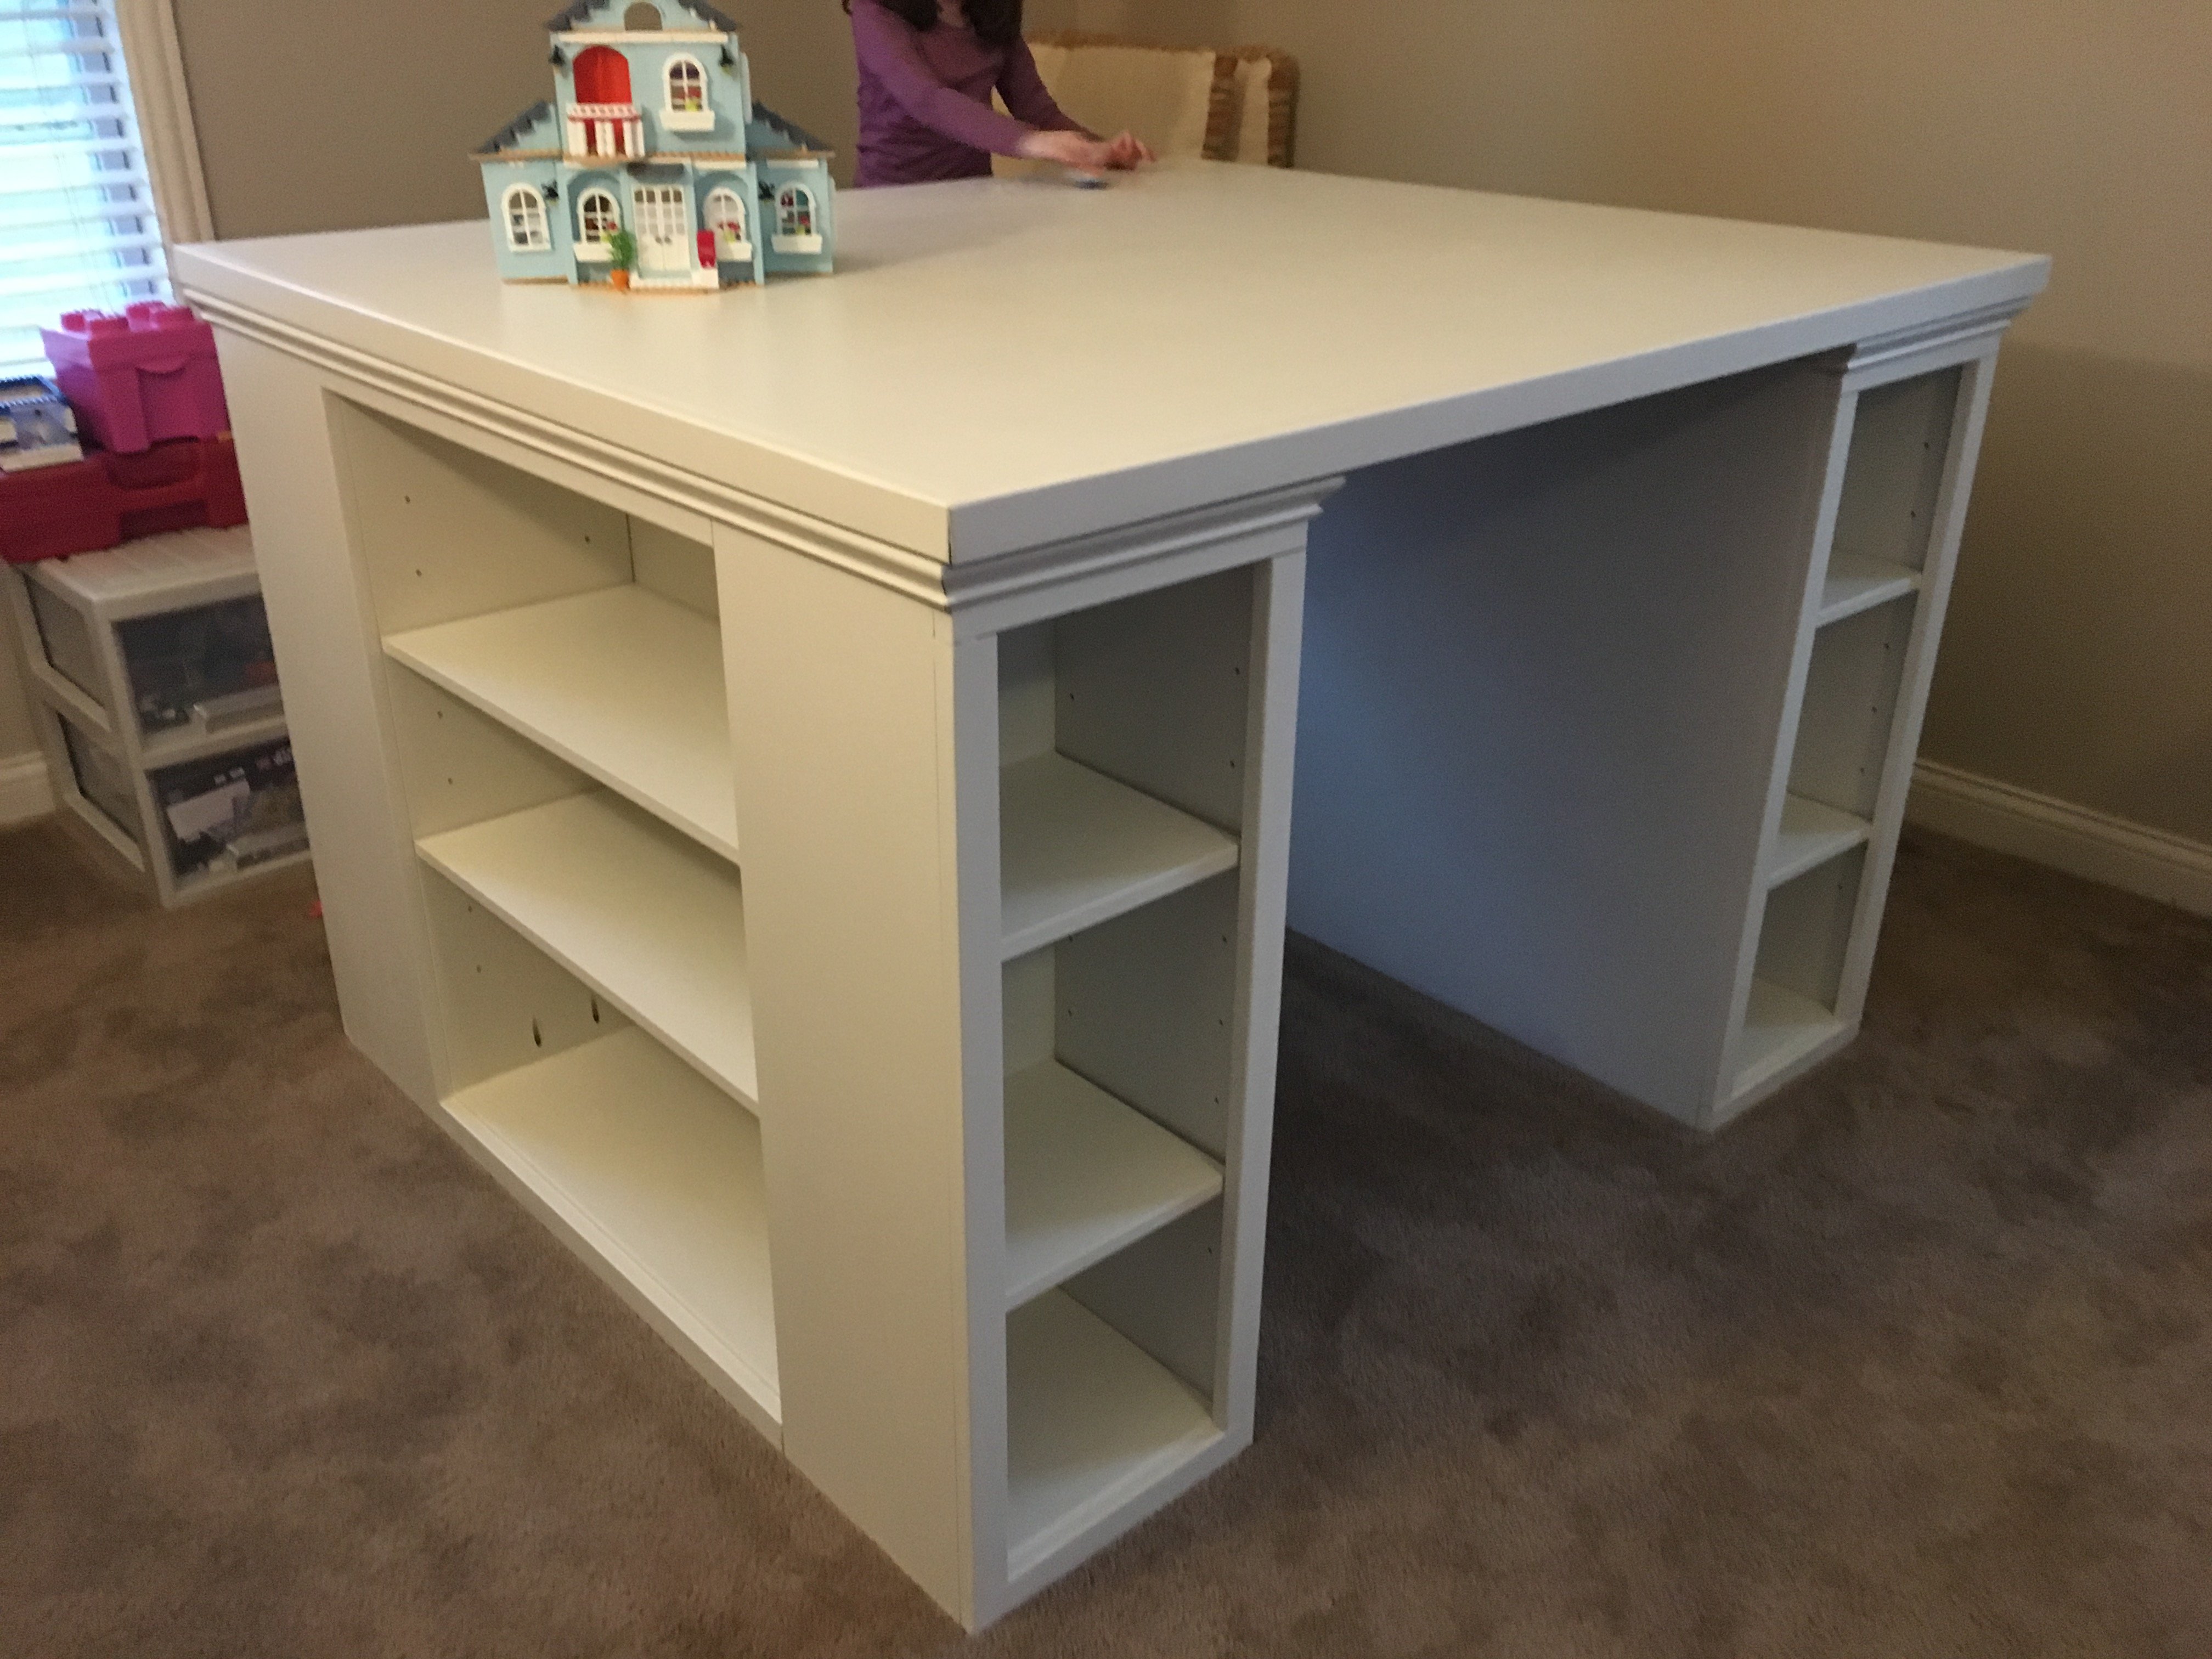
This is my more traditional take on the modern craft table (I guess that means it isn't technically "modern"!). We call it the "Lego Table" at our house. I doubled up the ends like others have so that my two daughters can have their own sides. My wife asked that the there be backs on the side shelves so that items aren't pushed off. I also added trim around the tabletop and molding to give it a bit more traditional appearance. Finally, I made the shelves adjustable.

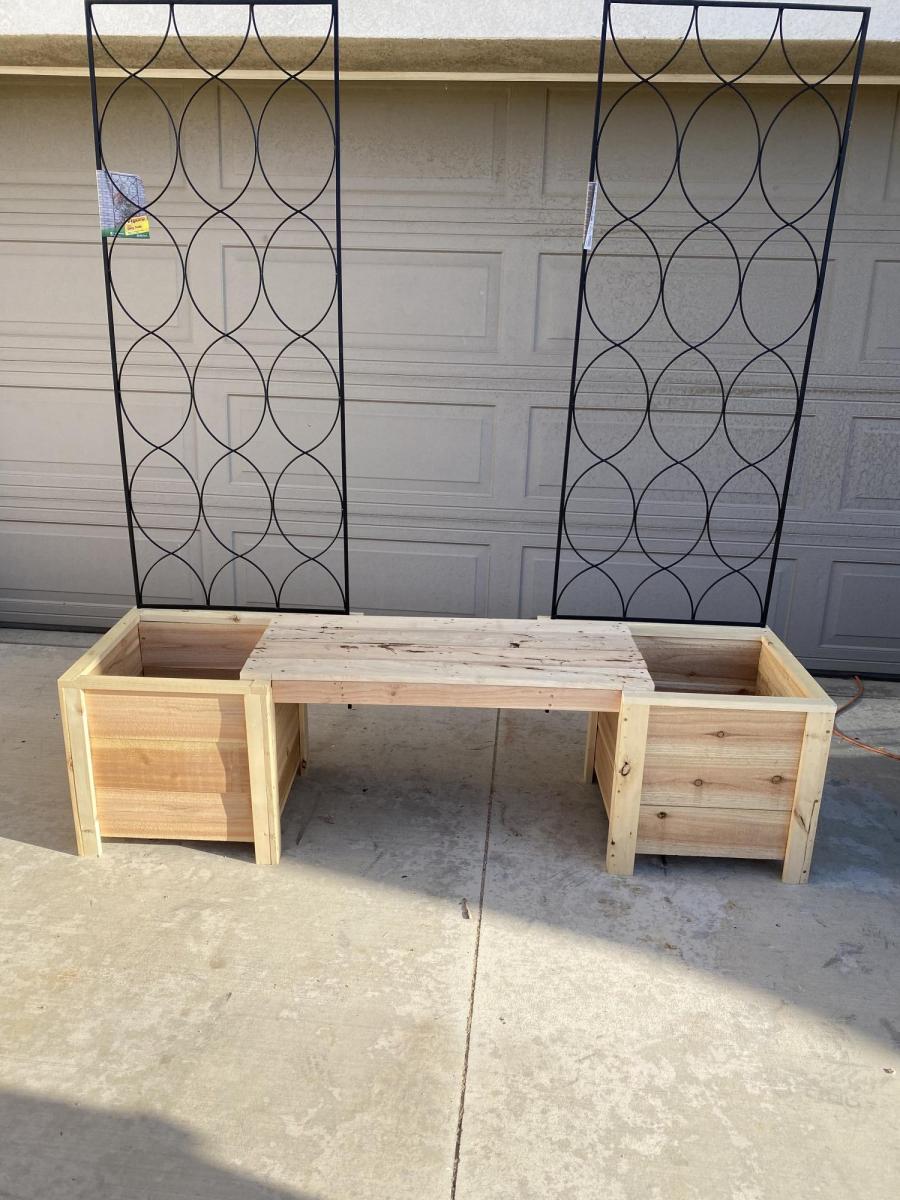
I made the boxes from plans, but added bench and trellis from my own design.


SUCH a great project for my first ever build! The plans were so simple and fun to follow. I altered them slightly to measure 50" long so it would fit perfectly in my entry way. I used the Varathane wood stain in Dark Walnut. Can't wait for my next project! Ana, thank you for giving first time builders the tools and confidence to build beautiful furniture!


My husband and I live on a small hobby farm and are growing/raising a lot of our own food. We decided to venture into working with chickens. We wanted to start out small so we got 6 chickens and needed a home for them. We found a kids play house one day while shopping and got the idea of modifying it into a chicken coop with a run. We took off with this idea and with quite a bit of modification and some extra building materials we were able to raise it up in the air and attach a run so our chickens would have a nice home to protect them from preditors and the emements and not to mention one that looks good in our yard!

In reply to OMG! by benfoldsfivealive
Wed, 05/27/2015 - 18:42
Building chicken coop doesn't have to be expensive. Just get the easy-to-follow plan from this:
http://bit.ly/how-to-build-cheap-chicken-coop
Fri, 06/17/2011 - 21:26
Looks awesome! I just spent the evening building a coop for 4 hens of my own!
Tue, 02/21/2012 - 19:08
Are the plans available? I have Black Copper Marans and Lavender Ameraucanas and I really need to separate the LAs from the BCMs and this would be perfect!
Sun, 02/26/2012 - 18:00
When I click the link to get the plans for the standard coop, they are not there. Do you know where I can find the original plans? Thanks.
Tue, 02/28/2012 - 10:20
Yes - would love the plans please!!!
It's gorgeous - great job!
Sat, 06/02/2012 - 15:22
Sorry guys there are no plans for this coop. My husband and i just "winged it" and built it without any plans.
It is a play house that we found at Mills Fleet Farm and we modified it to make it a chicken coop. We put together the play house based on instructions from the box (with a few of our own modifications to make the window on the ground etc.) added some chicken wire to the doors and bay window, added some 4x4 "stilts" and a floor to get the house in the air, and constructed a frame around it with 2x4's and wire fencing to make the run
Sorry I dont have any plans to give you guys!

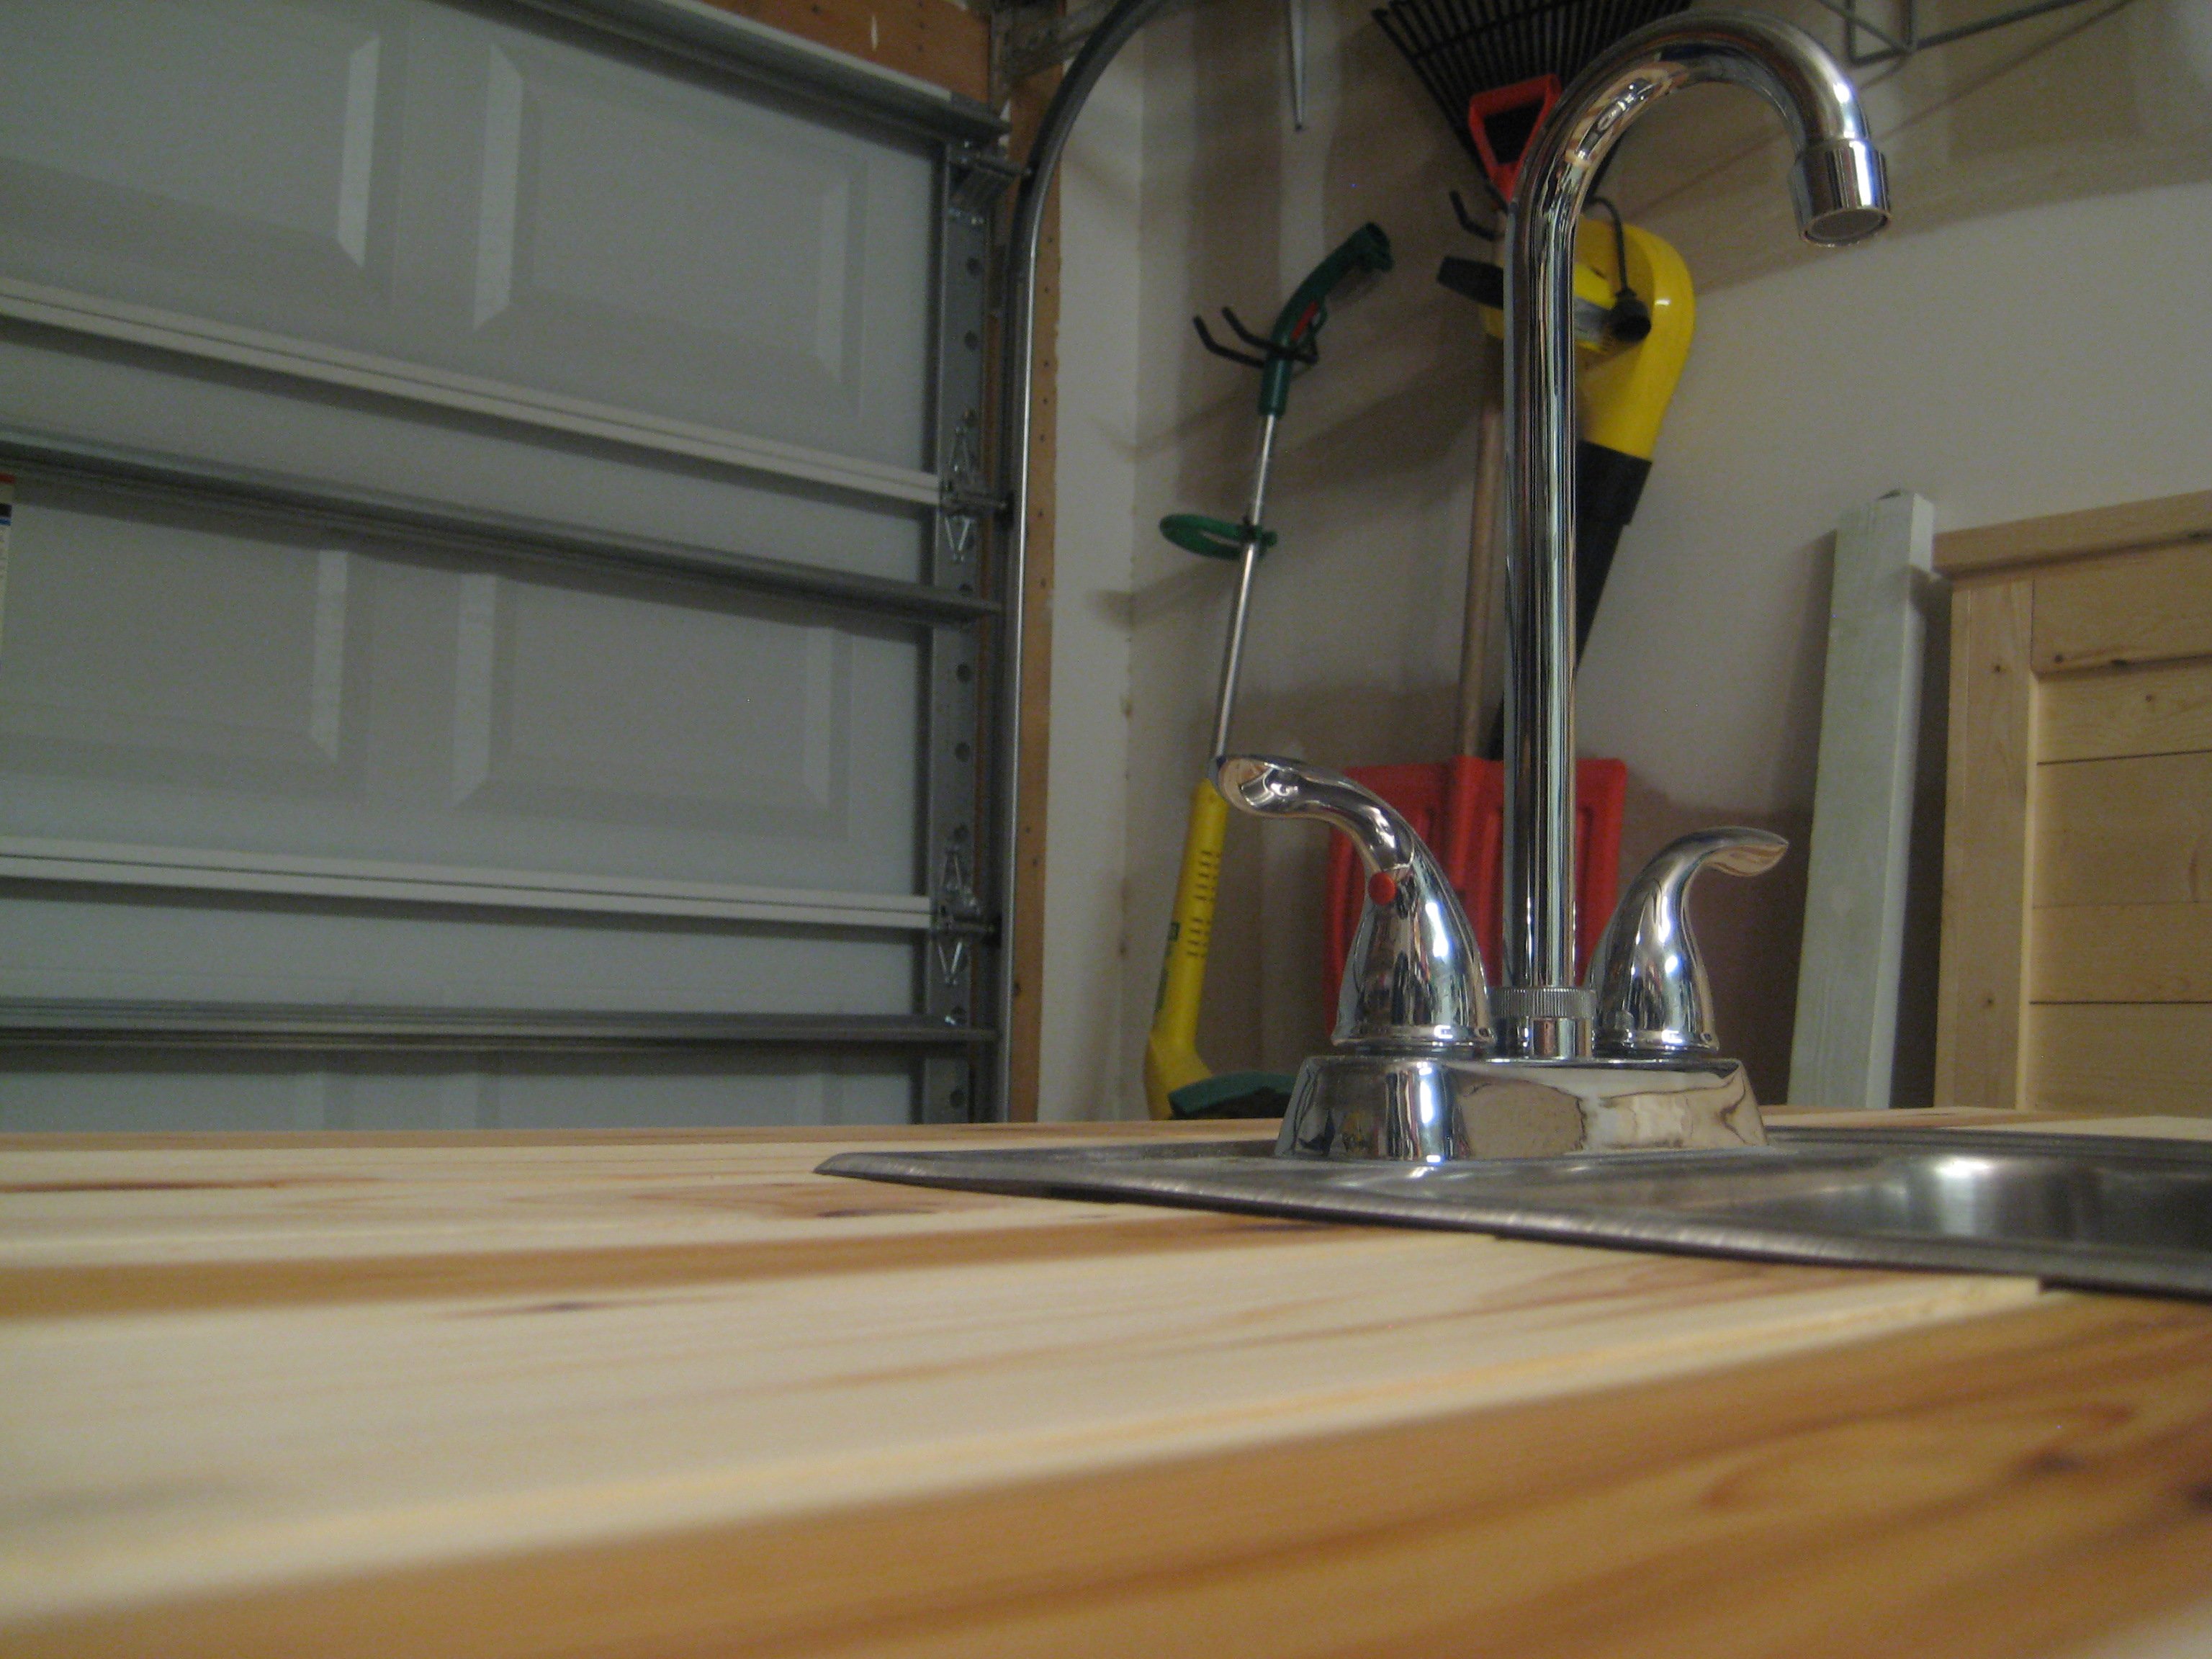
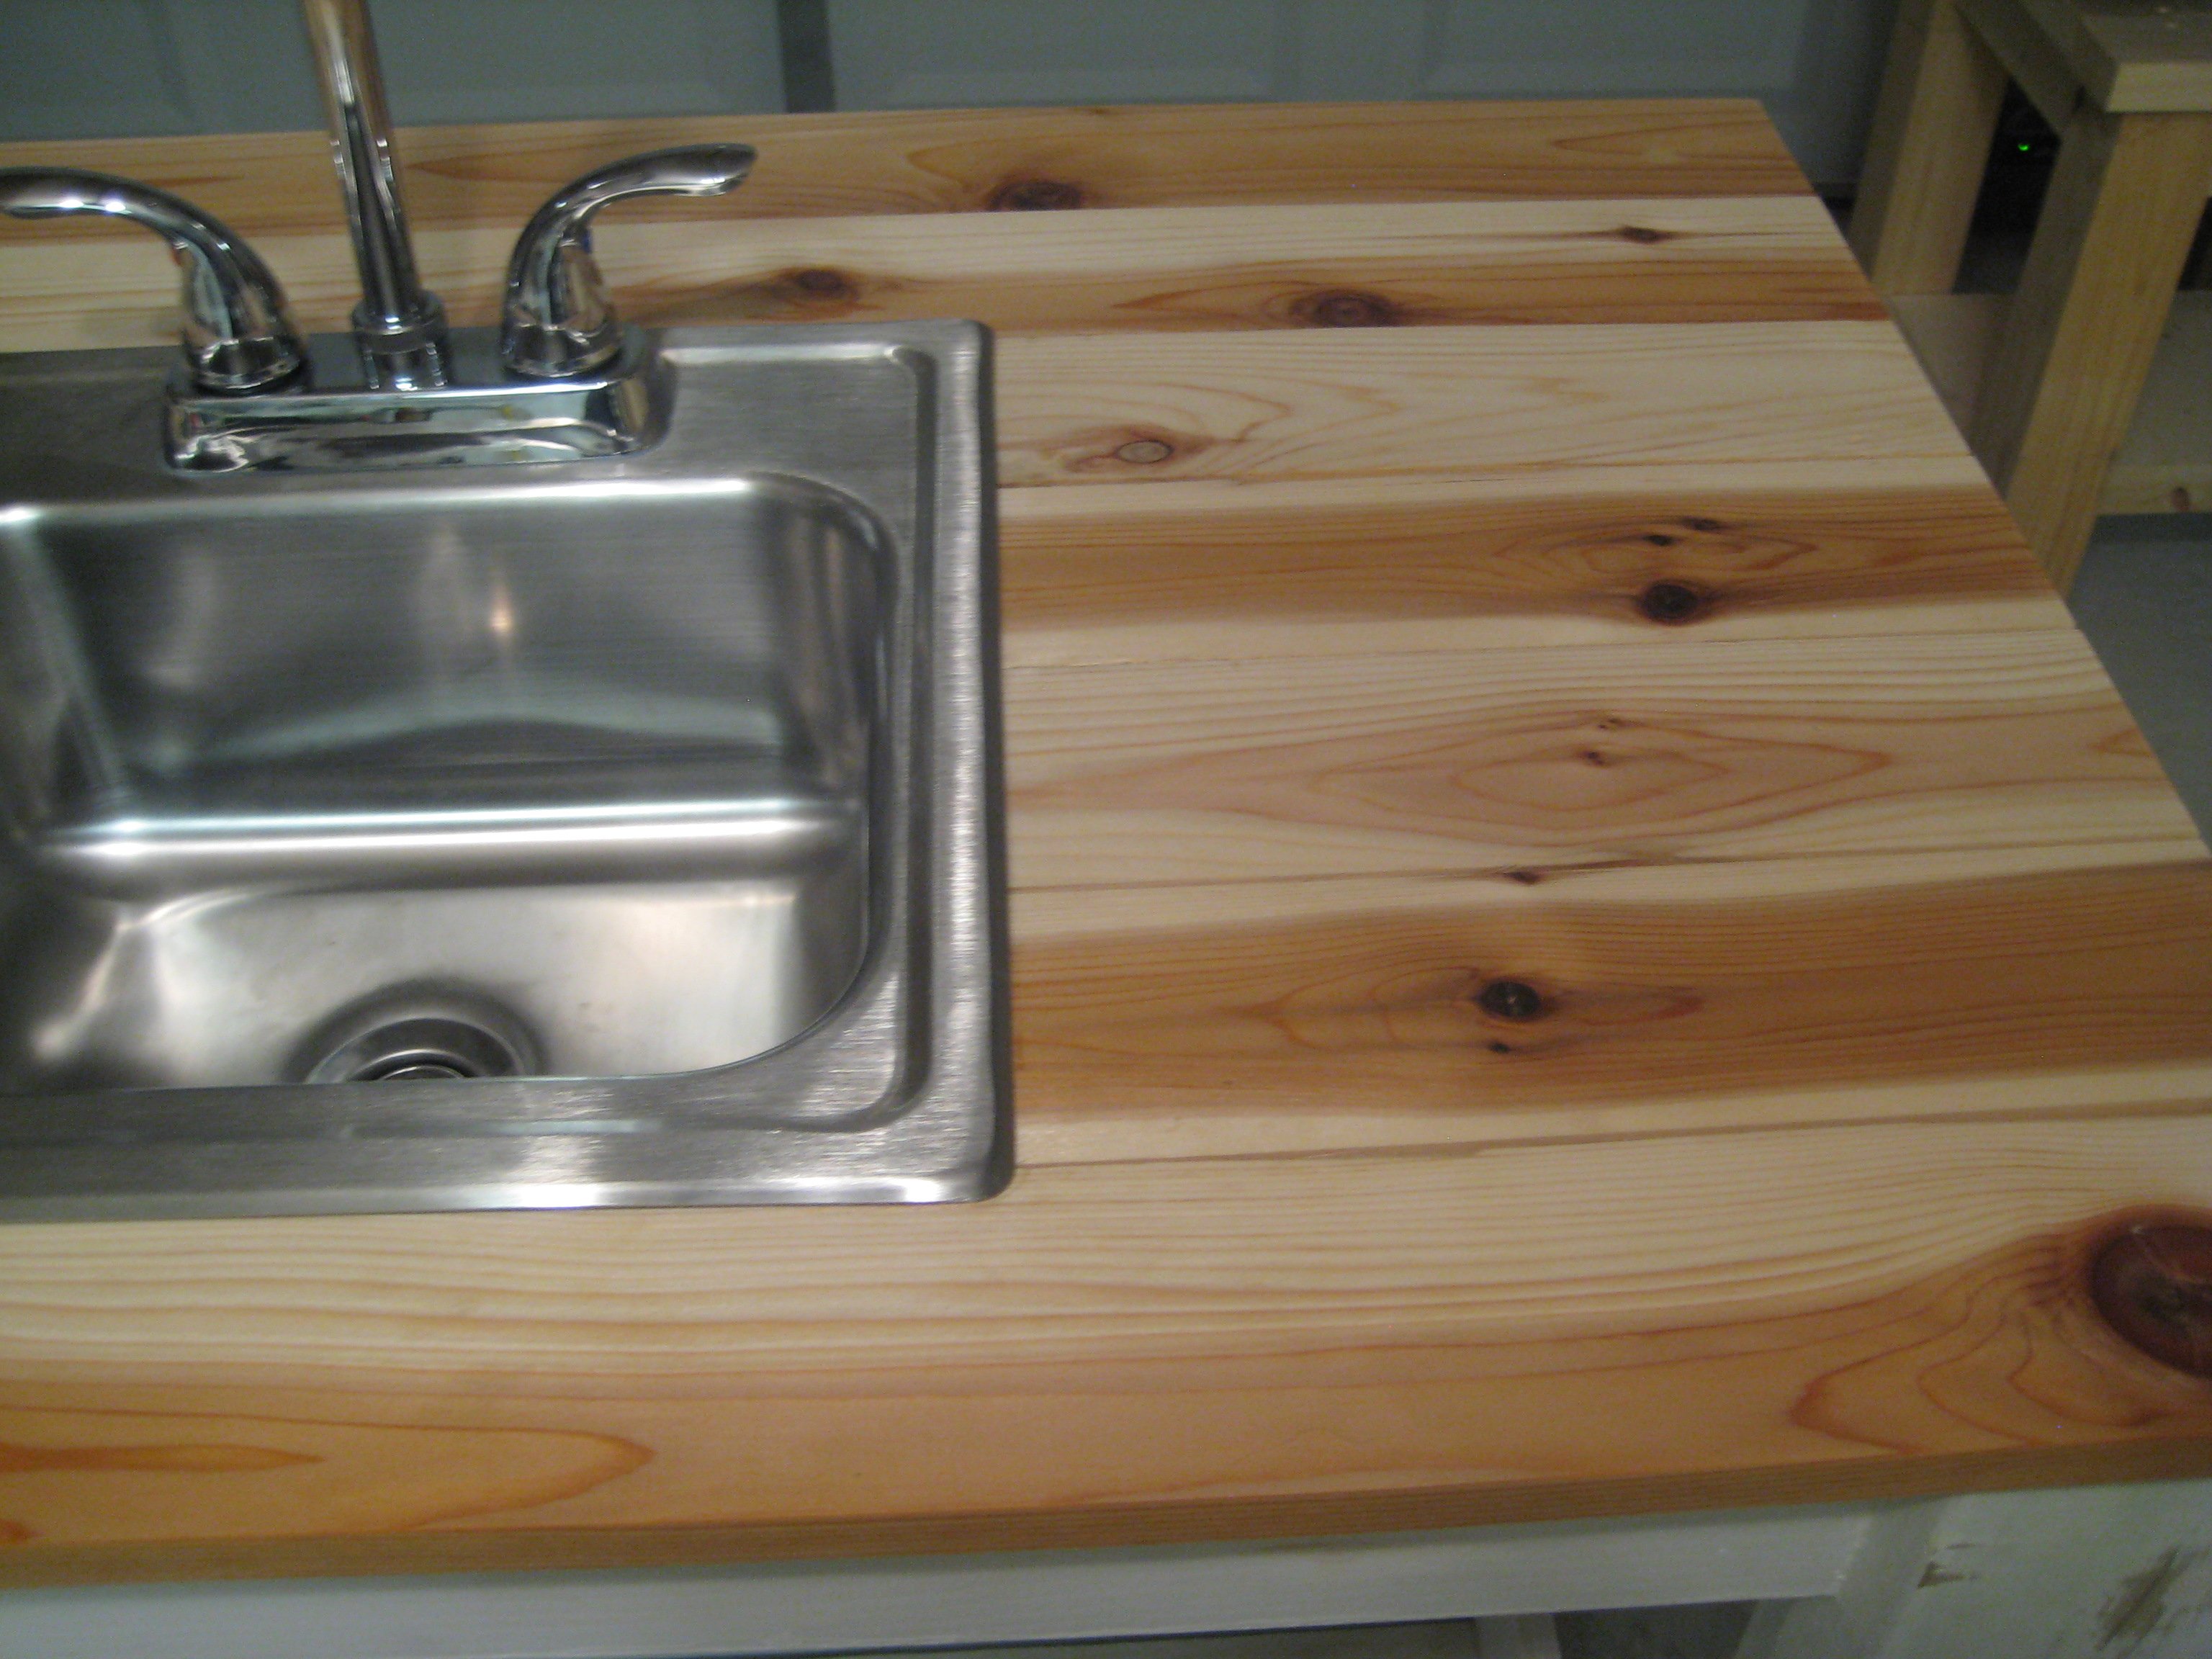
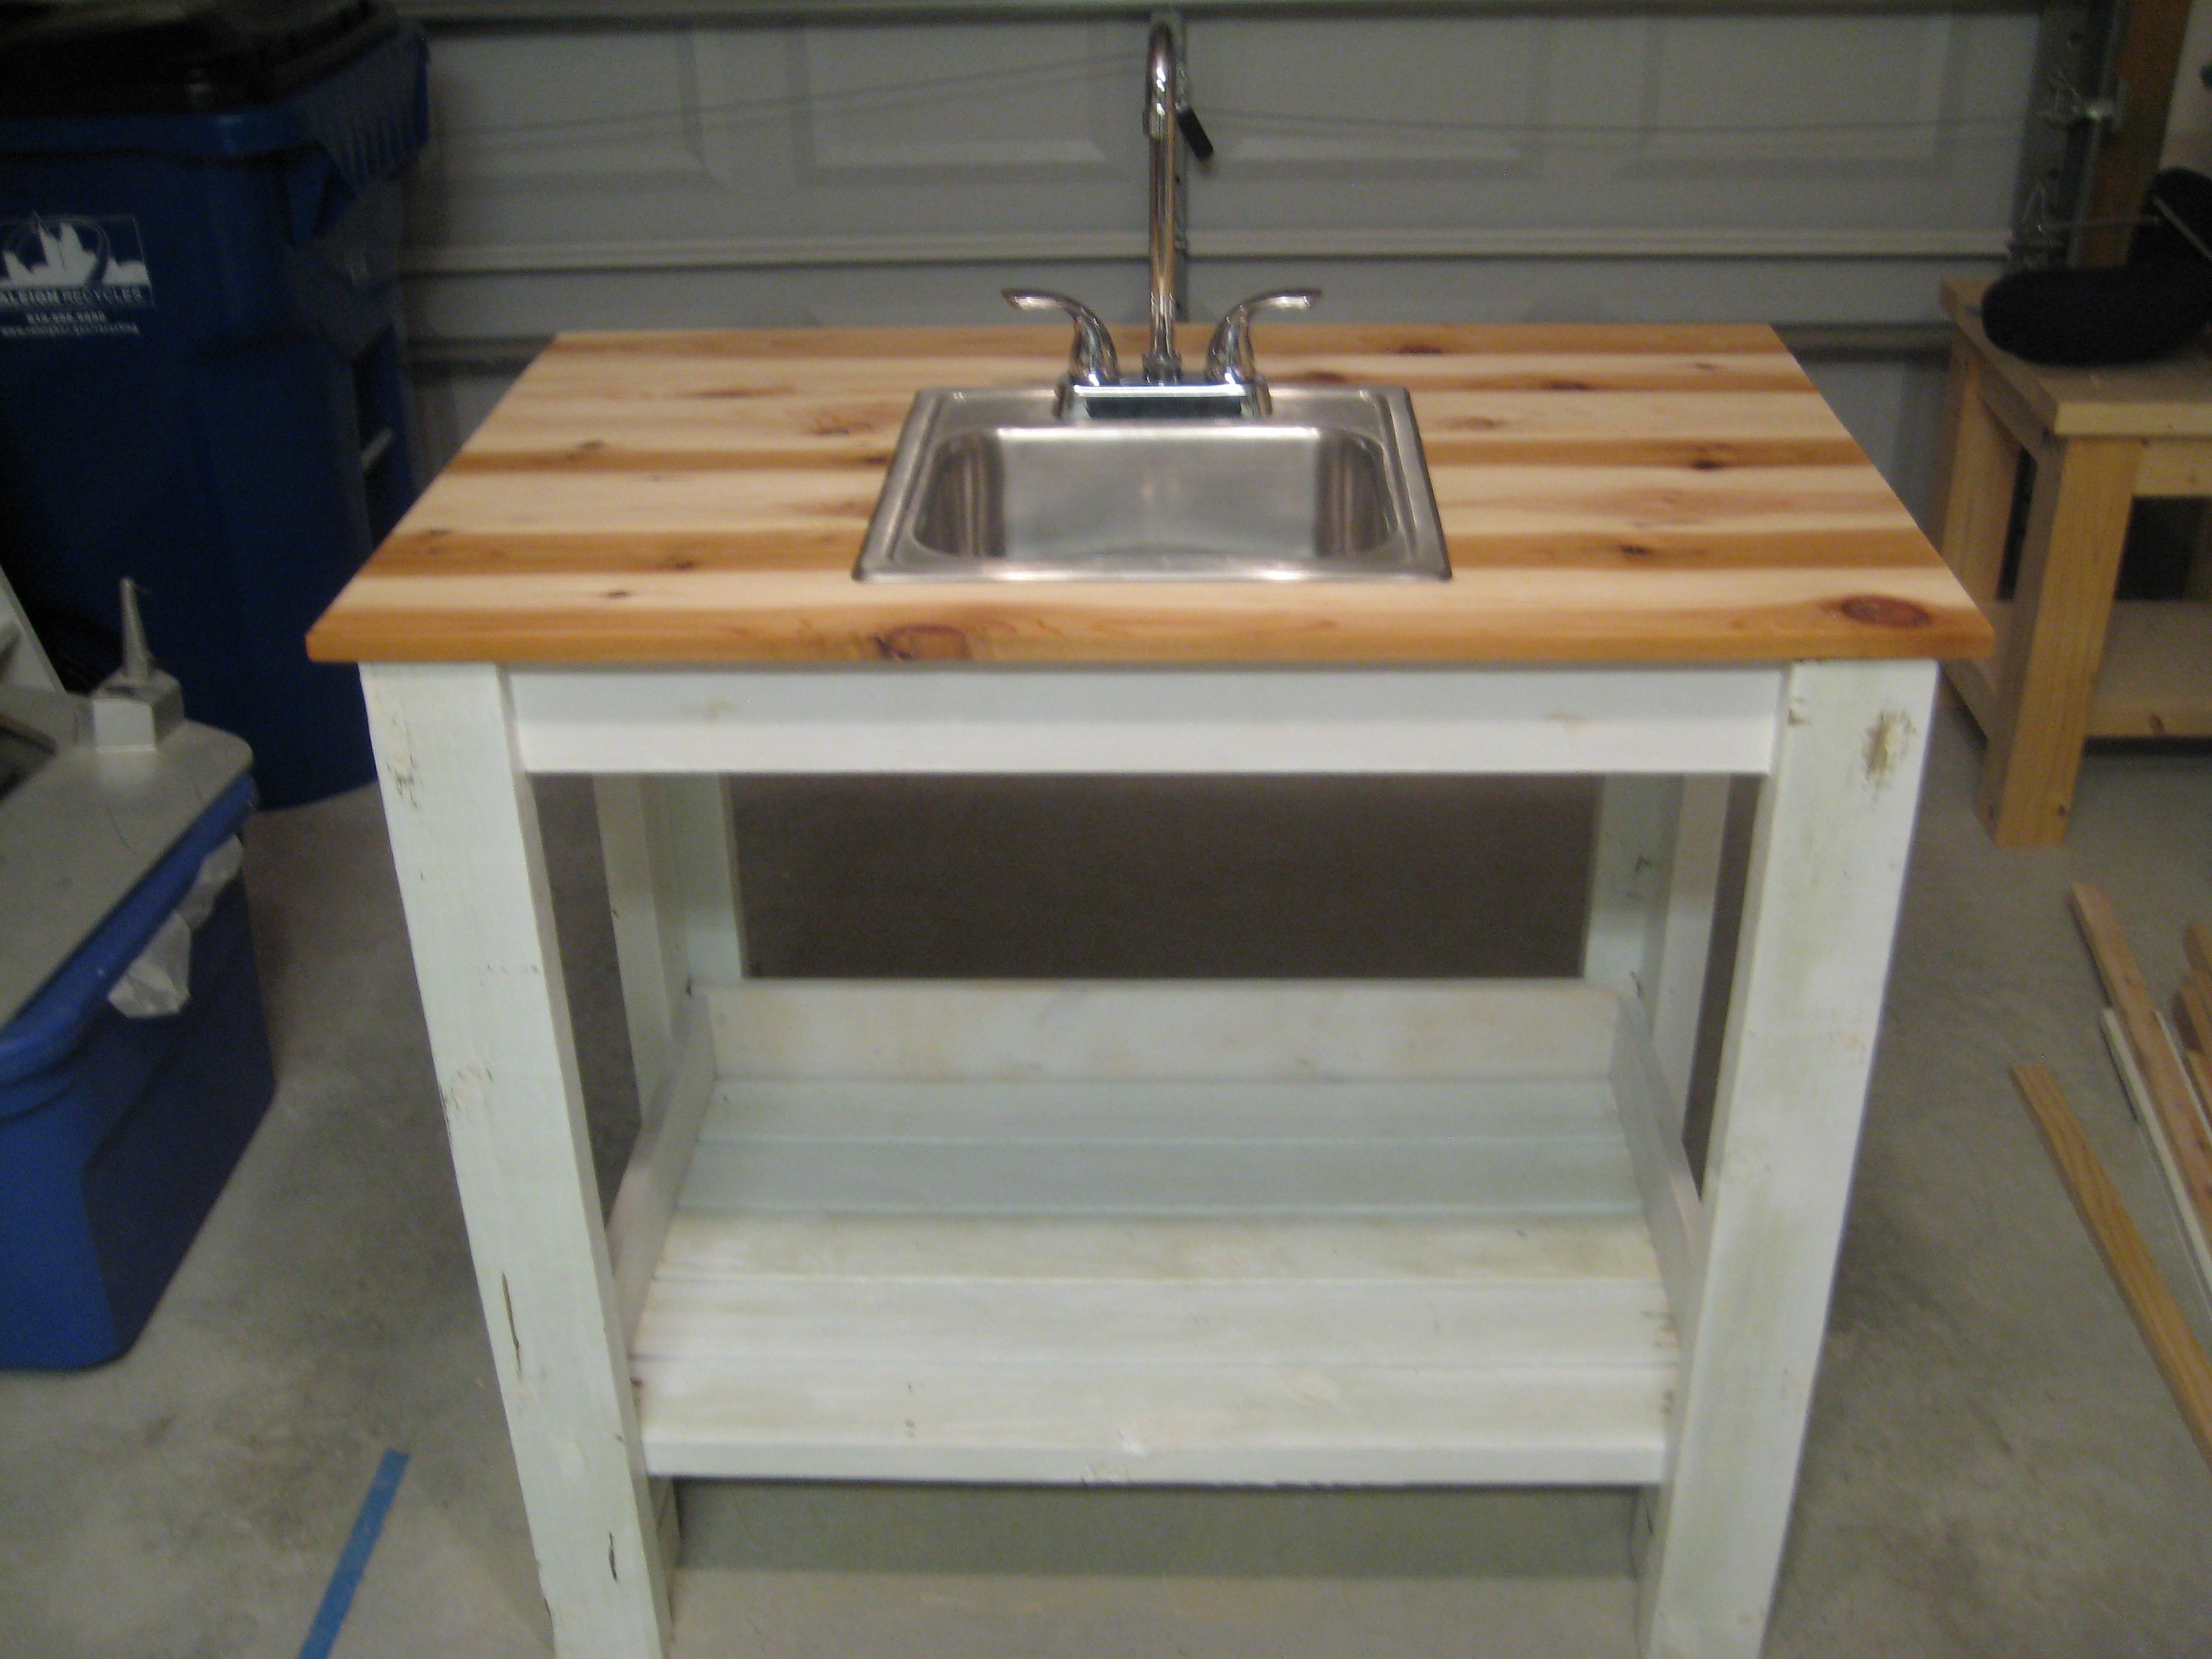
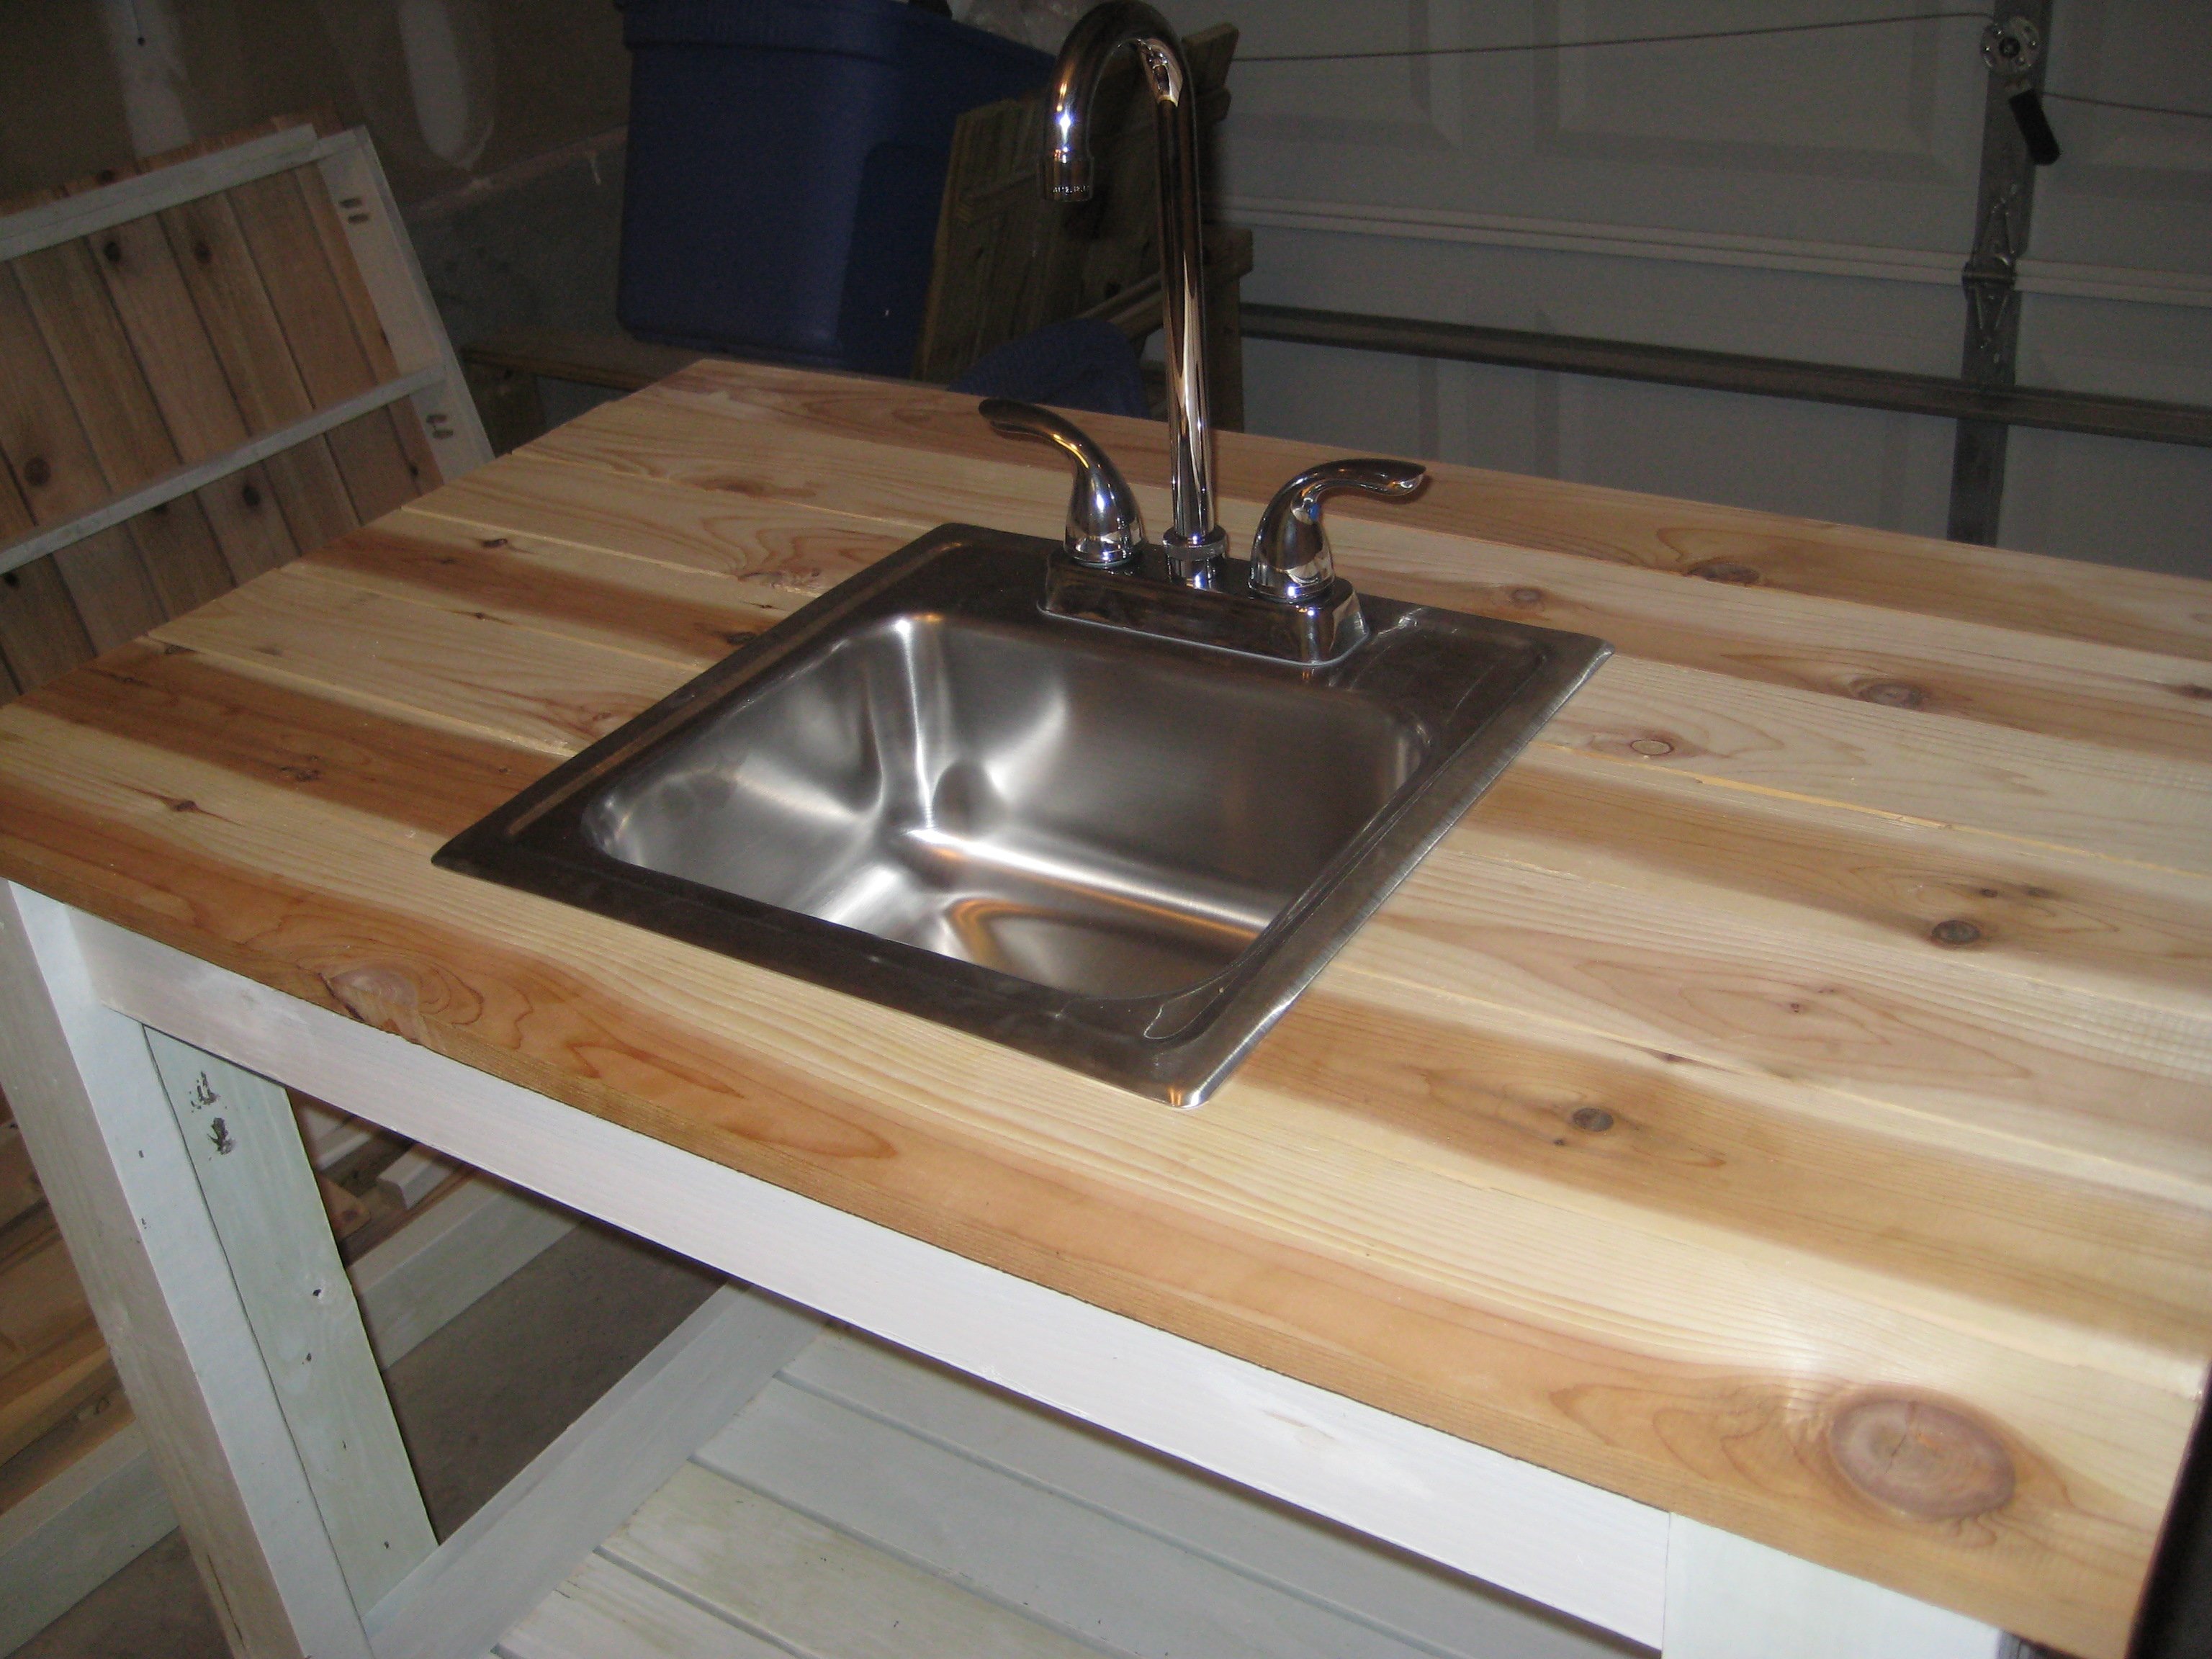
I finally completed the last piece to my customized simple two-toned outdoor collection...an outdoor kitchen sink!!! It still needs a couple of touch ups... but more on that later. This is by far my favorite and easiest project to date. We plan on using this as a grill caddie/garden station. This will eventually go onto a 24x12 deck up against our kitchen window (The indoor and outdoor sink will be against each others backs). I decided to go with the Sturdy Workbench plans for the base mainly because of the weight. We wanted something that's going to be difficult to move since it will be hooked up to outdoor plumbing. I used treated 2x4's for the base, cedar 1x4's for the top. I bought the bar sink for about $70. I also used a Kreg Jig to screw in the cedar slats from underneath so the screws won't be visible from the top. FYI - Wait a couple of weeks before you paint soaking wet treated wood. The green chemical from the 2x4 is starting to leak through my white paint. I'll have to go and prime/paint it again when it finally dries. Other than that, it came out 10 times better than I could ever imagine.


A variation on your barn style greenhouse. I included a cooling fan with intake louvers, temperature controlled heater and grow lights. Also used anchor bolts embedded in concrete footer.
David Buckmaster d [email protected]


I used 2x12 instead of 2x4 for the base and four 2x6 instead of six for the seating area. So this modified version is higher and narrower compare to the original plan.


Ana doesn’t have a plan for a catio but she does for a playhouse and a cedar shed made from 2x2’s. I sort of combined my knowledge from making her plans over the last 10 years and came up with this for my cats. It was fun to make!! My baby kitten is loving it. I used garden fencing and stapled it to the outside and pocket holes for the walls. I made each wall individually like the playhouse then connected them once in place.


Wed, 06/09/2021 - 12:36
Thank you for sharing! My daughter wants a cat for her birthday but it can't be inside due to our son's allergies. Roaming outside isn't really an option because we have coyotes. We are going to use one of these in combination with an underground electric fence.

This was a great summer project. The table looks great and it was any easy build. Doesn’t get any better than this. I added a hole in the center of the table for my umbrella and used the longer screws for more frame stability.


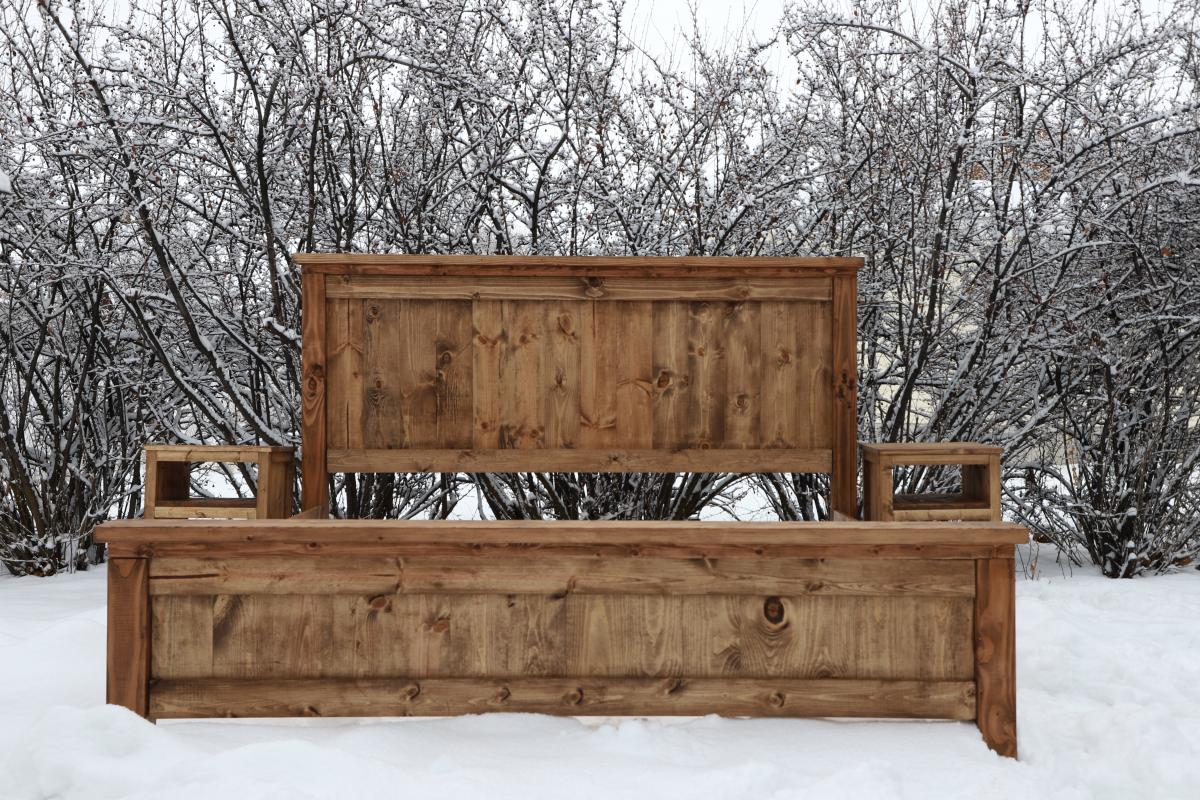
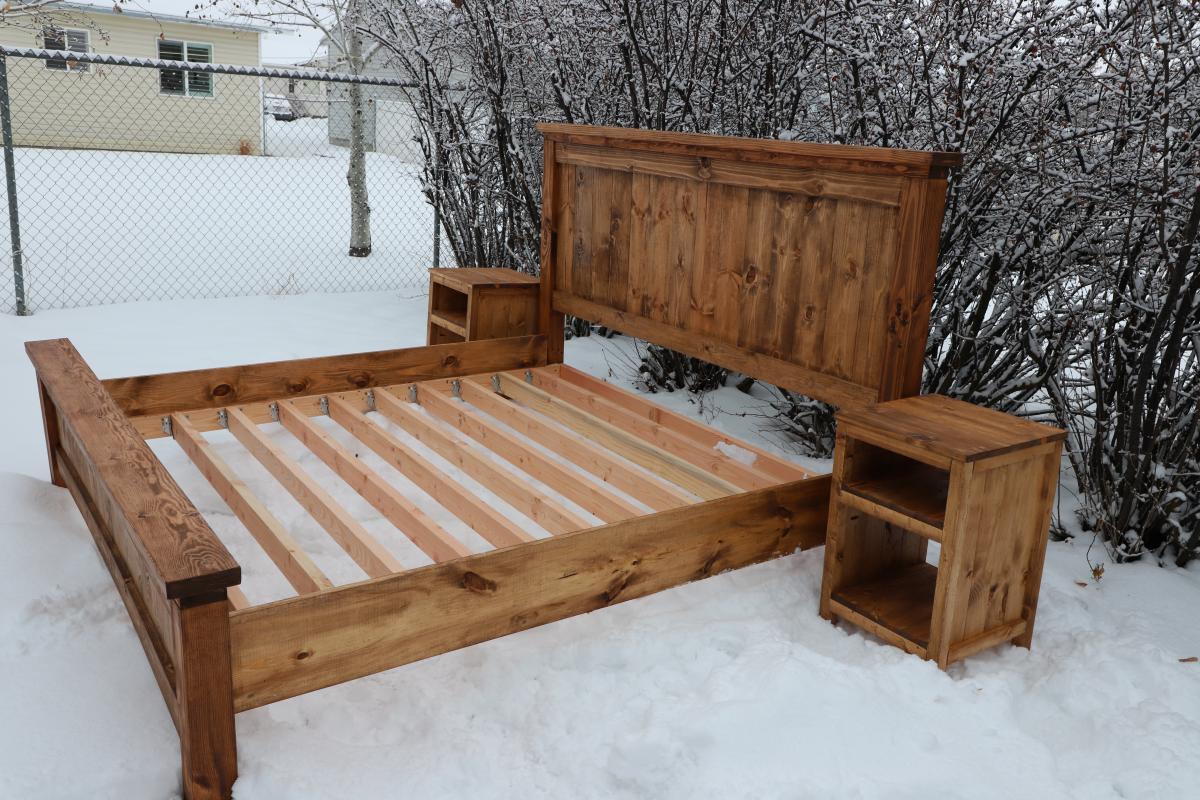
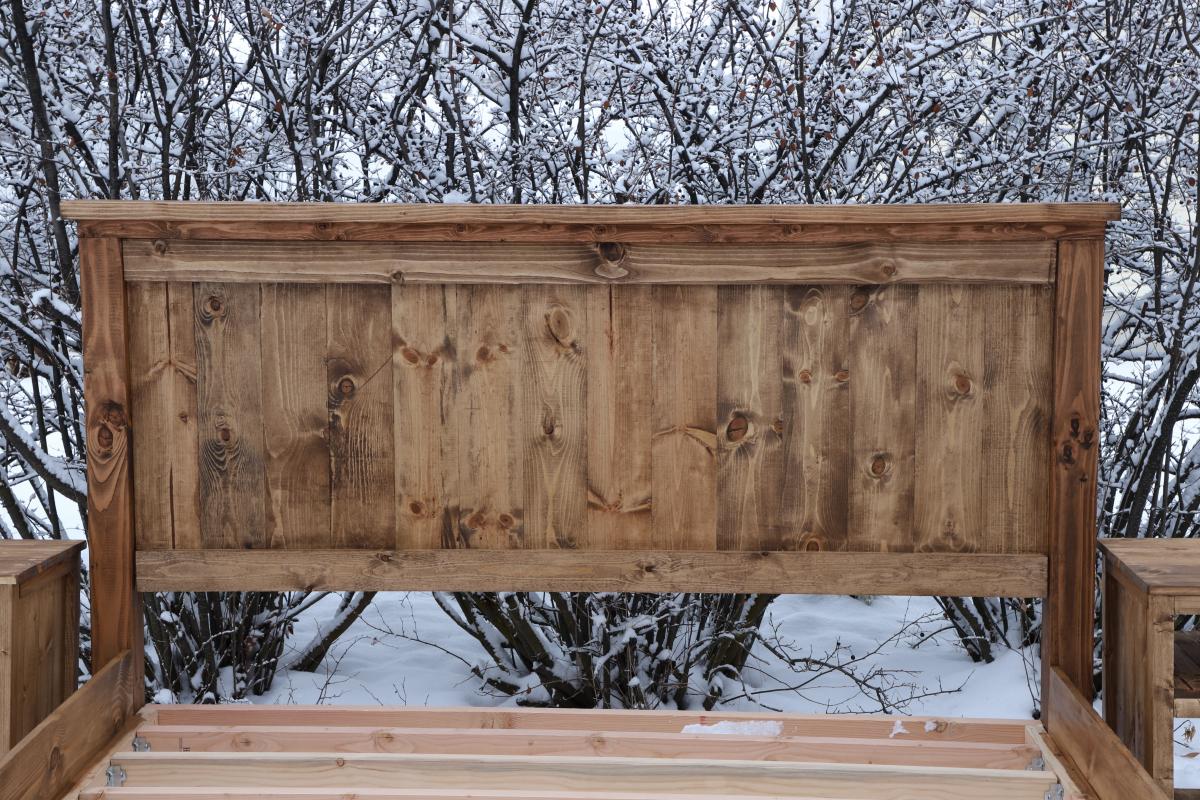
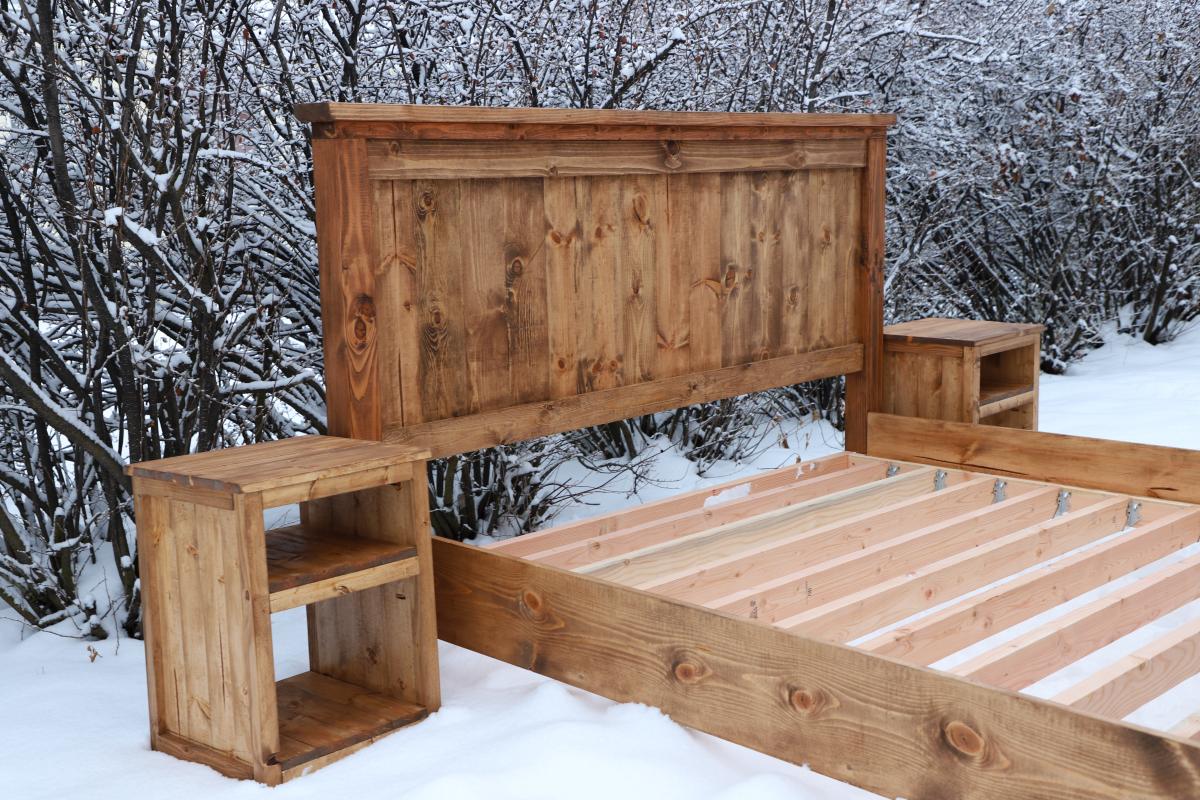
Since developing a love for woodworking I’ve began building things for other people. This particular bed frame I built for a couple who are rebuilding their home after it unfortunately burned down. It’s a beautiful farmhouse home out in the country, and this bed frame fits perfectly in their new home.

I modified this chair with 2x4's as the base and 2x2 for decoration on arms, this is prior to sanding and finishing


My first woodworking project. The plans were easy to understand and my four kids love it!

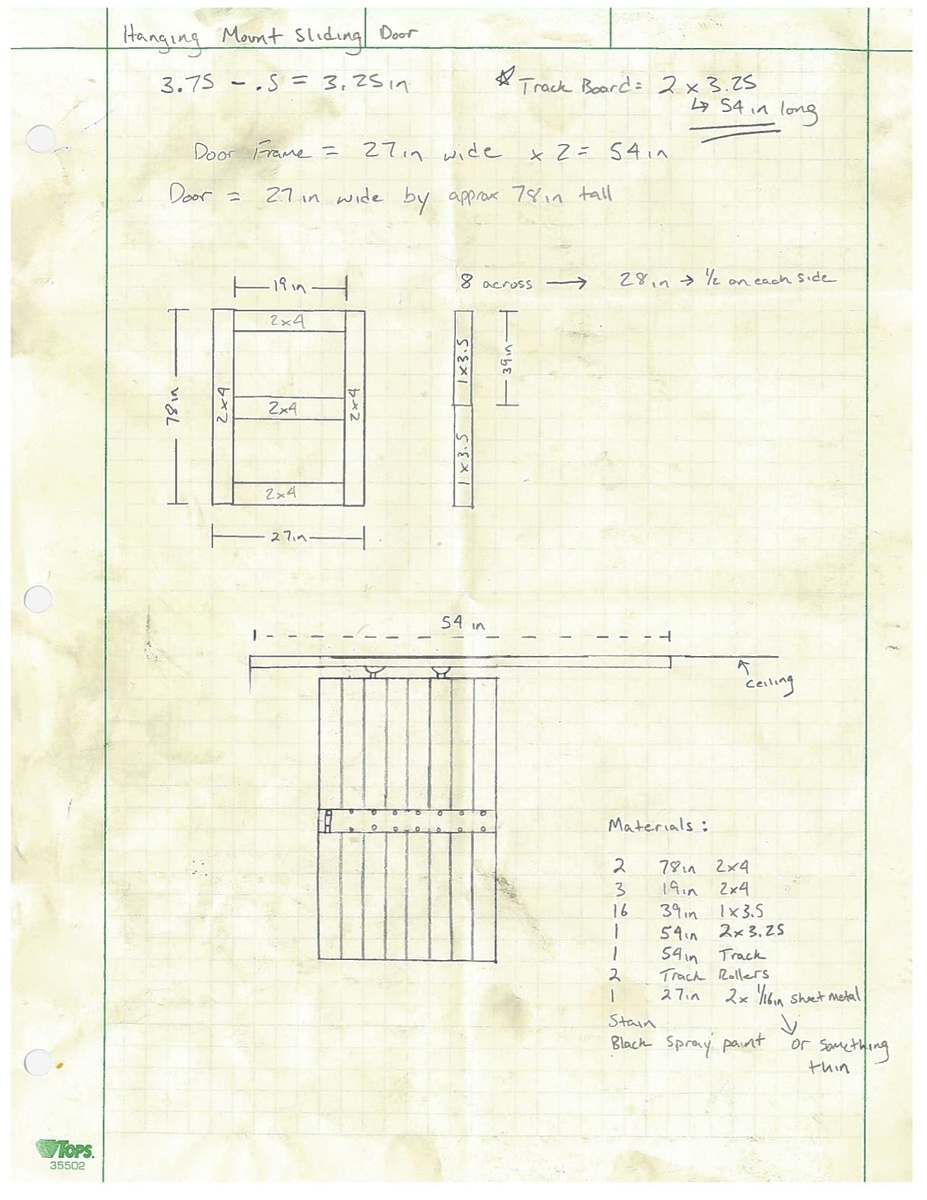
I saw many different sliding door projects online, so I did my own spin on one. I was able to get several old pallets for free (pine and oak). I went to Lowes and bought a few 2x3s which I used as the frame, and the track hardware which was only $13! Most doors I see are mounted from the wall, but since I have 7' ceilings downstairs I mounted mine from the ceiling. This project only took about 4 hours total and cost about $40 when you figure in costs for screws, stain, etc. The most difficult part was taking apart the pallets. Using a reciprocating saw with a 12'' demolition blade is the best way to take them apart. Thanks for the idea Ana.


Mon, 05/13/2013 - 20:00
Hi!!
This looks so awesome! I came across this and was hoping to repeat it. You mention that you found the door hanging hardware at Lowes for $13. I can't seem to find it. Do you happen to remember the name of it? I'm entering "hanging door hardware" into Lowes and Home Depot and can't seem to find any hanging door hardware at all. I'd appreciate the help. Thanks!
Tina

The concept of hidden boot storage at the back is genius!!! I knew as soon as I saw your plan that I needed that in this space! Thank you so much for what you do!

Fri, 01/22/2021 - 11:42
May I ask how you would assemble if you wanted the hinge in the back as in this picture?
Thank you.
Wed, 08/25/2021 - 04:51
Hello, can you tell me how to find the plans for the Mudroom Closet makeover? I’m interested in doing the one pictured on this page.
Thank you