Shoe Dresser
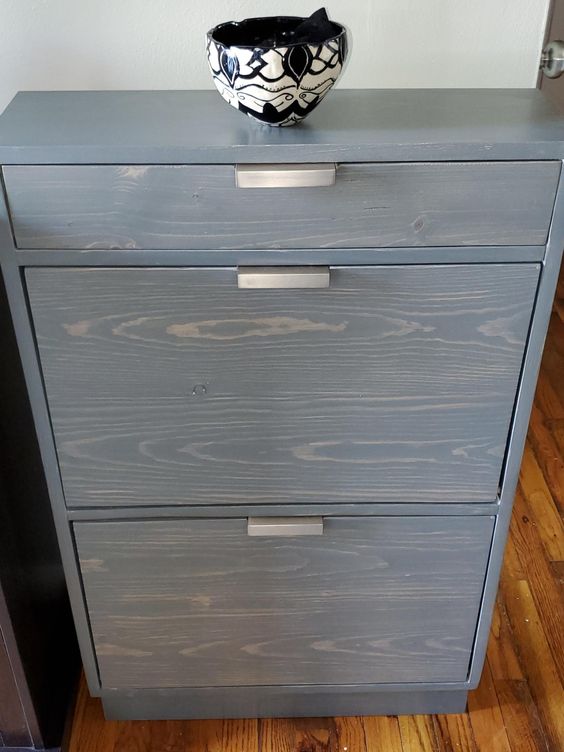
Added drawer and base to Ana's plan
Built from Plan(s)
Added drawer and base to Ana's plan

Made by my husband.


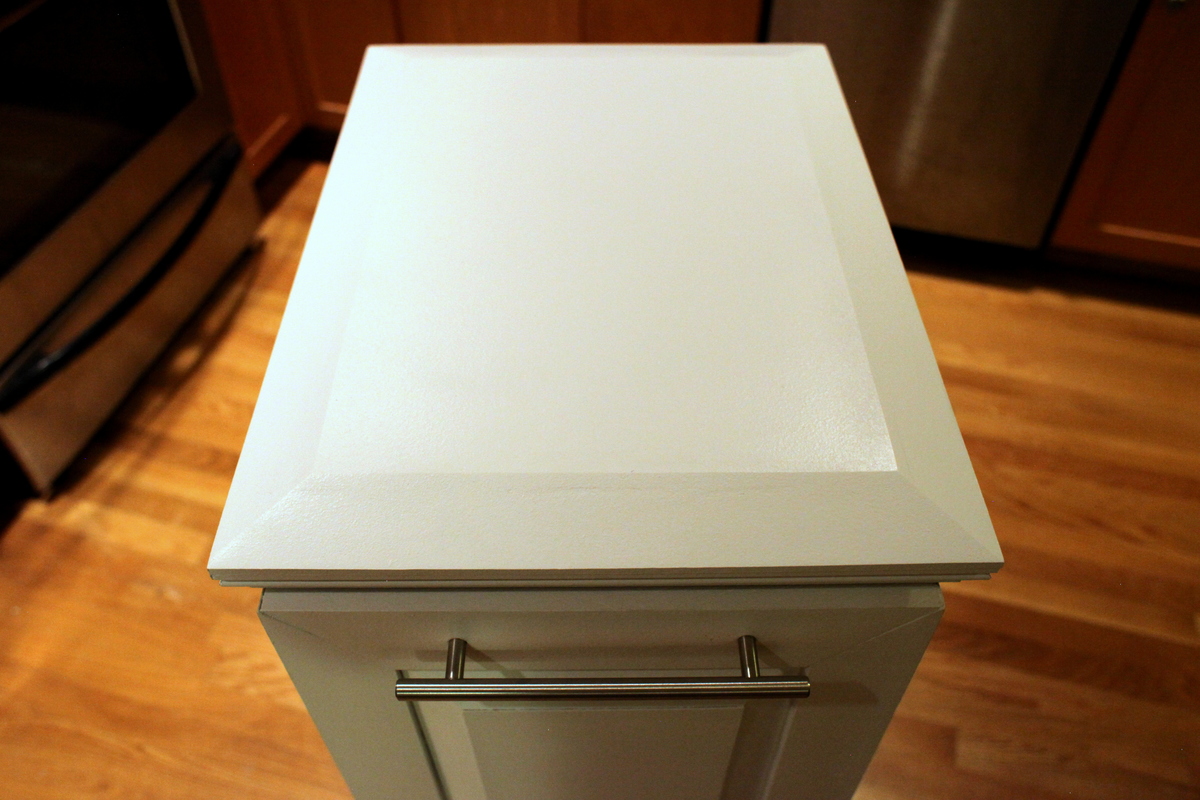
Kitchen cabinet I made with raised panels.
Some more details at:
http://bendrea.wordpress.com/2013/09/22/kitchen-cabinet-2013/


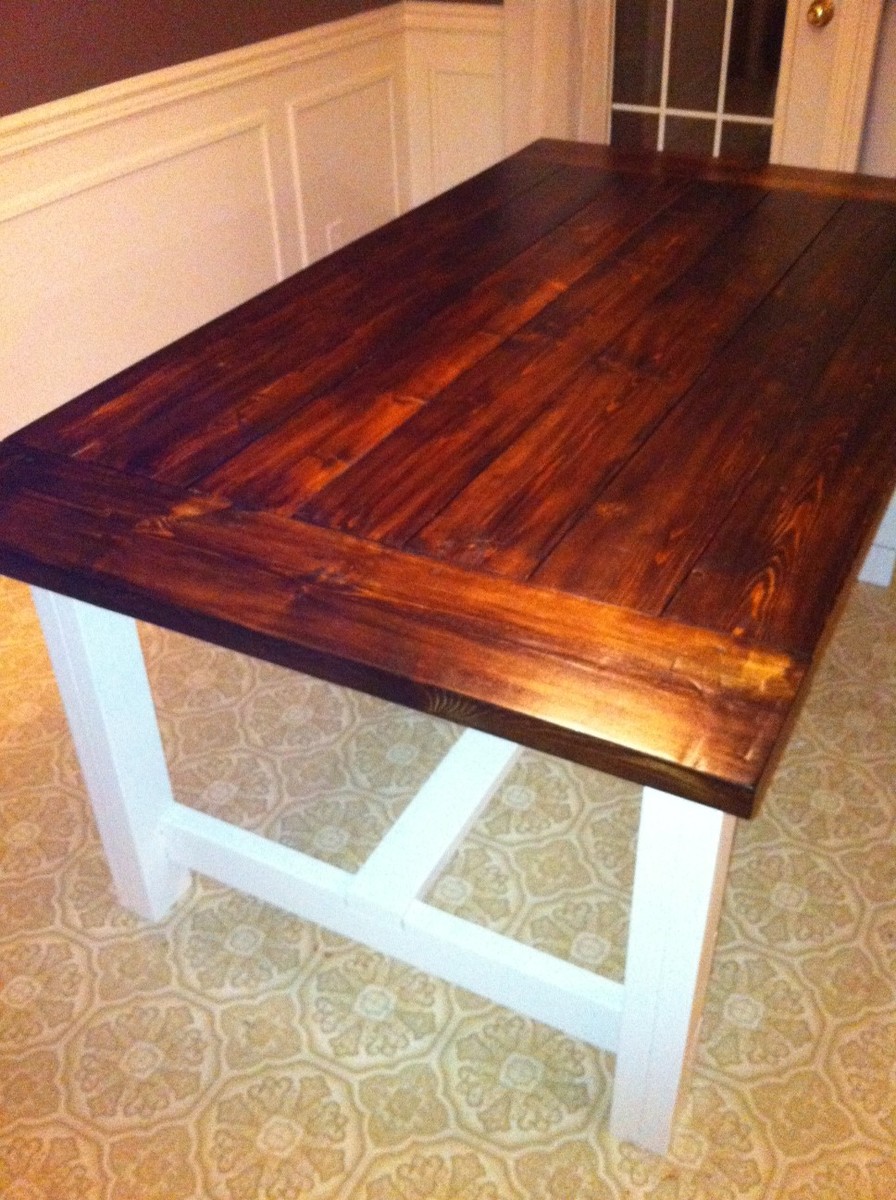
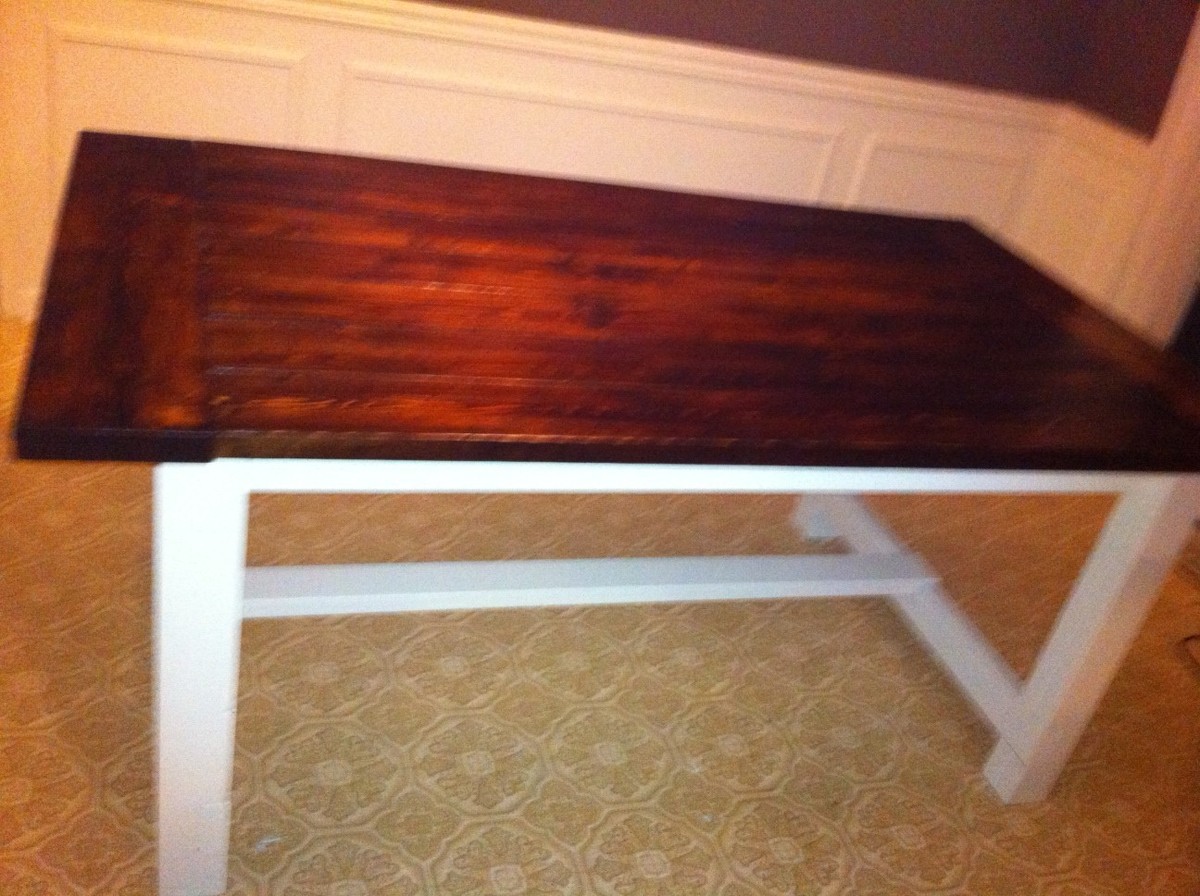
This is the first piece of furniture we've ever built and we are hooked. We used a 2x12x6 for the top and 1.5x1.5 for all the support. We just measured the height of our couch and away we went. This table is so sturdy and fills a need in our home. My husband and I enjoyed spending the afternoon putting this together. I did a color wash on the wood instead of stain. We came in well over the price point, but that is due to where we live.

Made a this for my step-daughter and her husband for Christmas. Love your projects, and am learning to do everything on my own which is so empowering thank you for sharing and encouraging all us girls we can do it!

I love my new table! My wood was a little bit warped for the tabletop, so that's where I ran into the most problems, but I used a hand planer to smooth it down and it turned out perfectly!


Fri, 12/09/2011 - 06:33
Thats quite nice. I'll bet you spent more than half of the time on the finish. Great color choice.

This was a really fun starter project for me. I've never made furniture before and I ran into some issues, but I learned a lot and enjoyed myself! My husband and I live with my Father-in-Law who has all the tools I needed (though I'm going to purchase my own later on).
The stool and table plans are here: http://ana-white.com/2009/11/plan-kids-large-storage-play-table.html . I modified it slightly because I was using scrap pieces (two doors from a particle board wardrobe). I don't like particle board... but I figured since it's my first try, I wouldn't waste any cash since I had all the stuff here, even the nails and screws.
So I made the table about 2 inches shorter and the stool 1 inch shorter. I also used a rectangle top for the table with one side flush against the table side so I could put the set against a wall (i.e. three sides have overhang, the 4th is equal with the legs).
I painted both sets a dark red orange (my husband's favorite color) and let my daughter put her handprints all over in white paint . She LOVES it. And despite the 'wood' I used was particle board, it's pretty strong. I'm pleased. I will probably make another one with stronger material in the future.
Oh there were a lot of holes and such from the used board and some breaks from being thin, crappy board, but I was able to use filler one a lot of it and glue too. It's hard to tell it was a beginner job from a few feet away! Haha!


A joint effort between my dad, my husband and I! I love the way it turned out! The painting was a little time consuming but totally worth it. Cannot wait for my daughter to see this on Christmas morning. My dad even made a little crib and highchair, which are just adorable!


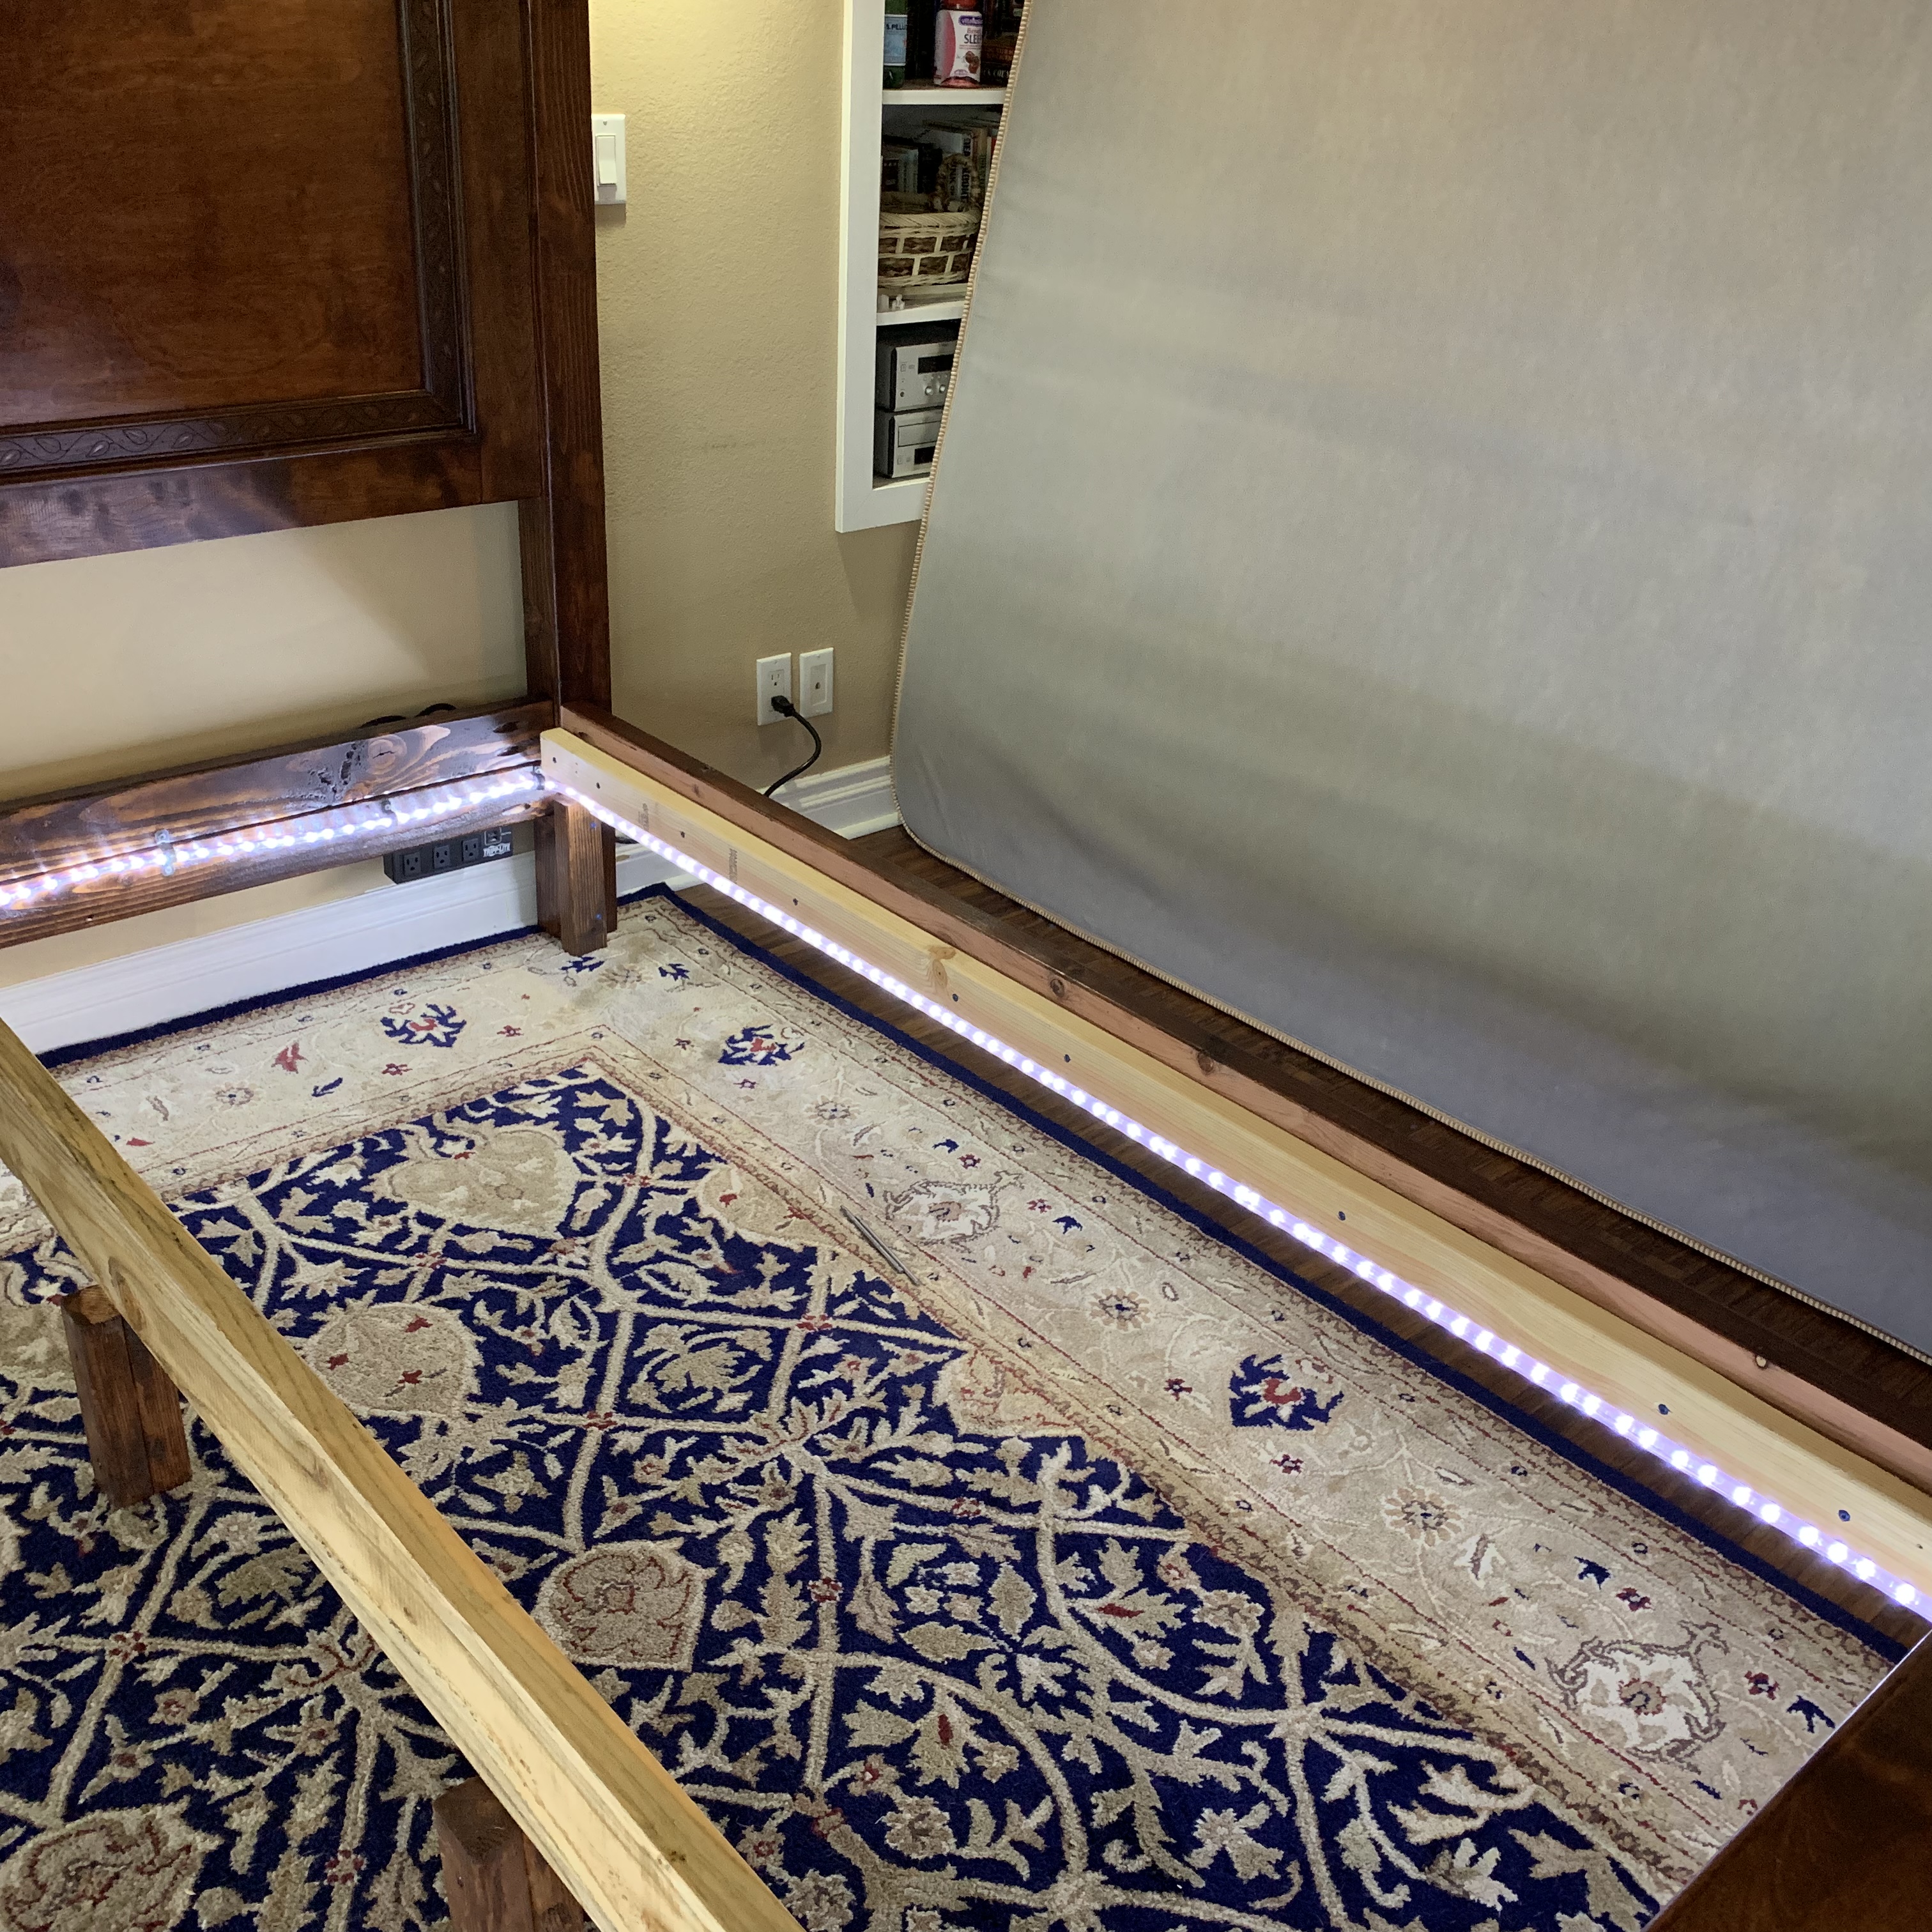
This was my first furniture build. Wanted something a little more detailed, so did solid panels, and inset molding into the panels for depth. I also wanted a taller footboard, so the panel is 18" high instead of the 15" that the plan showed. Ended up adding some crown molding as well, but mostly to cover up my mistakes. Also dressed up the side rails by covering them in a matching molding as well. Didn't want to use box springs, so moved the slats up to the top of the rail, and spaced them with 2" gaps between slats to give maximum support to the mattress. Since we have a small dog that I tend to trip over in the dark, I ran a 24' rope light along the interior side panels and footboard, and plugged into a wireless switch that I mounted to side of headboard, which I can turn on and off from bed. Stained it with General Finishes Mahogany Brown and then two coats of poly. Really happy with the way this turned out! Can't wait to do some more building, thanks to Ana! :-)


Thanks for the plan Ana… my Christmas break project. Plans were very well done….
Joe in Boston…


I recently built the Parson Tower Desk (which I see is no longer here on the site). I built it up 3 tiers vs. 2 tiers as the plan called for. Using the Kreg Jig this desk came together like a charm. It was the first piece of furniture I've ever built. Following Ana's plans was so simple. The part that took me the longest was painting it.


I built this Taylors console table and barnwood frame for my guest room which also contains my double Lydia daybeds! The room that Mary built...

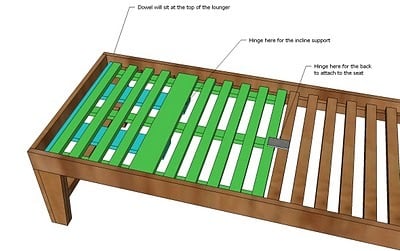
Here's my version of the plans. Not a big difference but i used triangle supports for the mattress instead of strips of 1x1.

A fun project that my girls loved. Through a flat sheet on top for fun!

Reader submitted photo

I am so grateful for this site and the detailed plans. My youngest daughters bedroom is super small and had very little room to play. I have been wanting to get or build her a loft bed, but most sites wanted money or the beds were very generic. I started this project on Christmas break thinking that I could get it done over the holiday. After about 10 trips to the hardware store and working on it periodically, it was finally finished in March. Both my daughters love it. My oldest now want one, but I think her room is more of the fashion of an industrial looking metal one. I did make some modifications to the front as I did not want to close it in, making here room look smaller. We have put up curtains that she can close. She will sit for hours reading and playing underneath. I have gotten lots of comments from friends. This was a tough but good starting project. There are some things that I would do differently, small things. Thanks Anna for your website. Now, on to a bed for me. No, it will not be a loft bed. Thinking of a platform bed.
Fri, 09/30/2011 - 05:19
What a great job... I love how you have left the front open with an added curtain for her to hide away. We have not long finished a loft bed as well, massive job but worth it for the look on our daughter face :)
I also love how you have painted it the same colour as the walls, makes it blend and not seem to large. Well done!
Fri, 09/30/2011 - 09:21
Great job! We are slowly gathering the supplies (and saving money) for this project for our daughter's room which is verrrrrrrrrrry small - very small!
I love that you opened up the entire front side and put a curtain up! I may have to steal your idea...I wonder if I can convince my daughter to give up the 'window' in the original design, though.
It looks great! You did a wonderful job on it.

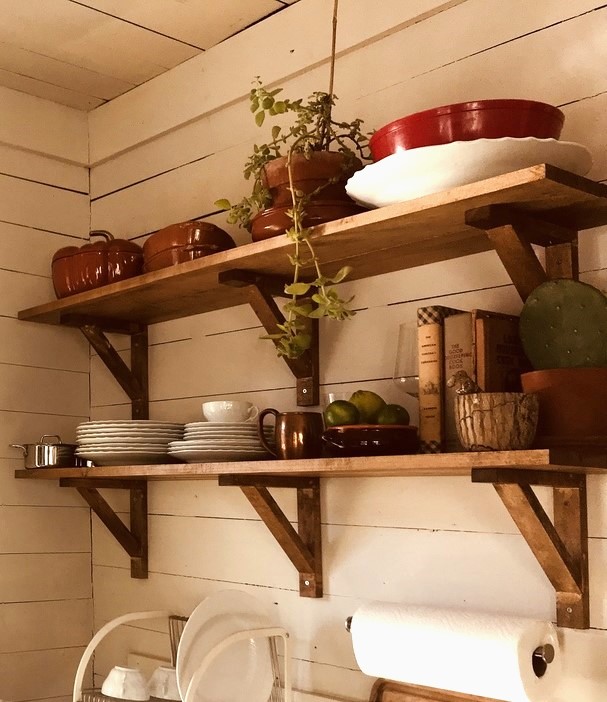
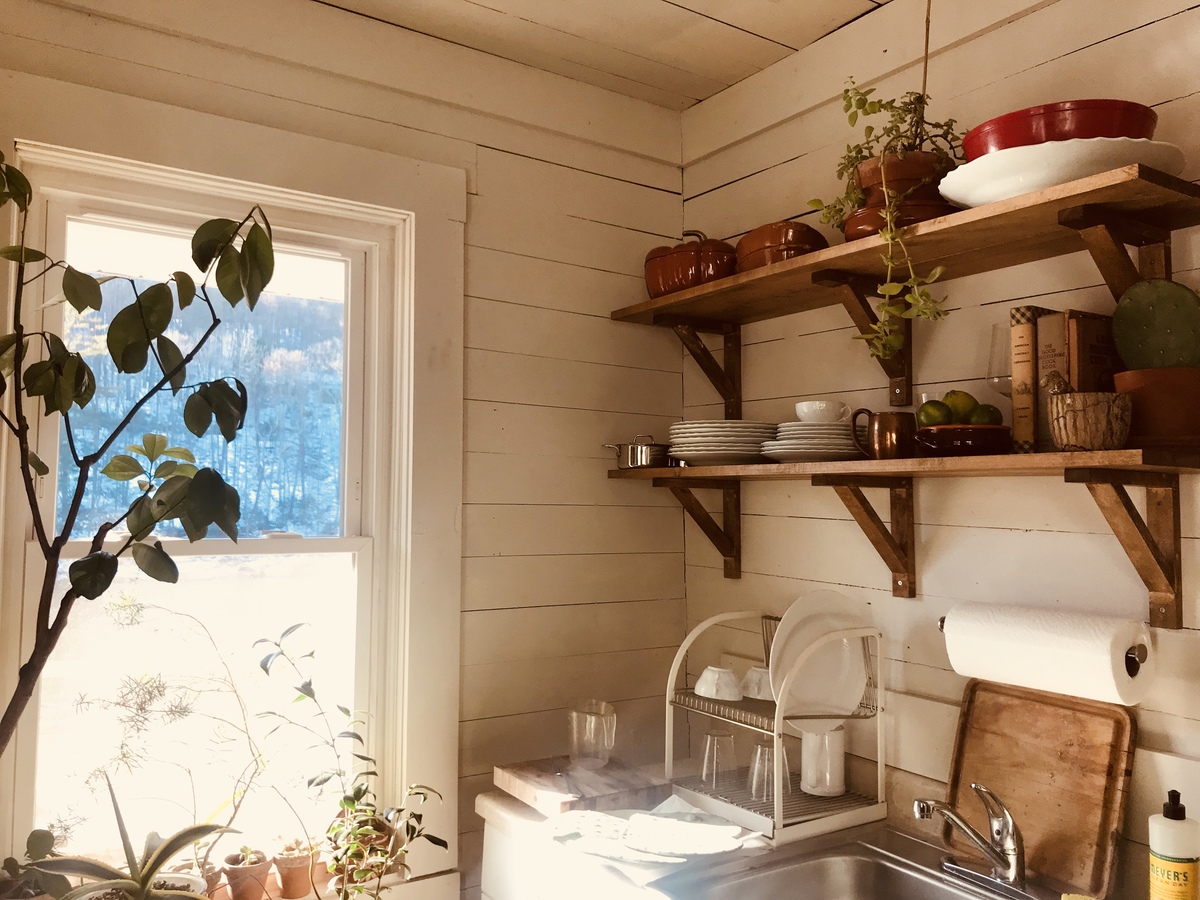
My husband and I worked together to build this spice rack with the plan from ana-white.com. The instructions were very clear and easy to follow.
As you can see from the photo, we haven't hung it on the wall just yet. We have a narrow galley kitchen in an apartment, and I won't be able to get a good photo of it once it's hung.
Thank you, Ana, for inspiring us! We have picked out several more plans to build.
Sarah Hughes
We wanted to get rid of the plastic contractor’s cabinets in our tiny 1930 cabin on the Delaware River. Found your plans and video and went straight to Home Depot. Took only a few hours and we love it!
Mon, 03/04/2019 - 12:59
Perfect for the space, great job and thanks for sharing!
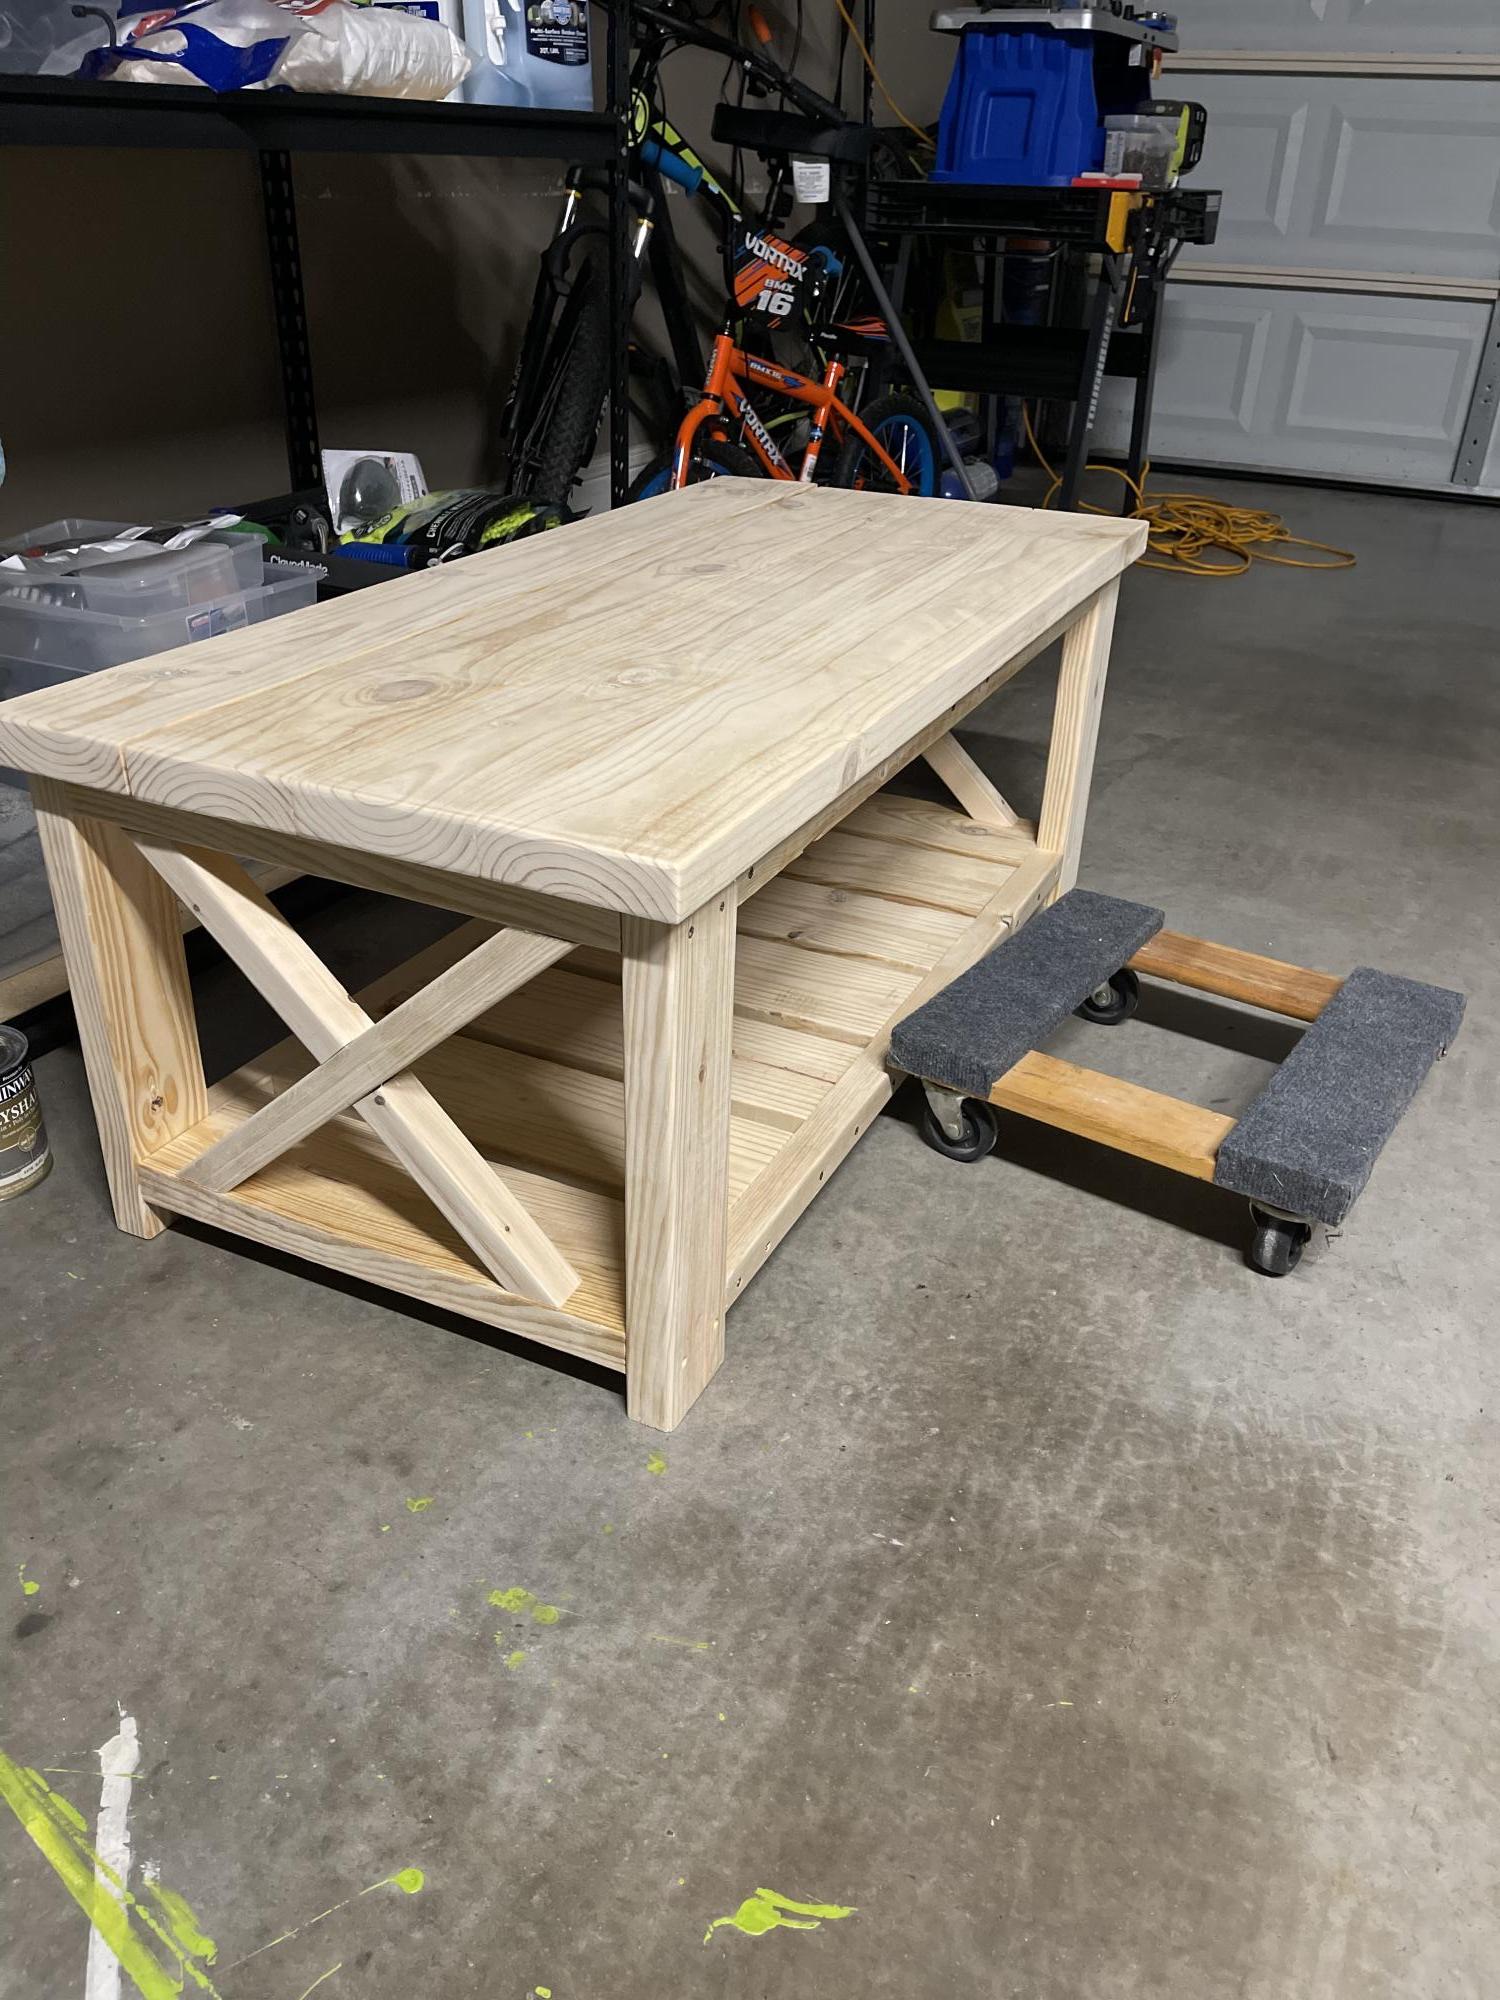
First time doing anything this big. The crosses on the side kicked my butt but I think I got them figured out.


Comments
Ana White Admin
Tue, 12/13/2022 - 12:13
Fantastic shoe storage!
Super cool, love the mods, finish and hardware! Thanks for sharing.