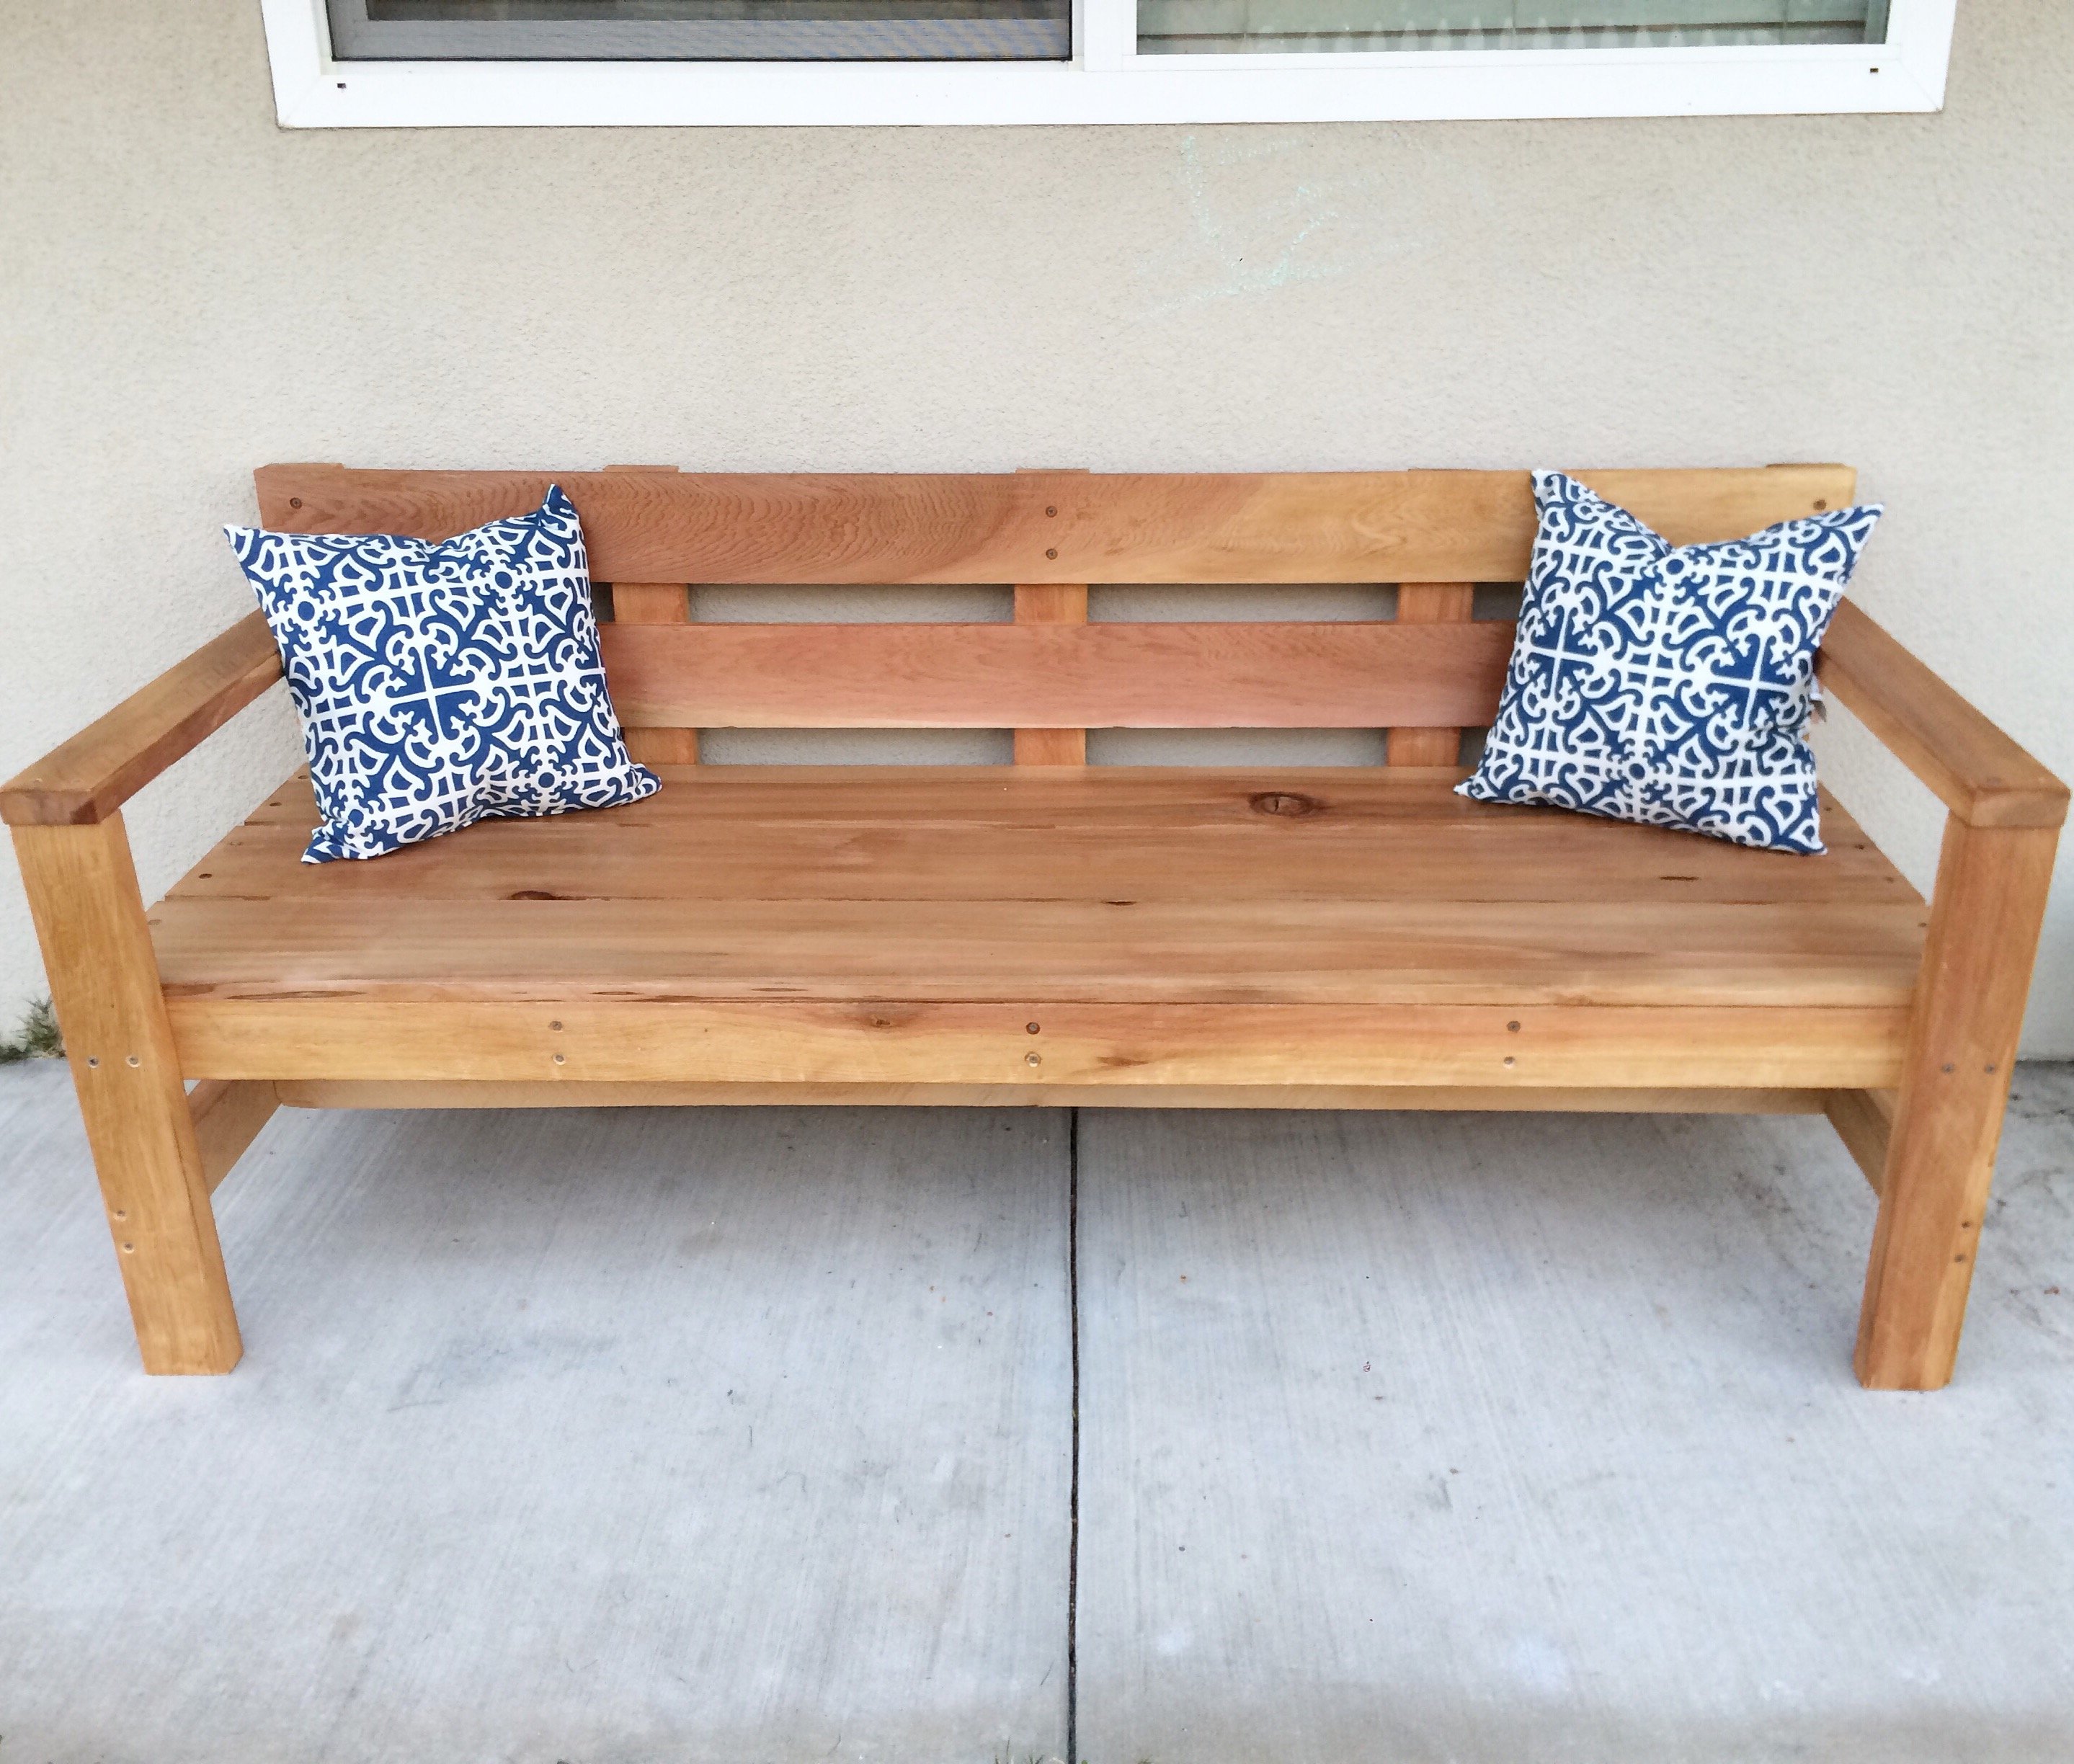
Community Brag Posts

Garden Bench!!

Submitted by Nathan1342 on Mon, 08/06/2012 - 12:09

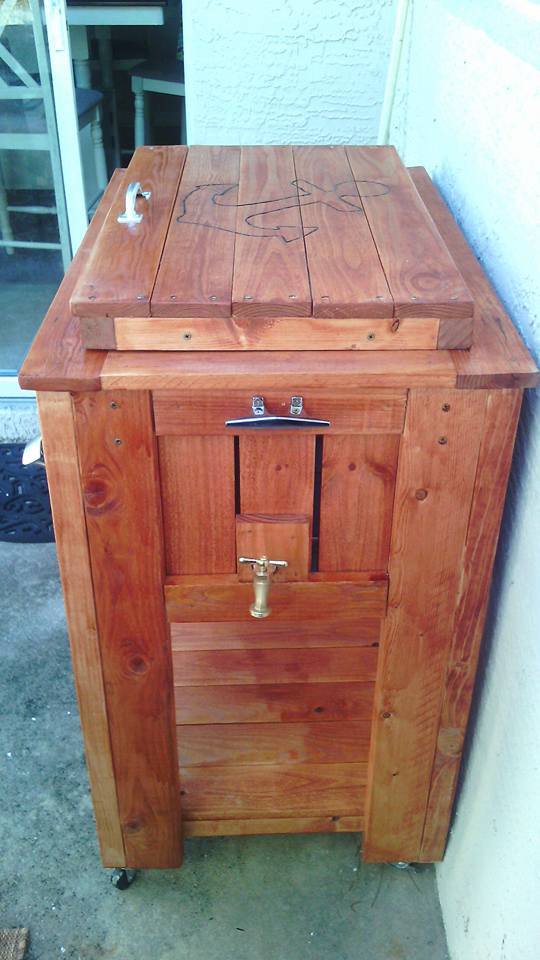
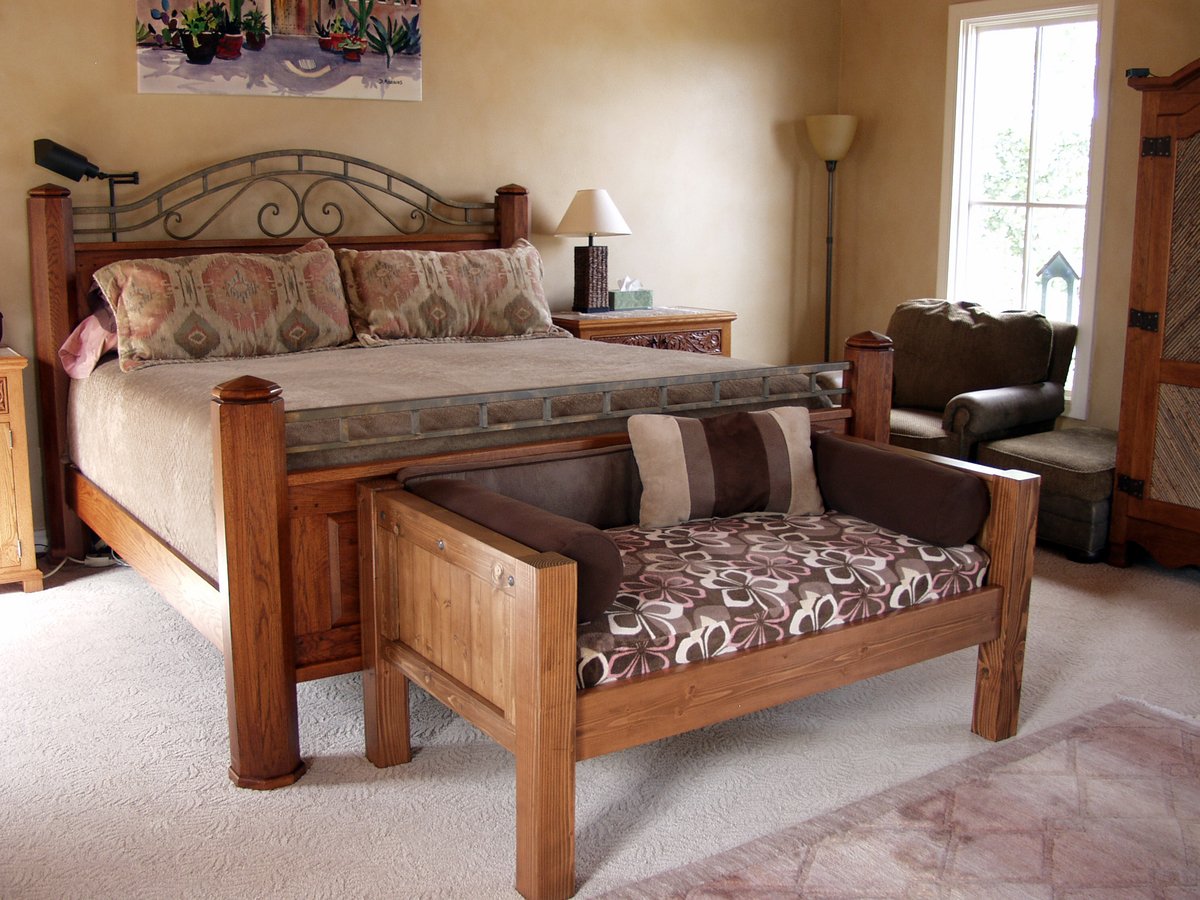
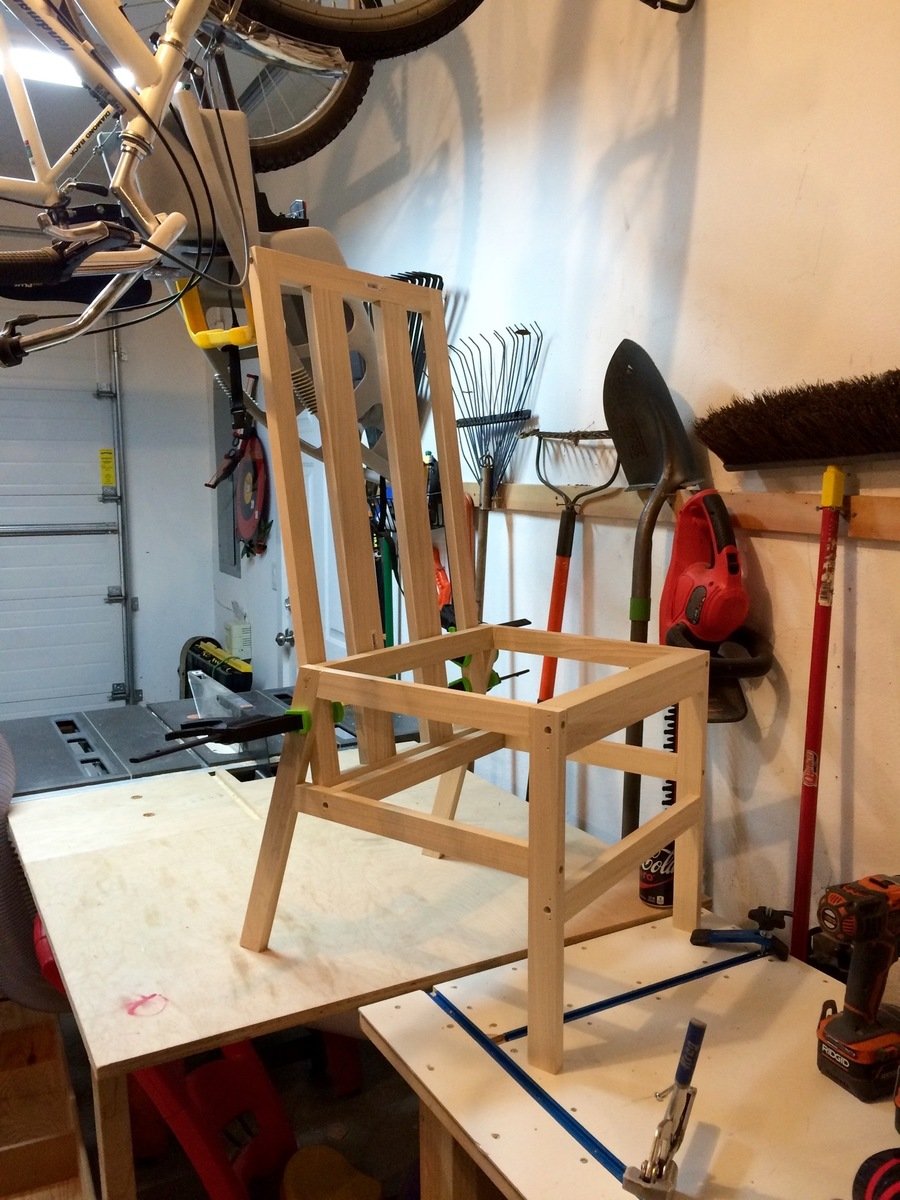
I built this for my wife for an anniversary present. She had wanted a garden bench for some time but the ones that she wanted were between $500-$700 which is ridiculous for this type of bench. So, I did a search on here for garden benches but there weren't really any plans for them and the few brag plans were not really the type of bench I was looking for. I printed off a few pictures of benches that I liked and got to work. The front and back legs a 2x6 and a 1x6 glued together and then cut to be straight. I wanted something thicker then just a plain old 2x6. If I had to do this again though, I would have just glued 3 1X6's together. The reason being, is that 1x6's usually do not have a rounded edge and a 2X6 does. So needless to say when you glue them together you have a nice little gap on either side. Without a table saw to take this off, its pretty difficult to get a straight cut. But I ended up getting it right after sweating for a few hours in the garage. The bench stands 36 inches high, 48inches wide and about 18 inches deep. The seat height is right at 18in also.

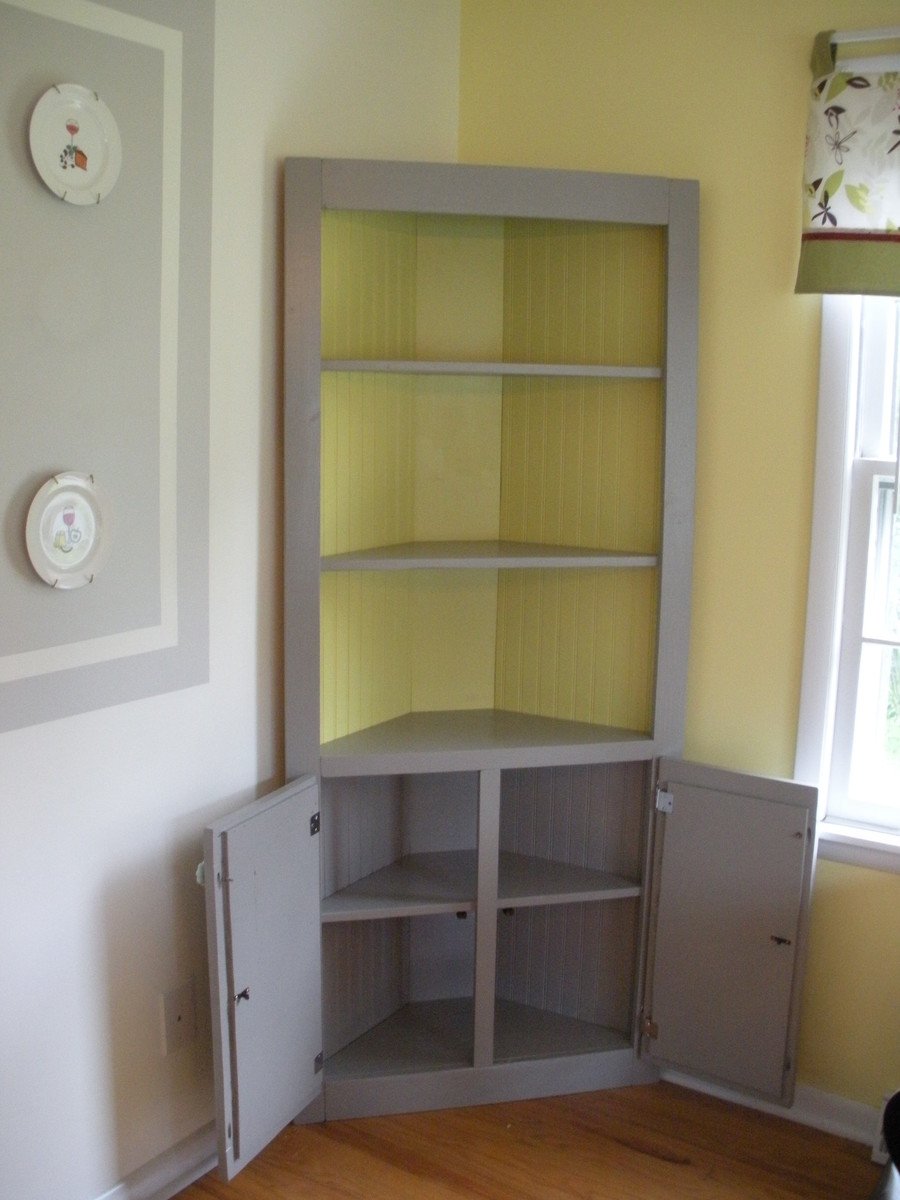
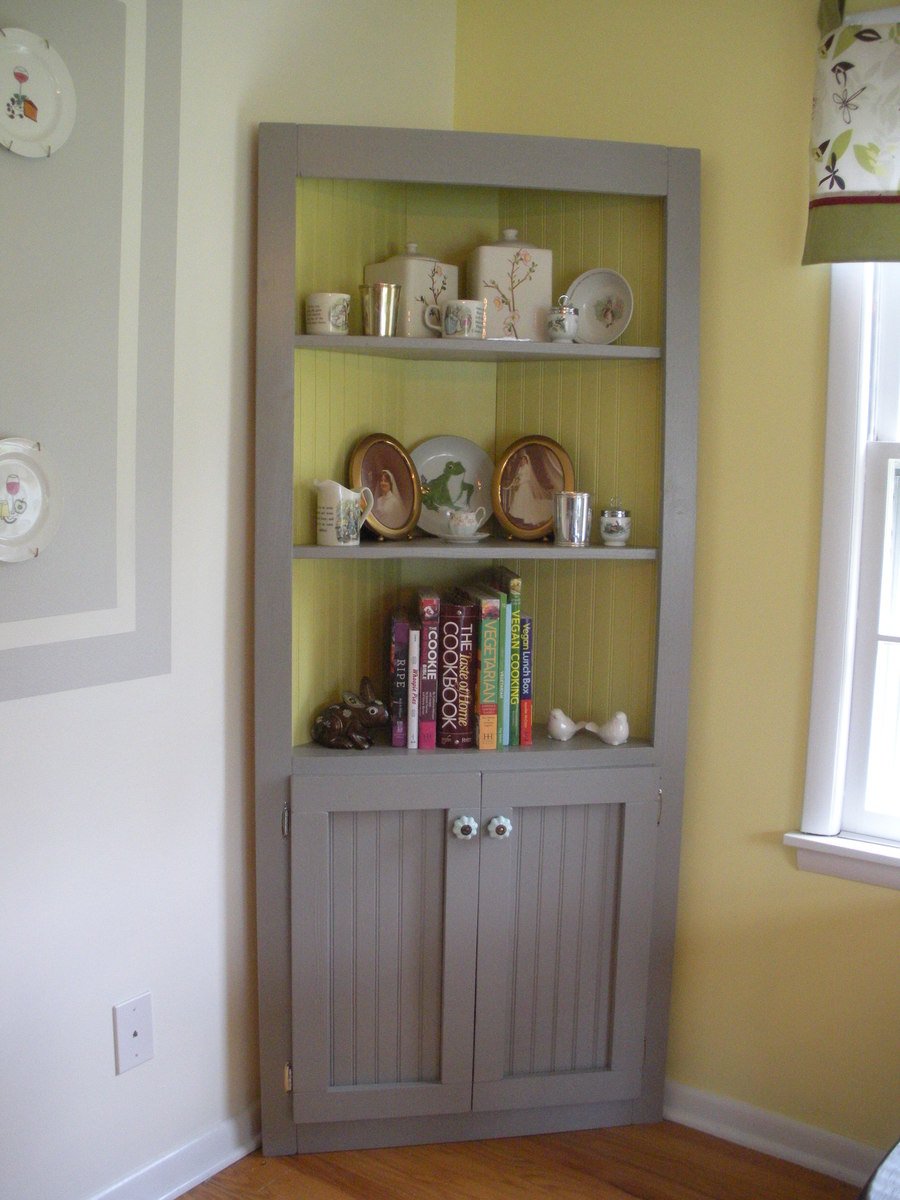
In the unfinished pictures I actually had the depth being 24 inches. After sitting on it though it was just way to deep. So I pulled it apart, made the adjustments and its now much more comfortable to sit in.

If anyone has any questions or wants more details feel free to drop me a line!

Thanks!

Estimated Cost
85
Estimated Time Investment
Weekend Project (10-20 Hours)
Finish Used
Oil based acrylic paint
Recommended Skill Level
Beginner

Comments

Torwart13

Tue, 06/16/2015 - 11:25

So legs are about 2 1/4" square? Are the seat supports 2x4's? Back cross pieces 2x4? Slats 1x4"?

smz1919

Wed, 06/17/2015 - 12:39

how did you get the curve on the back legs?

In reply to by smz1919

Nathan1342

Fri, 06/19/2015 - 13:34

I glued a 2x6 and a 1x6 together to get the thickness. Now that i have a table saw and a jointer this entire process would have been much easier but after getting it to look like one solid piece i just outlined the slant i wanted and cut it using a jig saw.

smz1919

Fri, 06/19/2015 - 20:17

So the back slats are just glued in place right? I wonder if it would be easier to use a biscuit joiner or not

Mikeyw221

Sun, 10/23/2016 - 17:46

on the back legs how high up did you go before you started cutting the angle? and was it around 15 degrees fromt he edge?

SawdustMaker21

Wed, 05/26/2021 - 08:32

Hi Nathan
Love the look of the bench. Would you have a list of material requirements. I intend to make a bench like this and would like to know the measurements of the top back spar (the shaped one).
Here in the Uk our timber yards do not always supply the same cuts as the US so I need to have some idea of the pieces I need
Many thanks

Farmhouse counter stool - Thanks Ana!

I started learning woodworking several weeks ago and came across your video and plans for the Farmhouse Counter Stool. It was easy to follow, and I love how it turned out! I made one first as a test, and I think I'll make three more. Thanks Ana!

Built from Plan(s)
Estimated Time Investment
Day Project (6-9 Hours)
Finish Used
Chalked paint - linen white and coastal blue, matte clear finish
Recommended Skill Level
Intermediate

Comments

Williams Sonoma Inspired Chicken Coop

Submitted by Anonymous (not verified) on Tue, 11/10/2020 - 18:46

We took some creative liberties on the Williams Sonoma inspired coop posted here. Because we don’t get a whole ton of sun in our backyard, we eliminated the herb garden planter and instead built a longer run. We also made the coop a bit wider to accommodate for the inevitable chicken math. And, you’ll notice the vent both shaped differently and is a bit higher. This was to increase air flow, avoid the dreaded draft, and to lend a more Scandinavian vibe. We also decided to place the chicken exit on the outside wall to allow for more living space under the coop itself. The project took about a month to complete, dedicated to only working weekends. And, it was very much over budget! Who knew wood is so expensive?! But overall, the outcome was even better than I expected. The chickens love it and I don’t mind looking at it!

P.S. this was a pretty advanced project. The fractions alone had me yelling “uncle!” Thankfully my husband is pretty handy, and my father-in-law (career in the construction industry) had a few pointers, so they took the lead in executing. I chose the paint colors and suggested the deviations from the original blue print. ;-)

Estimated Cost
$1000
Estimated Time Investment
Week Long Project (20 Hours or More)
Finish Used
Sherwin Williams Iron Ore in matte
Recommended Skill Level
Advanced

Comments

racbino

Wed, 11/18/2020 - 12:55

Thank you! Yes, I suppose everyone is wanting wood for home improvement projects now that we're not leaving the house! Also, I didn't mean to post a picture of my son and his friends. Am I able to delete?

joshwilson28

Thu, 01/14/2021 - 07:43

does this roof have the same angle as the 'Small Chicken Coop with Plans'? It seems to be 'less steep'. Wanting to start this project next weekend and trying to get my mind wrapped around everything!. Thanks.

Seasonal And Holiday

My Extra Wide Simple Dresser

Submitted by adpeters on Thu, 02/05/2015 - 18:35

This is the first dresser that I have ever made. There was a learning curve, but not much. It was a lot of fun and I hope you enjoy it!

Built from Plan(s)
Estimated Time Investment
Weekend Project (10-20 Hours)
Finish Used
Egg White Paint with Minwax® Polycrylic® Protective Finish on top
Recommended Skill Level
Beginner

Comments

nvadrevu432

Tue, 02/16/2016 - 10:40

what kind of wood did you use to build the drawers? i have used 1X6 and 1X8 as per the plan and the drawers dont fit in the frame. sliding doesnt work properly. plewase let me know, thnks 


Simple Outdoor Lounge Chair - Beefed Up

Submitted by Radcrafter on Sun, 06/24/2012 - 10:55

Loved building this chair. Super simple to put together and very sturdy once everything came together.

I modified it to create a larger and taller chair, using 2x6 and 2x4 lumber. Because of this change I felt like my math challenged brain was completing some sort of quiz, but to keep things simple I cut the pieces step by step recalculating lengths as I went.

I marked up the plan as I went, so if anyone is interested just let me know & I'll add the changes.

http://radcrafter.com/2012/06/simple-outdoor-chair-beefed-up/

Built from Plan(s)
Estimated Cost
$20-30
Estimated Time Investment
Afternoon Project (3-6 Hours)
Finish Used
outdoor stain in solid slate
Recommended Skill Level
Beginner

Comments

spiceylg

Sun, 06/24/2012 - 18:18

I thought it looked beefier and I prefer that look. I'm curious, what size cushion is that?

J (not verified)

Sun, 08/19/2012 - 08:29

I would love to see your changes and build the beefier version! Please share!

Tammyctr

Thu, 07/26/2018 - 07:05

I have a large (400+) family member who I need to make chairs for.  This plan looks perfect (even though I will have to probably adjust width and add additional support)  Can you please send me your plans?

Outdoor side table

Keeping budget with wood projects, made side table for outdoor fire pit area.

Estimated Cost
$25
Estimated Time Investment
An Hour or Two (0-2 Hours)
Finish Used
Legs and braces=rosewood stain
Top=honey pine
Recommended Skill Level
Starter Project

Cat Tree/Condo

Submitted by Joni on Sat, 05/11/2013 - 07:22

I always wanted a cabin-type cat tree where my cats could crawl in and feel safe, but still have a great view of the birds out of a window. I tried to draw my vision on paper, but that had a hideous result. Learning Google SketchUp (at least the basics) was an absolute necessity. I could never have built this without drawing it in 3D first, and seeing how the boards would connect, etc.

For the scratch pad, I built a frame out of 2x4s on top of plywood, covered it with carpet, and dropped the standard size scratch pad in place. This is the cat's favorite feature. I put barn doors on the window with tiny hinges so that I can close for added privacy. The tree sits against a window so that the back side is totally open. I made cozy zippered cushions for the platforms (that can be taken off and washed). I covered the carpeted areas with spare carpeting.

Estimated Cost
Approx. $30 for can of paint, varnish and a 4x4 (all other was scrap material)
Estimated Time Investment
Weekend Project (10-20 Hours)
Finish Used
Combination of Minwax Water-based stains: 6 parts Colonial Pine: 1 part American Walnut, followed 3-4 coats Minwax Polycrylic
Recommended Skill Level
Intermediate

Comments

bhoppy

Fri, 07/12/2013 - 09:36

Would you mind sharing your dimensions for this? It is absolutely beautiful!

Jodi W

Sun, 08/25/2013 - 08:10

Do you have the plans somewhere? I really want to build this (even got the okay from the hubby!) but I don't think I could do it without some serious guidelines...

Joni

Fri, 08/30/2013 - 15:55

First, sorry for the late notice; I just happened to look and saw the comments/questions.

I don't have plans...all I have is a google sketchup diagram that I created as a guideline for my construction (which is included in the photos), which is not to scale. Actual measurements are:

* Base (green carpeted base): 33.5" x 19"
* 4x4 legs: 35" tall
* 'Mezzanine' scratch pad level: 22" x 17.5"
* Mid-level base: 18" x 32"
* Enclosed cabin: 18.25" x 22.5" x 17" high
* Highest point: 56"

This has turned out to be a fantastic hit with the cats. They use all 5 levels, but the scratch pad and cabin are their favorite spots. If you need anything else or additional pics, please contact me.

Jodi W

Fri, 08/30/2013 - 18:15

Thanks for the dimensions, Joni! I'm trying to learn SketchUp so I can draw up my own plans, also. If I can't figure it out, I'll hand it off to my 12 year old, who is a pro at it (go figure). I know my cats will love it if I can manage to get it built!

Joni

Thu, 10/31/2013 - 14:30

Bhoppy -- I looked at your cat tree on facebook. It's awesome! The sturdiness of it shocked me too. And I was initially worried that my cats might knock it down!!

The worst part of building it was getting that lower scratch pad level on straight with the 3 posts. I'd never want to do that again!
Thanks for sharing, Joni

gregmasciola

Fri, 01/02/2015 - 01:18

Funny, almost every time I'm looking for ideas or inspiration when I want to build something, I end up back on this site. I was searching for pictures of cat trees and this was the only one that made me say "Holy crap, that's EXACTLY what I want!" My cat will love it!

M0710NM4N

Mon, 04/27/2020 - 20:41

Not sure if anyone is still around to see this, but I fell in love with this tree the second I saw it. Wondering if anyone created a detailed plan and might have it handy or possibly a detailed sketchup and wouldn't mind sharing the save file?

In the event nobody has either... I'm planning on having someone else build this for me as I don't have the tools nor skill to do it myself. I have a few questions:

1. The tree base/platform, what's a good recommended thickness?
2. The platform for the scratchpad... is there any certain reason it's so much thicker compared to the other platforms?

Thanks.

whiteroses9

Sun, 09/12/2021 - 11:51

Reverse engineering this project, using just 2x4s. None of the photos show the undersides. How are the plywood pillow bases attached for the top and bottom of the cabin? and the base of the top viewing platform?

Cute corner cabinet!

Submitted by rmurray87 on Sun, 06/02/2013 - 11:24

This project took me the majority of a three-day weekend to complete, but it was well worth it! I had the lumber store cut the beadboard panel for me so that it would fit in my car. This was also the first time I built something with doors on it, which was a bit of a learning curve, but came out alright in the end. I used pocket holes to build the face frame, and attached the shelves to the frame first before attaching them to the 1x8 back. I used 1 1/4" pocket hole screws and 2" wood screws. I left off the trim at the top and didn't bother to cut out the footer, but I think it still looks pretty cute.

Built from Plan(s)
Estimated Cost
$110
Estimated Time Investment
Weekend Project (10-20 Hours)
Finish Used
Accent color: Appletini from Valspar
Main color: Earthy Mushroom Taupe from Glidden

Everything was given a good sanding and a healthy dose of primer before painting.
Recommended Skill Level
Beginner

Comments

Modern Park Bench

Submitted by TaylorMade on Tue, 03/08/2016 - 18:42

HI Ana! Just wanted to tell you thank you for sharing all your knowledge. I really got inspired reading your book and looking through your website. I was quite intimidated but I finally completed my first build. It feels amazing and I am so grateful for your help! XO Sarah Taylor

Built from Plan(s)
Recommended Skill Level
Intermediate

Comments

Wooden patio Cooler by DIY Pete

This was my very first project I did. Very proud of how this turned out. Now my sister has one and I am building another one with Mickey Mouse on it for my other sister. I build it in a day with lots of breaks due to 4 teenagers.

Built from Plan(s)
Estimated Time Investment
Day Project (6-9 Hours)
Recommended Skill Level
Beginner

Tall Rustic X Bookshelves

I followed the Rustic X Tall Bookshelf plan to make a set of bookshelves for my husband for Christmas! It was my second ever woodworking project. The plan was really easy to follow and so fun to make! I ended up using an additional shelf piece on the very top for a more modern spin on it. I also bought a pocket hole jig to use on this project. I'm happy with how it turned out!

Built from Plan(s)
Estimated Cost
$75 per shelf
Estimated Time Investment
Weekend Project (10-20 Hours)
Finish Used
MinWax English Chesnut Wood Finish and Paste Wax
Recommended Skill Level
Intermediate

Petra's Doggie Day Bed

Submitted by Joni on Sat, 08/25/2012 - 10:33

Yes, my husband and I share our bedroom with 6 dogs and an occasional cat (or 4). Our older dog (Petra) has slept on our bed for over 10 years, and she's getting too old to jump anymore. We didn't want her to feel like she was getting kicked off the bed, so I made Petra her very own bed at the end of ours so that she wouldn't feel left out. I was inspired by MurdaRae's dog bed (http://ana-white.com/2012/06/doggie-daybed), and thought it was genius to use a toddler/crib bed. So I went looking for plans on Ana-White, and came up with a mixture between a couple of twin bed plans. I love that the plans are easy enough to modify my sizes, and come up with exactly the custom solution that I need. This was my first big project using Bri-Wax. The last one was kind of a disaster when the wax changed the stain color to something not-so-great. With this project, I learned to wait at least 2 weeks before attempting to wax it. I was blown away with the results. It is a beautiful subtle satin finish that feels great to the touch. Plus, I can easily touch up all the dog fingernail scratches that will inevitably occur. When I re-assembled the bed in my bedroom, I actually nicked it in a few places. No problem -- slap on some more Bri-Wax! My Bri-Wax was 11 years old, and pure liquid. I tossed it in the fridge (per Bri-Wax's recommendation), and it was as good as new. The only real problem I had with this project was leaking sap from one of the 4x4s. I'm still fighting this today. In talking with Rustoleum/Zinsser reps, they said that no sap could penetrate their "Seal Coat" shellac product. After 5 coats, the sap is still penetrating, but only if I turn it on it's side or upside down. I'm still baffled. I made the mattress cover out of a dog blanket, and made the cushions from some remnant fabric (suitable for dogs and weekly washing), so this was a fairly inexpensive project. It was a success because Petra slept in her bed from the fist night and loved that she had all the room to herself, and no boston terrorists (I mean terriers) attempted to bother her.

Estimated Cost
$65 for Wood, $60 for Crib Mattress, $7 for stain, $9 for Decorative Clavos
Estimated Time Investment
Weekend Project (10-20 Hours)
Finish Used
Combination of Minwax Water-based stains: 6 parts Colonial Pine: 1 part American Walnut, followed 4-5 Coats Bri-Wax (Light Brown)
Recommended Skill Level
Beginner

Comments

spiceylg

Sat, 08/25/2012 - 18:41

You did an amazing job! Looks professional and at first glance, you definitely can't tell it's a dog bed.

StacieM

Sun, 08/26/2012 - 10:24

It matches the woods in your bedroom so well and looks great! Also, I love the bolster pillows around the edges. That is something I need to make for our dog bed. Thanks for sharing.

Modern Adirondack Chairs

Submitted by Anonymous (not verified) on Fri, 09/04/2020 - 07:59

Ana,

I needed to replace some old dark adirondack chairs to match a pine table. I was about to order them but with Coivid there was going to be a long delay, so I decided to build them.
Your plans were perfect, easy to follow, I built (4), production got easier with each one and learned some new skills.

Gratefully,
DS Humarock, MA

Estimated Cost
$50 per chair
Estimated Time Investment
Day Project (6-9 Hours)
Finish Used
Minwax - Clear Gloss Spar Varnish
Recommended Skill Level
Beginner
Seasonal And Holiday

2x4 Essential Adirondack Chair

Submitted by mricks1960 on Mon, 11/16/2020 - 11:31

I used Western red cedar to build my chairs. The build was a little more expensive but well worth it. The chairs were stained with Cabot’s Australian Timber Oil ( Jarrah Brown). Thanks for the plans Ana, your site is awesome and you do a great job! Mark


Comments

Stocking Stand

Submitted by mpjacob08 on Thu, 12/10/2020 - 06:34

So fun! Directions were easy! Can also be used as Backpack hanger if you put a little bit longer feet on them. I bought the metal hooks from Walmart.

Built from Plan(s)
Estimated Cost
$18
Estimated Time Investment
Afternoon Project (3-6 Hours)
Finish Used
Jacobean Minwax stain
Recommended Skill Level
Starter Project

Comments

Seasonal And Holiday

Modern Craft Table

Submitted by Anonymous (not verified) on Sat, 01/23/2021 - 19:30

My husband just used Ana’s plans to create my Dream craft table.

Built from Plan(s)
Estimated Cost
$250
Estimated Time Investment
Week Long Project (20 Hours or More)
Recommended Skill Level
Intermediate

Comments

Harriet Chairs (by me)

Submitted by Medickep on Fri, 05/01/2015 - 09:01


I'm pretty happy with the way these chairs turned out.  It was a fun project as I did a few first, which included going to the fabric store (long waits) and got to tackle some upolstery for the first time!  I did end up with a few glue drops that did not take the stain, so I'll be researching tips and tricks to prevant that in the future!  


Also, I made these out of Popular, which pre stain was a must for cherry stain.  Next time, I would use Cherry!

Thanks to Joanne S for the original post and consults regarding the upolserty!!

Built from Plan(s)
Estimated Cost
80-100/chair (depends on materials used)
Estimated Time Investment
Weekend Project (10-20 Hours)
Finish Used
Golden Oak Wood Classics stain from Sherwin Williams. Tinted to match my existing chairs.
Recommended Skill Level
Intermediate

Comments

JoanneS

Fri, 05/01/2015 - 13:29

These are spectacular! Beautiful build! Love the finish and the upholstery. Also I'm super impressed that you can't see any of the filled screw holes. Would love to know the technique you used to hide them so well - I'm going to copy that! :)
JoanneS

Medickep

Fri, 05/08/2015 - 12:48

Thank you both for the nice comments. I was please with the way these turned out too, despite some glue spots not taking up the stain. I plan on getting more disciplined in this area. For hiding the screws, I finally upgraded to a real countersink like this one: http://www.rockler.com/8-pro-tapered-countersink-bit at Rockler.

Instead of always forcing a dull one in and getting a crooked openings, this razor sharp one cuts beautiful holes with no effort! But watch out, I cut myself just adjusting the depth of the drill bit. I discovered these the last time I made some wine oak barrel chairs!

Medickep

Fri, 05/08/2015 - 12:53

Since I use Kreg screws for almost everything, (even non-pocket hole stuff)because they are self tapping and won't crack the would I sure my countersink matched the head of the Kreg screws and than purchased a plug hole bit. Can be used on a drill, but better on a drill press. You have to keep the drill perfectly straight or the plug can break and get stuck in the bit!

Queen size storage bed with headboard storage

Submitted by Cranky on Mon, 01/29/2018 - 12:49

There was some deviation from the original plans..  We made the storage boxes a bit taller and the headboard has several new features.

First off, the under-bed storage takes up the whole size of the bed.  So the drawers (six of them) are nice and deep.  One of the drawers is actually the dog's bed now.

The picture doesn't show it but behind the headboard there are cubbies for storing books, tablets, phones, glasses, etc.

On both sides of the headboard there are four electrical outlets plus two USB charging outlets for charging tablets, phones, etc.

There are two reading lamps on the headboard as well.

I did the construction portion while my talented wife did the amazing paint job.


Estimated Time Investment
Week Long Project (20 Hours or More)
Finish Used
FAT paint, charcoal colour.
Recommended Skill Level
Advanced

Comments

Axel

Sun, 06/09/2019 - 04:28

That's awesome! Do you have notes on how you did the modifications and the additional features?

Standing Outdoor Planter

Submitted by Anonymous (not verified) on Fri, 04/14/2023 - 06:42

A friend of mine has issues with her knees but loves gardening so I built this to allow her to continue gardening. She loved it.

I didnt follow any particular set of plans I watched several you tube videos and combined different ideas from the videos to develop my own plan.

Comments