Community Brag Posts

Garden Shed

Submitted by Anonymous (not verified) on Mon, 01/30/2017 - 06:26

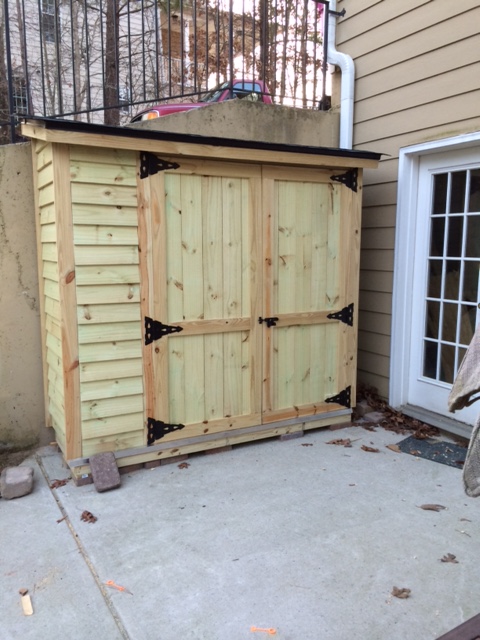
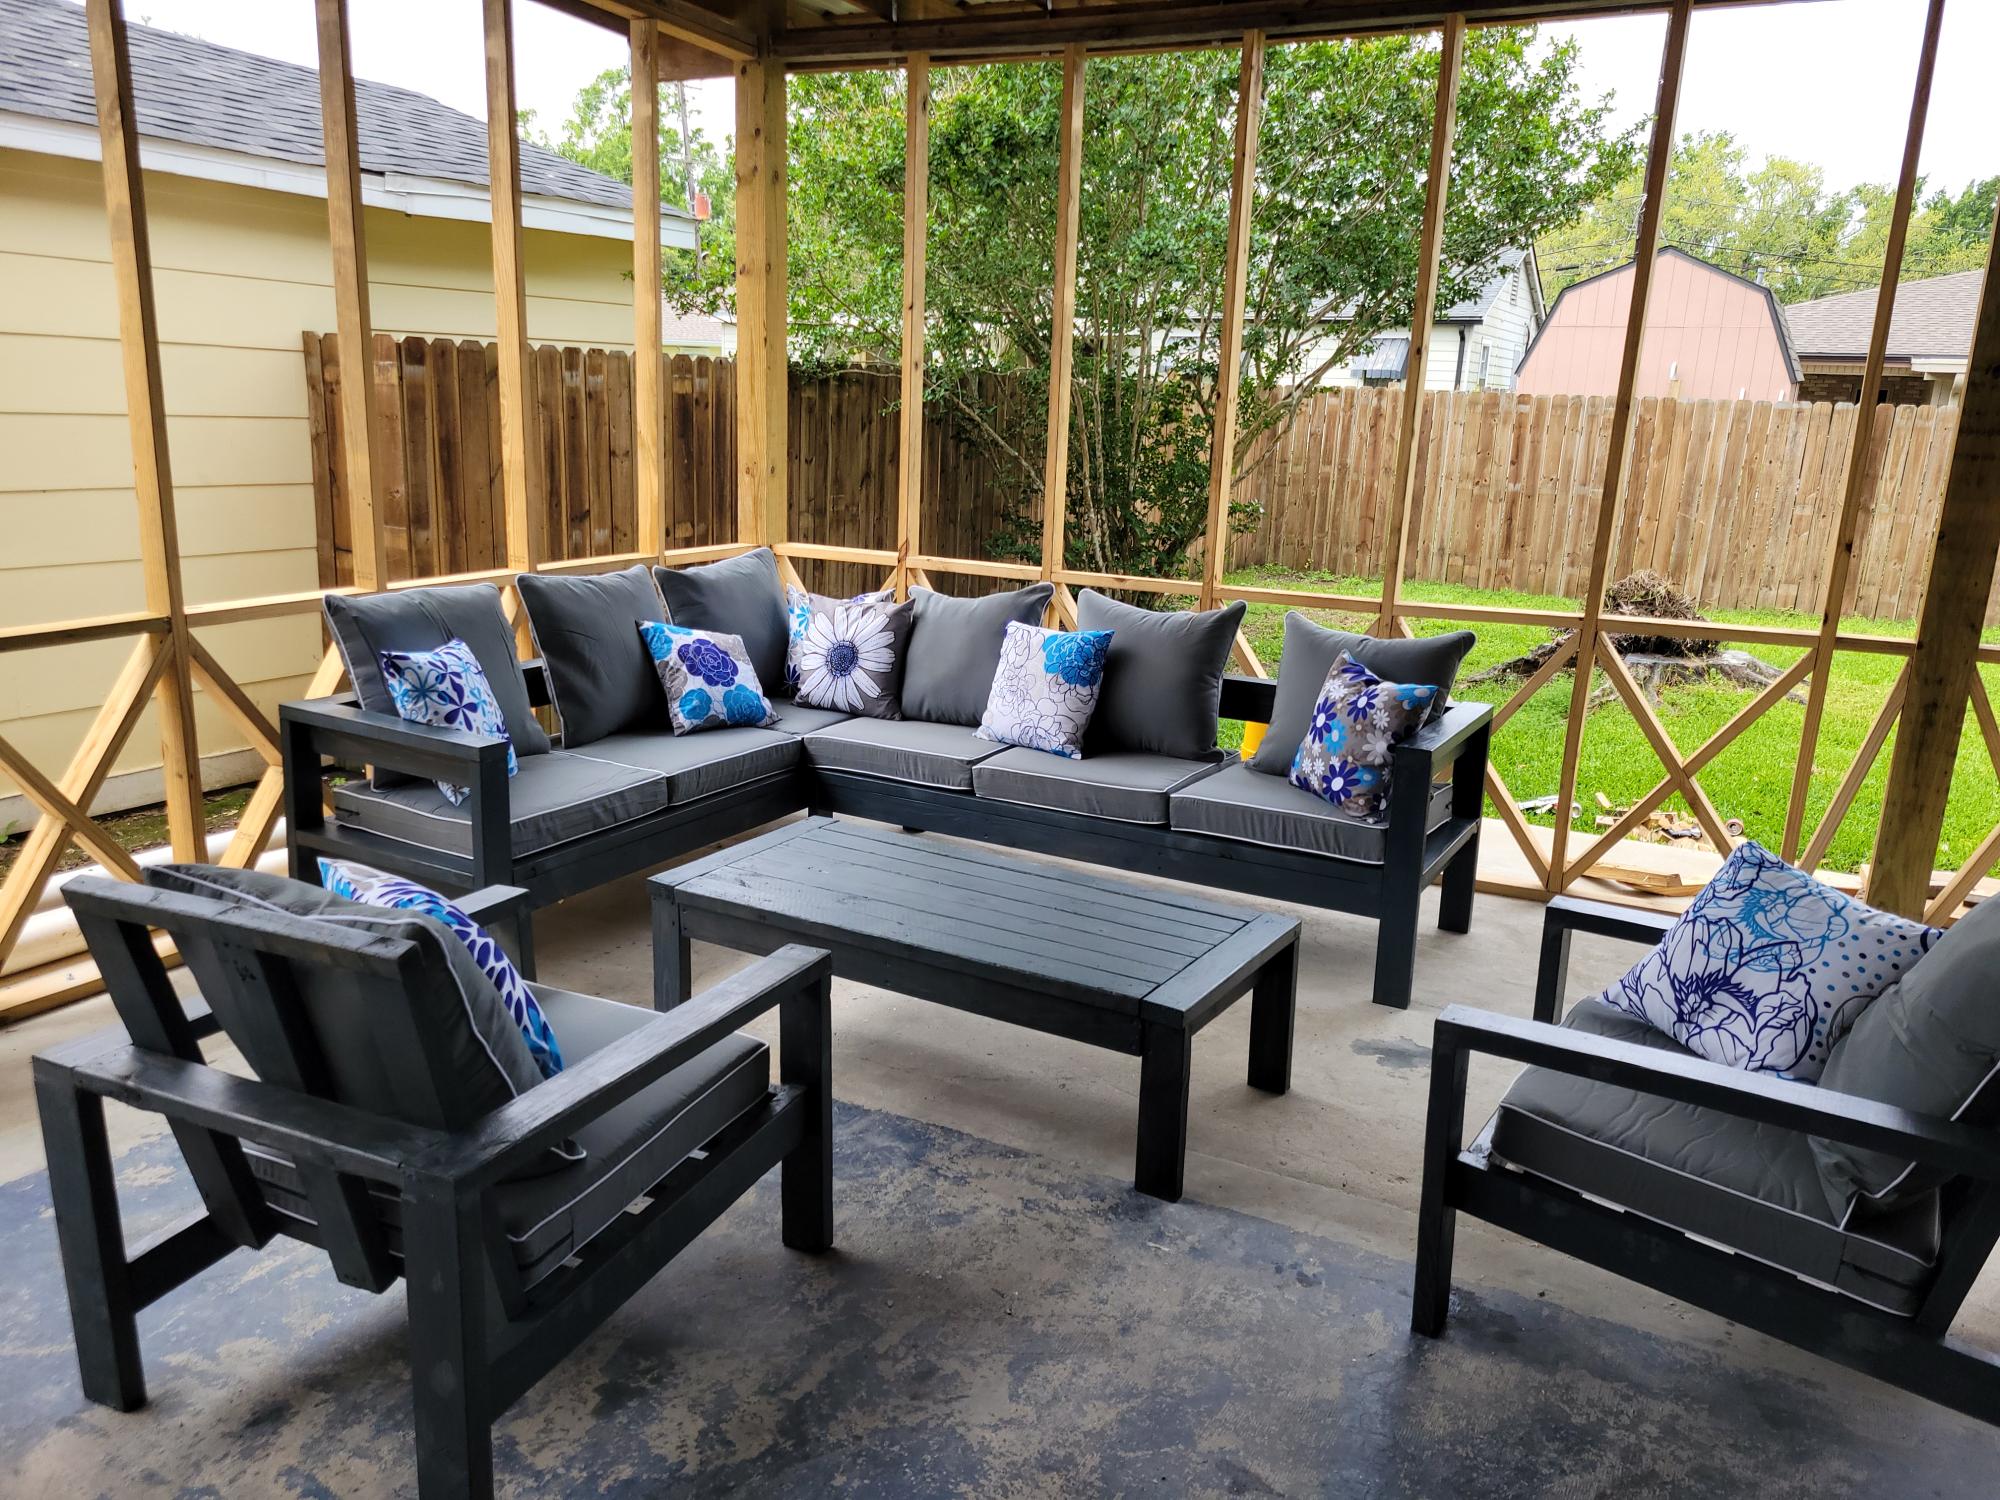
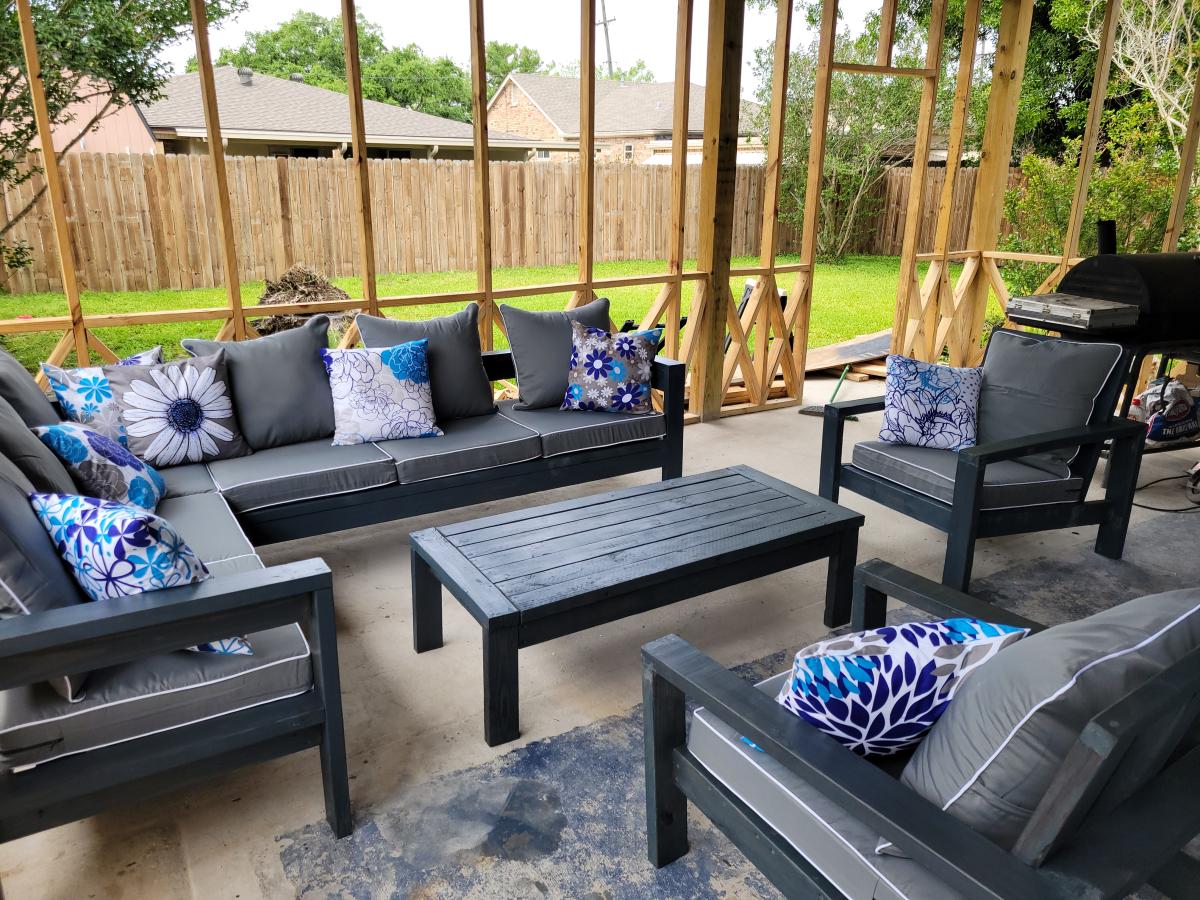
Had to clean out my storage area to make room for my new woodworking shop, so a new shed was in order. Since my neighborhood does not allow large sheds i thought this would be the perfect fit for the small area right outside of the shop. I had to adjust the plan to make it narrow but longer. Used pressure treated fence pickets for the siding..

Built from Plan(s)
Estimated Cost
Cost approximately $300-350
Estimated Time Investment
Weekend Project (10-20 Hours)
Recommended Skill Level
Intermediate

Outdoor Sofa - Front Porch

Submitted by mclaudeg3 on Fri, 11/06/2020 - 16:47

This project was quite easy and did not require many tools. The plan allowed me to adjust the measurements easily so it could fit in that space. I used regular 2x4’s and treated the wood with Mountain Ash colour in a semi-transparent stain from Sherwin Williams, I just love the colour! I build 2 - 2 seaters exactly the same. The one side has no arm, as I wanted it to look like a lounge chair. I love to sit in the corner and stretch my legs 😊. I bought the cushion covers from IKEA, and got good quality foam.

Estimated Cost
Wood ~$300
Estimated Time Investment
Weekend Project (10-20 Hours)
Finish Used
2 coats of semi-transparent Mountain Ash stain from Sherwin Williams.
Recommended Skill Level
Beginner

Comments

Seasonal And Holiday

2x4 Sectional , table, and chairs

Submitted by Anonymous (not verified) on Fri, 04/14/2023 - 04:57

Your easy to follow 2x4 proje ts turned out amazing. My outdoor set is complete. The chairs, also, came from your plans. I built all of it by myself in one weekend. Thank you

Comments

Wood Storage Mantle

Submitted by Anonymous (not verified) on Fri, 02/23/2024 - 10:26

I had been wanting to build a mantle for quite a while but couldn't decide what I wanted it to look like, then I saw the wood mantle with hidden storage plans on Ana's website. I used a steel wool\vinegar mixture as a stain, 3 coats making sure it dried completely before applying the next coat. I finished it off with a beeswax & orange oil wood polish & conditioner. So far I'm storing the remote for the fireplace, the key to the gas for the fireplace and the tool that helps remove the front of the fireplace in there. I'm not sure what else will find it's way in there. I'm very happy with how it turned out.

Julie V.

Built from Plan(s)

King Farmhouse Bed

Submitted by jhavinga on Thu, 05/22/2014 - 16:31

Second project ive completed from Ana White, and I am very happy with how this bed turned out! The only thing I would fix would be the finish, I wanted it a bit whiter. not so creamy. Otherwise very quick and easy fun project to do. =)

Estimated Cost
$300
Estimated Time Investment
Day Project (6-9 Hours)
Finish Used
1 coat of a basic latex white paint.
Then I sanded down just so raised grains would become exposed.
1 coat of dark walnut stain (wipe on with cloth)
Done.
Recommended Skill Level
Starter Project

Comments

jhavinga

Thu, 05/22/2014 - 16:34

Thank you for sharing all of these awesome projects. I was always hesitant when it came to wood, but now I cant seem to stop!

jhavinga

Wed, 06/11/2014 - 13:43

(You can do all this before or after your project is put together or not.)
Be sure to do a test piece before hand so you can see exactly what your getting :)

The first step I did once the head board and foot board were put together, was to sand any sharp edges or corners. I liked mine rounded and worn looking. I did not sand anything else.

Second step is to paint 1 even coat of a basic white latex paint.

Third step is to sand away some white paint. because we didnt sand it before hand the grains in the wood will be very bumpy. so the paint on the grains will sand off while the paint lower than the grain will remain. makes sense? hopefully i explained that right!

Fourth step is to now wipe on the stain of your choice. I went with Dark walnut. It stains the paint a bit bringing the white to a gray/brown tone. and stains the wood dark walnut so the grain patterns show up dark.

Let me know if you have any other questions and good luck!

jbogan15

Thu, 01/29/2015 - 07:49

What grit of sand paper did you use to sand off the white paint? and did you sand it by hand? Also, for the dark walnut stain, did you wipe off immediately or leave it on for a bit before wiping? Beautiful bed, I want to achieve this look!

In reply to by jbogan15

jhavinga

Fri, 02/06/2015 - 09:15

Hi jbogan15, thank you!
For sanding I used a palm sander with 120 grit to get the job done a bit quicker, than went over lightly with 220. When staining I actually just dipped a rag in the stain and would wipe the stain on. =)

Good luck!
Justin

kosborn

Fri, 01/27/2017 - 11:05

Love this look! Exactly what I am trying to achieve...A few questions about the side rails. How high did you connect them to the 4x4 posts and exactly how did you connect them? Did you use brackets or screw right into the posts? Thank You!

barkleyl

Thu, 09/05/2019 - 15:07

I have seen several beds from Anna White. I was wondering if the frame require a box spring mattress or not. If not, are the beds lower than what a traditional mattress and box springs are. Thanks ! 

Adirondack chairs

Submitted by Anonymous (not verified) on Mon, 10/04/2021 - 15:15

I made five of your 2 x 4 Adirondack chairs. Well I started with one and then my wife wanted four more after she saw how it turned out. We absolutely Iove them and they are easy to make! Thanks Ana!

David Knight

Comments

Guest Room update

Submitted by nlaupp on Wed, 05/25/2011 - 15:18

Our guest room had to be ready for some friends coming in town for the week. Before this room had no shelves and worse yet; no head board. Turned this boring room into...well a less boring room. In the picture are my first two projects; the Ten Dollar Ledges and the Reclaimed-wood headboard.

Estimated Cost
$200
Estimated Time Investment
Weekend Project (10-20 Hours)
Finish Used
The ledges were just painted with a glossy white and the head board was painted with a flat charcoal, distressed, and finished with a mahogany gel stain.
Recommended Skill Level
Starter Project

Sweet Pea Bunkbed - Modified

I took the basic plans for the Sweet Pea Bunk Bed and modified them to make a loft bed for my daughter. She dreams of opening her own restaurant when she gets older. The bed is on top and her restaurant is below. I made a chalkboard on the back wall of the bottom section. Curtains will be added sometime in the near future in her restaurant as well. Now she wants a cafe table and chairs as well.

Estimated Time Investment
Week Long Project (20 Hours or More)
Finish Used
Olympic One Gloss and Valspar Chalkboard paint
Recommended Skill Level
Beginner

Comments

Teaching Easel

Submitted by vlane2014 on Fri, 07/17/2015 - 20:32

My father-in-law built this for me using Anna White's plans. He tweeked a few things to add somethings I wanted to add. A huge sheet of white board bought from Lowes was used to make both easel sides and the shelves. Once he had it built for me, I painted the lilac paint color onto the wood and whiteboard shelves. The black chalk board side was made by using black chalboard paint. I wanted it to look cute so, I added a black boarder on the white board, and then used a cotton ball with the lilac paint to make the paint blotch style on both sides. I cannot wait to use this in my classroom!

Built from Plan(s)
Estimated Cost
$60.00
Estimated Time Investment
Weekend Project (10-20 Hours)
Finish Used
Lilac Valspar paint and black chalkboard paint.
Recommended Skill Level
Intermediate

DIY Mobile Lumber Cart

I followed plans from Woodworking for Mere Mortals. Steve Ramsey has a great build video for the project. You can check out the video on his YouTube channel. This lumber cart replaces a previous one that I built a few years ago. My old lumber rack could not store sheet goods and took up too much floor space in my garage.  I disassembled the 2x4s from it and hope to recycle them for a future shop project.

For complete build details continue reading my DIY blog here.

Estimated Cost
$100 - 125 for two sheets of plywood, screws and caster wheels
Estimated Time Investment
Day Project (6-9 Hours)
Recommended Skill Level
Beginner

British Telephone Booth Bookshelf

So I wanted to make a bookshelf for a friend who's having a baby. Her husband is British. The invite to her baby shower said, "Bring a book, not a card" so I knew she was going to have a lot of books. I took the gas pump bookshelf plans and added an arched roof, plexiglass door, and some fluted trim to make it look authentic. I found a vintage rotary phone for $20 and added a battery operated puck light to complete the look. My kids loved it!

Comments

Corner Cabinet--Perfect for practicing corners

This was my second project. I wanted to get practice working with corners so I could do a media cabinet eventually and this was a great starting point. This cabinet is a great addition to our dining area too! My little helpers were never far away :)

Estimated Cost
$150 (higher costs thanks to island living)
Estimated Time Investment
Weekend Project (10-20 Hours)
Finish Used
Randomly mixed (flat interior based) paints in a shade of green (left over from another project).
Recommended Skill Level
Beginner

Perfect Trestle Table/Desk

Submitted by c-e-fogus on Thu, 07/18/2013 - 11:16

My husband asked me to make a small and inexpensive table for our new TV. I decided to make a desk so it would be able to be used later when we move the TV. Very easy plans. Easy assembly. Great beginner project. I used 1X6 for the top instead of 2X6. It was less expensive and seems to work just fine. I also threw together a small TV stand so the DVD player can go under the TV and not clutter up the table. It's 3 1X4's @ 20 inches. And I made the sides by ripping the leftover 1X4 in half the same width as the top. I spent $30 in wood and have some scraps left over for another project.

Built from Plan(s)
Estimated Time Investment
Afternoon Project (3-6 Hours)
Finish Used
Minwax stain in Early American. Minwax fast drying polyurethane in clear satin.
Recommended Skill Level
Starter Project

12 ft farmhouse table with extensions - reclaimed wood

I had no experience building furniture prior to this project but I wanted a 12 ft outdoor table and could not find one.  This tables center section is 8 ft and was built roughly following the plans for the farmhouse table.  I added two 2 ft extensions at each end making the overall table 12 ft.  The extensions included aprons so when installed they look to be part of the table.  The extensions just plug into the end apron of the center section with 2x4 oak braces which engage in the apron and under the table approximately 2 ft from end.  There is no visual sagging of the extensions. I finished the table with Sikkens DEK finish.


Estimated Cost
The lumber was reclaimed and cost approximately $400 for this project.
Estimated Time Investment
Week Long Project (20 Hours or More)
Finish Used
Sikkens DEK transparent
Recommended Skill Level
Beginner

Bedzilla

Submitted by pmarchino on Sat, 02/17/2018 - 19:28

We had bought a house in New Mexico that was sadly lacking for closet space, as well as square footage for furniture. I was looking at Ana White's website, and saw the plans for the Farmhouse storage bed. It was good, but needed some steroids. I got out the calculator, and started upsizing EVERYTHING. What happened was, BEDZILLA!! King sized bed with 12 giant drawers. I also added lighting to the headboard for reading. It was a blast to build, and I was very pleased with, and proud of the finished product. 

Estimated Cost
Good question!
Estimated Time Investment
Week Long Project (20 Hours or More)
Finish Used
Minwax Polyshades Pecan
Recommended Skill Level
Intermediate

Kitchen Book & Wine Case

I made a small book case that includes a wine shelf.
It is all solid cherry. I used a shiplap paneling design for the back panel.
It is finished with many coats of natural color Danish Oil.
Here's a video of how I built it:
https://www.youtube.com/watch?v=Hxil44OfJ9M

Comments

Modified & Far from Perfect Corner Unit

We were in desperate need of a corner media unit. I just know that Ana will post something incredible for this soon, but we just couldn't wait any longer. SO...I 'TRIED' to modify her lovely Cabin Collection Media Console & Hutch. Her plans were great, and I pretty much followed them step-by-step and just modified corners and things to fit my need. I'll emphasize...it is NOT perfect by any means and is probably not 'done-by-the-book', but it hides all of my hubbies gamer items (rockband guitars and keyboard, wires, controllers, games, etc). AND, I built it with growing room for his biggest wish, a new t.v. :)

Built from Plan(s)
Estimated Cost
$300 (higher prices of lumber on an island)
Estimated Time Investment
Week Long Project (20 Hours or More)
Finish Used
Nuwood poly stain-Walnut. 2 fulls coats of stain, lightly sanded between coats.
Recommended Skill Level
Intermediate

Teddy Bear Bunk Beds

I made these bunk beds for my daughter and her best friend for her best friends birthday. My 4 year old daughter helped putting them together and painting so she got one too:) We used the paint sparkle add-ins from lowes with sample paint colors in each girls' favorite color. I haven't finished the bedding for my daughter's yet, but as you can see, it is working just fine without bedding:)

Estimated Cost
$25 for both with bedding
Estimated Time Investment
Day Project (6-9 Hours)
Finish Used
Valspar sparkle add-in and Valspar yellow and purple samples (don't remember exact color, actually I don't think I ever looked, my child selected them:) I just sanded with a sanding sponge and then painted when done.
Recommended Skill Level
Starter Project

Antique reclaimed heart pine rustic x

Submitted by jchriceol on Wed, 02/21/2018 - 05:29

Got this wood from some thick old flooring we laid in a house and brought them to my shop. Cost me about 20-25 dollars for lumber and paint. Everything else I pretty much had on hand. But man I think it turned out really well 

Estimated Cost
20-25 dollars that’s for paint and 2x lumber everything else I had
Finish Used
Minnwax early American
Minnwax semi gloss polyurethane
Recommended Skill Level
Intermediate
Back