Community Brag Posts

Fire Pit Swings

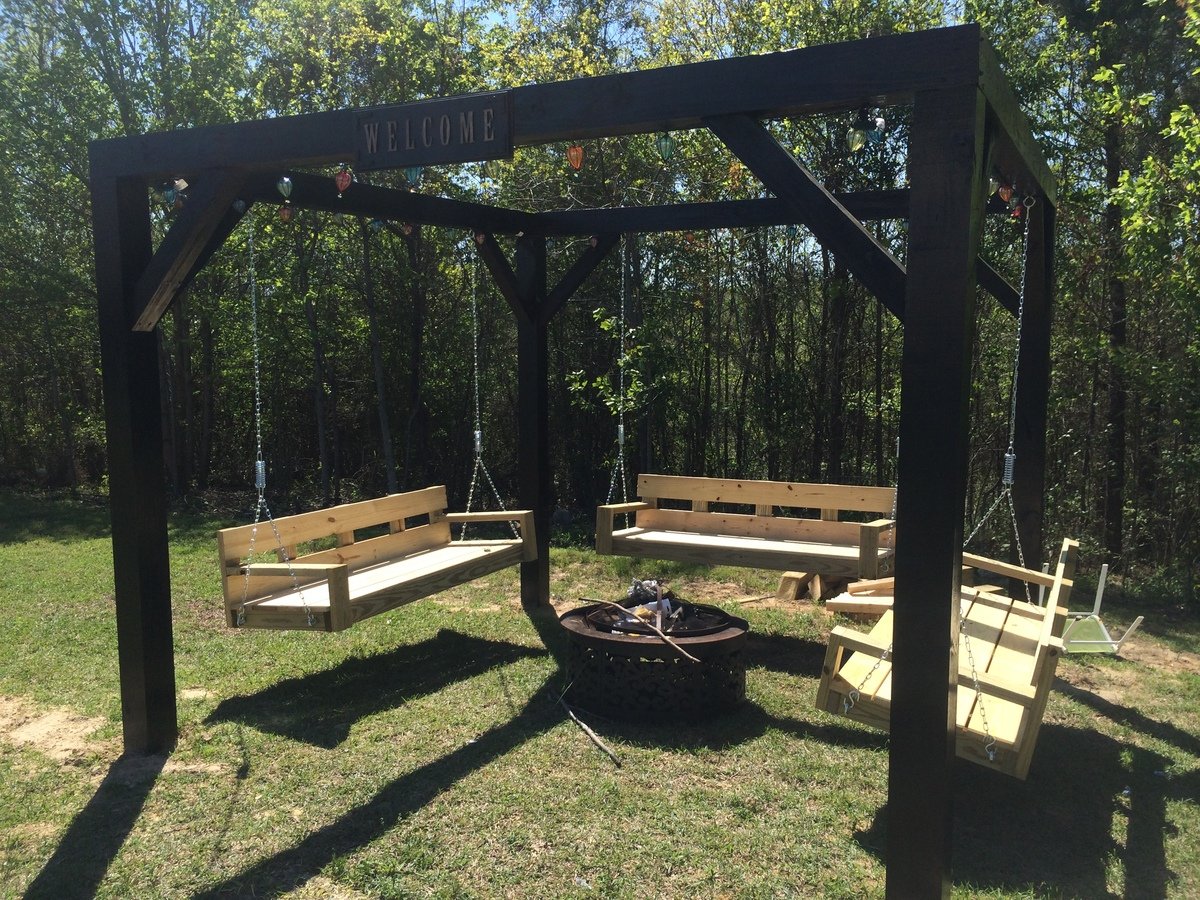
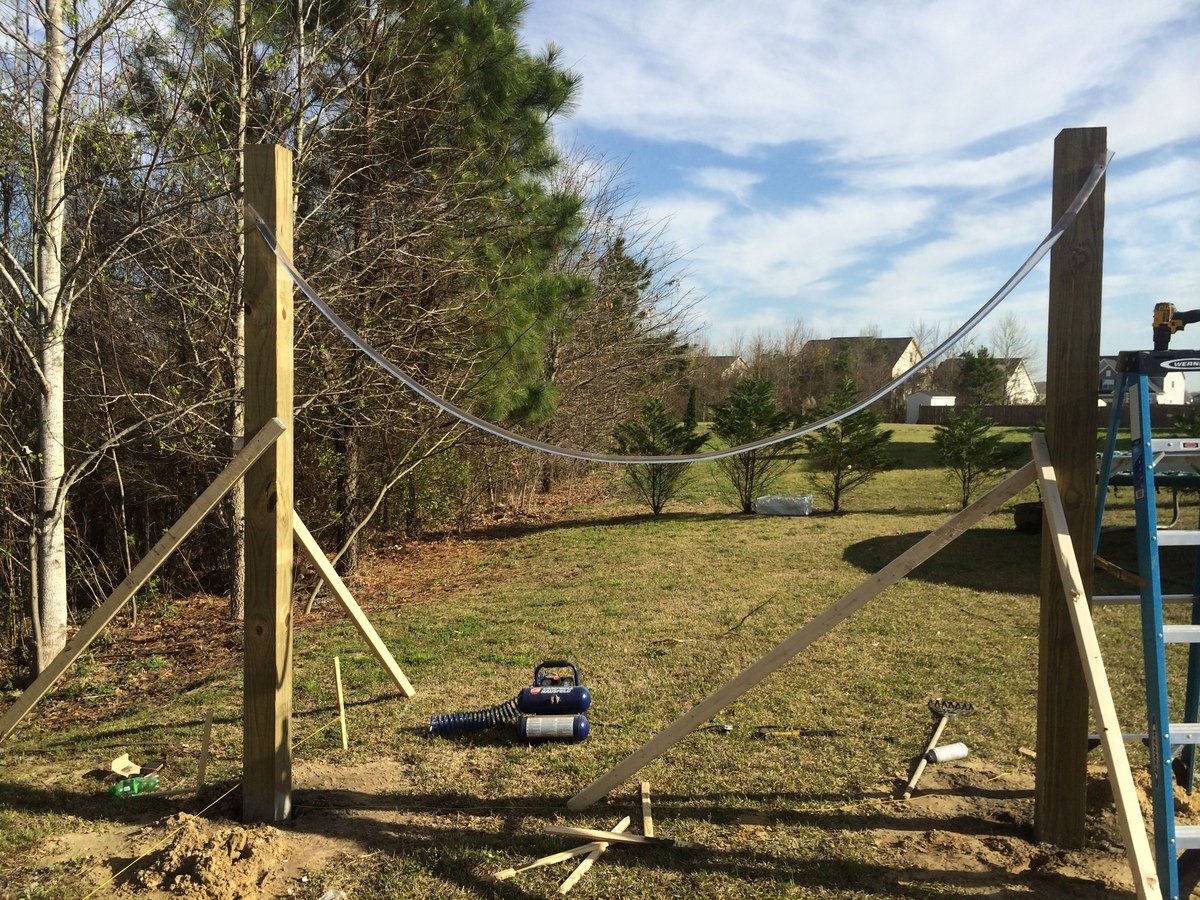
My wife saw something like this on Pinterest and desperately wanted one. The one she saw was hexagonal in shape. We didn't need as many swings so we went with just a plain square shape. We used 6x6s for the legs and posts across the top and used 4x4s for the angled support pieces. We built the swings using the plan from this website. All the materials can be picked up at the blue and orange stores. However when it came to the springs for the swings, the blue store was 1/3 of the price of HD. The legs are 12' long and buried 4' under the ground and cemented in for strength. Luckily I am retired military and was able to rent an auger for 1/2 the price of HD or the blue store. You could do it by hand but it saved us hours and lots of back pain. We found our dimensions for the size we wanted and spray painted dots on the ground where the posts were going to go. We dug the holes and stuffed the 6x6s in them. Using a post level we made sure they were plum. We braced them and added the quickrete and left them to setup over night. The next day we had to make sure all the tops were level with each other. This is where having some knowledge of physics paid off. I took clear tubing and screwed it above the height that I wanted on one post and then screwed the other end to another post. Fill it with water until the water level on the first post is where I wanted it (8 feet high) and it will automatically fill it level on the other end. There is a picture of this above. Water will always level itself out. I had to do this because my yard is at a slight down hill grade. We marked it and cut the tops off to make it level. After attaching the 6x6s on the top with 8" lag bolts it was time to paint. After painting was done we built 3 swings from Ana's plans. We shortened them by 6" to give room to walk between the legs and the swings. All in all it was a great project that only took two dedicated weekends. My wife still has to paint the swings though.
Built from Plan(s)
Estimated Cost
$600ish
Estimated Time Investment
Week Long Project (20 Hours or More)
Finish Used
We used an oil base Black Barn Paint from the blue store.
Recommended Skill Level
Intermediate

Comments

jkread

Wed, 05/27/2015 - 22:38

It sounds and looks like the top 6x6s are mitered and sit on top of the end of the vertical posts. I'd say at least one lag bolt each way to hold the mitered corner together and then at least one in each piece down into the vertical to hold it in place.

carewarner

Mon, 04/27/2020 - 10:24

WOW, LOVE!!! This is simply gorgeous! What a warm and welcoming addition to your yard. And thanks for sharing your method of finding level for your posts on your sloped yard. I absolutely love it!

Seasonal And Holiday

2x4 Essential Adirondack Chair

Submitted by mricks1960 on Mon, 11/16/2020 - 11:31

I used Western red cedar to build my chairs. The build was a little more expensive but well worth it. The chairs were stained with Cabot’s Australian Timber Oil ( Jarrah Brown). Thanks for the plans Ana, your site is awesome and you do a great job! Mark


Comments

Pet Stairs

Submitted by alli2410 on Tue, 03/13/2018 - 06:26

I needed sturdy stairs for my 2 60lb dogs.  My bed is 33 inches from floor to top of mattress.  So, this is my very first project completed by myself!  Custom size pet stairs 24inx24inx24

Estimated Cost
$40-50
Estimated Time Investment
Afternoon Project (3-6 Hours)
Finish Used
Minwax polyshades Espresso gloss (3 coats)
Recommended Skill Level
Starter Project

Comments

Great Plan for Garage Shelf!

Submitted by edapina on Wed, 11/26/2014 - 07:35

This was an easy project to complete in an afternoon that does not require any advance woodworking skills

Estimated Cost
About a $120 bucks considering that I had to buy all the wood and a box of 2 1/2 In screws!
Estimated Time Investment
Afternoon Project (3-6 Hours)
Finish Used
No finish used.
Recommended Skill Level
Beginner

Comments

edapina

Wed, 12/10/2014 - 09:41

This is my second completed project with plans and ideas from your website. Thanks for your good work!

DIY Sofa - Storage Sectional

Submitted by LittleG on Thu, 08/09/2012 - 15:38

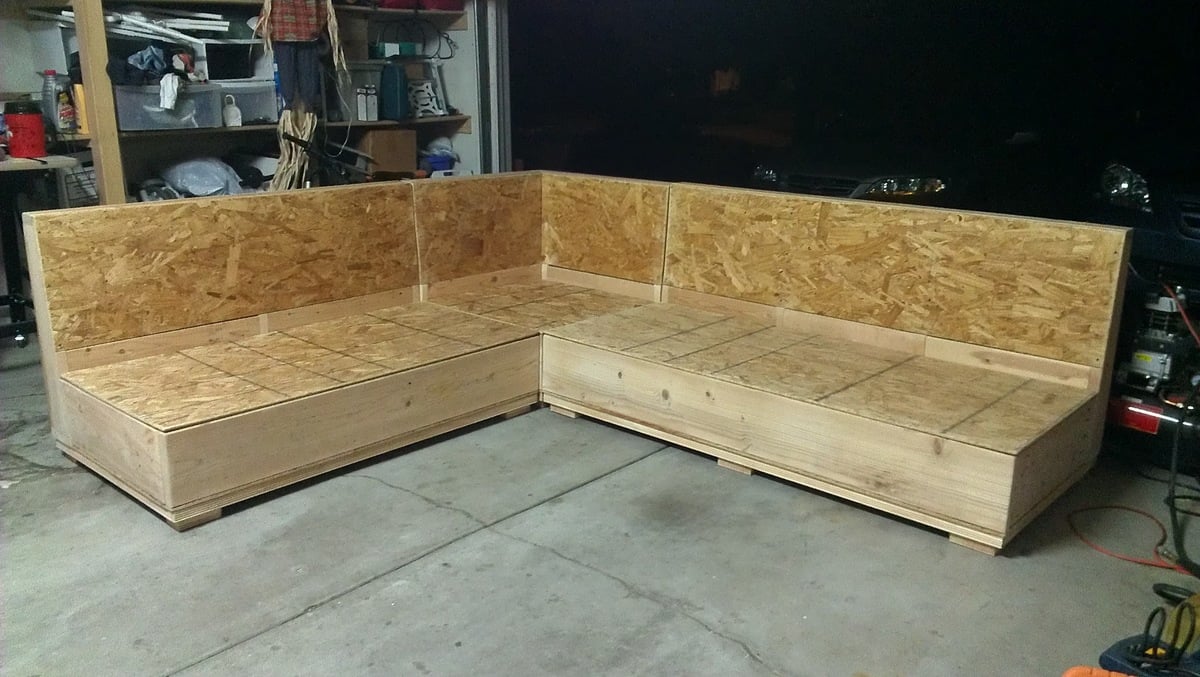
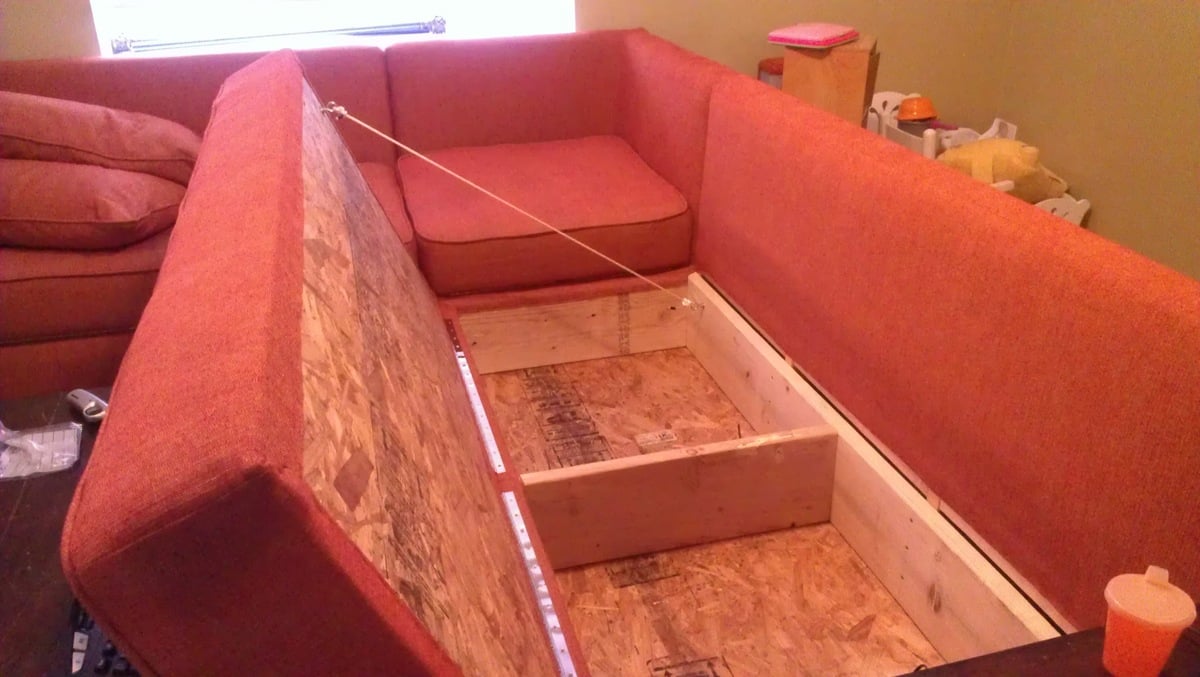
Basically I took Ana's plan and tweaked it to create a diy sofa, a love seat, and a corner piece to make a sectional. All 3 pieces have the same basic design and function (they all have a storage compartment), although the corner piece, because of its placement and the thickness of the seating cushions, doesn't open unless the couch is opened first. We purchased custom cut, 6" thick foam cushions for the seats (we bought the XL-38 foam from https://www.buyfoam.com/, but if we had to do it again, we'd go with the XL-28 as the 38 is VERY firm). We also used upholstery fabric instead of a paint drop-cloth to cover the couches. The foam and upholstery fabric upped the overall cost significantly. Other changes from Ana's plan, I used 15/32" OSB because the 1/4" plywood just felt too flimsy (I'm a large guy). I also added I bolts to the underside of the seat before the foam and upholstery so I could add a stress relief rope to prevent the kids from opening the top and dropping it and ripping out the hinges. I used piano hinges as they seemed to me to provide the most support. Finally, I ended up using 1x2s for the base trim since I couldn't find any 2x2s that were straight and finish-ready, then I added router detailing to provide some visual interest. I used 3" pieces of 4x6 for the feet and added matching router detail. Additionally, I used T-Nuts and bolts to make the feet and base trim completely removable.


Built from Plan(s)
Estimated Cost
$1300
Estimated Time Investment
Week Long Project (20 Hours or More)
Finish Used
Minwax PolyShades Espresso
Recommended Skill Level
Intermediate

Comments

masmith38

Fri, 10/23/2015 - 11:11

Love this!  Totally want to think hard about doing this instead of buying when time for a new couch comes. Job well done, and the storage is a total plus.  

Chased

Sun, 05/15/2016 - 21:15

Where can I find the plans to this or the cut list

mikeyb

Mon, 10/03/2016 - 18:11

Awsome job!!! question? is that a typo on the cost to build??

mikeyb

Mon, 10/03/2016 - 18:12

Awsome job!!! question? is that a typo on the cost to build??

albertmick30

Mon, 08/17/2020 - 07:46

It is superb blog and i really appreciate your blog. It is because i always like the informative blogs. You did a great job and thanks for sharing.I am impressed by your post. It contains very informative data and i gain a lot information from it. It is very useful for me. Thanks for sharing and keep on sharing that type of posts.The Mobile App Developer Dubai provides good service you visit here site https://www.mistersaad.com/

DIY Modern Rustic Outdoor Chair

Submitted by susanshamp on Fri, 07/10/2015 - 15:07

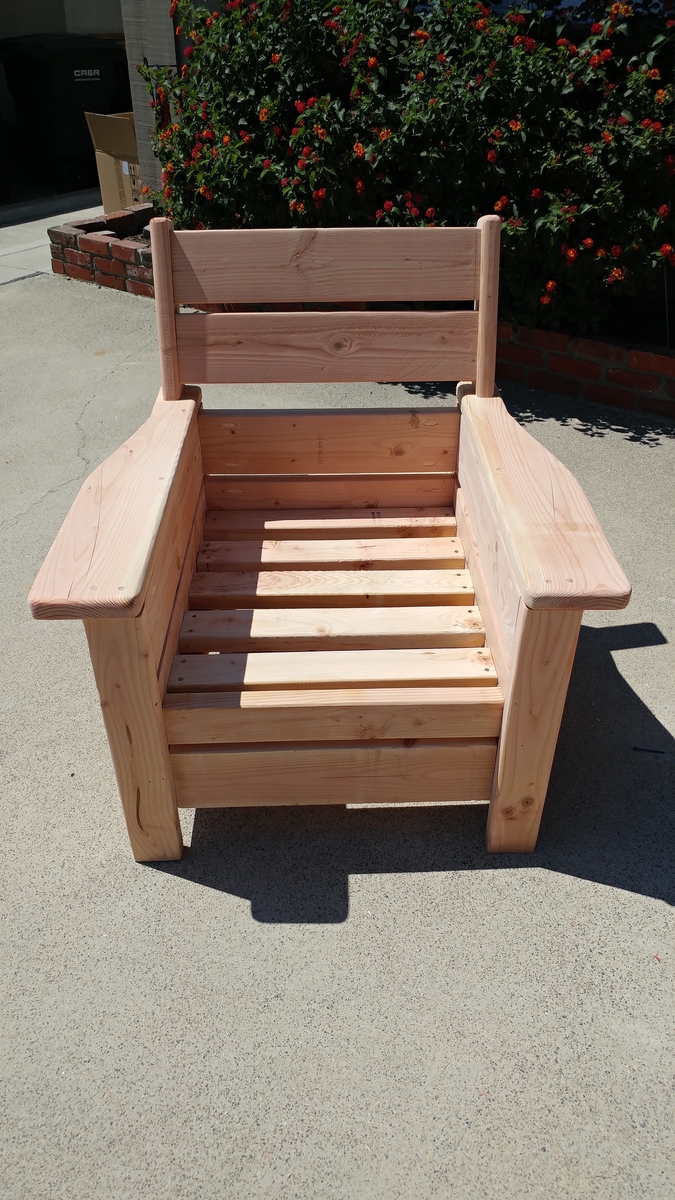
I made this outdoor chair by looking at a variety of plans and designs from Restoration Hardware and other stores. Check out more info on the project on my blog link. Thanks for looking!

Estimated Time Investment
Afternoon Project (3-6 Hours)
Recommended Skill Level
Beginner

Comments

Poolside Towel Cabinet from Benchmark Cabinet Plan

Submitted by Anonymous (not verified) on Thu, 03/23/2017 - 11:21

My father and I made this awesome poolside towel cabinet using the Benchmark Cabinet plans. A super easy 1 day build and it looks amazing on the patio. Bring on the pool weather! 

Estimated Cost
$60
Estimated Time Investment
Day Project (6-9 Hours)
Finish Used
Chalk paint/Poly topcoat
Recommended Skill Level
Beginner

2x4 outdoor cedar couch with ottoman

Submitted by Anonymous (not verified) on Thu, 05/04/2023 - 11:51

I used pocket holes to hide the screws. I made an ottoman out of the outdoor coffee table plans to my dimensions that can be used as a coffee table when we need it.

Comments

Best Chairs Ever!

Submitted by Anonymous (not verified) on Tue, 06/09/2020 - 18:16

I made these modern Adirondack chairs for our business in Anchorage. GREAT and easy to build design by Ana - we upgraded the arms to tapered 2x6 and they're awesome!

Rustic X Farmhouse Coffee Table with Storage

Submitted by Anonymous (not verified) on Sun, 02/05/2023 - 08:54

This project was made from reclaimed wood from my office where they had built a temporary safety railing out of 2x4s and 2x6s. I added a compartment for storage. The top is stained in a classic grey. I painted the body in black followed by white. I then sanded the body to allow the black to bleed through for a distressed look.

Comments

Drop down murphy bar

Submitted by nick_h on Tue, 12/06/2016 - 10:54

My attempt at the murphy bar featured on this site. Still have to add the sash locks. Added pallet crossmembers at the back, an x in the leg, and a french cleat to mount to the wall. 

Estimated Cost
$45
Estimated Time Investment
Day Project (6-9 Hours)
Finish Used
Special Walnut Minwax on the bar top and shelves, crisp linen matte latex and dry brushed casual gray for accents/aging. 2 coats of polycrylic for protection. If built again would pre stain and base coat all the wood before build time, then assemble, add accent brushing and spray the polycrylic.
Recommended Skill Level
Beginner

Comments

zannej

Tue, 12/31/2019 - 11:49

This looks awesome! I want to help my friend build this for his kitchen. I've looked at the plans in the link & I'm wondering what modifications you made for the X pattern-- how much did it alter the material & cut list?

Would you please share your material & cut list for this?

Modern Outdoor Chair with a twist

Submitted by Anonymous (not verified) on Wed, 07/05/2017 - 16:05

Taken from the Modern Outdoor chair project and added a back. Then decided that I love the andorak style chair arms and thus the Andrmodern chair was born.. 

Estimated Cost
$35.00
Estimated Time Investment
Afternoon Project (3-6 Hours)
Finish Used
Will use the Behr two in one
Recommended Skill Level
Beginner

Comments

jkess44

Tue, 06/09/2020 - 13:36

Wow! I really like this look, Im sure its very comfortable. Do you have plans to share? I am very much a beginner and need guidance, lol.

lawn and garden shed

Submitted by brittanyj on Wed, 08/19/2015 - 13:17

Needed a shed to store bikes and mowers, etc, so I'd have more room in the woodshop : )  I made a lot of modifications to the plan to fit my space and make it much larger.  The completed size is 7 foot tall at the peak, 6 feet deep and 5.5 feet wide.  I made it as a 3 sided shed, using the wall as the 4th to save on cost, increase air flow, and make the exterior house wall accessible.  I also made an egress in the back of the shed in order to get behind the shed if needed. 

Instead of roofing shingles, I opted for ribbed metal sheets and one clear sheet in the middle to make a skylight, so there would be light in the shed.  This is my favorite part of the project.  It was a huge pain to attach the roofing from a ladder with very limited access, but it looks great and I love the light coming in.  We have very little rain in CA, so I'll have to wait until winter/rainy season in order to test out its waterproofing. 

Since the shed sits between the house and the neighbors block wall fence, and I wanted to use as much of the space as I could, I decided to design the shed to have the side wall against the house rather than the back wall, as shown in the plan.  This took a large amount of modifications, but with careful planning and measuring, it can be done.  This also meant blocking off access to behind the shed, so I cut an egress in the back wall and added hinges so you can lift the back cut out panel, and rest it on a stop block attached to the fence behind it in order to have access.  That's what woodworking is about- problem solving.  Love it. 

As you can see by the full shed picture, it fits a large amount of stuff- 2 adult bikes, mower, edger, trimmer, chainsaw, hedge trimmer, garden tools, shovels, etc, with plenty of room for more.  I now have a free corner in my garage that I've already filled with a DIY rolling workbench and more pegboard space for tool hanging.  Woodshop increased space= happy Brittany. 

I should also mention that building the frame and adding the pickets was quite a quick and easy job.  The hardest and most time consuming part was the roof (I didn't have metal cutting tools), rolling each very heavy wall to the site (I was alone) and the previous 2 weeks in which I built the paver patio the shed sits on.  Hard work, but worth it.  I love it!

Built from Plan(s)
Estimated Cost
$280
Estimated Time Investment
Week Long Project (20 Hours or More)
Recommended Skill Level
Intermediate

Comments

brittanyj

Mon, 01/25/2021 - 13:15

It has been incredibly useful for storing! One thing about the skylight- Over time the sun has warped it and there is now a hole and crack there. So I wouldn't plan on the clear roofing being a long term solution- I will be replacing it with either thicker clear roofing or 2 layers.

Laundry Station

Submitted by Anonymous (not verified) on Mon, 02/27/2017 - 10:03
We followed these plans, but instead of building two cabinets, we combined them with one side in the middle. We also used pine planks on top. The sides are painted with chalk paint, and the top is finished in dark wax. 
Built from Plan(s)
Estimated Cost
$200
Estimated Time Investment
Afternoon Project (3-6 Hours)
Recommended Skill Level
Beginner

Comments

modern outdoor lounge chair

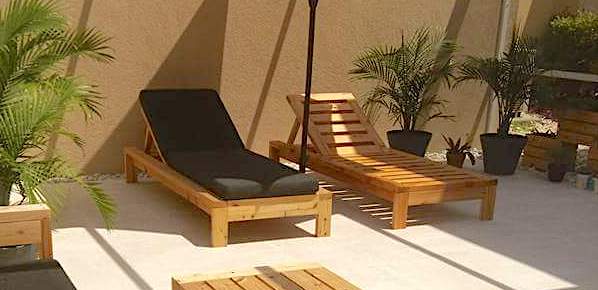
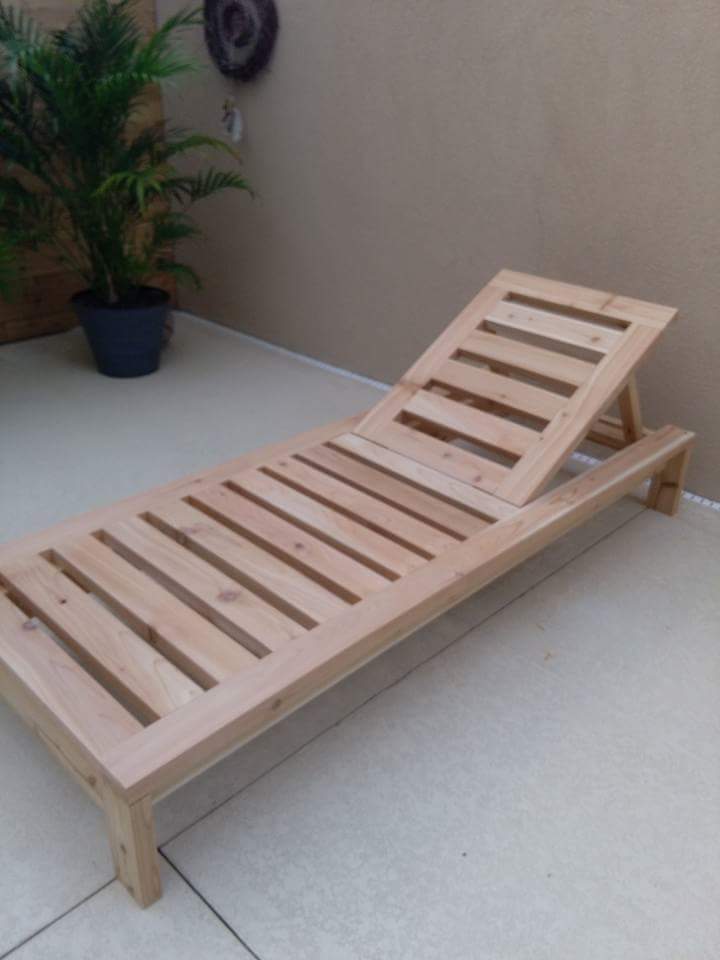
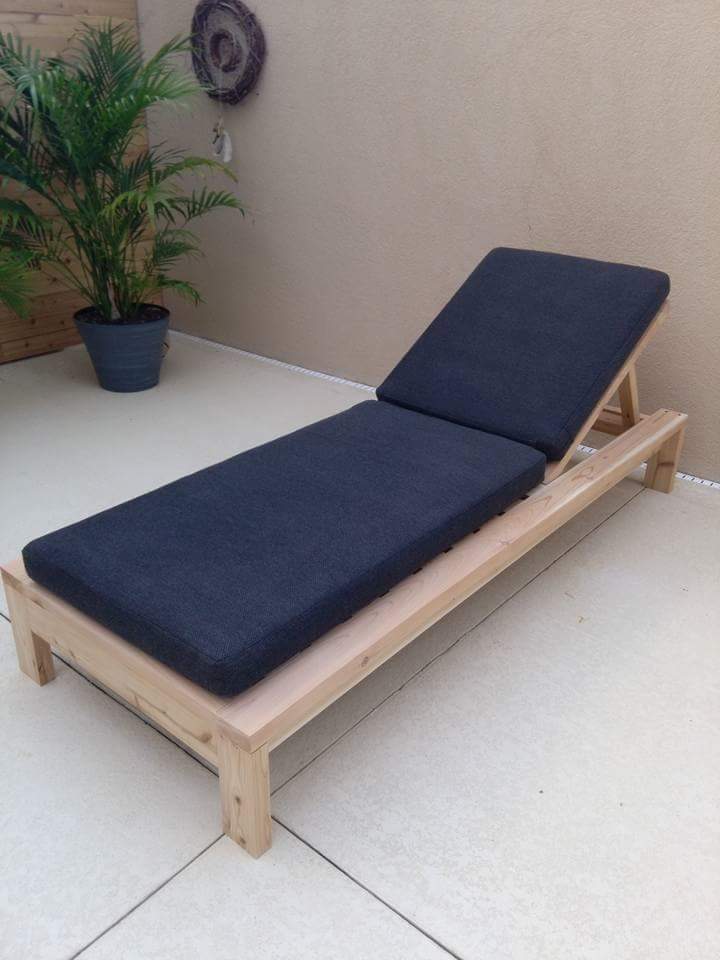
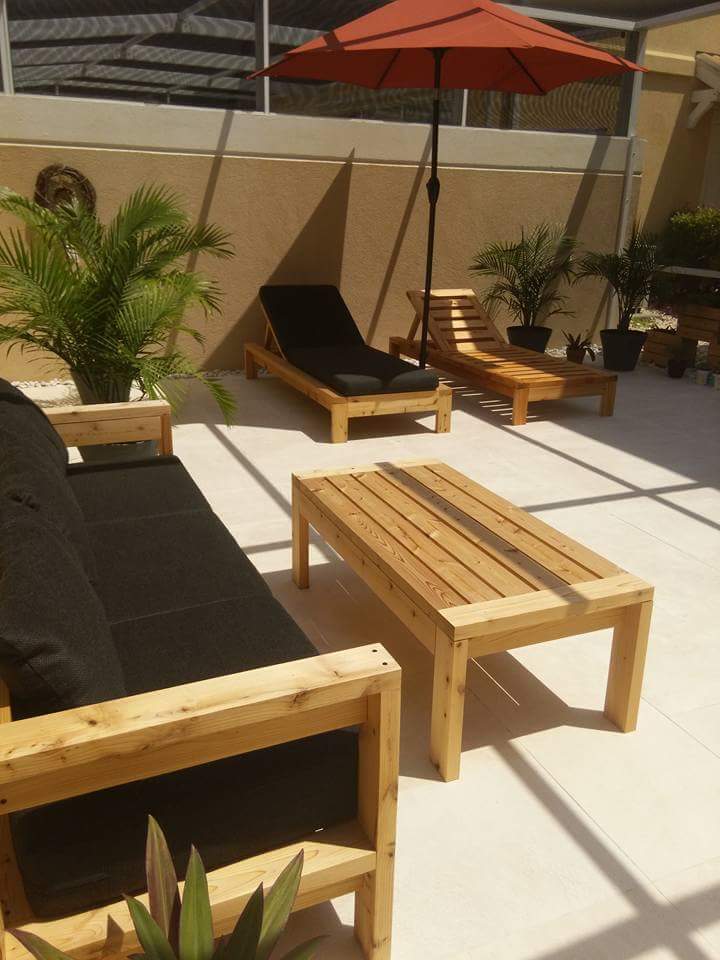
Just finished this beauty, entirely made with 2x4, plans were modify to match our outdoor sofa and coffee table. I think our best looking project so far ;) Thank you for inspiring me to build !!!

Estimated Time Investment
Week Long Project (20 Hours or More)
Recommended Skill Level
Beginner

Comments

Seasonal And Holiday

Open Seat Octagon Picnic Table

Submitted by Anonymous (not verified) on Mon, 05/13/2024 - 07:47

I had a lot of fun building this table! Ana's plan was easy to follow, even for a beginner like myself! The only thing it needs is exterior paint. I will definitely try another project from this site! Thank you Ana!

Vicky Shank

Bright and Cheery Adirondack Chair

Submitted by Anonymous (not verified) on Mon, 05/13/2024 - 07:51

I made this chair for my mom on mothers day. She loves it and I was able to use some lumber from my dad's garage stash, who passed over Thanksgiving. So there was a special link for her to this chair. Loved the easy to follow plans, thank you.

cgauley.cg

Simple Square Cedar Outdoor Dining Table

Submitted by Finns-Dad on Mon, 03/12/2012 - 17:58

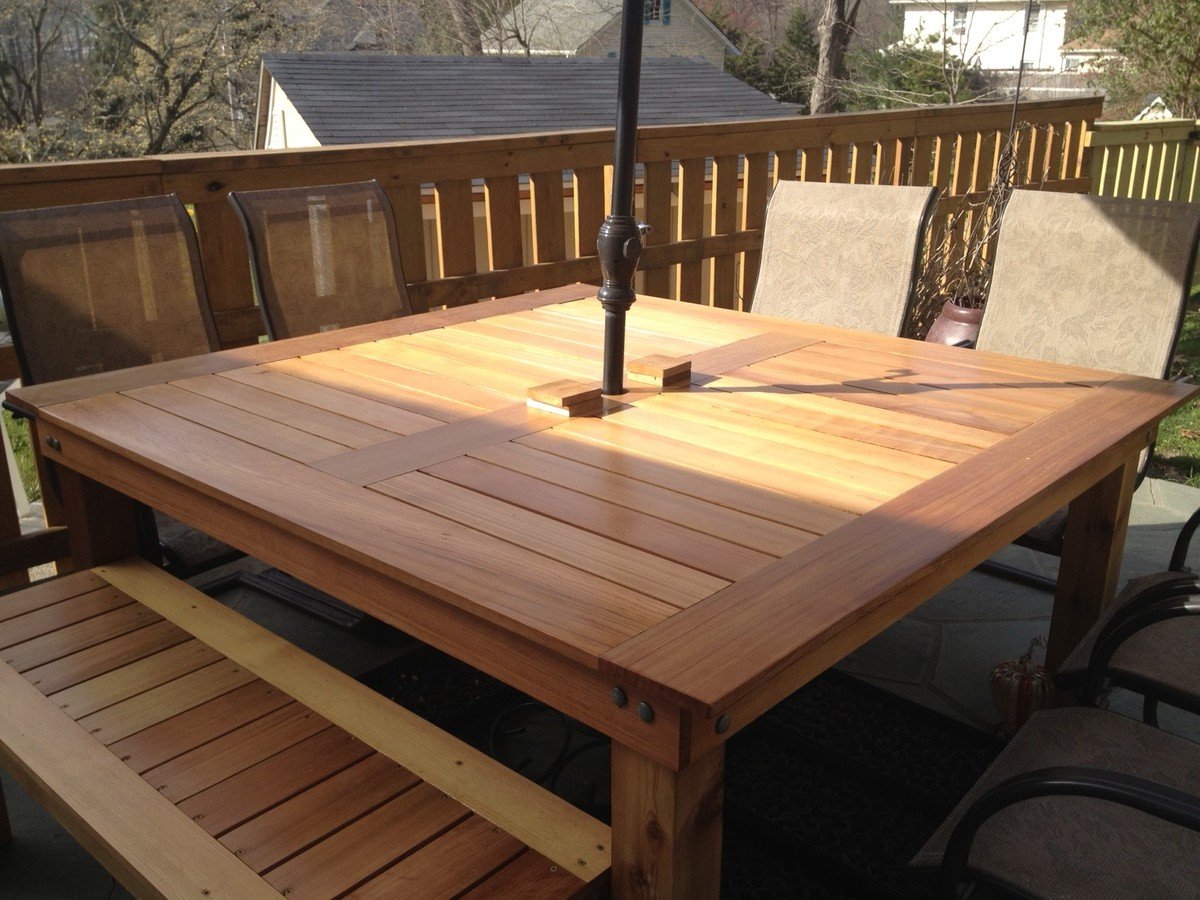
I've been planning on building a patio table for this coming spring and summer, but didn't know where to begin. I found Ana's wonderful site and now I don't know where to stop! So many great ideas.
After seeing ewood's great table I decided to make one similar. I made my square table based on Ana's and ewood's basic designs. Thank you both. I also made a bench based on Ana's design.

Built from Plan(s)
Estimated Cost
300--475
Estimated Time Investment
Weekend Project (10-20 Hours)
Finish Used
Semigloss Spar Urethane
Recommended Skill Level
Beginner

Comments

7CsShepherds (not verified)

Thu, 03/29/2012 - 07:37

I have a family of 7 (soon to be 8, I hope), and was trying to figure out how to fit us all on the rectangular table. This is the solution! I can simply make 4 benches to go with it! Thanks for the idea and the picture!

Guest (not verified)

Mon, 04/09/2012 - 07:24

Love this table and your modifications to ewood's table. I was wondering what size are the legs on your table - I can't tell if they are 4x4s...which is sort of what I'd like to have on mine. And they are under mounted, which I love because I want to make ours with the ability to remove the legs for reduced storage space in the winter. If you could would you mind putting a few close up photos of how the outside corner came out and the underside of the corners. It would be much appreciated.

K_W (not verified)

Mon, 04/09/2012 - 07:27

Love this table and your modifications to ewood's table. I was wondering what size are the legs on your table - I can't tell if they are 4x4s...which is sort of what I'd like to have on mine. And they are under mounted, which I love because I want to make ours with the ability to remove the legs for reduced storage space in the winter. If you could would you mind putting a few close up photos of how the outside corner came out and the underside of the corners. It would be much appreciated.

In reply to by K_W (not verified)

Finns-Dad

Sat, 04/14/2012 - 13:35

Hi - sorry it took a little while to get back to you. Yes the legs are 4x4's. I used knotted cedar 4x4's for the legs and made them 29" tall. I wanted to be able to disassemble the table and put it away for winter, so I attached the legs using carriage bolts, 2 per side (4 total per leg). I drilled holes using a pilot bit, then used a spatter bit to make the larger holes for the carriage bolt.

I didn't bother to counter sink them, but if I made another I think I would try that to make a more polished look. The legs are sturdy, the table doesn't wobble at all, but I am sure that someone with more furniture building experience might have a different/better idea.

I've added a couple more photos showing the corners, outside and underneath. I've also added my very basic plans that I used to make the table, one of these days I will study Ana's post of how to use sketch-up, until then this is what I worked with.

Joni

Wed, 06/06/2012 - 09:26

Can you tell me what size (width) boards you used on the frame pieces of the table, and what size on the inner boards? From your diagrams, it looks like the frame is made of 1x4s, but the inner pieces look smaller. Thank you !!!

Your table is absolutely beautiful. It looks like a very high-end piece of furniture. One of my favorite things is how the carriage bolts are installed -- I wouldn't change a thing on them!

In reply to by Joni

Finns-Dad

Tue, 07/30/2013 - 16:36

Sorry it took so long to reply - I didn't see your post. So far the table is holding up well.

You're right, the top is made from 1x4's, including the inlaid slats. To support the top, I cut 1x4's down to 1x3's so they remain hidden by the side 1x4's of the frame.

Aussie Paul (not verified)

Tue, 10/16/2012 - 18:02

Love the table - looks absolutely fantastic! I have been looking for a decent square outdoor table for ages and this one certainly fits the bill.

Can you please add a photo of the underside of the table and advise how you fastened inner boards on table top. Thanks.

In reply to by Aussie Paul (not verified)

Finns-Dad

Tue, 07/30/2013 - 16:40

I added a new photo of the bottom. Hopefully this will help show how I attached the top. I have a number of additional photo's I can send to you if you like - this site limits the number of photos I can add.

Everything is attached from the bottom to hide the screws. I used a kreg jig and it helped so much - i really recommend it.

Belmo

Wed, 08/14/2013 - 12:35

I love the look of this table, man - I think I'm gonna steal some ideas from this.

I have a question about your top, though. The slats look to be 1x4s, which I can understand, but the edges seem to be a bigger size.
Did you use 1x6 boards for the edges? 1x8s? Something else?

Thanks for your help.

Finns-Dad

Mon, 09/02/2013 - 11:03

Thank you - please take any ideas from it that you can. That is what I love that about Ana's site. You can take these great ideas and make them fit your own style...

You're right - the table top is made of 1x4's and 1x6's. When i put the top together I made the frame first. Then I added the exterior 1x6's. Next I added the center 1x6. Lastly I cut each 1x4 to size and added them.

livingston.140

Sat, 05/17/2014 - 07:15

This is an amazing table, it is beautiful! I am somewhat new to wood working and was wondering if there was a material list? I plan on creating this in AutoCAD first, so I have a visual to work off of. Also what did you use for spacing in between the boards or what was the allowance of space.

Thanks again, your work is beautiful!

leitaf

Wed, 04/22/2020 - 20:37

In looking at the plans and the underside of the table, there are some measurements missing that make it a little hard to decipher. It would be good to know the lumber sizes e.g. 1x4x8 etc. the underneath side seems to have some additional boards that don’t seem to be in the drawing. I was just wondering if it might be possible to get some additional details?

@njhorseplayer

Sun, 05/24/2020 - 08:05

This is a beautiful table and I'm going to try and replicate in a rectangular version. Primary question I have is what length screws you used to affix the framing pieces underneath to the top side so that the wood doesn't split and that the screws don't pop thru the top. Any help you can provide would be appreciated, if even you still look at this page. Thanks in advance!

Back