Community Brag Posts

Cedar Fence Board Planter Box

Submitted by iowachap on Sat, 03/15/2014 - 19:40

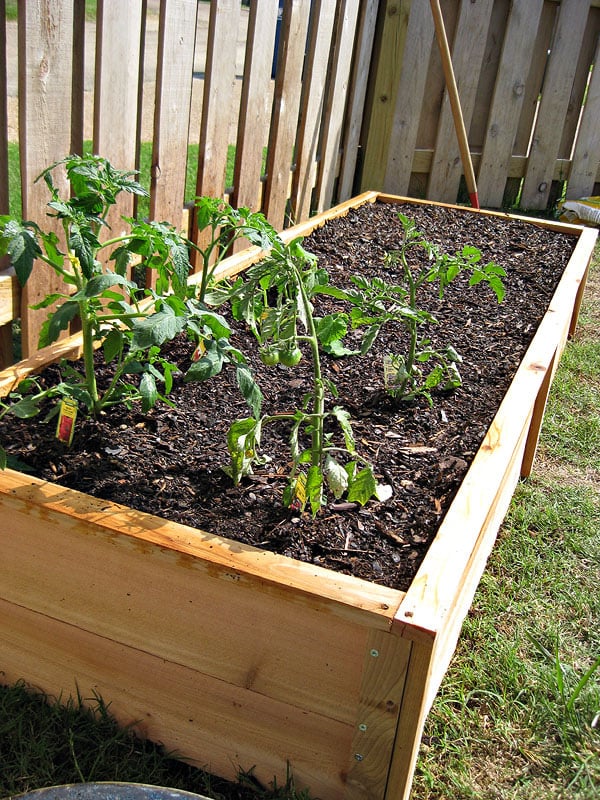
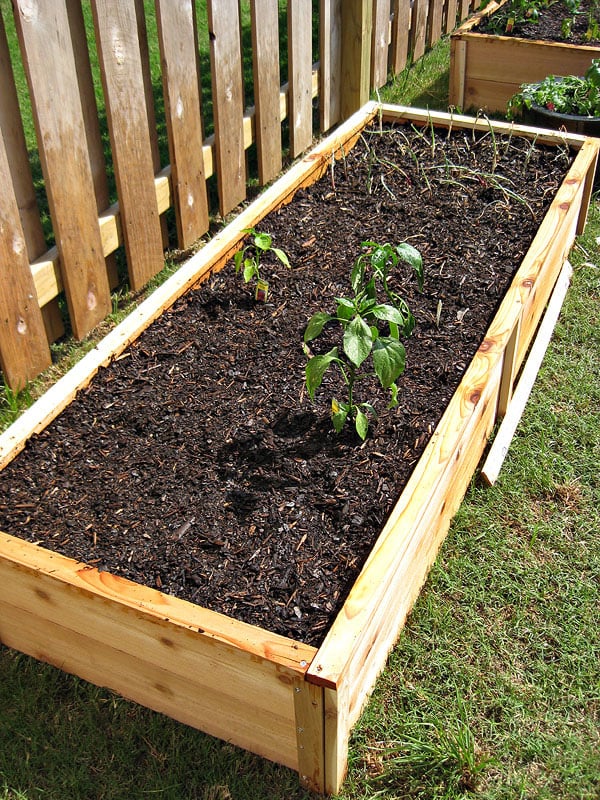
Using Ana's 10 dollar raised garden planter box idea, I made my own using the cedar fence boards and then used 2 x 3 x 8 studs for the L corner supports and mid center support along with top rail. This photo is the first 3, I will have a total of 6 boxes. Will post more as I progress.

Estimated Cost
20 to 25 dollars per box
Estimated Time Investment
Afternoon Project (3-6 Hours)
Finish Used
I used 6 fence boards, 2 for each side of the 6' long runs, and 1 for each short 3' section cut in half.

I got the 6' x 5 1/2 " x 5/8 " cedar fence boards at the orange box

I used 2 x 3 x 8 boards for the corners the middle support and the top rail. I got these at the blue box

I used 2 " and 2 1/2" exterior star bit screws.

NOTE: I pre drilled holes in the fence boards and screwed all the boards to the L corner sections from the inside out, so the screws are on the inside of the box, they did not poke through the 2 x 3 boards.

Instead of trying to measure how far off the side of the board I needed to go to match the vertical 2 x 3 boards, I just cut 10 11 inch long 2 x3 sections, and then used the 2 1/2" screws and made 4 L corner pieces the shorter side I screwed the short 3 foot length fence boards too, once I had both my short sections screwed to the L corner sections, I then stood one up and screwed 2 of the 6' length boards to the L corner section. Then the other side.

Once all 4 walls were done, I would then measure 3' in the middle of the 6' long side runs, and put in an additional 2 x 3 x 11" again screwed from the inside of the box out.

Now that all the 2 x 3 x 11" L corners and side support sections were connected to the fence boards I then cut 76 1/4" 2 x3 boards one for each length run, and then 2 26" 2 x 3 sections that were all cut on 45 degree angle to complete the top rail.
Recommended Skill Level
Starter Project

Sewing table

Submitted by Firemedic on Fri, 12/29/2017 - 19:34

Great project and my wife loves it. I added a door, locking hinges, and made a custom cutout with shelf for the machine to sit flush with the table. I switched to piano hinge for the leaves and locking hinges for the 2x2 legs. Turned out great. 

Built from Plan(s)
Estimated Cost
150
Estimated Time Investment
Weekend Project (10-20 Hours)
Finish Used
Dark walnut stain
Recommended Skill Level
Intermediate

A-Frame Chicken Tractor

Submitted by Tonya P on Tue, 07/09/2013 - 19:46

New to raising chickens, but eager to jump right in to it.
We bought a pre-made coop for the main home for our new chicks and it's very nice, not something I could do myself since I'm not yet at that level, but I saw this chicken tractor and thought it would come in handy for what I have in mind so I made up my mind to build it.
The lumber, chicken wire, staples, and wheels are all store bought new and came to about $75. The materials we had on hand were the screws, hinges, plastic coated metal shelving (used in the nesting area, I thought that would make it easy to clean), paint, and the corner piece of vinyl siding for the roof cap (hubby's brilliant idea, and I painted it green with spray paint for vinyl).
I did not try to build it quickly, I don't really know how much time it took me, but if I had to guess I'd guess total time would amount to about 3 afternoons, by myself.
I wanted to leave the top on the one side open with the option to slap on the other boards if/when the need arises. I have the other t1-11 panels that can sit right in those areas because I stapled the chicken wire in a way that would allow it.
I also added a flip up panel as seen in the pictures for access. I didn't want a small door that I would have a hard time getting to things in there. I'm so glad I added this feature, it sure gives plenty of room for me to maintain the food and water dispensers as well as get in there and catch the little chickies :)
I wanted it green to blend into the wooded background in our backyard. I didn't want to take any beauty away from the cedar greenhouse and fencing we added last year, and this tractor would be moved from time to time and I felt this green that we had on hand was perfect to help it blend in rather than stand out.
This thing is heavy! I have a hard time moving it around and usually need my husband to move it so I won't hurt myself. I am considering some options... I don't like the rope I have on it to pull it, any suggestions would be appreciated.
As with the other items I've made with Ana's plans, this was fun and pretty easy to make. I love this site! Soon I will take on my next project, I've bought and gathered the materials, I'm anxious to get started :)
Thank you for looking :)

Built from Plan(s)
Estimated Cost
$75 - $85 for the new materials listed
Estimated Time Investment
Weekend Project (10-20 Hours)
Finish Used
Green exterior paint we had on hand.
Recommended Skill Level
Intermediate

Simple Outdoor Table

Submitted by Kingsamui on Tue, 07/24/2018 - 17:24

Modifications to the simple outdoor table plan thanks to Finn’s dad. 

Built from Plan(s)
Estimated Cost
$200 -Found a place that had Cedar shorts “B quality”, but very few knots for an unbelievably cheap price. I ran all to boards through a planer to start and saved a bundle.
Estimated Time Investment
Week Long Project (20 Hours or More)
Finish Used
3coats Spar Urethane. I’ve heard the Spar doesn’t hold up well, so would have used something rlse if I knew that at the beginning.
Recommended Skill Level
Intermediate

Ten Dollar Cedar Raised Garden Beds

Submitted by kelli224 on Wed, 06/29/2011 - 19:19

Since moving and finding Knock Off Wood, we decided now would be a good idea to try some gardening (again...after failed attempts!) These beds are so simple but beautiful out in the yard and for the first time I actually have vegetables growing. We used the cedar fence posts just as Ana suggested.

Estimated Cost
$40
Estimated Time Investment
An Hour or Two (0-2 Hours)
Finish Used
None
Recommended Skill Level
Beginner

Comments

Seasonal And Holiday

Love our new greenhouse!

With the help of friends and family, we managed to build this greenhouse rather easily. We had to start with the foundation since the spot we chose was not an even grade. We did this by filling sono tubes with cement and leveling each off so the greenhouse would have a solid place to sit. We then built out a frame around the outside of the cement tubes with some reclaimed 6x6's. After that, we filled the space with 5 tons of river rock and then got to work! After the foundation was ready putting the rest of the house together was a piece of cake. The frame was so easy to put together. We had a few minor kinks to work out here and there, I won't say this house came out 100% perfectly, BUT I am so happy with the end results. We chose to paint it a deep green color as a final touch. So far we just moved a few potted plants from our deck to the greenhouse for the winter. It has been working very well to keep the plants cozy during the colder days we've had. Eventually, I plan to build a potting station, shelving, and most likely a garden bed for winter harvests.

Built from Plan(s)
Estimated Cost
$2000
Estimated Time Investment
Weekend Project (10-20 Hours)
Recommended Skill Level
Intermediate

Comments

Ana White Admin

Mon, 11/09/2020 - 09:52

The foundation looks great the greenhouse looks amazing! I'm sure fun was had building it too:) Thanks for sharing.

Seasonal And Holiday

Outdoor To Indoor Wine Caddy

Submitted by calcowoods on Tue, 12/29/2020 - 08:30

Built a number of wine caddies with/without the stake. Stake useful for an outdoor environment, yet not useful for an indoor table top setting. Provided a simple alteration by inserting a t-nut into the bottom of the caddy & a hanger bolt screwed into top of stake. Simply screw in stake as needed.

Estimated Cost
$4
Estimated Time Investment
Afternoon Project (3-6 Hours)
Finish Used
Minwax Cherry and Minwax Satin Polyurethane
Recommended Skill Level
Beginner

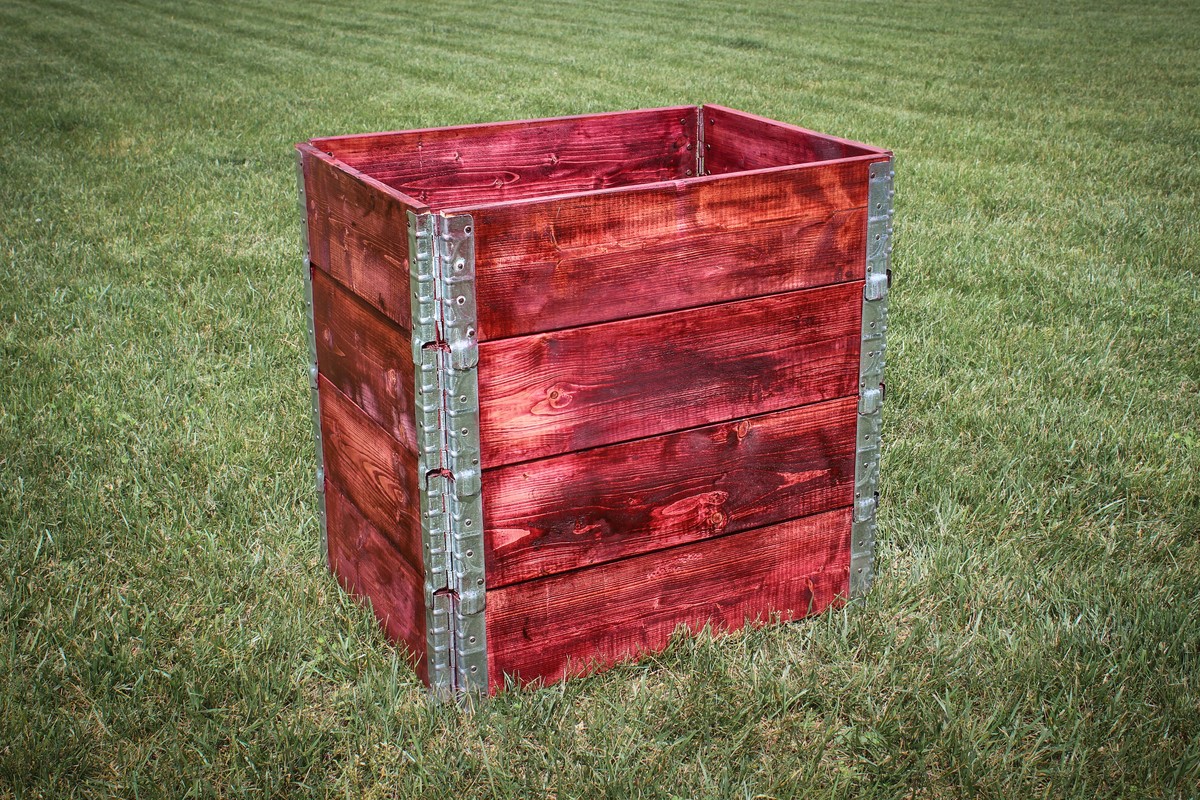
Simple Stackable Compost Bin from Pallets Collars

Submitted by mtairymd on Sat, 06/06/2015 - 13:48

Build Instructions:
http://www.instructables.com/id/Simple-Stackable-Compost-Bin-from-Palle…

How it works:
https://www.youtube.com/watch?v=Tgtd88kKIn0

With one single unit as opposed to two or three bins, the space needed for composting is minimized. Each tier stacks on top of the other, latching together to make the bin. This setup makes it easy to turn and rotate the compost, since moving the collars is simple. Just remove the top collar and place in a new location adjacent to the original bin location. Turn the compost into the new location and stack the collars until finished. This is a great alternative to having multiple compost bins next to each other.

Estimated Cost
Free
Estimated Time Investment
An Hour or Two (0-2 Hours)
Finish Used
Cabernet colored stain from Varathane and a polyurethane from Minwax.
Recommended Skill Level
Beginner

lawn and garden shed

Submitted by brittanyj on Wed, 08/19/2015 - 13:17

Needed a shed to store bikes and mowers, etc, so I'd have more room in the woodshop : )  I made a lot of modifications to the plan to fit my space and make it much larger.  The completed size is 7 foot tall at the peak, 6 feet deep and 5.5 feet wide.  I made it as a 3 sided shed, using the wall as the 4th to save on cost, increase air flow, and make the exterior house wall accessible.  I also made an egress in the back of the shed in order to get behind the shed if needed. 

Instead of roofing shingles, I opted for ribbed metal sheets and one clear sheet in the middle to make a skylight, so there would be light in the shed.  This is my favorite part of the project.  It was a huge pain to attach the roofing from a ladder with very limited access, but it looks great and I love the light coming in.  We have very little rain in CA, so I'll have to wait until winter/rainy season in order to test out its waterproofing. 

Since the shed sits between the house and the neighbors block wall fence, and I wanted to use as much of the space as I could, I decided to design the shed to have the side wall against the house rather than the back wall, as shown in the plan.  This took a large amount of modifications, but with careful planning and measuring, it can be done.  This also meant blocking off access to behind the shed, so I cut an egress in the back wall and added hinges so you can lift the back cut out panel, and rest it on a stop block attached to the fence behind it in order to have access.  That's what woodworking is about- problem solving.  Love it. 

As you can see by the full shed picture, it fits a large amount of stuff- 2 adult bikes, mower, edger, trimmer, chainsaw, hedge trimmer, garden tools, shovels, etc, with plenty of room for more.  I now have a free corner in my garage that I've already filled with a DIY rolling workbench and more pegboard space for tool hanging.  Woodshop increased space= happy Brittany. 

I should also mention that building the frame and adding the pickets was quite a quick and easy job.  The hardest and most time consuming part was the roof (I didn't have metal cutting tools), rolling each very heavy wall to the site (I was alone) and the previous 2 weeks in which I built the paver patio the shed sits on.  Hard work, but worth it.  I love it!

Built from Plan(s)
Estimated Cost
$280
Estimated Time Investment
Week Long Project (20 Hours or More)
Recommended Skill Level
Intermediate

Comments

brittanyj

Mon, 01/25/2021 - 13:15

It has been incredibly useful for storing! One thing about the skylight- Over time the sun has warped it and there is now a hole and crack there. So I wouldn't plan on the clear roofing being a long term solution- I will be replacing it with either thicker clear roofing or 2 layers.

Sandbox with Benches

Submitted by cscottrun on Mon, 04/13/2015 - 10:33

We altered the original plan by enlarging the sandbox (approx 5' x 6') which made for wider benches that can comfortably seat an adult.  The benches and back rests are three boards deep instead of two.  We added 2x12 supports under the benches for additional support, as well as another 2x4 support in the middle of the backrest.

Built from Plan(s)
Estimated Time Investment
Day Project (6-9 Hours)
Finish Used
None
Recommended Skill Level
Beginner

Comments

Seasonal And Holiday

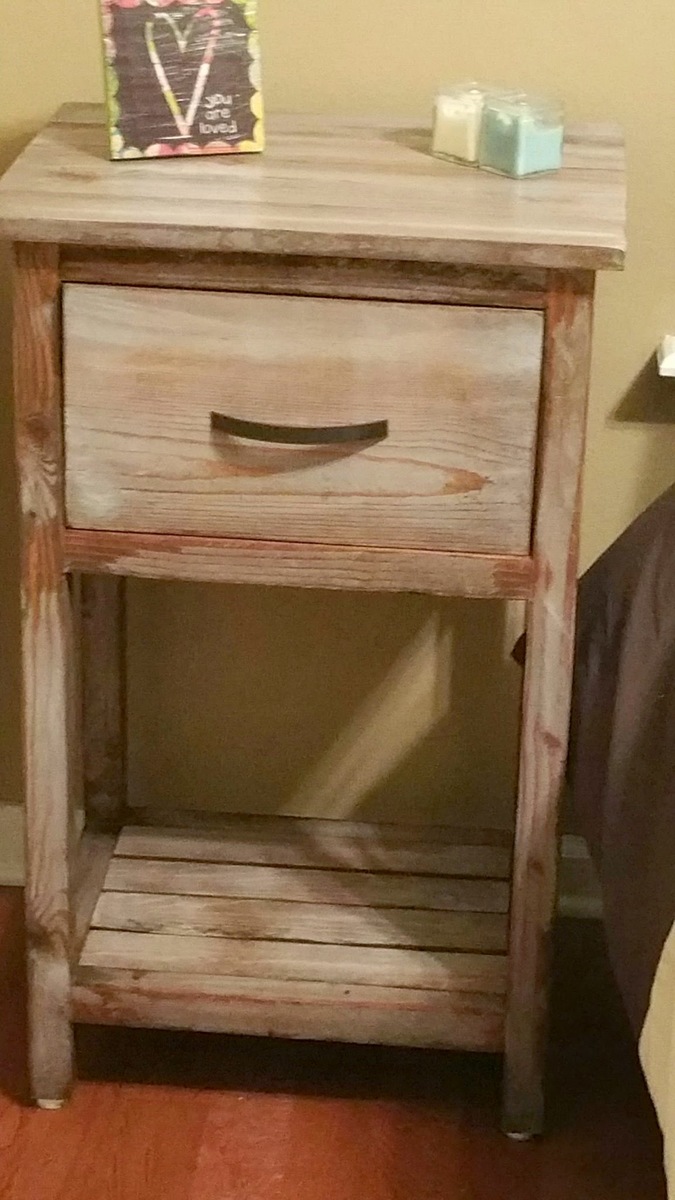
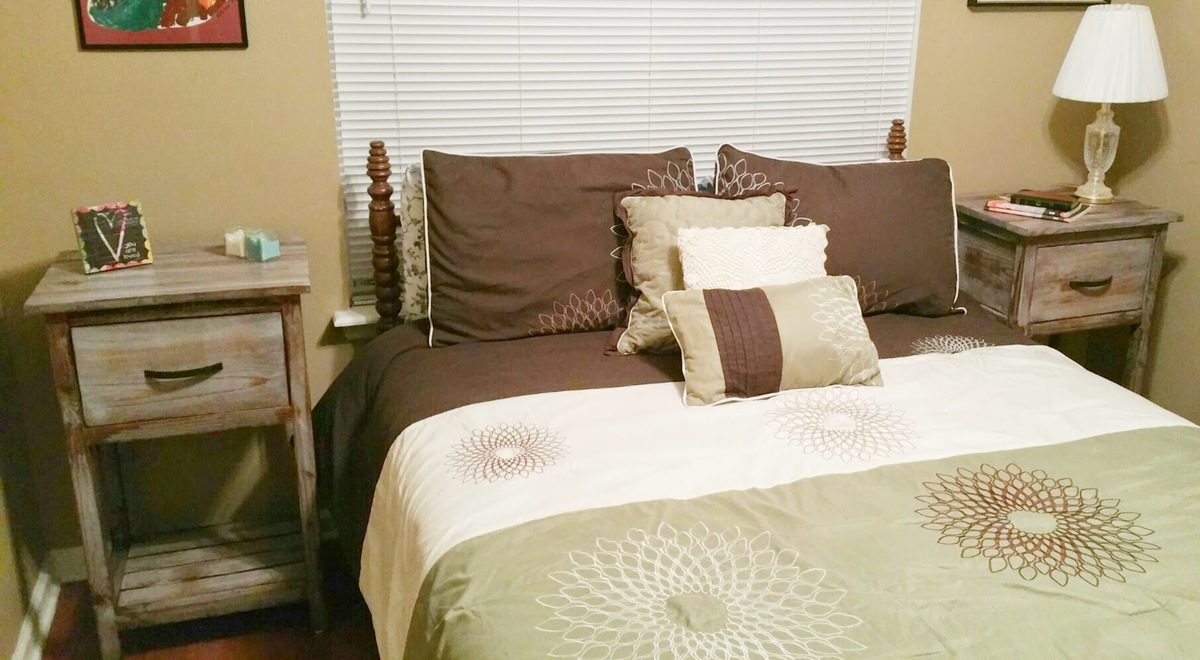
Night Stands custom sized and finished

Submitted by pondrider on Thu, 01/15/2015 - 07:50

Night Stands custom sized and finished per customer building new home based Ana White's Farm House collection  #‎anawhite‬  

Intentional distressing per customer request with guidance from Ana White plans.   Finish contains a mix of paint, removing of paint, staining and restraining.   Now to move to a purposeful Mud Room Locker for a new home suited for family. 

http://ana-white.com/users/pondrider/
#anawhite   #Stain   #CustomFurniture   #Paint 

Estimated Time Investment
Weekend Project (10-20 Hours)
Finish Used
Finish contains a mix of paint, removing of paint, staining and restraining.
Recommended Skill Level
Intermediate

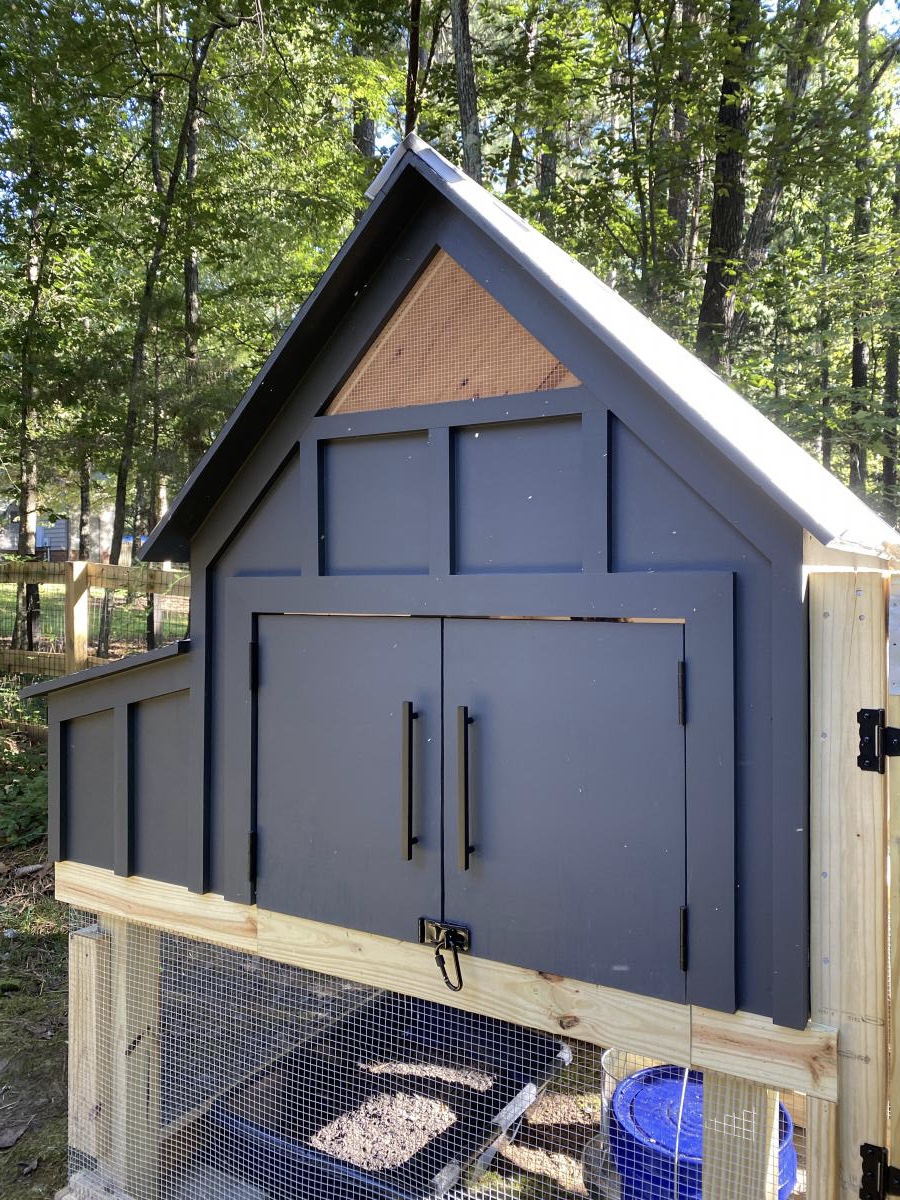
Williams Sonoma Inspired Chicken Coop

Submitted by Anonymous (not verified) on Tue, 11/10/2020 - 18:46

We took some creative liberties on the Williams Sonoma inspired coop posted here. Because we don’t get a whole ton of sun in our backyard, we eliminated the herb garden planter and instead built a longer run. We also made the coop a bit wider to accommodate for the inevitable chicken math. And, you’ll notice the vent both shaped differently and is a bit higher. This was to increase air flow, avoid the dreaded draft, and to lend a more Scandinavian vibe. We also decided to place the chicken exit on the outside wall to allow for more living space under the coop itself. The project took about a month to complete, dedicated to only working weekends. And, it was very much over budget! Who knew wood is so expensive?! But overall, the outcome was even better than I expected. The chickens love it and I don’t mind looking at it!

P.S. this was a pretty advanced project. The fractions alone had me yelling “uncle!” Thankfully my husband is pretty handy, and my father-in-law (career in the construction industry) had a few pointers, so they took the lead in executing. I chose the paint colors and suggested the deviations from the original blue print. ;-)

Estimated Cost
$1000
Estimated Time Investment
Week Long Project (20 Hours or More)
Finish Used
Sherwin Williams Iron Ore in matte
Recommended Skill Level
Advanced

Comments

racbino

Wed, 11/18/2020 - 12:55

Thank you! Yes, I suppose everyone is wanting wood for home improvement projects now that we're not leaving the house! Also, I didn't mean to post a picture of my son and his friends. Am I able to delete?

joshwilson28

Thu, 01/14/2021 - 07:43

does this roof have the same angle as the 'Small Chicken Coop with Plans'? It seems to be 'less steep'. Wanting to start this project next weekend and trying to get my mind wrapped around everything!. Thanks.

Seasonal And Holiday

Farmhouse Dining Table

Submitted by keribeth on Sat, 03/17/2012 - 13:28

I used the basic construction of the turned leg coffee table, but used 2x4s screwed together for the legs, added a couple of supports, and made the dimensions larger (38.5" x 62" for a dining table that seats 6). I used pocket holes for all the joints and it came together pretty easily. (One day, though, I am going to build a project without drastically altering the plans. One day.)

Built from Plan(s)
Estimated Cost
~$180, including finishing
Estimated Time Investment
Weekend Project (10-20 Hours)
Finish Used
Minwax wood conditioner followed by two coats of Minwax stain in walnut, and then, because the stain looked splotchy, one coat of Minwax gel stain in hickory. The gel stain evened things out a bit and was great to work with. Then a few coats of wipe-on poly on all that.
Recommended Skill Level
Beginner

Comments

Toddler Captains Bed

Submitted by Anonymous (not verified) on Tue, 07/05/2016 - 19:36

My wife wanted a dresser and a bed for our two year old foster daughter on her second birthday.  Since half the dresser drawers are not useful for a toddler I considered a Captain's Bed or Mate's bed but couldn't find one.  I modified the Traditional Wood Toddler Bed plan adding drawers underneath and painted it white.   My little girl loves it.   It turned out nice enough that my oldest daughter asked me to make another for my grandson since his convertible bed will be converted back to a crib with a new granddaughter on the way.  Her only request was to color it Espresso Brown.  I have included the picture.  Thank You for the ideas.   God Bless You and your faimily

Built from Plan(s)
Estimated Time Investment
Week Long Project (20 Hours or More)
Finish Used
Black Primer and Espresso Brown Paint
Recommended Skill Level
Beginner

Bench with soft-close drawers for Front Entry

Submitted by drickstan on Tue, 08/11/2020 - 10:43

We needed a bench to fill the space in our front entry and provide some storage for seasonal gear. We couldn't find anything to buy that would work for us, so when my wife found these plans, I had to try it! Couldn't be happier with the results. We widened the bench by a foot to 84" to fill the space. Basically, it just made each drawer 4" wider. Everything else was built to plan. The most expensive thing was the soft-close 24" drawer slides (~$100). As soon as you go above that 24" depth, they get pricier! It was also tricky to get the drawers to catch properly on the soft-close mechanisms, but I made sure to take the time to get it right before closing it all in. Now I just open and close the drawers for the pure satisfaction of it! I used premium pine plywood for the top and I find it still doesn't give that smooth finish I like, even after sanding. I think I'll create a new top out of joined knotty pine planks later and just attach it to the top.

Built from Plan(s)
Estimated Cost
$300 CAD
Estimated Time Investment
Week Long Project (20 Hours or More)
Finish Used
Primer and pearl finish paint.
Recommended Skill Level
Intermediate

Loving These Shelves

Submitted by woody311 on Thu, 01/15/2015 - 18:51

I changed the plans a little bit to add on the extra shelf on top as well as making the shelves an inch narrower than the plans. The project was actually pretty easy and really only took me about a days worth of work.

Estimated Cost
$160
Estimated Time Investment
Day Project (6-9 Hours)
Finish Used
None
Recommended Skill Level
Beginner

Comments

Inspired by the Farmhouse Bed..... for my Dog!

Submitted by dmanar33 on Wed, 06/22/2011 - 20:15

Inspired by Ana's Farmhouse Bed plans, I built this dog bed for my Jack Russell. I measured and planned for it to comfortably fit two standard bed pillows (in waterproof covers of course!). She loves it!

Estimated Cost
$20ish
Estimated Time Investment
Afternoon Project (3-6 Hours)
Finish Used
Primer and latex eggshell paint with glaze on top
Recommended Skill Level
Beginner

Comments

Mgoodlin

Thu, 10/03/2013 - 08:49

I love this dog bed and want to make it for my puppy's Christmas gift. Where can I find or purchase the plans to make it?

Cubby/Bookshelf/Corner Desk Combo

Submitted by Anonymous (not verified) on Wed, 01/18/2017 - 20:40

This is a mashup of several plans, combined into one big, bad ass, office desk. I've had a little experience years ago in high school woodworking classes, but haven't really built much since. This reminded me how much I enjoy working with wood. So rewarding to be typing this message at my new office desk!

Estimated Cost
$400
Estimated Time Investment
Weekend Project (10-20 Hours)
Finish Used
Minwax "Early American"
Recommended Skill Level
Intermediate

Comments

treemeagher

Wed, 08/19/2020 - 06:25

This is amazing! So amazing could I ask you to share with me what prices from the collection of plans you used and how? I’m looking at your pic trying to figure out how to incorporate the plans you used. I want to build one for myself lol fantastic job!!!!