Community Brag Posts

Cost less than $5

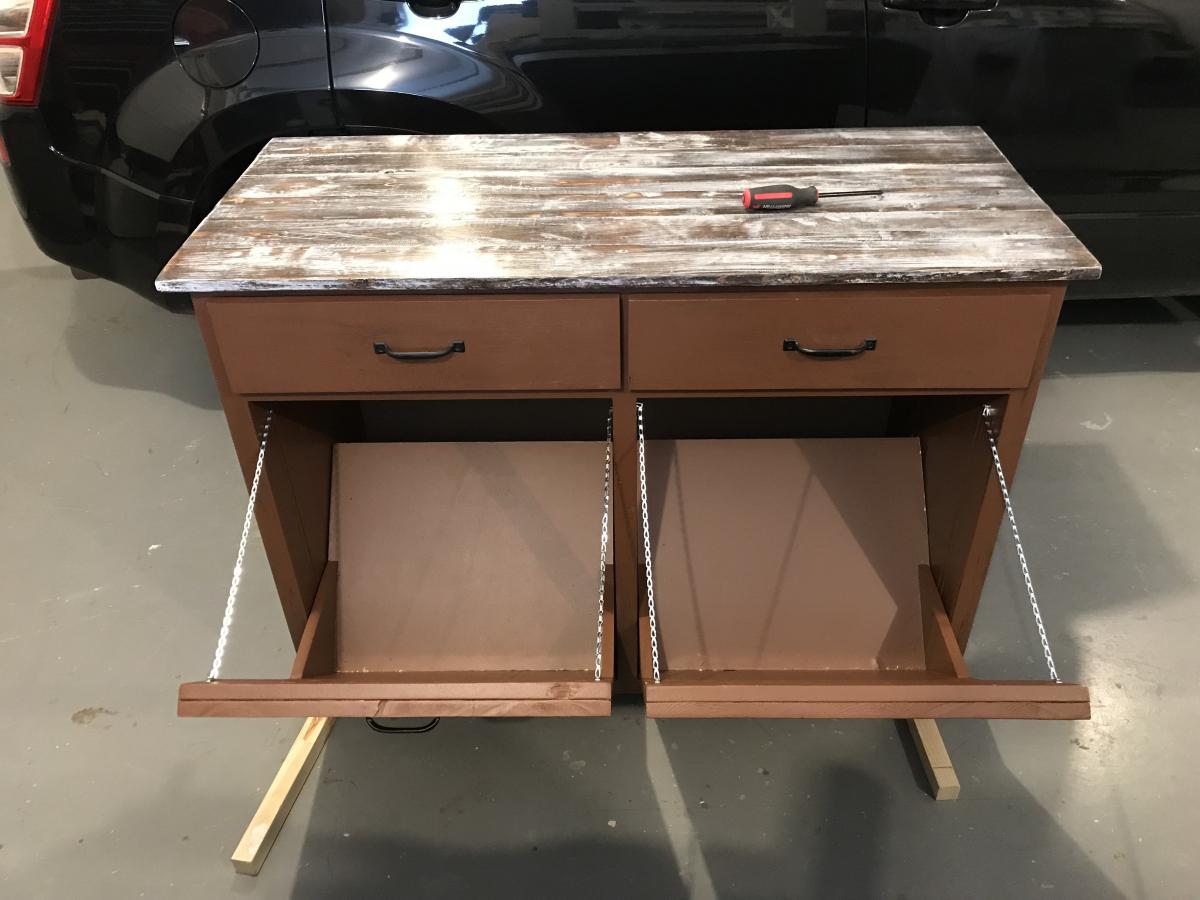
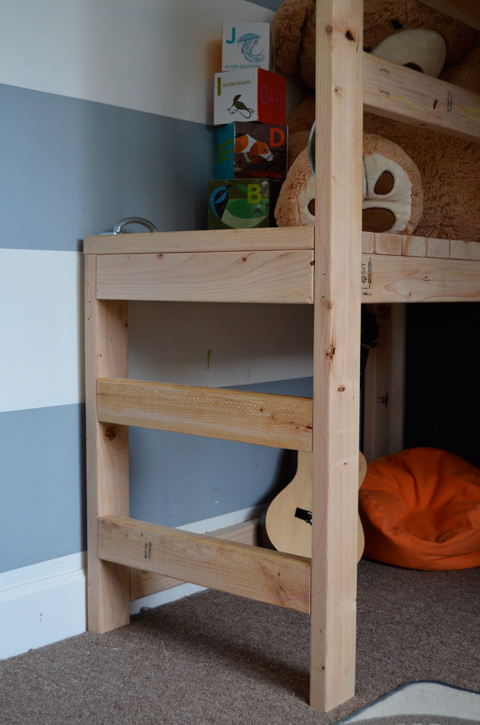
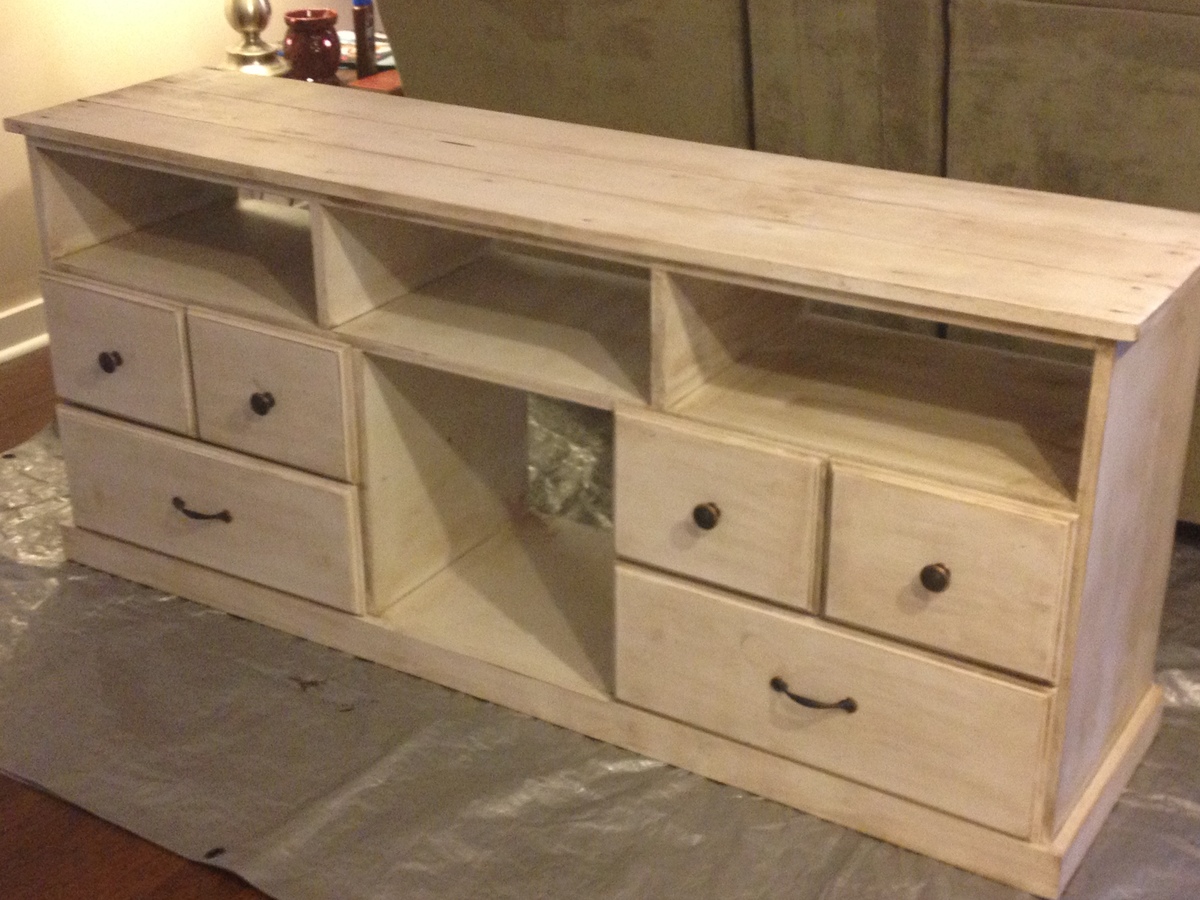
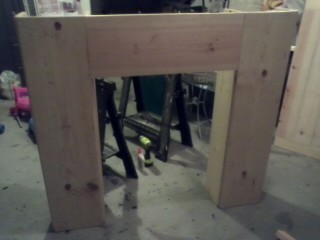
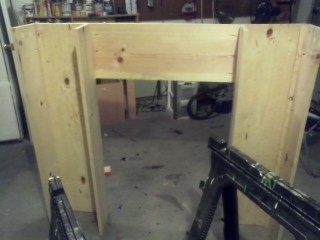
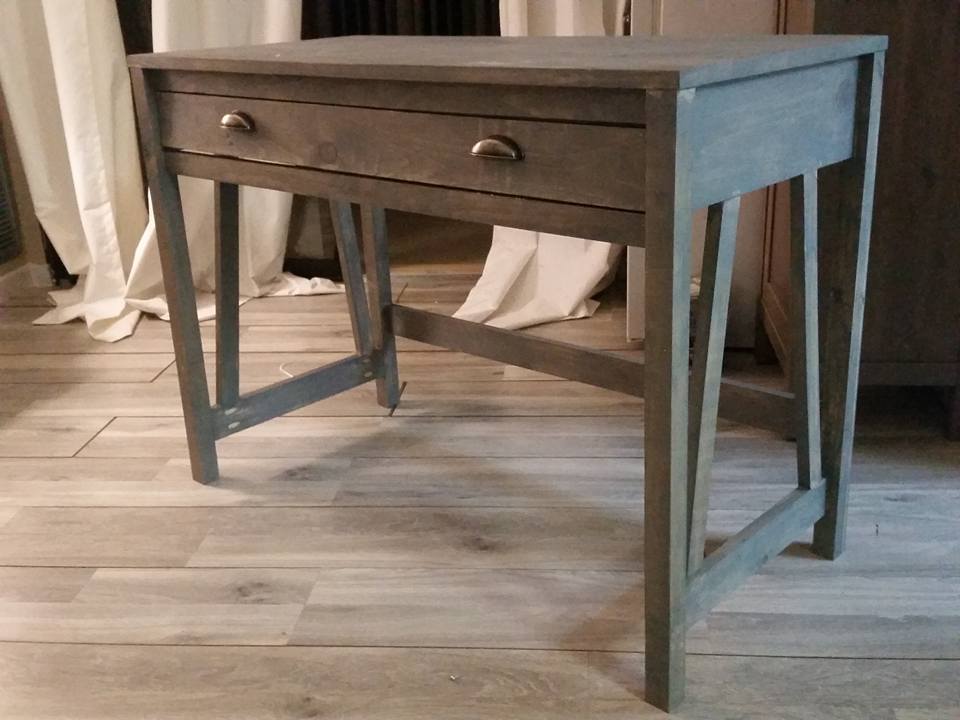
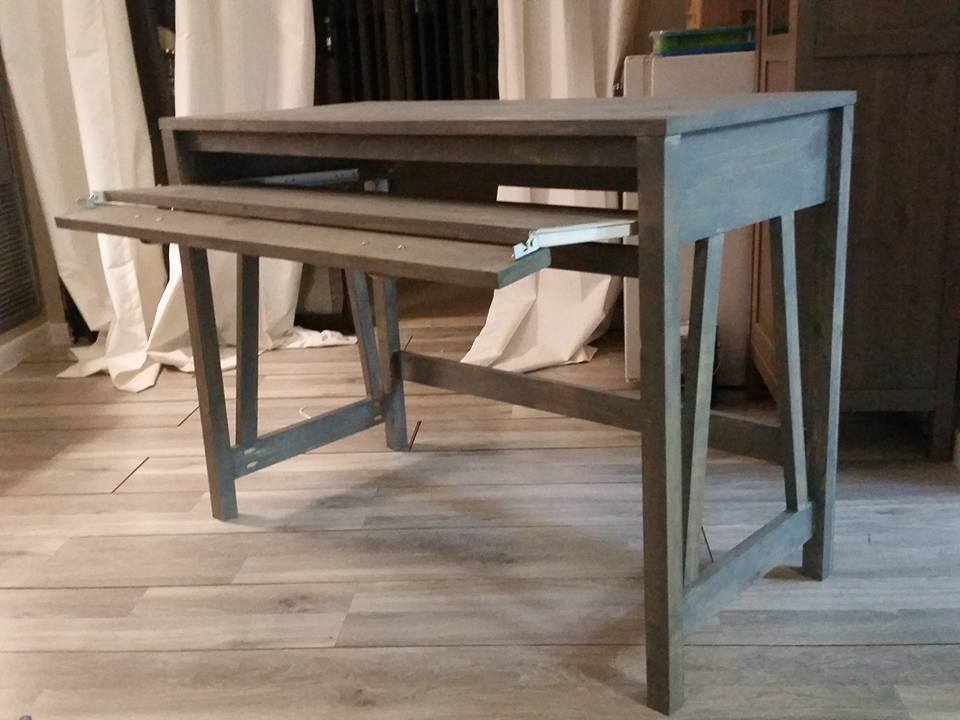
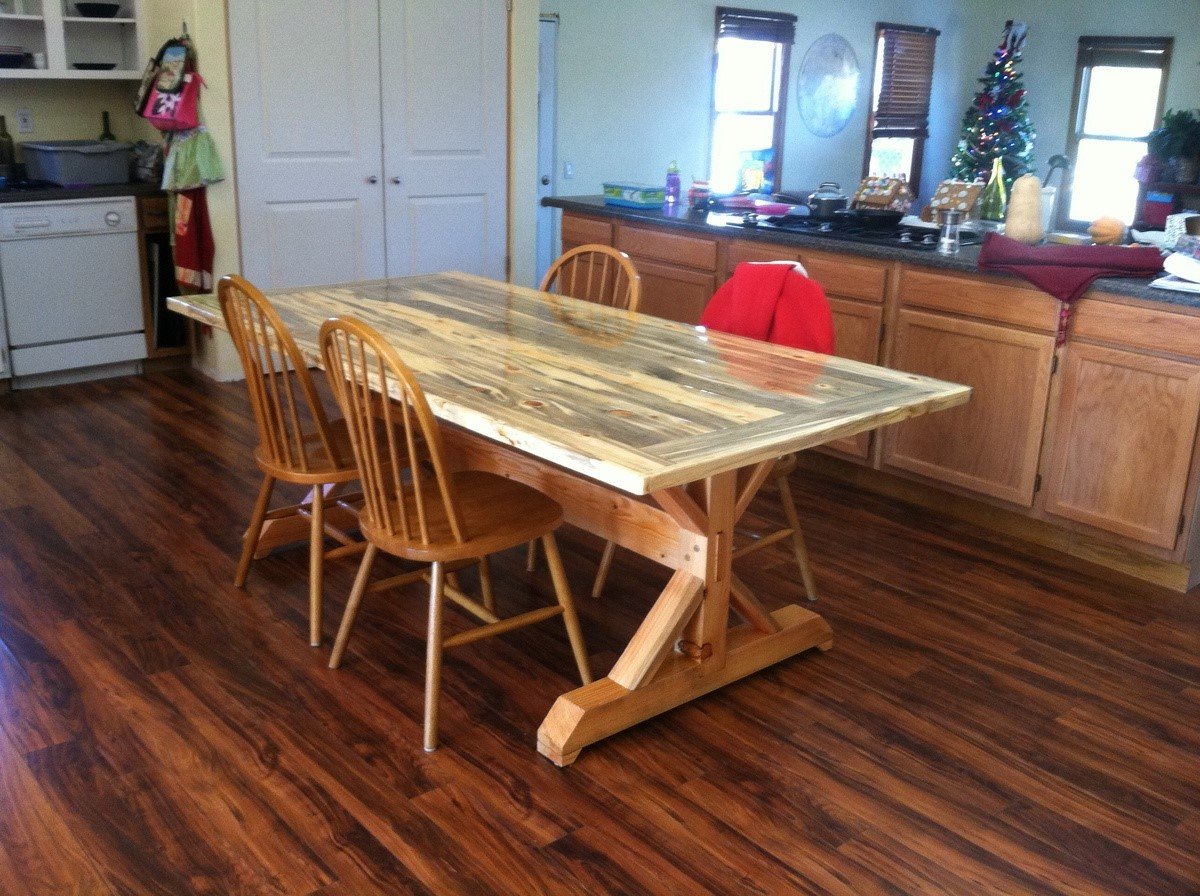
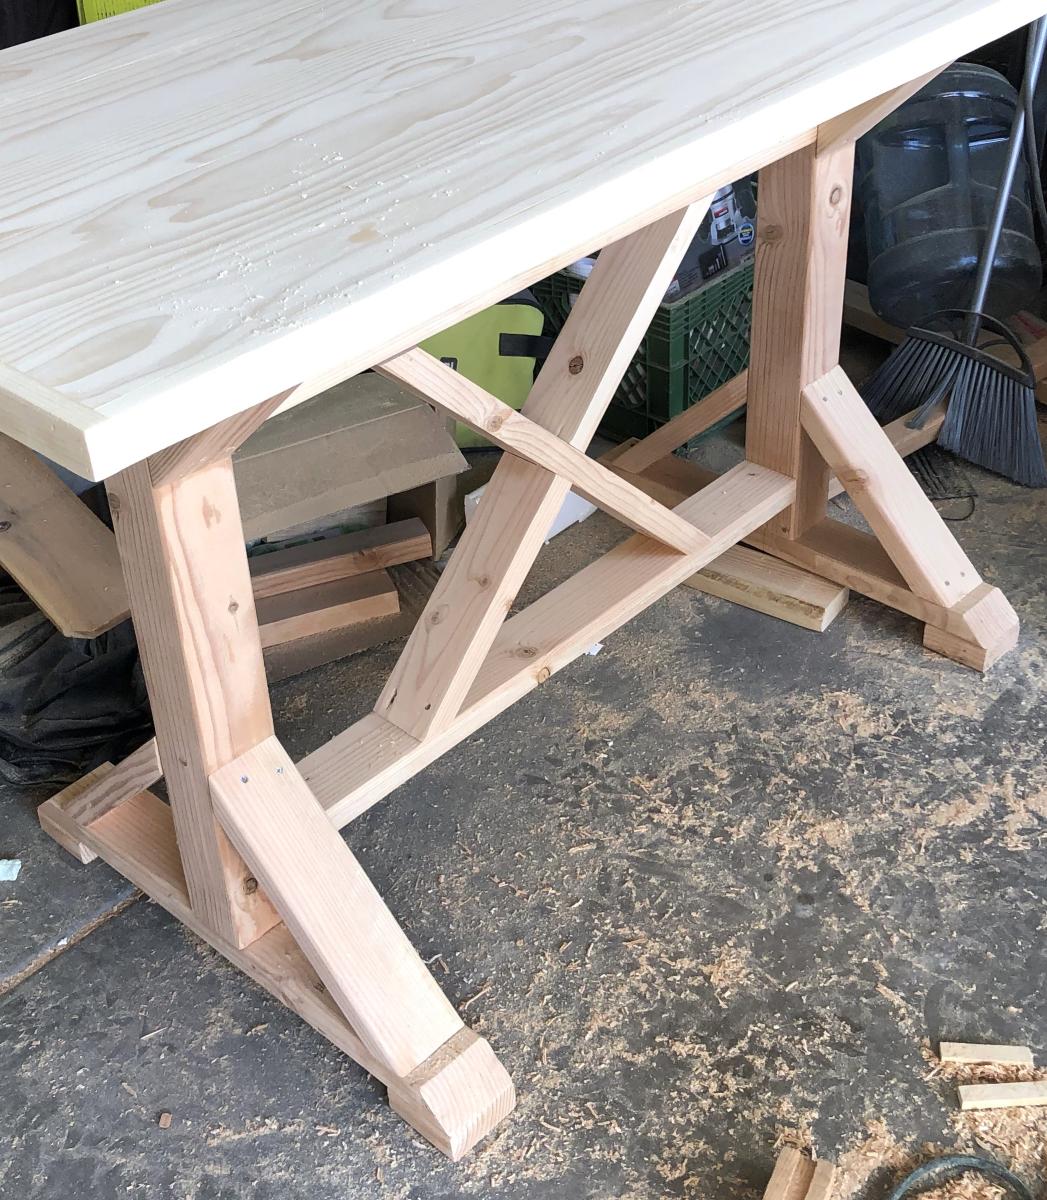
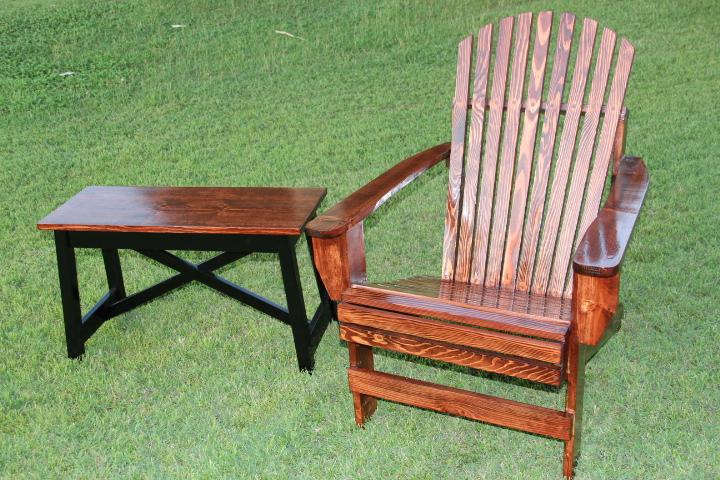
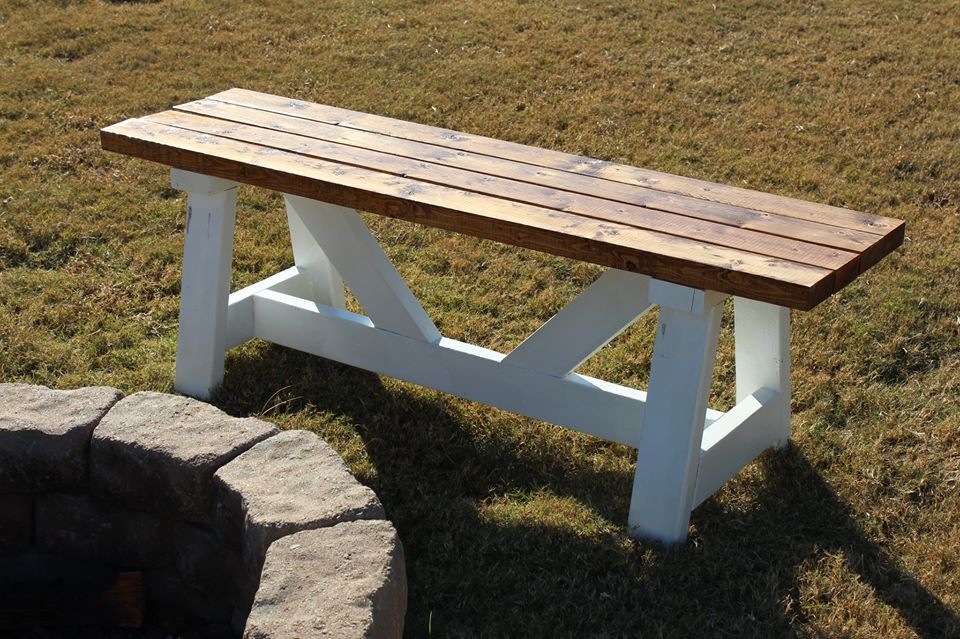
Nothing was bought for this table. I allocated $5 as cost for the screws and sandpaper. 2 x 6 legs & 2 x 4 rails used wood recycled from material removed during alterations to our 1930's barn. Supports were extracted from the woodpile. Nails were removed where possible, or cut off and punched below the surface where they were not removable. Because the wood was very old and splintery an enormous amount of time was spent sanding.


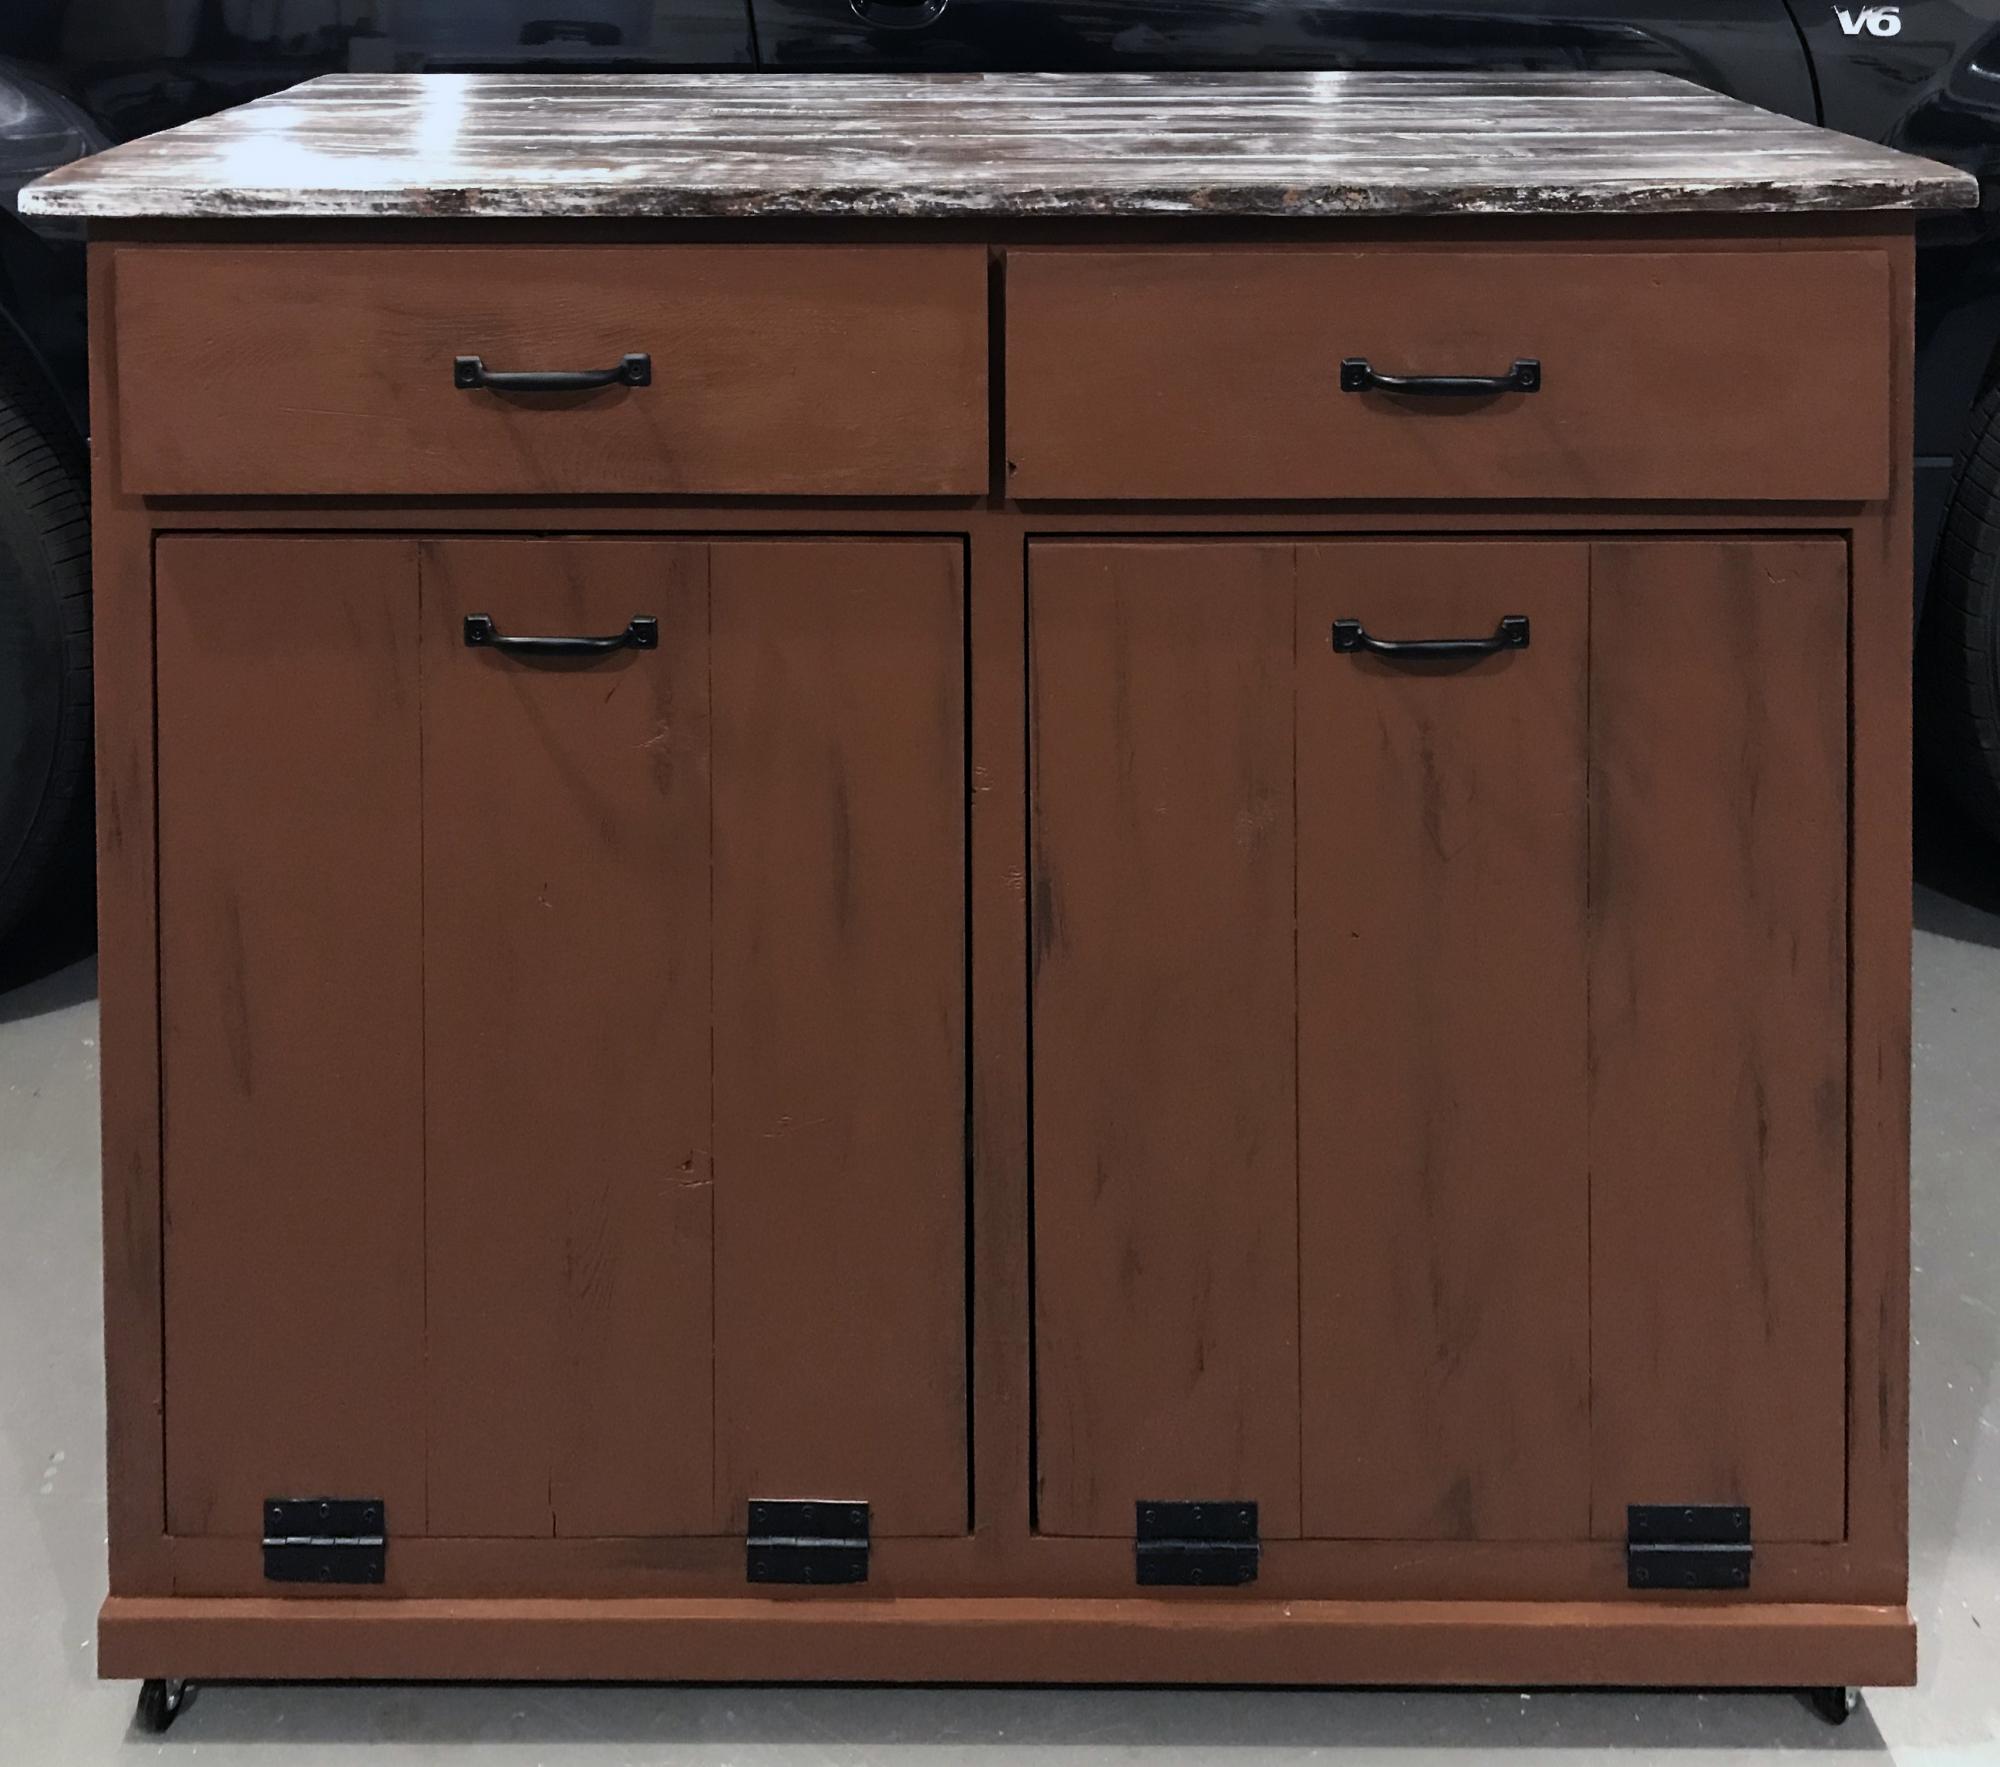
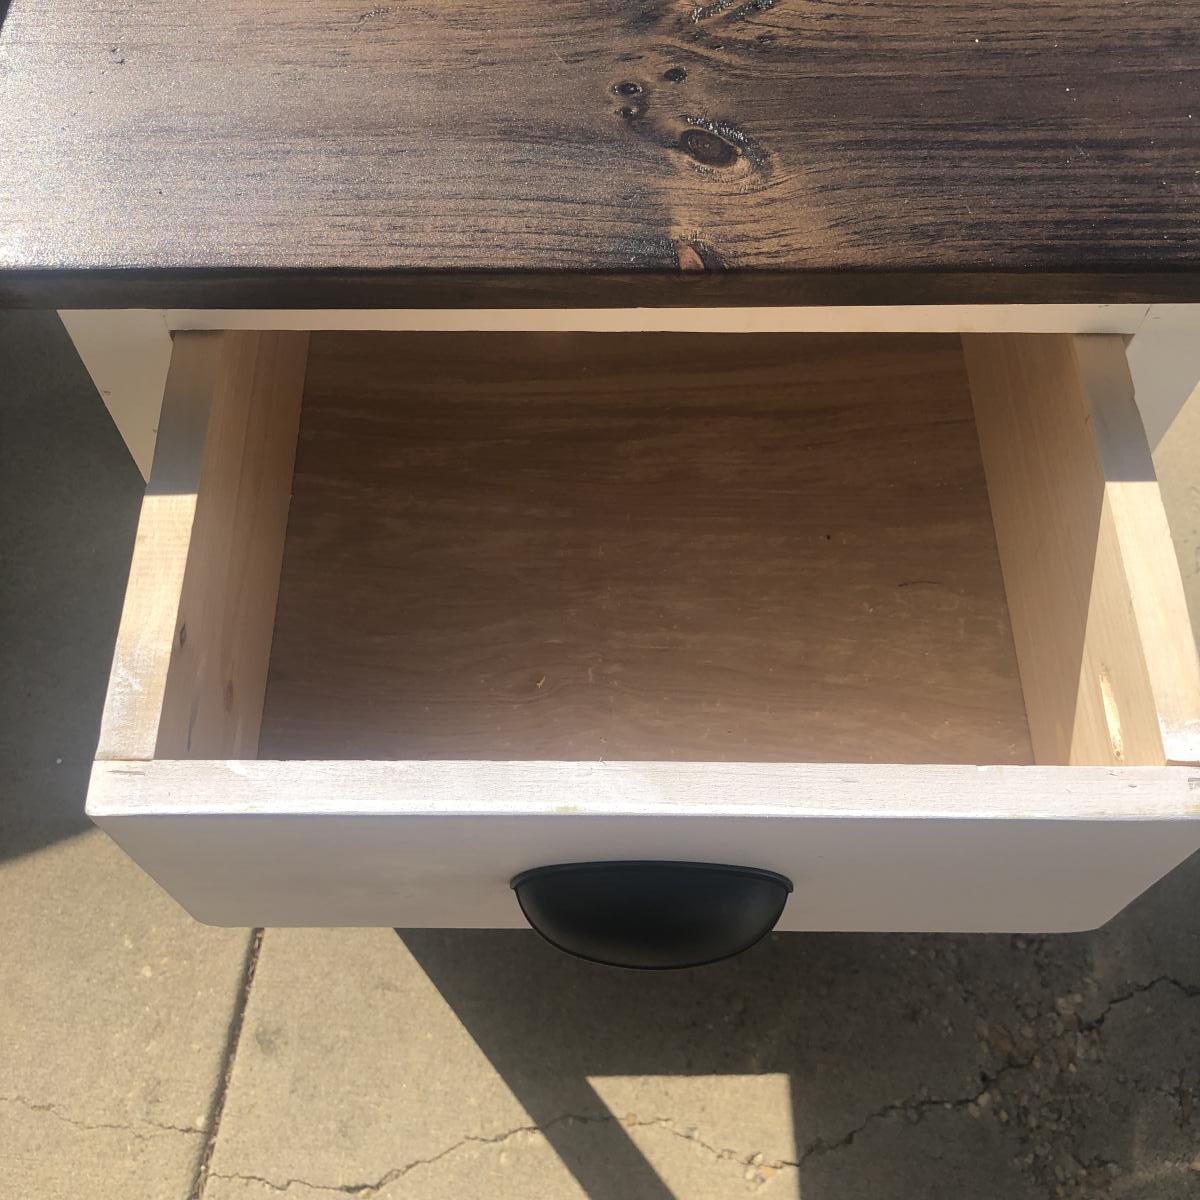
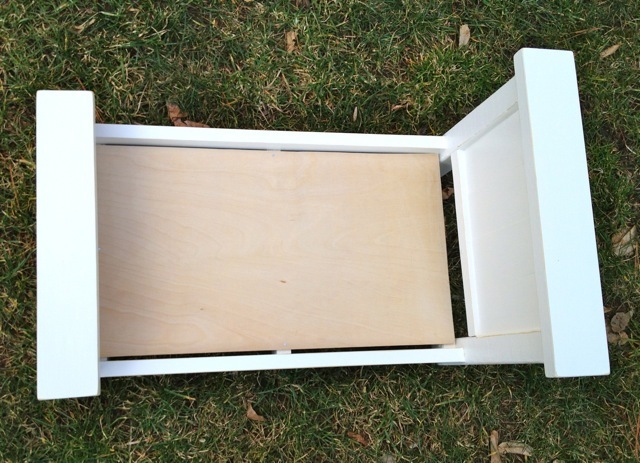
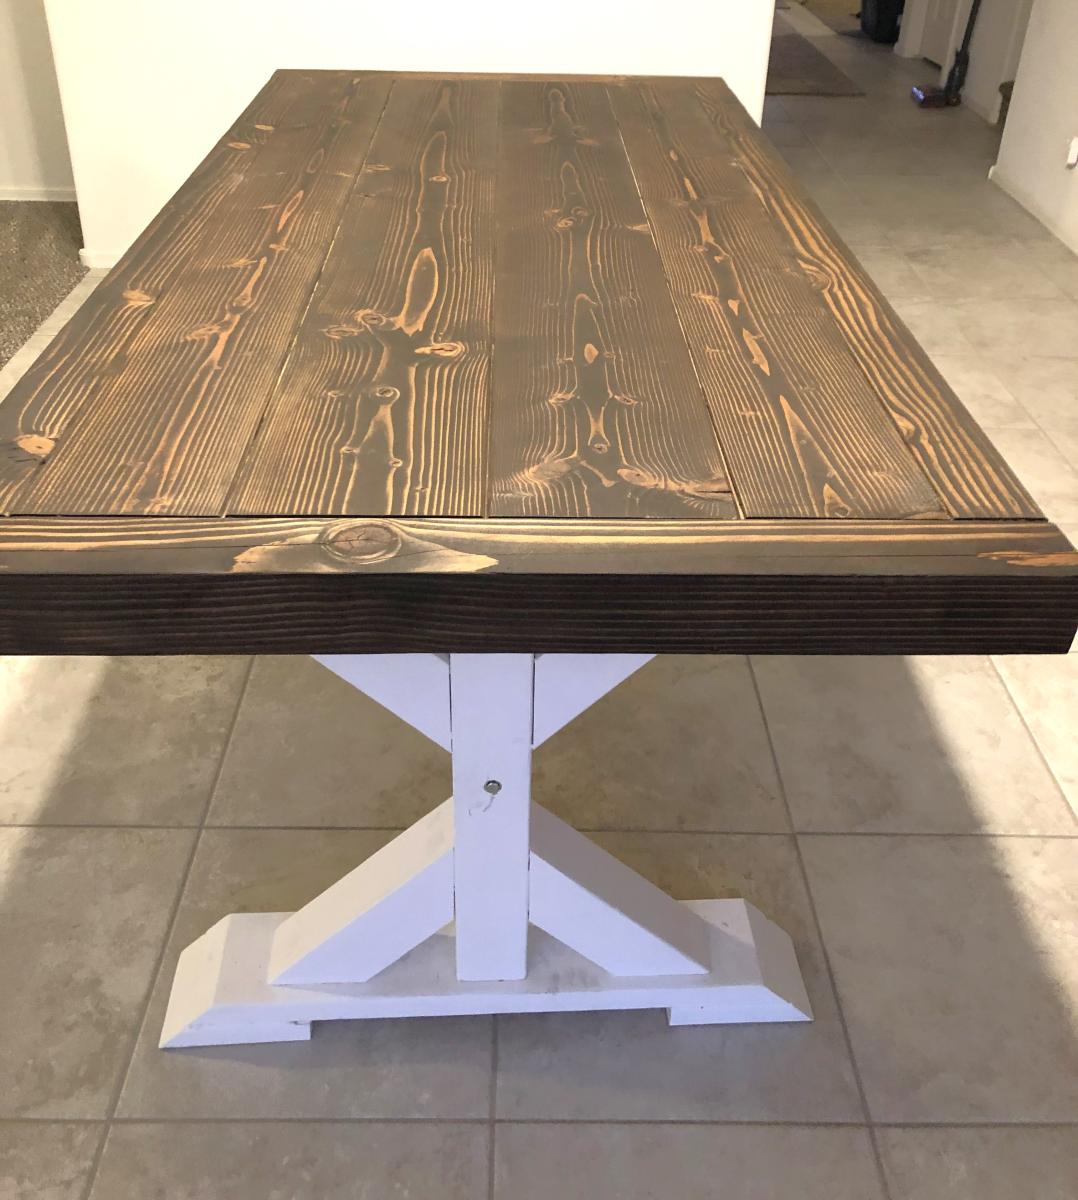
The top is an Ikea counter thrown out from a kitchen remodel and rescued from the roadside, still in its cardboard box. Score!


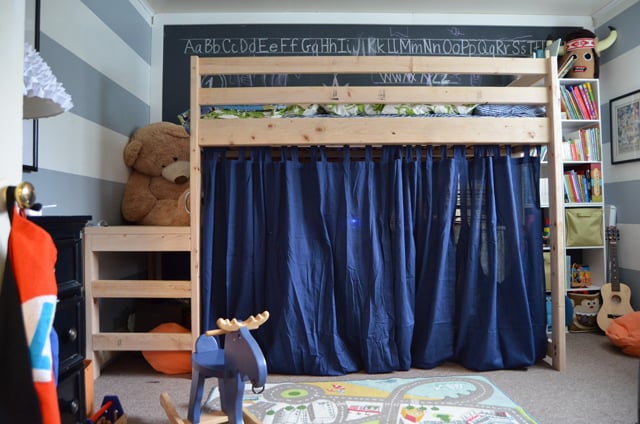
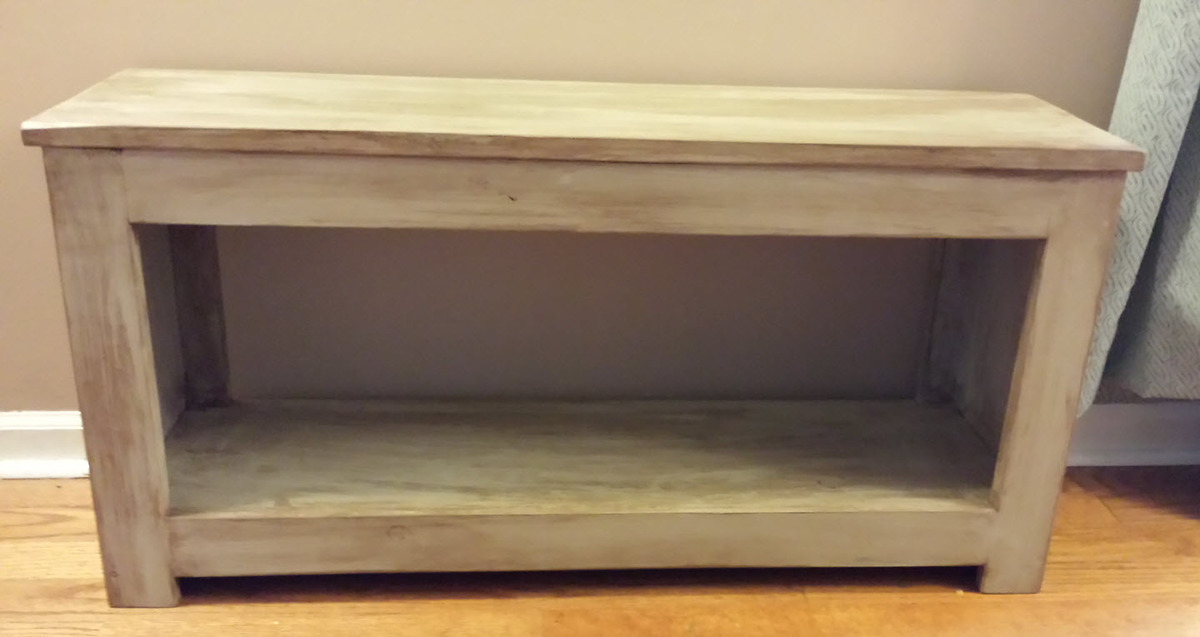
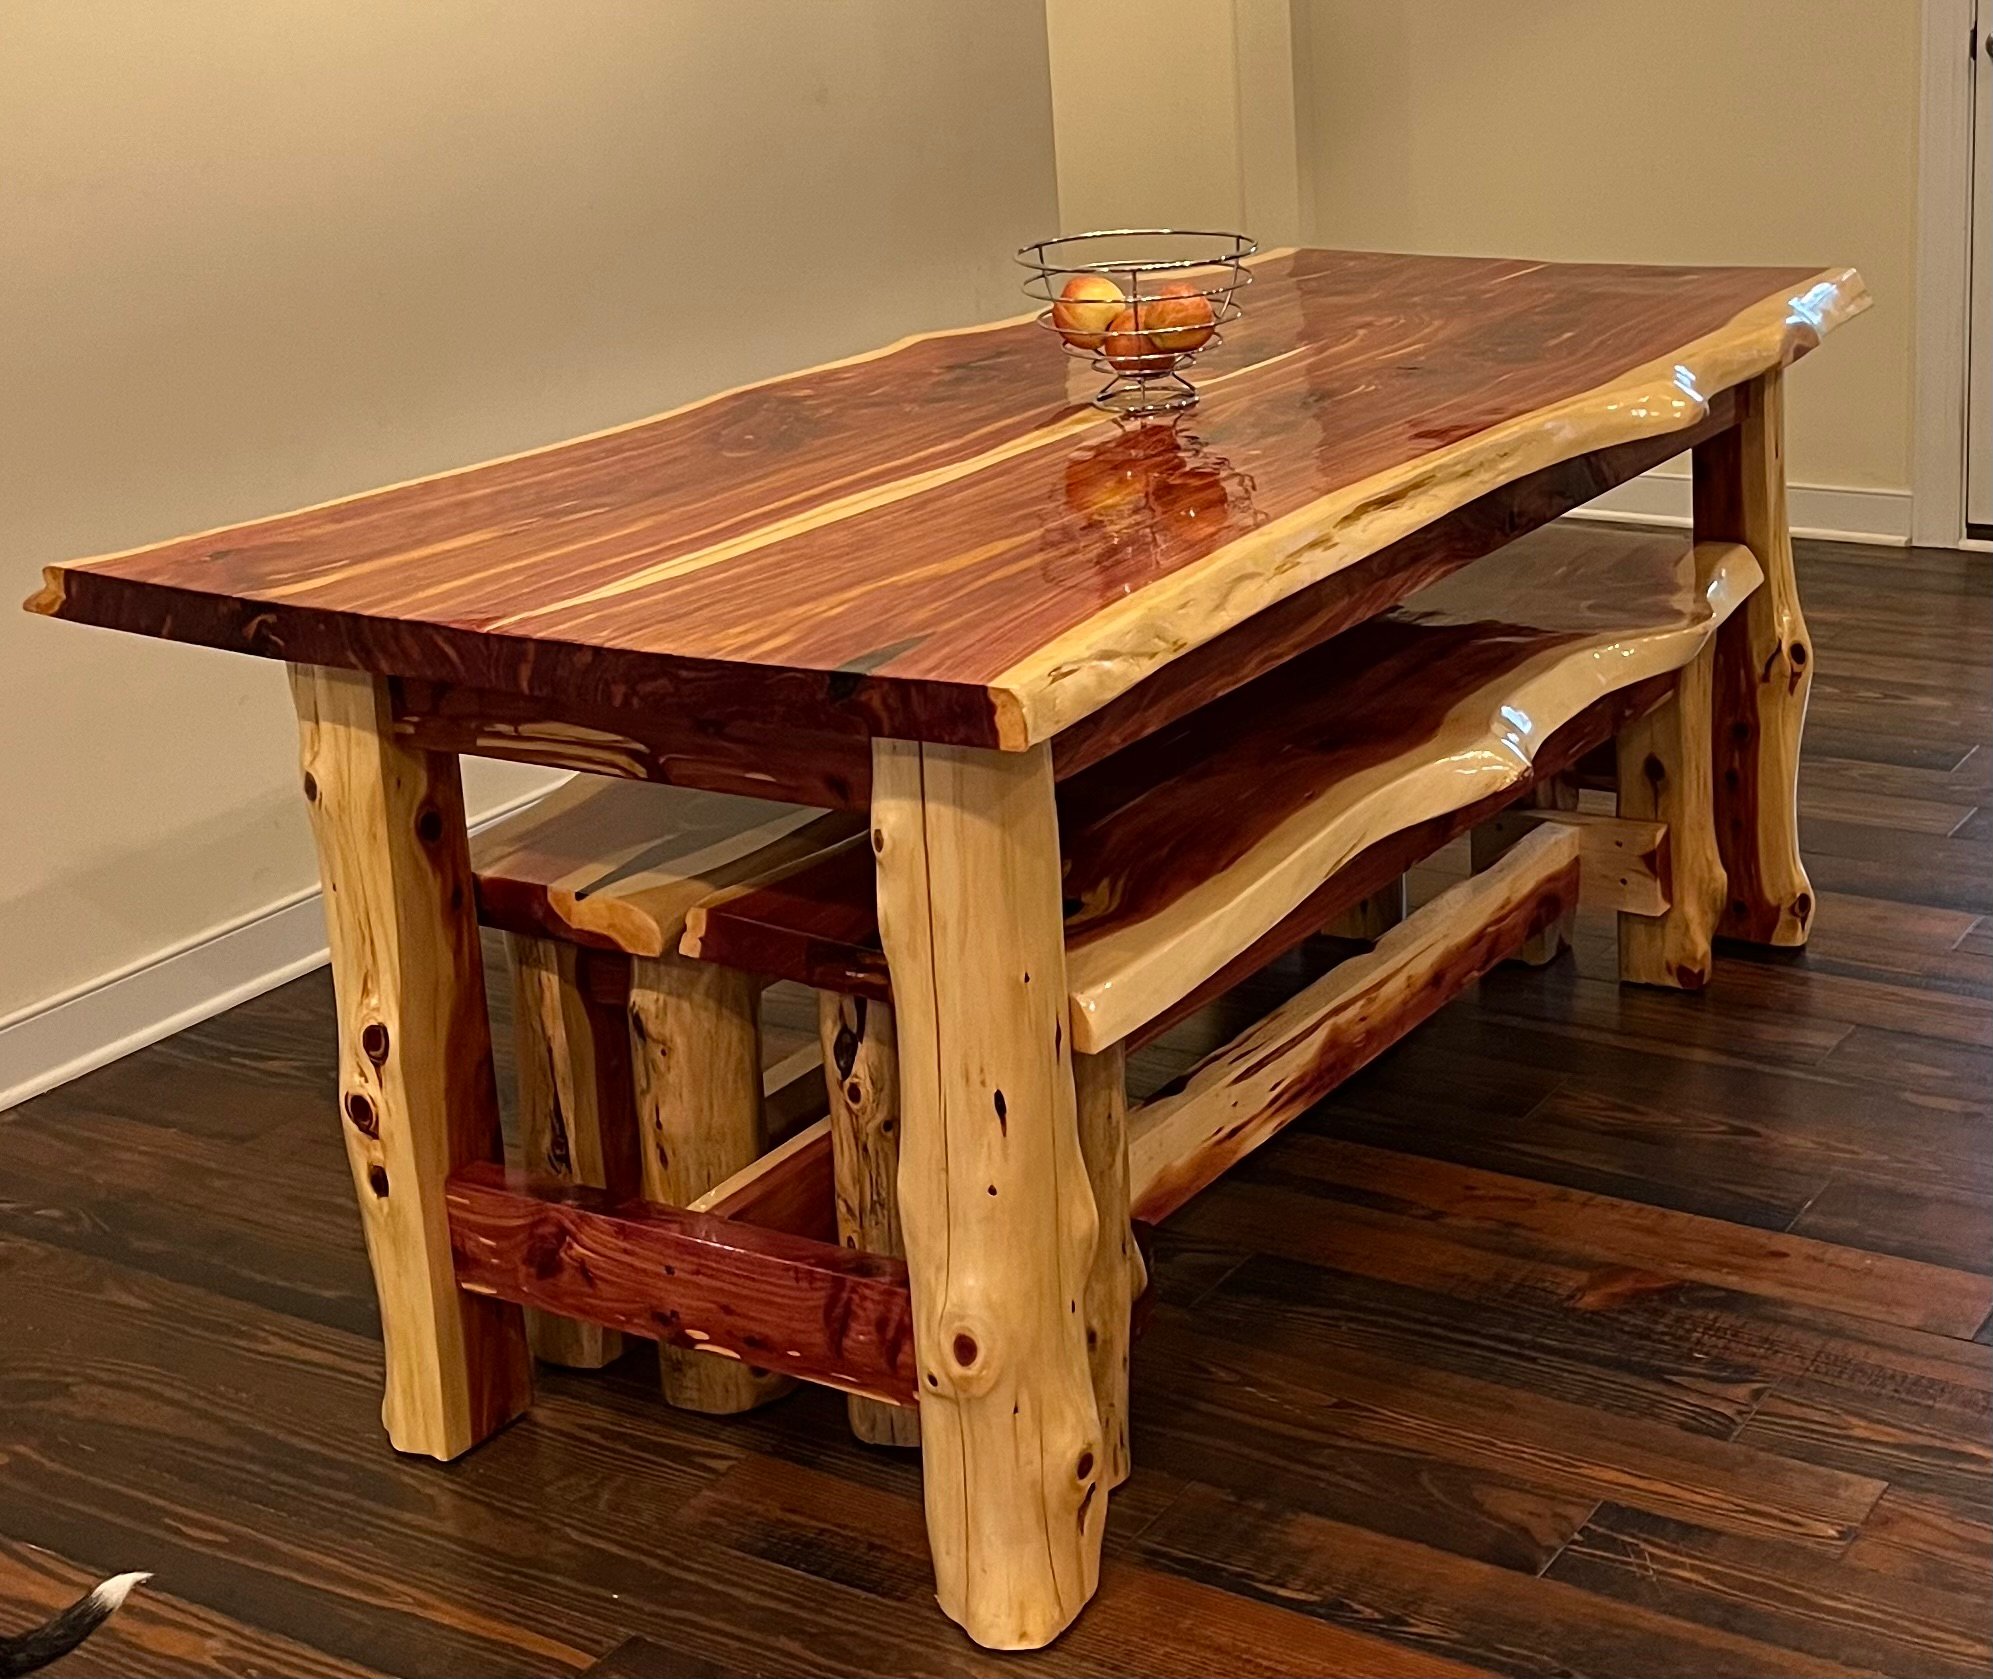
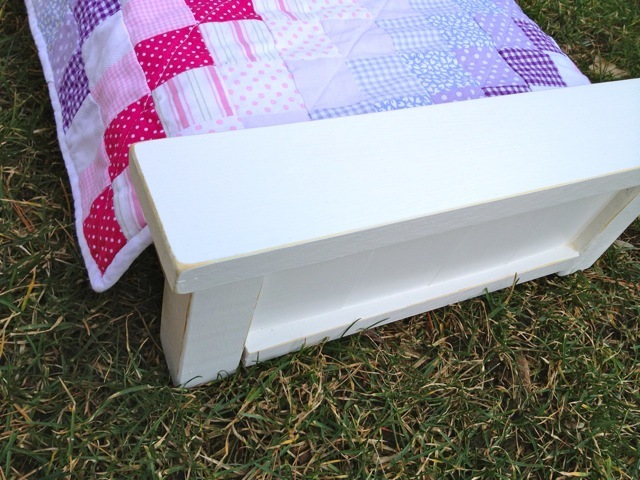
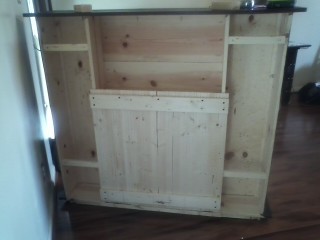
I am very pleased with the design and plan to make another using better lumber. The table is very sturdy and will be used as a sewing/crafts table.

Built from Plan(s)
Estimated Cost
Less than $5
Estimated Time Investment
Afternoon Project (3-6 Hours)
Finish Used
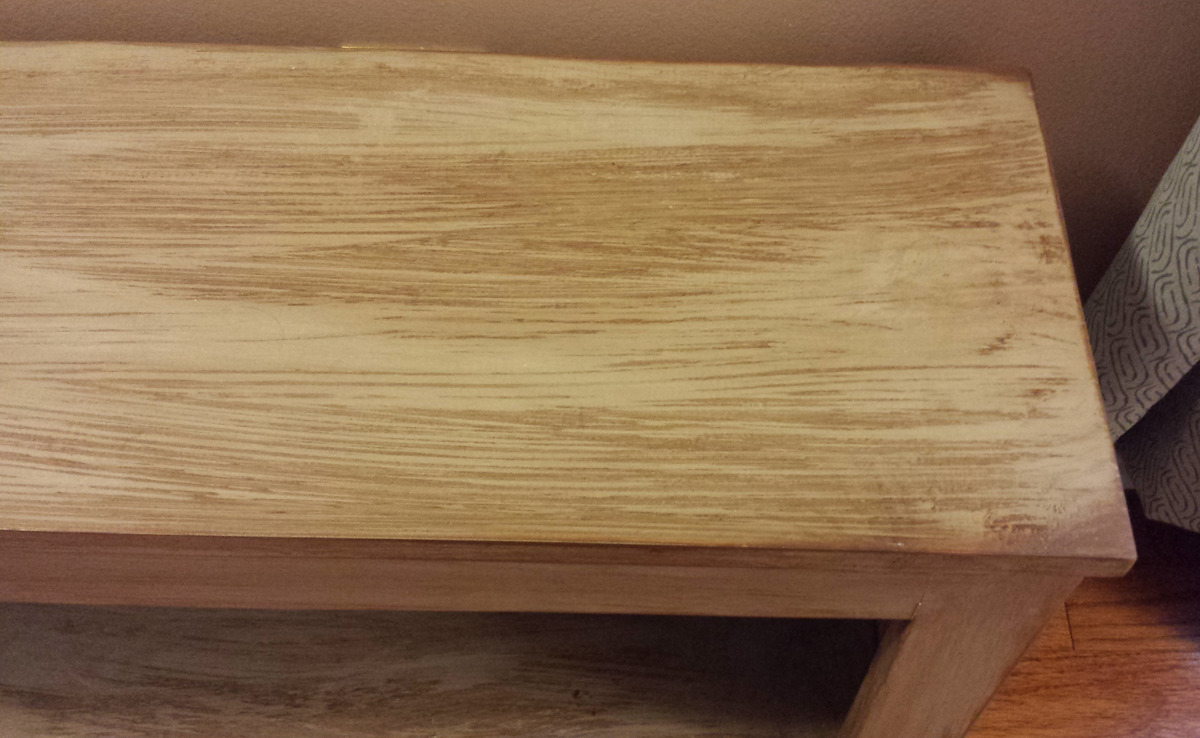
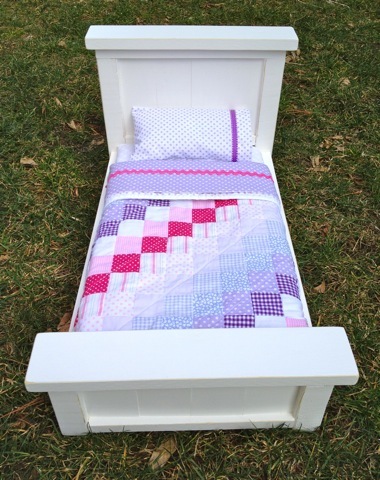
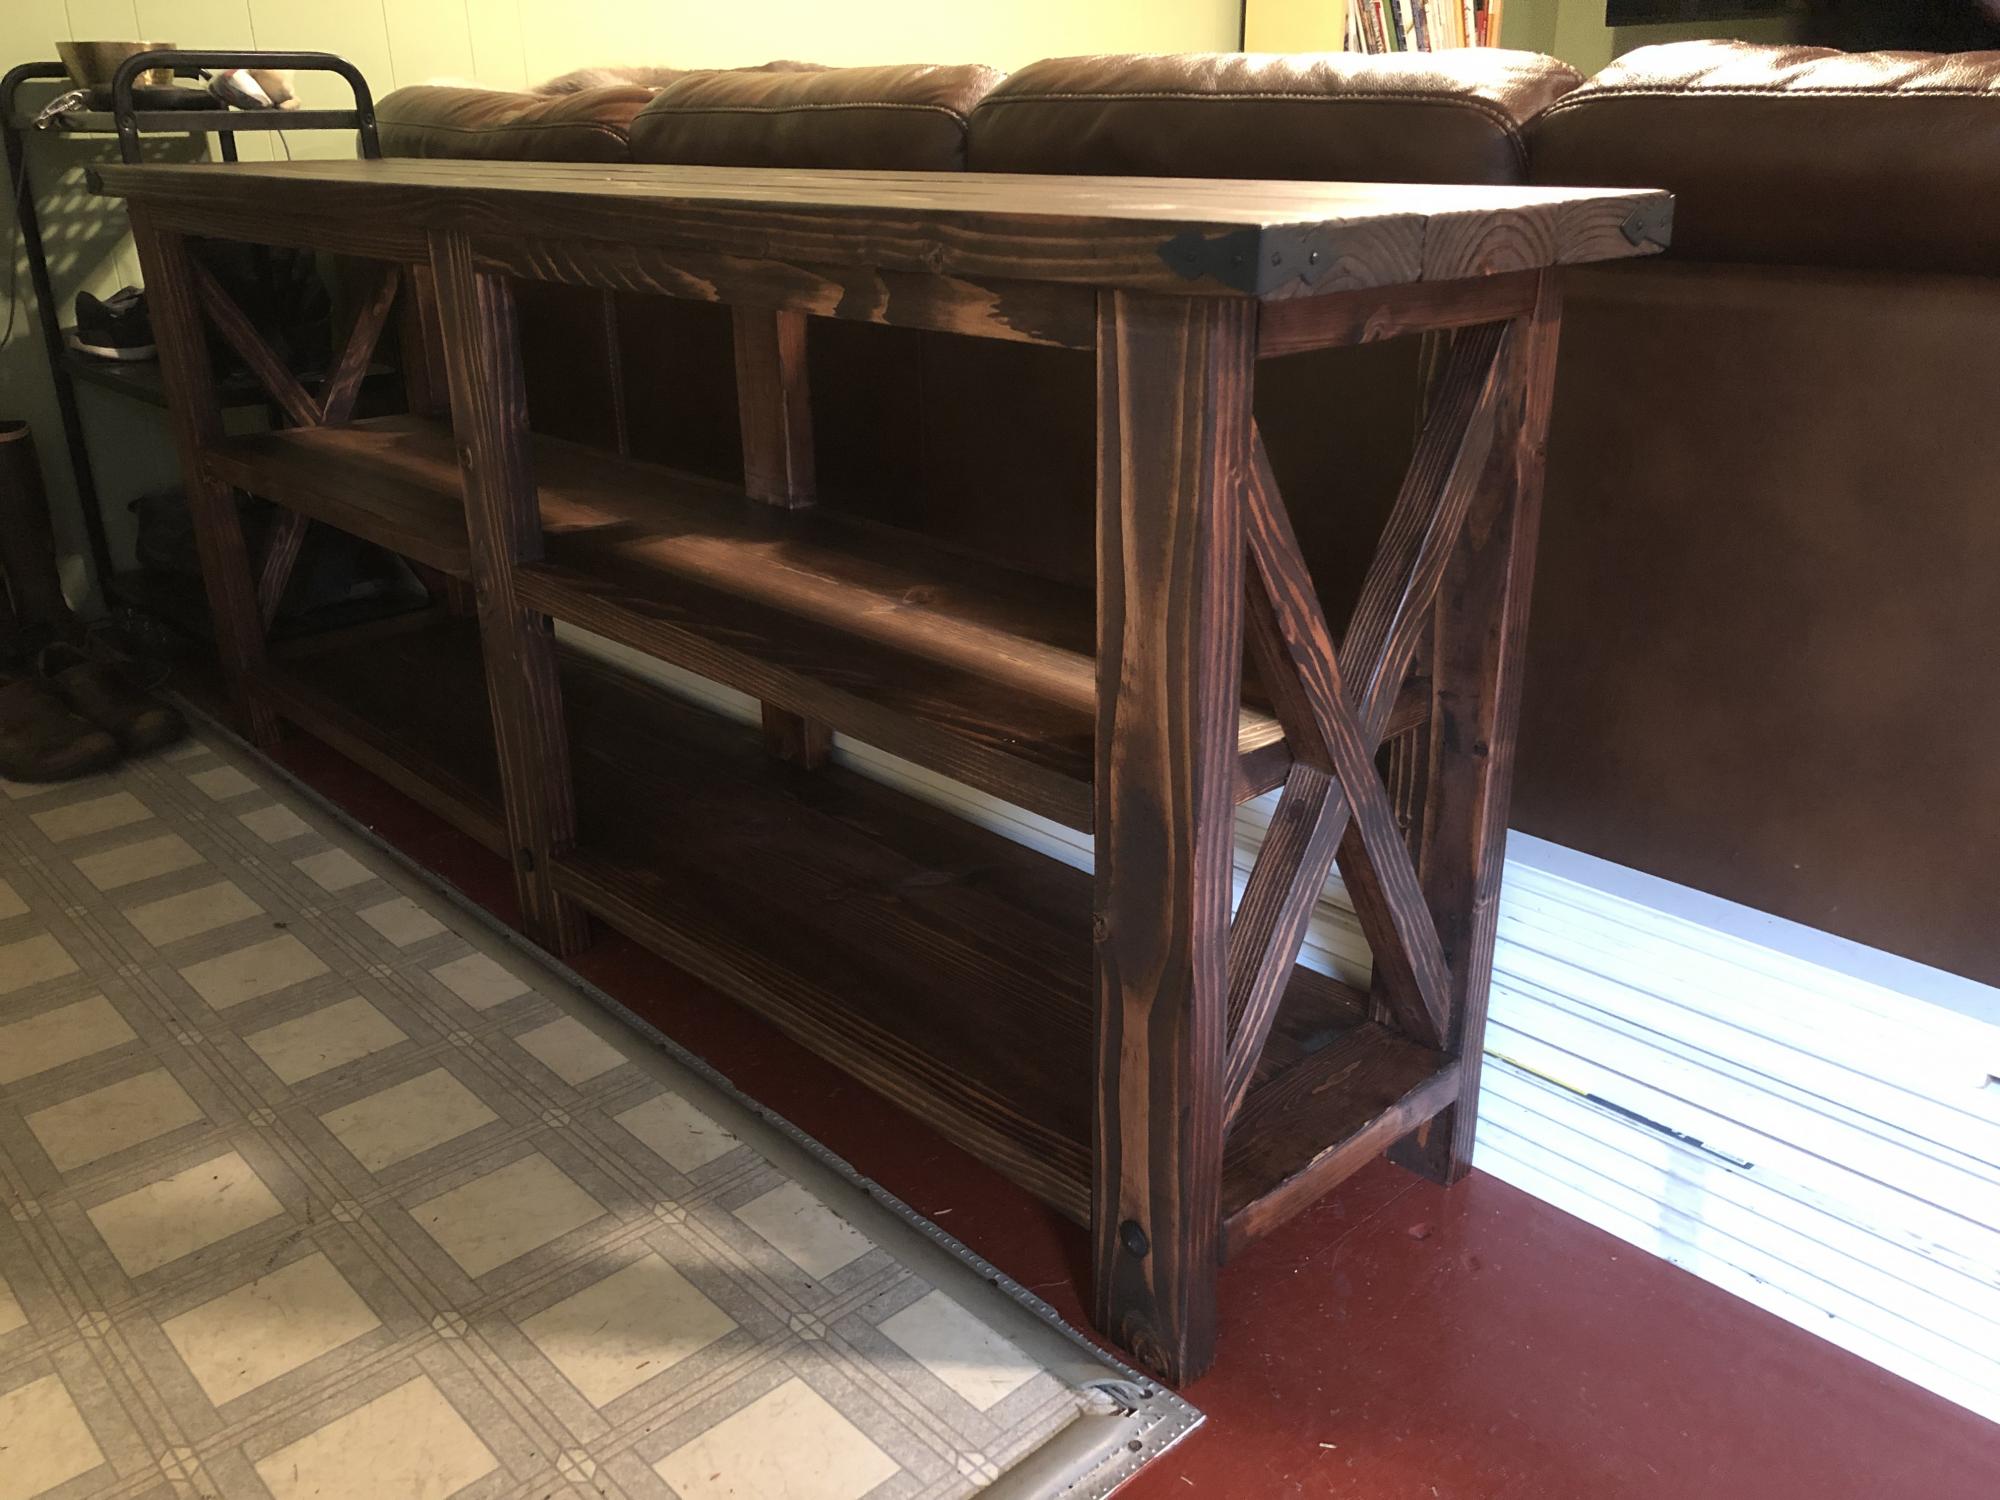
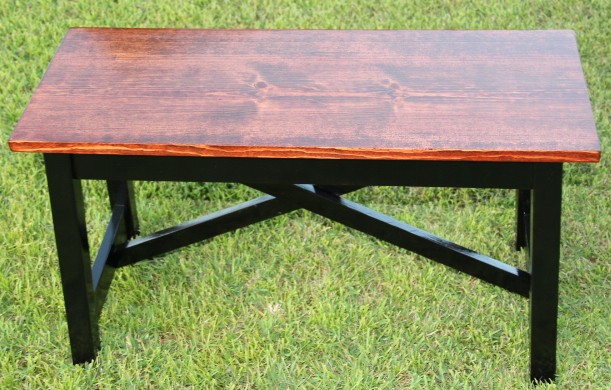
The paint is Glidden Rusty Red latex leftover from a friend's barn and so old it had separated beyond remixing. What was left acted like a cross between a glaze and chalk paint. It had to be rubbed down with rags after each coat to remove specks of pigment and loose powdery color. Four coats each applied 24 hours apart and coverage was as good as it was ever going to get. Final coat was Minwax wax.

To duplicate it:
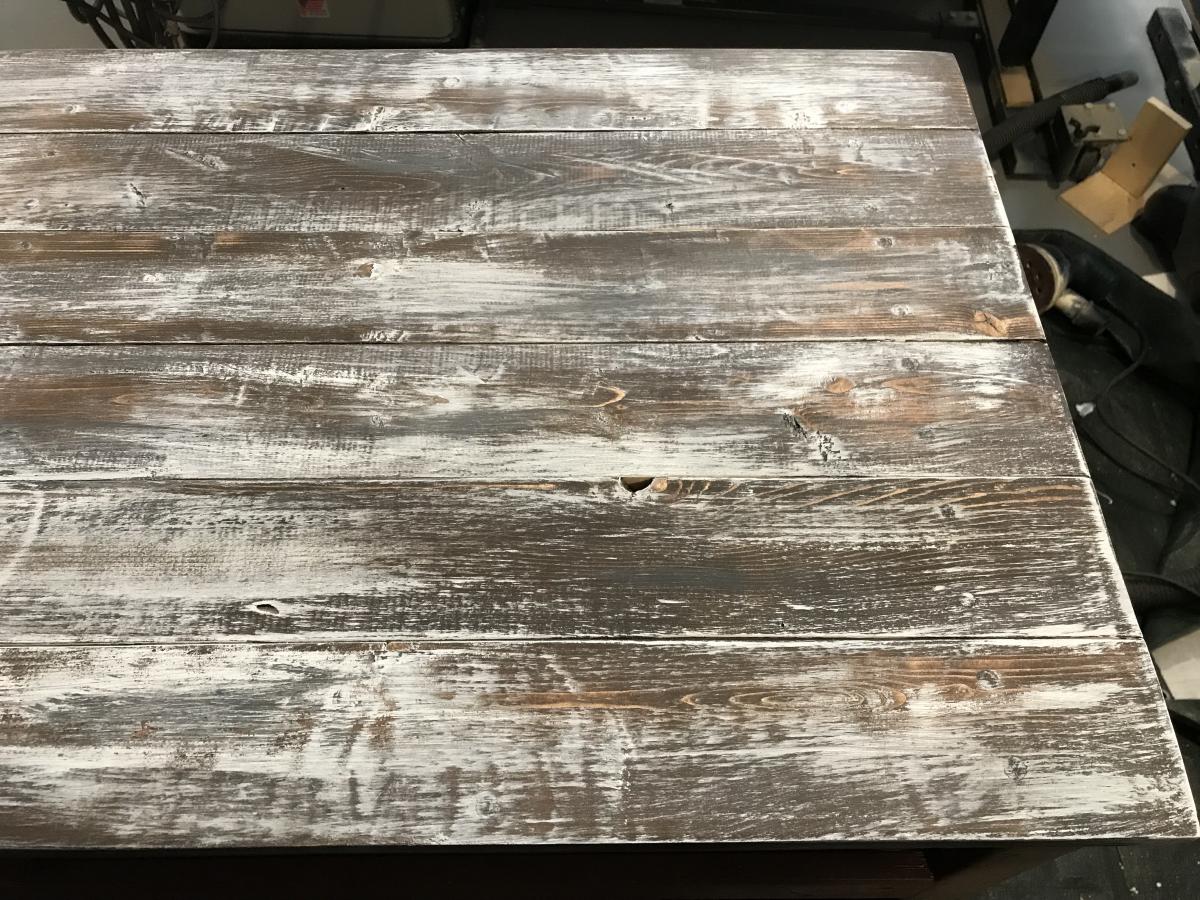
1. Randomly paint white or light paint. Let dry. Sand.
2. Dilute 1 cup of red paint with one cup of water and rub it in/wipe it off immediately. You shouldn't need more than one coat if you want the white to show through depending on how much "old paint' you want to show.
Recommended Skill Level
Beginner

Wood Tilt Out Recycling Cabinet

Submitted by frmoody on Wed, 10/02/2019 - 15:59

I built this for my friend who wanted a double cabinet for her recycling material. I used Ana's plan and just doubled it up. She also wanted a weathered looking top. The plan's were great but it was a bit difficult to get the two side by side bins.

Estimated Cost
$50.00
Estimated Time Investment
Day Project (6-9 Hours)
Finish Used
The top was created with a combination of Varathane Kona stain, white paint and grey paint. I can't remember the stain used for the cabinet itself.
Recommended Skill Level
Intermediate

Plant stand so grand :-)

Submitted by Anonymous (not verified) on Fri, 06/09/2023 - 14:20

Was recommended by YT (yes I subscribed) thought it was awesome. Just getting into woodworking and thought it was perfect to try. Appreciate the help, very kind. Godspeed.

Comments

DIY Loft Bed

We adjusted the plans slightly to better fit our room. Rather than an angled set of stairs leading to the platform, we replaced it with a short vertical ladder. We also increased the height of the bed to allow for another bunk in the lower section for when Callaghan outgrows his crib. Plus, we added handles to the bed which made it easier for Luke to get up and down.

Estimated Cost
75
Estimated Time Investment
Afternoon Project (3-6 Hours)
Recommended Skill Level
Beginner

Comments

Simple jig to save time and increase accuracy

Submitted by Anonymous (not verified) on Thu, 06/15/2023 - 12:13

I downloaded the plans for the octagonal table. I have made several and used a few different woods, made a few minor design changes as well as creating a routine and using a jig or two. This jig fits in between the two boards that form the seat support frame. I used a large paint stick and a scrap piece of 2 x 4. Using a table saw, I cut a groove in the 2" edge, approximately 1/2" deep, this took two passes (pass it through, turn it and pass again), a slight adjustment and another two passes. Insert the paint stick and seat all the way down. Place jig between seat support frame, might be a little snug or use a clamp to hold in place. Adjust so just the paint stick sticks up enough to separate seat boards. With seat boards against the jig, it forms the perfect angle/guide to match cuts. I also used 1/2" spacers to create consistent spacing. Love the various plans you make available as well as your videos.

Comments

Happy Entertainment Center

Submitted by tzachary on Fri, 12/13/2013 - 14:27

I really wanted a new entertainment center but could not find one in the stores that I liked and looked to be made of good quality. I liked the Apothecary Console but needed to make a few adjustments to the plan, which is why I marked my project at an intermediate level.

I built this about a year ago and love it as much today as I did the day I finished it. I have had a ton of compliments on it and many are impressed when I tell them I made it myself.

Built from Plan(s)
Estimated Time Investment
Week Long Project (20 Hours or More)
Finish Used
I painted with a Satin Sheen Behr Pure white paint then wiped on and then off a dark walnut stain.
Recommended Skill Level
Intermediate

Spa Bench

Submitted by Anonymous (not verified) on Wed, 02/24/2016 - 08:45

I love this plan! It's so versatile. I made this bench for my daughter's entry. First I painted it with an all in one paint/primer in light grey, then I sanded it down to reveal some of the wood grain and roughed up the edges a bit. Next, I brushed a dark ebony stain over the entire bench, one section at a time, and wiped it away. I thought I would get less stain, but really enjoy the end results. Thanks Ana!

Built from Plan(s)
Estimated Cost
$30
Estimated Time Investment
Afternoon Project (3-6 Hours)
Finish Used
Paint/Primer in one (I had some leftover and mixed it with a black chalk paint to get a light grey)
Ebony stain
Recommended Skill Level
Beginner

Bed Side Table

Submitted by Anonymous (not verified) on Fri, 10/04/2019 - 15:25

My daughter wanted a table to fit a specific location .... your plan for a side table fit the bill - with some dimensional adjustments

Built from Plan(s)
Estimated Cost
100
Estimated Time Investment
Day Project (6-9 Hours)
Finish Used
White paint
Dark oak stain with satin poly
Recommended Skill Level
Intermediate

Cedar log table

Submitted by Anonymous (not verified) on Tue, 06/20/2023 - 12:01

All cut up with our sawmill! Francesca and Bob Schilling. Beaverdam, Virginia

Comments

doll bed #10

Farmhouse style doll bed, modified width one less slat.

Estimated Time Investment
An Hour or Two (0-2 Hours)
Finish Used
1. Paint two coats Behr Swiss Coffee
2. Distress
3. Seal with wipe on clear satin poly
Recommended Skill Level
Beginner

Comments

lmhaney (not verified)

Fri, 03/09/2012 - 05:36

What are your finished dimensions on this bed? I was thinking of making it with one less slat also to make it more like a twin bed.

Faux Mantle

1st of all I want to apologize for posting several of my builds at once. I am not trying to steal the show, but I'm just deciding I would like to share my builds.

Ok, now to this build. I didn't get this mantle from this site but still wanted to share. I used the one from "blue roof cabin" site and adjusted it to my desire. I wanted my depth to be bigger so I used 1x8's to bring it out from the wall more. I got the backing idea from "Netties Expressions" by using Whitewood V-Groove Wainscot wall panels.

I plan on building one from Ana's site to do one for my dining room. I check this site daily just to see what you all have built so I can get more ideas. Thanks Ana for sharing your builds.

Finish Used
Rustoleum black cherry and dark walnut.
Recommended Skill Level
Beginner

My UpsideDown V Desk

Submitted by MPopadynec on Sun, 02/28/2016 - 06:54

I am a novice builder living in an apartment. I needed a new desk for my den and fell in love with two - the X-frame desk from Ana's Website and the Truss Desk I saw on Shanty 2 Chic. As I have limited tools, I decided to combine features of both to make my custom desk that included a keyboard tray as I needed one to ensure I type more ergonomically. I love my desk and now, on to build another piece!

Estimated Cost
$100 - As I used pine and had items cut.
Estimated Time Investment
Weekend Project (10-20 Hours)
Finish Used
Weathered Grey Stain - Varathane
Recommended Skill Level
Beginner

Console Table

Submitted by Anonymous (not verified) on Sun, 10/06/2019 - 15:17

Made from the rustic Console Table plans, used a dark oak stain and antique oil finish.

Built from Plan(s)
Estimated Cost
$80.00
Estimated Time Investment
Week Long Project (20 Hours or More)
Finish Used
Minwax antique oil finish
Recommended Skill Level
Intermediate

HGTV'd myself

Submitted by angiemicn on Fri, 02/10/2012 - 04:21

This was one of my first big projects, this site motivates you to get better. No, at first I couldn't build a box, now, I'm building outdoor bars! All of my skills, I learned from this site. The boxes are heavy, sturdy, they've had 5 golden retrievers on it, 4 adults at once, and the storage is incredible. The pics below show what an improvement a piece of furniture can do. This piece went into a dead space corner, a catchall. I'm not proud of the mess, :), but I am proud of the after. Extra room, light, airy, yeah!

Built from Plan(s)
Estimated Cost
80 to 100
Estimated Time Investment
Week Long Project (20 Hours or More)
Finish Used
primered x2 coats, Kilz2, stained n between. Semi gloss Pure White 2 coats
Recommended Skill Level
Beginner

Modified fancy x

Beetle kill table. I chose to mortise the support and use pegs for effect. As such used 4x4 for leg uprights. Made the top removable because it's heavy!

Built from Plan(s)
Estimated Time Investment
Weekend Project (10-20 Hours)
Finish Used
Oil based gloss plolyurathane
Recommended Skill Level
Intermediate

Comments

Josh-Adam

Wed, 08/03/2016 - 09:59

That table looks awesome ! I am in the process of making one similar i went to a local mill and they had ambrosia maple to make the table topper and i am making the base. I was wondering how you went about making the table top removable did you use threaded inserts ? also how did you get the cross support cut out done? Last question i have is where did you find the 4x4 material i am in eastern north carolina and it seems it doesnt exist around here. thank you for sharing

Coen's Cabin Bed

Submitted by Anonymous (not verified) on Mon, 02/29/2016 - 15:28

This is a fairly easy build. It did take some time with three little ones running around, but the finished product is well worth it! My three-year-old doesn't want to get out of bed in the morning (win!).

Built from Plan(s)
Estimated Cost
$250-$300
Estimated Time Investment
Week Long Project (20 Hours or More)
Finish Used
Minwax weathered oak stain
Recommended Skill Level
Intermediate

Comments

Ana White Admin

Tue, 03/01/2016 - 12:19

You did an amazing job on this, I wouldn't want to get out of bed either! Thanks for sharing:)

Rustic Farmhouse Vanity

Submitted by jameslee on Thu, 10/10/2019 - 16:23

My master bathroom was my first DIY remodel. I took this room down to the studs and built it back up. I struggled to find the perfect vanity that felt strong and sturdy and could not find one. I needed a wide vanity to accommodate this 3 foot wide vessel sink. I found Ana White and this plan online and fell in love! This was my first build and I’ve become addicted to wood working since. As my first build, this took me most of a day to build and assemble drawers. Sanded and painted with a flat finish! I love it! Thank you Ana!

Estimated Cost
$200
Estimated Time Investment
Day Project (6-9 Hours)
Finish Used
General Finishes milk paint in Seagull Gray with a high performance flat finish. Hardware and sink found on Amazon.
Recommended Skill Level
Beginner

Comments

x bench

Submitted by sidman on Tue, 02/14/2012 - 02:41

I loved this bench when I saw the plan and had to try it. Thanks Ana!

Estimated Cost
20.00
Estimated Time Investment
Afternoon Project (3-6 Hours)
Finish Used
Red oak stain on top and painted the botton black.
Recommended Skill Level
Starter Project

Comments

Fire Pit Benches

Submitted by tsmonson on Mon, 12/23/2013 - 21:24

This was an easy plan to follow! We built these for around our fire pit. The finishes is what took the longest. The tops are stained American Walnut.

Built from Plan(s)
Estimated Time Investment
Day Project (6-9 Hours)
Recommended Skill Level
Beginner

Comments

Tiny House Ontario

Submitted by Anonymous (not verified) on Fri, 03/04/2016 - 12:43

I looked at all the sofas that people built and took bits out of a lot of them to decide what I needed to fit my needs. I am in a tiny house and I wanted the sofa to be super versatile as well as being good for storage. I decided to build it the size of a double bed, but to divide this into three sections so that it can be used as a sectional, a seating area for meals and a bed for overnight guests. It was a lot easier than I thought it would be.

Thank you for this, I would not have known where to begin.

I decided on brightly printed outdoor fabric because the interior of my tiny house is all wood and I though the bright colours would be a nice addition. The outdoor fabric was chosen so that it would resist water and stains as well as pet hair.

Estimated Cost
$487.
Estimated Time Investment
Day Project (6-9 Hours)
Finish Used
water proof outdoor fabric
Recommended Skill Level
Intermediate
Back