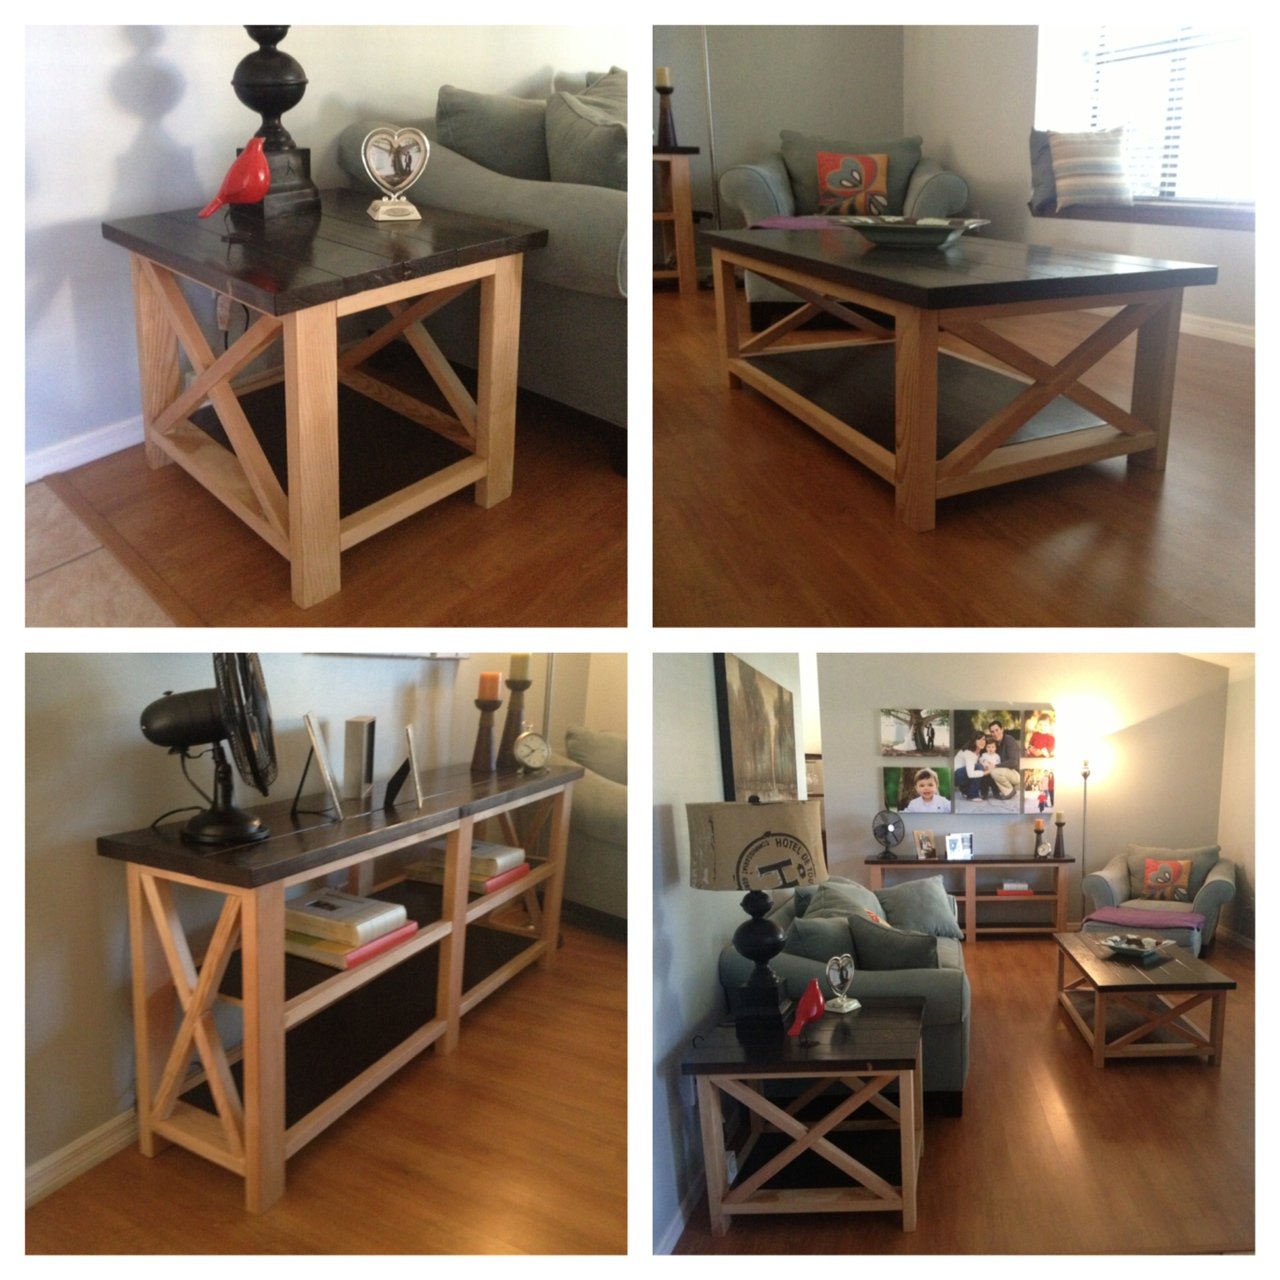
Matching Adirondack Chairs
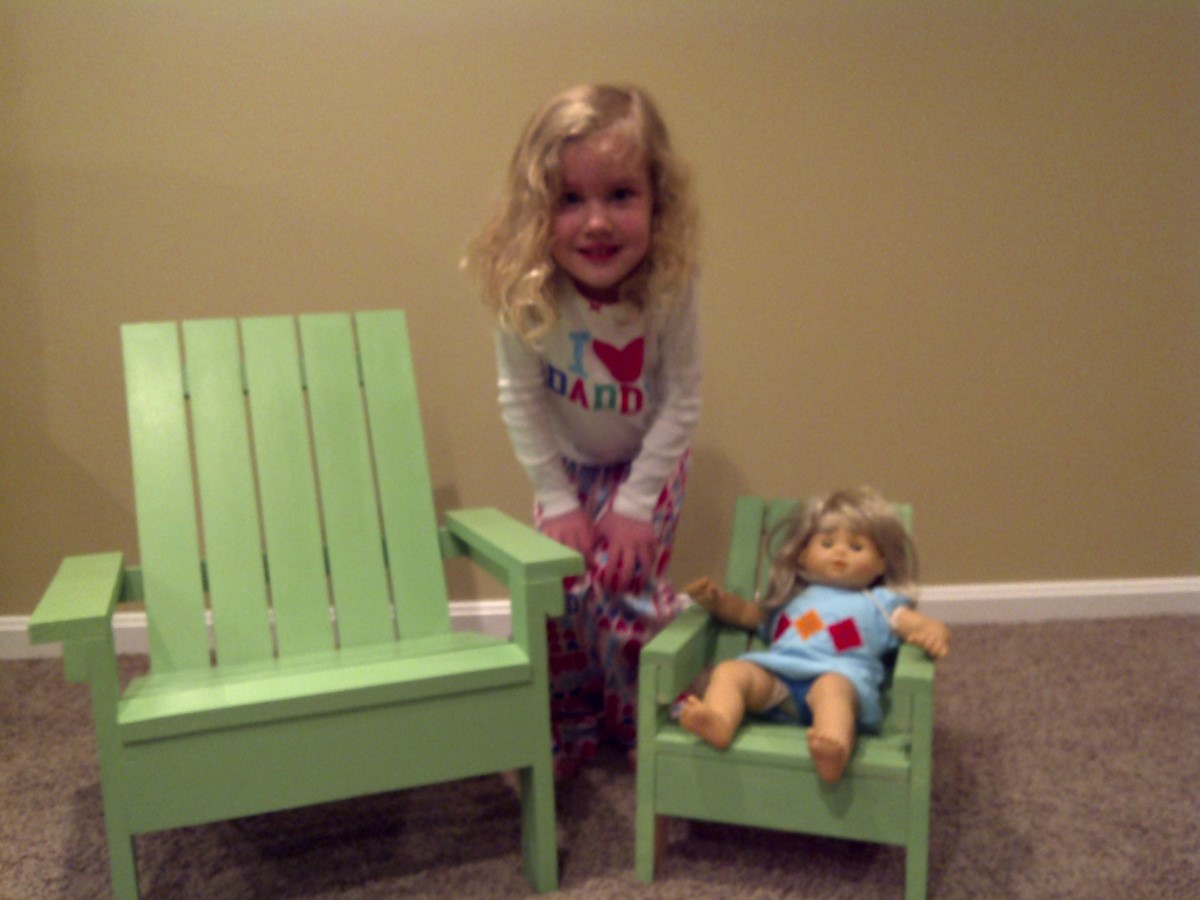
Matching American girl Adirondack chair and kids Adirondack chair build!
This was a blast to build. This was all a gift for my wife since the traditional 5th anniversary gift is wood.
The coffee table and console are both awesome! The only thing I would change/modify is the end table, because its kinda big and doesn't really look its part of the set other than the "X". I would maybe take about 2 or 3 inches off all sides or maybe 3 off the sides so its not such a box.
Thu, 06/20/2013 - 07:31
I'll start one! Go for the poly. You're absolutely right, it will bring up the beautiful grain, and show off the "X" accents. Nice work, by the way!
Thu, 06/20/2013 - 07:32
I'll start one! Go for the poly. You're absolutely right, it will bring up the beautiful grain, and show off the "X" accents. Nice work, by the way!
Thu, 06/20/2013 - 08:39
Beautiful builds! Wow, they look wonderful. What an amazing gift! From the pics, the end table looks fine, too, as the furniture isn't a small scale. I love the two-tone so I say go for just the poly!
Thu, 06/20/2013 - 12:08
I think you did an amazing job :) love the contrast of the two tones. Using poly for the rest would be beautiful. I cant wait to do this project myself.
Thu, 06/20/2013 - 15:47
What a wonderful gift! These tables are beautiful, great job on this build! I love the two-tone - One more vote for the poly! :)
Fri, 06/21/2013 - 13:04
I'm going to go with only the Poly over the bare wood. Thanks for the comments and advise! It will be a few weeks due to work and travel but I'll send updated pics once its done.
Sat, 02/24/2018 - 21:18
I like the naked/poly look too. The other option I think would look good would be painting it white. The contrast between the white frame and darker kona top and shelf would be cool.
I used local Colorado beetle killed pine. I based the table on Anna's Farm House Table plans. I used the bread ends to create pull outs for 11 inch extensions on each end.
Thank you Ana for the plans. Our daughters dolls needed some pets and this project was the perfect home for her New bunnies! I can't wait for her to open this gift Christmas morning.
Created from scraps using Ana’s plans for the bed and the mattress.
Fri, 12/24/2021 - 14:33
Thanks for the great plans and making the mattress so simple (for those of us who feel like just threading a sewing machine is like playing the game Mouse Trap while under the influence! 😄)
Made with western red cedar from Lowes. So pretty!
Wed, 08/21/2019 - 09:00
Did you use any kind of finish on the cedar? I’m making one as an indoor end table.
What grit sand paper did you use?
Looks great by the way. Excellent job!
I loved this project! I had been wanting a new set of end tables for a while and I came across these plans and was in love! I altered them just a smidge by raising the bottom shelf a little so I could fit a vaccuum/broom under it more easily, but other than that I left it as is! For the decorative hardware, I used L brackets and large upholstery nails/tacks...you can find them in most craft stores...I picked mine up at Hobby Lobby.
Ana White’s plans are the best I’ve seen. Some are easy and some are challenging builds. She’s so very encouraging in her videos. She makes me feel like I can keep on building. I’m very happy to say I started my business from her inspirations.
Modified the double lounger plans into 2 single loungers. I liked the idea of the boards running the long way rather than from side to side like the single lounger plan. These were pretty easy to build. All assembled with a Kreg for hidden screws. Made with Sanded and super polyurethaned cedar (3 or 4 coats). turned out beautiful with the matching boards running from head to toe!
This was my first project from ana white. Thank you for making such great and easy to follow plans! I will be making the matching coffee table next!
Mon, 07/08/2013 - 10:16
Was the color of the table brown like that after just the oxidation process or did it turn brown like that because of the Vermont Natural Coatings Polywhey?
The reason I ask is we're trying to decide between the wax finish, which we love, or the more protective and durable PolyWhey.
Mon, 08/12/2013 - 12:43
Sorry for the late reply. I hope this advice is still useful for you. I figured I would have got an email if someone replied to my brag post. I just changed my settings so I will get emails in the future.
After the oxidation process It was a fairly dark brown. At this stage the colouring was not even everywhere so I used 220 grit sandpaper on a sanding block to lighten the colour and even it out. I sanded fairly lightly. After applying the Polywhey the colour did not change much. It is hard to describe as I am not a very artistic person, but it definitely made the colour richer and more pleasing to the eye after applying the Polywhey. As for the Polywhey, it is oderless and very quick and easy to apply. I put on 3 coats. I hope that helps. Let me know if you have any other questions.
It was a fun and easy build. I did the oxidation finish for the first time on this project and am really happy with how it turned out. I also added washers to the lag screws on the legs to make it stand out a little more.
My husband built this a few years ago to free up counter space in our tiny kitchen and we just love it.
This is my first build from ana-white.com and it was a success. I am glad that I started out with a beginner project as my carpentry skills were a bit rusty but eventually everything came back to me, the step by step plans certainly helped! According to my daughter, I am the best mom ever!
The dragonfly/butterflies I found at Hobby Lobby for 67 cents a piece, what a steal!
Table was built using refinished tops from an old table/bench set. Cedar was used for the base of the table and benches. Also created two half-size benches that can be used to add seating at the table, or moved to the living room when additional seating is needed there. Finished with mahogany stain and several coats of clear gloss polyurethane.
Used Annie Sloan duck egg blue paint and glued 1x2s end up to make a butcher block top
Art cart!
i used furniture glide feet instead of wheels. I put the plexi on hinges. All scrap materials except for hinges.
We took this plan and modified it a bit. The first photo is as a nightstand. We resized the red cabinet, made it deeper and a little wider, gave it a contrasting finish of chestnut stain on the drawer fronts and barn red on the body to make my sewing storage/desk (2 cabinets with a hollow core door on top). The green cabinet is higher and wider, with a cabinet at the bottom. This is used in our stained glass shop at a Renaissance Festival in a remote area, which is powered by hidden solar. The drawers house my paperwork and sales tools and a solar inverter in the open back cabinet at the bottom.
Totally lovin' my new cubby shelf. I painted it bright yellow, but I may paint it a more nuetral color after noticing it does not math anything haha! This is a super sturdy shelf...LOVE IT! Thanks ANA!
I built this using scrap 2x2s and 1x4s that I ripped down to the appropriate sizes. Also instead of using pocket holes I counter sunk the screws and filled with wood filler.