Community Brag Posts
Queen size Farmhouse Bed

Stained Aged Barrel with mixed Whitewash
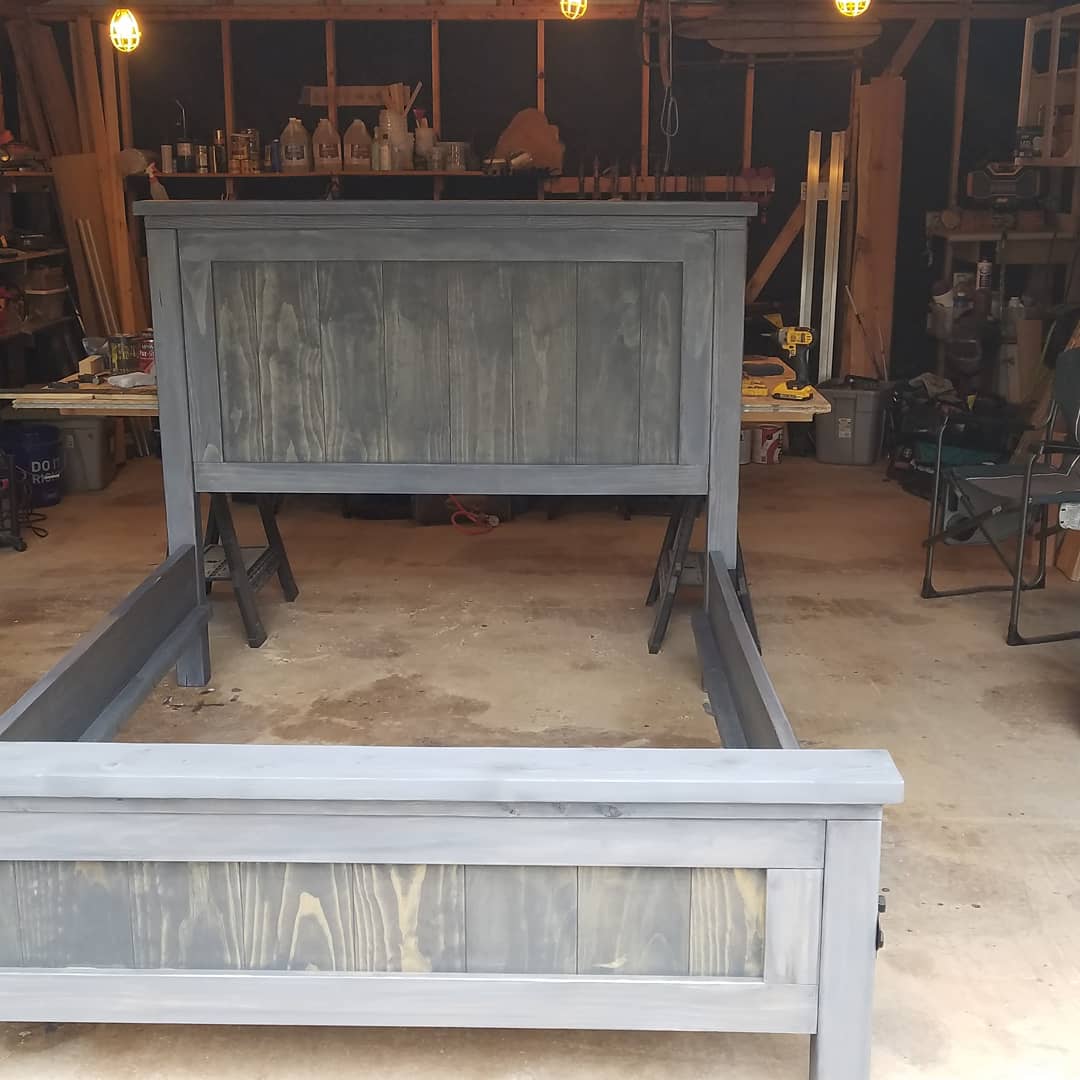
Built from Plan(s)
Estimated Cost
500.00
Estimated Time Investment
Week Long Project (20 Hours or More)
Finish Used
Min wax Aged Barrel
Recommended Skill Level
Advanced
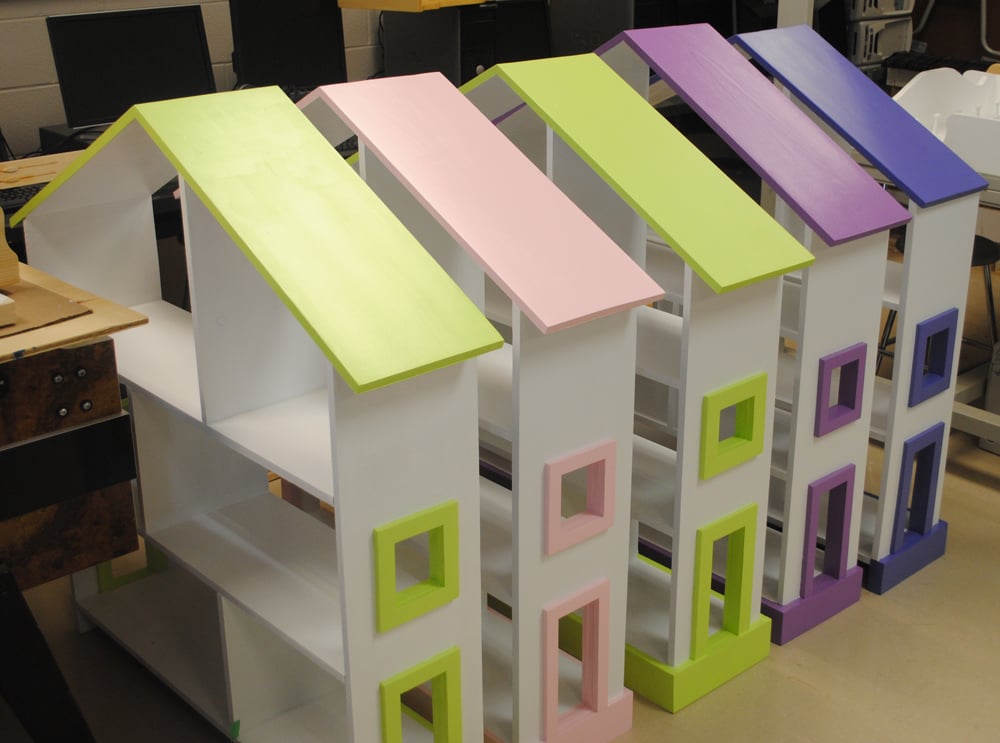
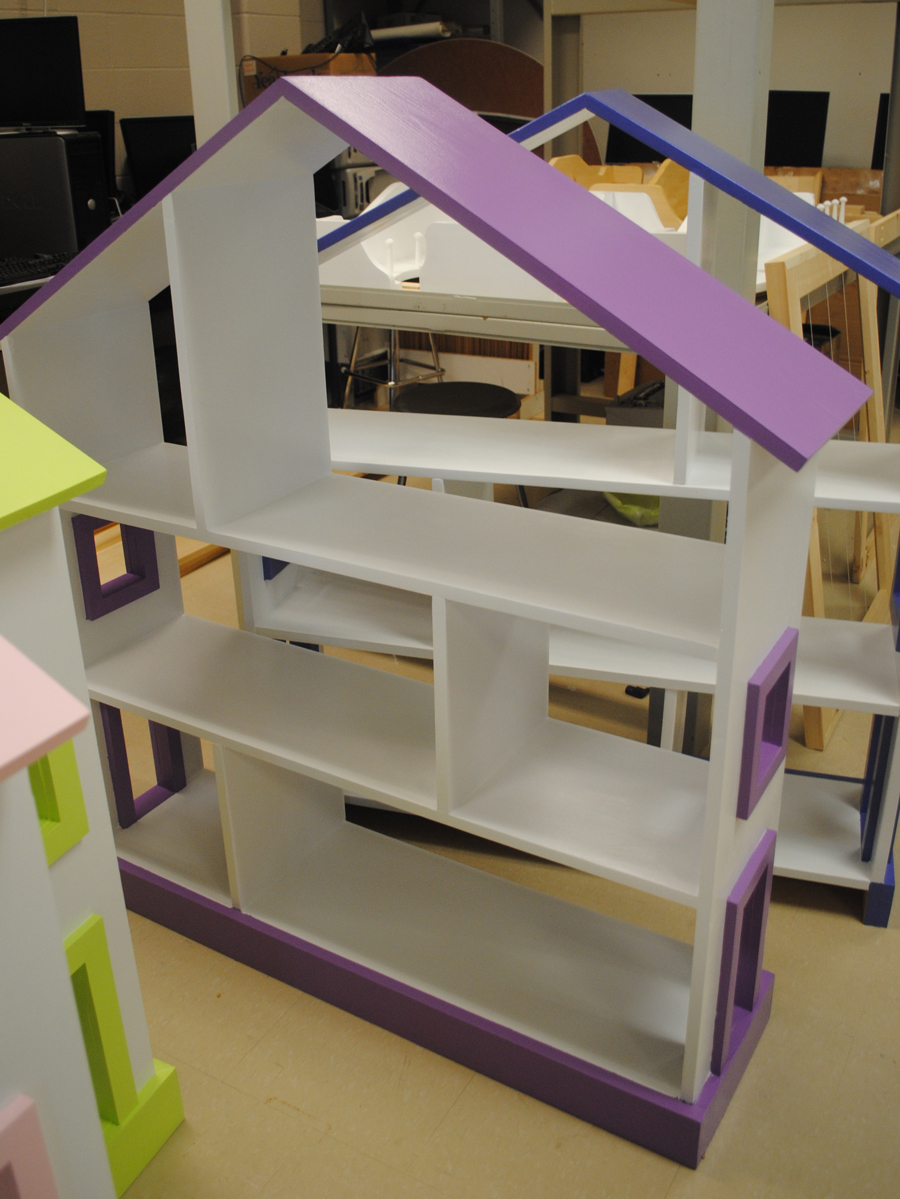
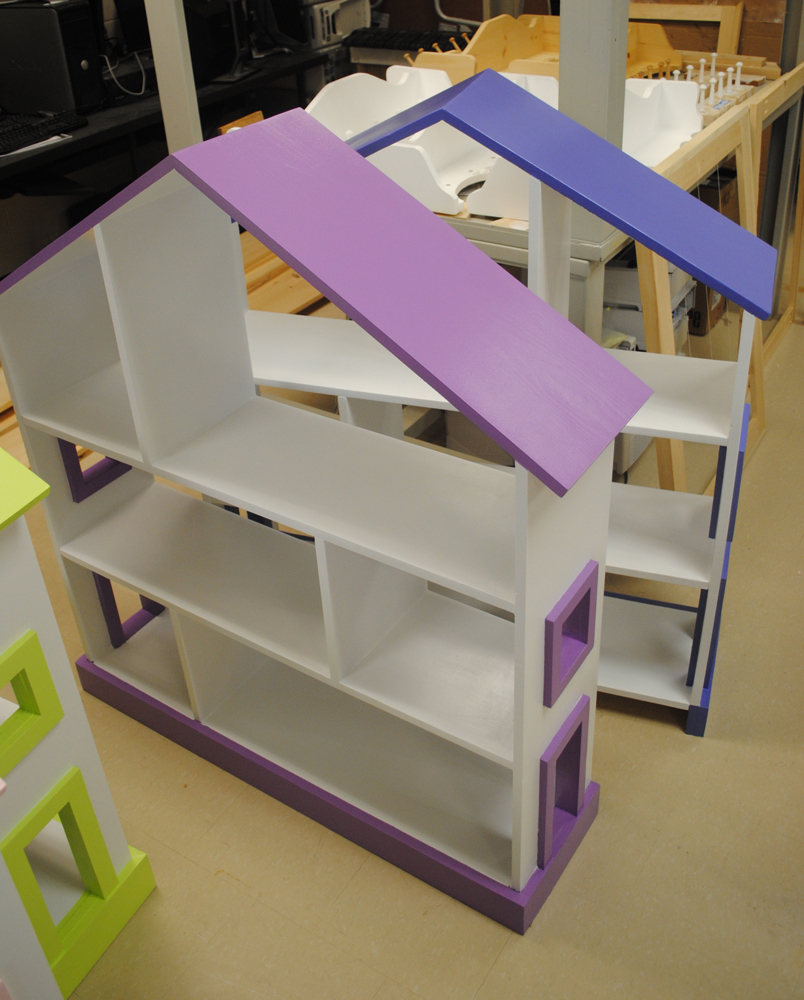
Dollhouse Bookshelves
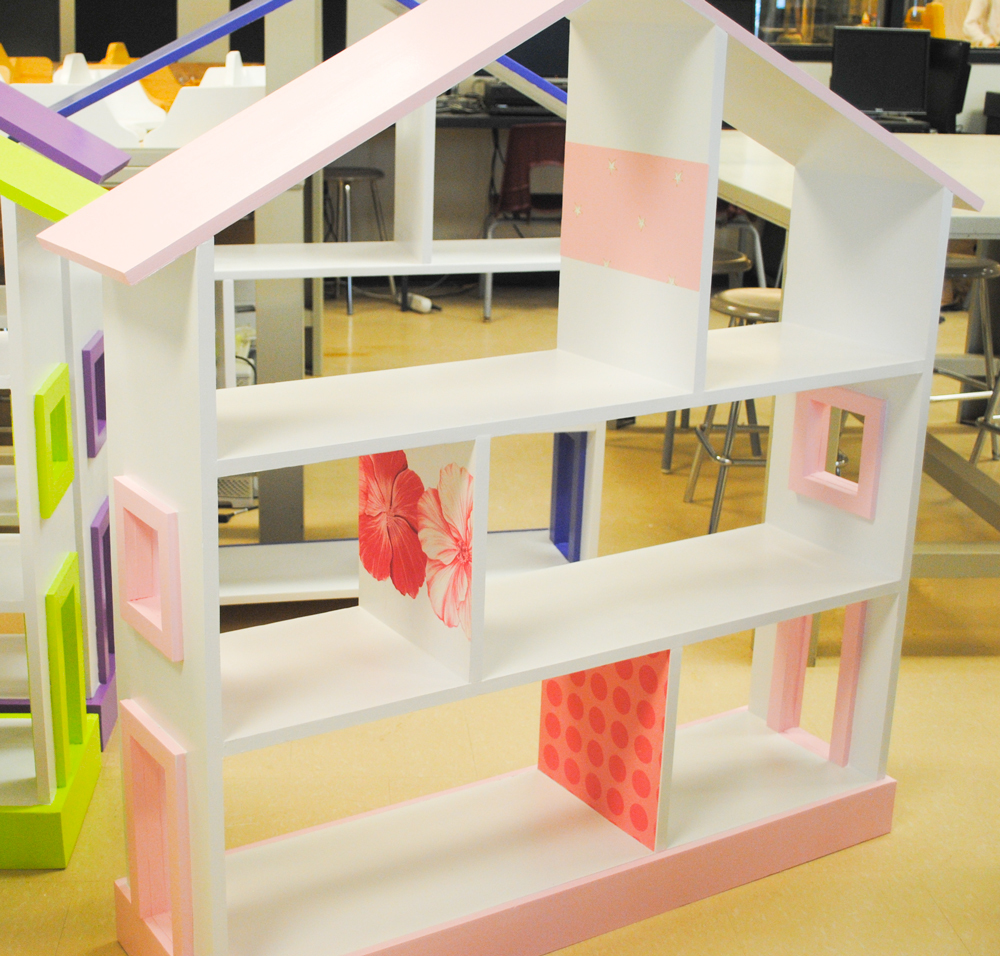
We used Ana’s plans in the Grade 12 Custom Woodworking class this semester at St. Theresa of Lisieux CHS in Richmond Hill, Ontario, Canada. Surprisingly the all boys class really enjoyed the project and there effort shows in the final products. We built them to order and sold them at cost to the other teachers to replenish the ever shrinking lumber budget.
For the first few bookcases we used wood screws,dowel plugs, and biscuit joints, but quickly smartened up and purchased a Kreg Master System. If you were on the fence about getting this system, then take our advice and go out and buy one. We now have a second system on order.
We added customizations with mitered trim pieces, custom colours, wallpapering (see pink shelf), and choice of a backer board or choosing to leave it open with trim all around. The project is such a hit, we now have 6 more shelves on-order for next semester.
Thanks for a great website.
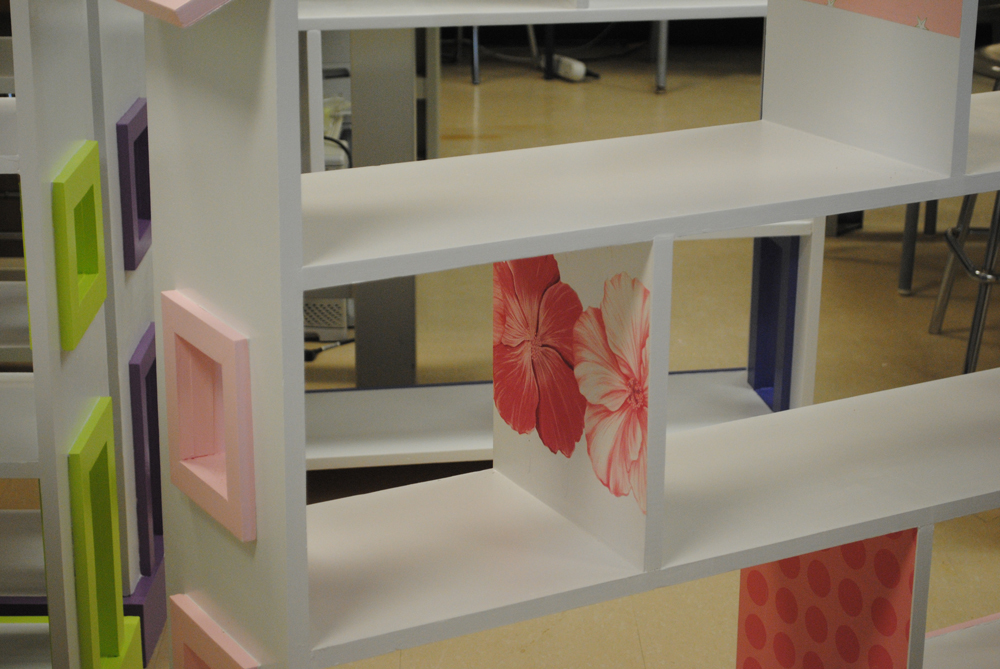
Built from Plan(s)
Estimated Cost
$120 CAD
Estimated Time Investment
Week Long Project (20 Hours or More)
Finish Used
Lowes Valspar Signature Paint (primer + paint)
(White, Pink, Lime Green, Wild Grape)
Because we used Pine with knots we used spackling compound to seal the knots and all parts were sanded with 80, 120 and finally 220 grit sand paper. Prior to painting in all corners we ran a bead of paint-able white caulking to give a nice finished look.
(White, Pink, Lime Green, Wild Grape)
Because we used Pine with knots we used spackling compound to seal the knots and all parts were sanded with 80, 120 and finally 220 grit sand paper. Prior to painting in all corners we ran a bead of paint-able white caulking to give a nice finished look.
Recommended Skill Level
Beginner
Comments
Wed, 07/31/2013 - 12:55
I love that you did this as
I love that you did this as part of class! They're gorgeous!
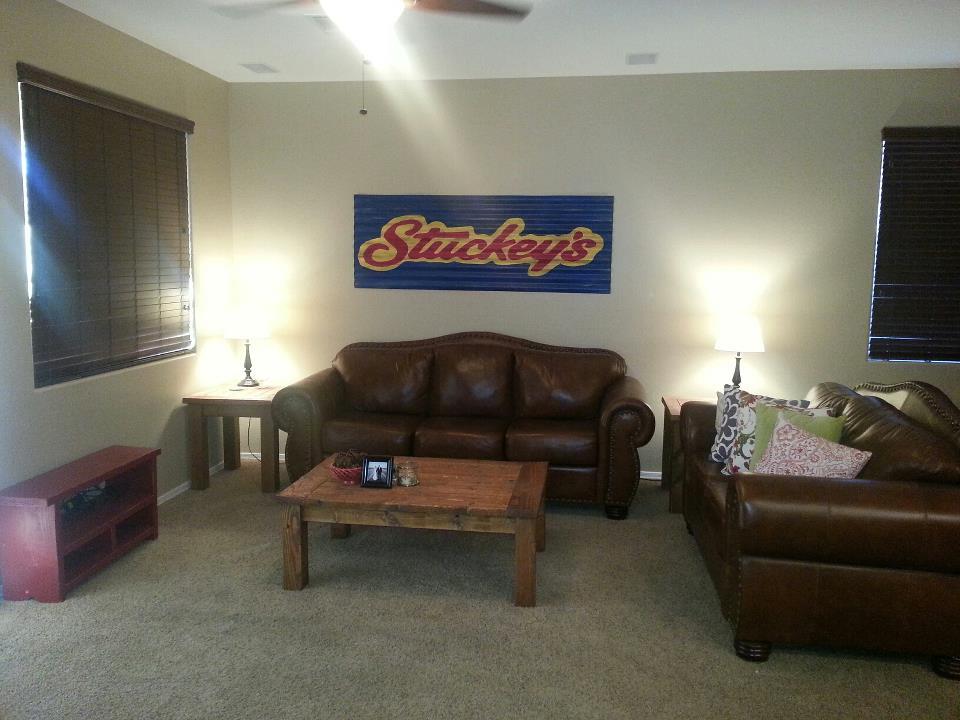
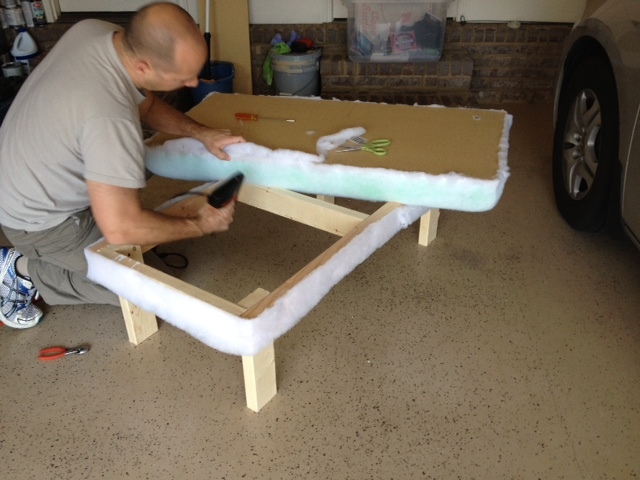
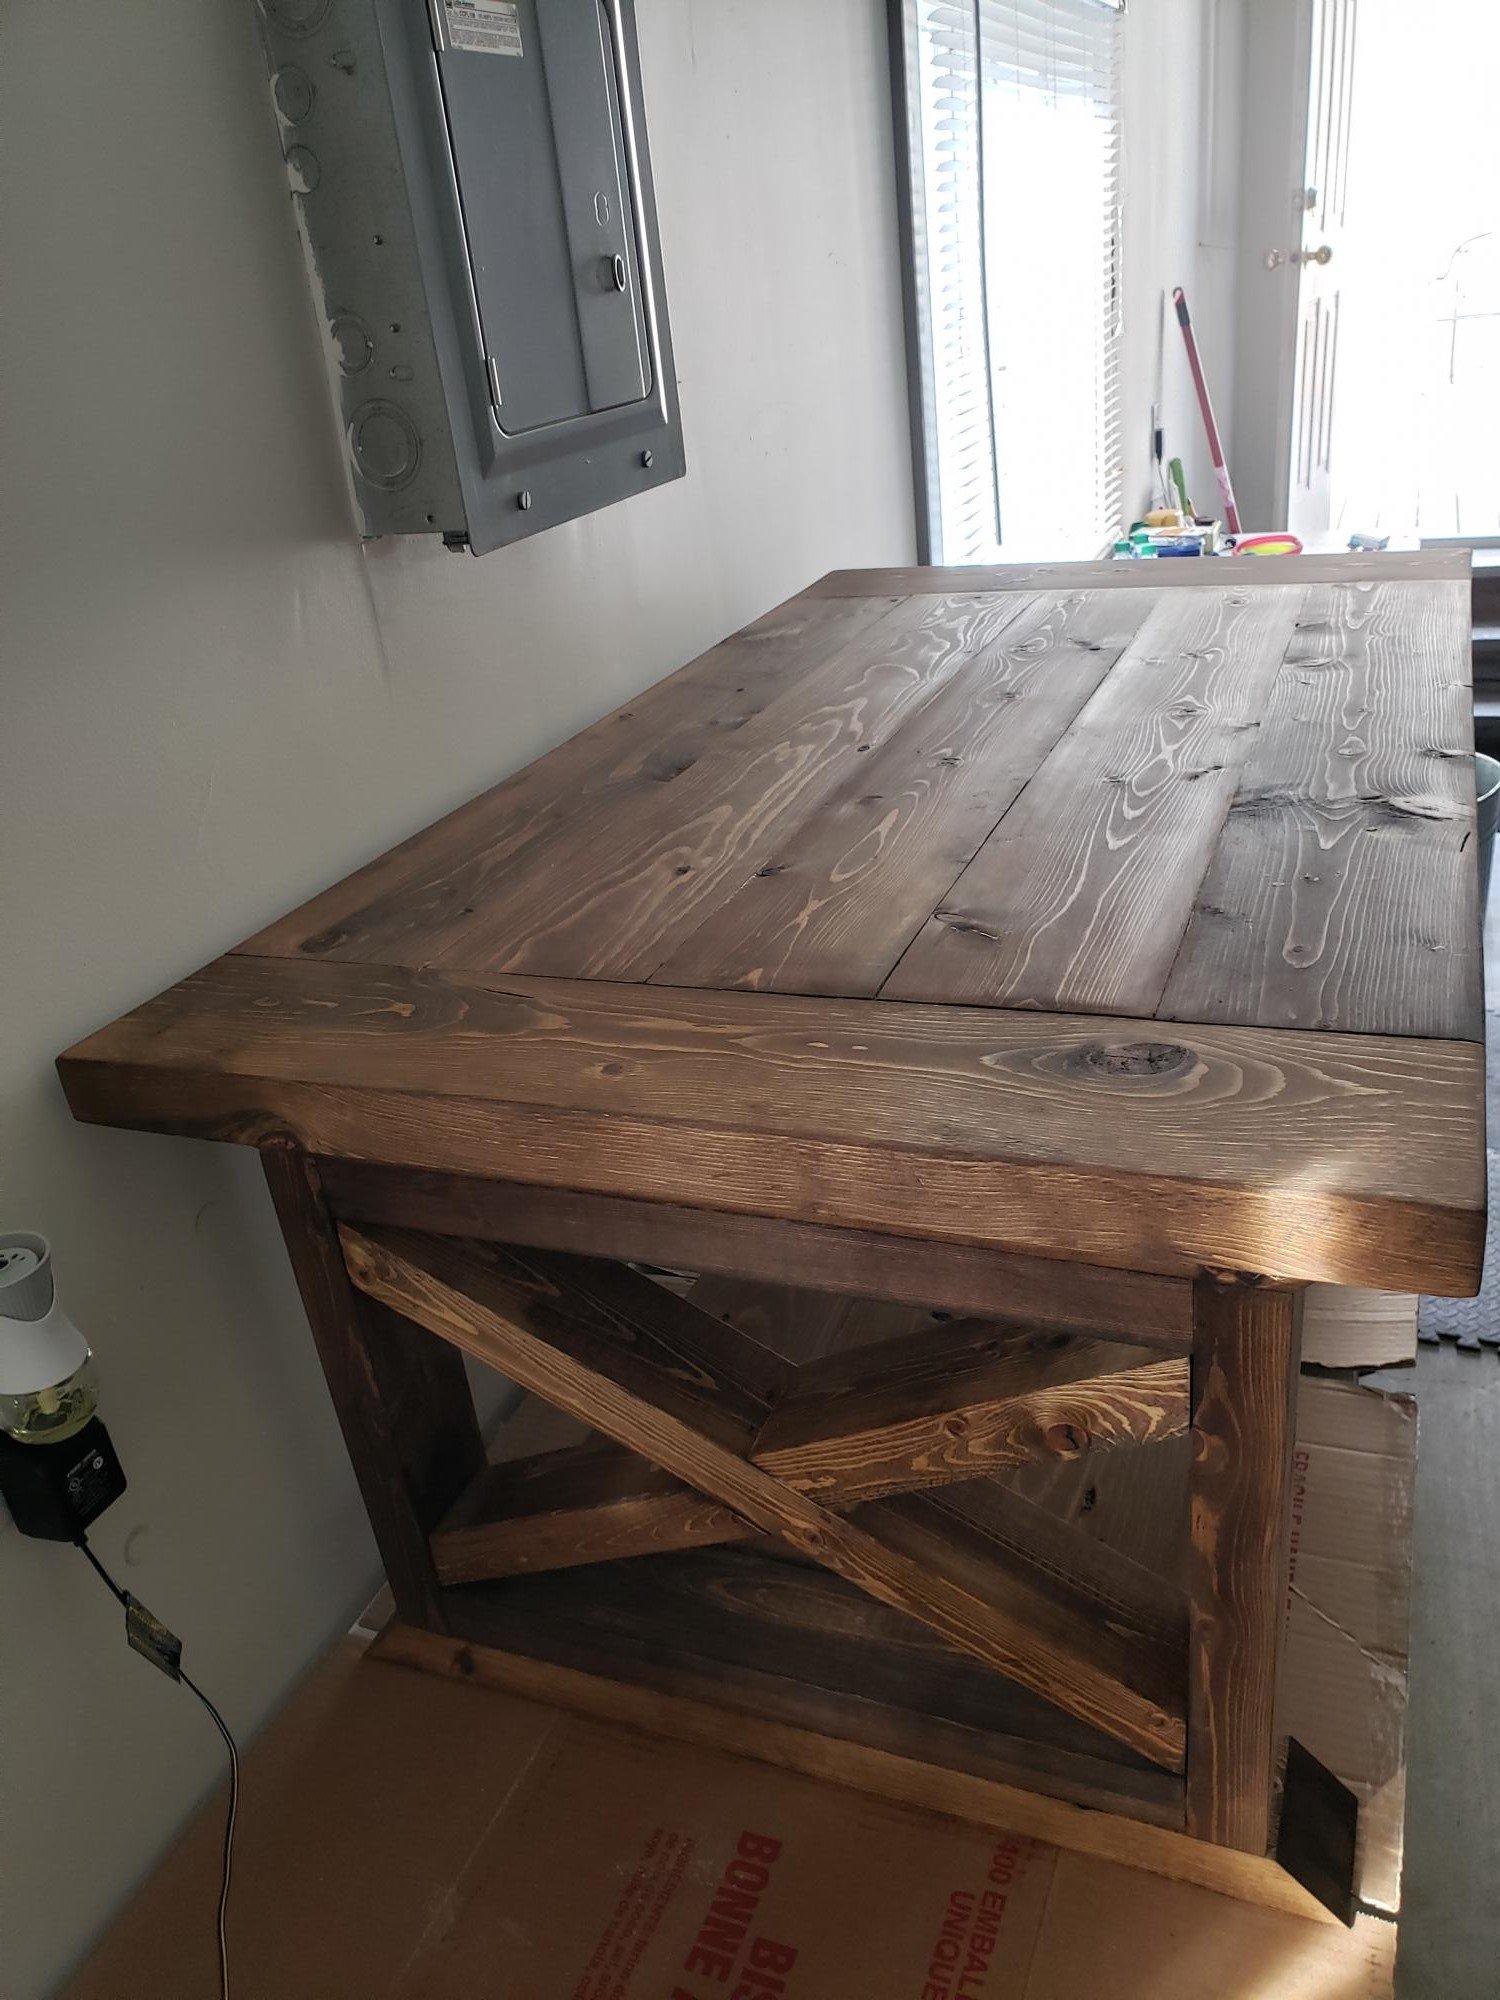
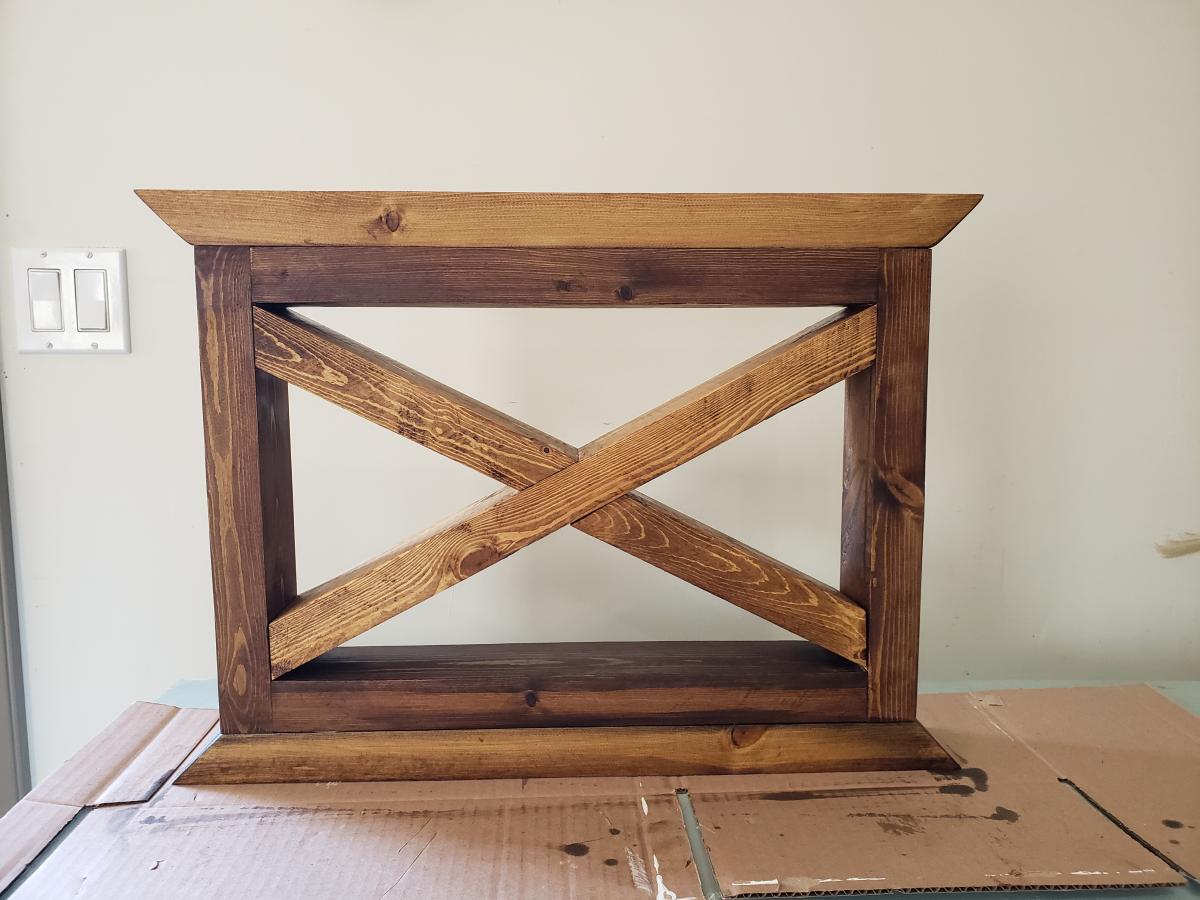
X Coffee Table
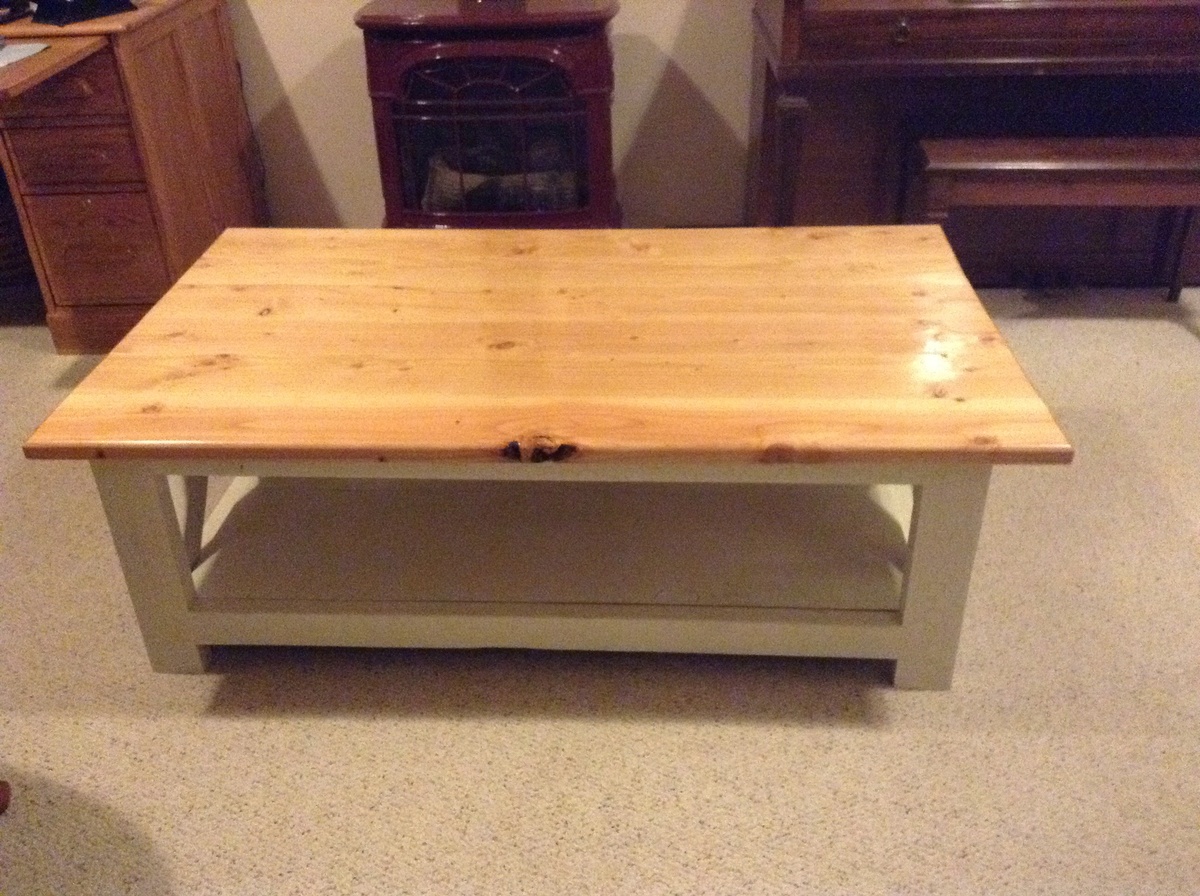
A rustic x table for our cottage!
Built from Plan(s)
Estimated Time Investment
Weekend Project (10-20 Hours)
Finish Used
Semi gloss poly.
Recommended Skill Level
Beginner
Comments

Reclaimed wood-look headboard
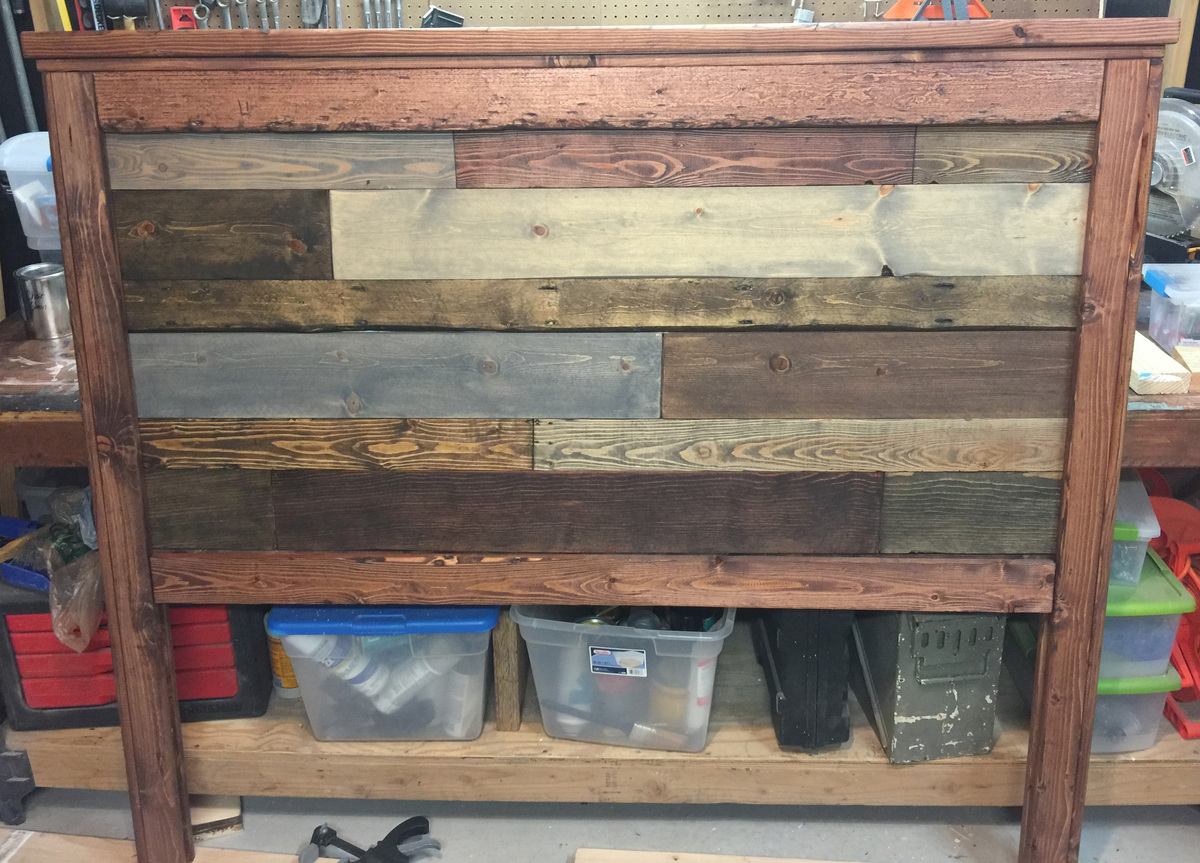
I used wacman's idea for faux reclaimed lumber to make this headboard by using a saw to score lines in the long boards to make it appear to be smaller pieces ( http://www.ana-white.com/2017/01/DIY_furniture/farmhouse-faux-reclaimed… )
I played with different stains, mixing some, overlaying others. I darkened the "seams" in the boards with some java glaze
The 1x3s and 1x4s were from the bottom of the stacks at HD, so they had lots of gouges, nicks, and imperfections that were perfect for the "rustic" look. Had to do a bit of sanding, but overall the "ugly" lumber ended up looking great.
One change to the plans I'll make next time. the top & bottom 1x4 boards end up getting covered by the final trim 1x4s. Next time I'll use 1x3s for the trim pieces so that a bit of the top/bottom 1x4s show.
Built from Plan(s)
Estimated Cost
under $50
Estimated Time Investment
Day Project (6-9 Hours)
Finish Used
different stains, some overlayed others mixed: Provencial, Red Mahogany, Ebony, Jacobean, Early American, Weathered Oak, Classic Gray, Dark Walnut, Colonial Maple.
Recommended Skill Level
Beginner
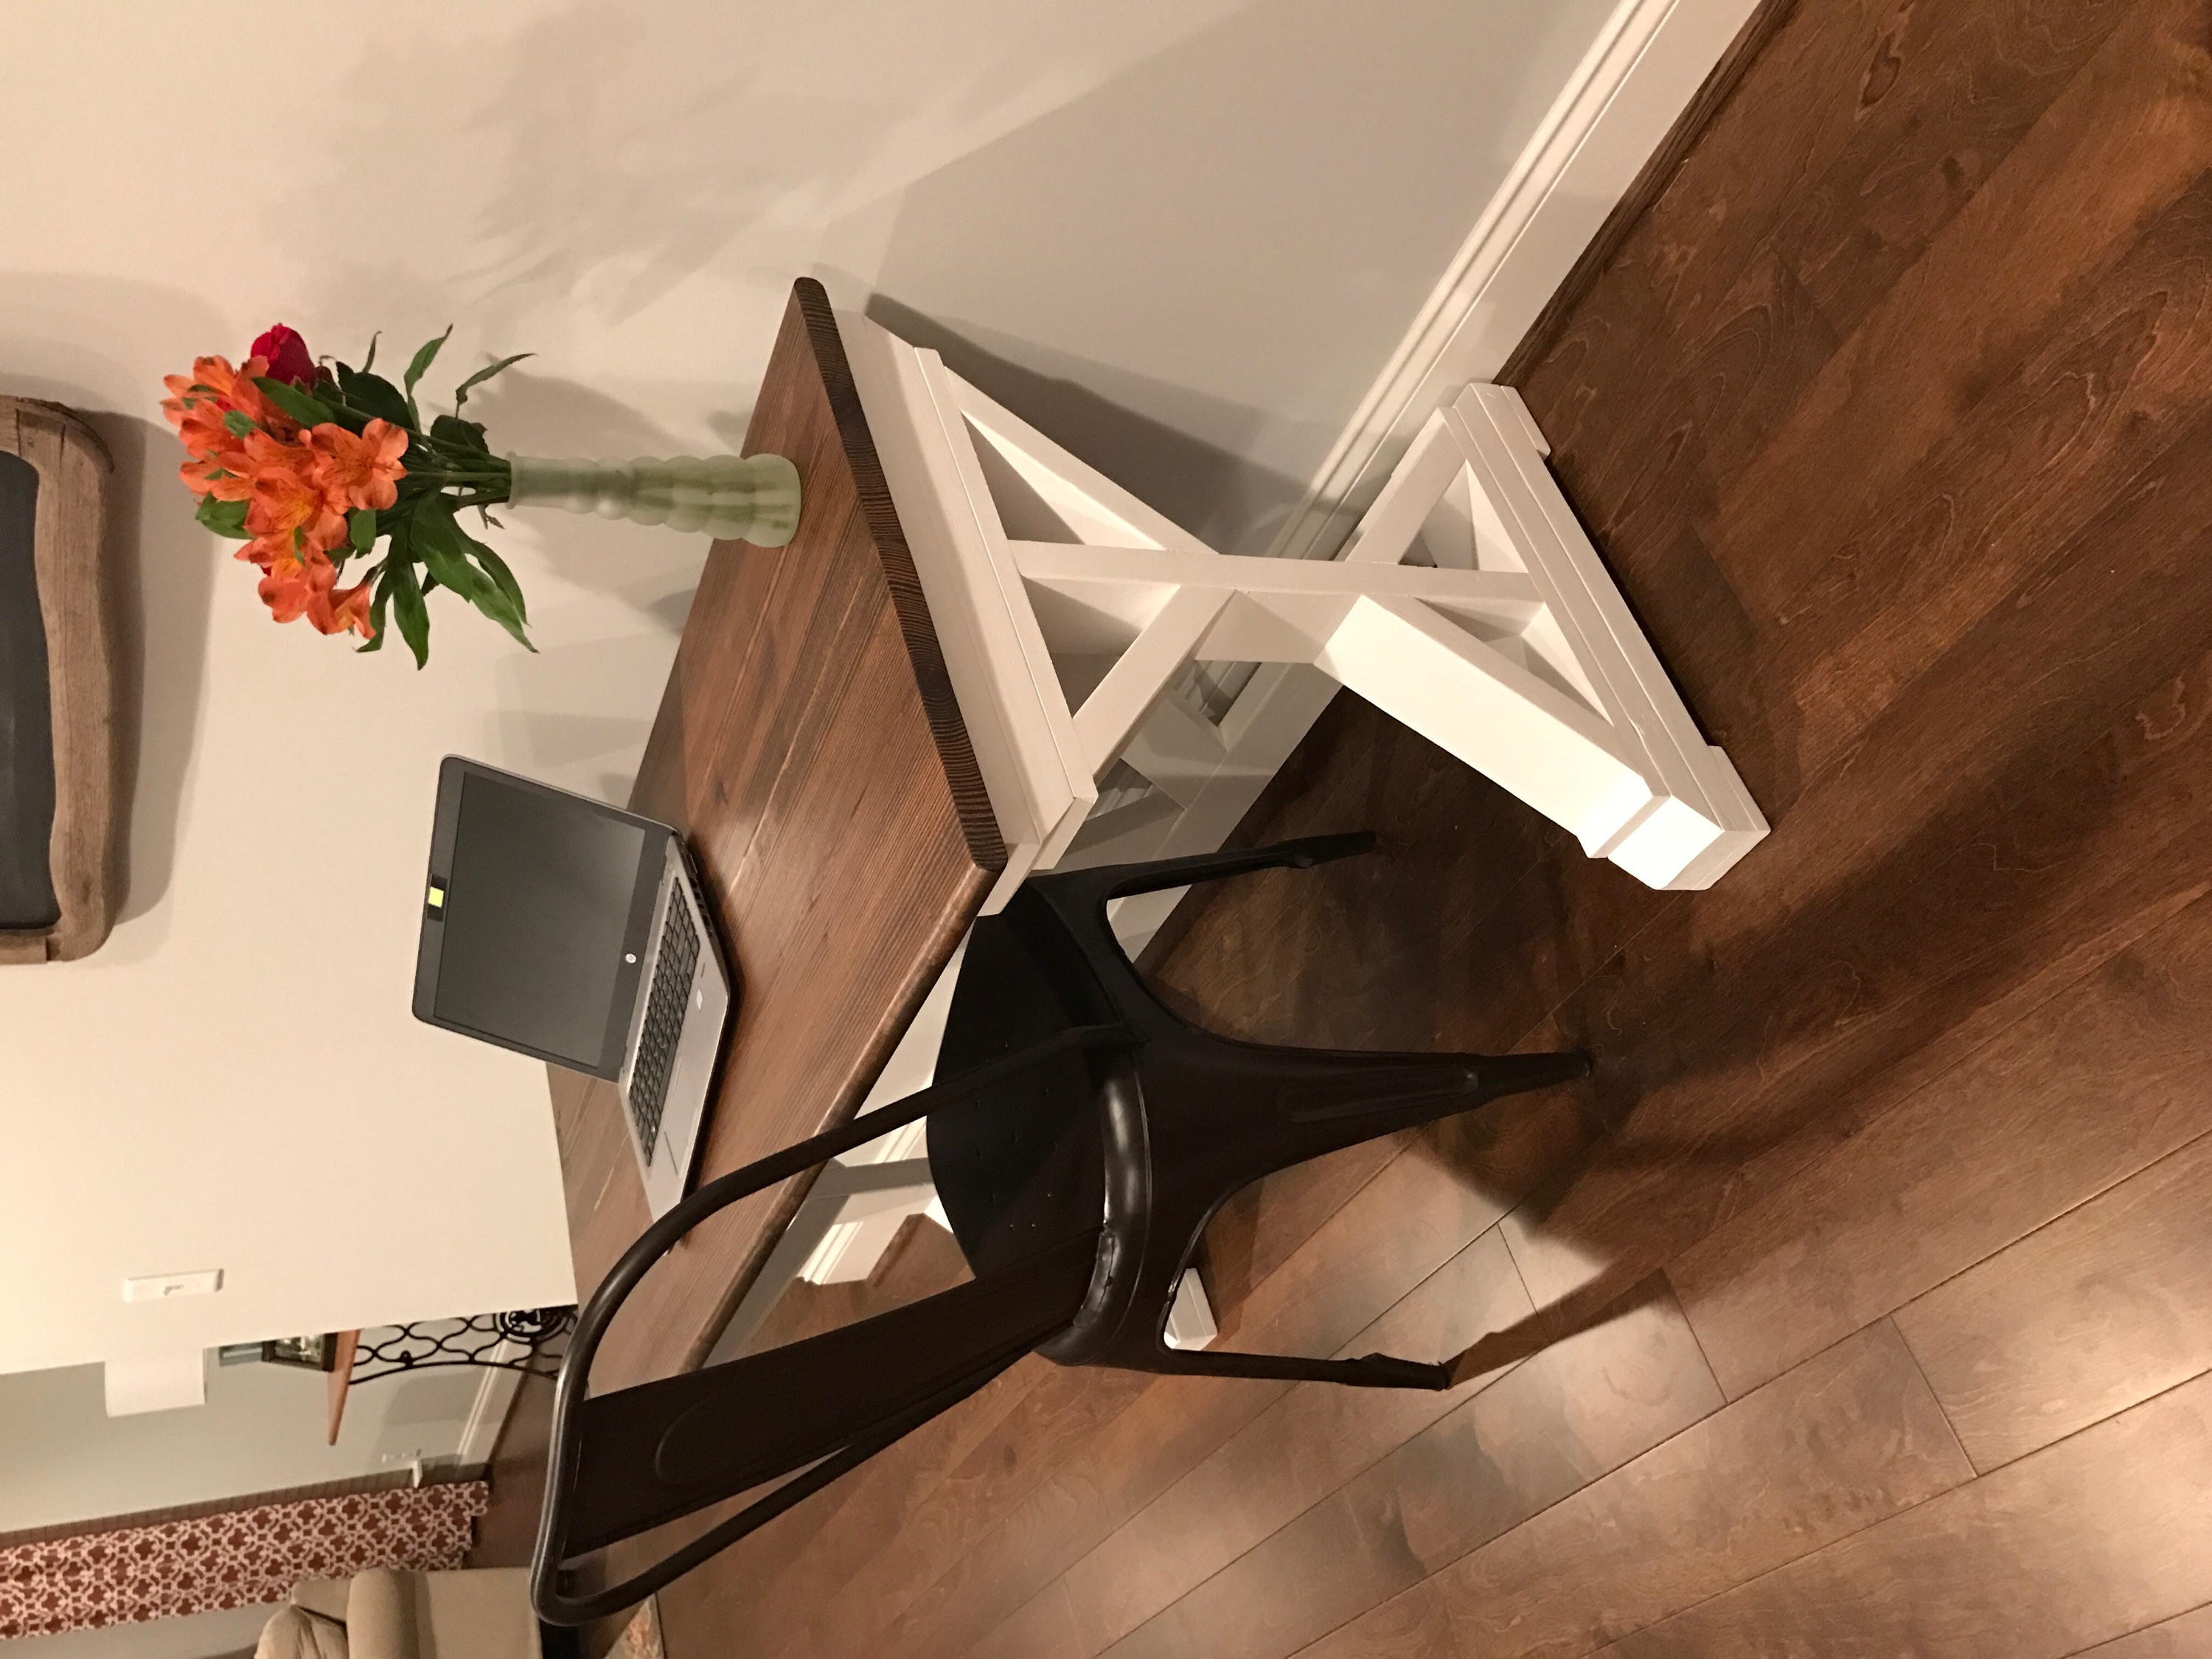
My build of the Potter Barn Keyhole Desk
I know it's been a while since you and Pneumatic Addict worked on the Pottery Barn Keyhole Desk but I wanted to let you know I was so inspired by it that I built my own. I also made a build video: https://youtu.be/AzkjgI3VmAo. Thanks for your great inspiration!
Estimated Cost
$700
Estimated Time Investment
Week Long Project (20 Hours or More)
Finish Used
Dark Walnut
Recommended Skill Level
Intermediate
Comments
new mudroom!
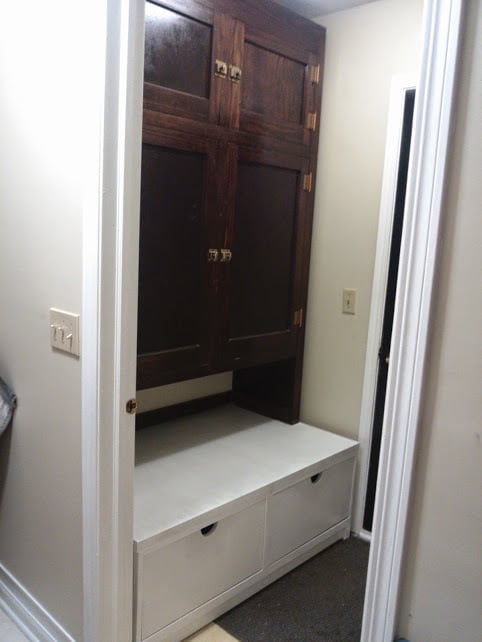
The drawers were my very first project! I have never built anything before and I loved how deep the drawers were here. I'm really thankful my dad helped! Super happy with how it turned out!
I picked up the hutch at an old barn sale for $65. It's perfect to hold all of our coats and stuff and the shoe drawers are super deep and hold ALL our shoes. Here's our story... http://onblissstreet.blogspot.com/2014/11/mudroom-makeover.html
Built from Plan(s)
Estimated Cost
$75
Estimated Time Investment
Weekend Project (10-20 Hours)
Finish Used
White paint
Recommended Skill Level
Beginner
Comments

Retro Art Station
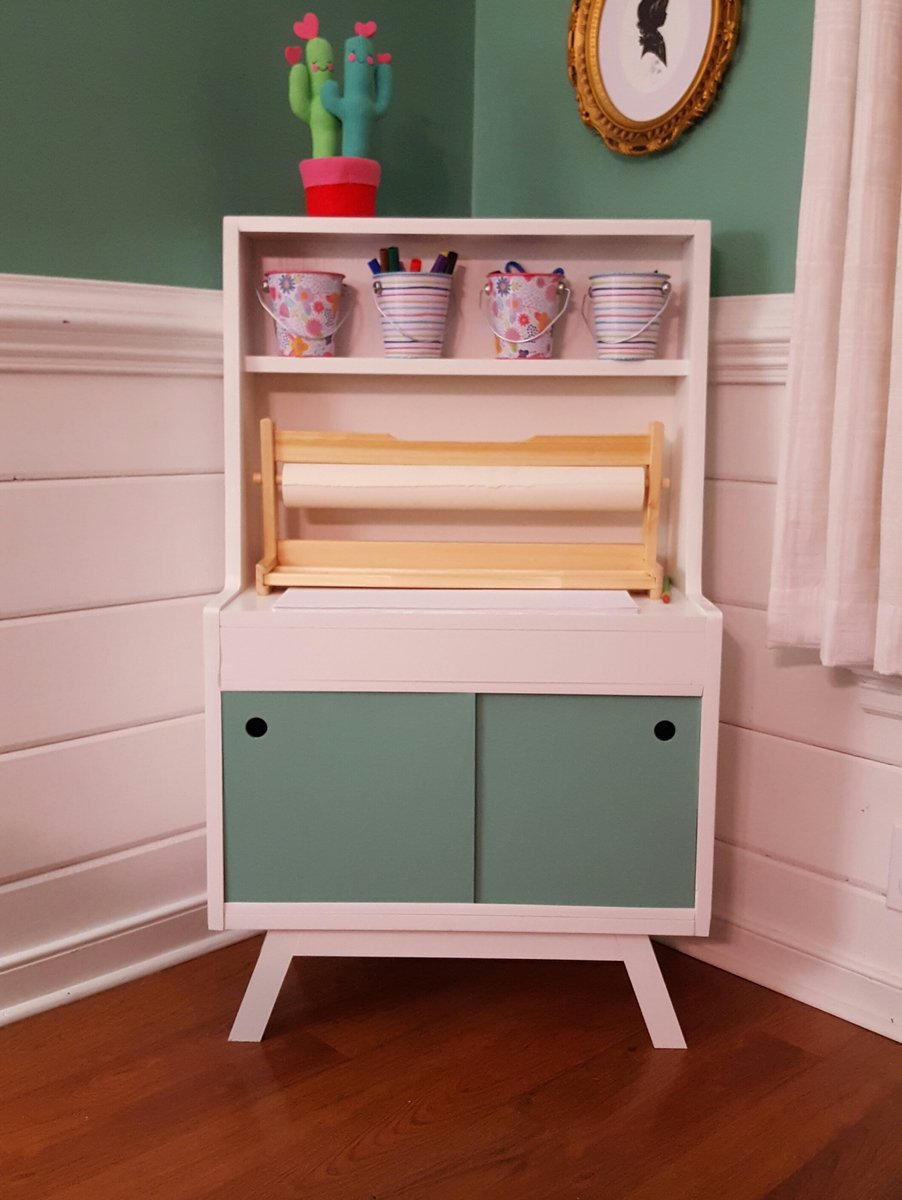
We decided to turn this little retro play kitchen into a kid art station. It's so adorable.
Built from Plan(s)
Estimated Cost
$60
Estimated Time Investment
Afternoon Project (3-6 Hours)
Finish Used
Paint in white and Aspen Aura
Recommended Skill Level
Intermediate
Comments
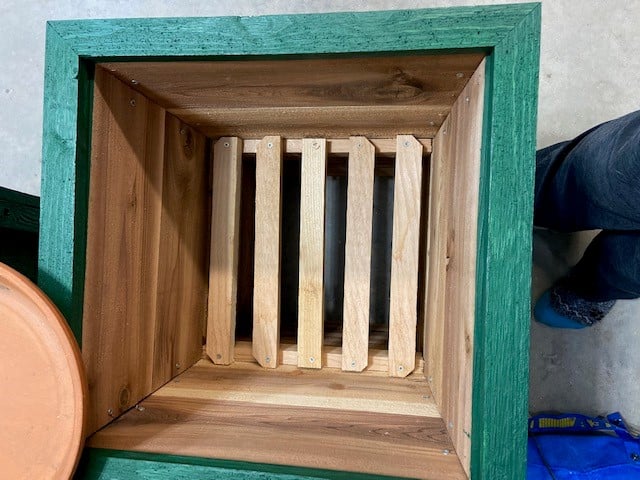
Tall Planters
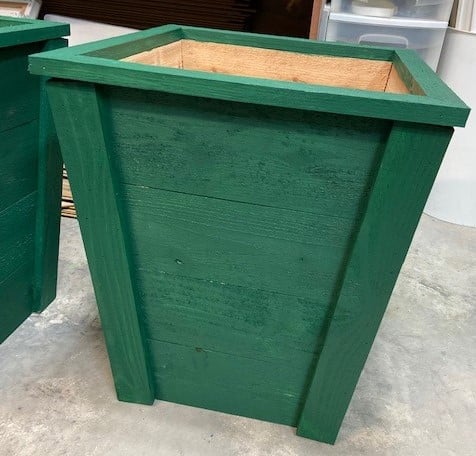
These were made using the Tall Planters plan...4 cedar pickets for each one. I also used cedar rough cut trim for the 1x2's and 1x3's. They are painted to match cedar shutters I made for my parents mountain house. I used Cabot's Solid Color Acrylic Deck Stain in Evergreen to protect the planters exterior. The only alteration to the plans was adding the top trim. I used 1x2's cut at 16" long each on a 45 degree angle to form the box. I glued and nailed together the trim before nailing into the tops.
Built from Plan(s)
Estimated Cost
$35.00 ea
Estimated Time Investment
Afternoon Project (3-6 Hours)
Finish Used
Cabot Solid Color Acrylic Deck Stain (tinted to Evergreen)
Recommended Skill Level
Beginner
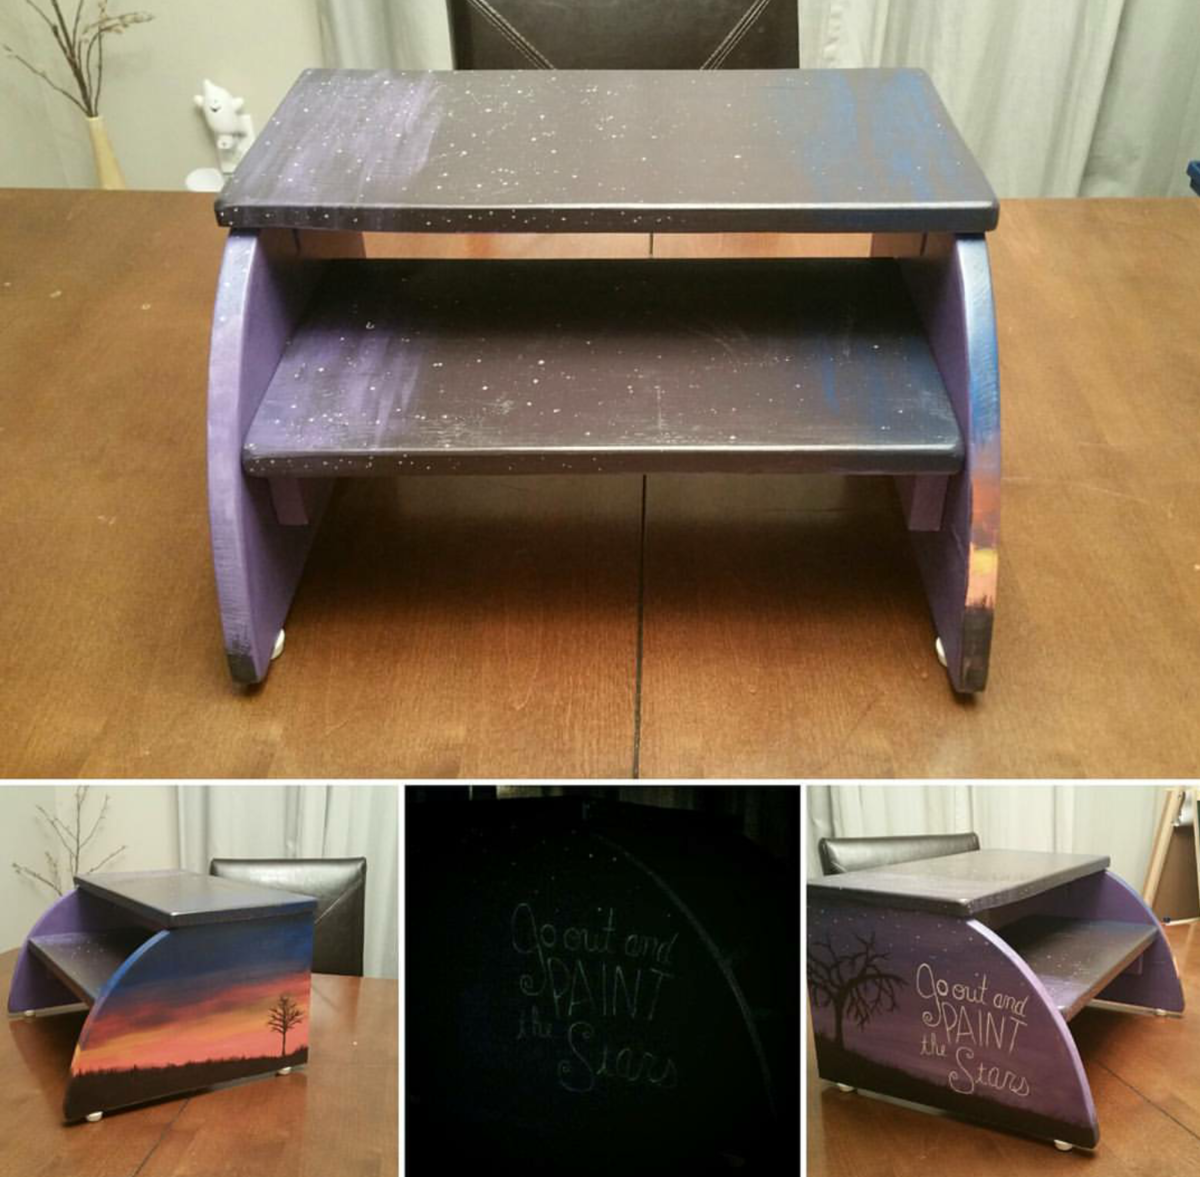
Step stool
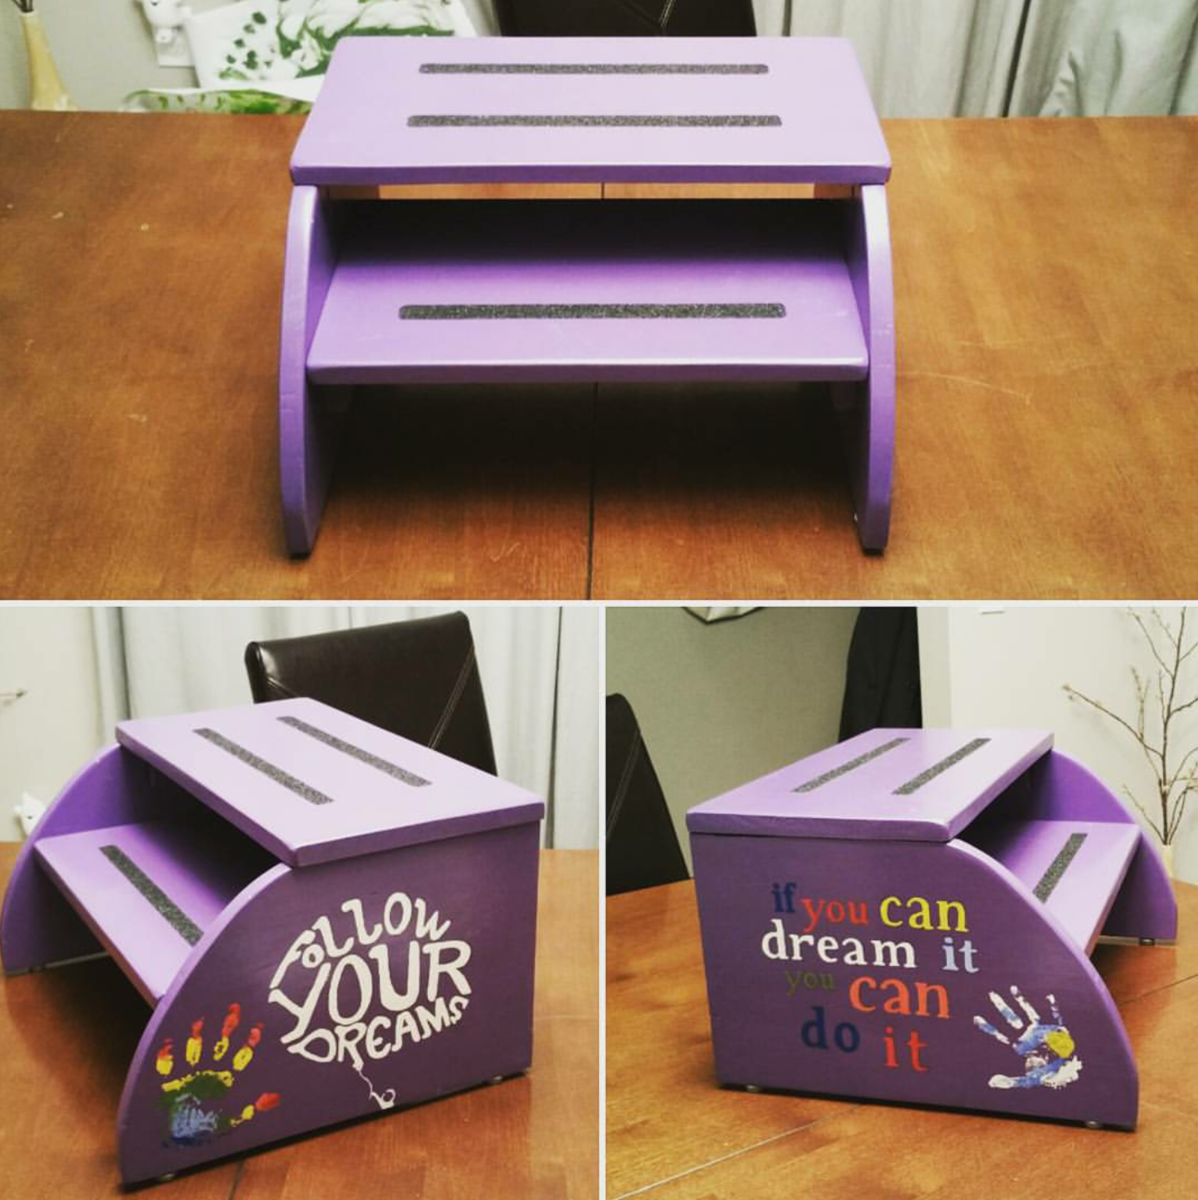
Step stools I built for my kids to use. The second one I actually used glow in the dark paint for the lettering and the stars. Took me longer to paint since everything was hand drawn / written. Total time for the project would have been a few hours if it wasn't for the paint and poly added.
Estimated Time Investment
Weekend Project (10-20 Hours)
Finish Used
Paint and polyacrylic.
Recommended Skill Level
Beginner
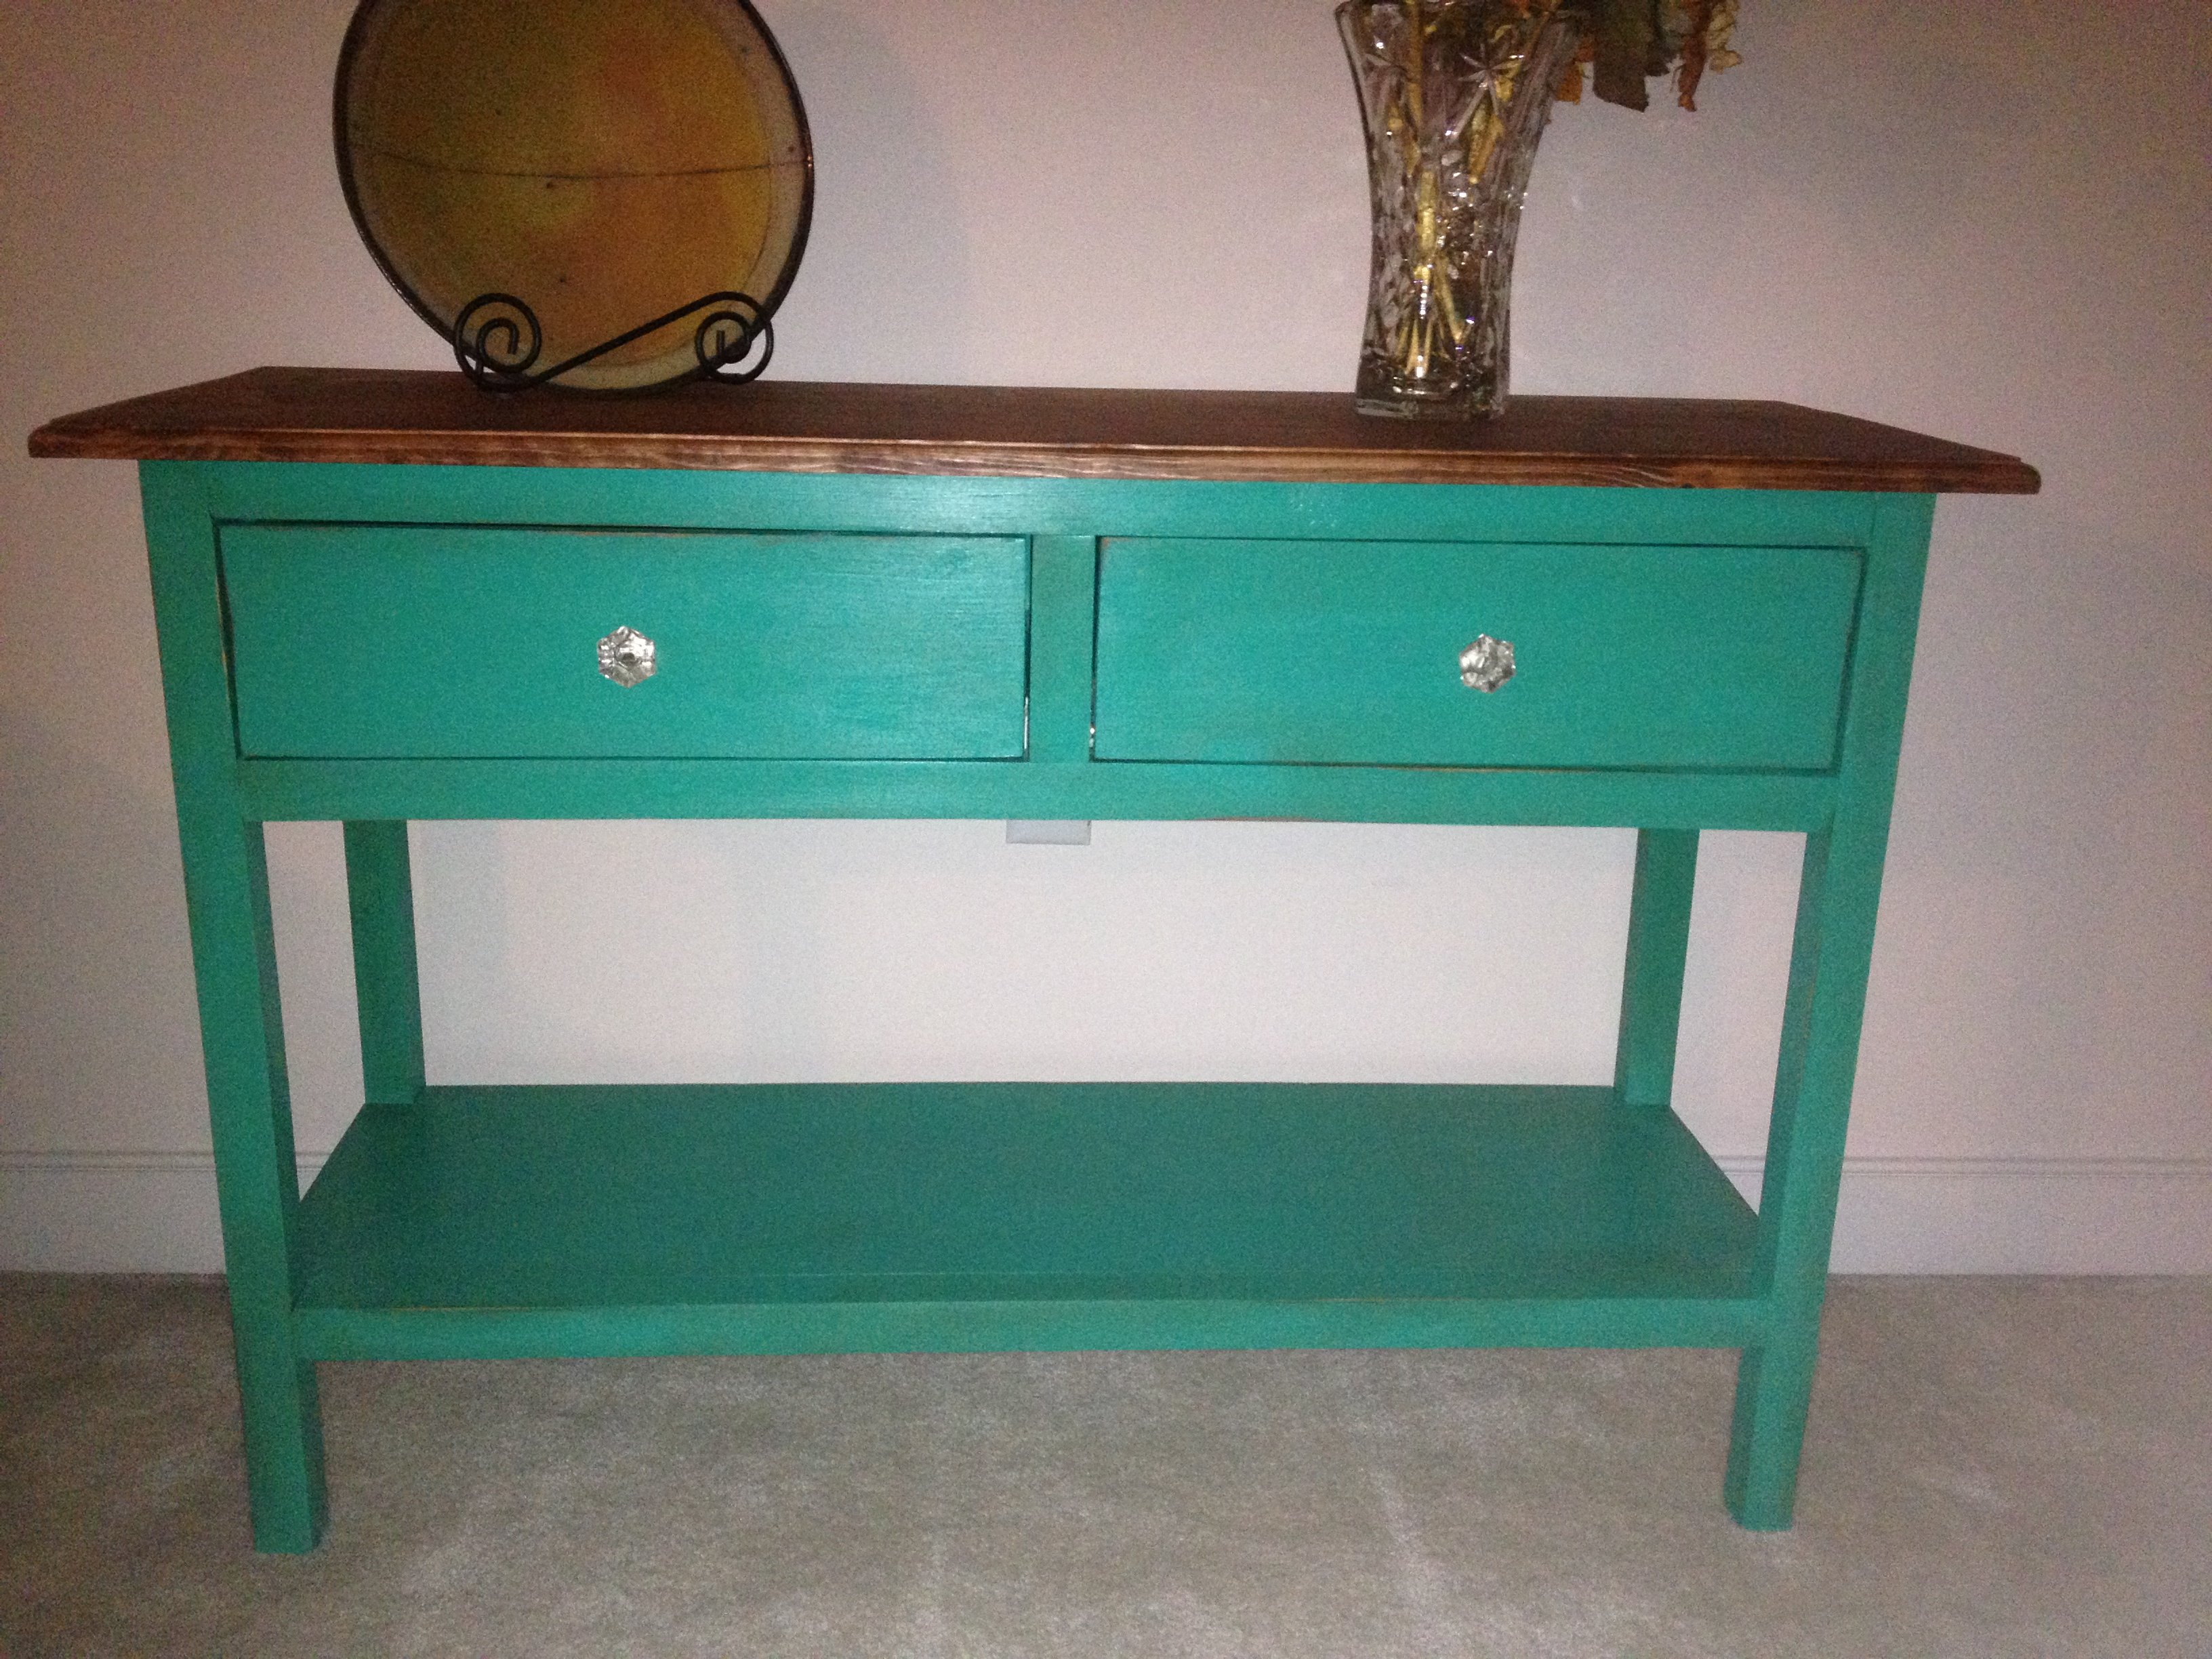
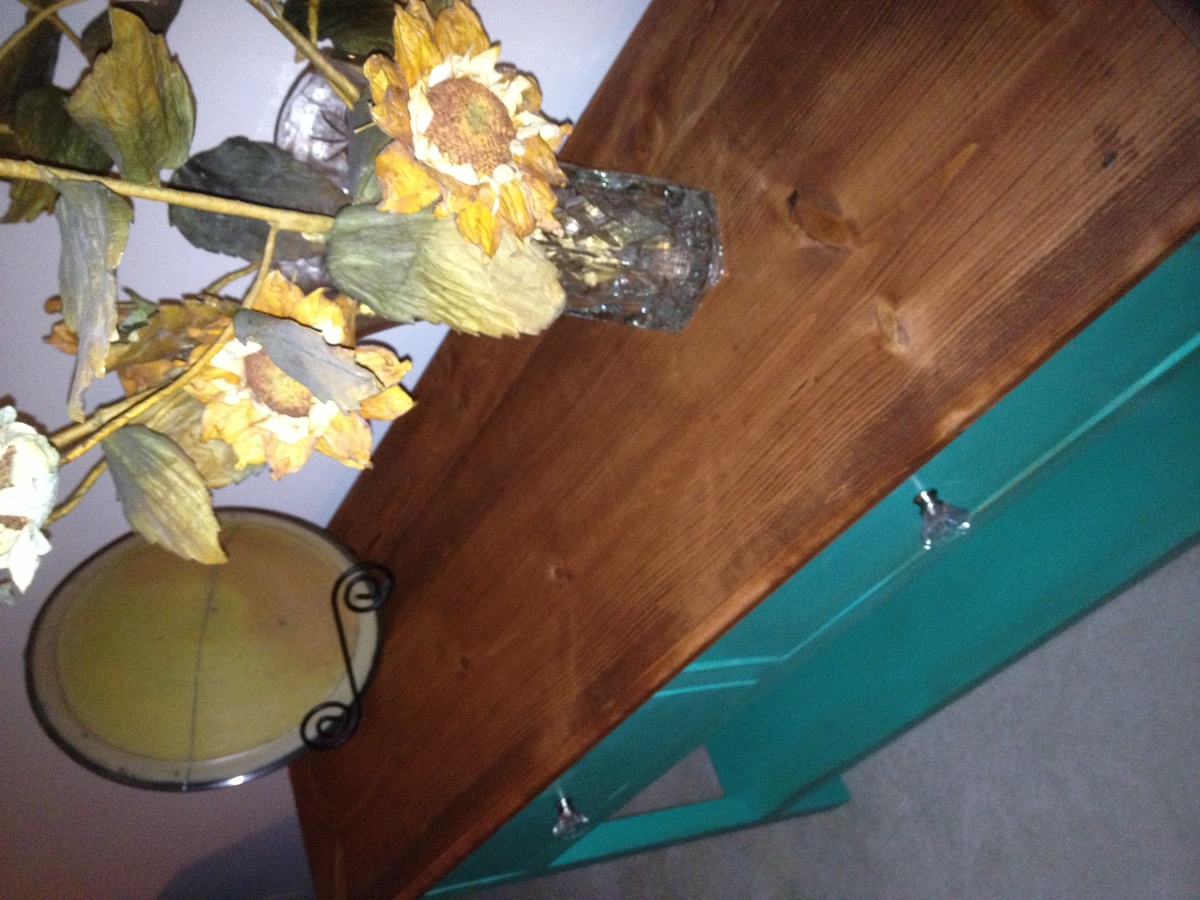
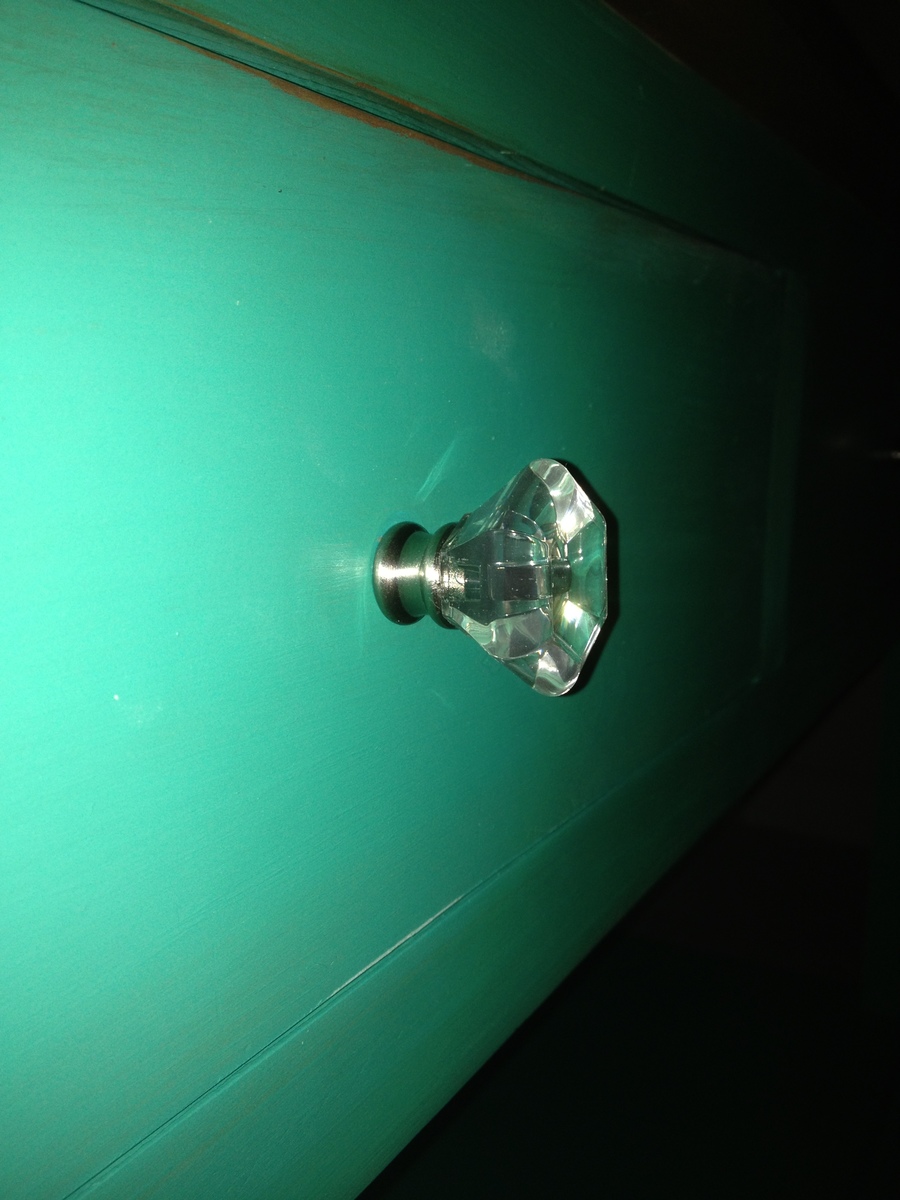
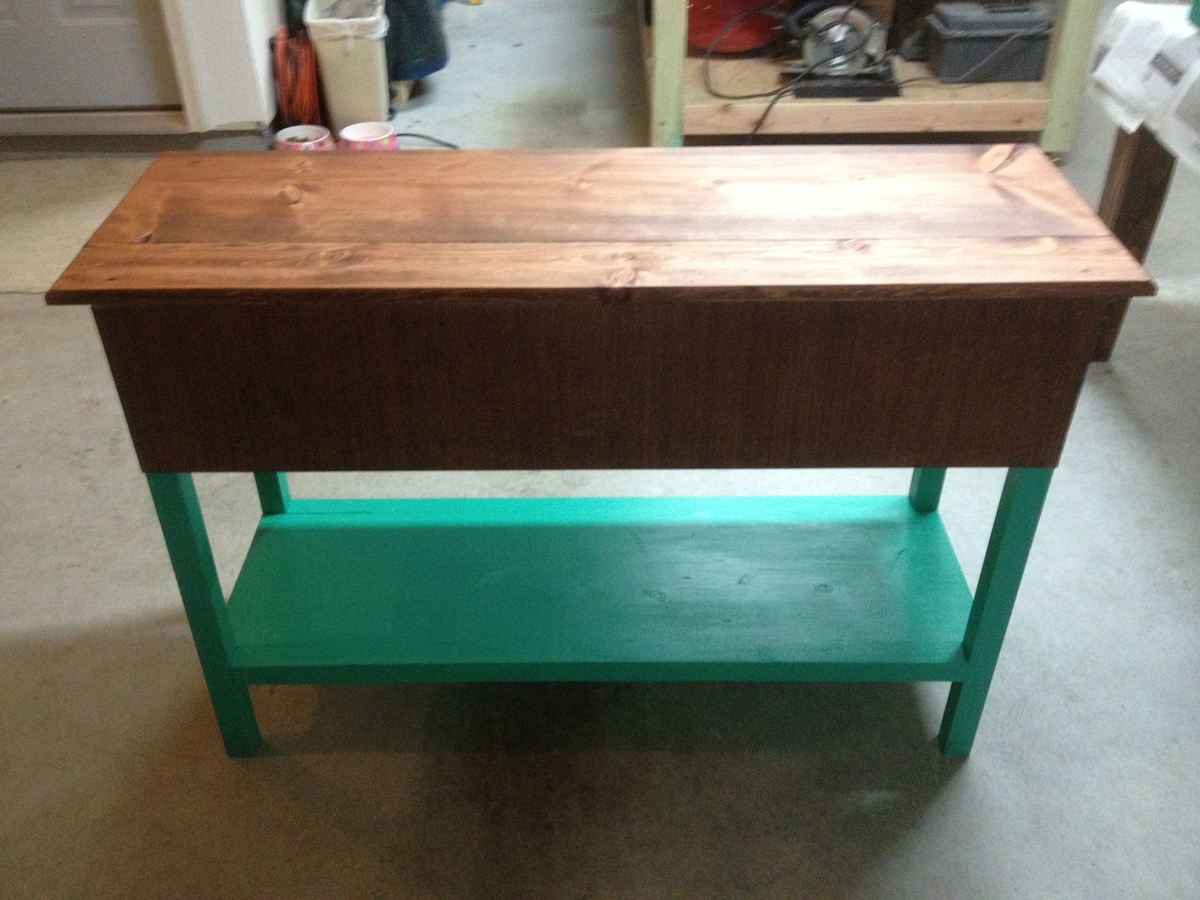
Console Table
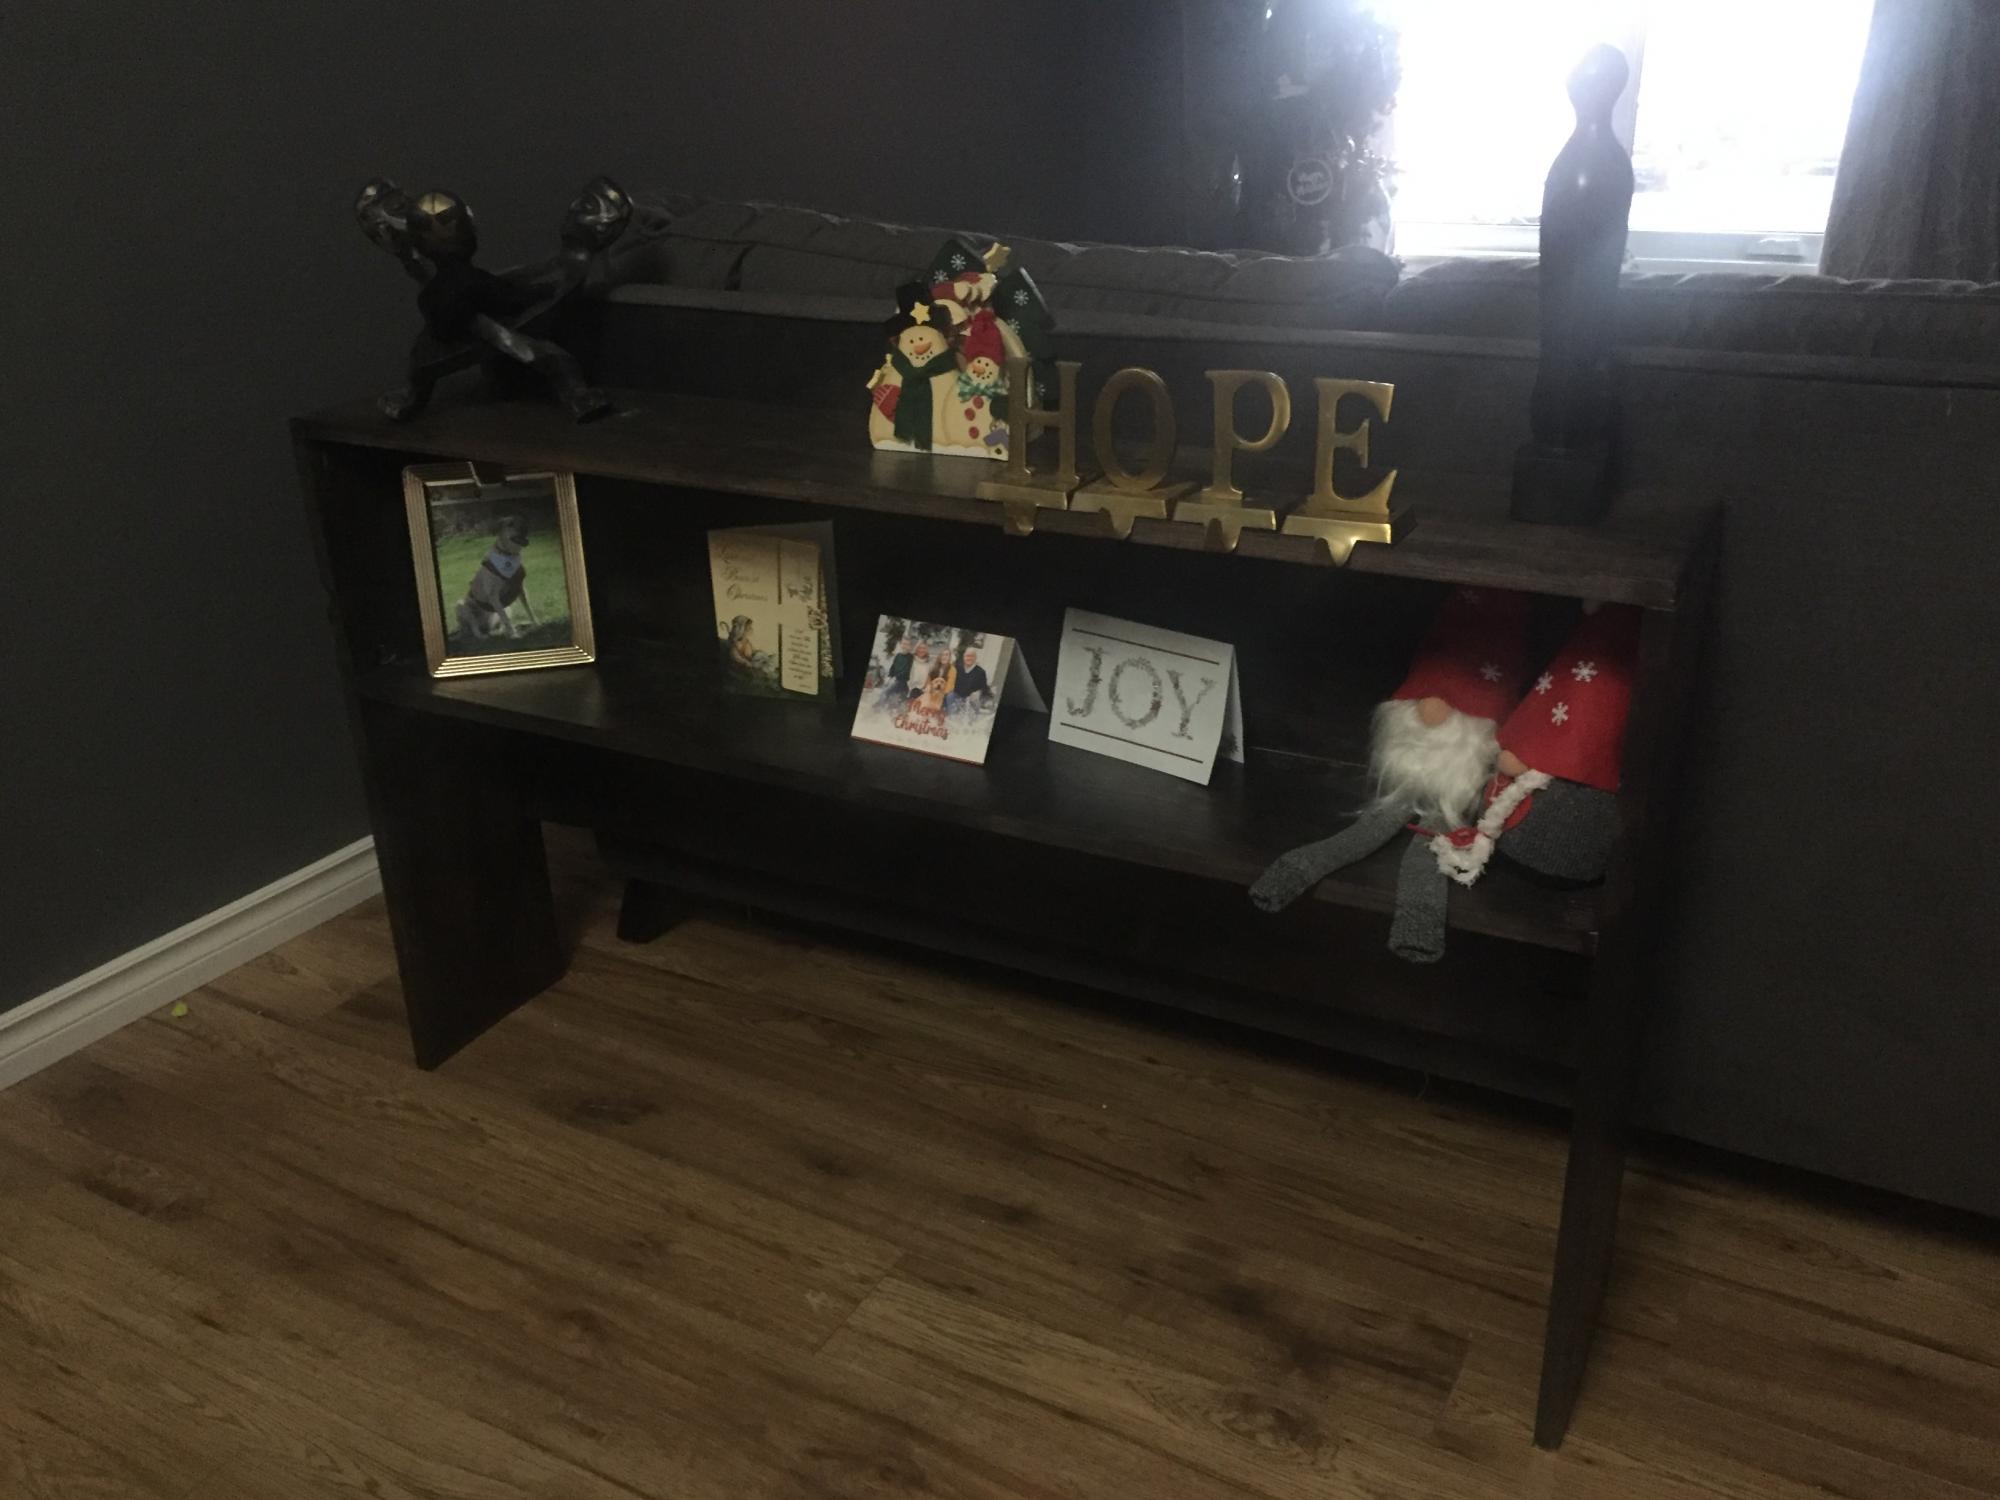
This was my first indoor woodworking project, where it mattered if the corners were 90 degrees and the colour matched and the wood was not warped.
Even when the lumber yard gave me the wrong width of board, did all the cuts and I didn't notice until I was home, laying out my pieces and measuring everything, I will still able to complete it.
I went with the 10" (9 3/4") wide top instead of the 12" (11 3/4") rather than go back to the lumber yard and have it recut. I was anxious to make my project and it was a hassle to drive that distance. it didn't have the 1 1/2" overhang that the larger width would have had but it fit in my tiny space better.
The next time I visited that lumber yard for more wood, I got my money back and I learned a valuable lesson - just because the lumber yard staff are picking up the wood for you, you need to read and check. I didn't go closer to see it because of Covid-19 restrictions but next time I will ask to measure it and check it before I bring it home. I've learned to carry my tape measure with me, just in case!
Built from Plan(s)
Estimated Cost
$50
Estimated Time Investment
Afternoon Project (3-6 Hours)
Finish Used
Varathane ultimate one coat stain and Varathane triple thick clear finish. Used a cloth to apply and brush in the corners where the cloth could not reach easily. Applied 2 coats with light sanding in between. I used a dark stain because other furniture in the room is stained a darker colour. Due to the pine's absorption, it is a little lighter, as I wanted.
Recommended Skill Level
Beginner
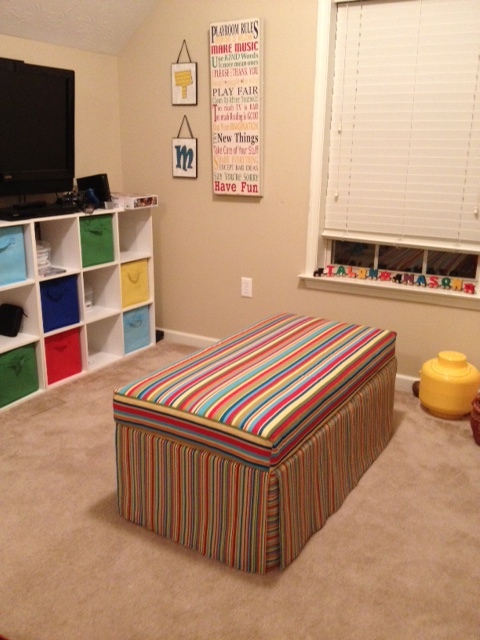
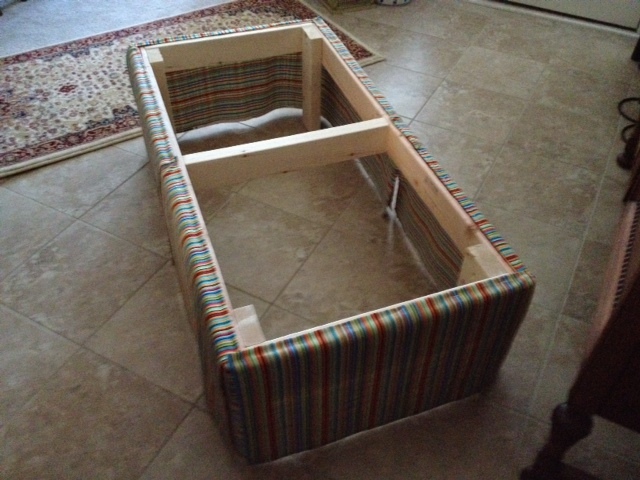
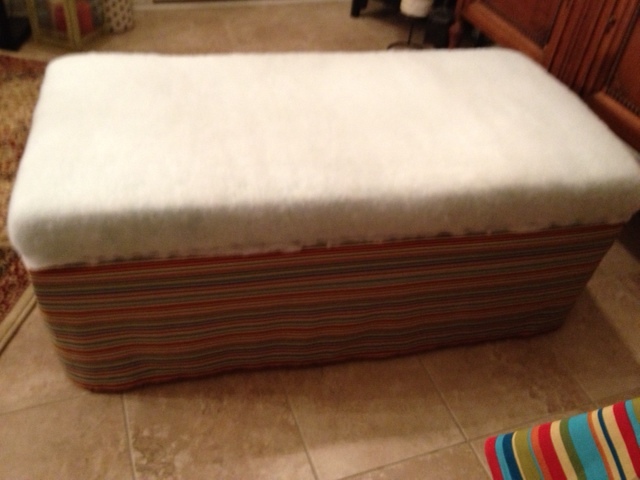
Bench Seat for our kids' toyroom
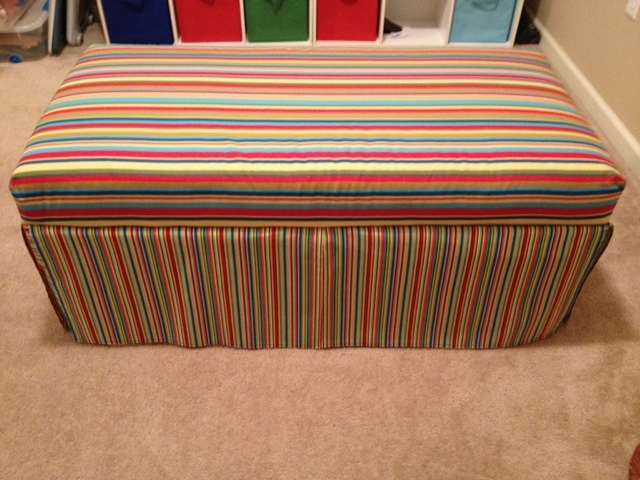
We used Ana's plans from her dining room banquette bench and made a bench for our boys' toyroom. We didn't put a back on because the bench sits in the middle of the room. We love the way it turned out! Thanks, Ana!
Estimated Cost
Bench seat
Estimated Time Investment
Weekend Project (10-20 Hours)
Recommended Skill Level
Intermediate
Comments
Sat, 01/26/2013 - 21:27
Woodworking part was for
Woodworking part was for beginners but the sewing part was a bit challenging. I had never done box cushion corners before but I got the hang of it after the first corner.

Decorative Stocking Holder
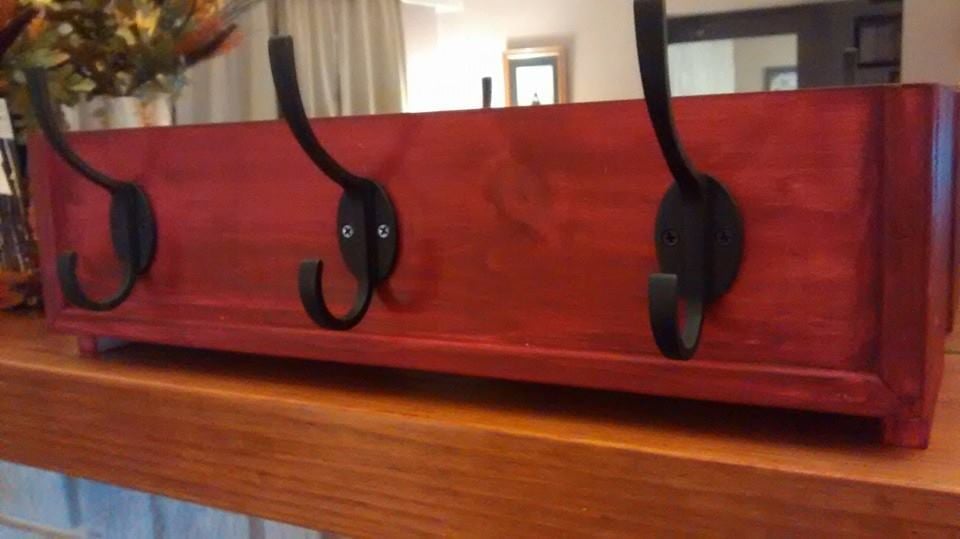
I loved the look of the DIY Stocking Holder, and decided to use it as inspiration to design my own. I basically built a box using scrap 1x6.
The front and back boards were cut to a length of 22" (that was the length my scrap would allow), while the side pieces were cut to a height of 6 1/4" to allow for a 3/4" legs on ends. The bottom piece for the box was cut to a length of 20 1/2". I then sanded all pieces 150 and 220 grit sand paper.
Using 1 1/4" inch finishing nails and wood glue, I attached the 6 1/4" side pieces to the 20 1/2" bottom piece (allowing clearance on the bottom for the 3/4" legs), and then attached the 22" front and back boards. I then cut trim to fit the front of the box. Finally, to keep a rustic look, I applied one coat of a dark burgundy paint. I really wanted the grain of the pine to shine through. After allowing the paint to dry, I attached the hooks.
It turned out to be a quick, simple, and fun build. I can't wait to hang our stockings and fill the box with pine branches and other decorative christmas items.
Built from Plan(s)
Estimated Cost
Under $20
Estimated Time Investment
An Hour or Two (0-2 Hours)
Finish Used
One coat of a dark red/burgundy paint.
Recommended Skill Level
Beginner
Pallet wall shelf

A pallet wall shelf unit that I made for my bathroom for my wife. There are four shelves, with the top and bottom around 8.5" deep, and the middle two around 5" deep. I planed the edges of the boards for joining, but just lightly sanded the faces to preserve the rustic look of the boards (so they are smooth to the touch, but still have texture). The back is edge glued and pocket screws, and the shelves are glued and pocket screwed into the back, and screwed in from the backside for extra strength. I finished with Minwax Water Based Wood Stain in Ebony and Satin Polycrilic.
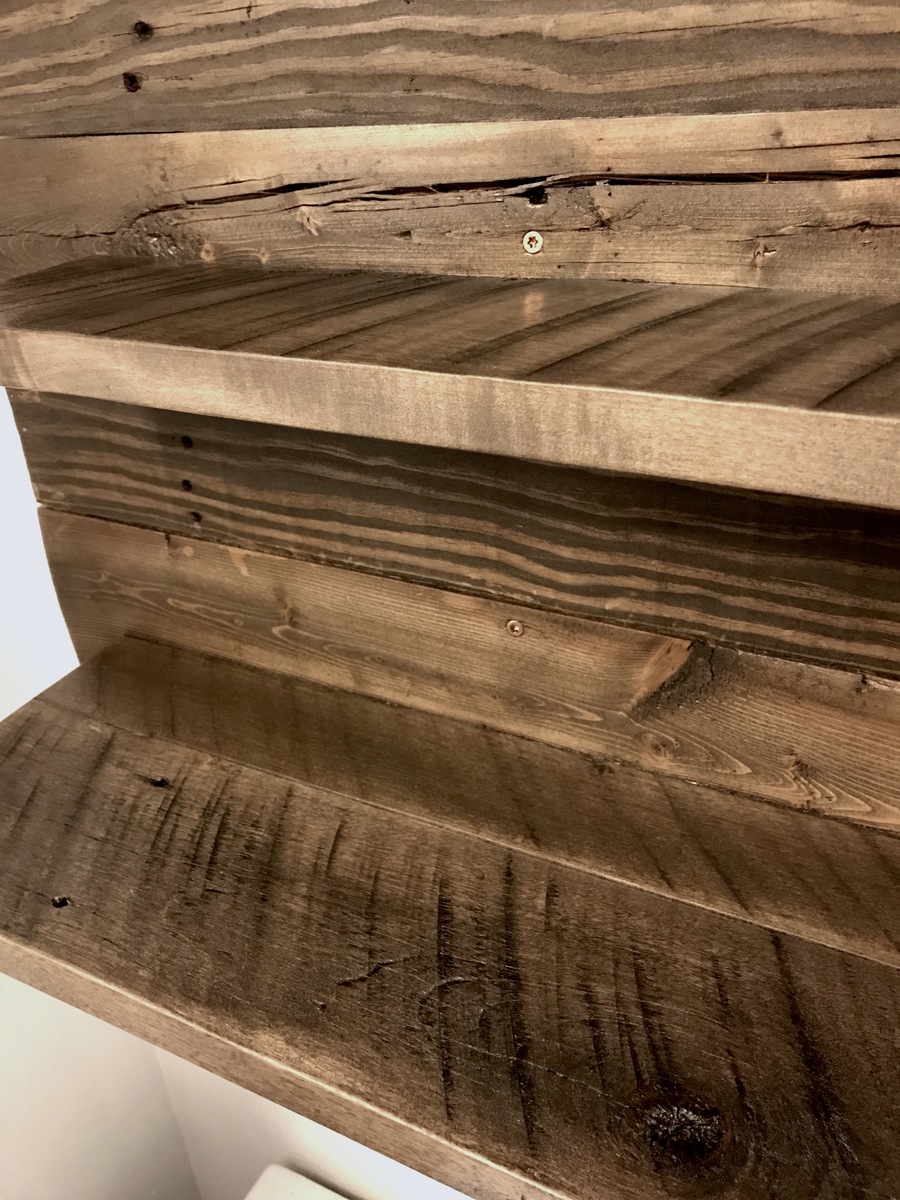
Estimated Cost
Used materials that I had on hand, but would cost around $30-40 if you had to buy the screws, stain, and poly.
Estimated Time Investment
Day Project (6-9 Hours)
Finish Used
One coat of Minwax Water Based Wood Stain in Ebony, brushed on and wiped off. One coat of Polycrilic in Satin, with an additional coat applied to the shelf tops.
Recommended Skill Level
Beginner
Reclaimed wood sliding door buffet
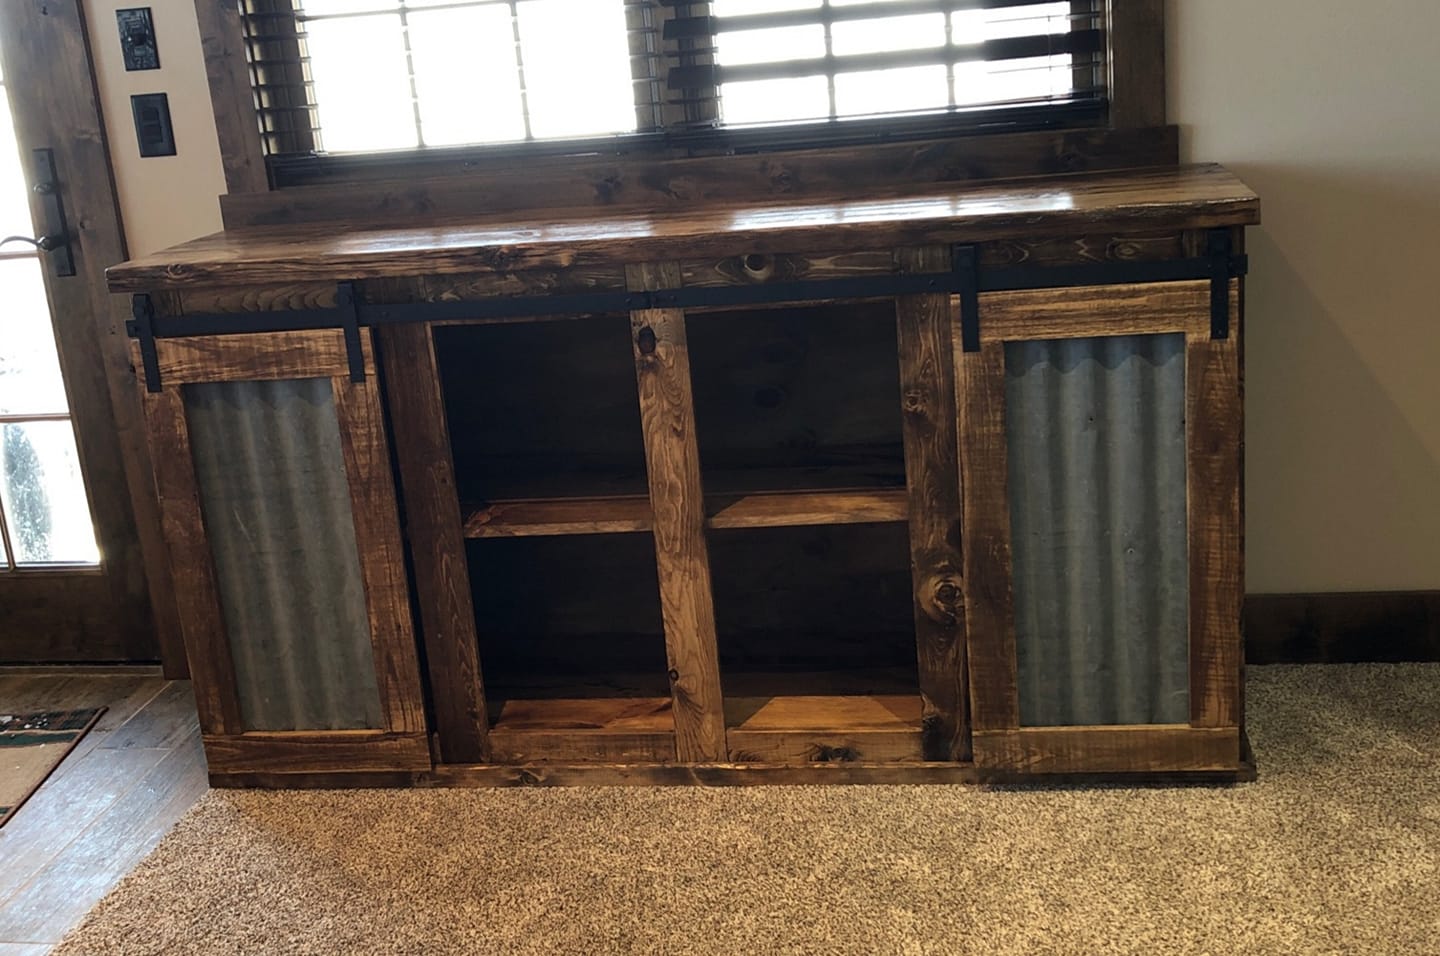
I made this out of primarily reclaimed lumber. This project had to be modified in size to fit in a certain space.
Estimated Cost
Less than $100
Estimated Time Investment
Week Long Project (20 Hours or More)
Finish Used
Watco oil in Dark walnut
Recommended Skill Level
Intermediate
Comments
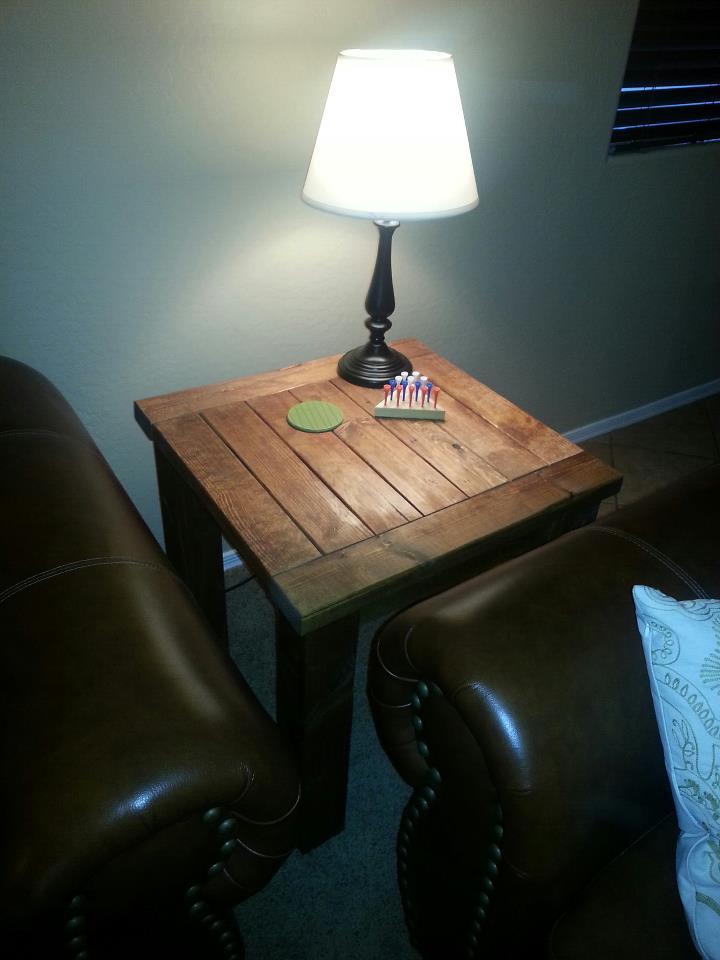
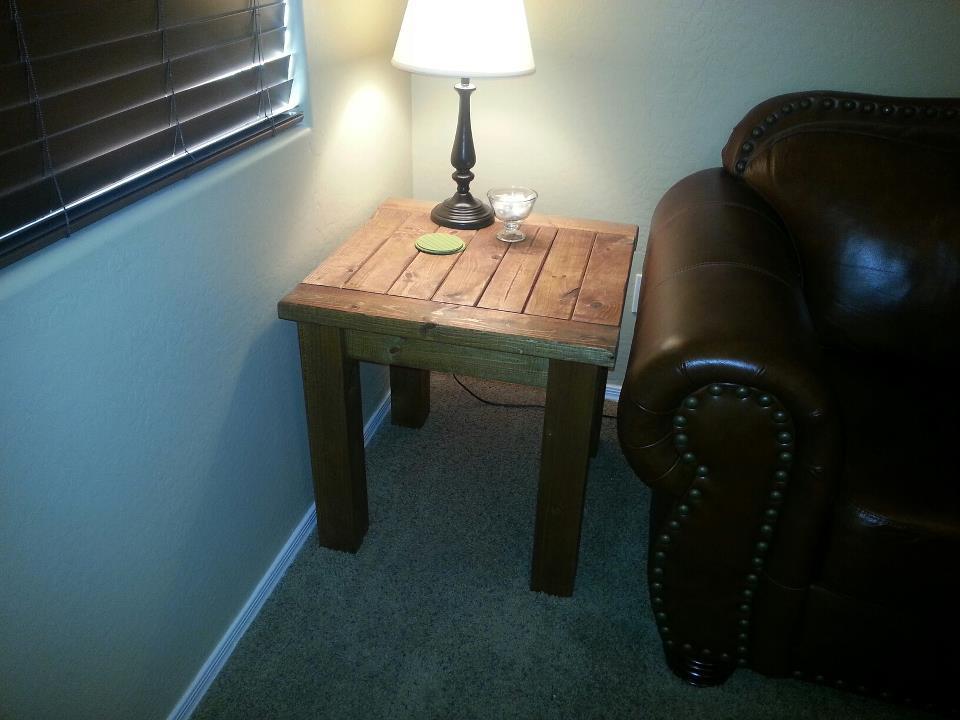
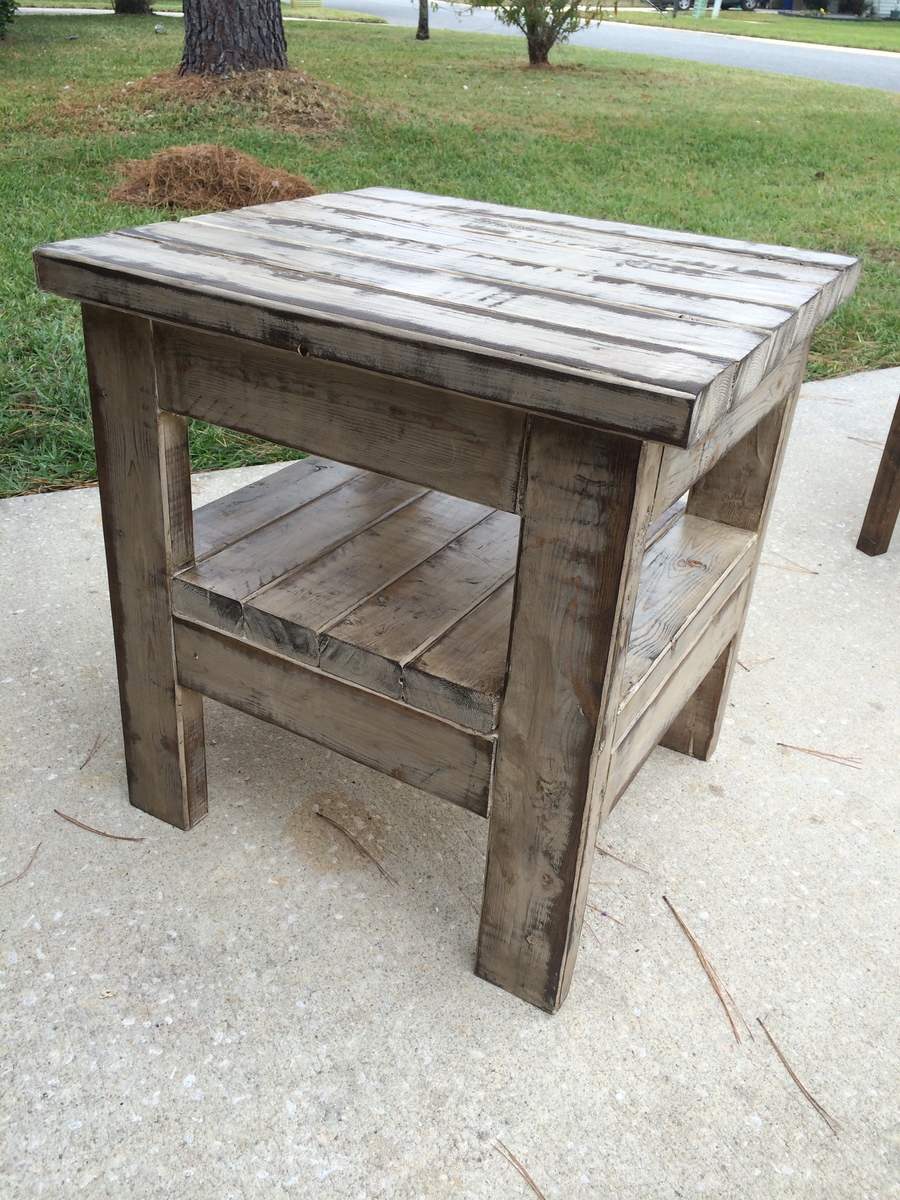
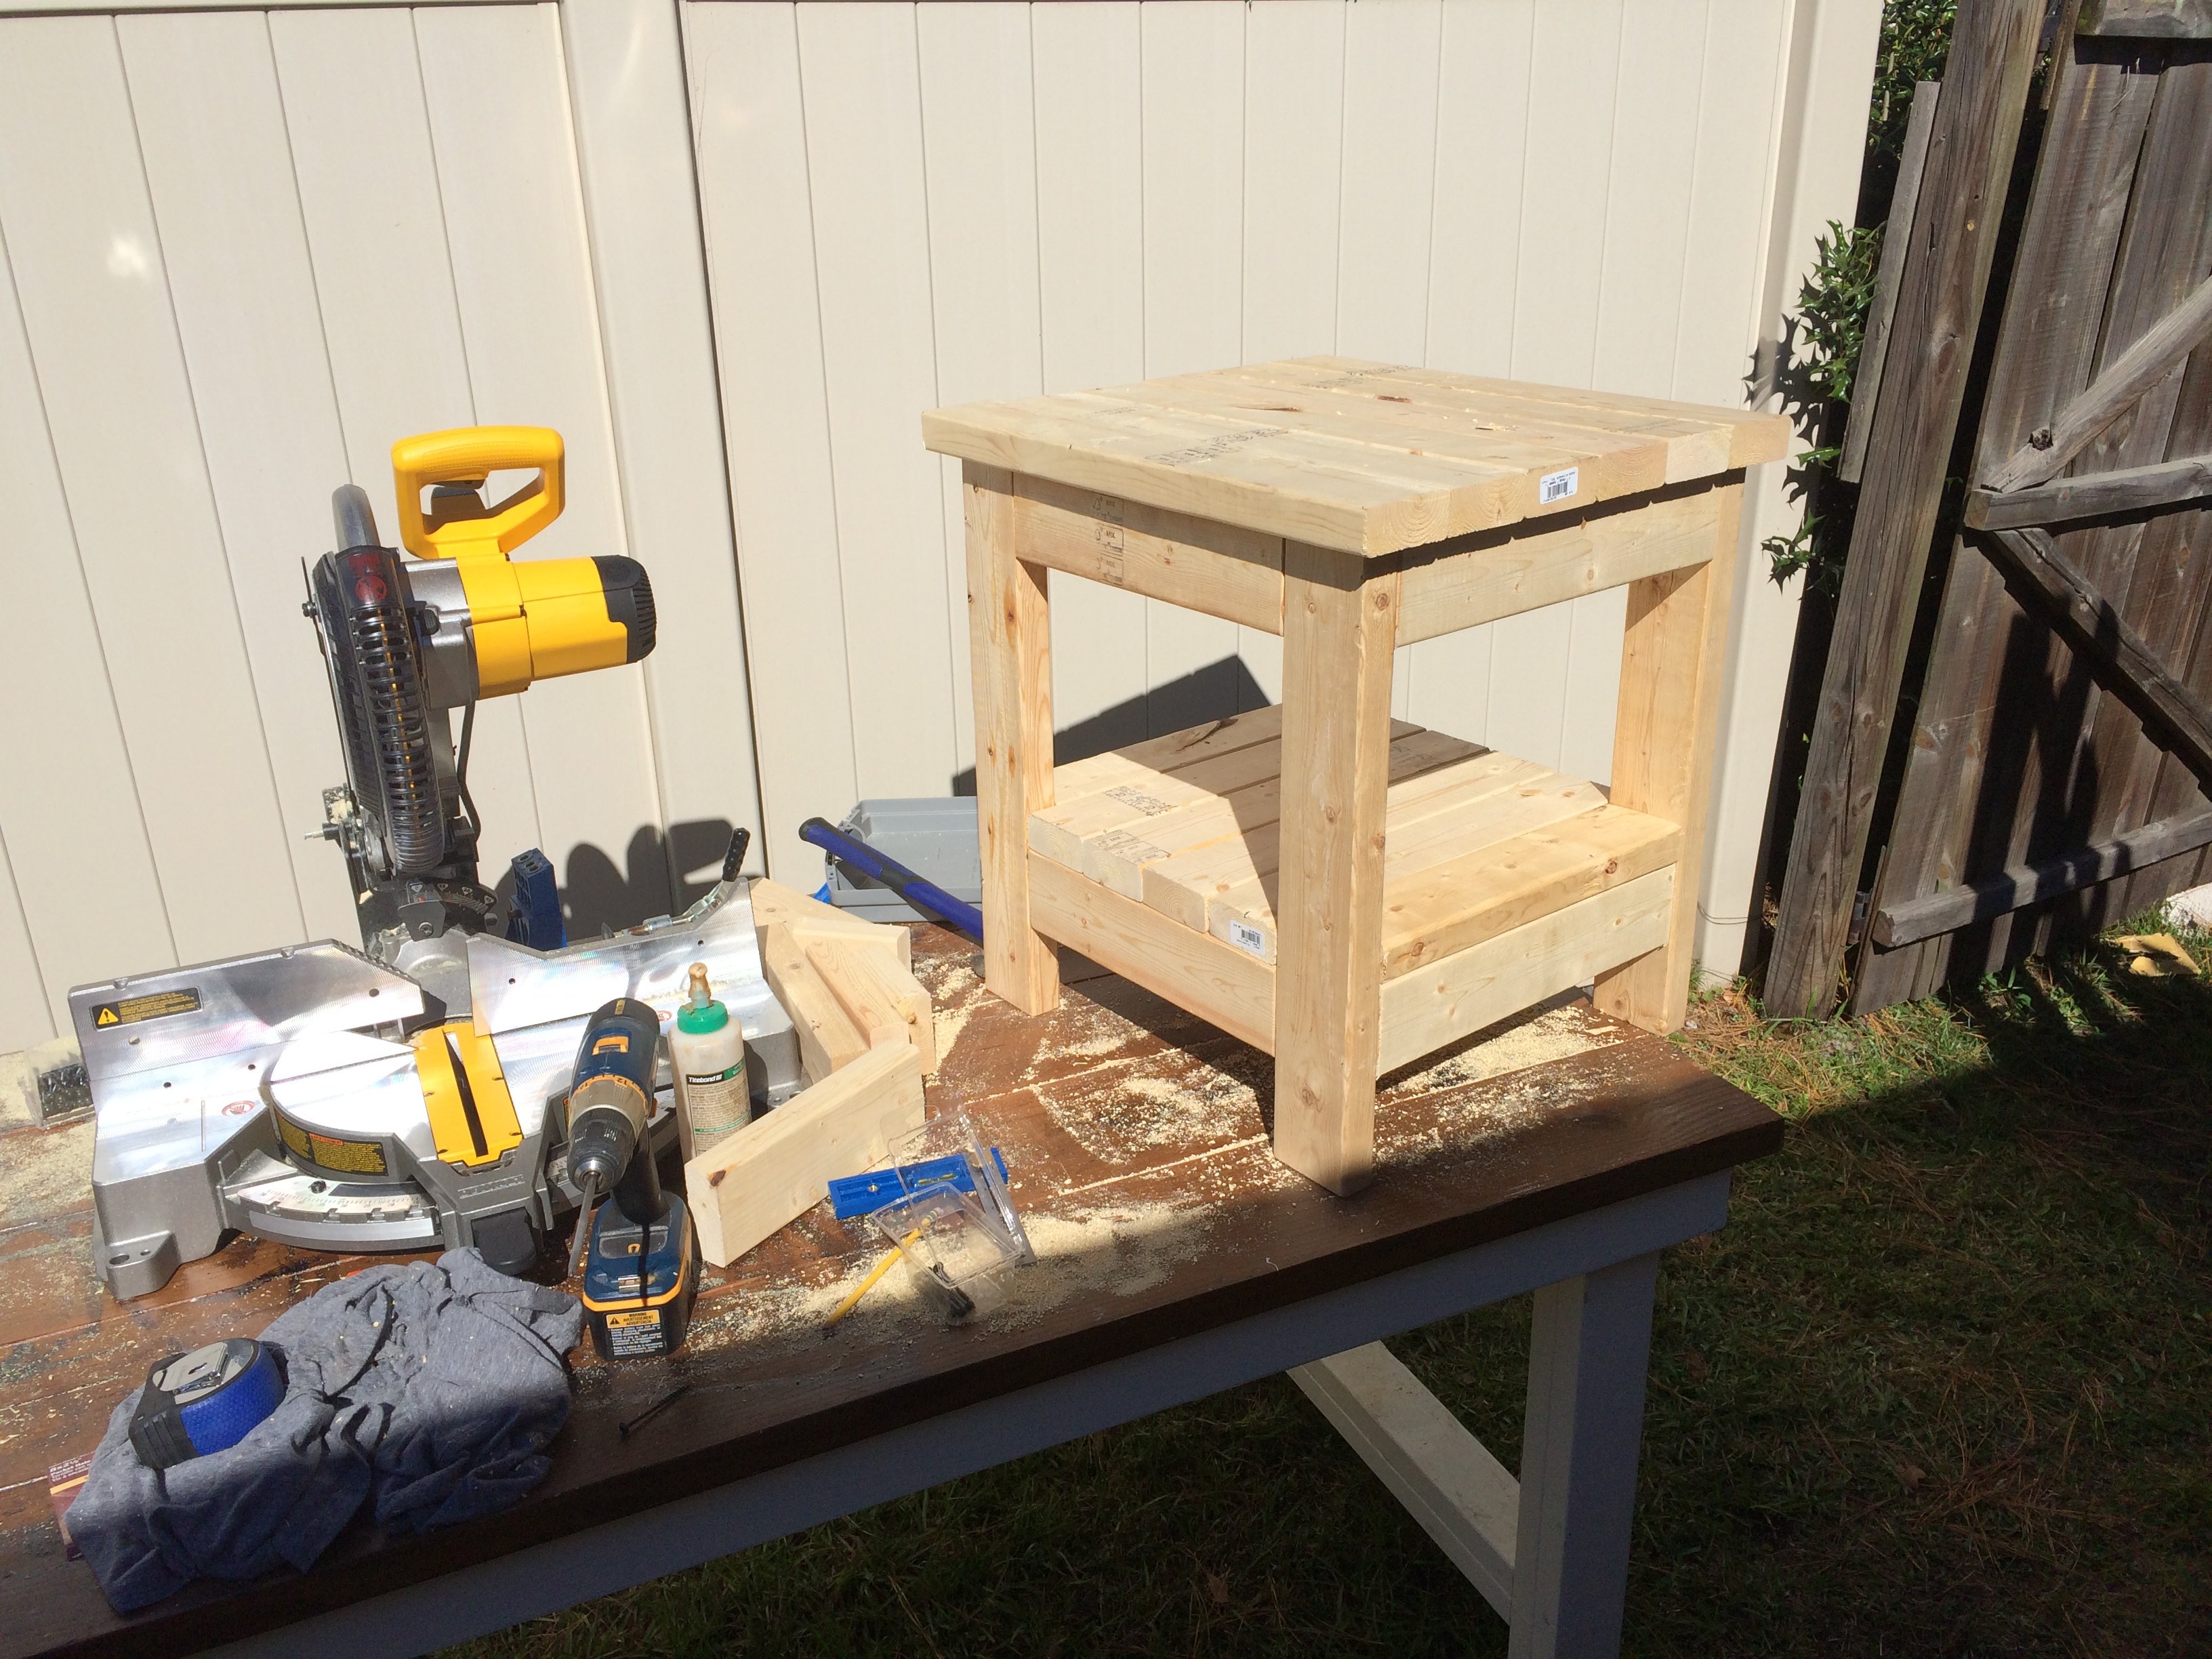
Tidy Up Coffee Table & Side Tables
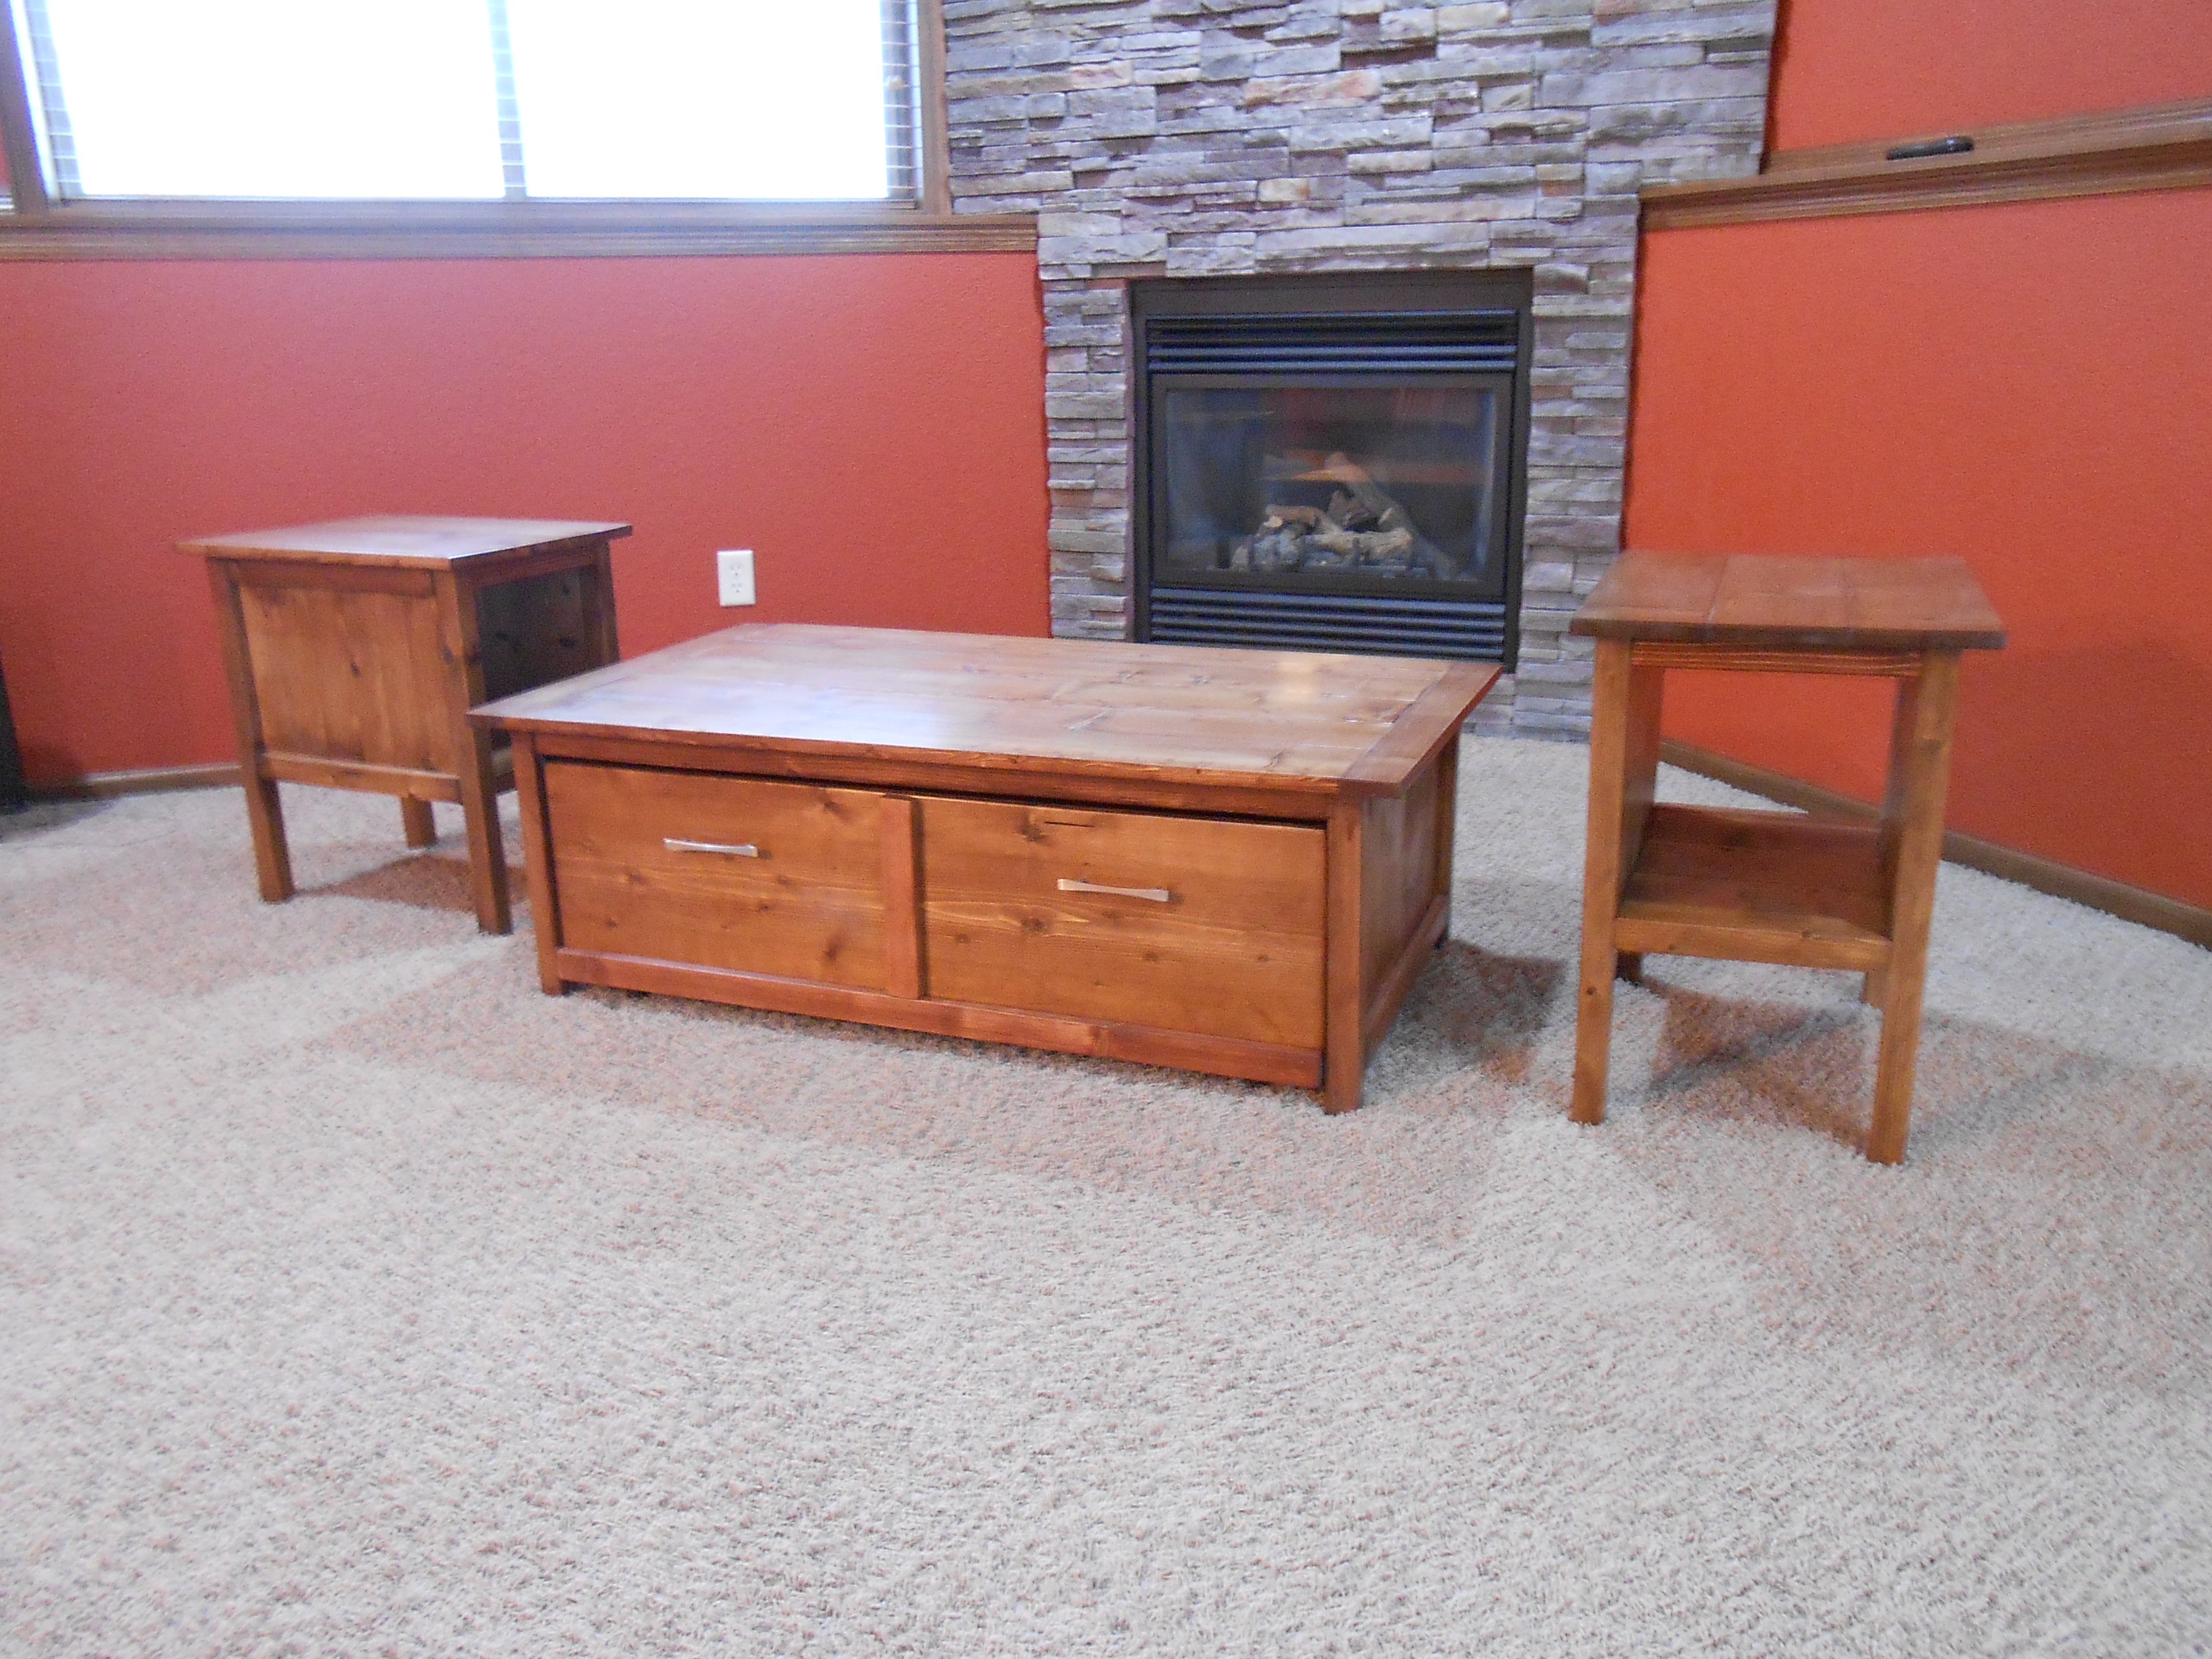
This was my second project. I am very happy with the way they turned out. The plans were very easy to follow. I did add L brackets to the legs as others have suggested. I added handles to my trundle because I could not get the cut-out handles consistent.
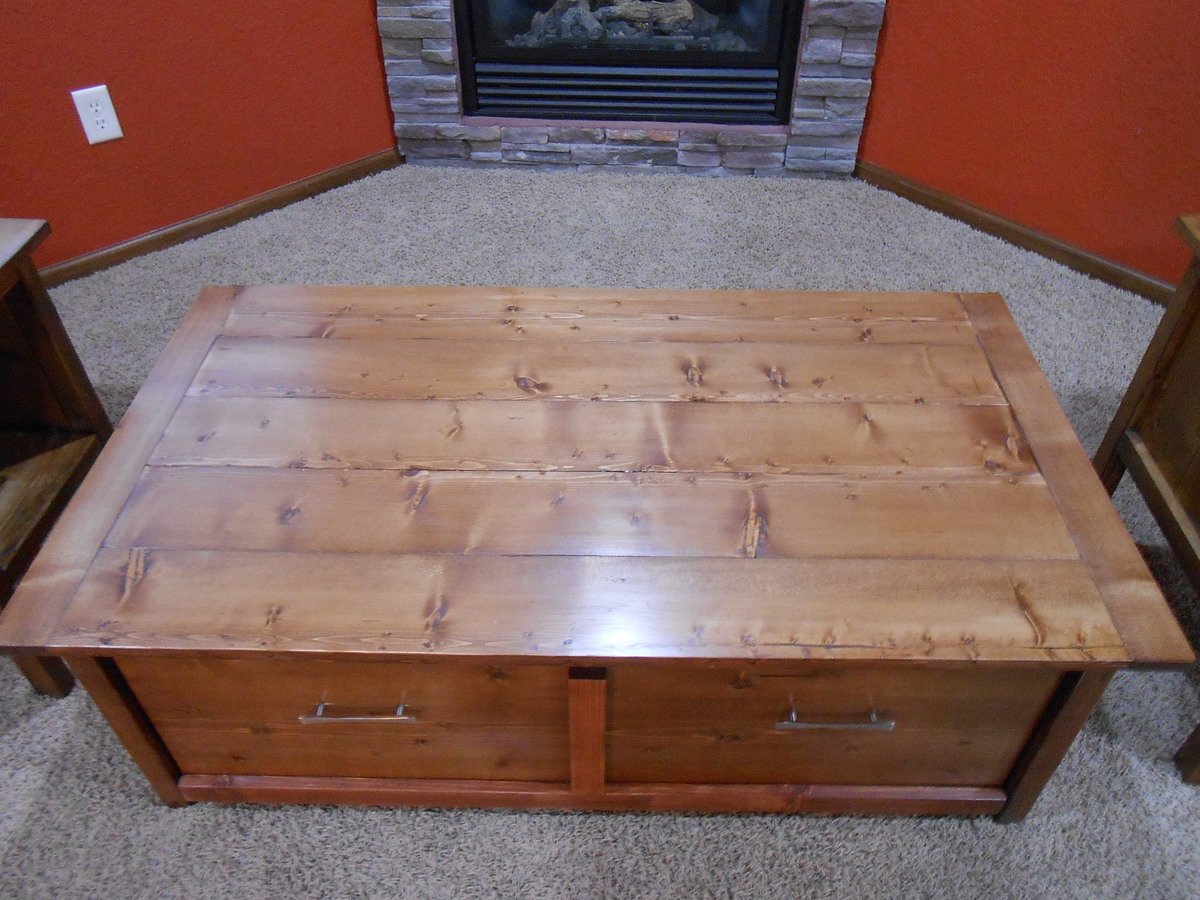
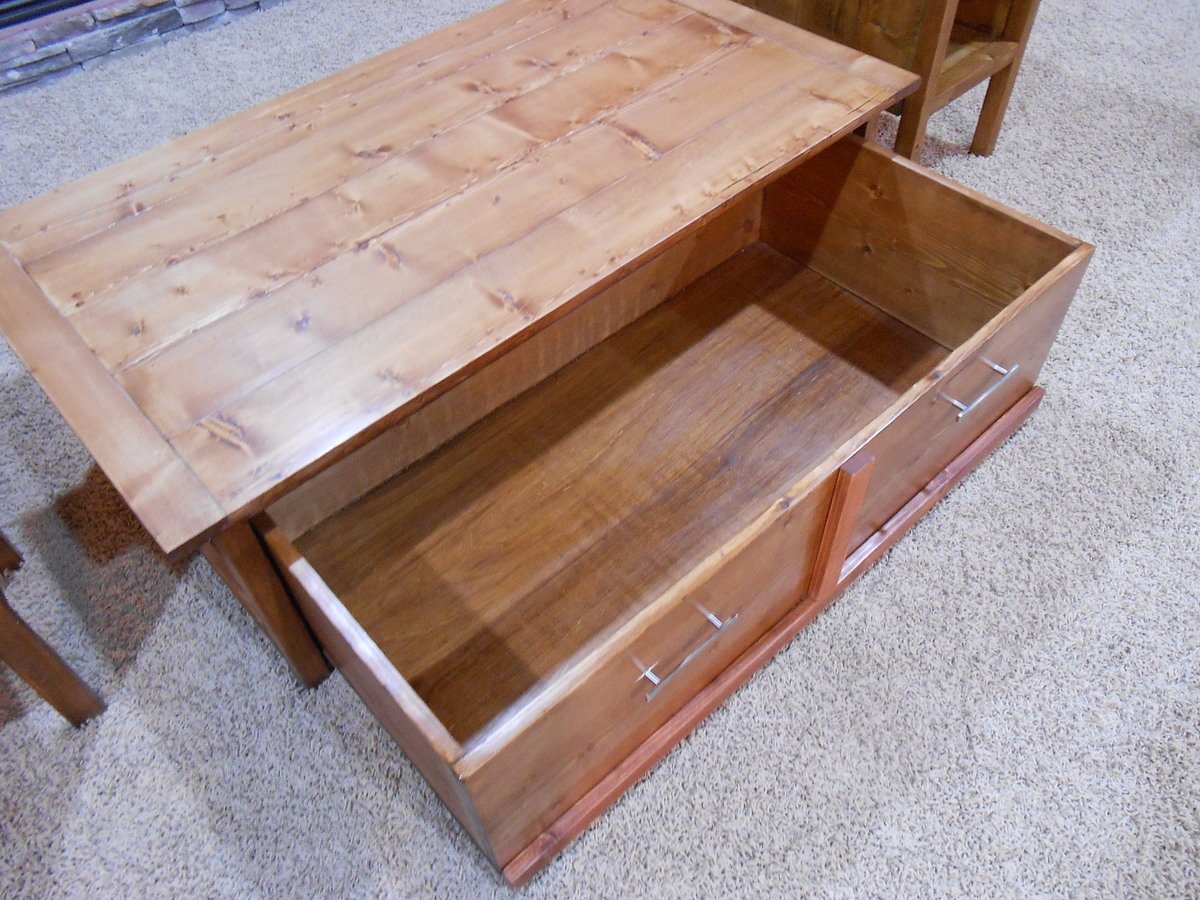
Built from Plan(s)
Estimated Cost
$90 on the wood for all three pieces; caster wheels, handles, and stain where extra
Estimated Time Investment
Weekend Project (10-20 Hours)
Finish Used
I used Minwax Pre-Stain Wood Conditinoer, Minwax English Chestnut Stain (one coat, about 5 minutes) and Minwax Fast-Drying Polyurethane semi-gloss (4 coats on top, 3 coats everywhere else).
Recommended Skill Level
Beginner
Comments
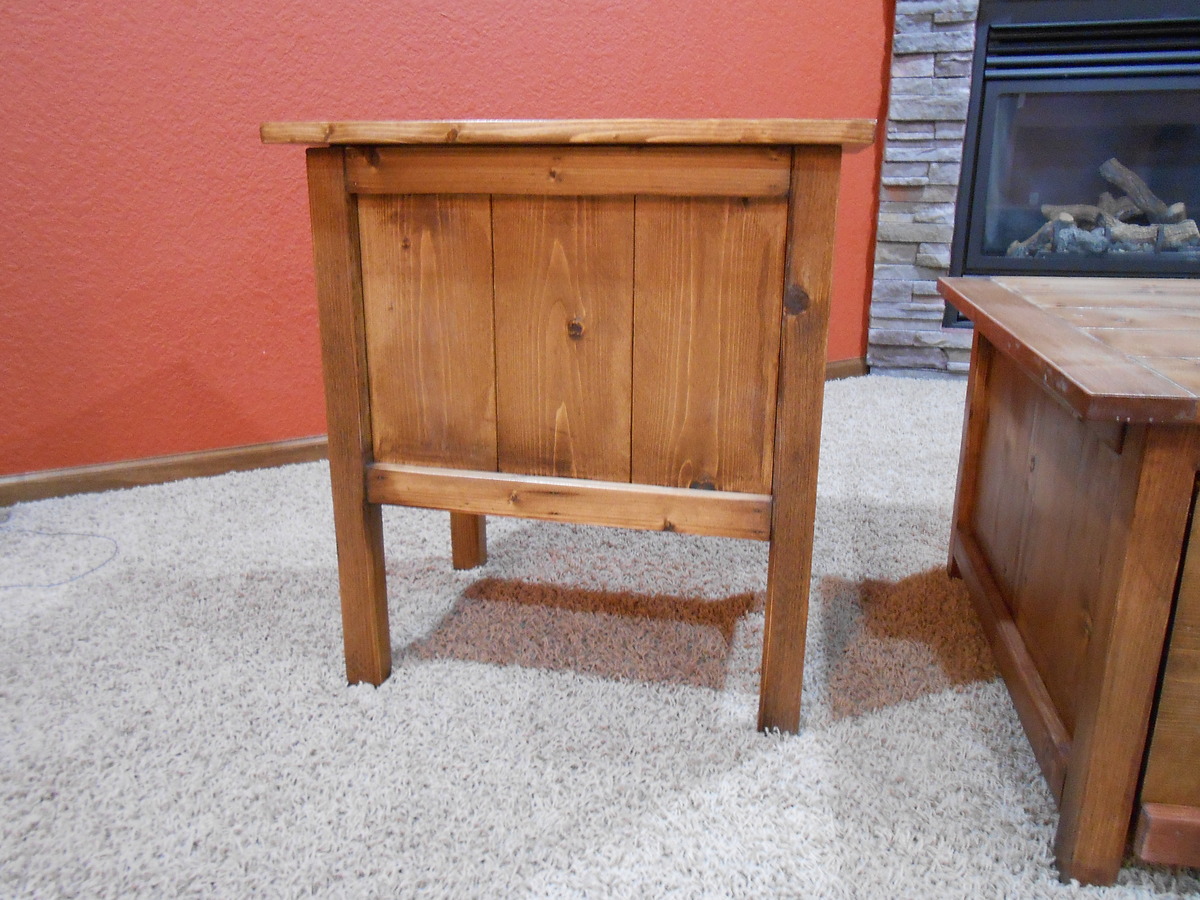
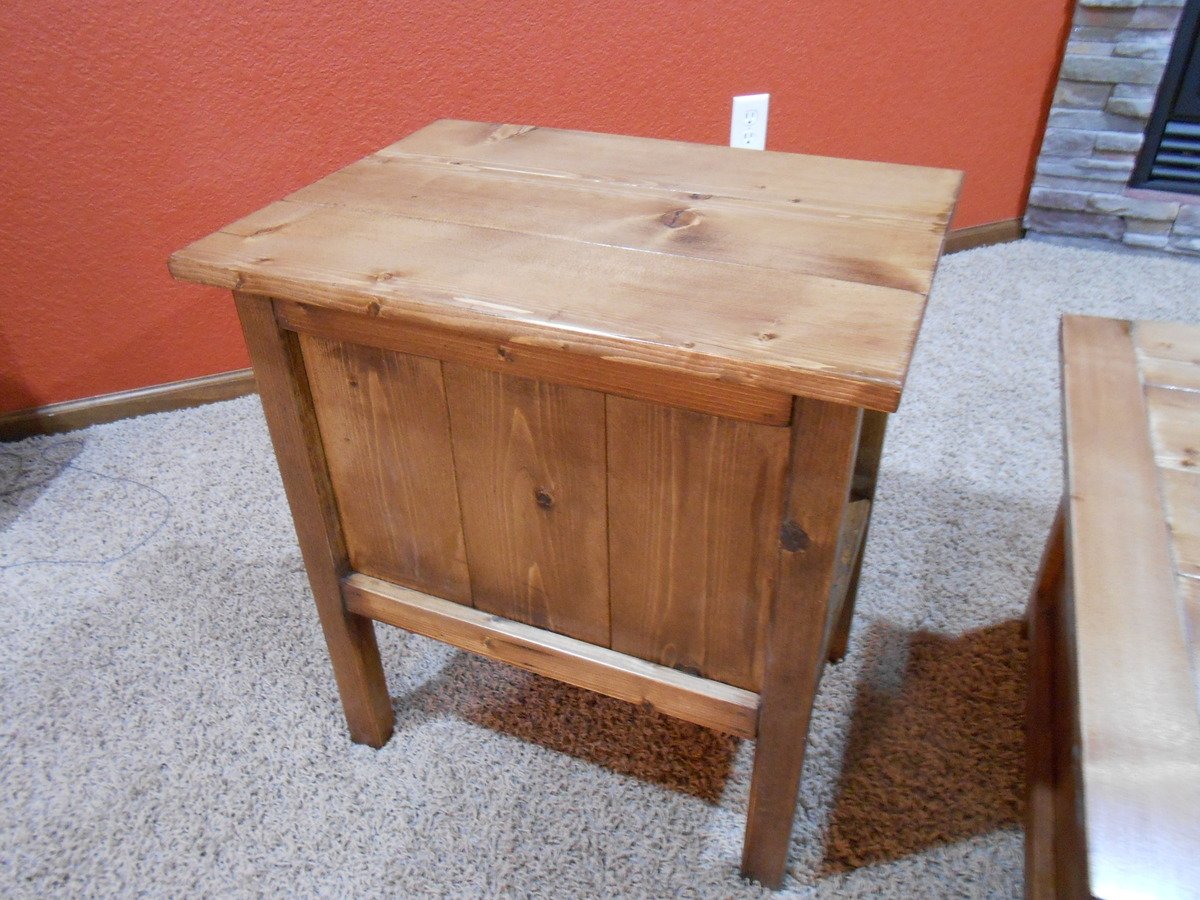
Weathered end table
Used the great plans from this website. Very easy to follow. Painted white, sanded, stained to give the weathered look. Very happy with it! Made two of them.
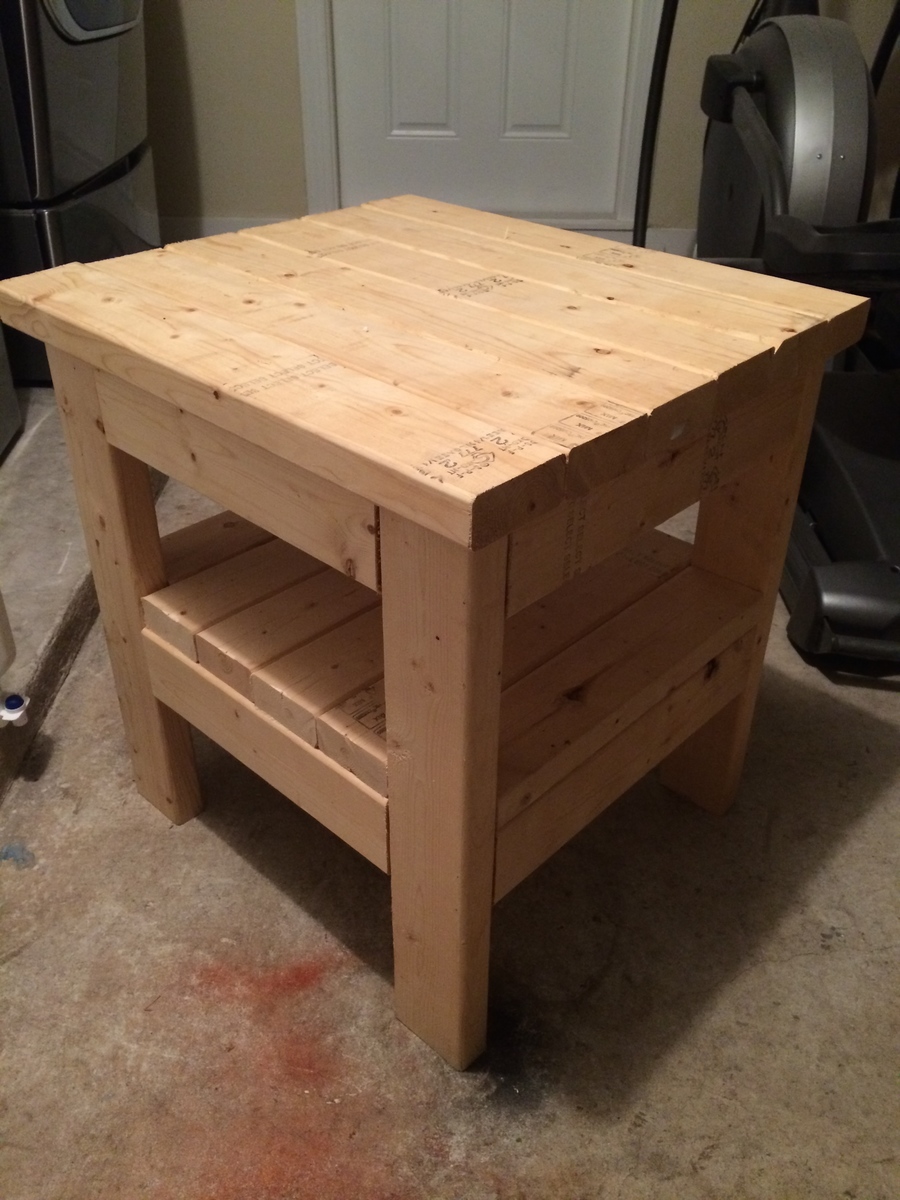
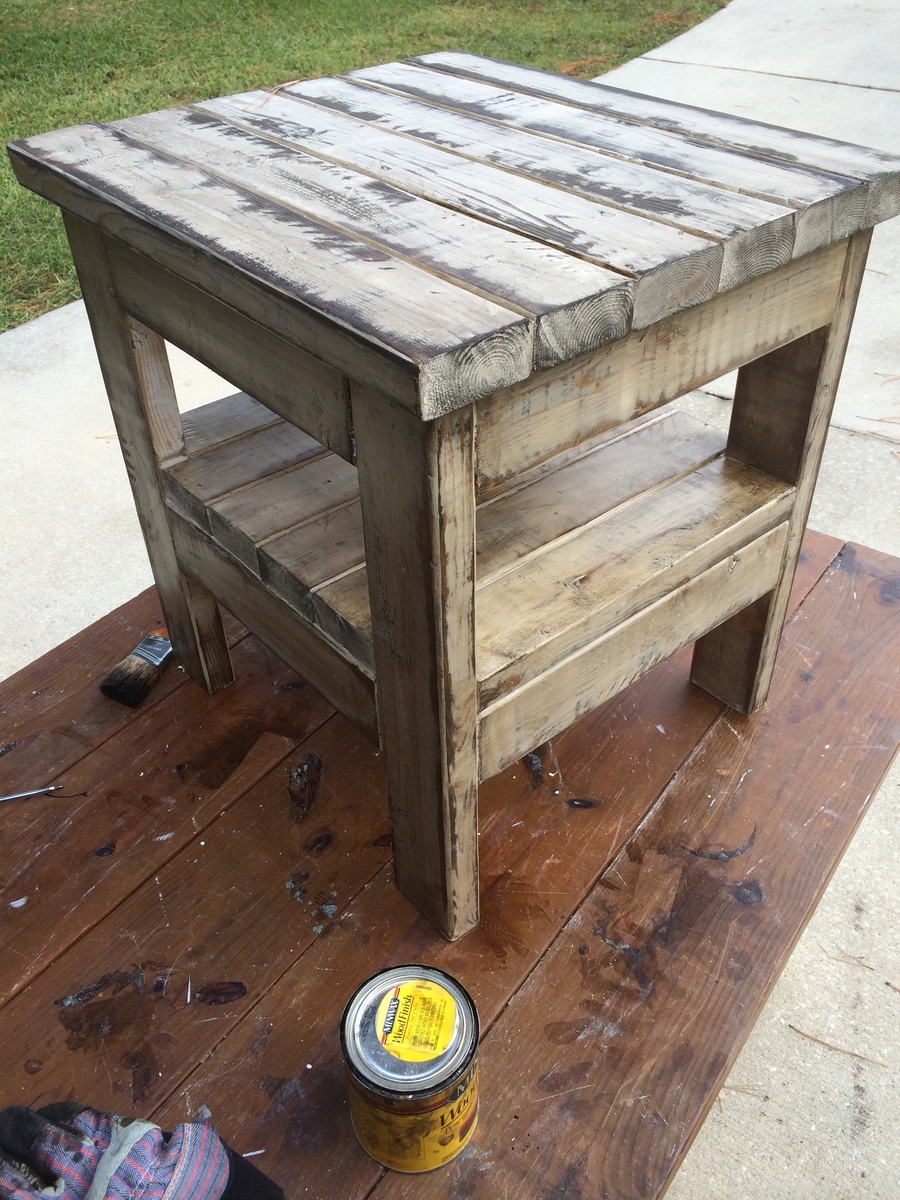
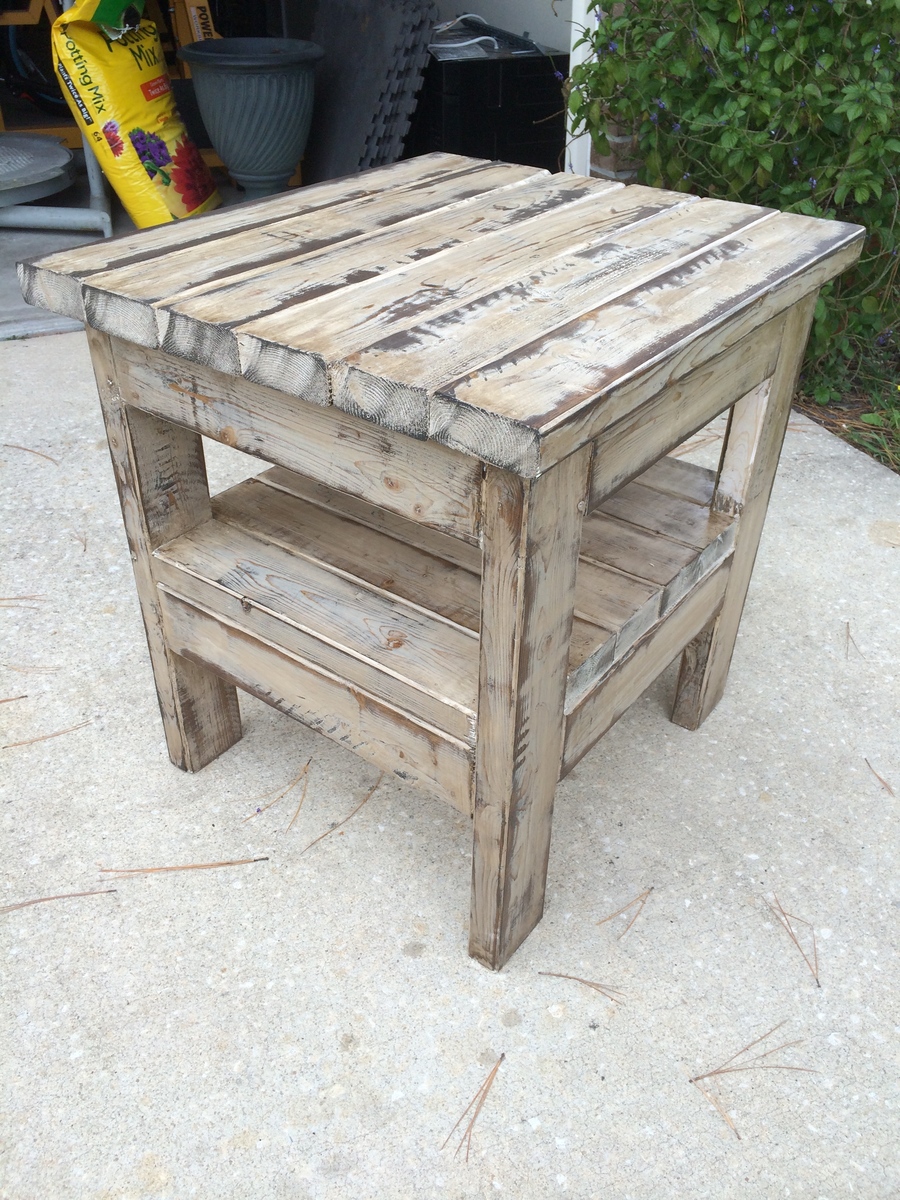
Built from Plan(s)
Recommended Skill Level
Beginner
Comments
Fri, 11/28/2014 - 09:46
Awesome stain job
Hey there friend,
I must ask for detailed instructions on how you painted/stained your table. It is gorgeous!
Thanks.
Ed

First thing I ever built
I took the plunge last year and started woodworking. This was my first build. I definately have learned alot since then. But I am pretty proud of this table.
Built from Plan(s)
Estimated Cost
50$
Estimated Time Investment
Day Project (6-9 Hours)
Finish Used
This was stained with jacobean varathane stain and sealed with clear varathane.
Console Made From Ana's Book!!
I am SO excited to show off my first build, thanks to Ana White and her amazing book!! This console was on the cover and I fell in LOVE LOVE! After I finished it I tried to find out the paint color with no luck....can't stop a woman on a mission...I googled looking for an iPhone App to match colors. BINGO! Benjamin Moore has one. I took a pic of the table in the book, and...you tell me...it sure looks like a match!
Thank you Ana so much for your generous help showing girls like me...YES WE CAN!
Estimated Time Investment
Weekend Project (10-20 Hours)
Finish Used
Top: Minwax English Chestnut
Paint: Benjamin Moore #608 Erin Green
Paint: Benjamin Moore #608 Erin Green
Recommended Skill Level
Beginner
Comments

Thu, 01/31/2013 - 15:34
Beautiful project!
Beautiful build, you did a wonderful job, congrats on your first project! Looks just like the book cover! Happy building! :)
Joanne
Thu, 01/31/2013 - 19:42
Yes, beautiful
Beautiful first build and yes, it does look like the one in the book!