Community Brag Posts
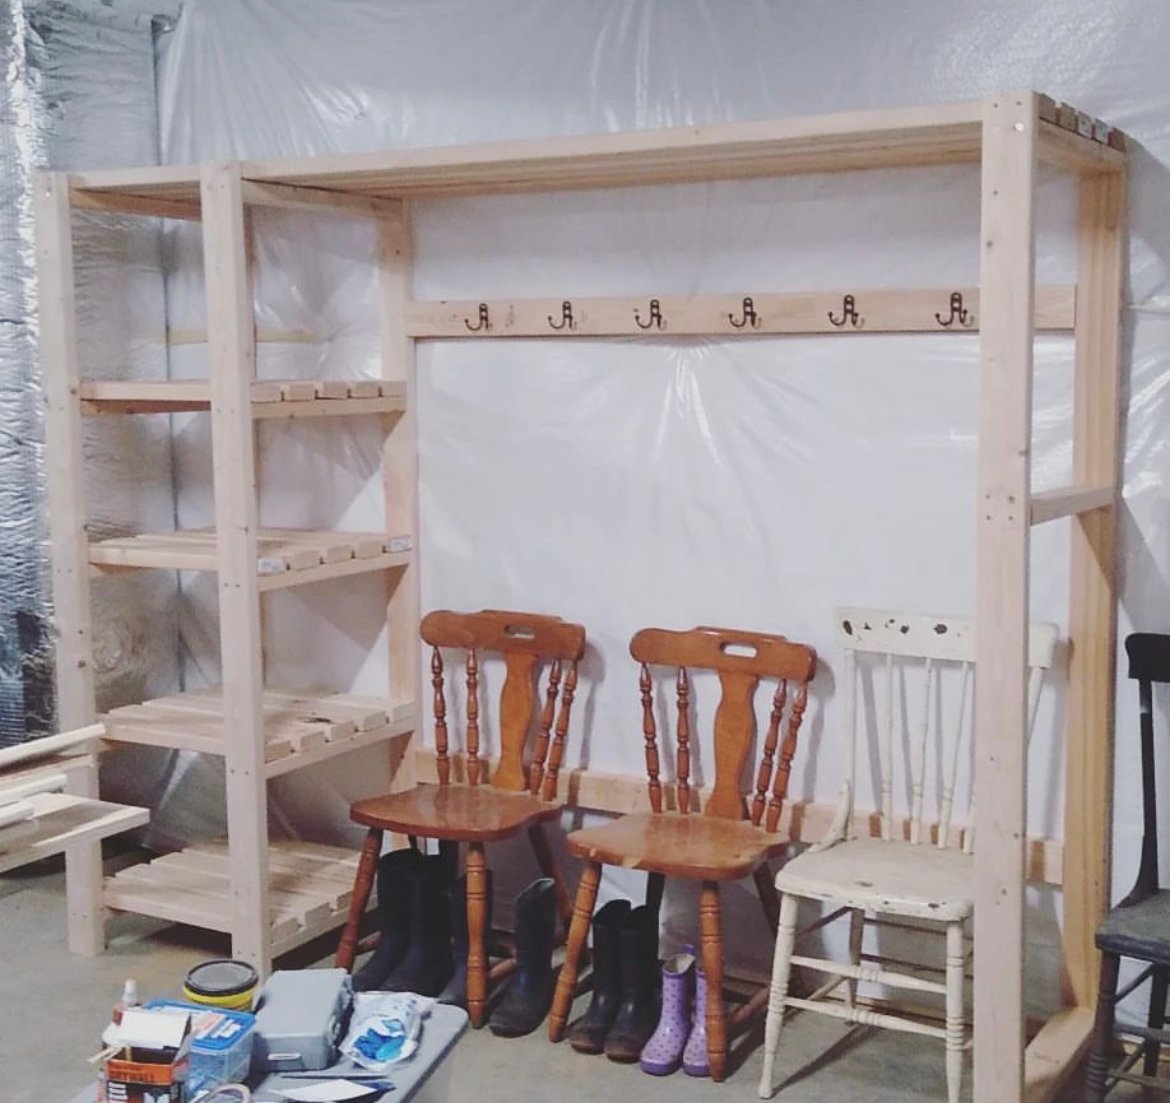
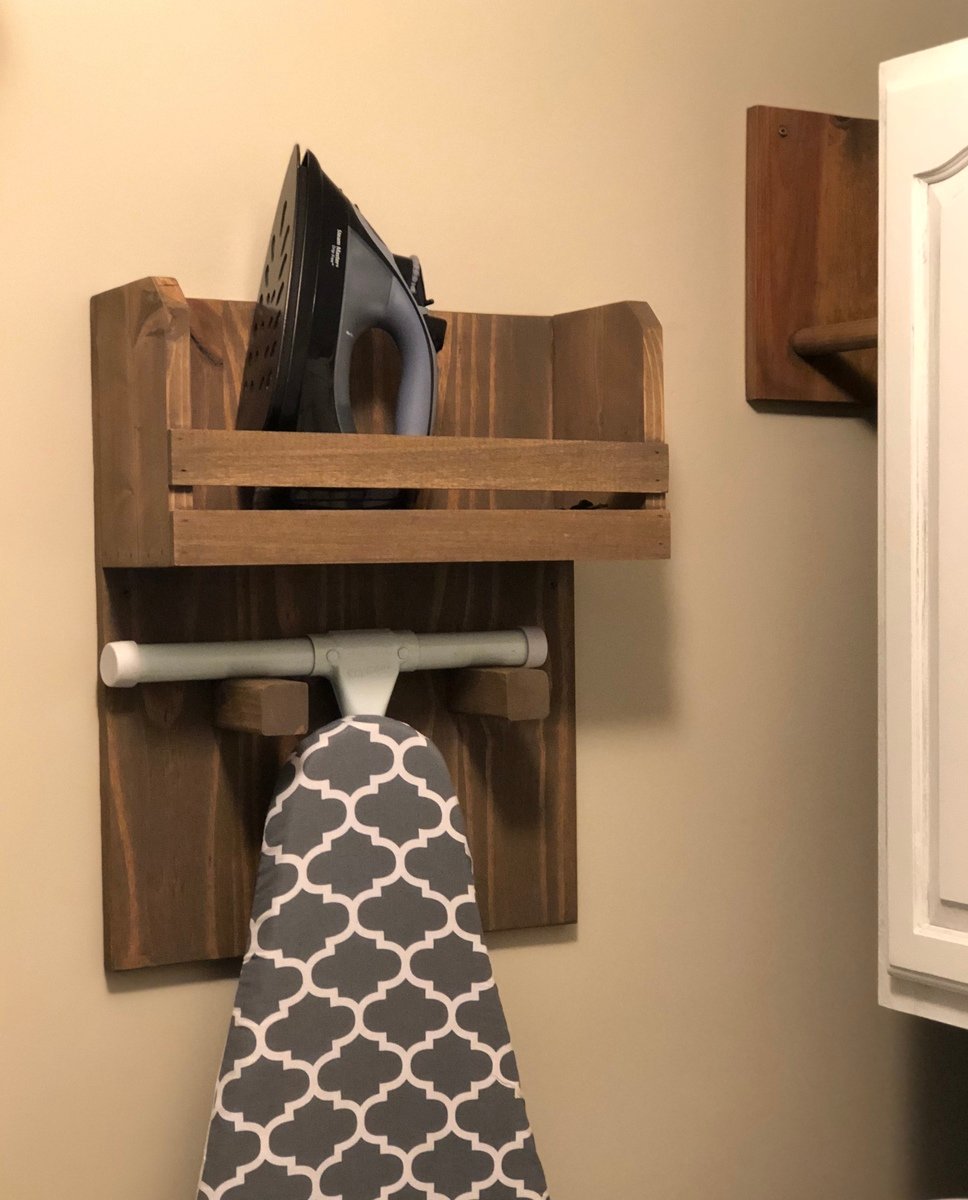
2x4 Entryway System
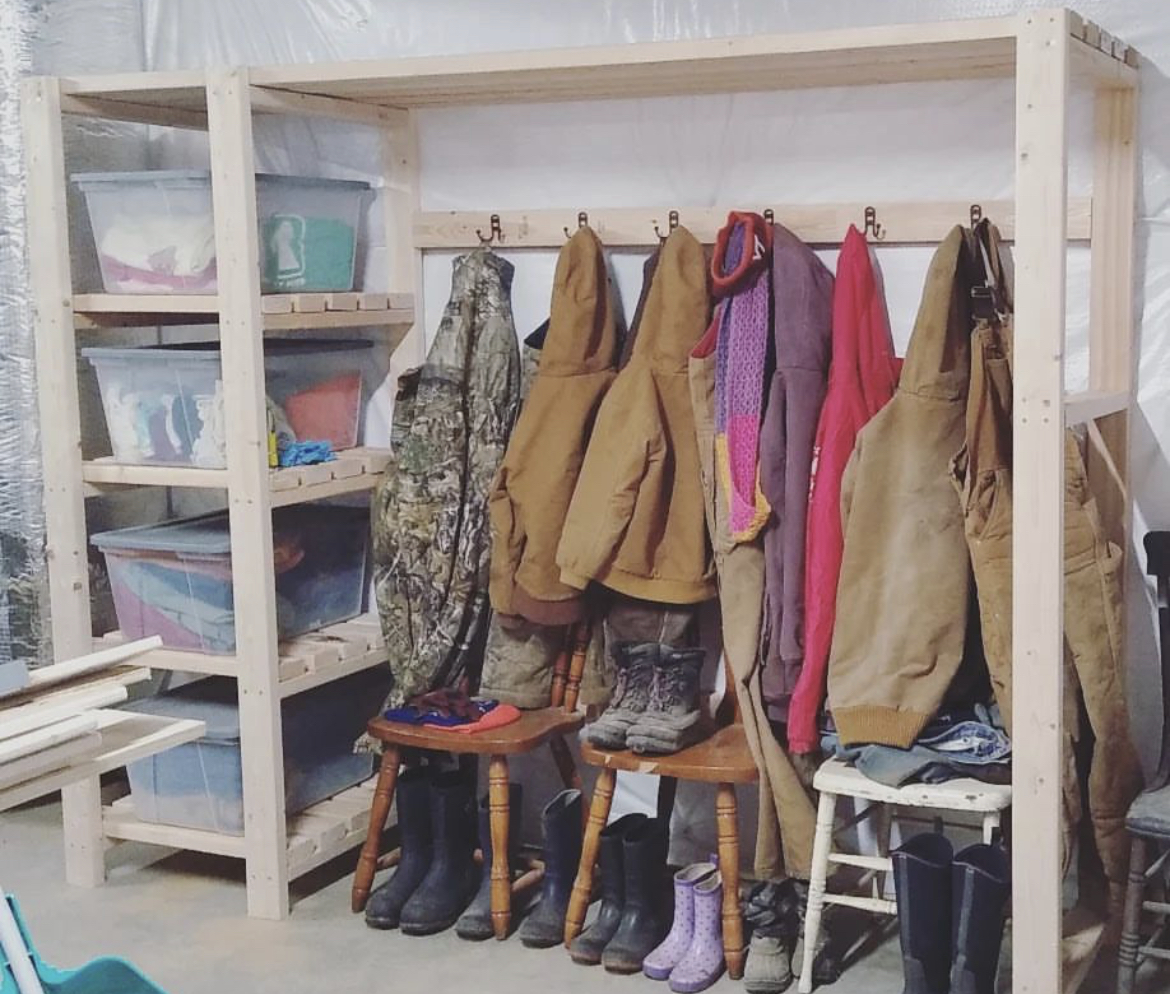
Freestanding closet shelving modified to make a mudroom!! More details in link below.
Built from Plan(s)
Comments
bookshelves
cube bookshelves modified to have one open shelf and 3 cube slots


Built from Plan(s)
Estimated Cost
$50 per shelf
Estimated Time Investment
Day Project (6-9 Hours)
Finish Used
1. one coat primer
2. two coats semi-gloss white
2. two coats semi-gloss white
Recommended Skill Level
Beginner
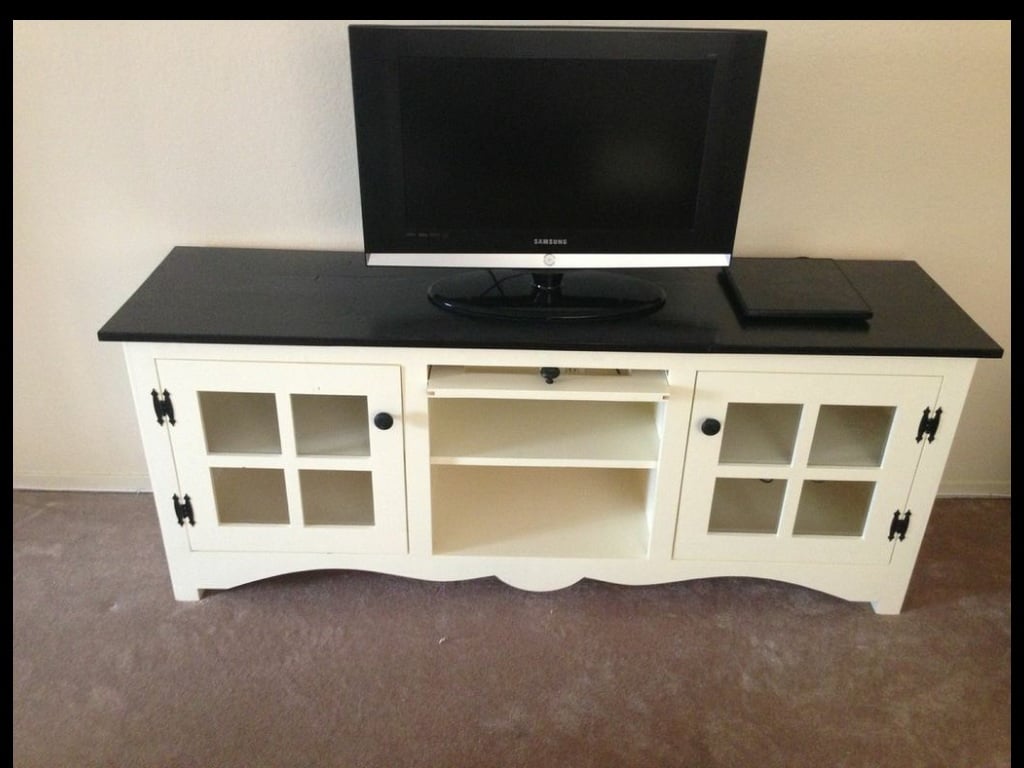
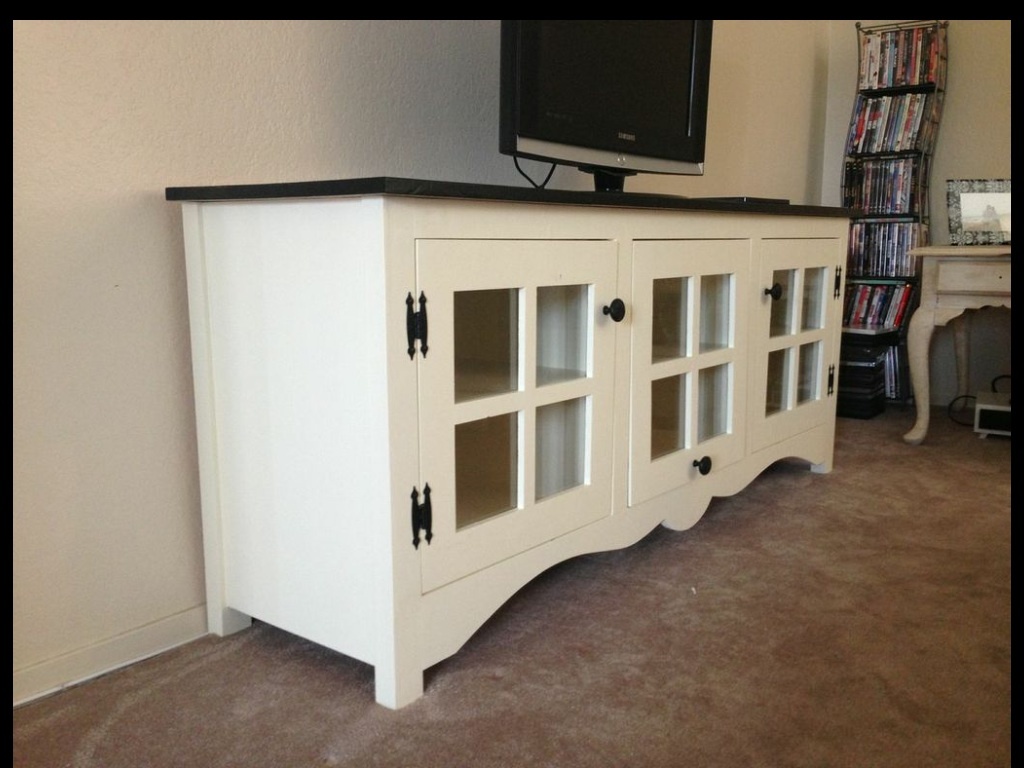
Farmhouse media console

Farmhouse media console. Made out of pine, maple plywood and the top is made from reclaimed lumber. The center door is a roll-up barrister door.

Estimated Time Investment
Week Long Project (20 Hours or More)
Recommended Skill Level
Advanced
Comments

Sun, 07/14/2013 - 13:36
Beautifully built
Beautifully built. :) Did you use pocket hole screws, or another method for making your joints?
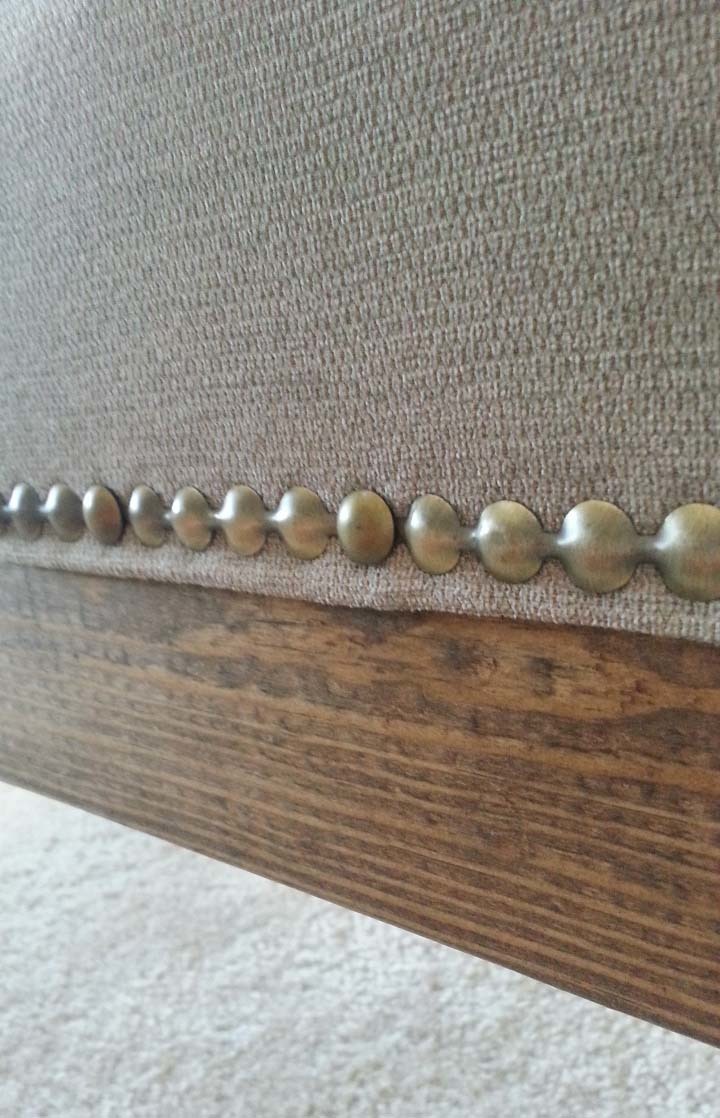
Easiest Upholstered Bench
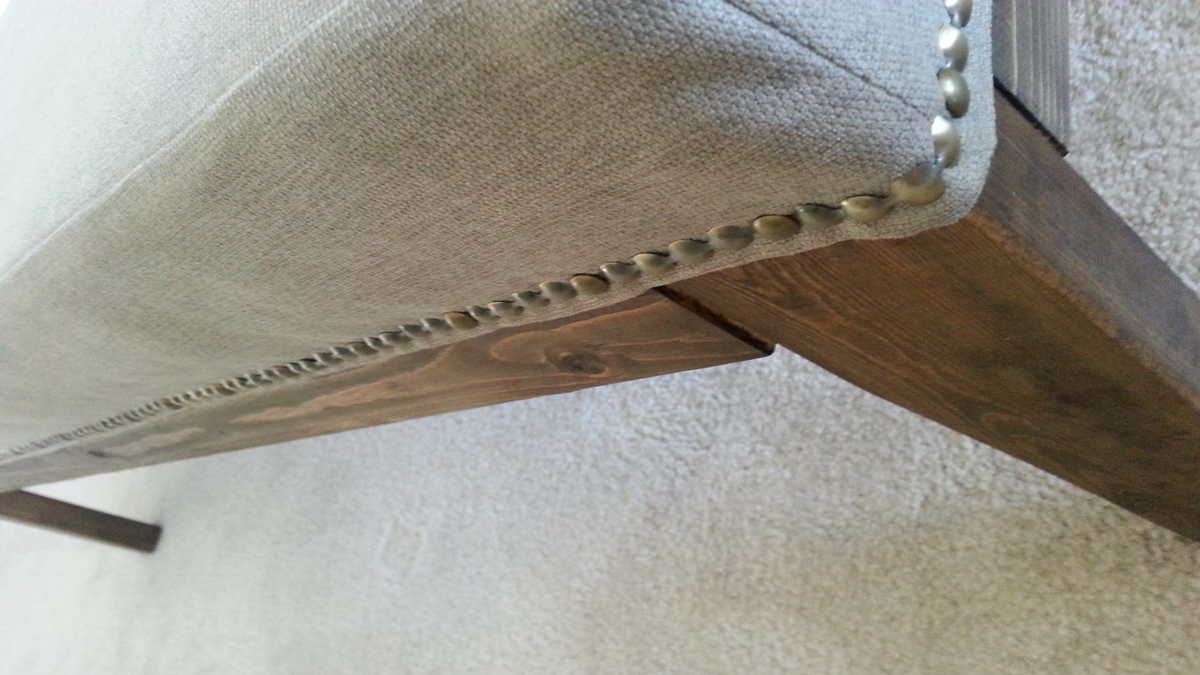
i'm so grateful for all of ana's projects and plans!! we recently bought a new house and have decided to make much of the furniture so that every piece will be customized to fit the space... i'd rather spend hours in the garage making the perfect piece than spending days/weeks (and money!) to find something that "could work"...
i just finished my latest project from an ana white plan, easiest upholstered bench... and it WAS easy! the hardest part, for me at least, was the sewing.... but even that was straight lines, so not too difficult... and i'm so happy with the way it turned out...
a couple things i did differently from ana's plan were attaching the cover to the bench with nail heads... i like the idea of the slip cover for cleaning purposes... but it was getting "messy" every time we sat down and stood up... it just wasn't laying nicely... so i hemmed the bottom and attached the nail heads... i absolutely love how it turned out... this was my first time using those - and it was super easy... they came on a roll and every fifth "head" has a center hole for you to tap in a real nail head... the other four are just faux nail heads... the only issue i had with the nail heads was that the color was slightly off between the real ones and the fake ones... i read reviews about them and people mentioned a lot of the nails bending, but i didn't have that problem... so, overall, i was pleased with using the nail heads to attach the fabric to the bench...
the other change i made was to the foam... the foam at the fabric store was crazy expensive... and i had heard that getting the foam from home depot was much cheaper... but i couldn't find it at my home depot, so we bought a foam mattress cover for a twin bed... it was $24.99 - which is about 1/3 of the cost of 3" foam from the fabric store! the mattress foam was only 1.5" thick, but it was wide enough that we just cut two pieces and stacked them on top of each other...
other than that, we kept the dimensions of the bench the same as the original plans... it was already the perfect size for what we wanted... and we love it!

Built from Plan(s)
Estimated Cost
$70
Estimated Time Investment
Day Project (6-9 Hours)
Finish Used
dark walnut stain
antique gold nail heads
antique gold nail heads
Recommended Skill Level
Beginner
Farmhouse Kitchen Island

We modified the plan and made many changes along the way and here’s our finished island. We’re thrilled!


Built from Plan(s)
Estimated Cost
$800??!
Estimated Time Investment
Week Long Project (20 Hours or More)
Finish Used
Paint then coffee then stain with mineral spirits finished with polyurethane
Recommended Skill Level
Intermediate
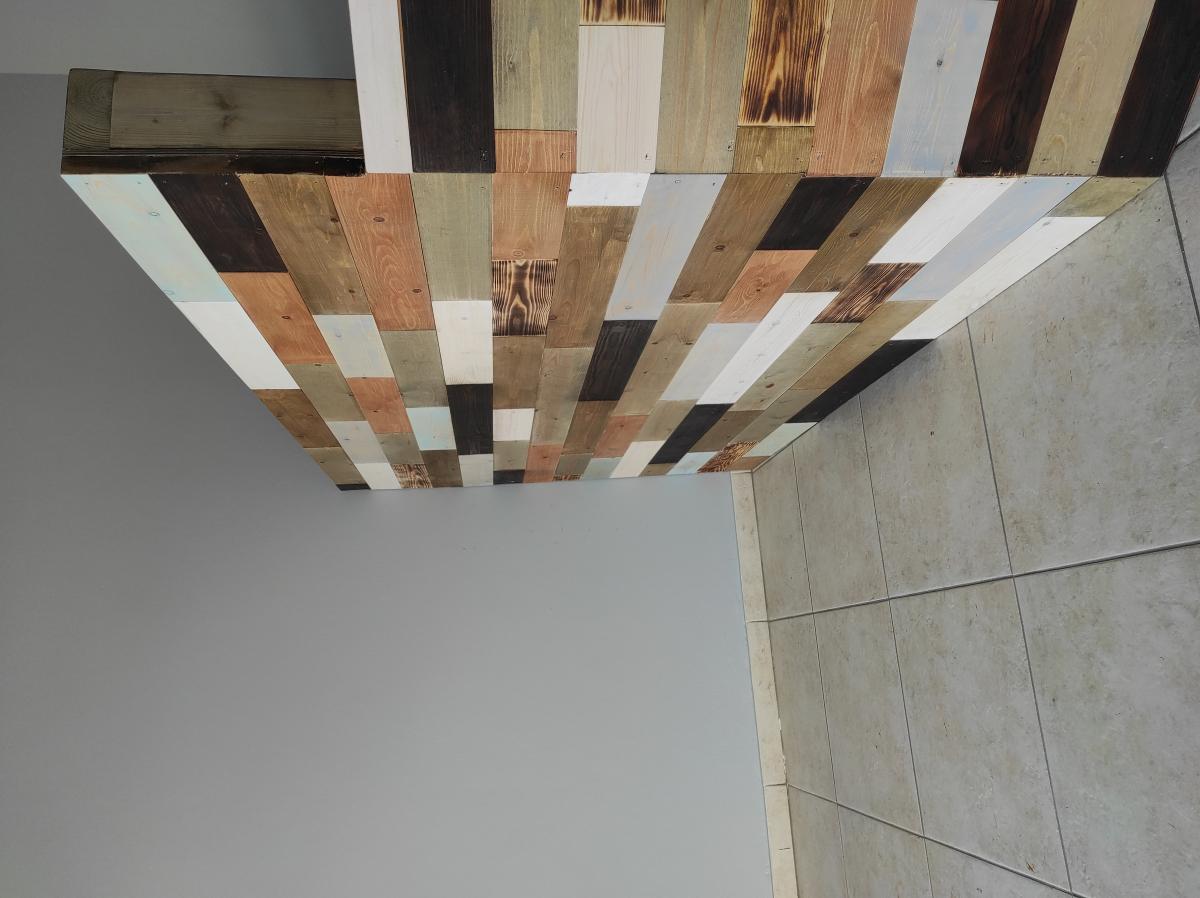
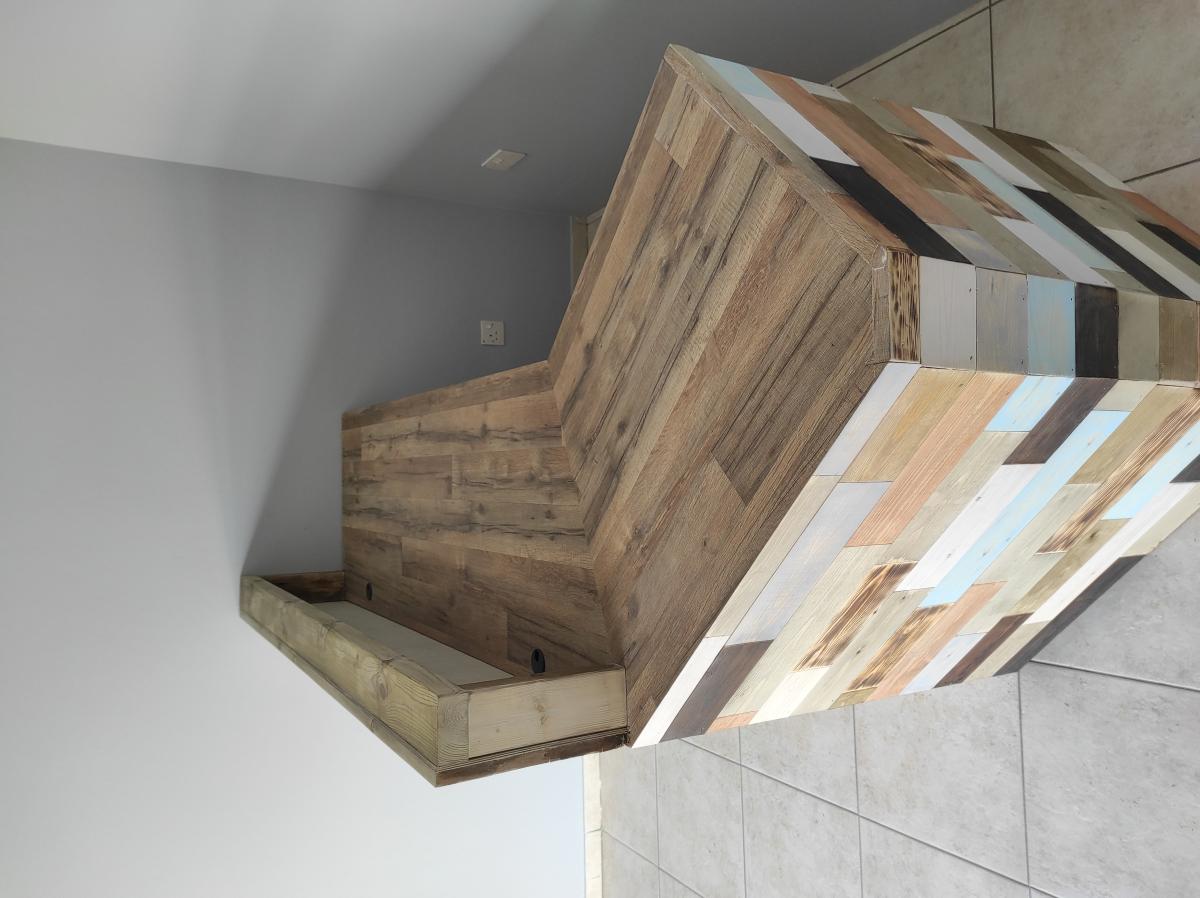
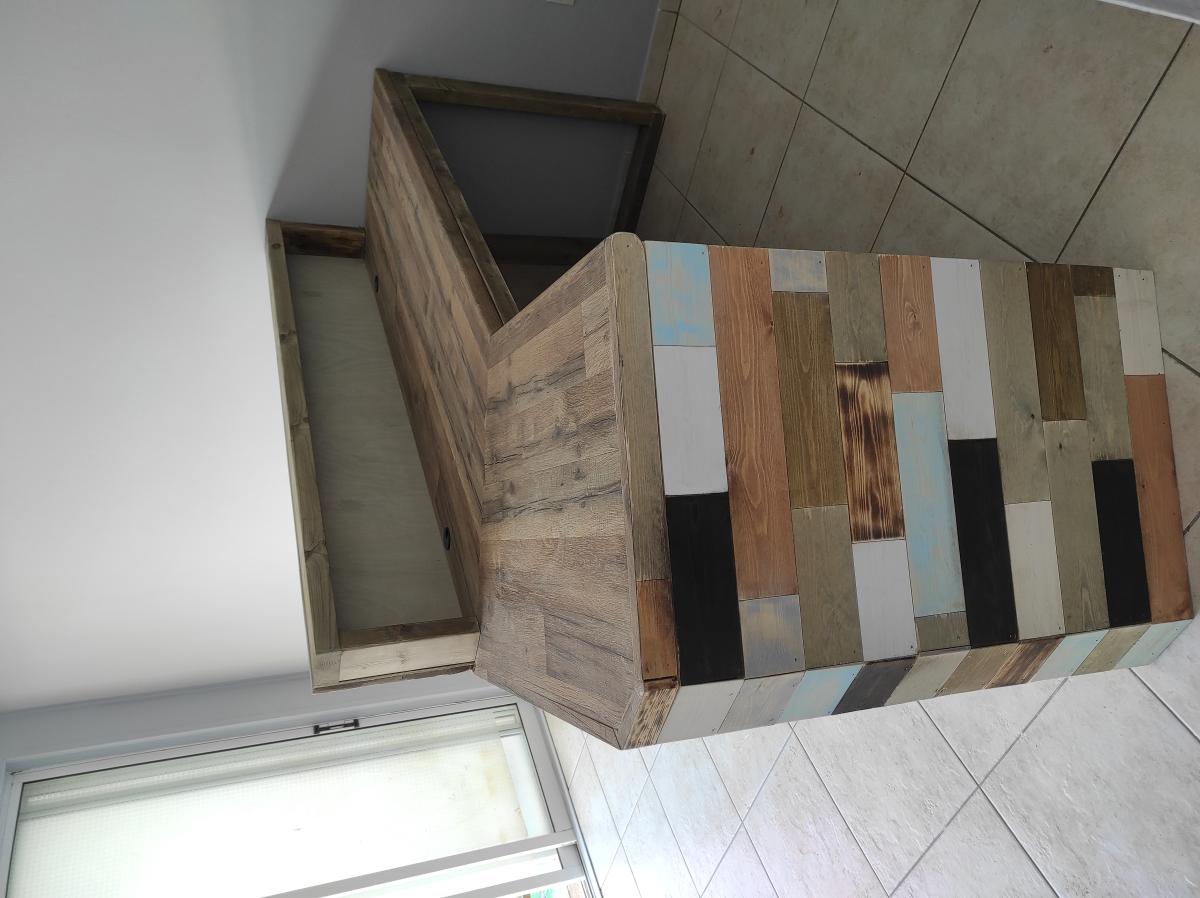
Rustic reception desk

A friend is opening a new tattoo parlor up and wanted a rustic looking reception desk making up.
Using reclaimed wood wasn't an option so we opted for 25mm t&g boards and randomly cut 1/4 way through it to give the appearance of individual boards. The main carcas is made with 2x4's clad with Baltic birch ply to give it a cleaner appearance from behind and, to give additional surface area to attach the boards to.
To finish inised a combination of forced aging with a solution of WWV, iron sulphate and black tea + coffee, varying degrees of Charing, the walnut and oak stains were by V33 and the whites and greys by French chic.
Comments
Tue, 02/08/2022 - 15:12
Love the contrasting colors!
Awesome build, I am sure it will get many compliments! Thank you for sharing!
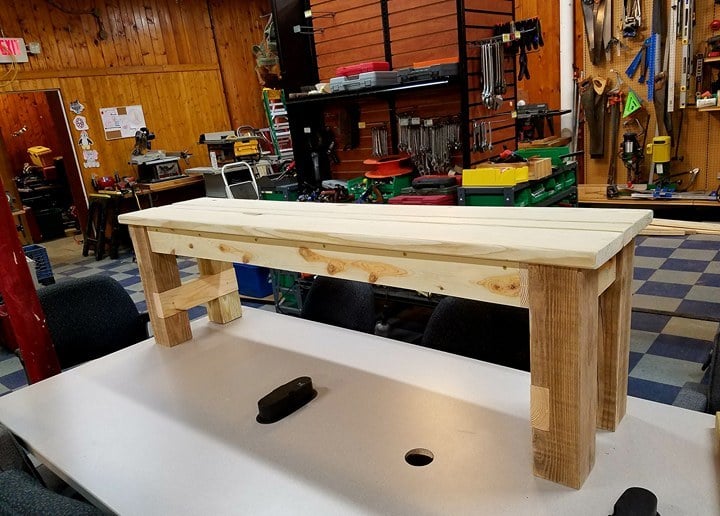
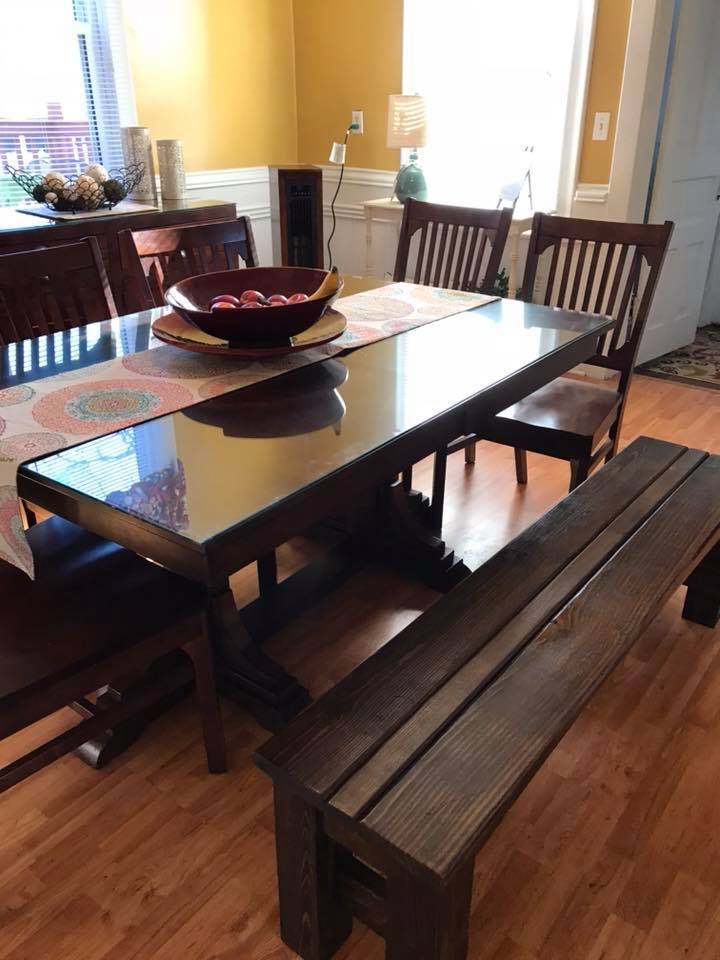
Rustic Pine Table
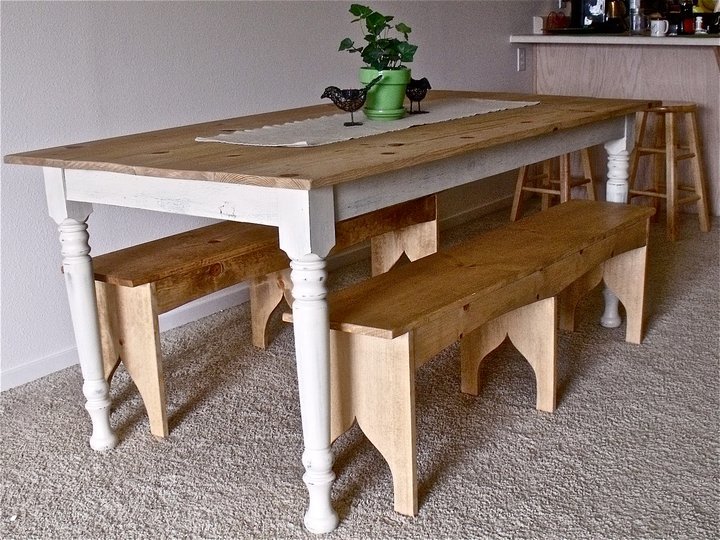
Very easy to make, and not too expensive. I'm not that great with a lathe. I tried it a couple times but not too good. So I buy my table legs online through osborne wood company. These legs however, came from an old table that I got for free from an antique store. The rest of the table got cut up and used for 2 night stands, and this is what I used the legs for. I used pocket holes to attach everything. Support the middle with cross supports and there you have it. The benches are just 1x12x8's cut into shape and supported by 2 1x4's on either side.

Estimated Cost
$200
Estimated Time Investment
Weekend Project (10-20 Hours)
Recommended Skill Level
Intermediate
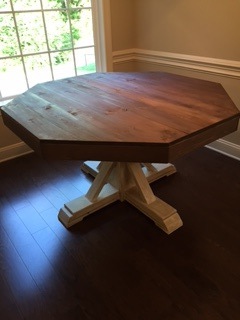
Octagon Table

I beefed up the table top supports by double stacking 2x6's and used 2x4 around the edges. My wife painted the base with valspar chaulk paint and antique gel. The table top she stained with miniwax waterbased stain, coffee color.


Built from Plan(s)
Estimated Cost
$130, the paint was expensive but we hardly used any so we have some for more projects.
Estimated Time Investment
Weekend Project (10-20 Hours)
Finish Used
Miniwax water base, coffee and valspar chalk paint
Recommended Skill Level
Beginner
Tall Panel King
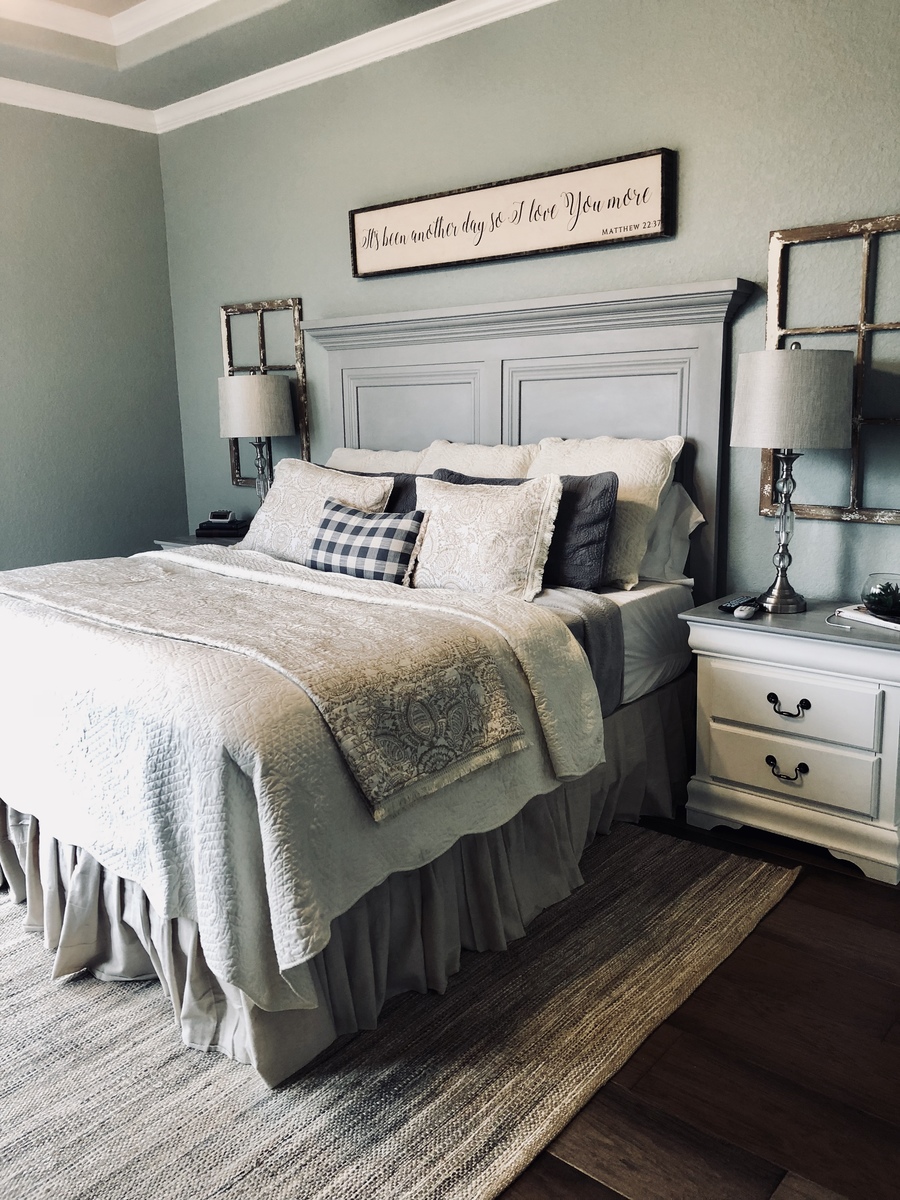
Thanks for another great plan! We wanted to replace our King sleigh bed with a Panel Headbord to free up some room in our master. Off to Pinterest I went to find a picture of what I wanted Hubby to build. I was excited to find that Ana-White had tackled this project because I knew there would be a great, well written plan to follow!
Built from Plan(s)
Estimated Cost
$100
Estimated Time Investment
Day Project (6-9 Hours)
Finish Used
Valspar Chalk paint and Clear wax
Recommended Skill Level
Intermediate
Wall entertainment center

Using your simplified 8’ barn door console plans I was able to make my dream wall come true. I made 2 of the consoles, added a center piece and shelves in either side. Your plans were so easy to follow, even a beginner like myself pulled it off. Thank you for sharing your talent!!!!
Built from Plan(s)
Comments
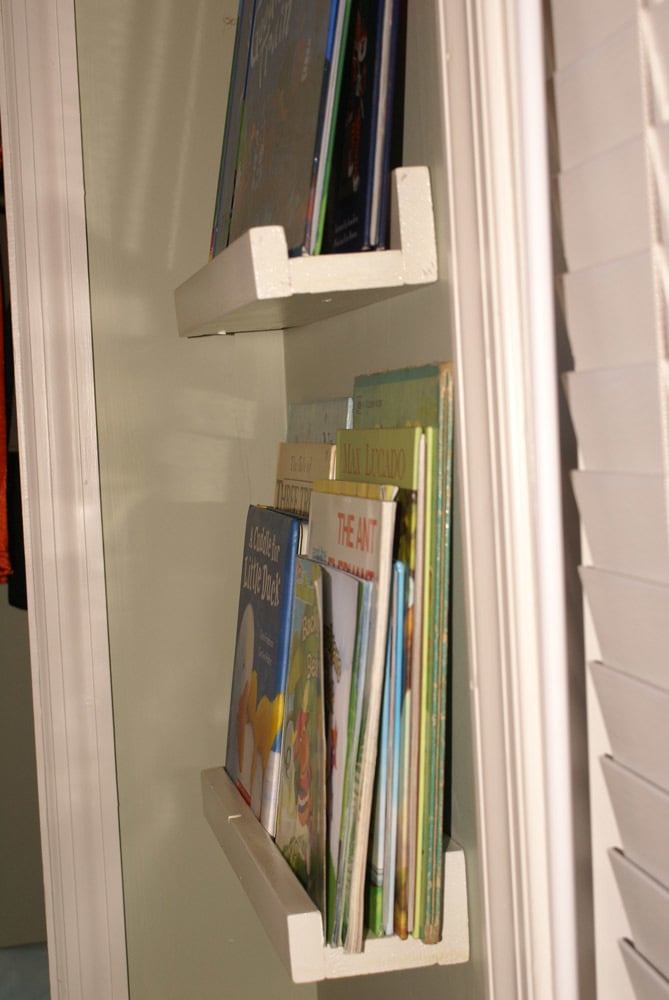
Modified Ten Dollar Ledges/Story-time Corner

I loved these little ledges, especially since I had the perfect scraps for them. I needed a little extra storage in our story-time corner, and these were perfect. Took me one nap time to get them cut, assembled and painted! SWEET!!!!
Built from Plan(s)
Estimated Cost
Free (all from scraps, wood & paint)
Estimated Time Investment
An Hour or Two (0-2 Hours)
Finish Used
white interior spray paint (2 coats), poly spray finish (2 coats)
Recommended Skill Level
Starter Project
20 Second Office

I am in the process of remodeling/redecorating my tiny house. I started with the kitchen and am now moving into the living room. The two rooms are connected so I needed something that would match the "beachy feel without being obvious" style I am trying to accomplish. I also needed a place for my files, printer, etc since I don't have an office. My house is very small so I have to consider function in every piece of furniture I own. This table was the PERFECT solution! It hides my seldom used but definitely necessary office supplies while looking super cute and brightening up the room.
As you can see I made a few slight changes to the look of the trundle. I made it look like three "drawers" instead of the two in the plans, and used manila rope instead of handles or cutting out the shape in Ana's design. I also lined the inside of the trundle with felt to protect my computer, etc. from the hard surface of the wood. I couldn't help pick my favorite color, since you can't see it while the trundle is closed. Though not pictured here, I added a bracket for files as well (they didn't photograph well). I picked it up from a woodworking specialty store for $15.
All in all it was an easy second project for me, I had it built and nearly finished in a weekend.


Built from Plan(s)
Estimated Cost
$100
Estimated Time Investment
Weekend Project (10-20 Hours)
Finish Used
I used 3 coats of Minwax's Polyshades Classic Oak, sanding with 220 grit VERY lightly in between. This was my first time using a combo product and didn't find it to be as great as I thought it would be. It was easy to apply but was very runny so I had to triple check every nook and cranny for drips and pile ups after and even then still missed a few. I could have achieved a similar look in half the time using traditional methods. I'll finish the can but probably won't buy it again.
Recommended Skill Level
Beginner
Comments
Thu, 07/18/2013 - 12:49
Just Found My Version of the Tidy Coffee Table
I really like your mods. I have been eying the 20 Sec Tidy Up Coffee Table for a while to store my kid bombs, but it just wasn't quite right. Now I know what I would like to do. Thanks for posting! You did a great job.

Wed, 08/13/2014 - 07:29
This is Perfect....
for our house at the beach. Thank you so much for sharing your design and your experience. We are just finishing up a 7 piece outdoor set for the deck. Your table is next, going right to the top of our "To Build List".
My first build - for my 7 year old

I needed to adjust the width of the dresser to fit - and it was may first build by myself... Already have a second one ready to paint!
Built from Plan(s)
Estimated Cost
$200
Estimated Time Investment
Afternoon Project (3-6 Hours)
Finish Used
White Latex paint, pink lace from Walmart, and Modge Podge
Recommended Skill Level
Intermediate
Dining Set

Wyldwood 42-square-inch pine table is finished with red mahogany stain and matte varnish, with black painted legs. It's paired with four of our custom dining chairs.
Comments
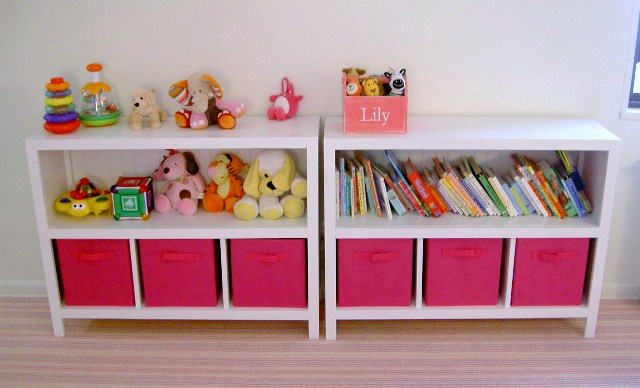
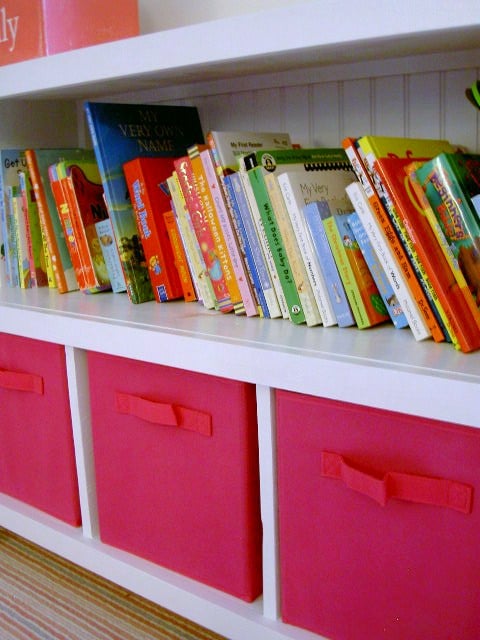
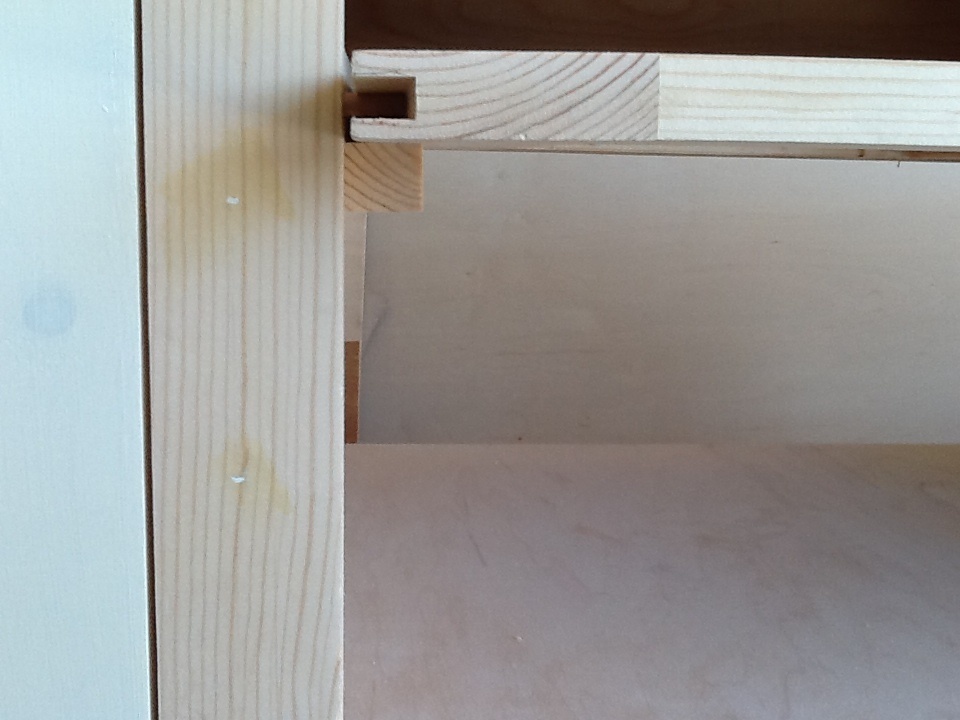
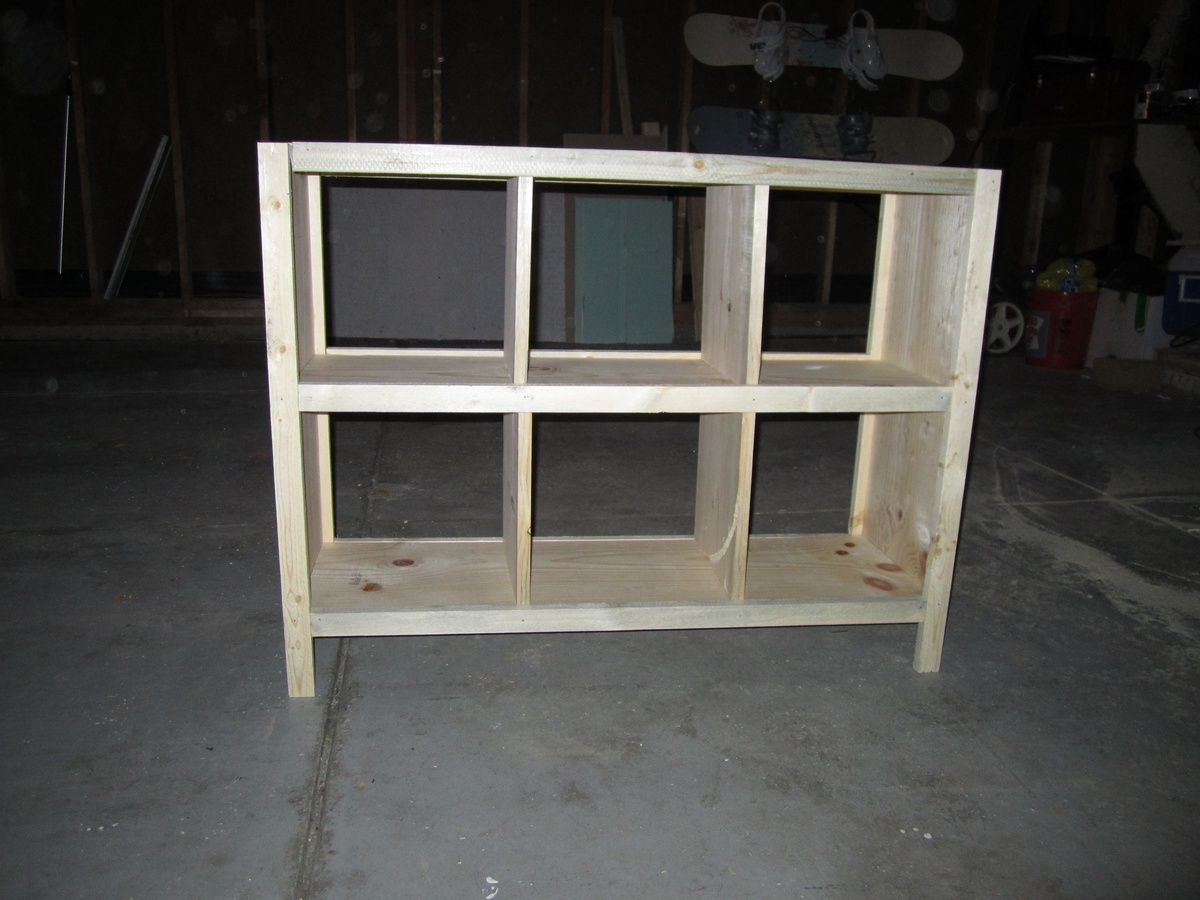
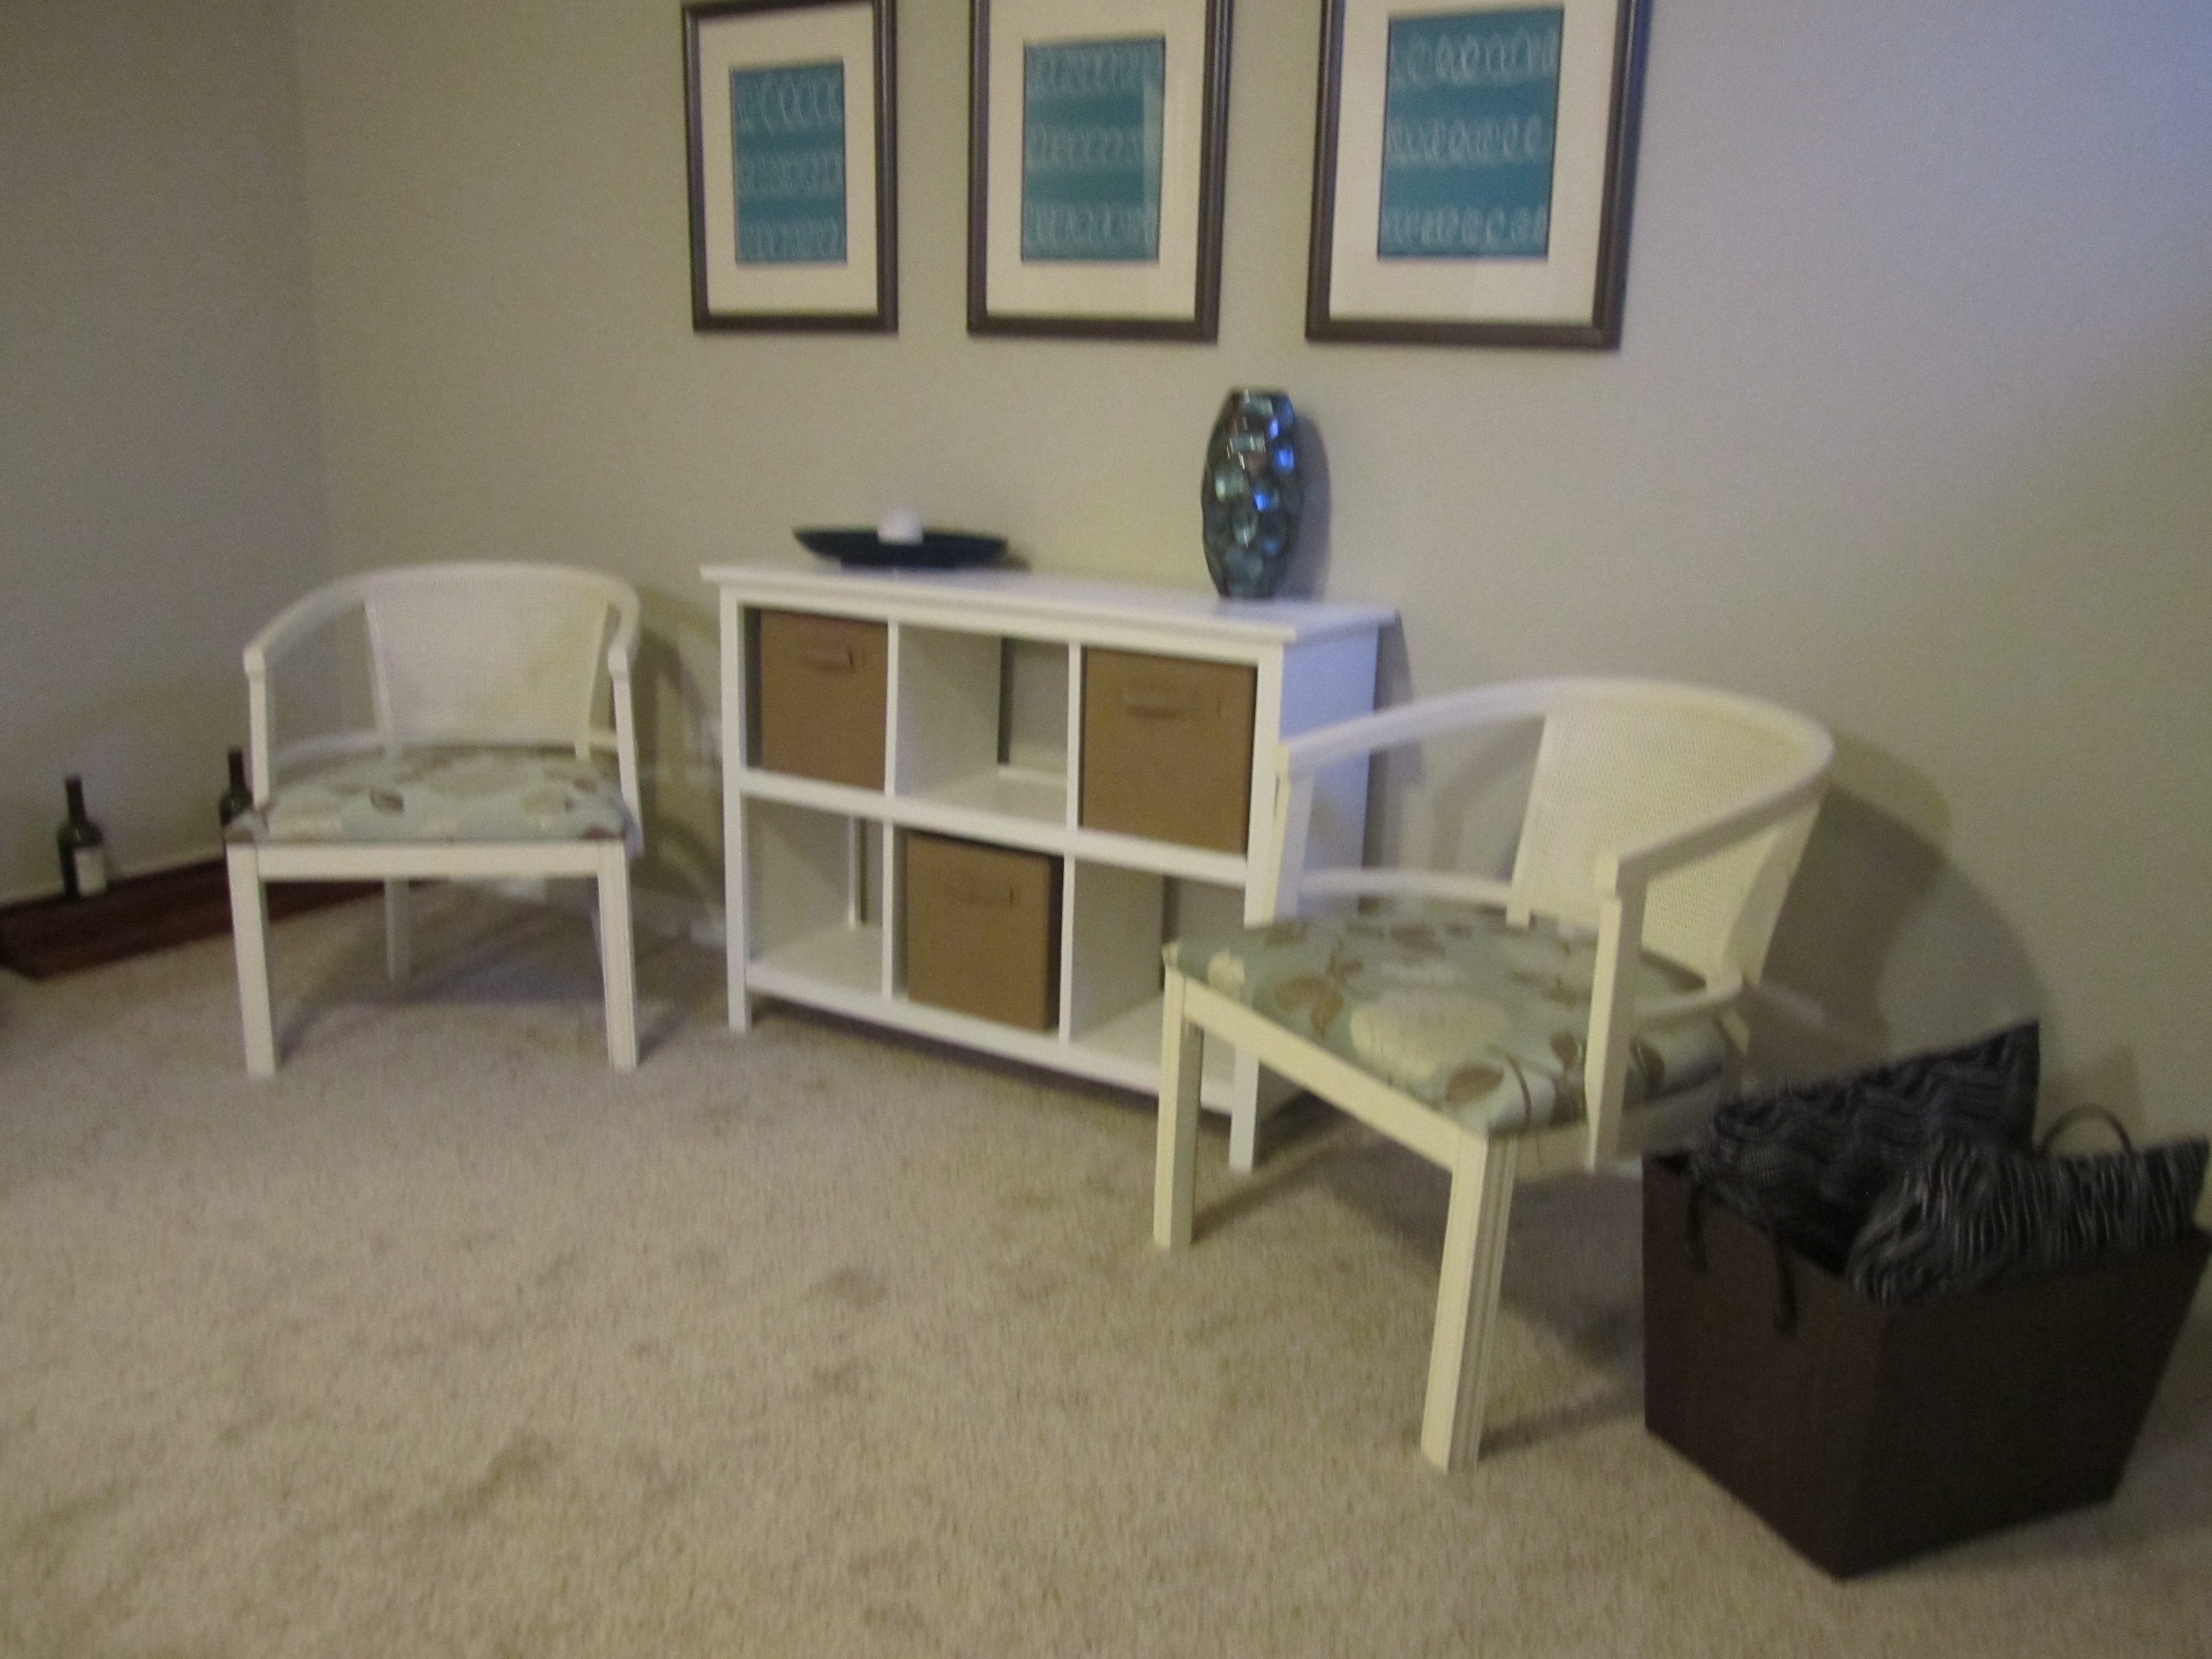
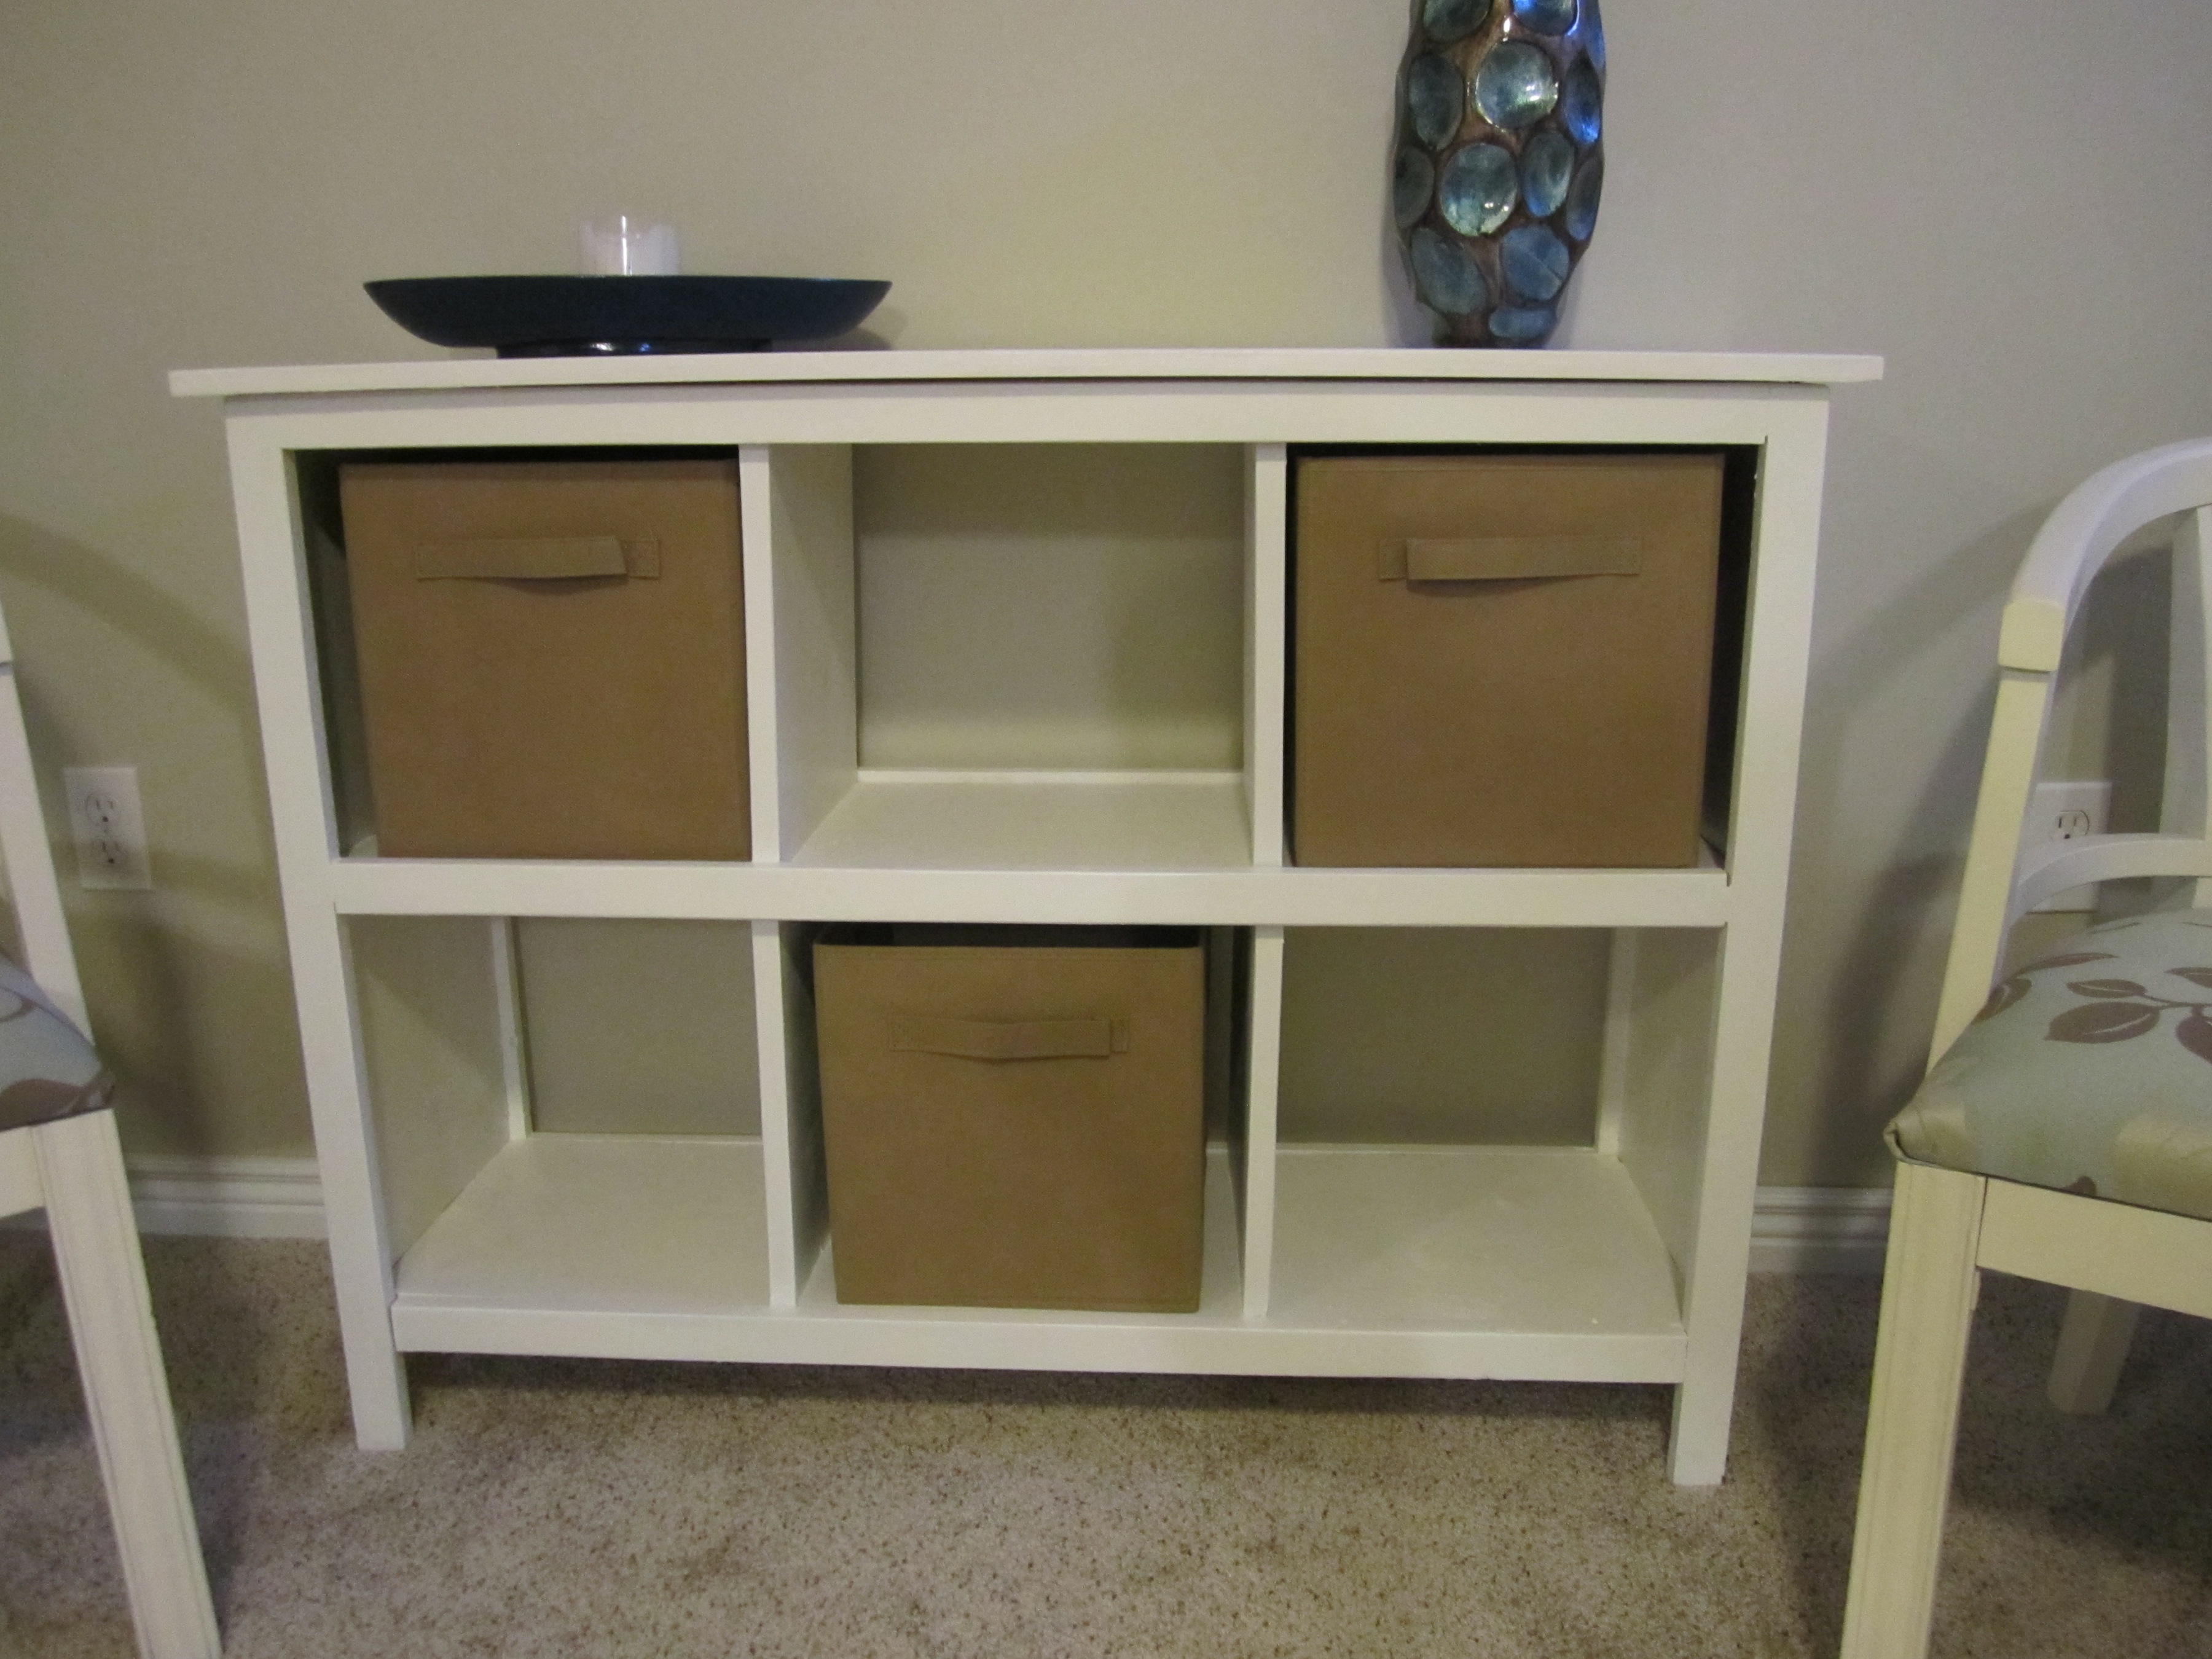
Cube Bookshelves

When we moved into our home we had minimal furniture pieces. On a tight budget and not wanting to buy something that was made of veneer, I stumbled upon the attractive and functional plans for the cube shelves. I love that I can "add on" to the set with additional pieces if I want to in the future. But for now, one set of cube shelving is just right for us.
This was the first project that I used the table saw by myself, and while it went just fine I do think it would have been helpful to have another set of hands around. Piecing together the first two joints was a bit challenging with only one set of hands holding the wood and putting in nails. But once I got a few done, the piece really came together quickly. It literally took me just a few hours to cut the pieces and put it together. It's the sanding painting and priming that can take some time and patience!

Built from Plan(s)
Estimated Cost
$50
Estimated Time Investment
Afternoon Project (3-6 Hours)
Finish Used
I use this cute cubby to hold books and gadgets that I like to keep out of sight in our family room area. If I had kids I think this would be an amazing storage unit for toys. Its so cute and functional. The canvas cube totes I picked up from Target for $12 for a set of 3.
I did add an additional top from a solid piece of wood that overhung on the edges slightly to give it a more finished look.
I did add an additional top from a solid piece of wood that overhung on the edges slightly to give it a more finished look.
Recommended Skill Level
Beginner
WIDE CABIN DRESSER METAL SLIDES

This was my third or fourth project and it was pretty tough. I started out with the basic build which was pretty simple and then I got to the end where everything was built except for the drawer slides and boy was it rough. I think that i spend half of the time on this project doing the drawer slides and half the time doing the build and the finish. I don't want to discourage anyone from doing this project but make sure you don't get in over your head. Check out my profile I am willing to do builds for people for an inexpensive price.


Estimated Time Investment
Week Long Project (20 Hours or More)
Finish Used
minwax jacobean oil based stain
minwax polycrylic clear coat finish
minwax polycrylic clear coat finish
Recommended Skill Level
Advanced
Comments
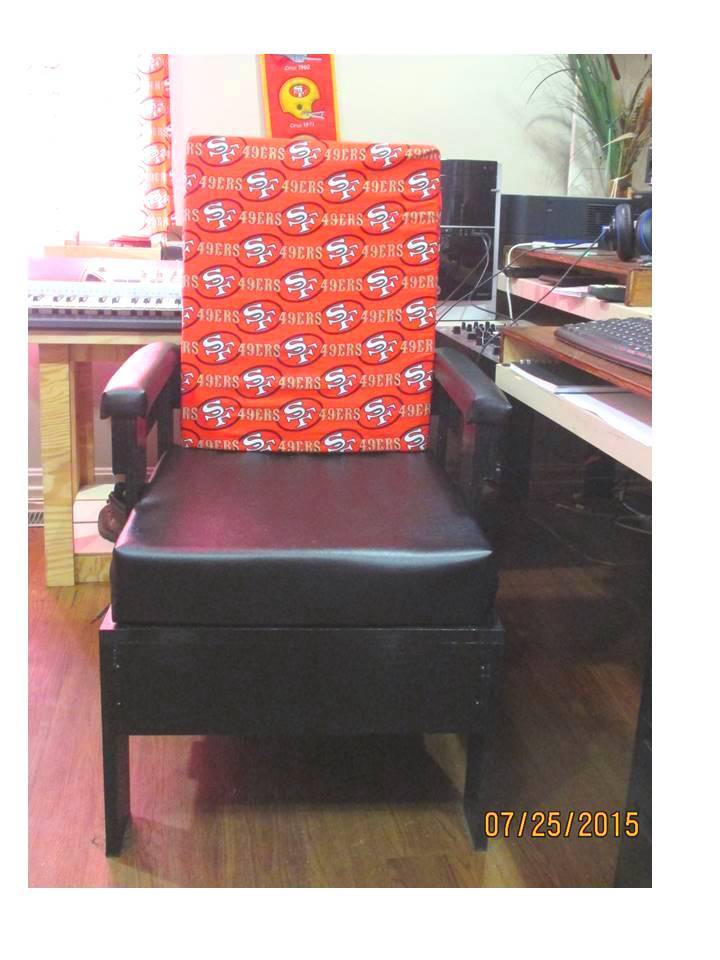
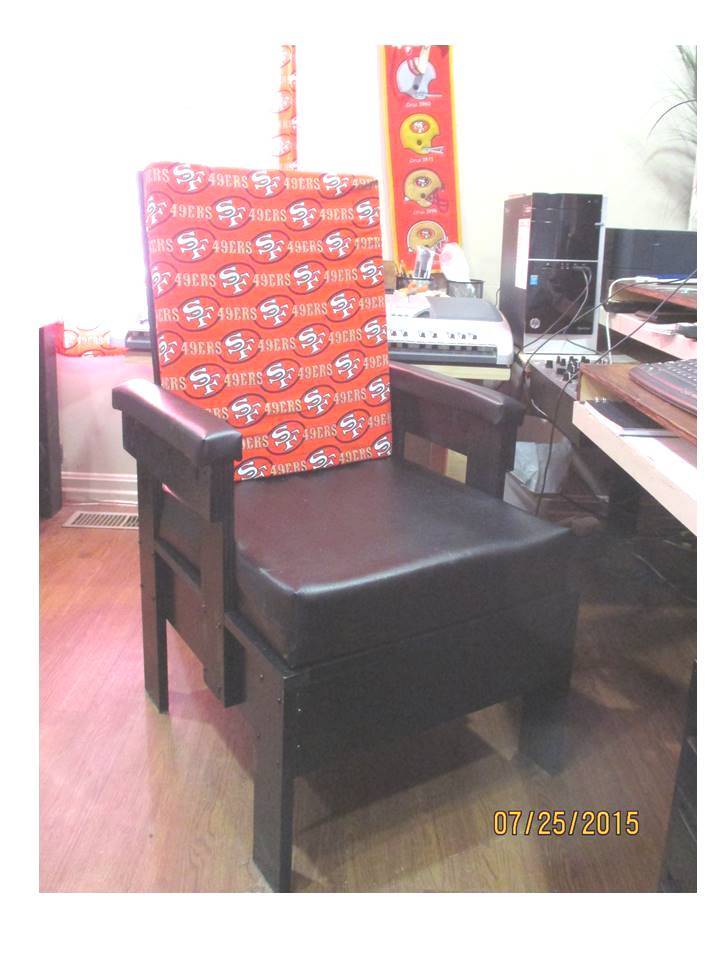
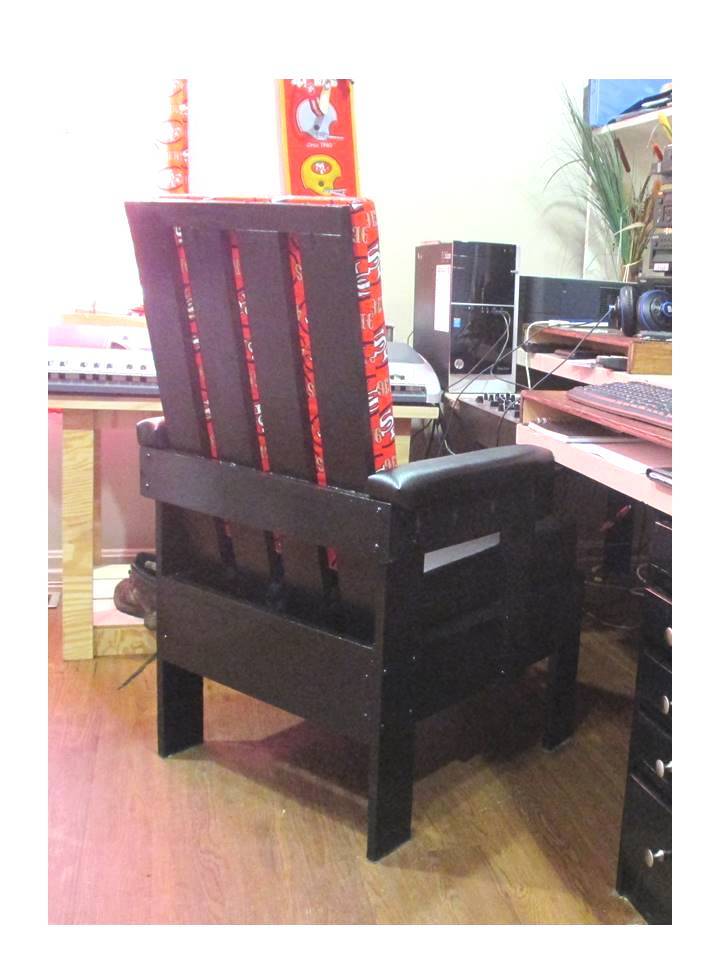
Man Cave Chair from Reclaimed Wood

Man cave chair for my Hubby, made entirely from reclaimed/scrap wood. This took a long weekend to build (includes time to rip down the reclaimed wood, and a couple of tries to get the padded arm rests right).
This build uses the Simple White Outdoor Chair plan, adjusted to fit smaller cushions and use my scrap/reclaimed wood.
The seat cushion is covered with marine vinyl, and the back cushion is covered with fabric from a curtain already on hand. The covers are done in a simple box style. The seat cushion closes with ties at the back, and the back cushion has an envelope back.
The end result is a sturdy, comfortable chair that’s not too heavy, and is decked out with colors from Hubby’s favorite football team. I’m very pleased to say that Hubby likes his new chair!
Built from Plan(s)
Estimated Cost
Cost: $75 for cushion materials (high density foam and vinyl). Everything else was reclaimed or already on hand.
Estimated Time Investment
Weekend Project (10-20 Hours)
Finish Used
Finish: 2 coats gloss black (Valspar Ultra paint + primer). The bottom surfaces of the legs are covered with some adhesive backed felt for easy sliding.
Recommended Skill Level
Intermediate
End Tables

I changed the size of one of the tables to fit the space. Otherwise they are built from the plans. Turned out very nice.

Built from Plan(s)
Estimated Cost
$100 for Both
Estimated Time Investment
Day Project (6-9 Hours)
Recommended Skill Level
Beginner
Leaning Wall Shelf
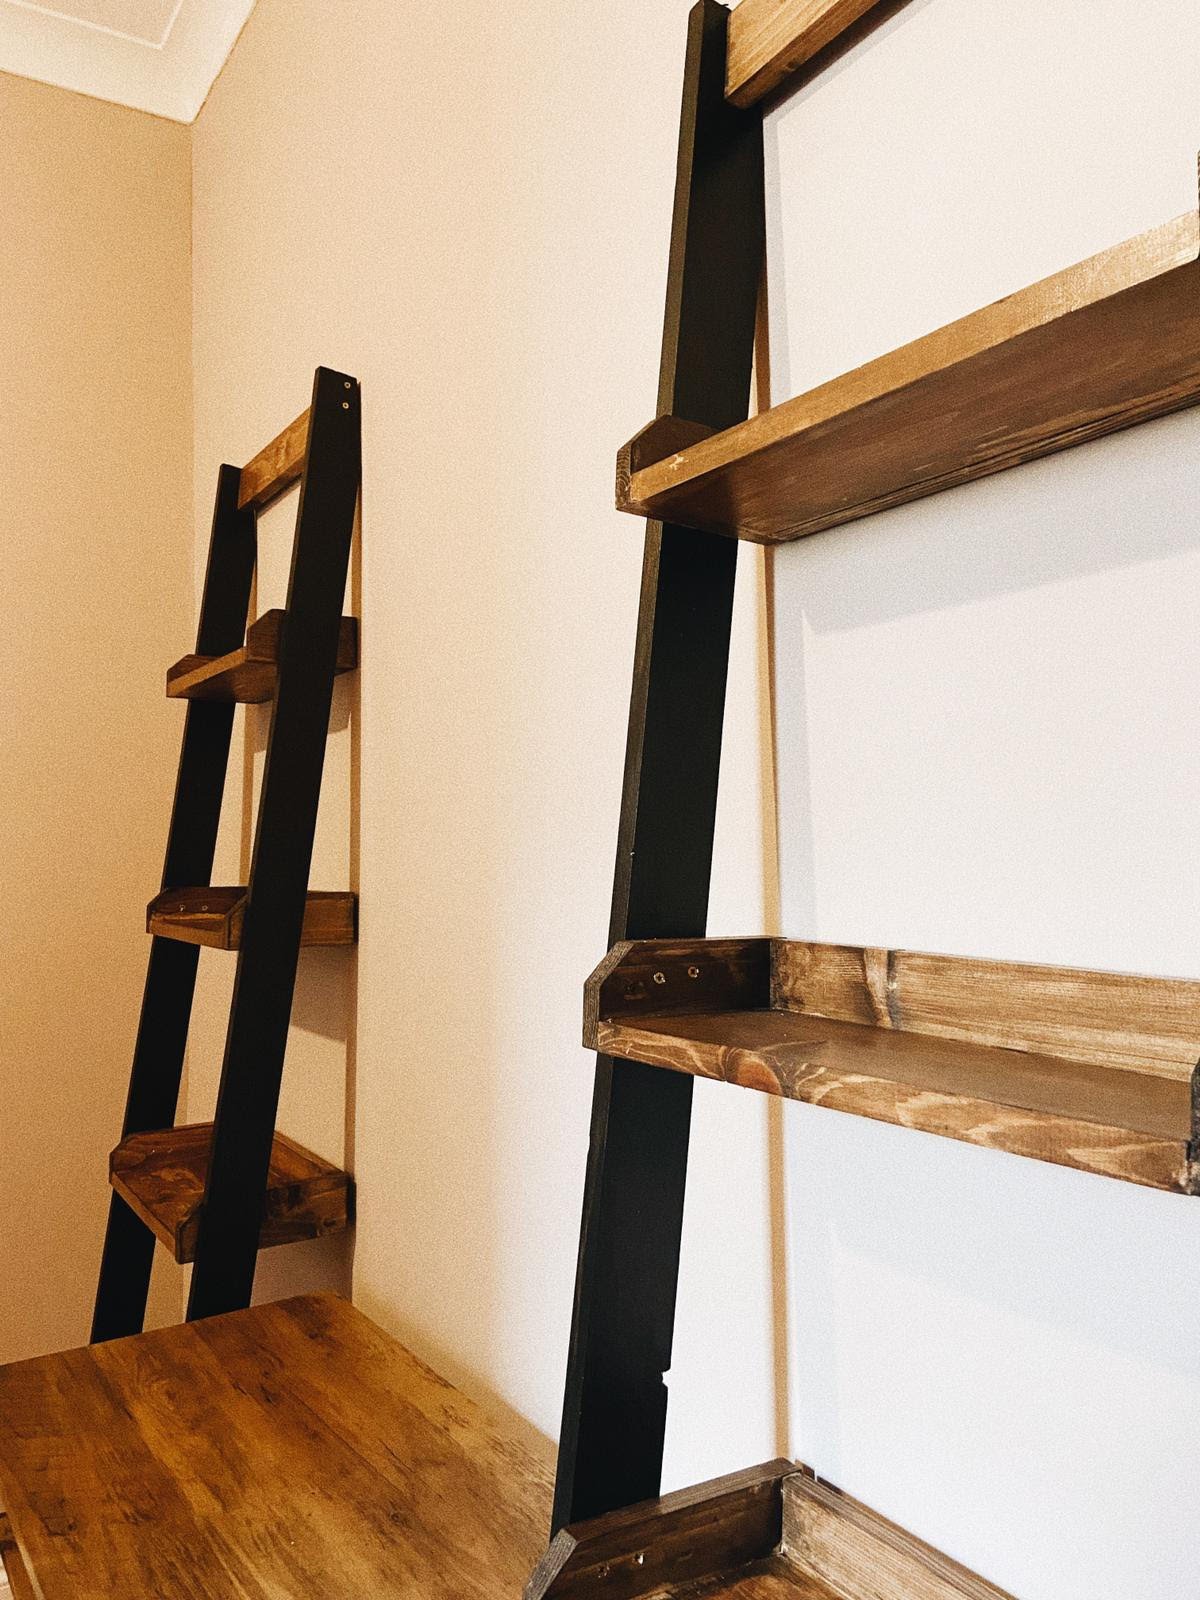
Build a leaning wall shelf easily with Ana White's free plans!
Built from Plan(s)