Flipped Cedar Planter
I used the Ana's Cedar Planter plans and flipped it, placed a bucket with cement inside to support umbrella and made a simple table top for drinks. Hope you like it ✌🏾
I modified this plan to use wood that I had and also a piece of kitchen counter top that was left over from my daughters new house.
We used Anna's outdoor Sofa plans, which were very easy to read. For wood, we kept costs low by using pressure treated wood, and staining it with Minwax Colonial Walnut stain. We did use the lumber cutting service at Home Depot- only $15 for the cuts, and it made the project time very quick. The cushions were from Lowes, and throw pillows were purchased the previous season at Homesense. We are so happy with how it turned out. Thanks, Anna!
I used Shelf Help for the plywood pieces and a mash up of Ana's plans for the rest. I shared a video on my family page for steps used here https://www.youtube.com/watch?v=urFoX5j4J0s
This was my first Ana White project! I didn't do the x's on the ends, obviously, and it's both taller and wider than the plans in order to fill up the giant space along our back wall. I notice the glue blobs that didn't stain, and the decorative hardware was trickier than I expected, but it was fun to build... and totally functional :)
Thanks so much for the plan!
Fri, 02/20/2015 - 09:35
This looks INCREDIBLE!!!!! I was hoping you could possibly share how you painted on the American Flag, and gave it the rustic look to match the coffee table? I'm new to this site, so I'm not sure if you can reply directly to this comment or not. If you can't, would you mind emailing me at [email protected]?
Thank you so much!
Wed, 10/07/2015 - 13:59
Hi. I love this coffee table. I have read through all the directions. I have one quick question. After I have built the coffee table and then oxidize the wood, do I then paint the flag with regular red white and blue paint and then seal it with the wax? Thank you
Welcome to our labor of love. This is our first build and while my bf did most of the work, it was a great project for us as a couple. It was definitely work, but well worth it. We love the way it fits perfectly in our courtyard and people keep commenting on how high-end it looks. Thanks for the plan, Ana! The project took a little longer than it probably should, since it was the first project for us. You should account fort he time it will take to cut, sand and stain your pieces before assembly. There are times you will need to allow for the lumber to dry etc.
Built this using Ana's Rustic X console table plan.
I have made many of these ledges and I just love them so much! I love that I can build them to any length or depth I want. I like to use them for more then just pictures. I feel like there will be many more of these in my future!
Papa Dana's version of Mimi's Coat Bench!
This was my first project! I learned a lot while doing it, and I look forward to building more projects in the future!
Built this table for a friend from the Ana White- Fancy X plans. It turned out amazing!
Fri, 01/10/2020 - 07:23
Love the table. Colors are great. I noticed you modified the table to to have five 2x10s instead of the plan 4. I was planning on doing the same thing. Did you have to modify the base to account for that? Specifically I'm wondering how, if at all, I need to adjust the angle of the X pieces. Thanks for your time!
I printed off your instructions and I had all the wood in the garage already. My husband and son finished this in a day and a half. I love it! I painted it. Still not sure what I want to do instead of the planters. I like that idea but I like to have access if I need to clean it. I love all the ideas on this site.
Easily made from scrap.
Used pocket screws where possible.
Strong enough for a 2 year old to jump in :)
Mon, 04/08/2013 - 15:58
This is a very cute doll crib--love the curved ends above the slats. I have made six of these, each one a little different, and this design is perfect for the next one--hee hee. Would you mind sharing the dimensions; are they the same as the Olivia doll crib? Thanks!
Thu, 04/11/2013 - 13:04
Oops!! the plan i used was http://ana-white.com/2010/11/olivias-doll-crib.html …
I used those direction .. just modified the end to be slats like the sides then made a curved line that appealed to me … sorry for the mistake!
I did make the farmhouse bed too for another grand-girl!
I was just thinking I would be making more of these .. glad to hear i'm not the only one!
My husband wanted a table next to the grill and he wasn't going to build one after working on our deck for 2 weeks. I thought to myself maybe I could build one that had a built-in cooler. Of course, my source of inspiration came from Ana White. I had to detour a little from her exact plan to accommodate our need. We had a basement egress window coming right at that corner near the grill so we would need a table that cover that area perfectly to make a good use of space, hence the measurements and plan had to be altered a bit. Ana White’s plan has 2 built-ins, ours has only 1. It turned out great and we enjoyed it ever since. Now if only the weather just got warmer!
Burnt and stained with a semi transparent mahogany water sealer
I had peformed internet searches on Pet Crates and decided to build my own. This one has a touch sensor small 1 watt light inside so I dont have to keep other house lights on when I am at work. The light has no heat and purchased at Rockler hardware. Shiloh's crib is on wheels and the only thing I screwed up is the width. I could not get it thru the garage door from the house. Had to take it thru the front door and had to take the door off the hinges. Either way I should not ever have to build another one. It has a kitchen cabinet black laminate on top purchase from a damaged piece at home Depot. Half the cost. Should be durable enough for my kids Printer, radio and Cable box. Doors have two hinges per door so they can fold back out of the way.
First I'd like to say THANK-YOU Ana for this incrediable site and for all the work that you do. You are an inspiration to us all!
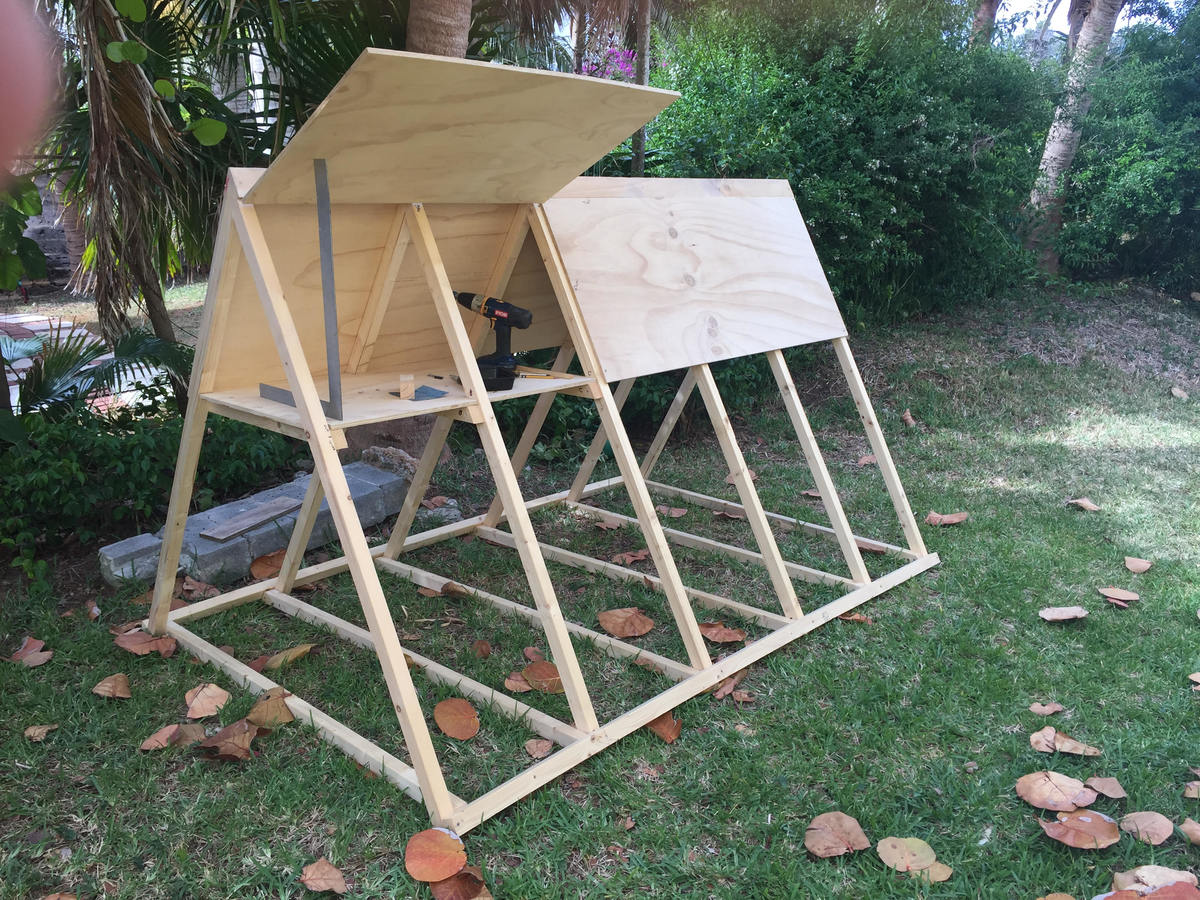
This was my very first project. I have been stalking this website for about a year working up enough courage to build something - anything for that matter! Finally my husband bought me a great Drill / Driver for Christmas and VOILA! I am putting it to great use.
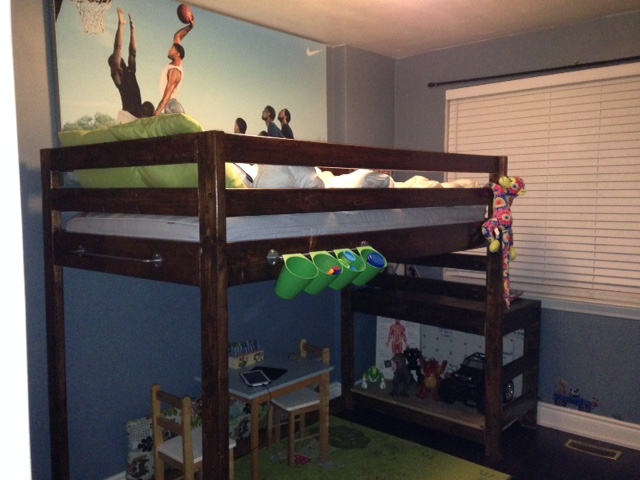
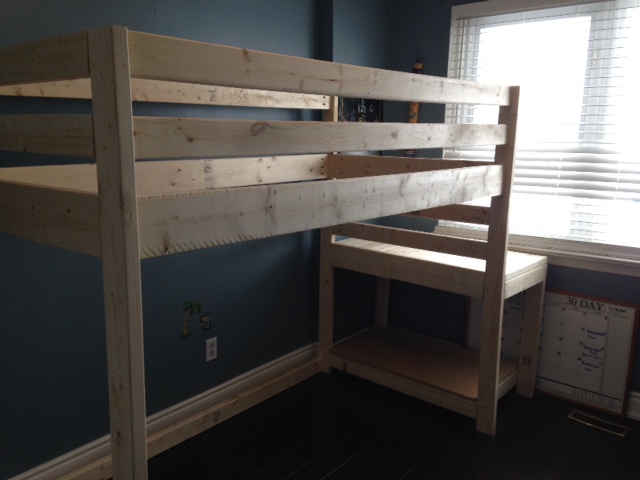
My son's room is rather small so I opted to eliminate the stair leading up to the landing area and just added a couple of 2 x 4 for him to climb up to the landing area
I love it - He loves it. Before I could never get him to play in his room or sleep throught the night without coming into our bed at 4am. Well let me tell you...Since I built this bed last week he sleeps like a charm and actually wont leave his room! Hhahaha
I did an epoxy coating which took a few coats as I learned the hard way how to use it but I love the look!! Did a custom gray and brown stain mix after sanding, weathering and conditioning the boards.
Decided to start doing woodworking as a pandemic hobby. Given what happened with wood prices, I could have picked a. better time to start making sawdust. Quite happy with the outcome.