

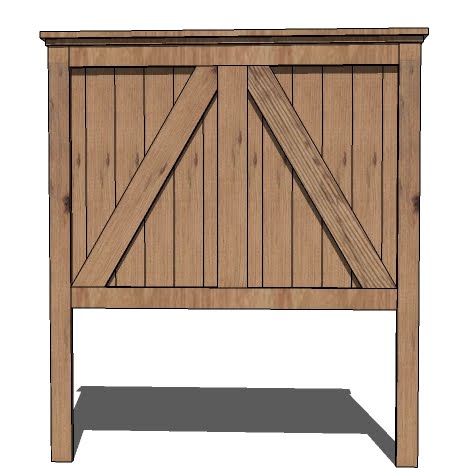
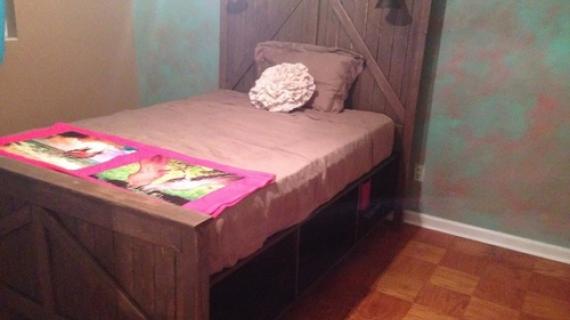
A beautiful simple headboard reminiscent of an old barn door. Our free step by step plans are perfect for the beginning woodworker.
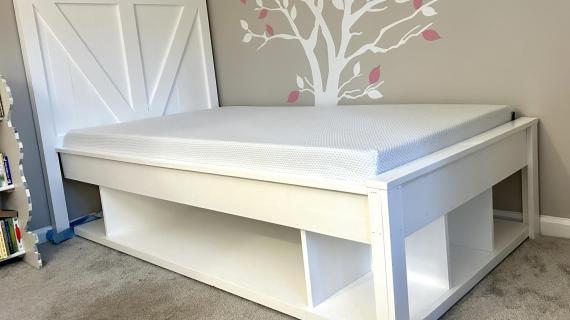
You can also build the matching storage bed frame with our free plans.
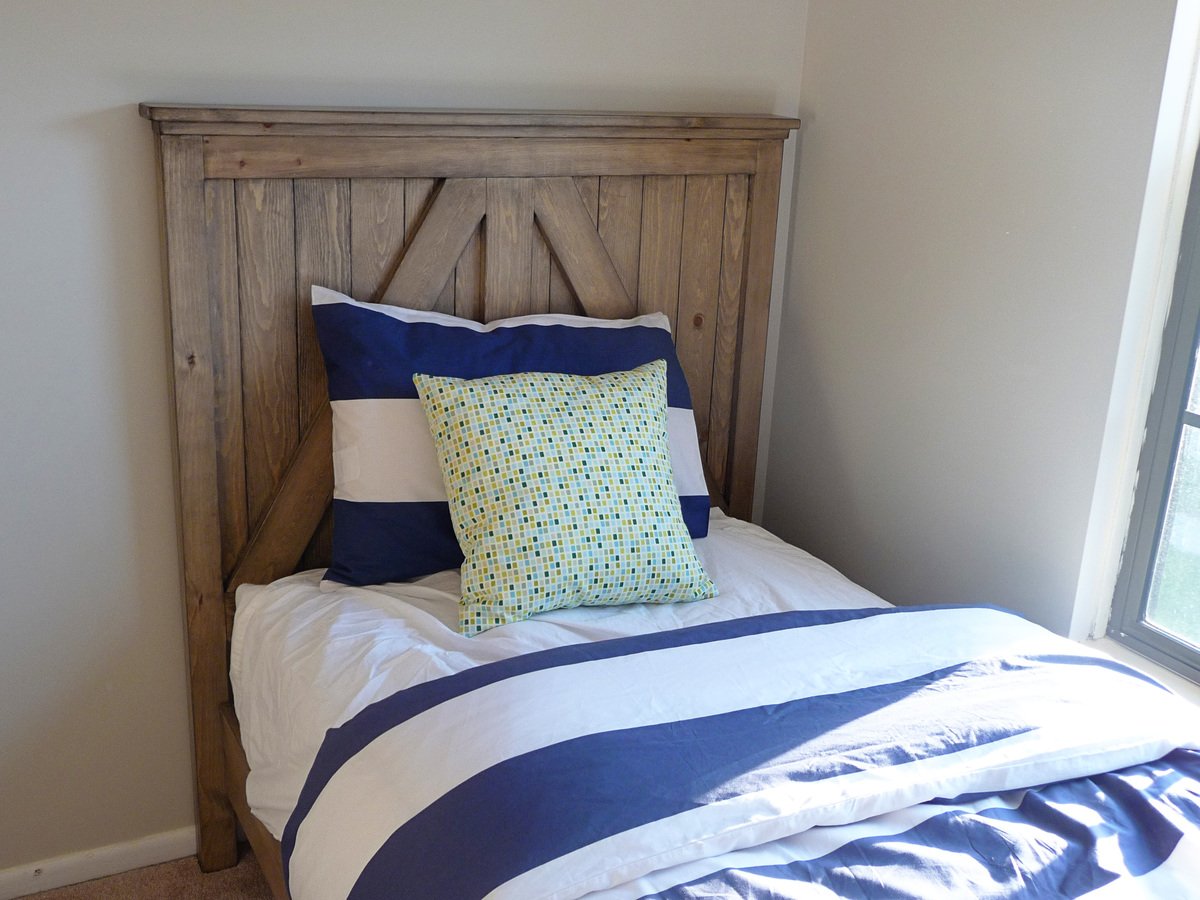
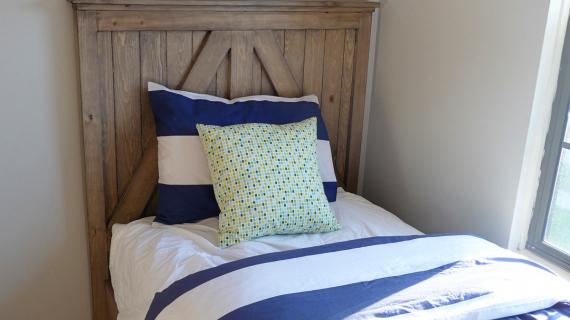
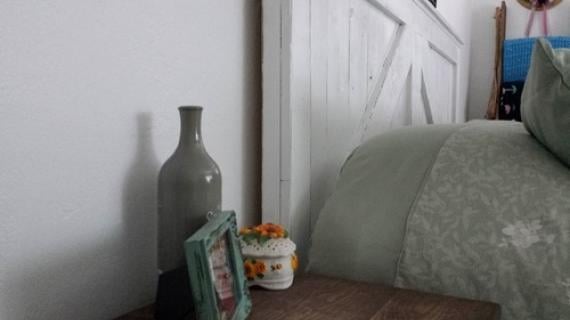
Reader submitted photo by ANGELADROSE
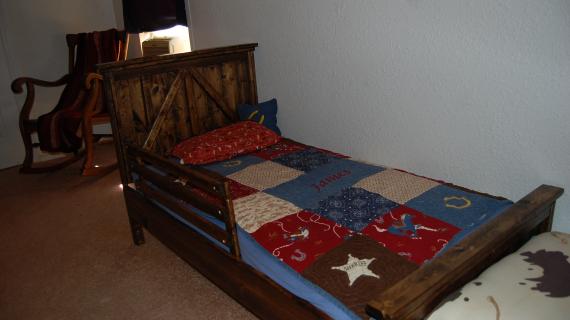
We love everything about this rustic farmhouse headboard. It's stunningly beautiful on it's own.
Or pair it with our matching diy storage bed frame -
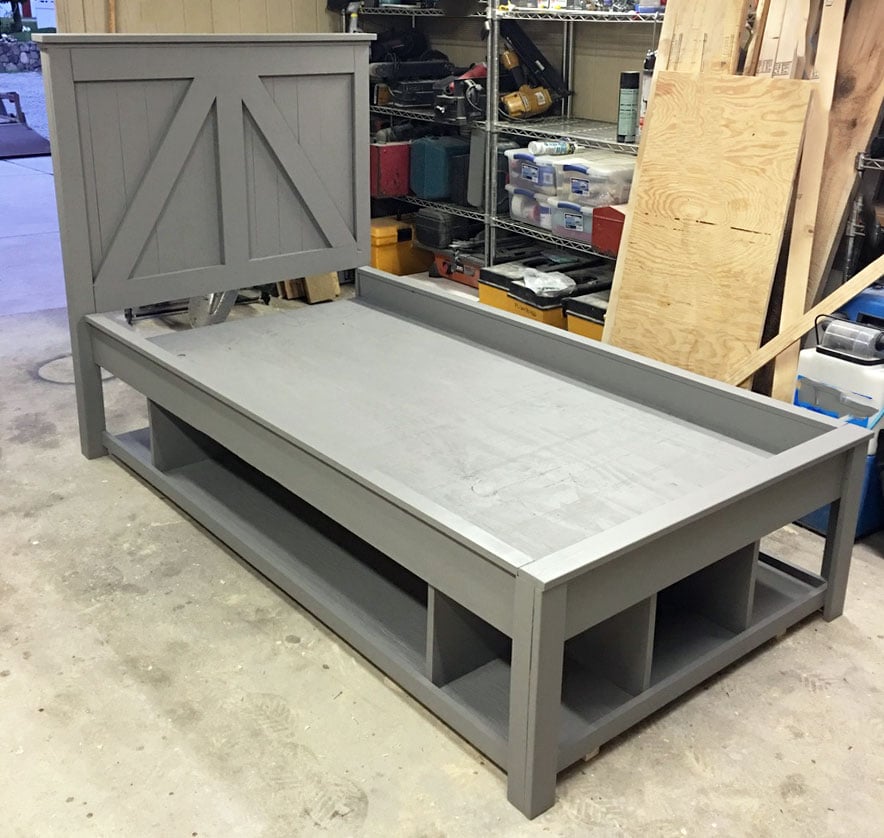
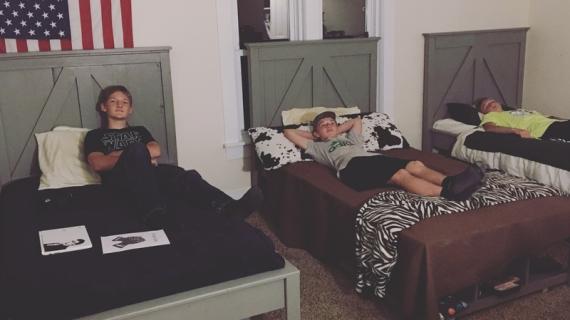
Photo SUBMITTED BY KILE529

Preparation
6 - 1x4 Boards @ 8 feet long
2 - 1x2 Boards @ 8 feet long
3 - 1x3 Boards @ 8 feet long
- 12 - 1x4 @ 31" (Panel Boards)
- 2 - 1x2 @ 49 1/2" (Side Legs)
- 2 - 1x3 @ 49 1/2" (Front Legs)
- 2 - 1x3 @ 38 1/2" (Back Supports)
- 2 - 1x4 @ 38 1/2" (Front Trim)
- 1 - 1x4 @ 26" (Center Trim)
- 1 - 1x3 @ 44" (Top Trim)
- 1 - 1x4 @ 45" (Top Trim)
- 2 - 1x4 @ 30" (Cross Bracing, ends cut 30 Degrees off square, parallel)


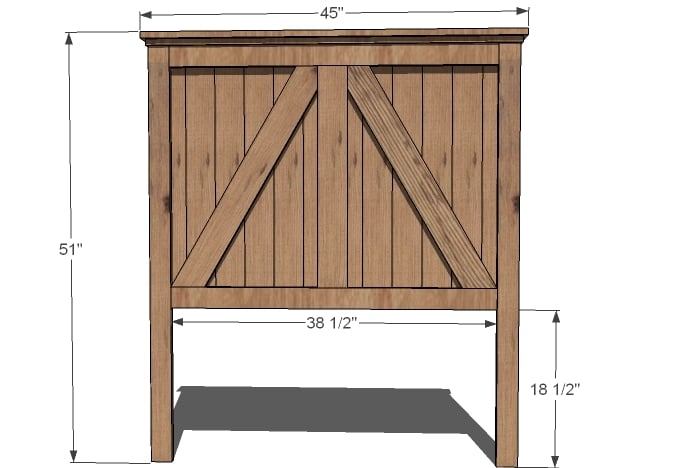
Instructions
Step 1
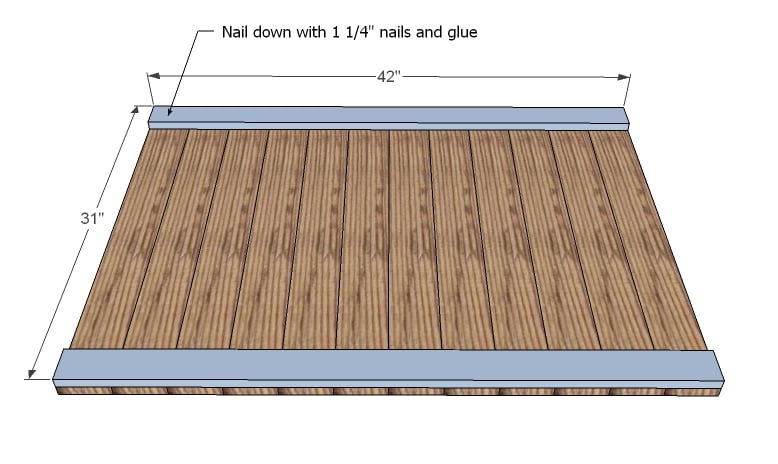
Shown above is a back view. Use a finish or brad nailer and glue to secure the back support boards to the panel boards. Please note that sometimes boards are not exactly the correct width – you could purchase “bad” boards. Measure your panel boards to make sure they are 3 ½” wide. If they are not, you should cut your back support boards to fit the panel, and not to the measurement I have given above. Adjust for square.
Step 2
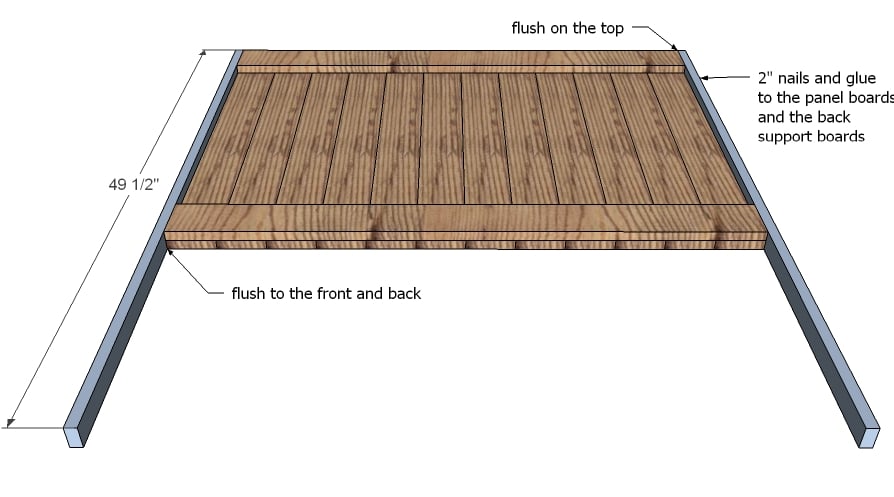
Attach the 1x2 leg sides to the panel as shown in the diagram.
Step 3
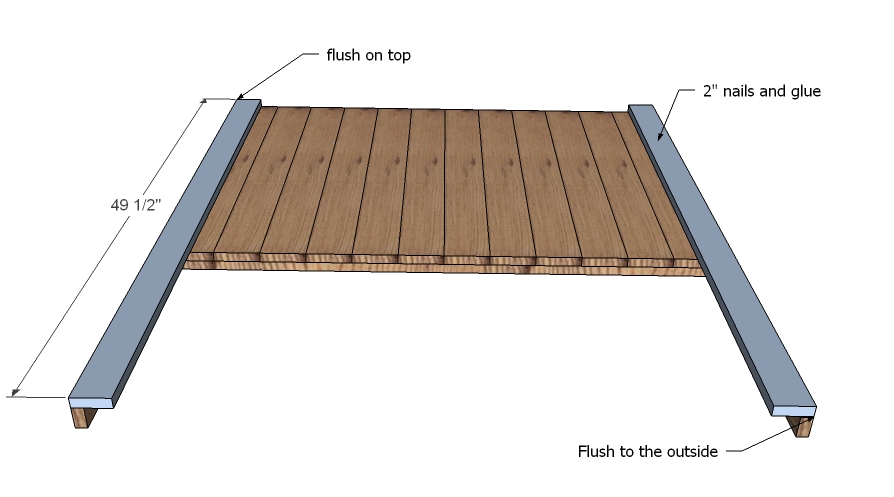
Attach the 1x3 legs to the front, as shown in the diagram. As you nail to the 1x2 leg, keep the seam as tight and flush as possible making the legs appear as a solid piece.
Step 4
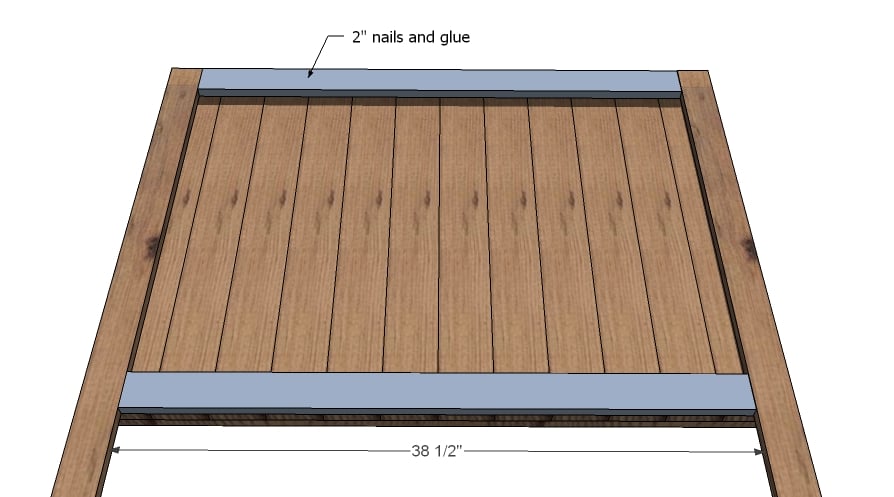
Use 2” nails an glue to attach the front trim to the panel boards, keeping outside edges flush.
Step 5
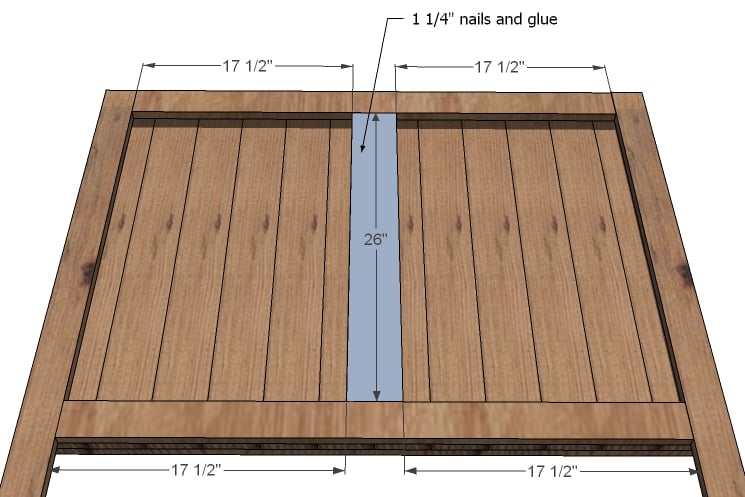
Mark the headboard as shown in the diagram. Use glue and 1 ¼” finish nails to attach the center trim to the panel.
Step 6
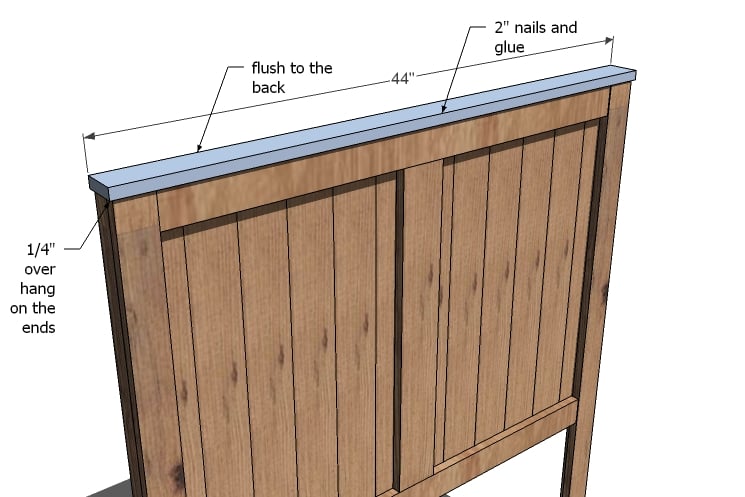
As shown in the diagram, attach the 1x3 top trim to the top of the headboard.
Step 7

Attach the 1x4 top trim to the 1x3 top trim, with a ½” overhang on all edges.
Step 8

This step looks more difficult that it is. Cut from a 1x4 two boards with both ends at 30 degree angles (off square), ends are parallel to each other. The board will measure 30” long, from the short point to the long point. Then on the top side, measure 2 ½” in from the short point and cut off at a 90 degree angle. Fasten in place with 1 ¼” nails and glue.
Step 9
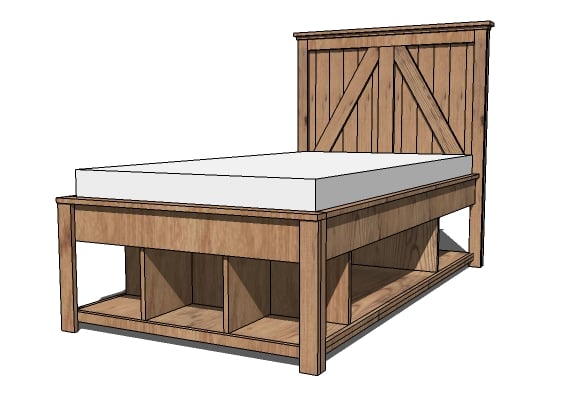
The optional storage bed frame plans are available here.

Comments
Annie (not verified)
Wed, 08/04/2010 - 08:13
OOOOOO! THAT bed in a KING
OOOOOO! THAT bed in a KING SIZE would be a rock star bed!!
Brandy Ellen P… (not verified)
Wed, 08/04/2010 - 08:25
yep! that is EXACTLY the bed
yep! that is EXACTLY the bed (in a KING size) that I want for our new farmhouse!
PRETTY PLEASE, Ana??????
Megan (not verified)
Wed, 08/04/2010 - 08:46
this is it!!! I have been
this is it!!! I have been looking and looking and debating and debating, some more. And it all just came to a stop! THIS IS IT! I love it!!!!!! (in a king size...) THANK YOU!!!!
Mom (not verified)
Wed, 08/04/2010 - 10:09
Just when I think there
Just when I think there couldn't possibly be any more furniture that I "need" to make, this beautiful piece appears. Love it! Thanks so much.
Rachel (not verified)
Wed, 08/04/2010 - 10:34
Ooh!! Cute!! I tried to find
Ooh!! Cute!! I tried to find a suggestion box on your site...but couldn't find one. :P Maybe on the new site? :) I love all your furniture so much! I am really needing to build a couple of pieces that you do not have plans for unfortunately. :P I need a bench for a vanity seat and I would LOVE to build a hope chest for the foot of my bed. Any suggestions?
*MICHELLE CAUDLE* (not verified)
Wed, 08/04/2010 - 14:00
Wow, it's amazing how easy it
Wow, it's amazing how easy it looks to build this bed when you break it down and I'm excited at how cheap it should be to build!!
Stephanie (not verified)
Wed, 08/04/2010 - 14:21
You just made my life so much
You just made my life so much harder ... now I don't know if I want the farmhouse canopy bed (which I had pretty much decided on) or the brookstone storage bed! Could you pretty please make plans for the bed in queen size?
Momma Button (not verified)
Wed, 08/04/2010 - 14:46
I'm agreeing totally with
I'm agreeing totally with Stephanie. I don't know which to make, this one or the farmhouse bed (queen size please.) Decisions decisions.....
Jen (not verified)
Thu, 08/05/2010 - 11:14
Ana, I LOVE YOUR BLOG! Thank
Ana, I LOVE YOUR BLOG! Thank you!! You've got me so inspired. You find time to build *and* be a mom. I'd love to see this plan in a KING size bed! I've lusted after the farmhouse bed, but really want the storage like the Stratton bed. This is perfect. King size please!
The Family Jacob (not verified)
Thu, 08/05/2010 - 18:59
Ana, Do you have plans for
Ana, Do you have plans for the lower section of the bed? Our current bed is not long for this world and is not what I really wanted anyway. I would love it if you have plans for the bed and like so many others would love it in a king size!!!
amyzap (not verified)
Fri, 08/06/2010 - 09:08
LOVE the bed!! Any plans for
LOVE the bed!! Any plans for the full size?
Rachel (not verified)
Wed, 12/08/2010 - 07:43
I absolutely LOVE this bed.
I absolutely LOVE this bed. I would love to try to make it, but the PDF plans aren't loading. anyone else have that problem? Can I find the plans anywhere else?
mark (not verified)
Fri, 12/10/2010 - 11:55
Is there plans for the head
Is there plans for the head board on this bed?
Daryl (not verified)
Sat, 01/22/2011 - 08:51
Do you have the buliding
Do you have the buliding plans for the headboard? I see you have plans for the storage base, but not the headboard.
Thanks,
newbuilder (not verified)
Sun, 02/06/2011 - 15:25
I'm having the same problem.
I'm having the same problem. The plans aren't here! Help Ana!!
Irma Philp (not verified)
Wed, 06/08/2011 - 15:12
The rest of the instructions for this bed!
Ana I really would love to make 2 of these twin size beds for my daughters who will have to start sharing a room soon and love that it has bottom storage as we can use this space for toys. Please let me know how to make it please please!!!!!
rhubbard36
Mon, 07/18/2011 - 19:31
In a KING :)
This is the one I want but in a king!
SonyaKyle
Wed, 03/21/2012 - 09:38
CLICK
hello there
_meganrachelle_
Tue, 08/20/2013 - 05:11
Q is for Queen ;)
This is AWESOME! How do I go about getting the dimensions for the base on a queen size bed?!
jt baker
Sun, 01/24/2016 - 14:02
Love this bed!
I absolutely love this bed! Do you have the plans available for the bed and headboard in King size?
Would love to give this to my husband as a project for him! Ha Ha!