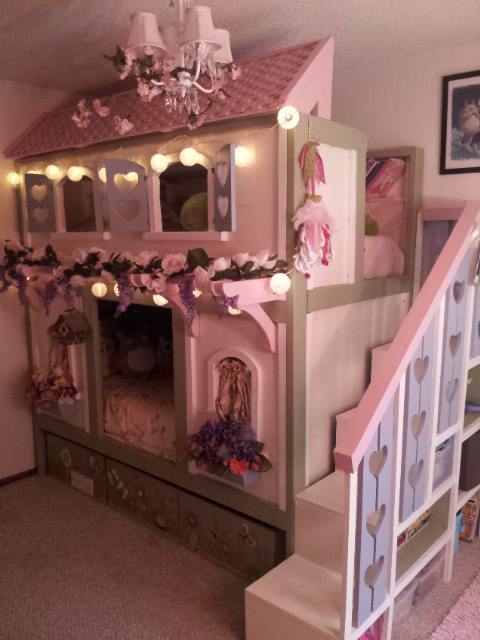
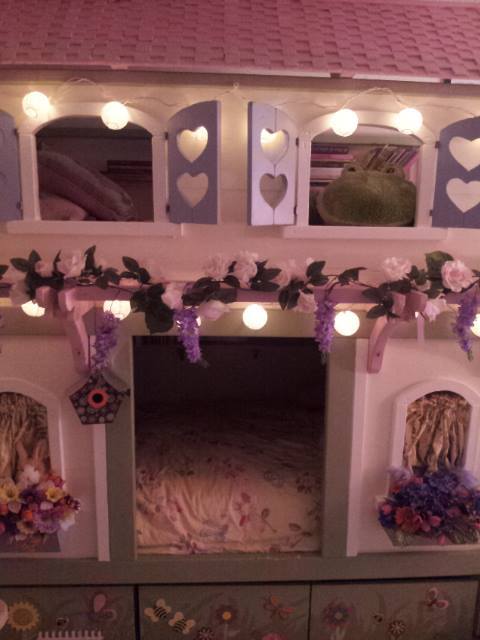
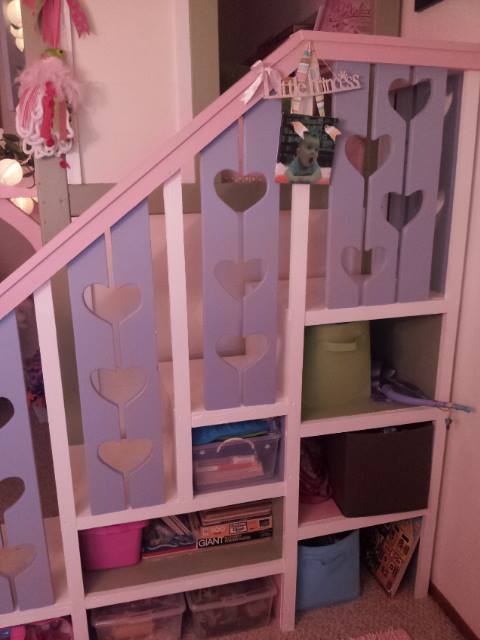
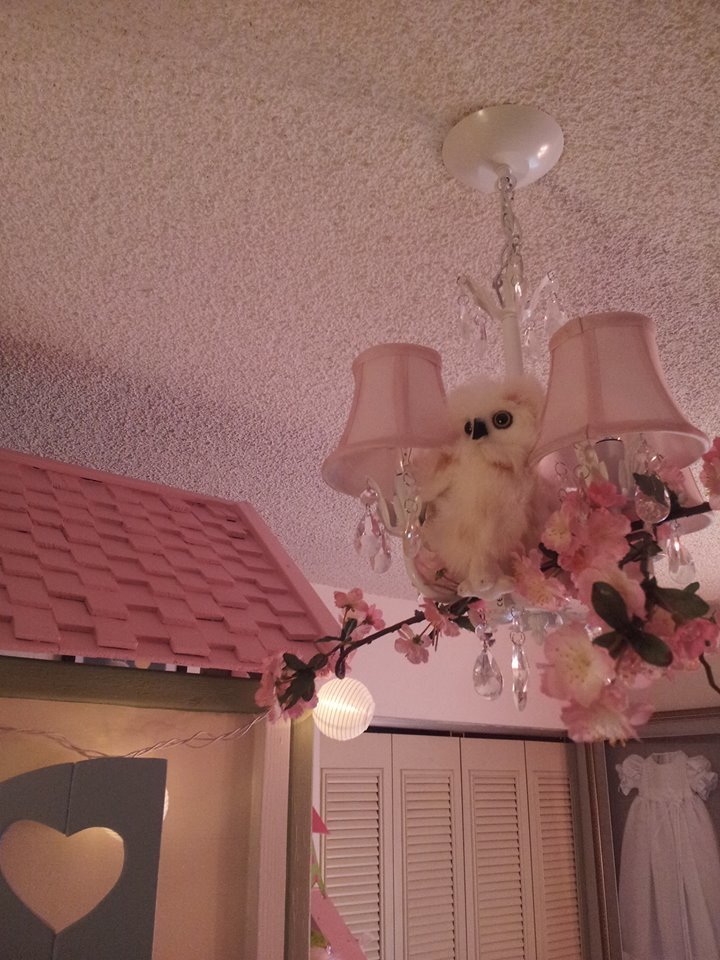
After yet another move (this time to Monterey, CA) and with a baby on the way, it was time to build the girls some big-girl beds of their very own. I was going to need to re-convert their double bed back into its original crib form by September, so in June, I started looking for plans. When I stumbled on Jenny's "Sweet Pea" bunk beds, I knew I'd found a winner! She also made it sound so easy, and I'd only assisted my dad on remodeling projects, never built anything from scratch. But I was familiar with the tools and terminology, so six months pregnant and in a serious nesting phase, I got to work. My hubs helped with the heavy lifting and I had some friends assist with sanding and priming -- many hands do indeed make light work! It took just under a month working four to six hours a day (on average), five to six days a week. I used screws for EVERYTHING, as this baby has to come apart easily for future moves (and does it ever -- Jenny's not kidding when she says you can have it up and down in ten minutes!). I'm most proud of the roof -- I had originally planned on finding real cedar shingles, but those babies are expensive! So I came up with idea of using door shims. A pack of 12-15 is only a couple bucks, and it took about 24 packs to cover the entire roof. I found some light wood trim and glued/screwed it to the edges, slathered on some pink paint, and voila! A wood shingle roof! The whole project ended up costing nearly double what I'd originally budgeted, but I'm so happy with it and my girls love it so much that I don't really care. Plus, if I'd had this baby custom made, it would probably have cost quadruple (at least!) what I paid in building materials. Let me know if you have any questions -- I'm happy to share what (little) I know :)!


Comments
birdsandsoap
Thu, 01/02/2014 - 01:16
Awww...This is so SWEET! You
Awww...This is so SWEET! You did such a great job- the roofing is ingenious! I wish I had thought of that! And you are right, wood shingles cost a fortune. You came up with such a clever way around it! Love how your bed turned out, I'm sure your girls feel like little princesses!
In reply to Awww...This is so SWEET! You by birdsandsoap
sarathurgood
Thu, 01/02/2014 - 08:12
Thanks :)! And yes, they do
Thanks :)! And yes, they do love it -- bedtime has not been an issue since completion!
birdsandsoap
Thu, 01/02/2014 - 01:16
Awww...This is so SWEET! You
Awww...This is so SWEET! You did such a great job- the roofing is ingenious! I wish I had thought of that! And you are right, wood shingles cost a fortune. You came up with such a clever way around it! Love how your bed turned out, I'm sure your girls feel like little princesses!
thomen
Wed, 04/09/2014 - 15:35
copy of the plans?
hi do you happen to havea copy of the plans the pdf link is broken and id love to build thr bed for my daughter
In reply to copy of the plans? by thomen
sarathurgood
Mon, 05/19/2014 - 16:18
So sorry this took so long --
So sorry this took so long -- I only just now noticed your comment! I do not have a copy of my plans, unfortunately. They were pretty much destroyed by the time I finished!
Bountiful Acre
Mon, 05/19/2014 - 14:51
Specific Paint Colors and Other Details?
This is marvelous! My husband says this is the best he's ever seen and wants to do exactly this. You have a designer's eye. The paint pallette is very pleasant. Can you tell us the specific color names of each paint you used and where you used it?
Did you use stencils to paint the flowers, etc? If so, where did you buy them from?
Also, where did you get the lights and what are they called specifically?
Thank you so much!!!
In reply to Specific Paint Colors and Other Details? by Bountiful Acre
sarathurgood
Mon, 05/19/2014 - 16:23
Thanks for your kind words!
Thanks for your kind words! I do not know the exact names of the paint colors I used -- they were sample cans, by Behr. The cream color was actually a very pale yellow, though. I free-handed the green on the drawers, and the flowers are actually made of wood and came from Michael's (in the craft department, where they keep wooden letters and stencils). The lights are oriental paper lights, and I got those at Ace Hardware. Hope this helps!
Bountiful Acre
Tue, 05/20/2014 - 11:20
Thank you!
Yes, that was helpful. Thank you for taking the time. It is appreciated!