
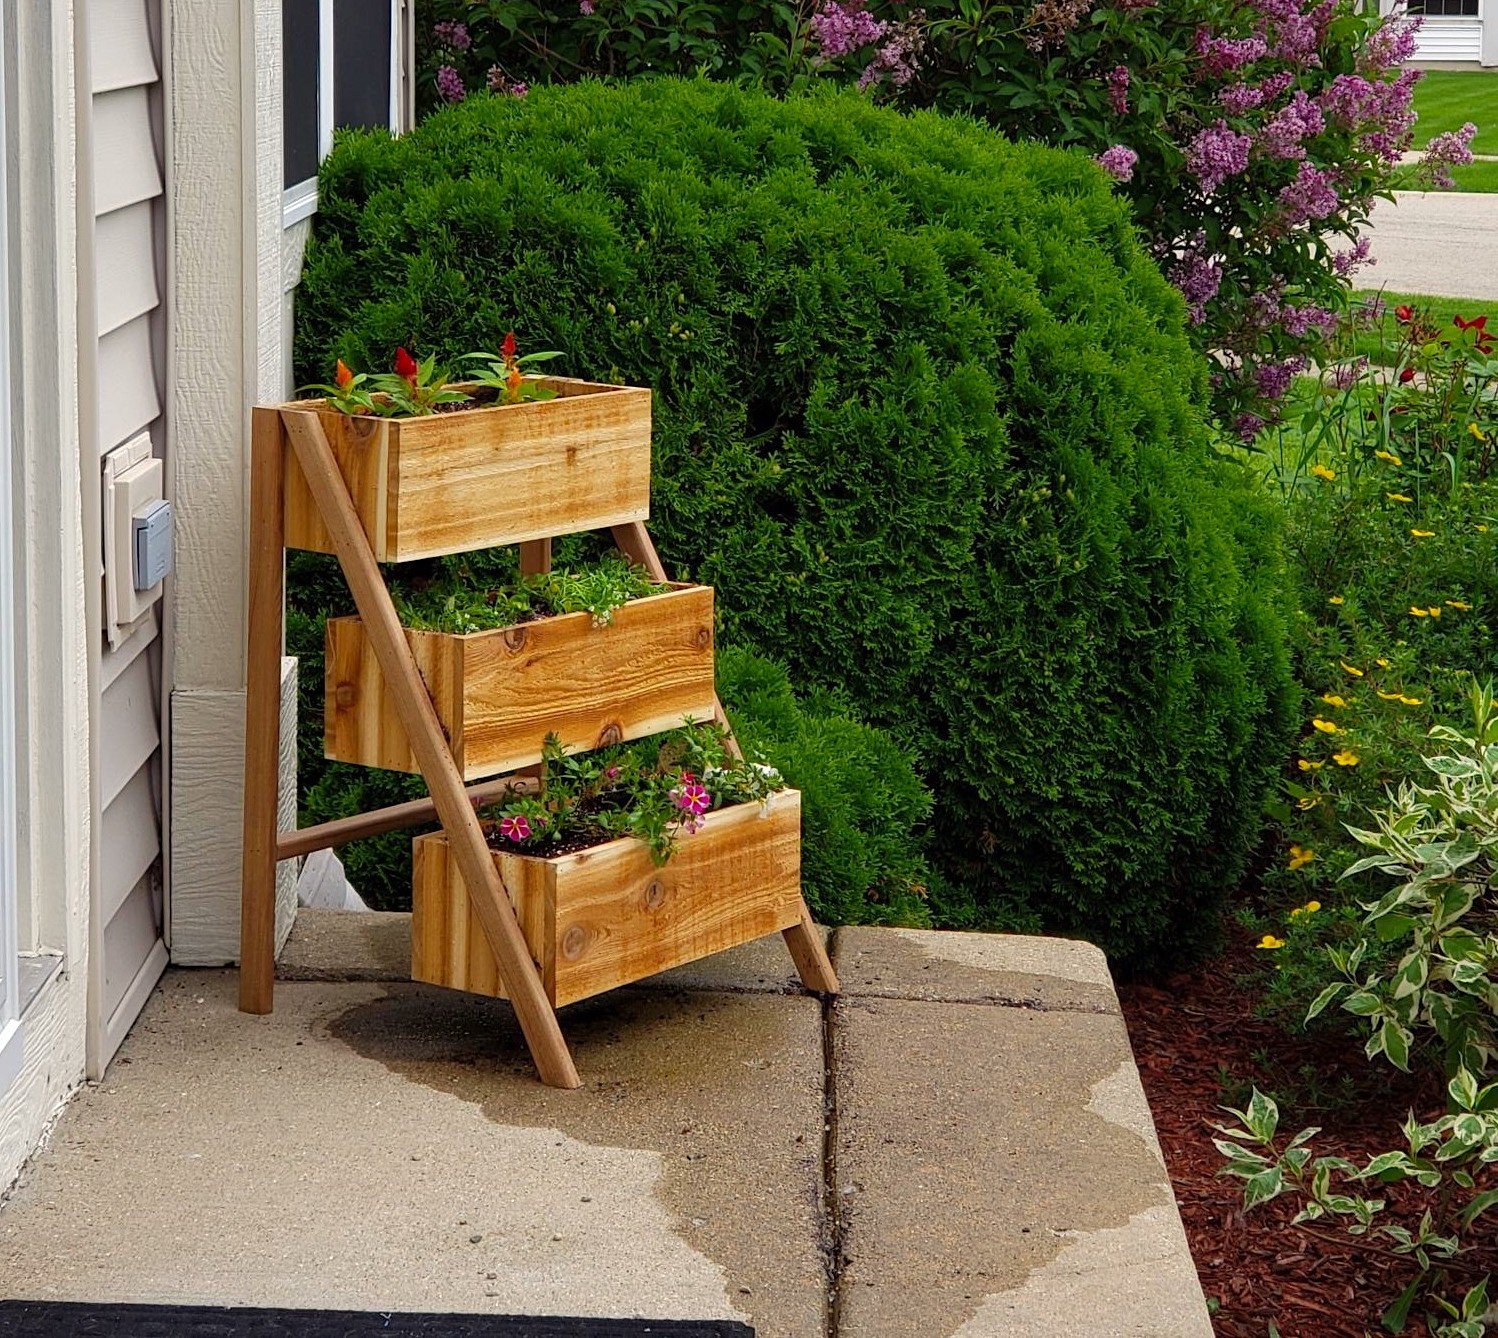

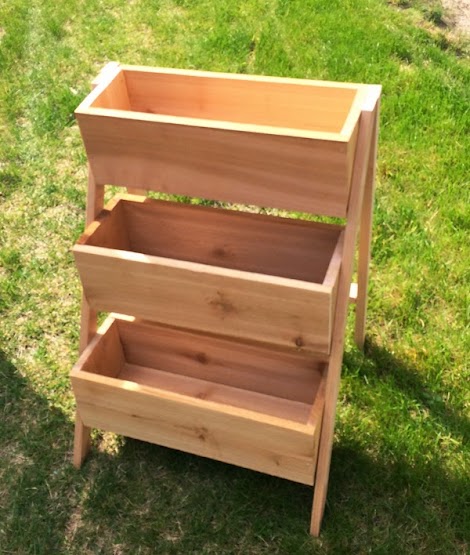
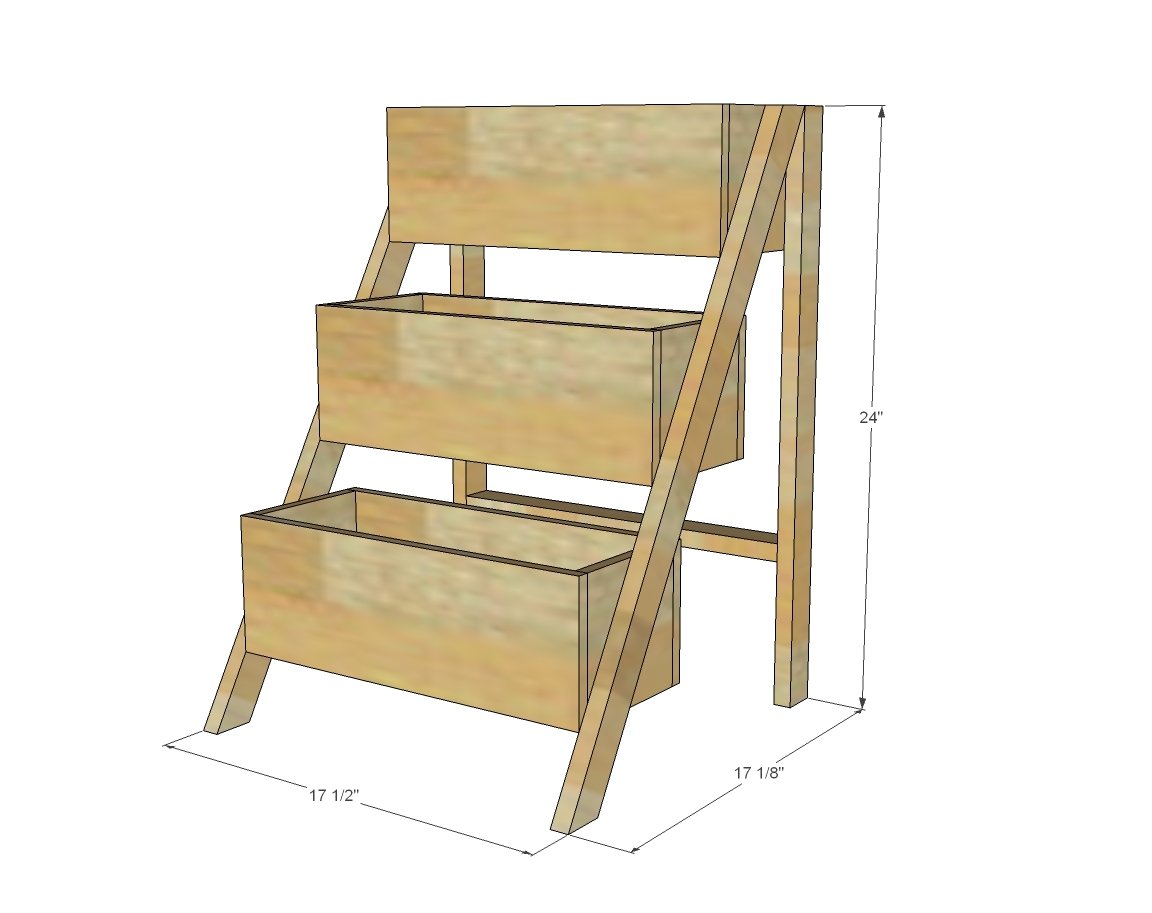
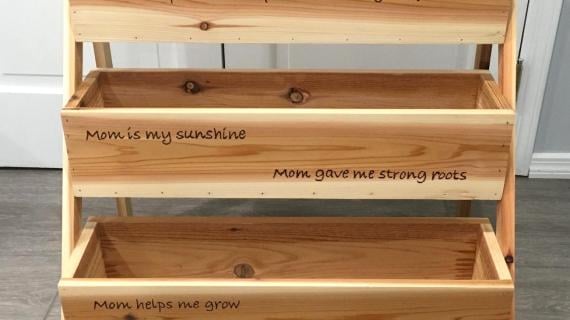
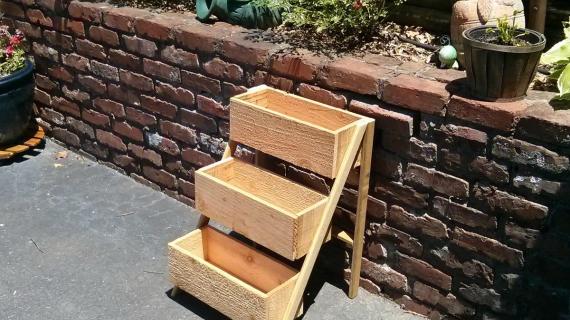
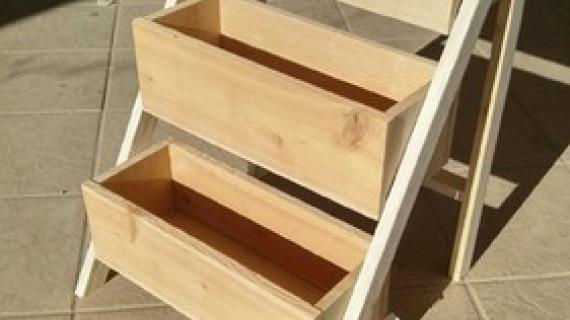
Make your own vertical tiered planter for flowers or herbs using cedar fence pickets! Free plans from www.Ana-White.com
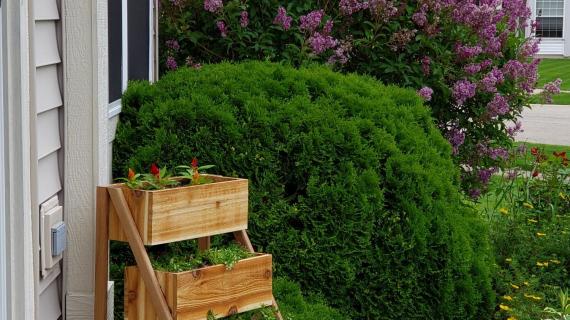
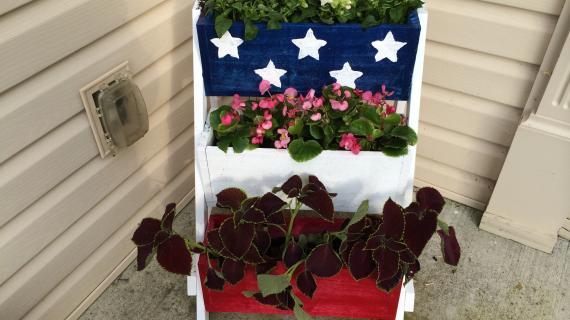
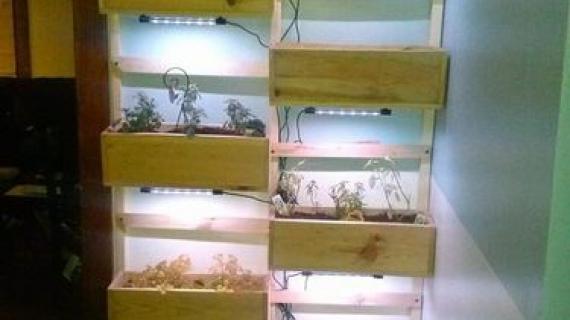
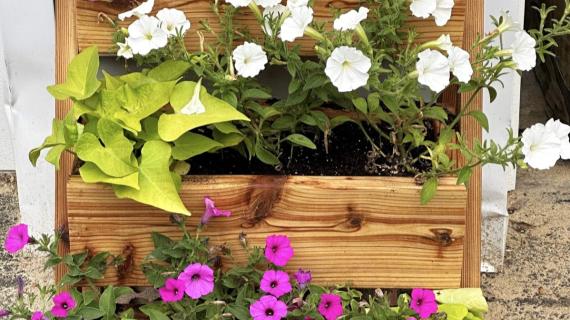
Reader submitted photo
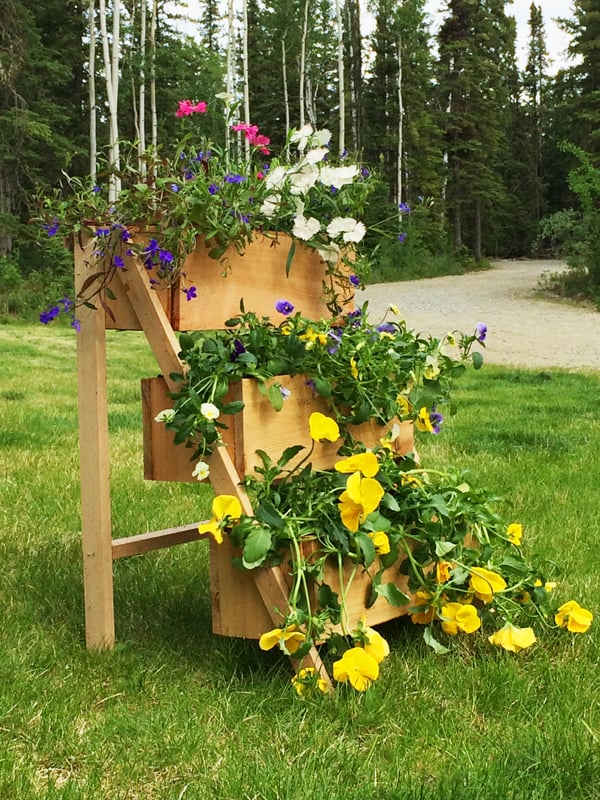
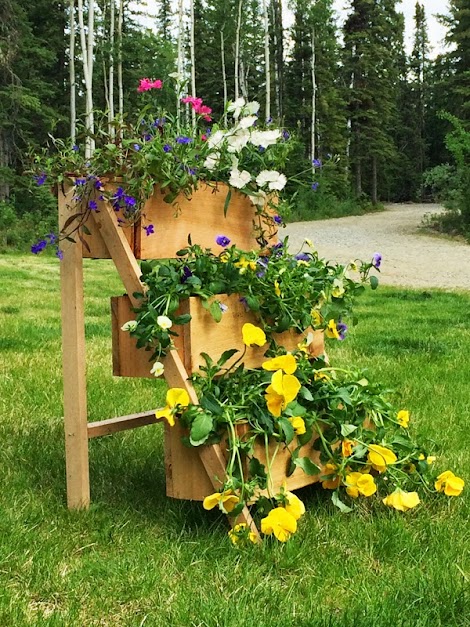
Cascading flowers or strawberries? Yes, please!
We are sharing plans for a tiered planter, that we only spent $10 on!
The secret to this tiered planter is we made it out of cedar fence pickets!
The first steps are pretty straight forward - just build the three boxes (we used staples but you can also use brad nails or screws). Here's a trick for adding the lower boxes:
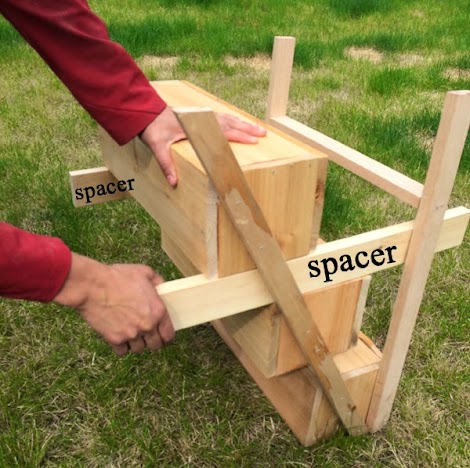
The spacer came in handy to help keep the boxes evenly spaced and I didn't have an extra hand, just another step to simplify the process.
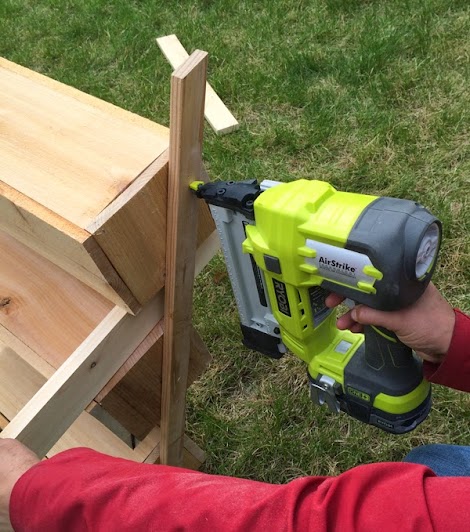
Gotta say I love this Staple Gun. Once I made the supports flush to the top I shot them in and viola, I had the stand attached!
Then I flipped this baby over and stood back to admire and couldn't believe how something so simple could make me so happy!
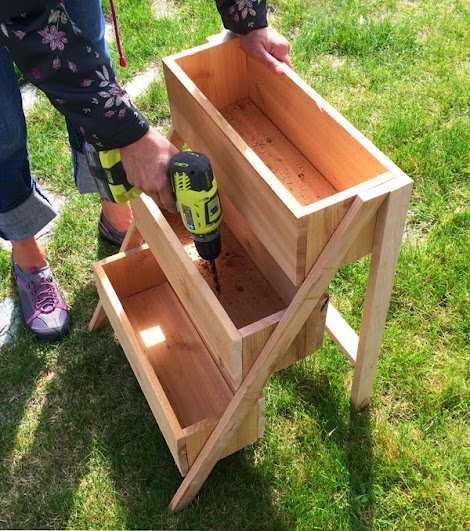
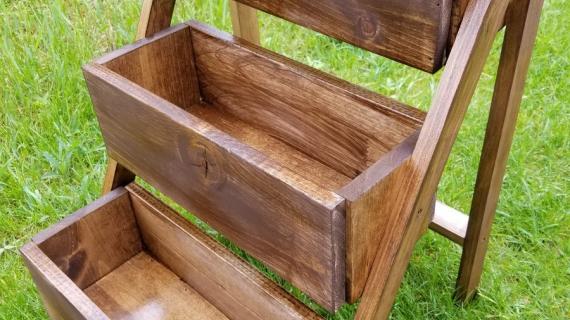
Be sure to drill holes in the bottom to allow drainage.
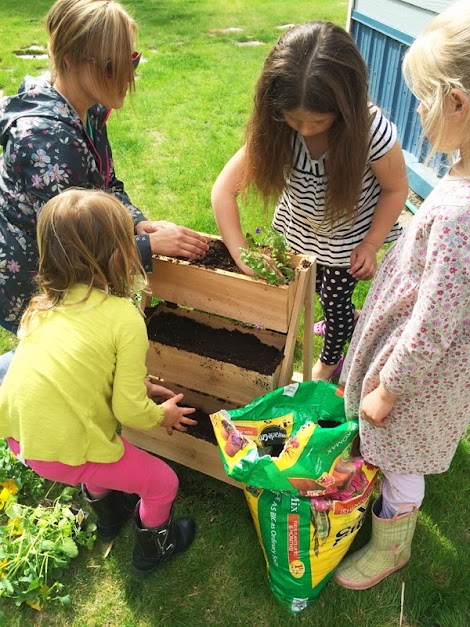
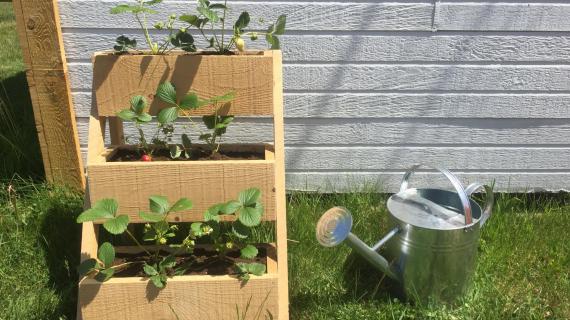
Time to get this baby planted, all hands on deck kiddos. They were so happy to help!
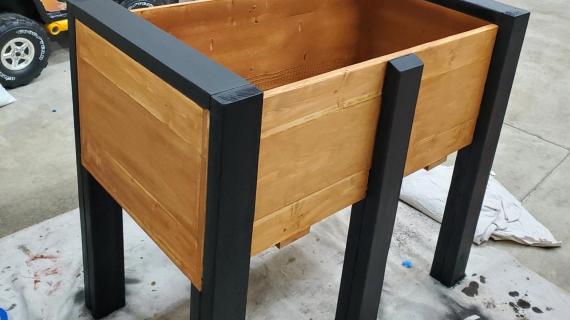
We decided to keep the cedar natural so the step that usually takes the most time, the finishing, didn't even need to happen. The final result is a beautiful planter that is so versatile. I thought herbs would be nice, or instead of 2 traditional planters on each side of the sidewalk, two of these would be fun and give a different look. If you do decide to finish it, paint or stain goes a long way. A simple project with many options, that's what I'm talking about!
Pin for Later!

Preparation
- 3 - 5-1/2" wide cedar fence pickets
- 2 - 1x2 @ 8 feet long
- I used 1-1/4" galvanized staples to attach but you could also use screws or brad nails in the same length, exterior appropriate
- 3 - 5 1/2" cedar fence picket @ 15"
- 6 - 5 1/2" cedar fence picket @ 5 1/2"
- 6 - 5 1/2" cedar fence picket @ 16" (cut last to fit)
- 2 - 1x2 @ 24"
- 1 - 1x2 @ 16"
- 2 - 1x2 @ 27 3/4" - both ends cut at 30 degree angle, ends ARE parallel, short point to long point measurement


Please read through the entire plan and all comments before beginning this project. It is also advisable to review the Getting Started Section. Take all necessary precautions to build safely and smartly. Work on a clean level surface, free of imperfections or debris. Always use straight boards. Check for square after each step. Always predrill holes before attaching with screws. Use glue with finish nails for a stronger hold. Wipe excess glue off bare wood for stained projects, as dried glue will not take stain. Be safe, have fun, and ask for help if you need it. Good luck!
Instructions
Step 1

Cut 5 1/2 " cedar fence picket for bottom first. Then attach both ends, cut sides last to fit. I used a Ryobi Airstrike Stapler and 1 1/4" galvanized for exterior staples. Make 3 of these boxes.
Step 2
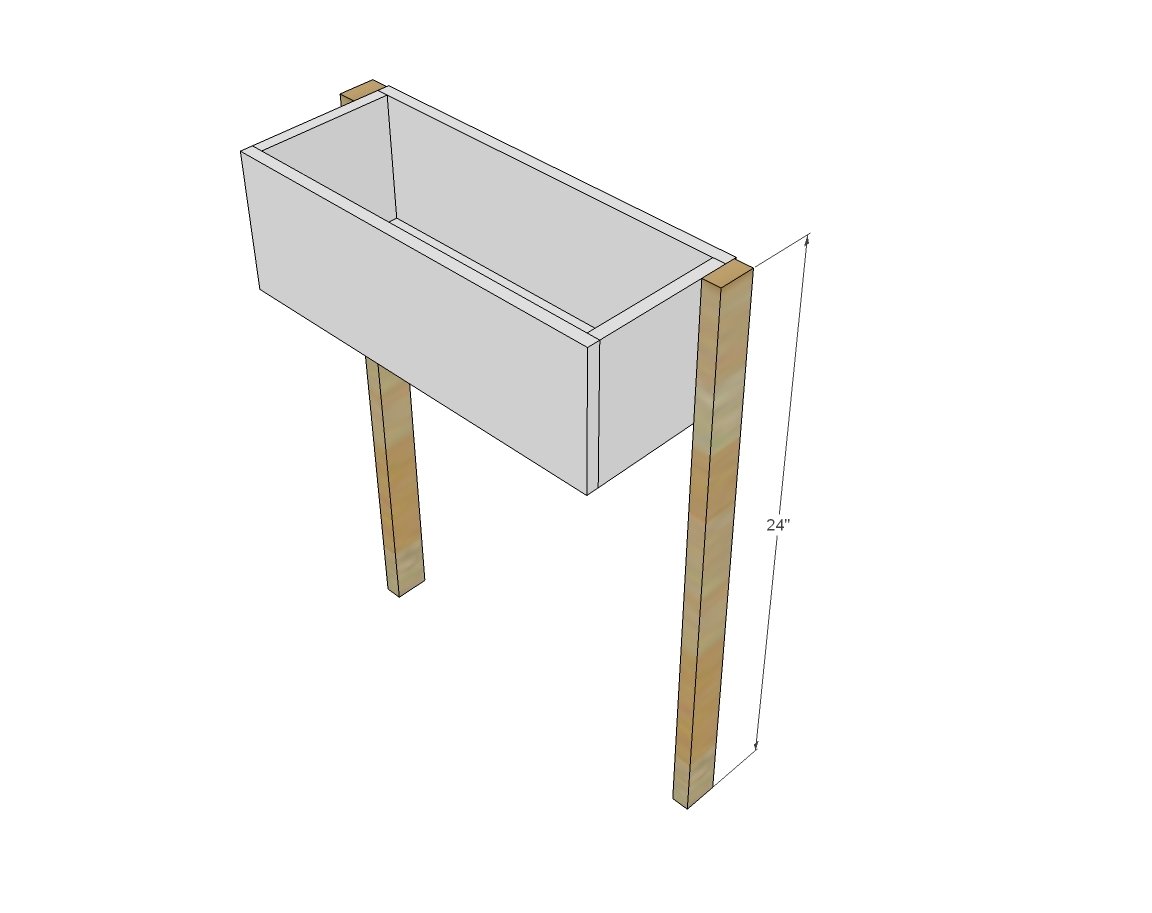
Attach both 1 x 2 @ 24" flush to back as shown on each side. Used the 1 1/4" staples.
Step 3
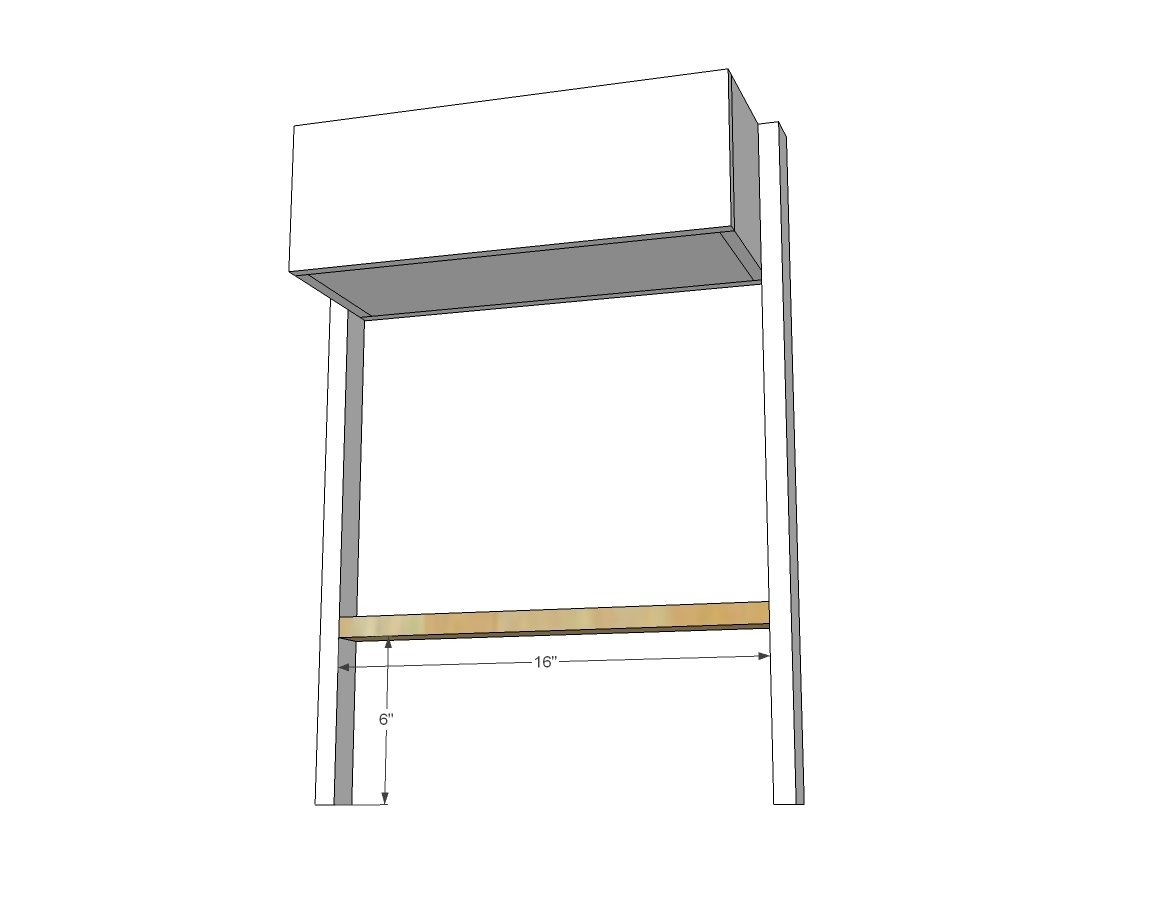
Add 1 x 2 cross support 6" from bottom of outside 1 x 2's. Used staples to attach.
Step 4
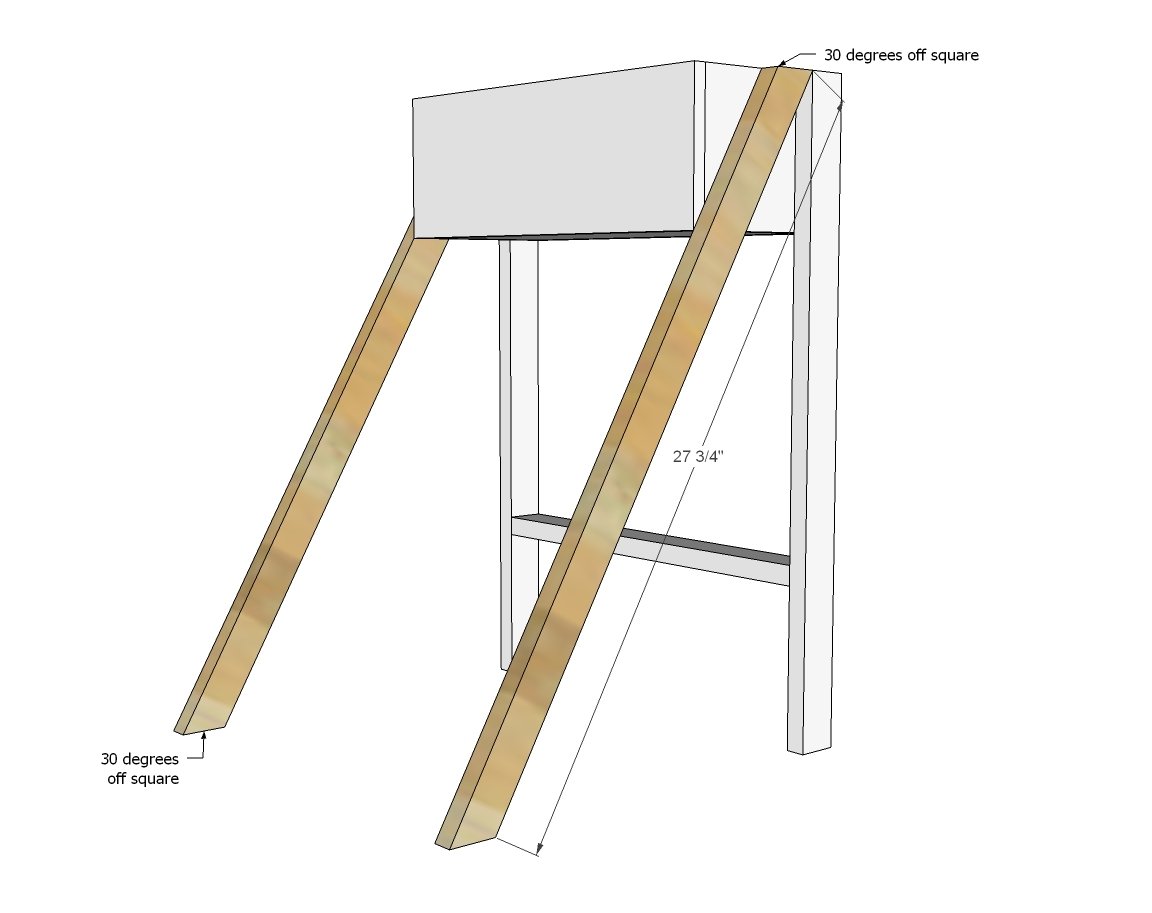
Cut 2 - 1x2's @ 27 3/4". Cut both ends 30 degrees parallel short point to long point. Make flush with top as shown. Attached with staples.
Step 5
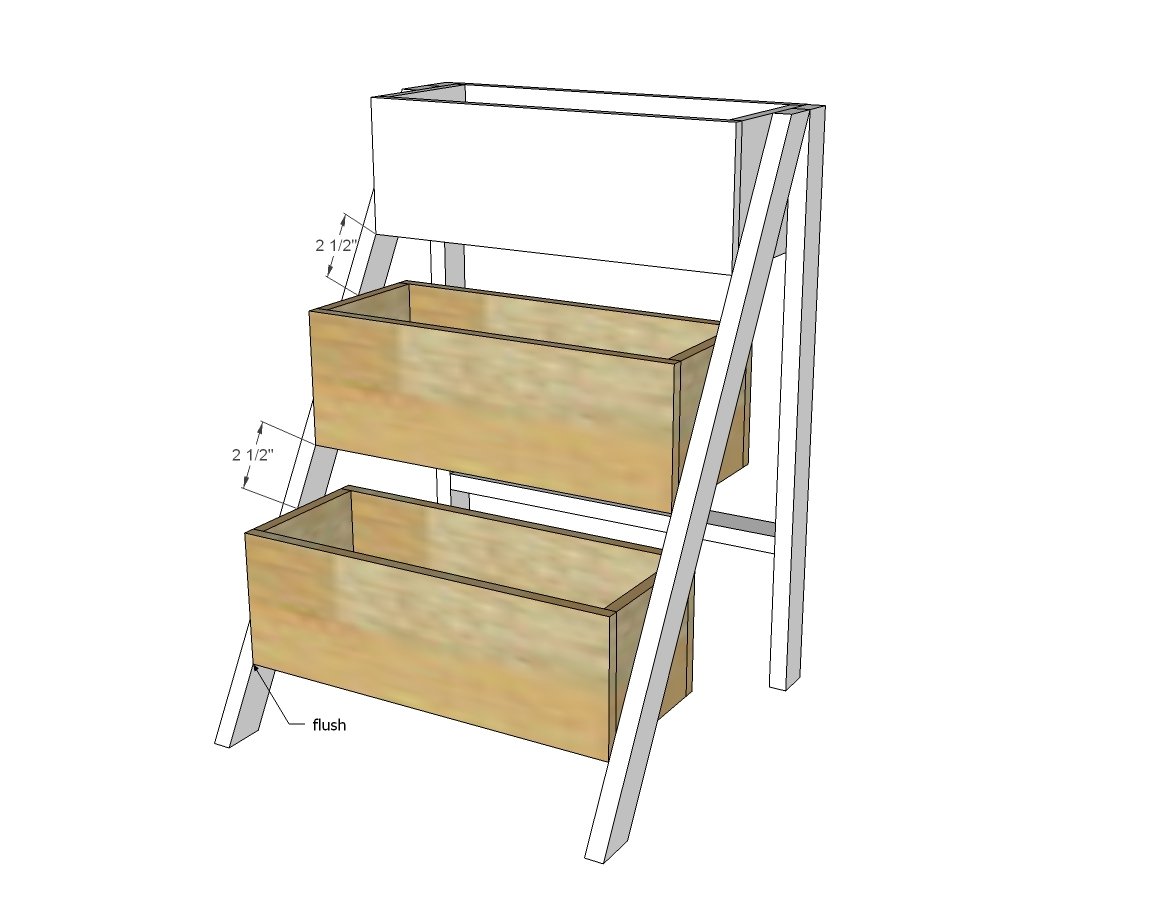
Attach the remaining planter boxes to the angled front legs with screws from inside (recommended) or staples.
It is always recommended to apply a test coat on a hidden area or scrap piece to ensure color evenness and adhesion. Use primer or wood conditioner as needed.


Comments
Kim559
Sat, 09/09/2017 - 14:32
Wood
What kind of wood did you use?
migerrits
Tue, 06/01/2021 - 07:04
Cedar.
Cedar.
HOWsMom
Wed, 05/27/2020 - 13:33
Just made the boxes, not the frame
We used the plans for these boxes without the frame, added wire and hung them from our fence !
Great little planters.
chicoquente
Fri, 07/24/2020 - 09:50
How did you prevent the…
How did you prevent the staples from rusting ?? I'm about to tackle this project but am not sure how to stop the staples from rusting if I do not plan to paint or seal, which it appears you did not do either.
Texasmom1994
Sat, 02/27/2021 - 10:21
Great project
This was so easy! I completed it while my husband stained one side of our footboard. I cant wait until I get some flowers in it!
Texasmom1994
Sat, 02/27/2021 - 10:21
Great project
This was so easy! I completed it while my husband stained one side of our footboard. I cant wait until I get some flowers in it!
kartsrae
Mon, 07/19/2021 - 19:03
awesome!
awesome!