
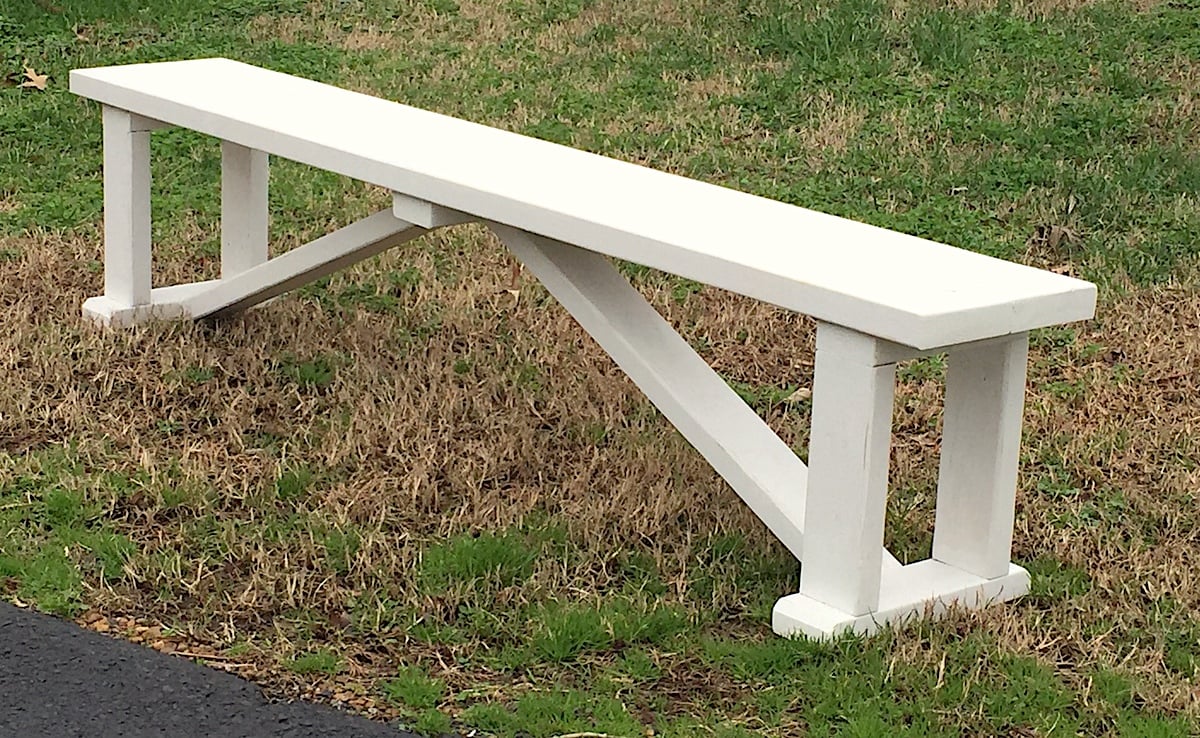

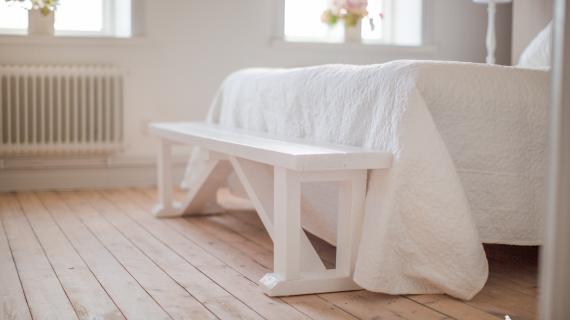
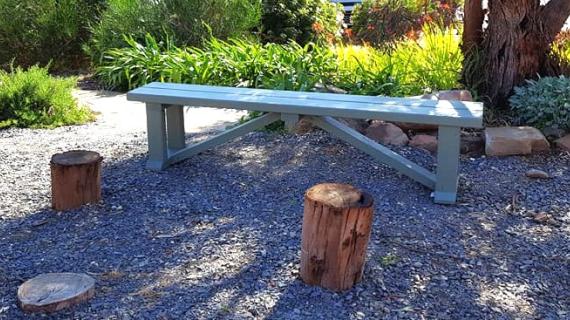
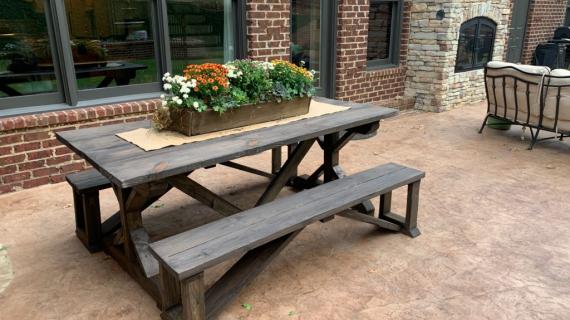
Build a bench for $15 in lumber! This is an easy project, makes a great bench for extra seating, outdoor seating, as an end of bed bench, or a dining bench. Free step by step plans with detailed diagrams from Ana-White.com
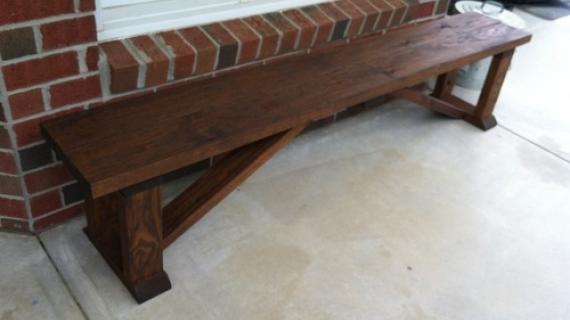
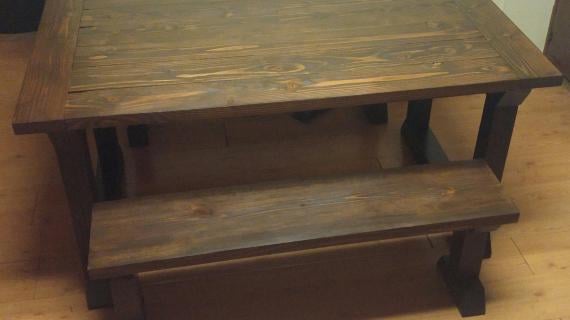
Photo By CSHANDYMAN
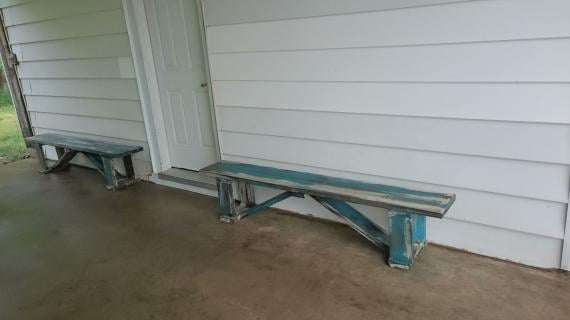
Why We Love this Bench
- Gorgeous solid wood grains take stain or paint
- Sturdy with cross bracing
- Easy to build design
- Inexpensive, built using off the shelf lumber
- Versatile - use paired with a dining table, indoors or outdoors, throughout the home]
Why We Built This Bench
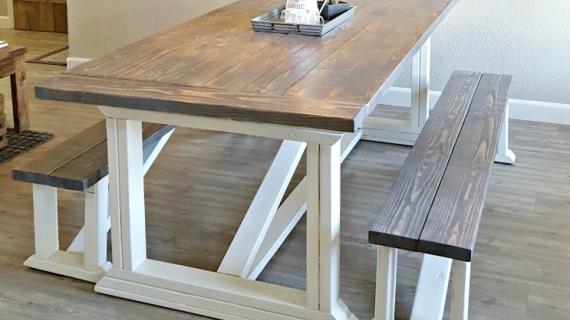
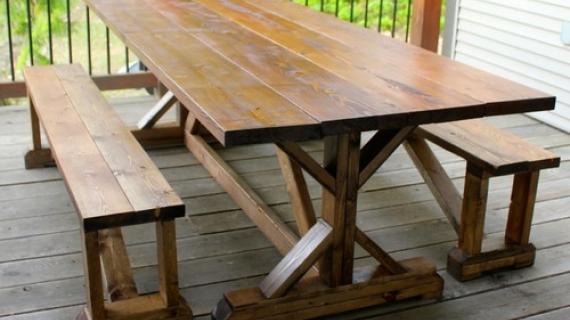
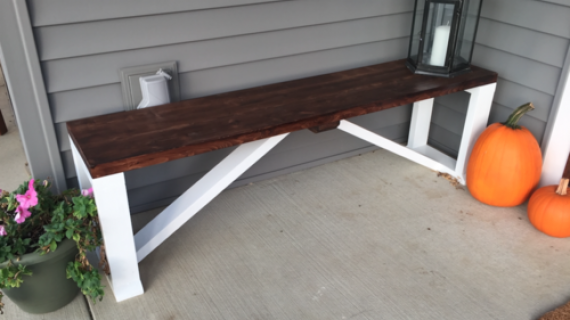
Do you remember back when my friend Melissa built this Farmhouse Table and we shared plans here?
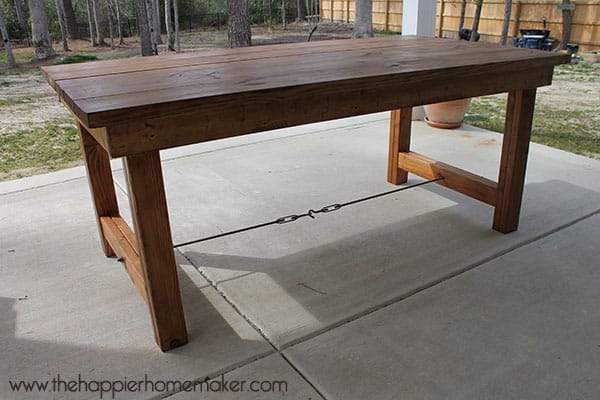
Melissa from the Happier Homemaker built a matching bench!

She spent about $15 in lumber on it - and wanted to share the plans with you so you all could have a matching bench too!
How awesome is that? The plans for this bench follow, but if you want more details from Melissa, please take a second to check out her post here.
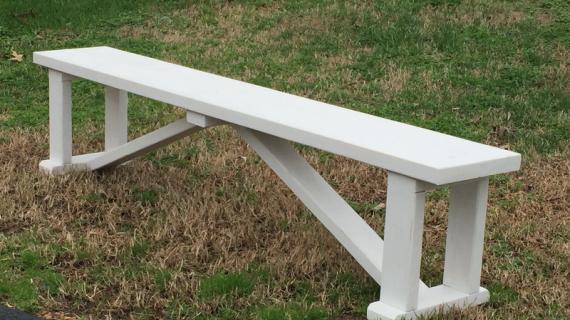
Free Plans to Build a Farmhouse Bench
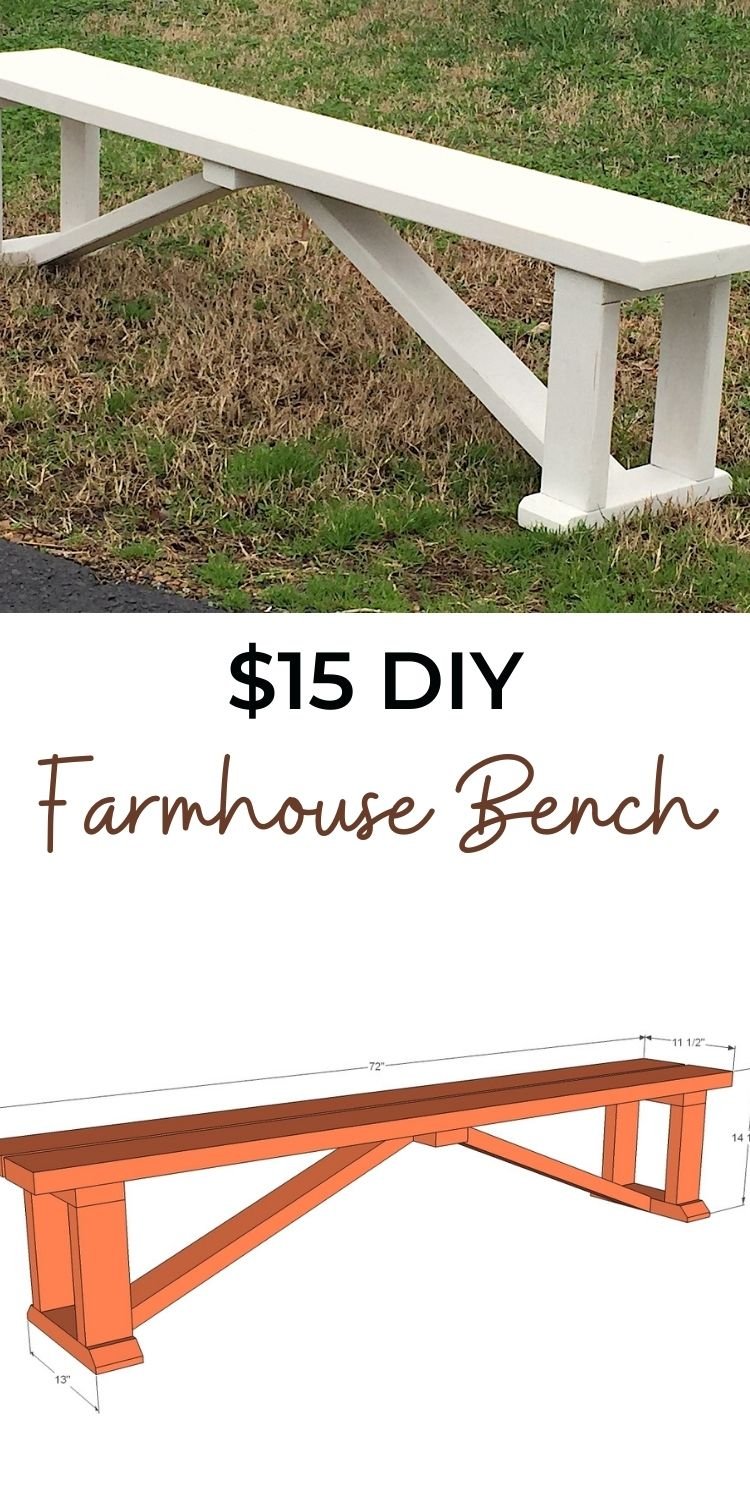
Pin For Later!
Preparation
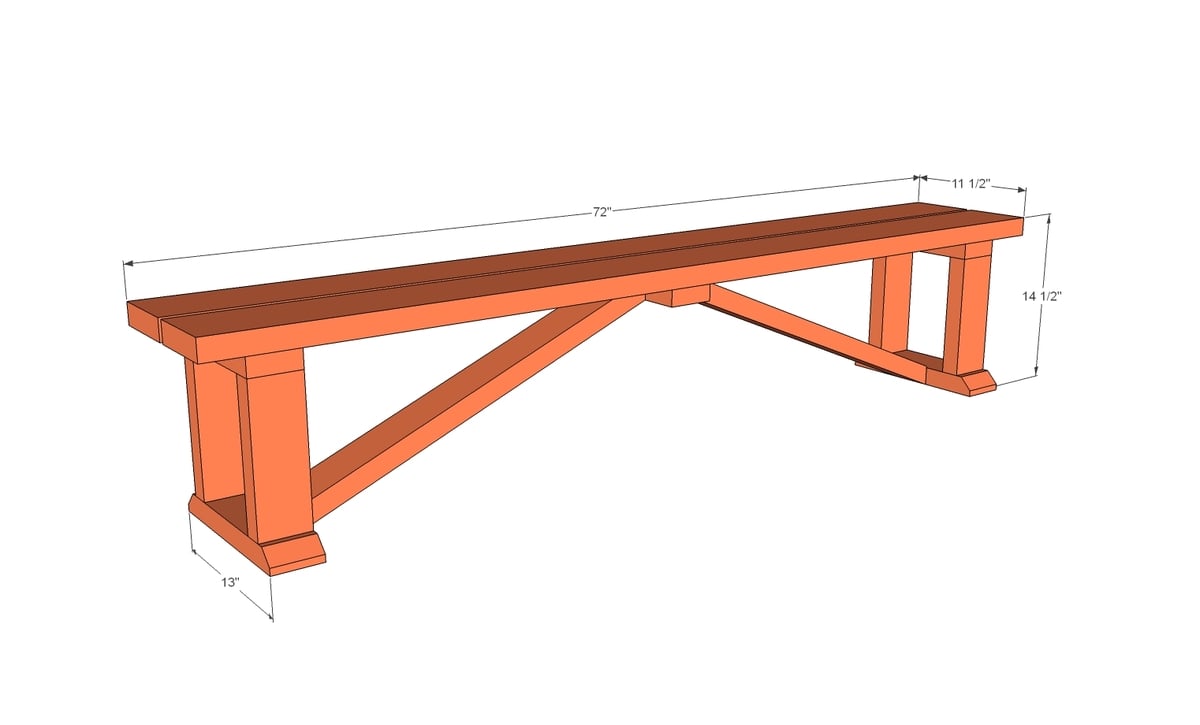
- 1 - 2x6 @ 12 feet long (you can cut this one into 2 - 6' long boards for easier transporting)
- 2 - 2x4 @ 8 feet long
- 2-1/2" self tapping star bit screws (try the exterior deck ones) or 2-1/2" pocket hole screws (for Kreg Jig users)
- 3 - 2x4 @ 10" long (under seat boards)
- 4 - 2x4 @ 11" long (legs - note that this is labeled incorrectly in diagram 1 and should be 11" instead of 10")
- 2 - 2x4 @ 13" long (leg bases)
- 2 - 2x6 @ 72" (seat boards)
- 2 - 2x4 @ 30" long - long point to long point, both ends cut at 22 1/2 degrees off square BEVEL, ends ARE parallel (angled braces) NOTE: You may wish to cut these later to get the angles just right.


Please read through the entire plan and all comments before beginning this project. It is also advisable to review the Getting Started Section. Take all necessary precautions to build safely and smartly. Work on a clean level surface, free of imperfections or debris. Always use straight boards. Check for square after each step. Always predrill holes before attaching with screws. Use glue with finish nails for a stronger hold. Wipe excess glue off bare wood for stained projects, as dried glue will not take stain. Be safe, have fun, and ask for help if you need it. Good luck!
Instructions
Step 1
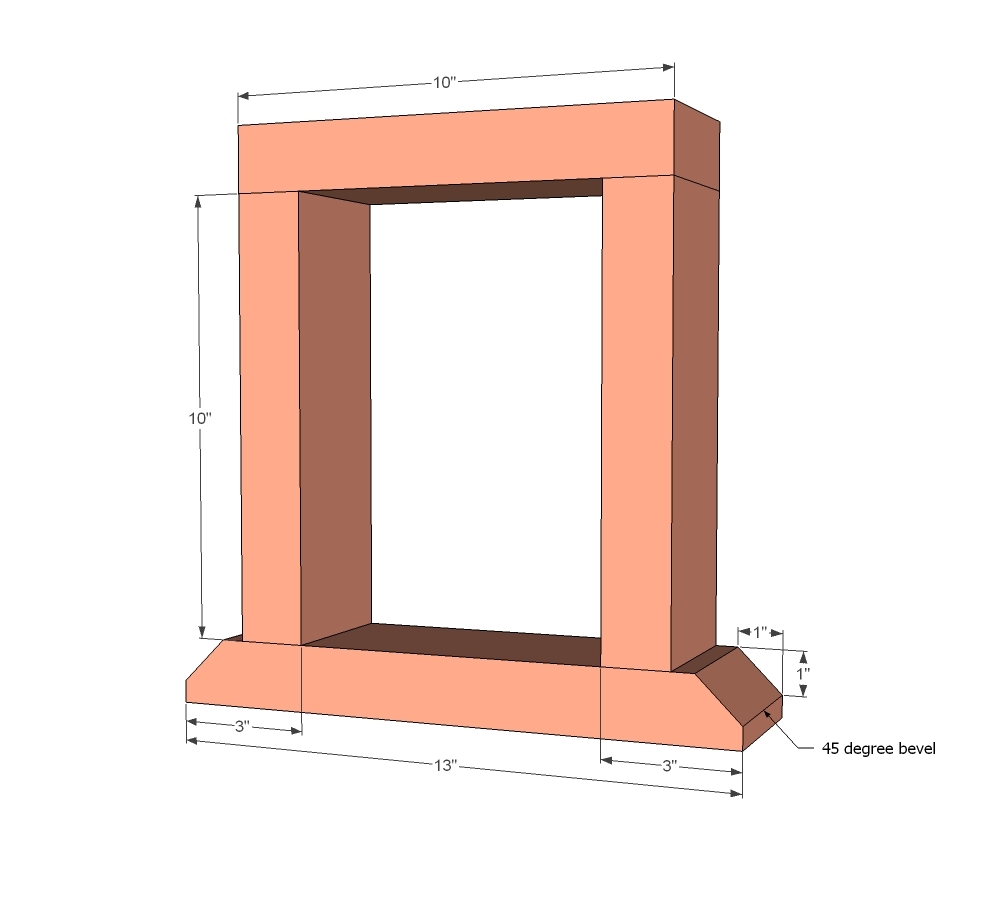
First, build your leg sets - the vertical legs are 11" long (not 10" as shown in diagram).
You can attach with countersunk screws (I recommend at least 2-1/2" long self tapping screws) or use 1-1/2" pocket holes and 2-1/2" pocket hole screws.
Build two of the leg bases.
Step 2
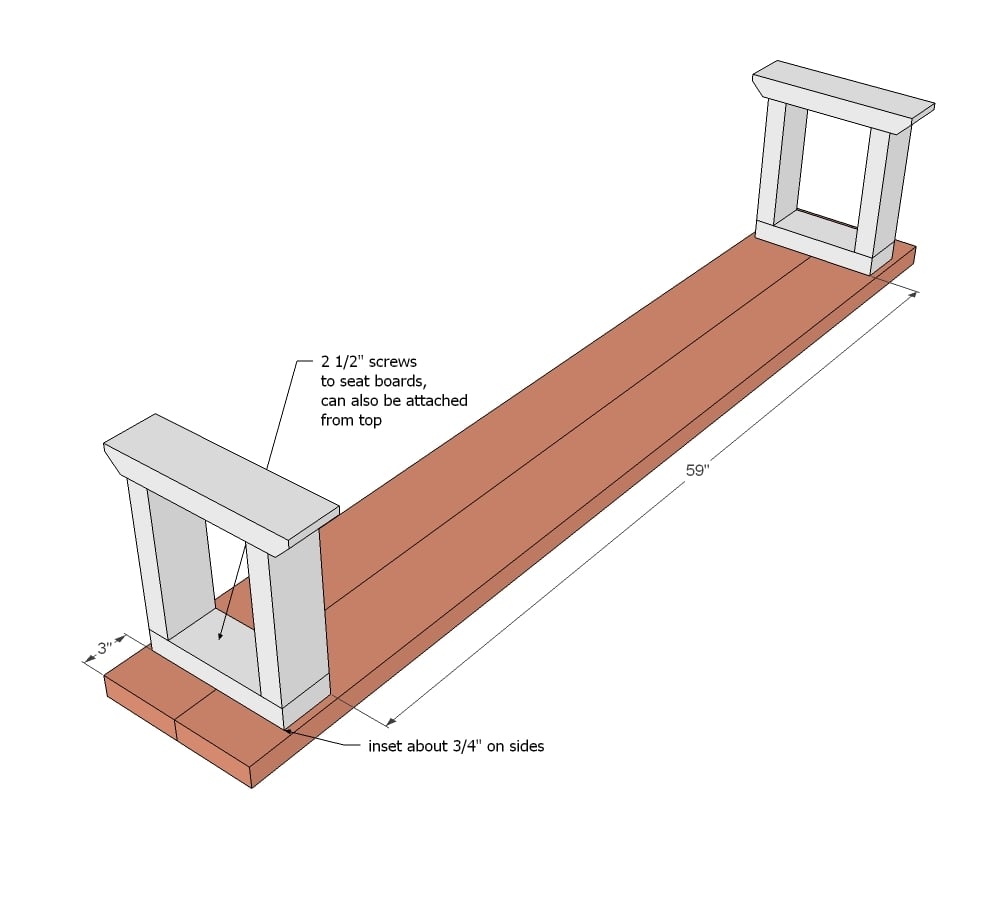
Attach leg bases to the seat boards - use 2-1/2" screws and glue. Kreg jig users - I'd just use the 2-1/2" pocket hole screws to attach here.
NOTE: Overhang will vary depending on width of your 2x6s, so split the difference.
Step 3
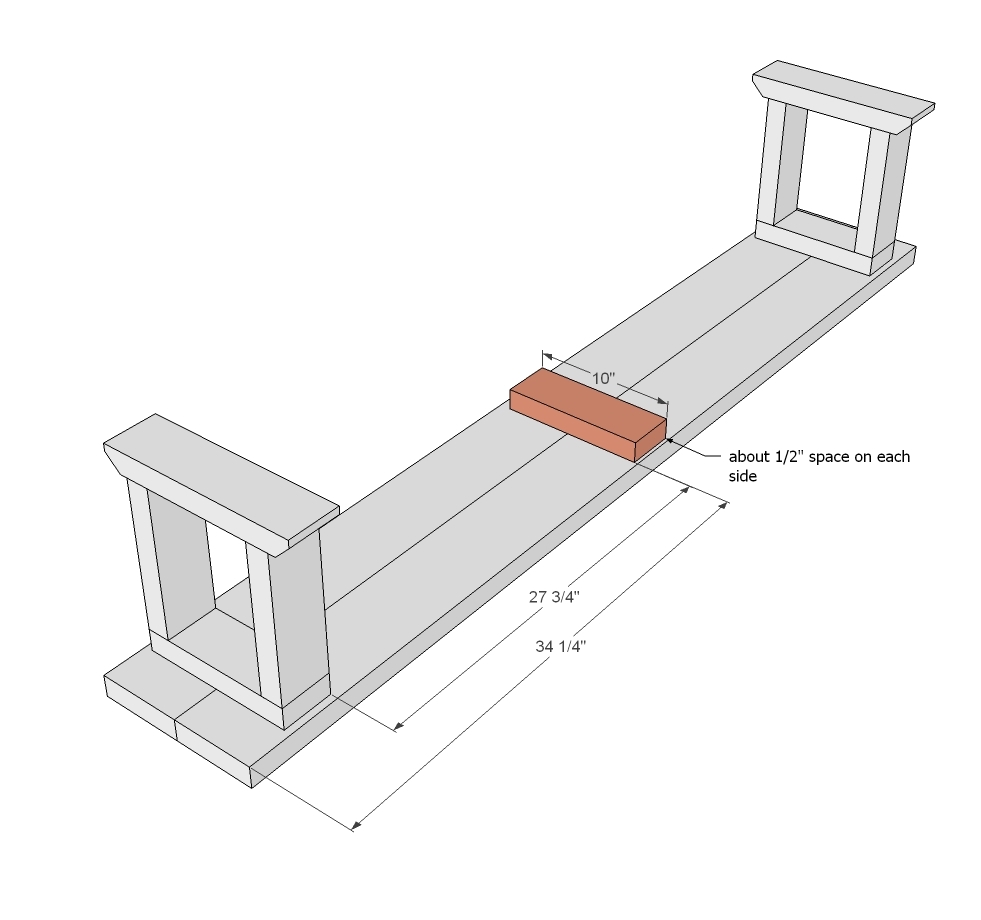
Attach center board, same as the legs, centered on the 2x6s.
Step 4
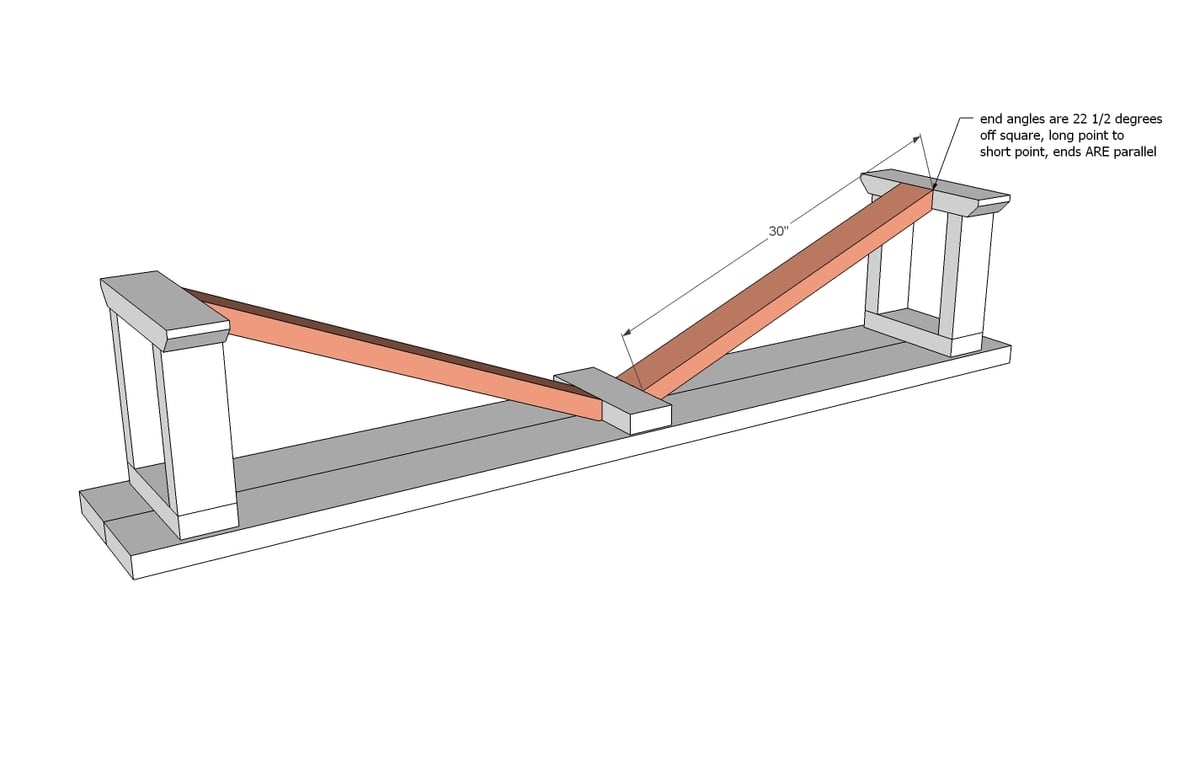
Fit the cross bracing boards, and attach in place. Pocket holes are the easiest way to go here, but you could also simple screw at an angle into the legs and the center support board.
Enjoy your bench!
It is always recommended to apply a test coat on a hidden area or scrap piece to ensure color evenness and adhesion. Use primer or wood conditioner as needed.


Comments
Tiffany McLeod
Thu, 10/17/2013 - 20:02
Beautiful
This is beautiful! I and my sister are planning to build a pair for her dining room next week.
I have one question: when you say "bevel" you mean cut so the cut spans the wide side of the board, not the narrow side, correct? I mean, I can make these cuts with a circular saw, right?
Kabarie
Thu, 10/31/2013 - 12:46
measurements
Hi there, love this table! I wanted it so built it to fit in my kitchen. So I'm stumped on the angle bit....not sure how to figure it out. The braced areas underneath you have as 30". Well because my bench is shorter and taller mine is at 19"inches...I can't seem to find the right angle to cut them on so I'm going through wood!! is there an equation? Anybody please help! Thanks!!
ken
Wed, 06/25/2014 - 11:53
an angle finder/general protractor
You can find them for not much $$. Some have printed numbers, either way they assist in finding the angle you are working with. Hope this helps.
slogalor
Wed, 06/25/2014 - 12:07
Great Idea
Very good idea to decorate the yard. I wonder if it has to be of any material especially since it rains a lot here to protect from the rain
cmcmassage
Sat, 12/20/2014 - 18:17
Great sturdy bench but...
Some of the measurements are off if you want to use this bench with a (my) dining room table. With these current measurements, the bench is only 15 1/2" high from the ground and while this might work for an outdoor type bench or general seating, I found it was about 1-2" too short for my table. I built this to the stated specs but will end up putting another 10" 2x4 horizontally under each footing to make it tall enough to be comfortable for my dining room table. Alternatively, you could just make your vertical leg pieces an inch or two longer to make up for the height difference; that is, if you found yourself like I did with a bench that was just shy of perfect for my dining room table. Bench is solid and super sturdy and I plan on making another for the other long side of my table. Thanks for the great plans! I'll upload pics once I get it painted/stained. Thanks again.
Laurel lub
Tue, 03/17/2015 - 21:03
Question about the 45 degree angle
I am super new to this and would love if somebody would please tell me how to proceed with cutting the 45 degree bevel off the legs since it has to be 1 inch up and 1 inch out. I can't visualize how to cut that out.
Emilynhok
Fri, 10/16/2015 - 16:11
1st project ever
So simple! I'm officially addicted to building things! My husband got me a miter saw for our anniversary (I think he thought I was nuts) but thanks to all the easy to follow instructions I was able to build a bench! I don't think I'll ever but a piece of furniture again unless it's a couch.
ntschaenn
Thu, 09/15/2016 - 11:57
Mistakes and corrections
I believe there are a few mistakes in this plan that made this simple bench unecessarily challenging for me. The cut list says 11" for the leg height noting that the plan measurement incorrectly shows 10. After doing the math i found 10 is indeed correct otherwise you would have to cut the angle at 24.62 degrees. I would immagine you might be able to make 22.5 work but it's going to be off a bit. also the cut list says the parallel cuts at 30" long point to long point which is not only difficult to do but incorrect it turns out. There is no way to make that work without recutting.
Huney
Thu, 05/09/2019 - 08:18
Measurements
After reading the comments on errors in cuts, I'm really hesitant to even begin. Any other comments to refute the measurements of previous poster?
Thanks