
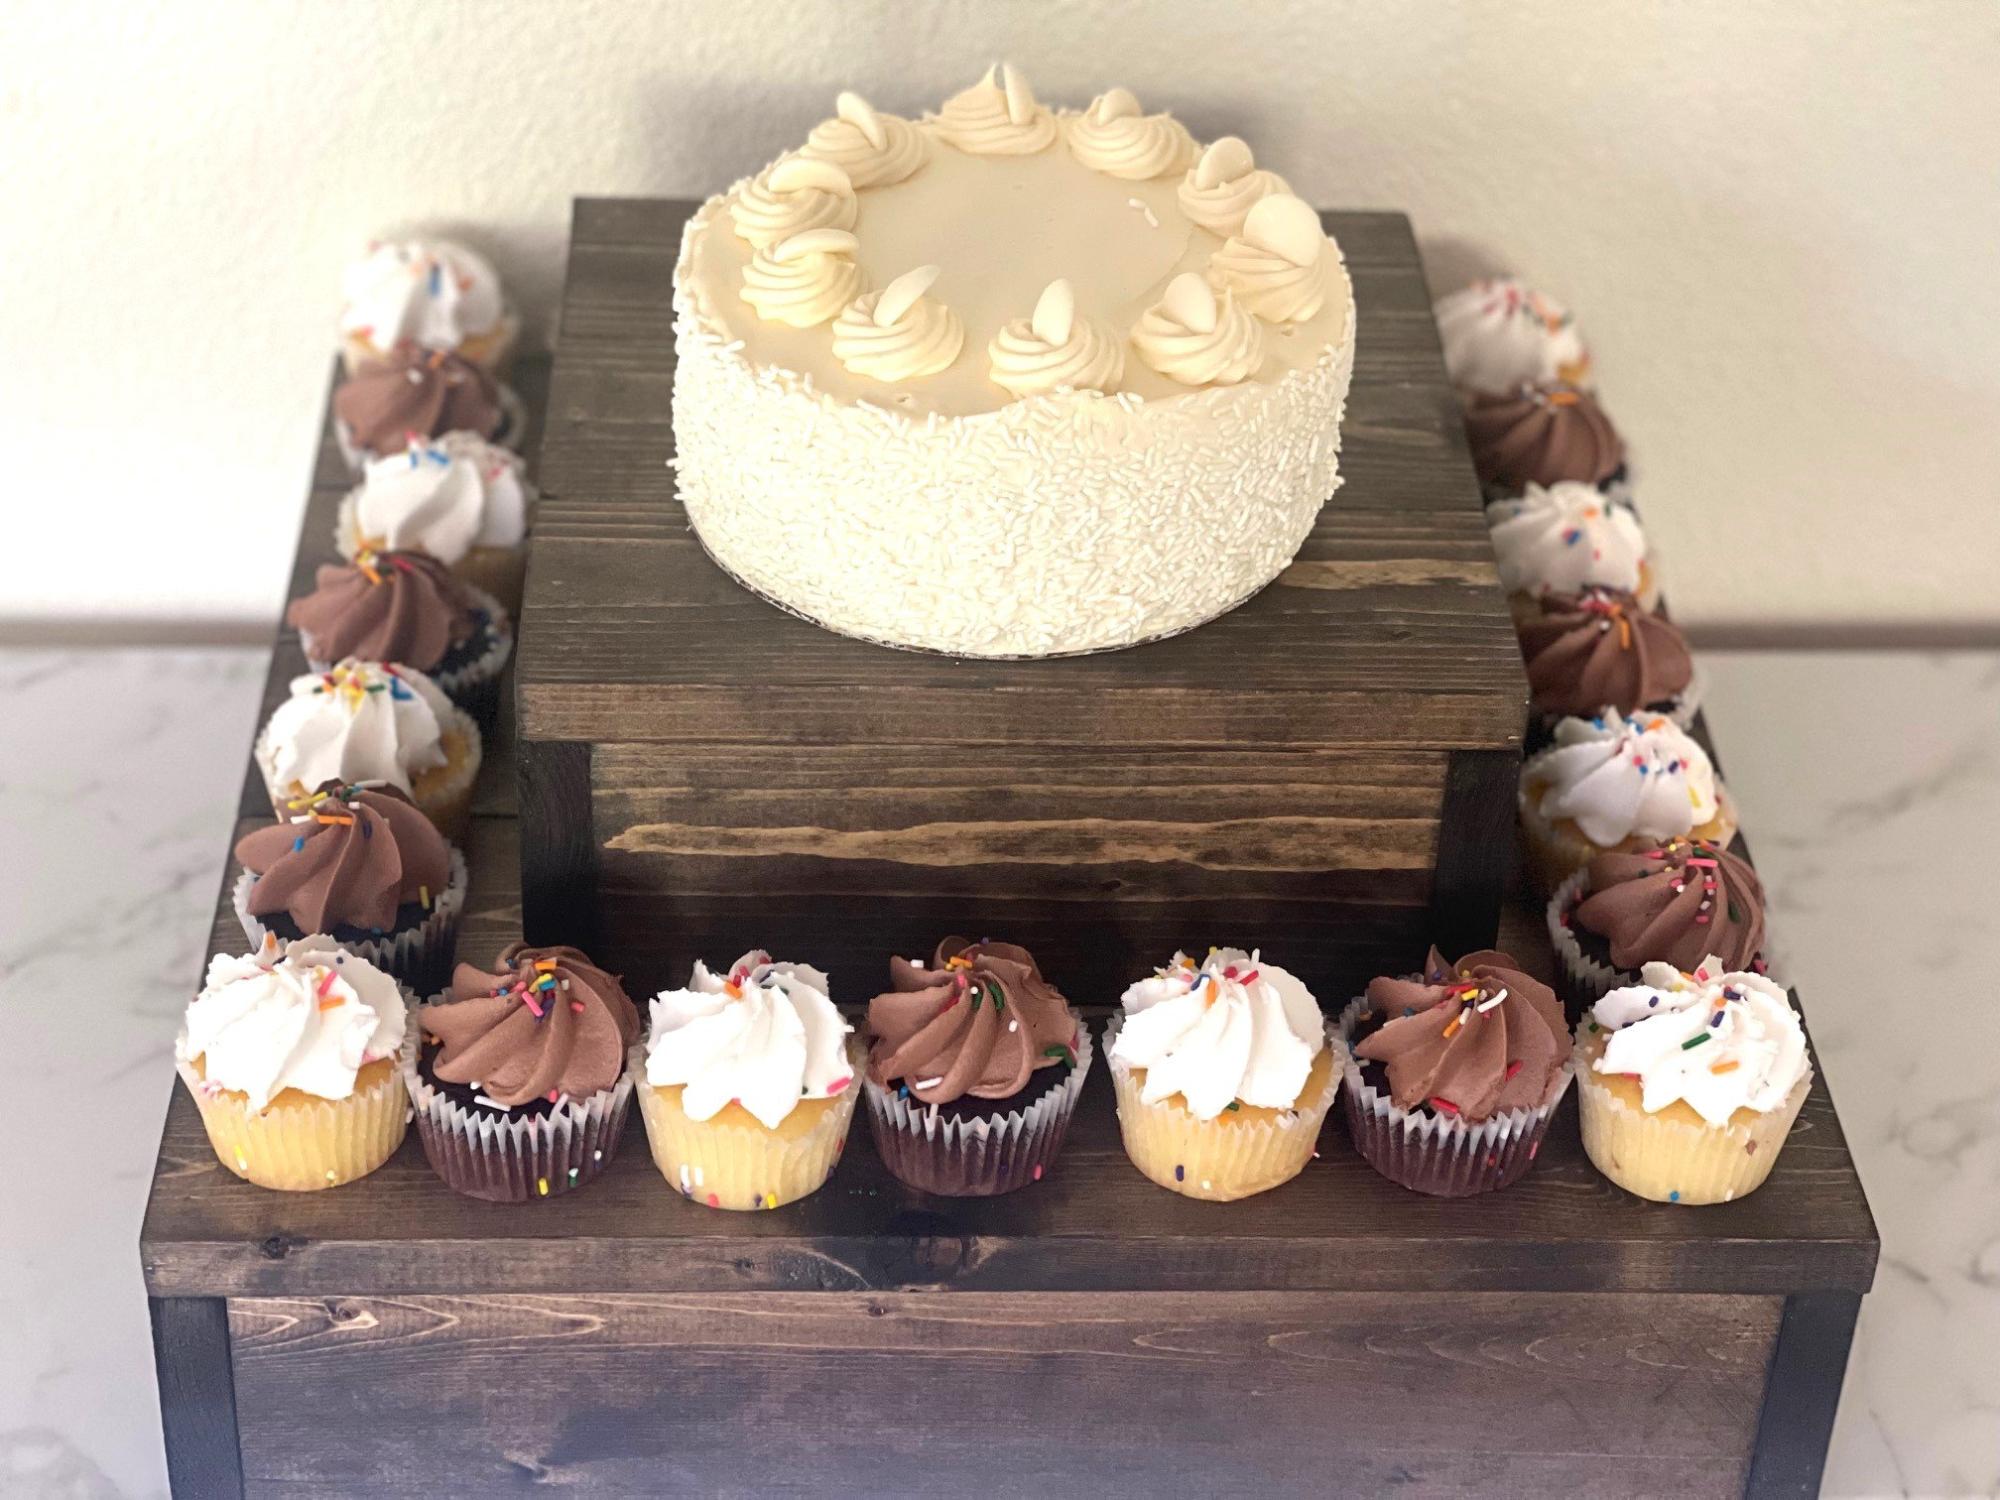

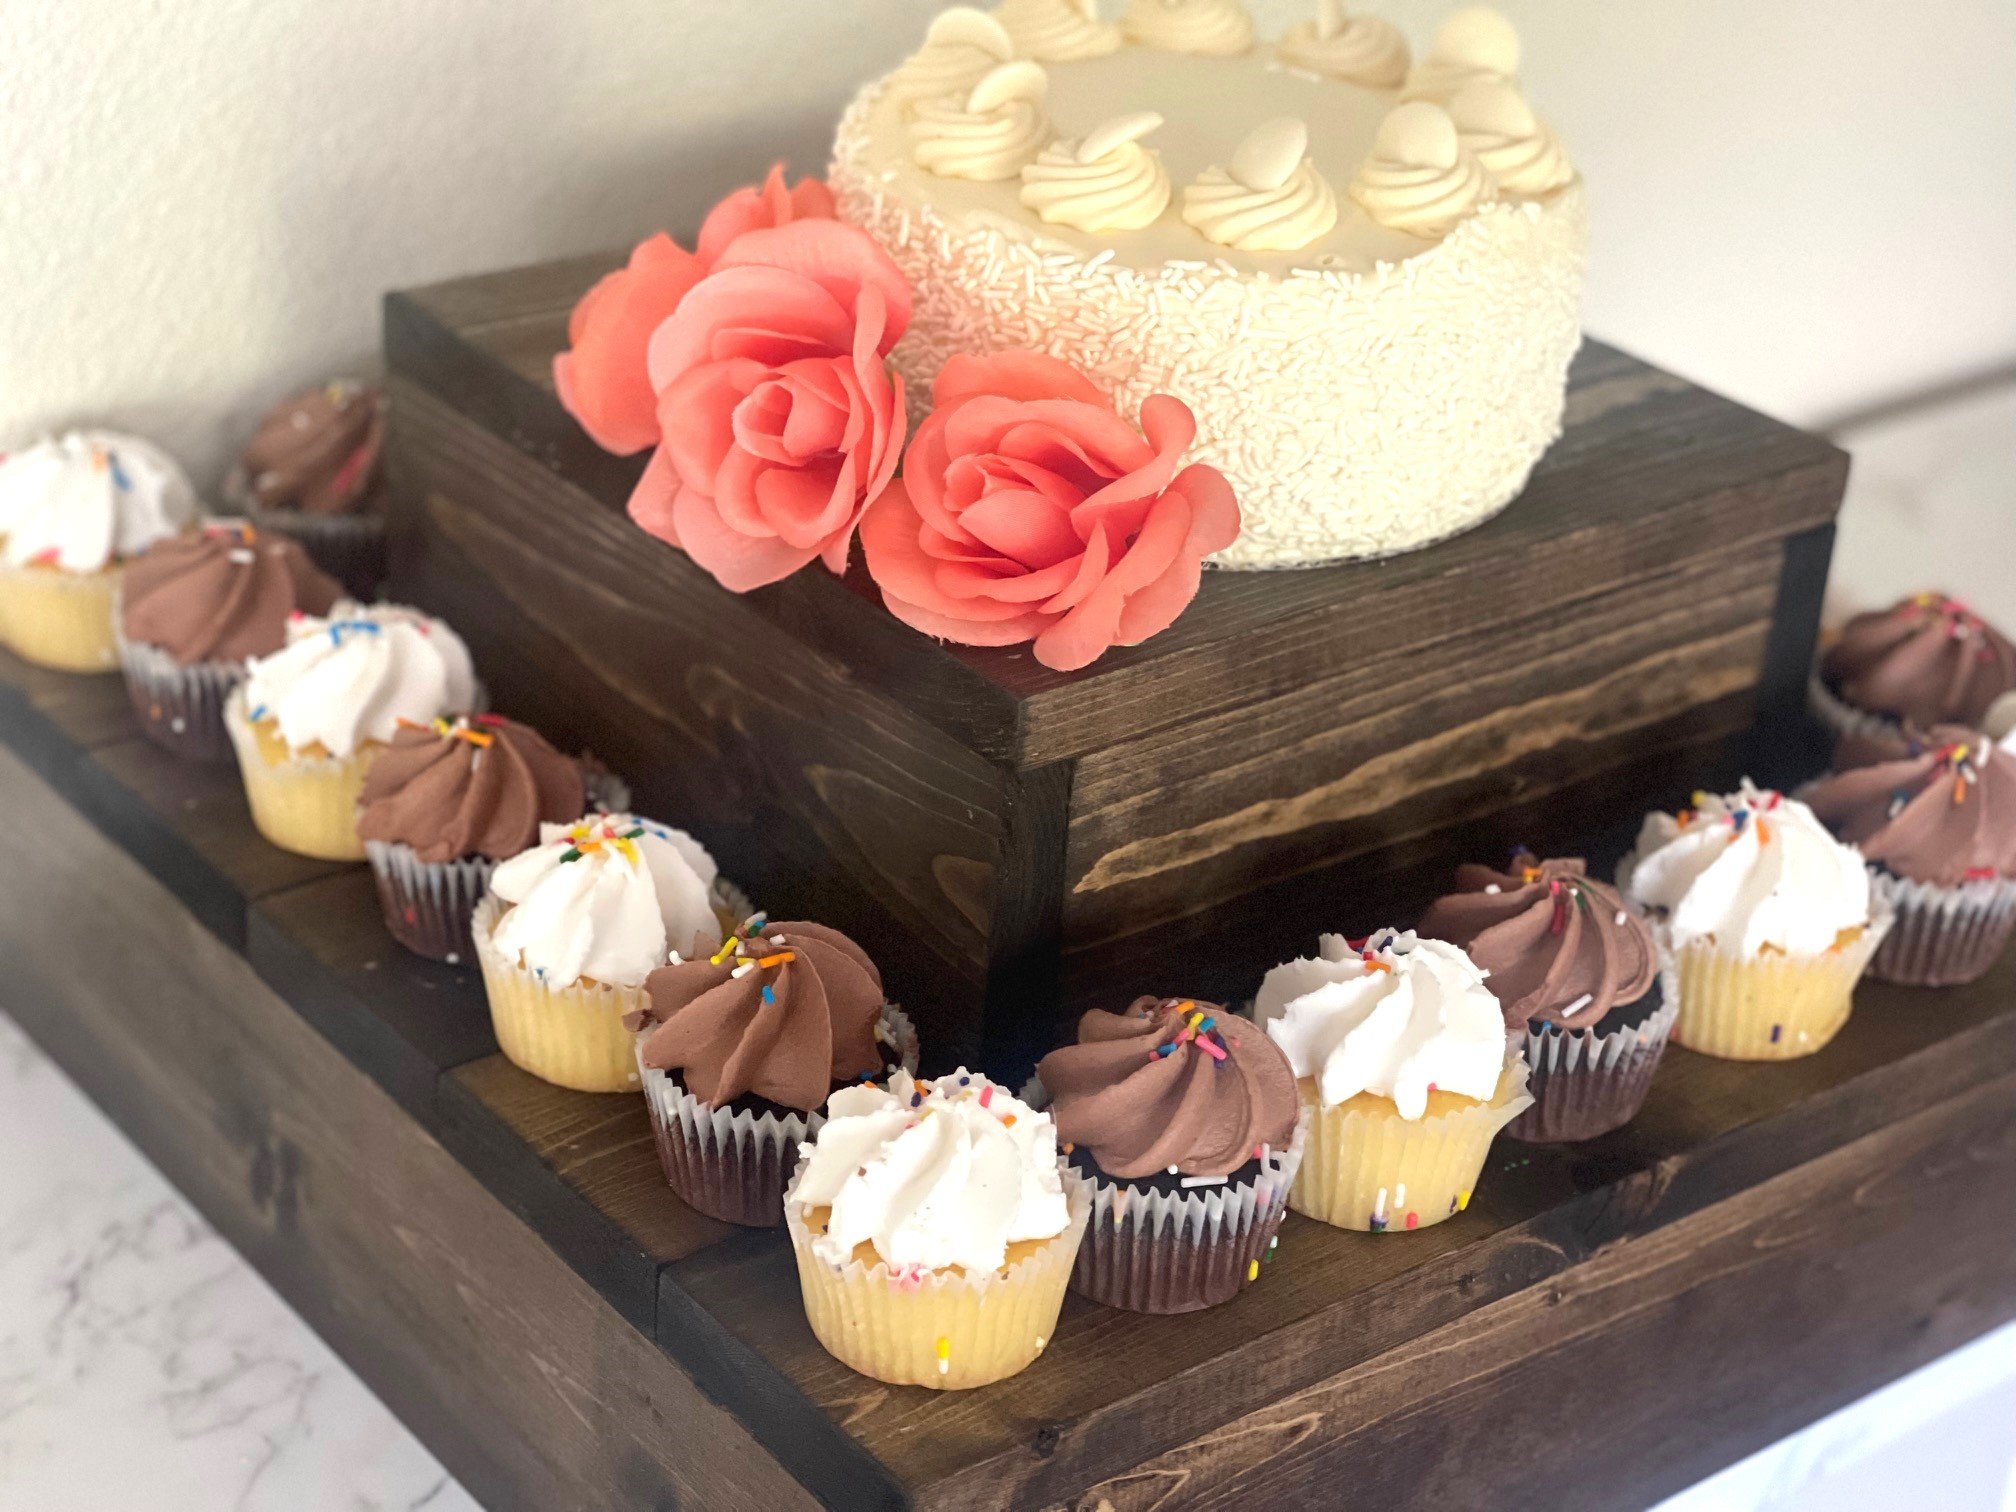
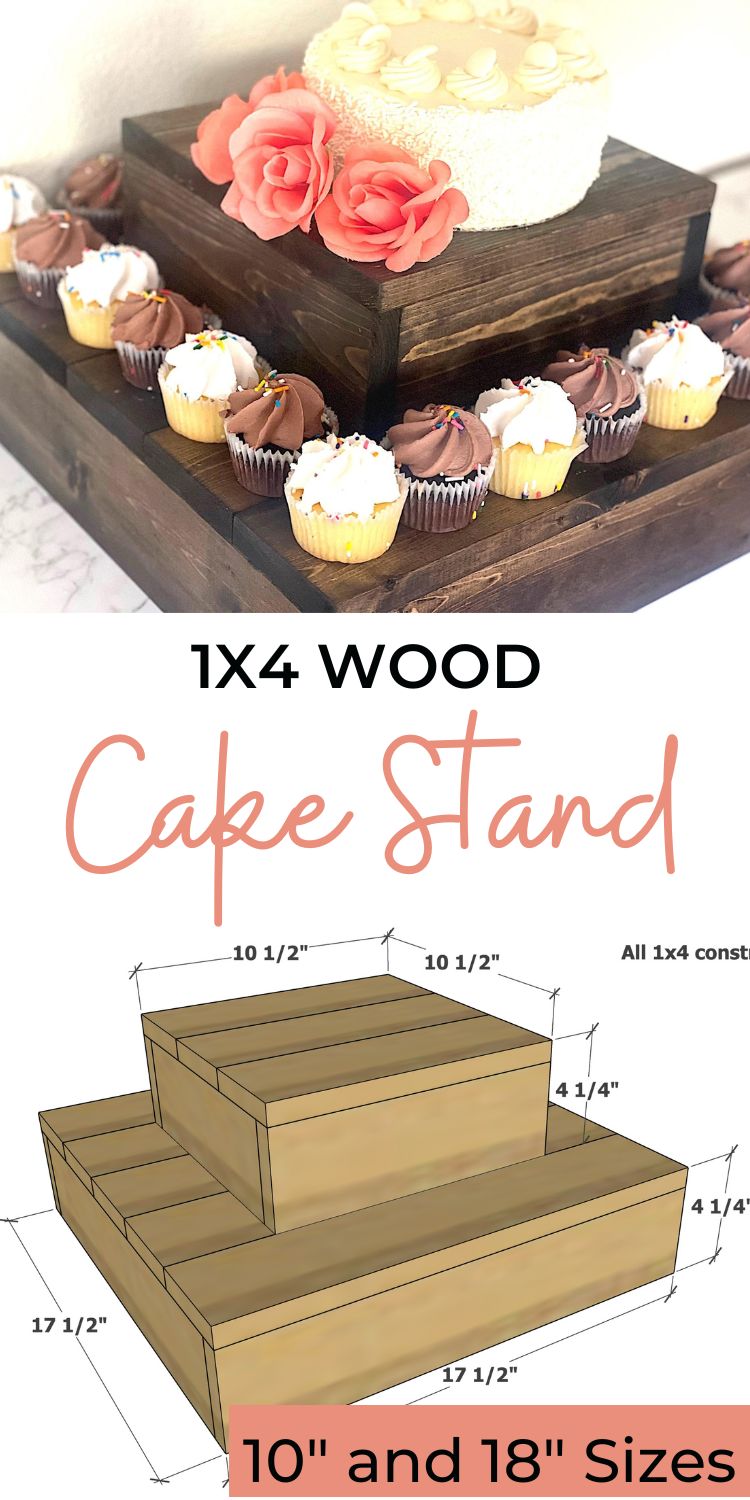
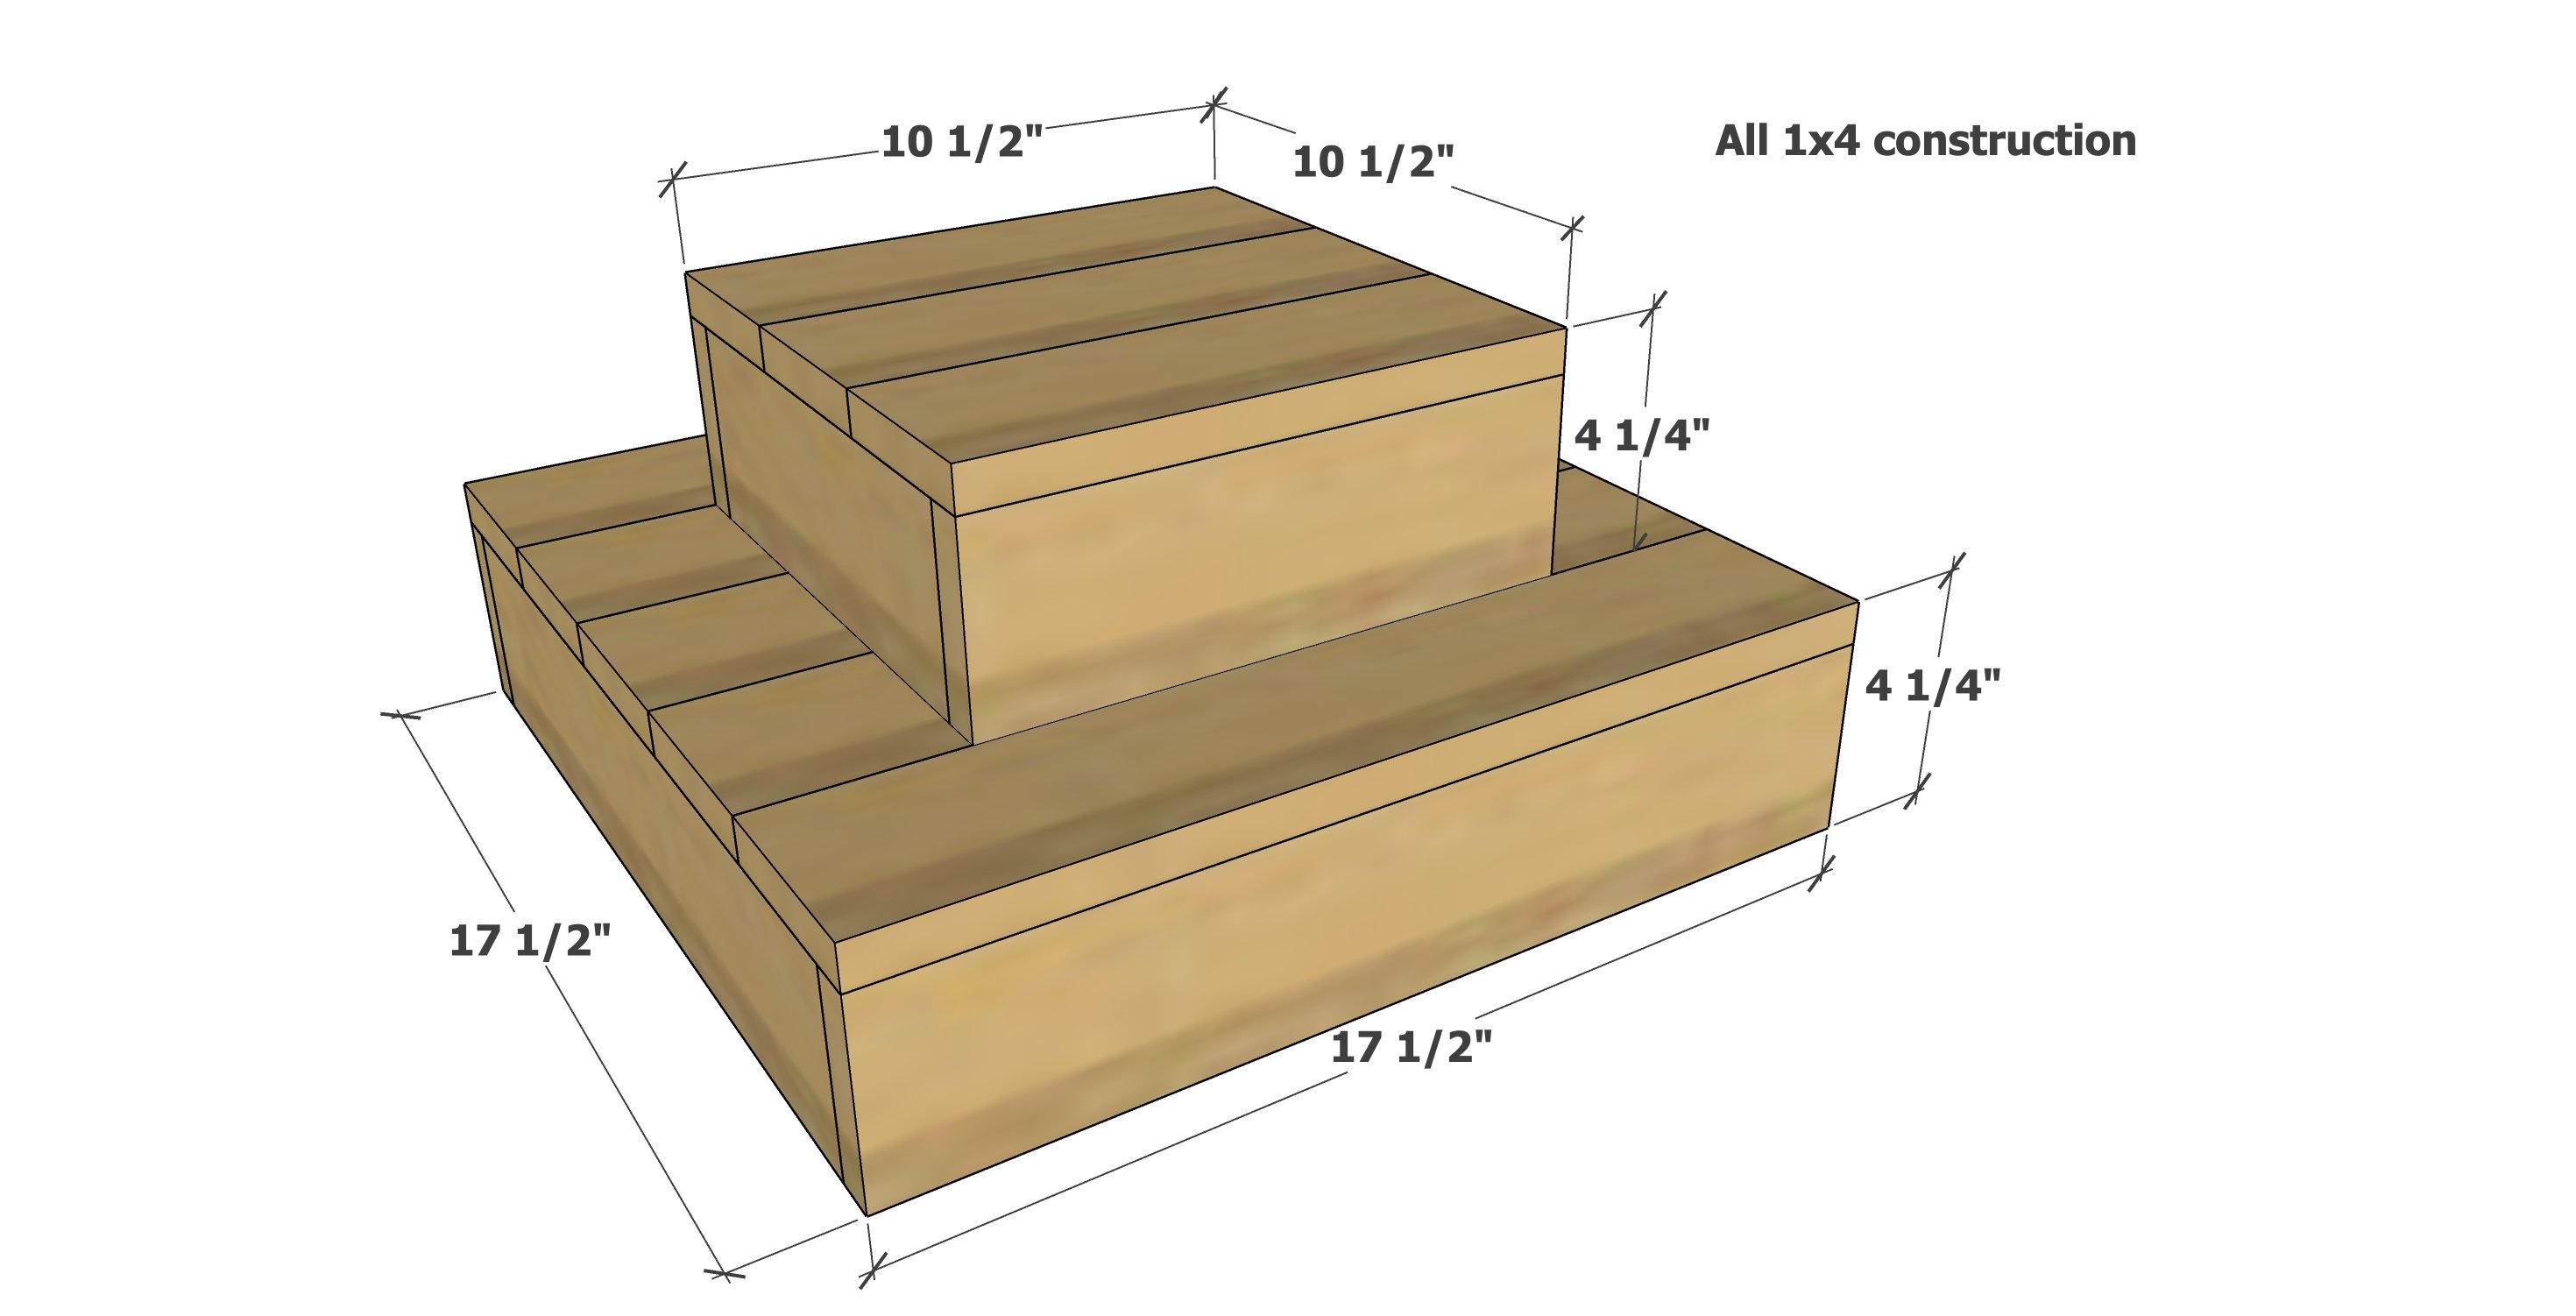
Display your cake and cupcakes with this easy to build wood cake stand plan. Featuring two tiers with no overhangs, these wood cake stands nest together for storage, and can be used as risers individually or stacked.
Using pine 1x4s, create a rustic display for cakes and cupcakes. Free step by step plans from Ana-White.com
Related: 1x3 Cake Stand Plans (not as tall and less expensive to build)


Build this stacked cake stand in an hour or less!
How I Build these Cake Stands
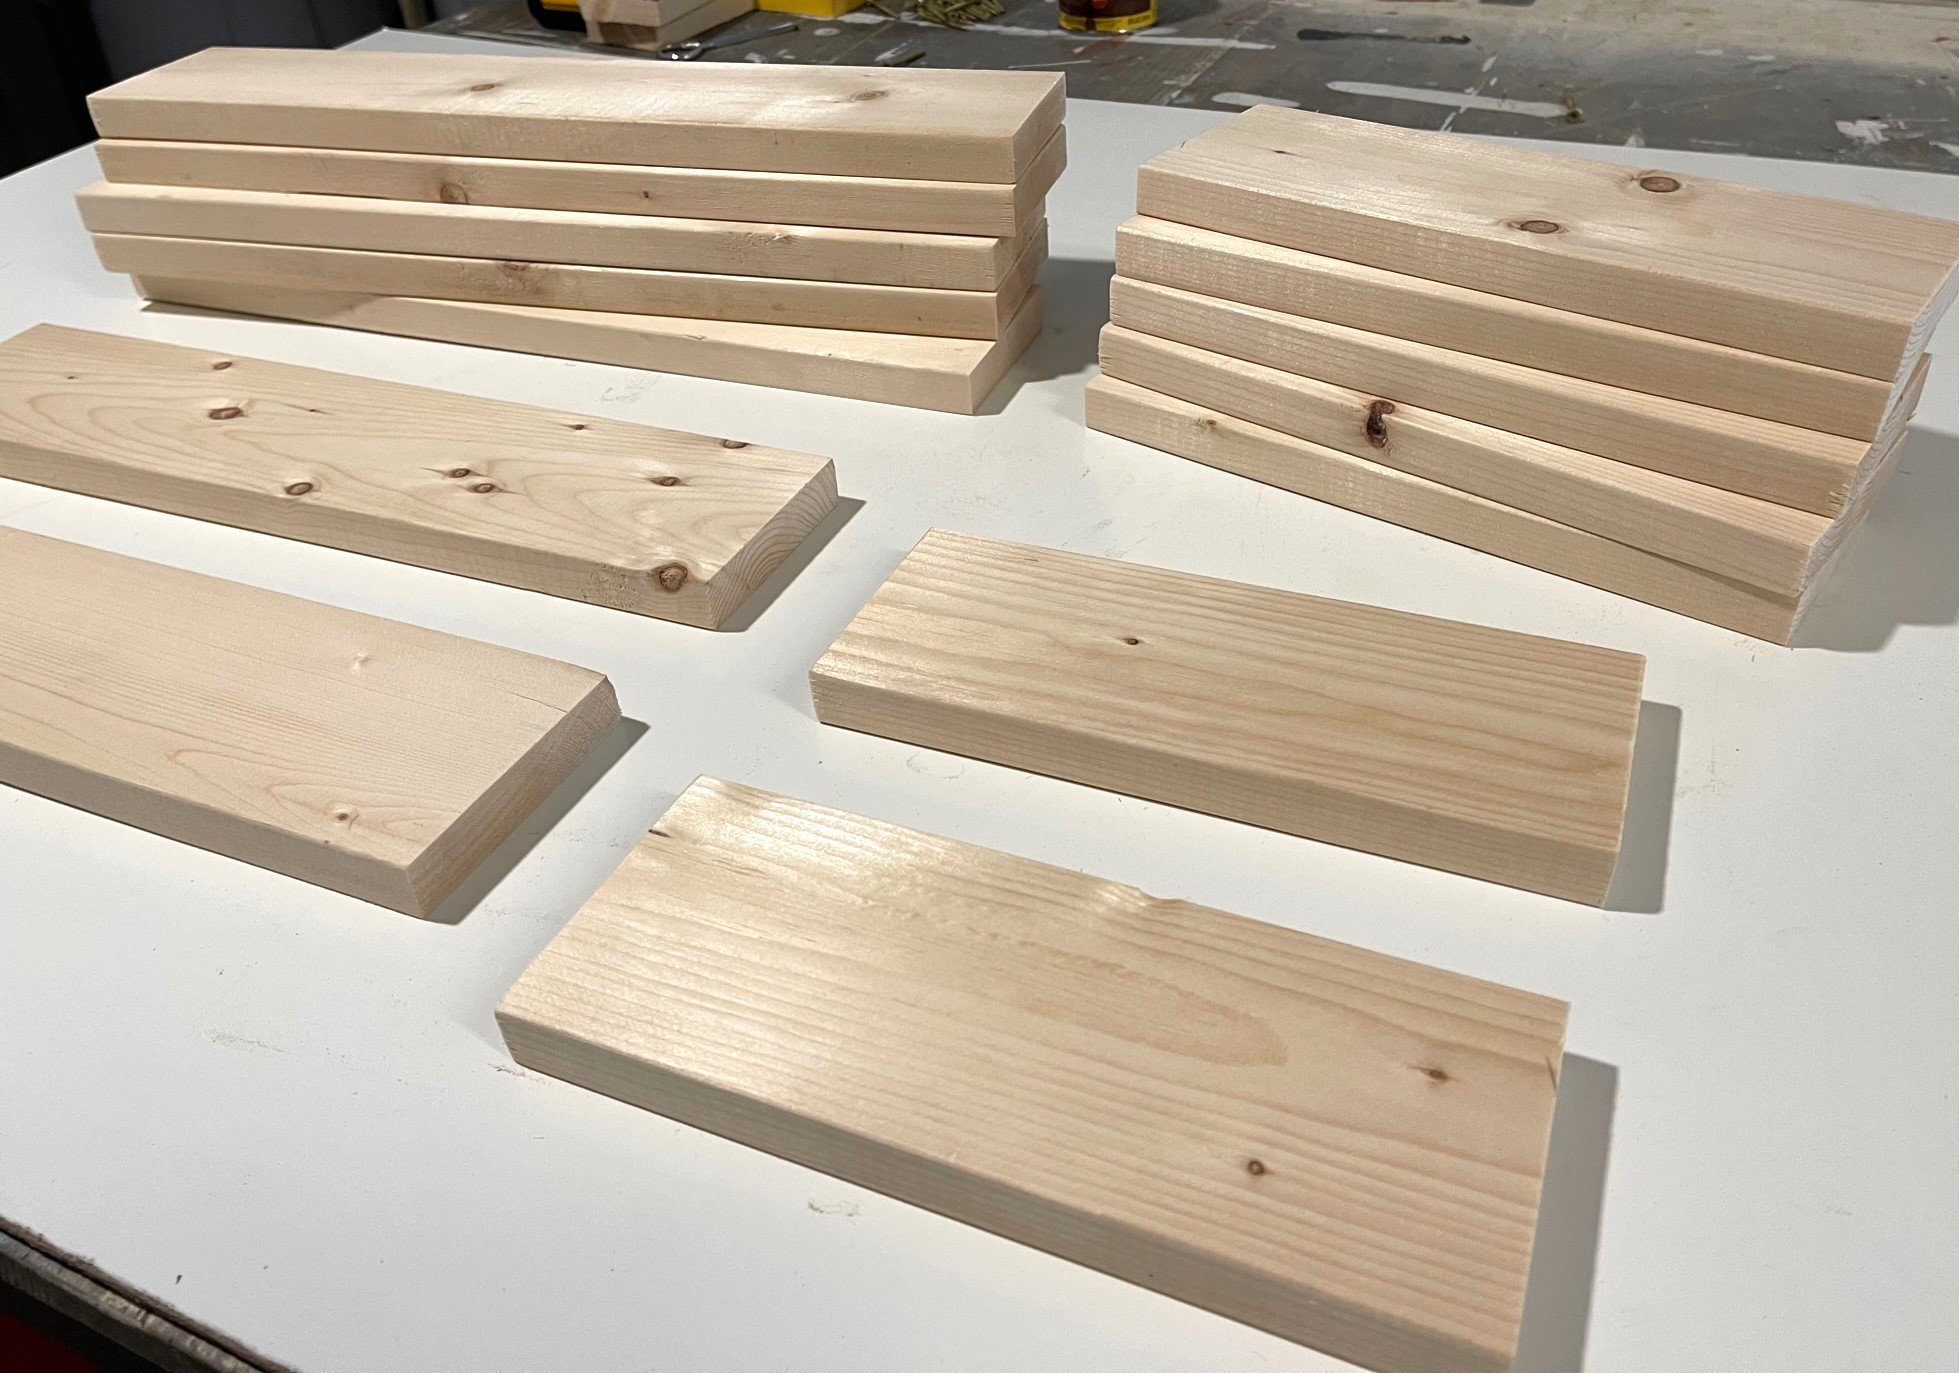
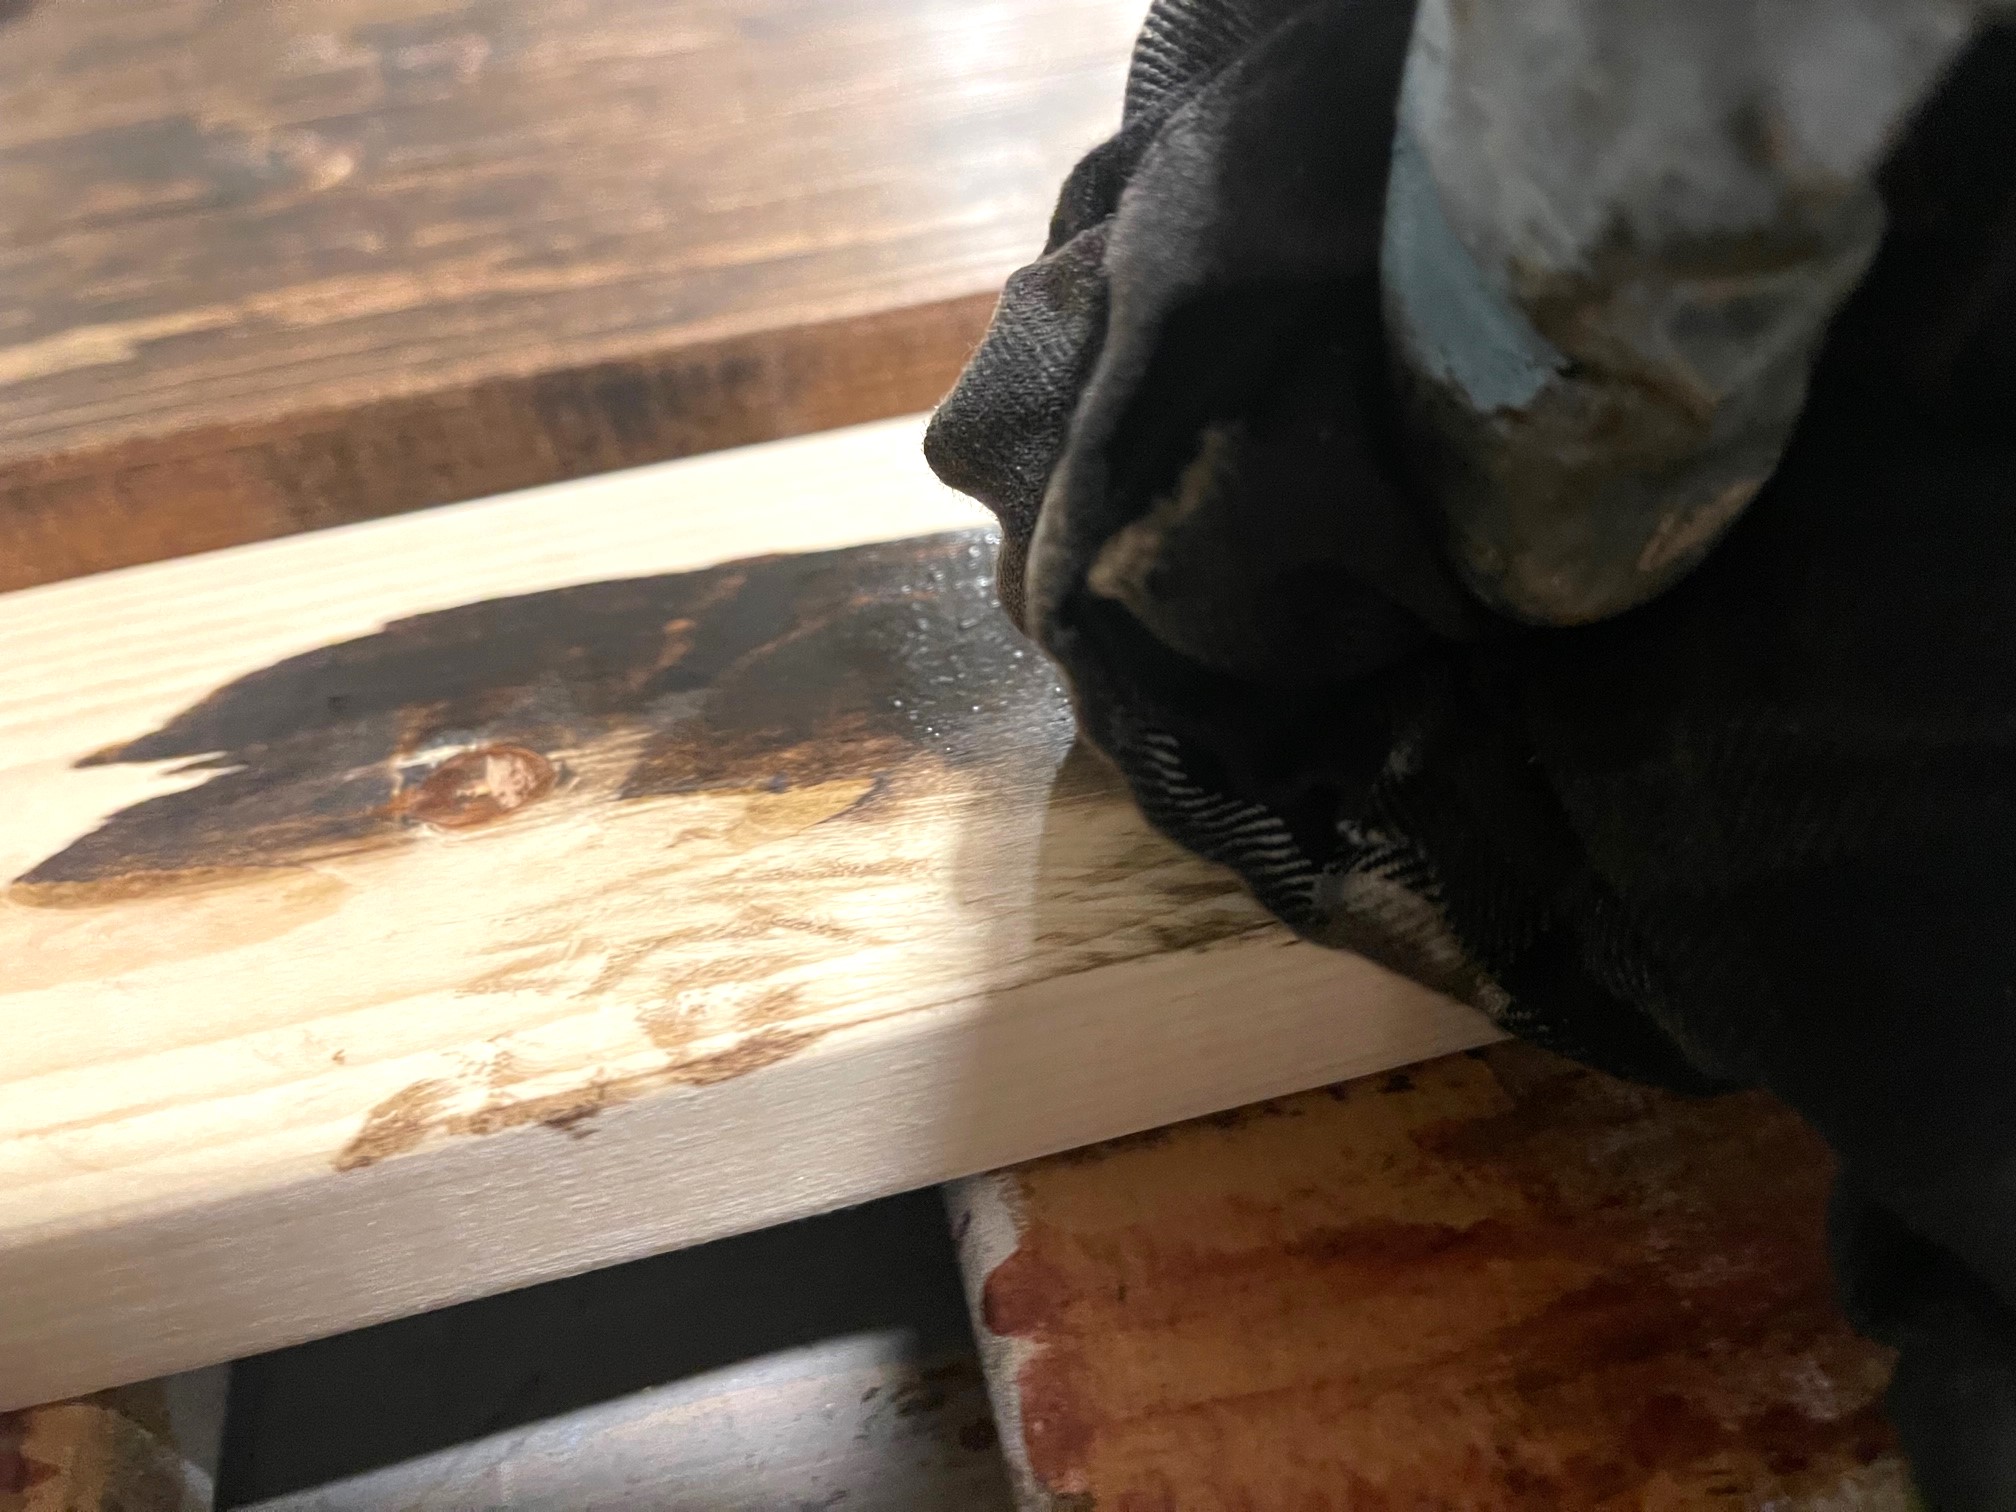
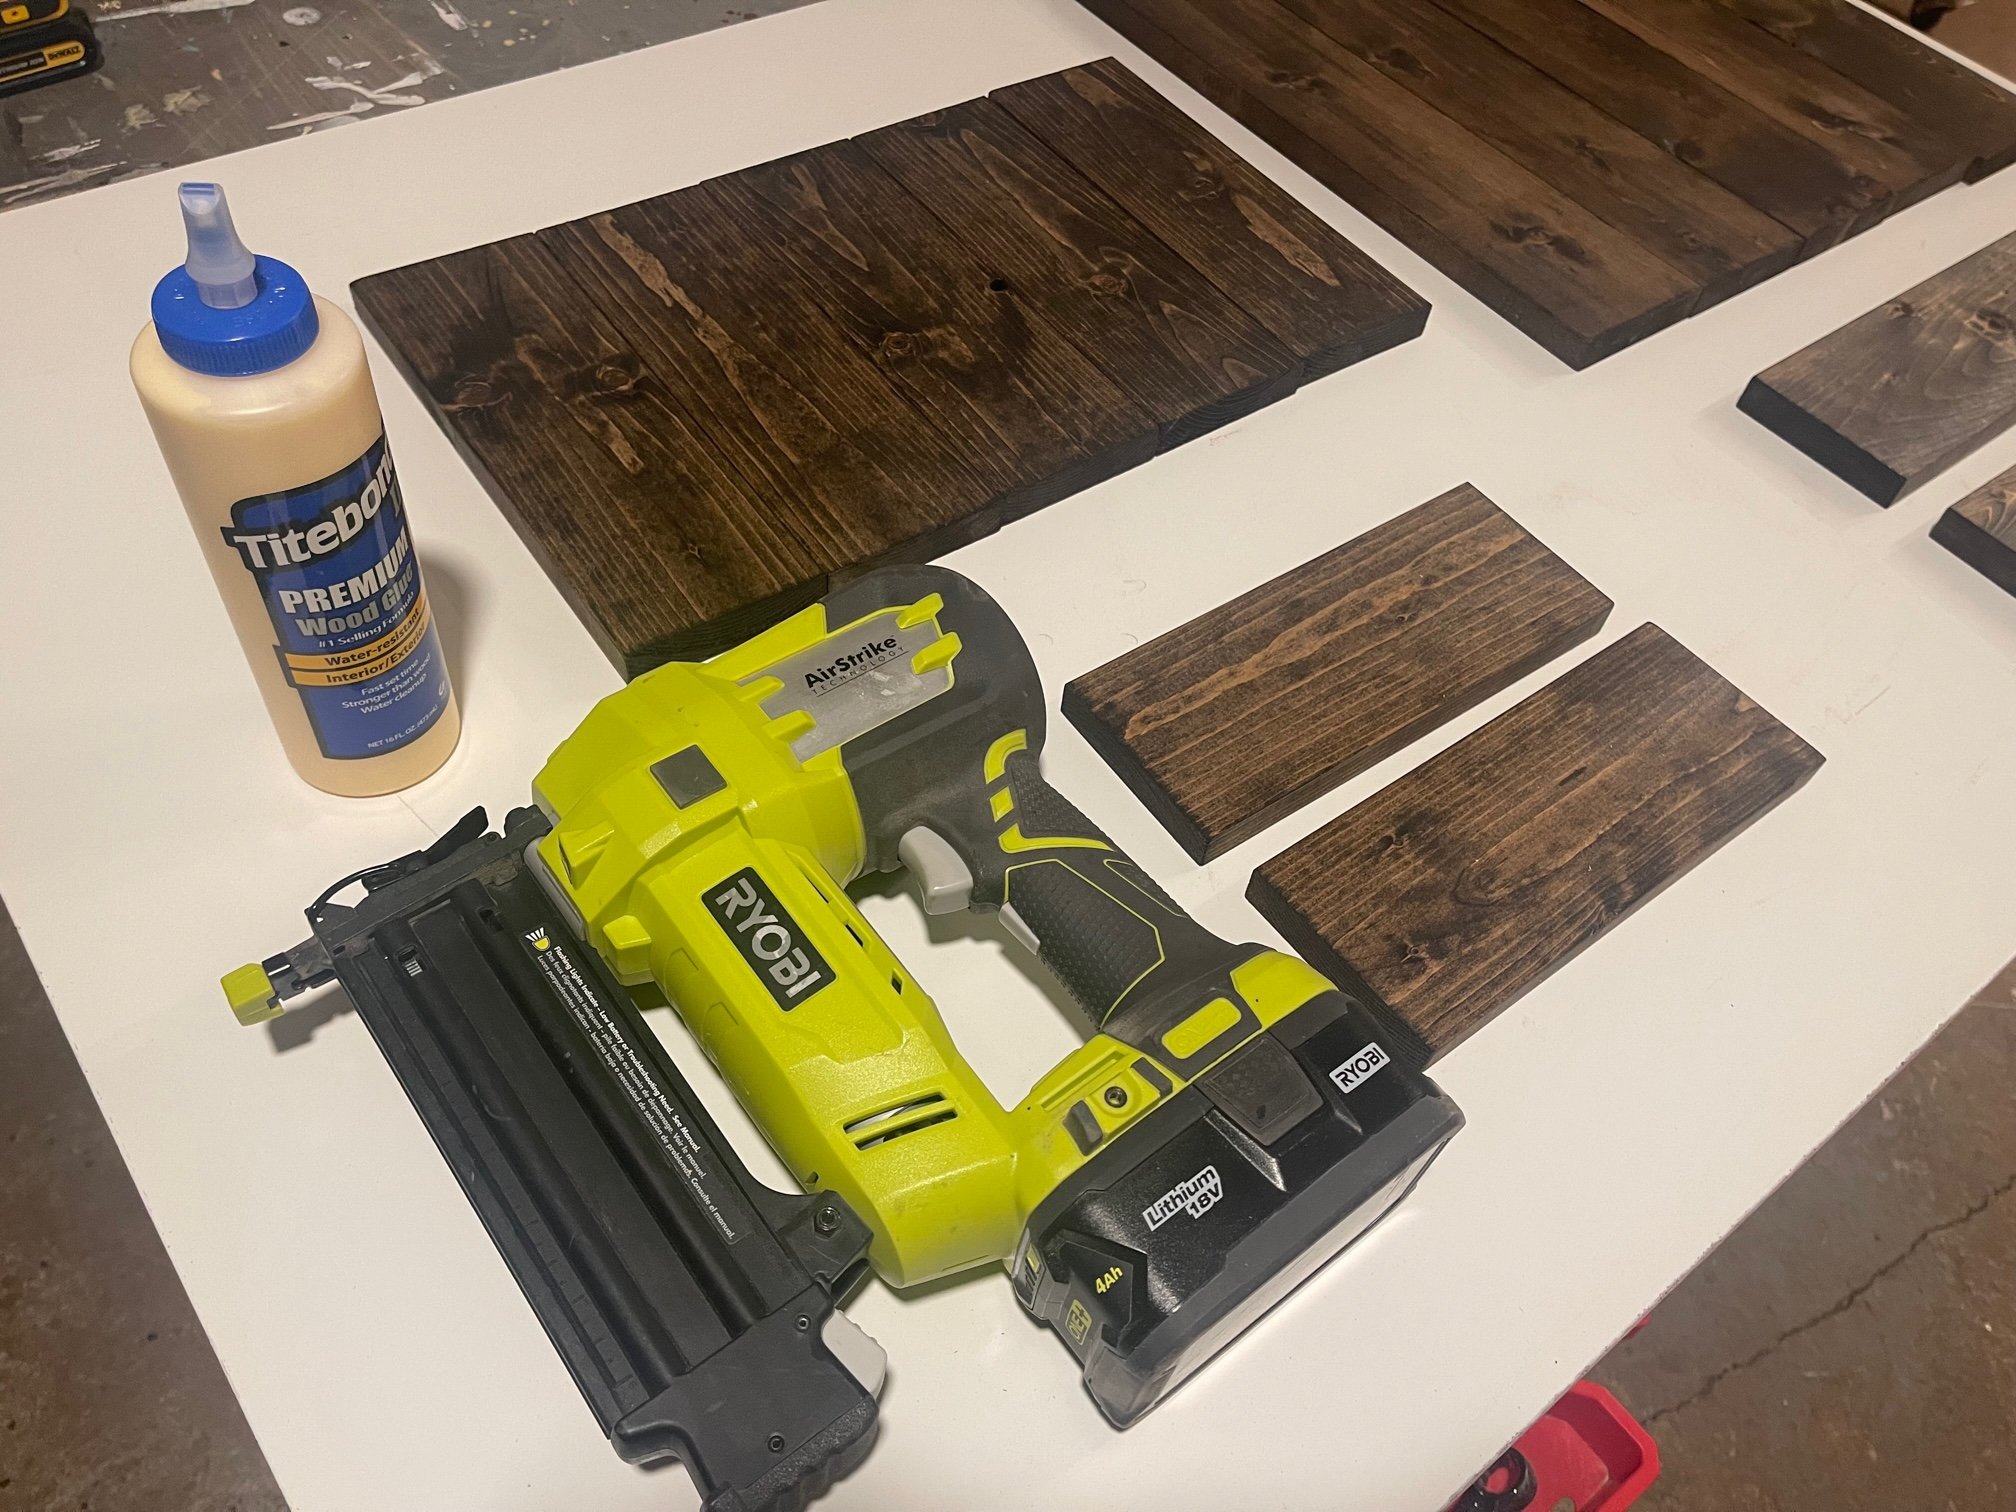
Start by cutting all of your boards, be sure to sand any rough edges. Now you may leave the wood natural or I recommend prefinishing the boards.
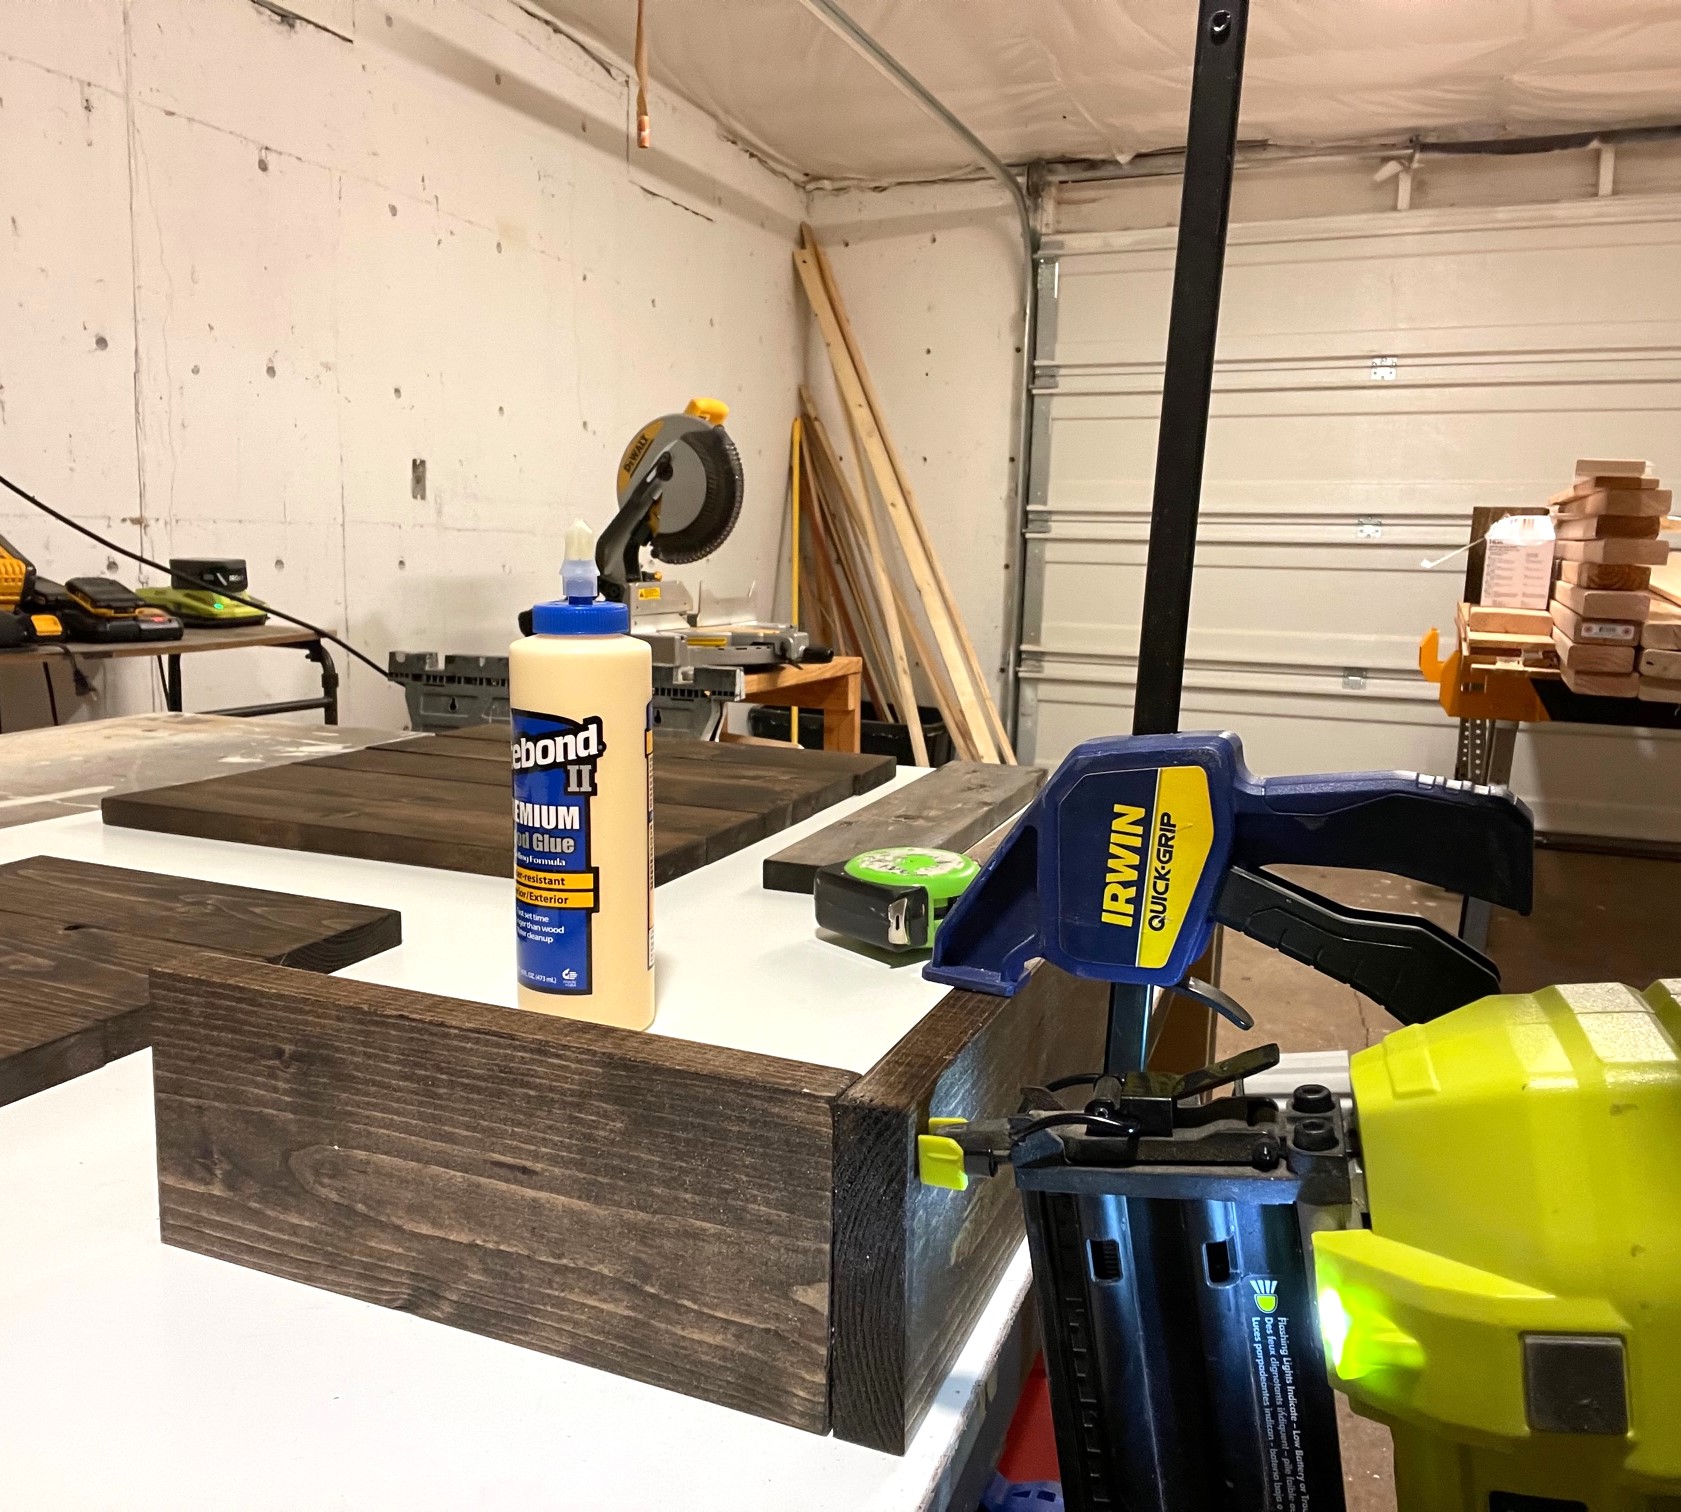
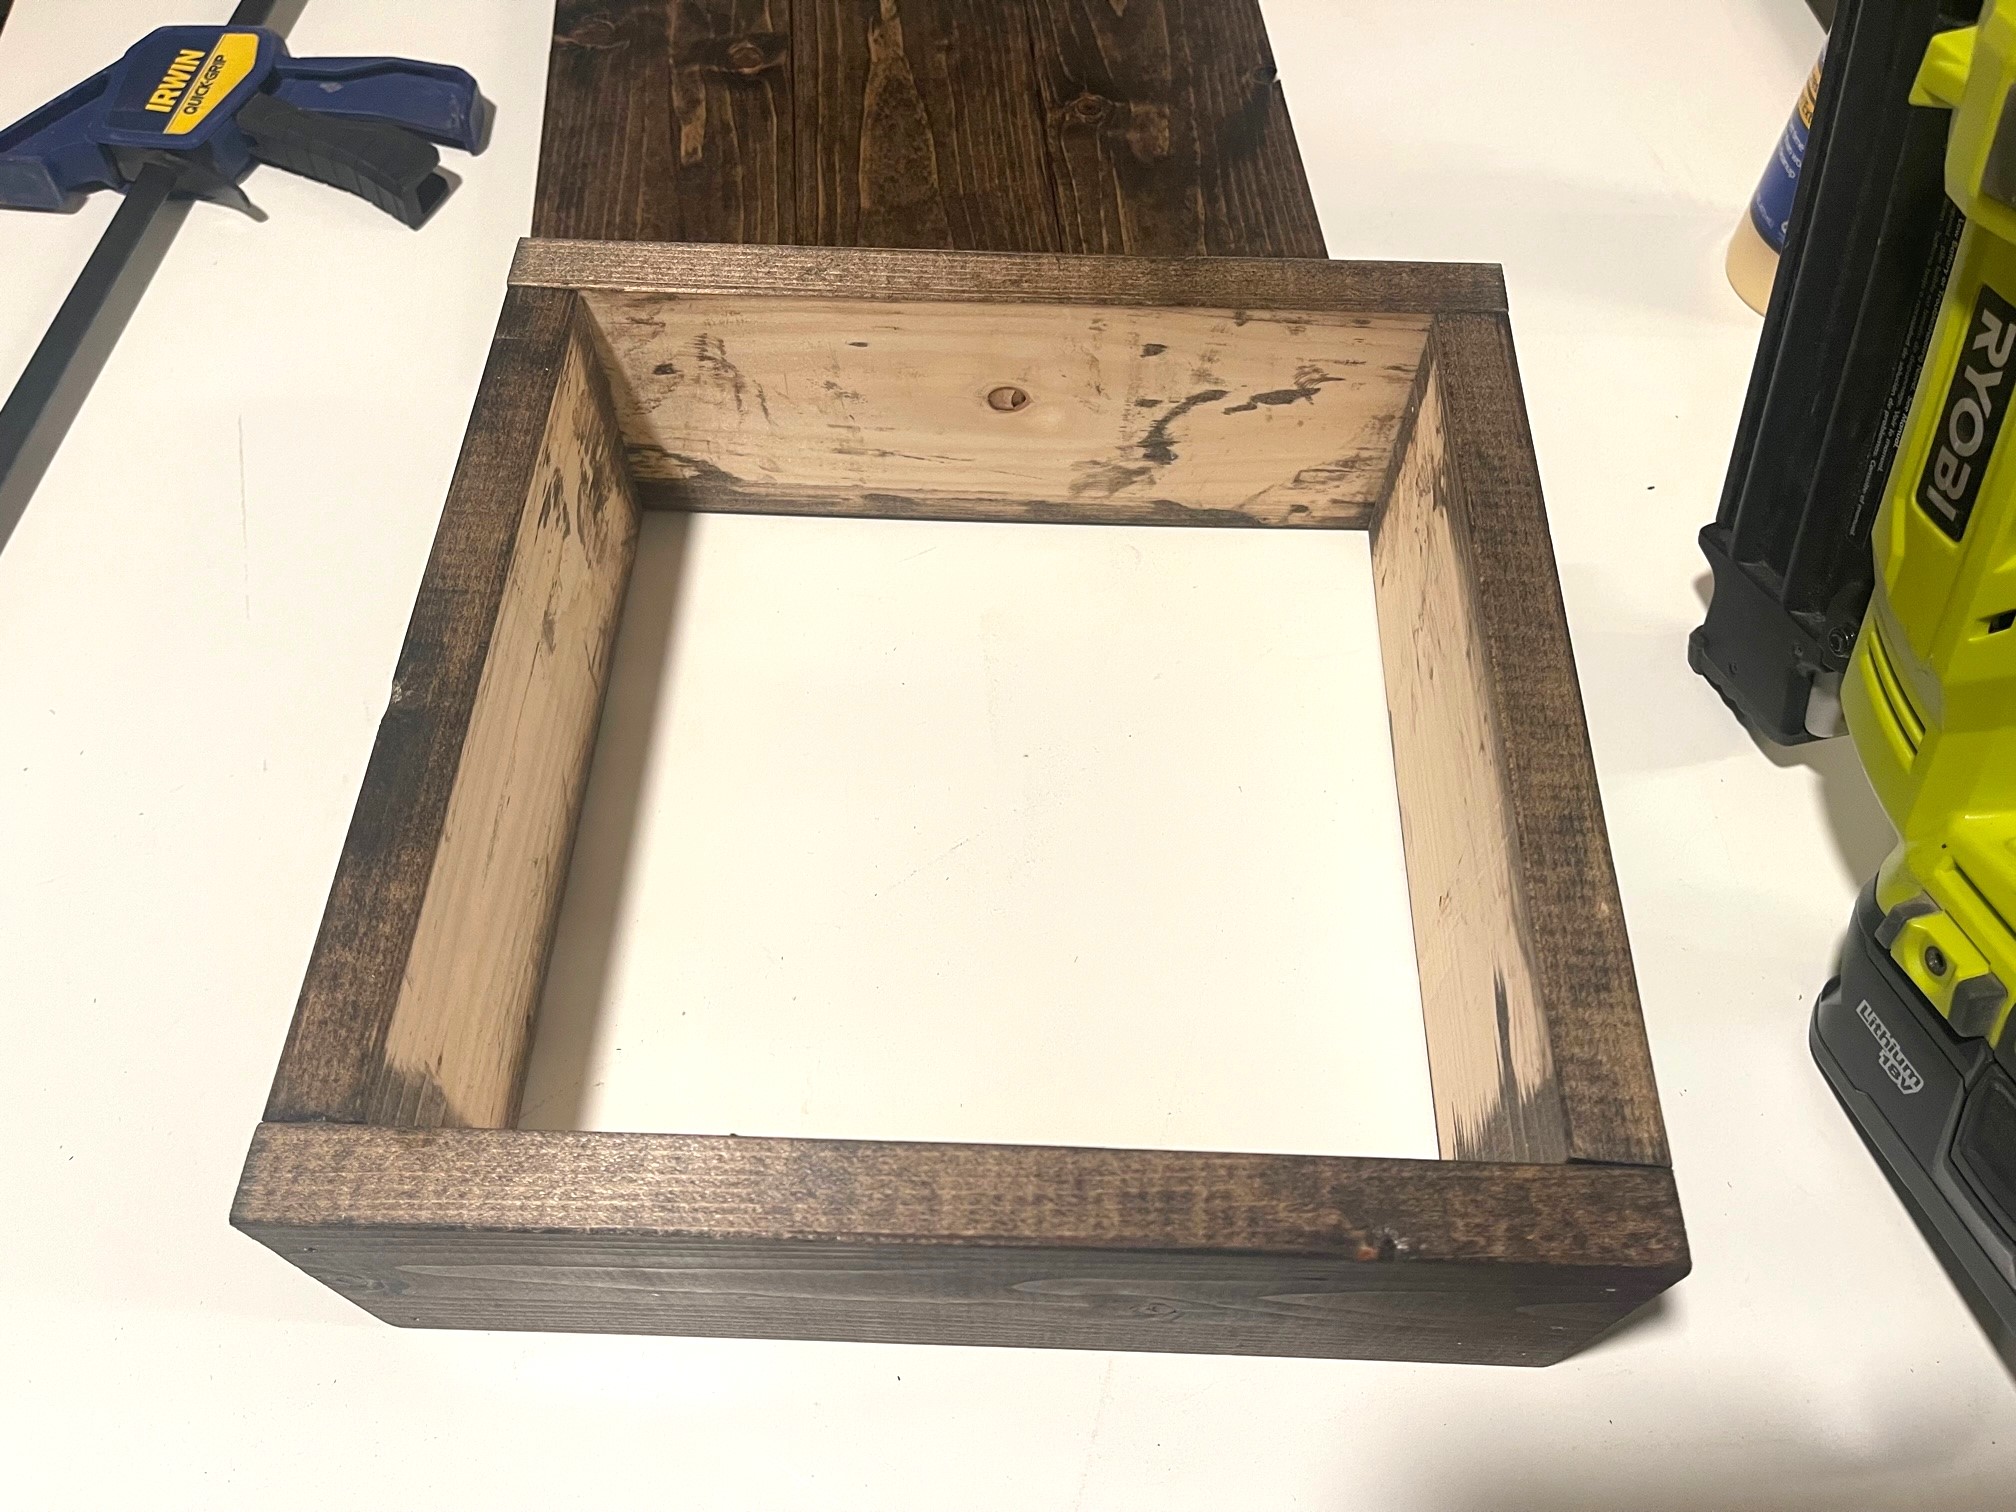
For assembly, you will nail and glue the 4 side piece together.

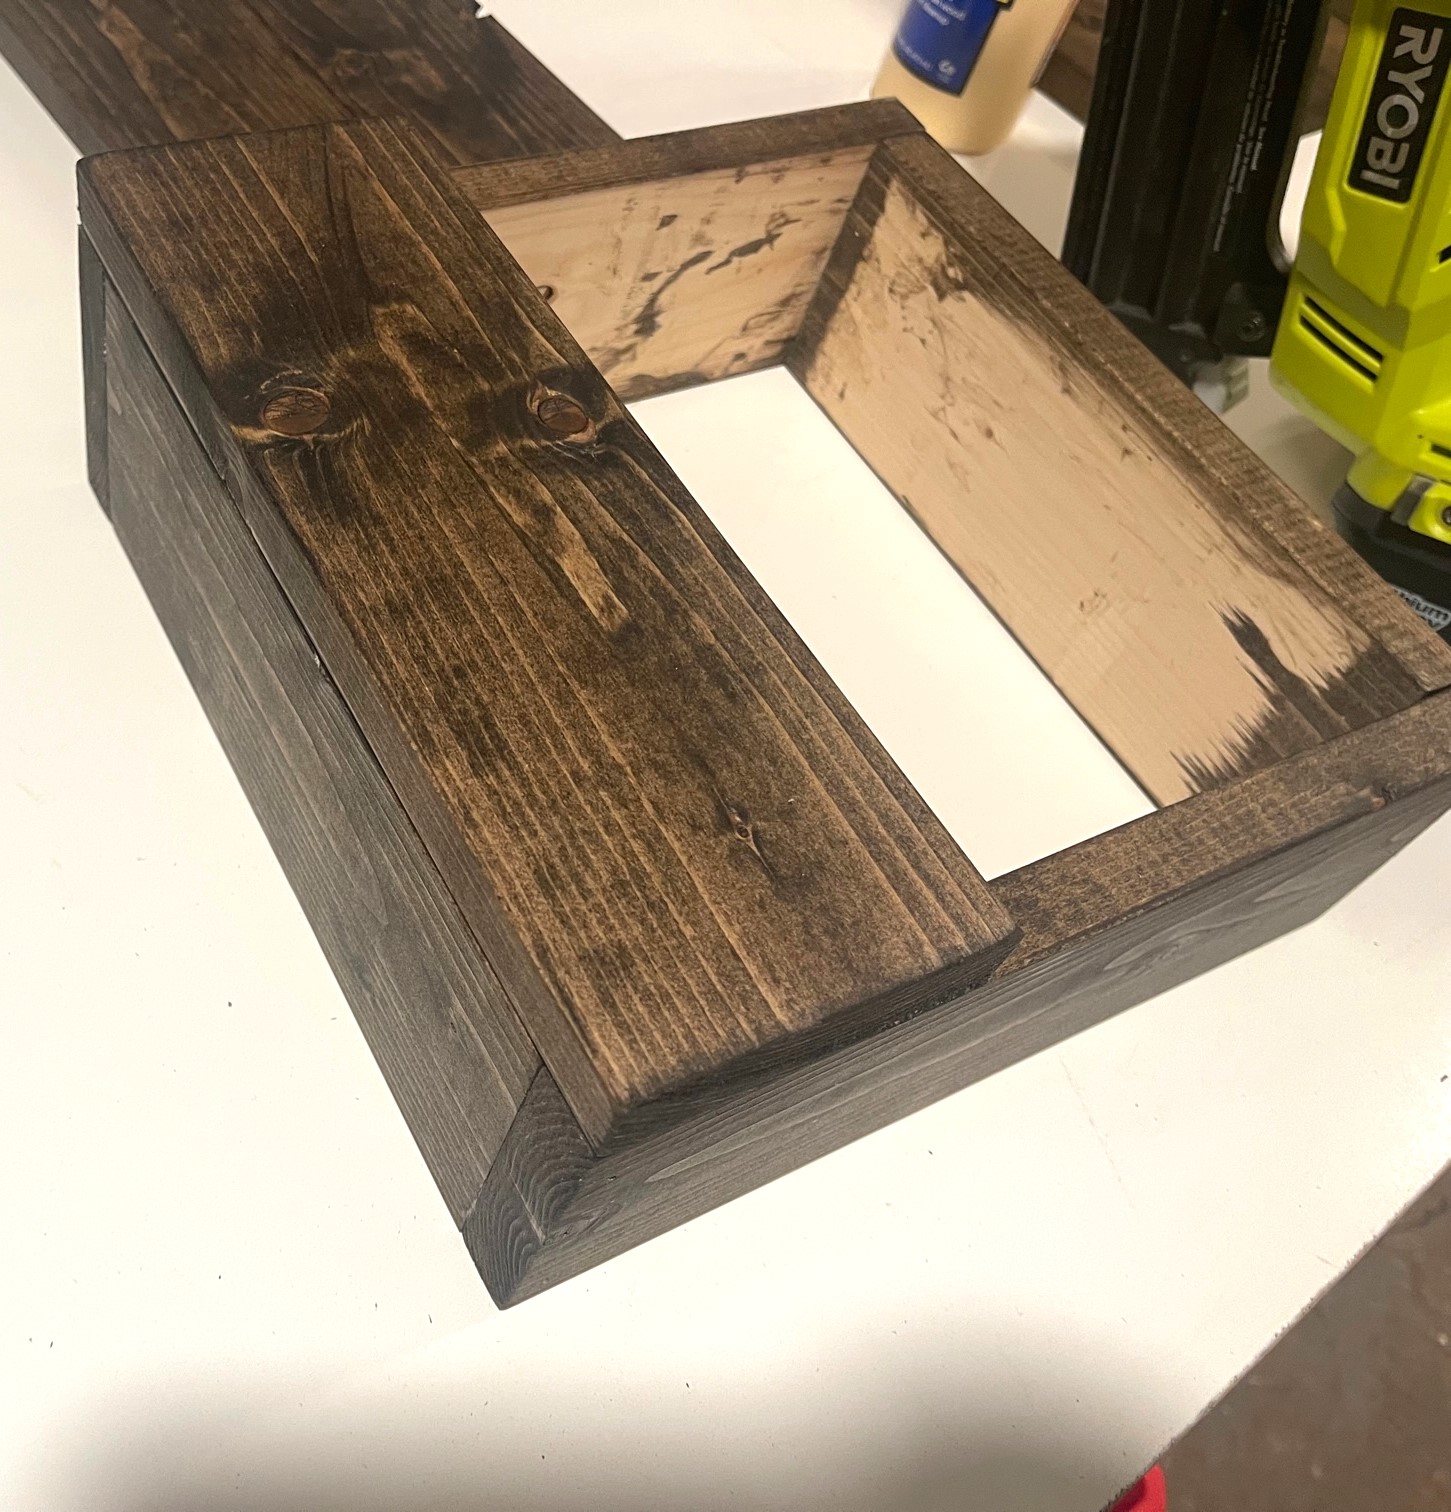
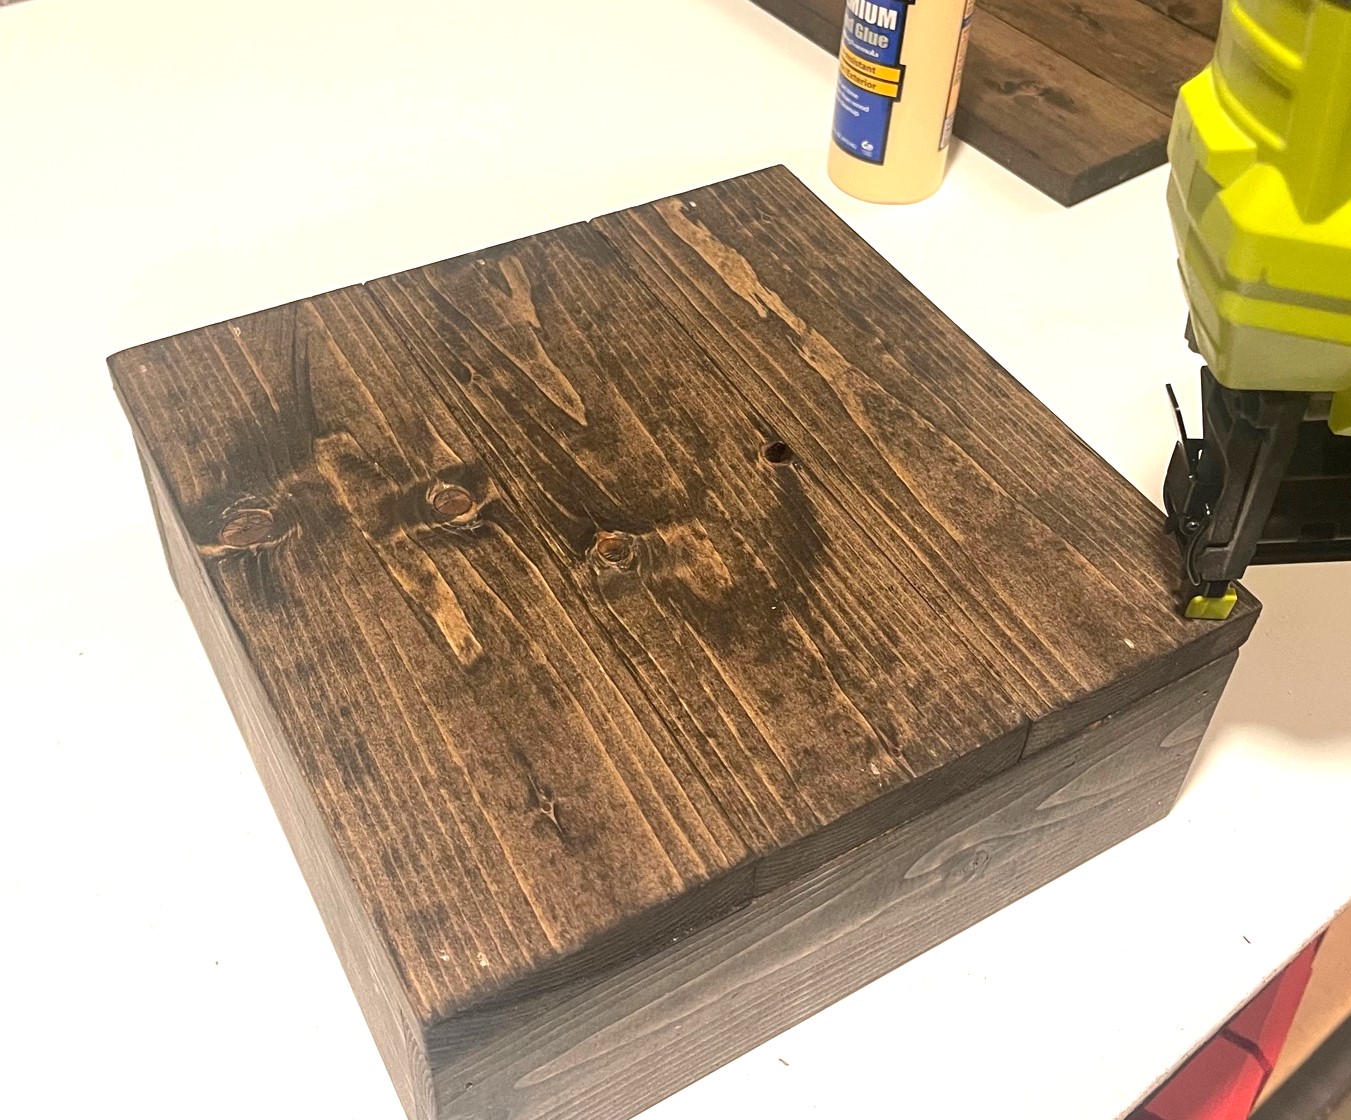
Next set the planks across the top keeping them flush to each side. Nail and glue each board down to the box base.
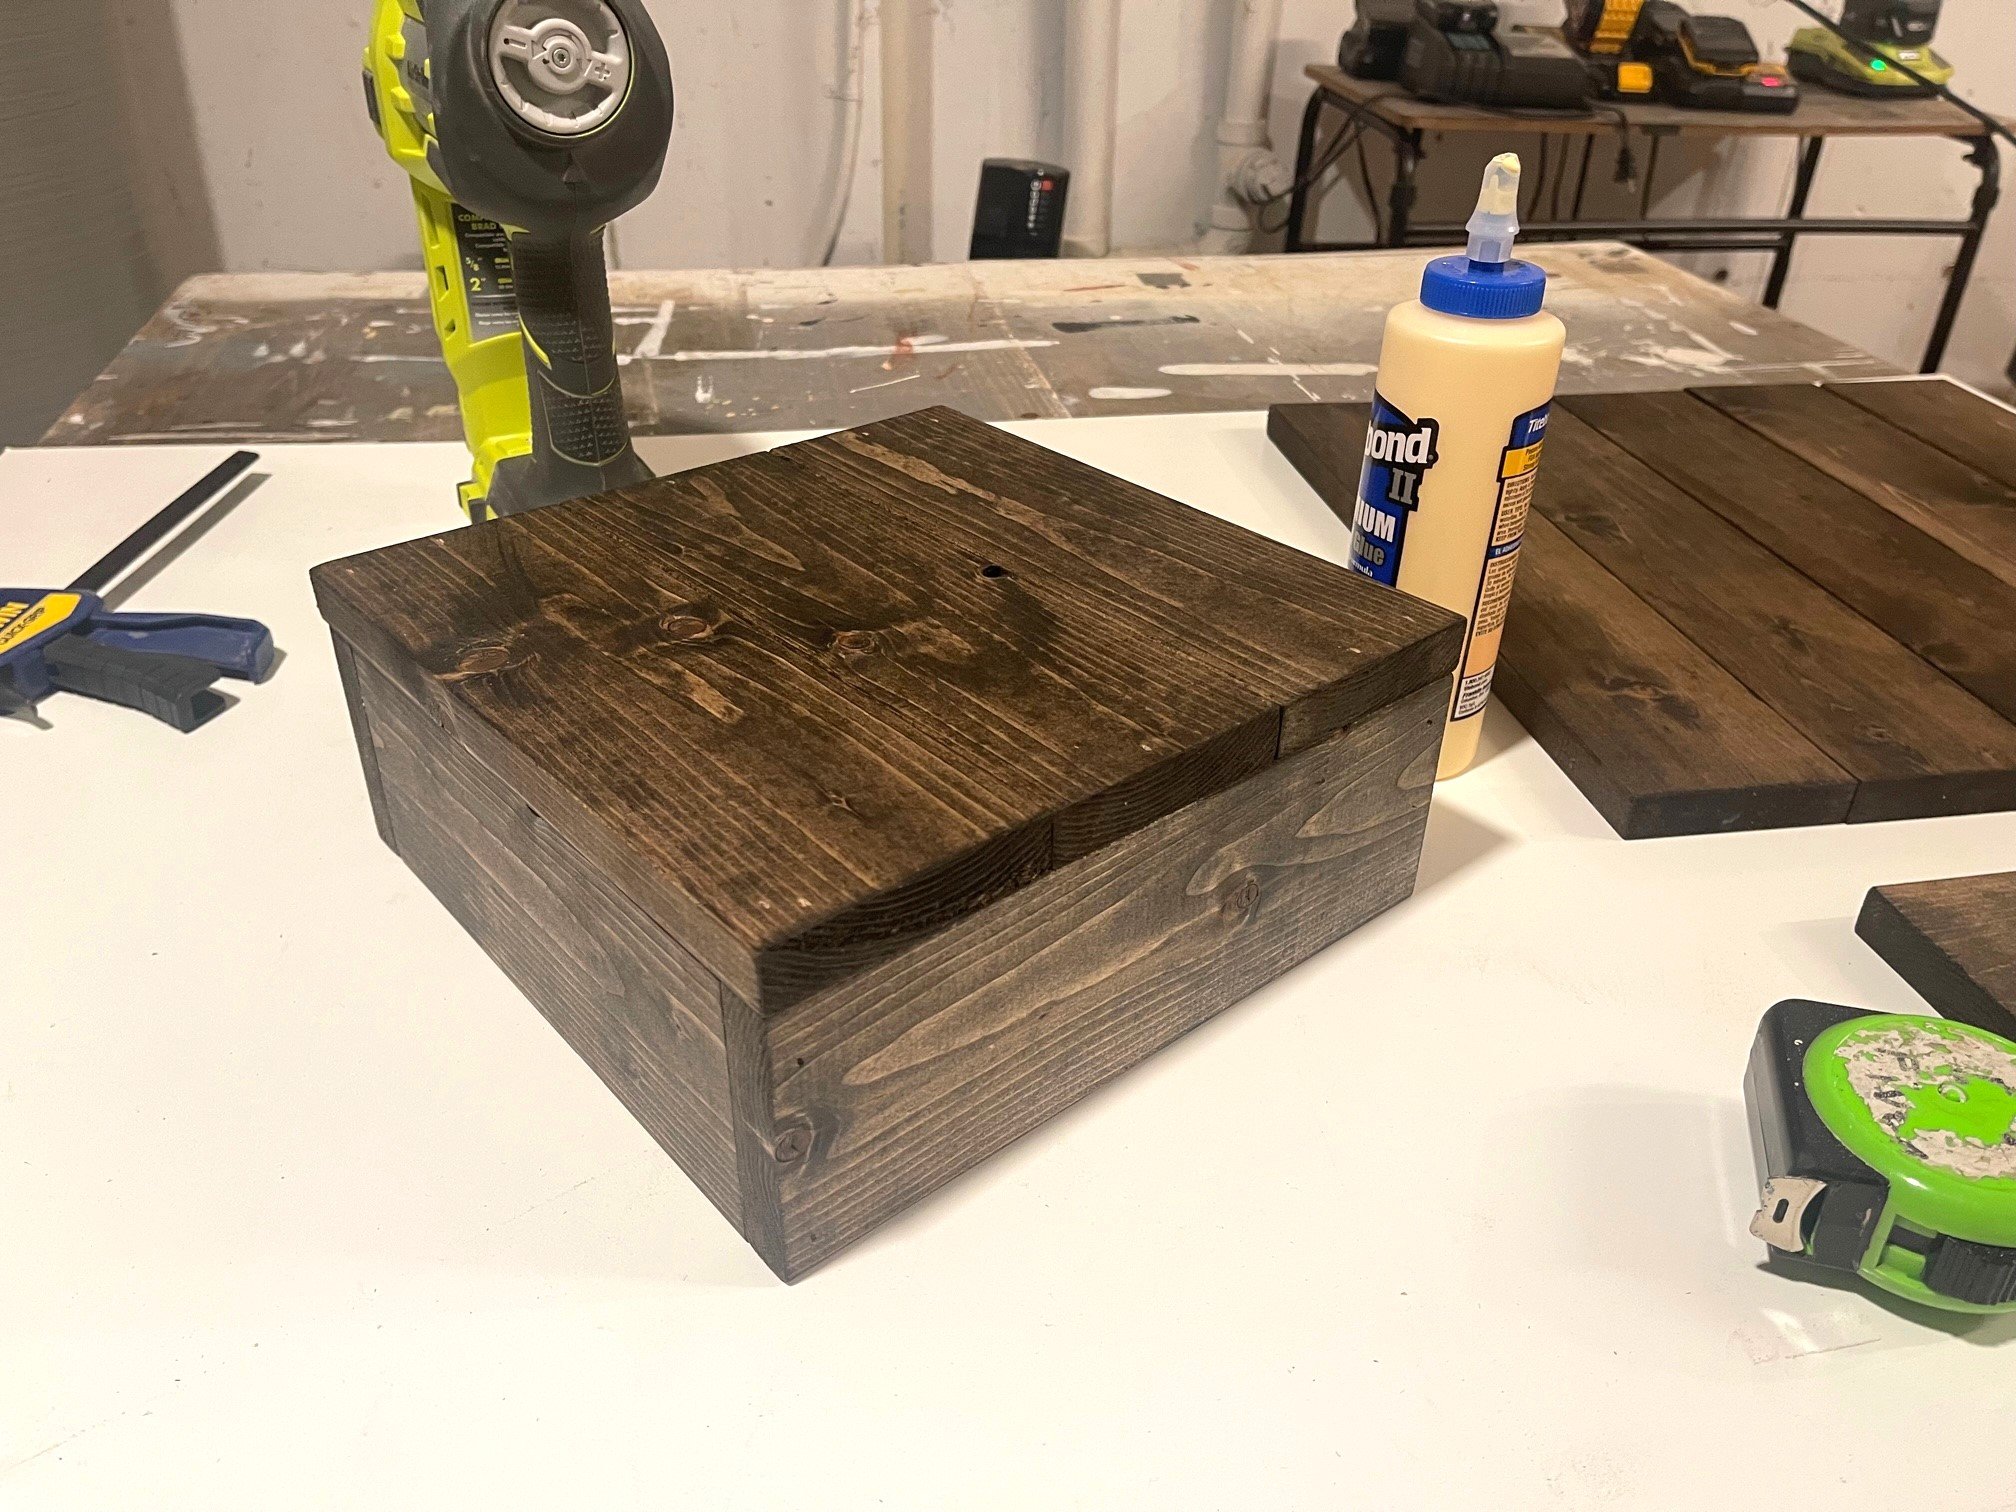 You will build the next box with the same steps as the first and then just stack! This DIY cake stand is easy to personalize with initials or a name. Plus you may customize the size or how many boxes you stack. Something this simple, why not take an ordinary cake to the next level?
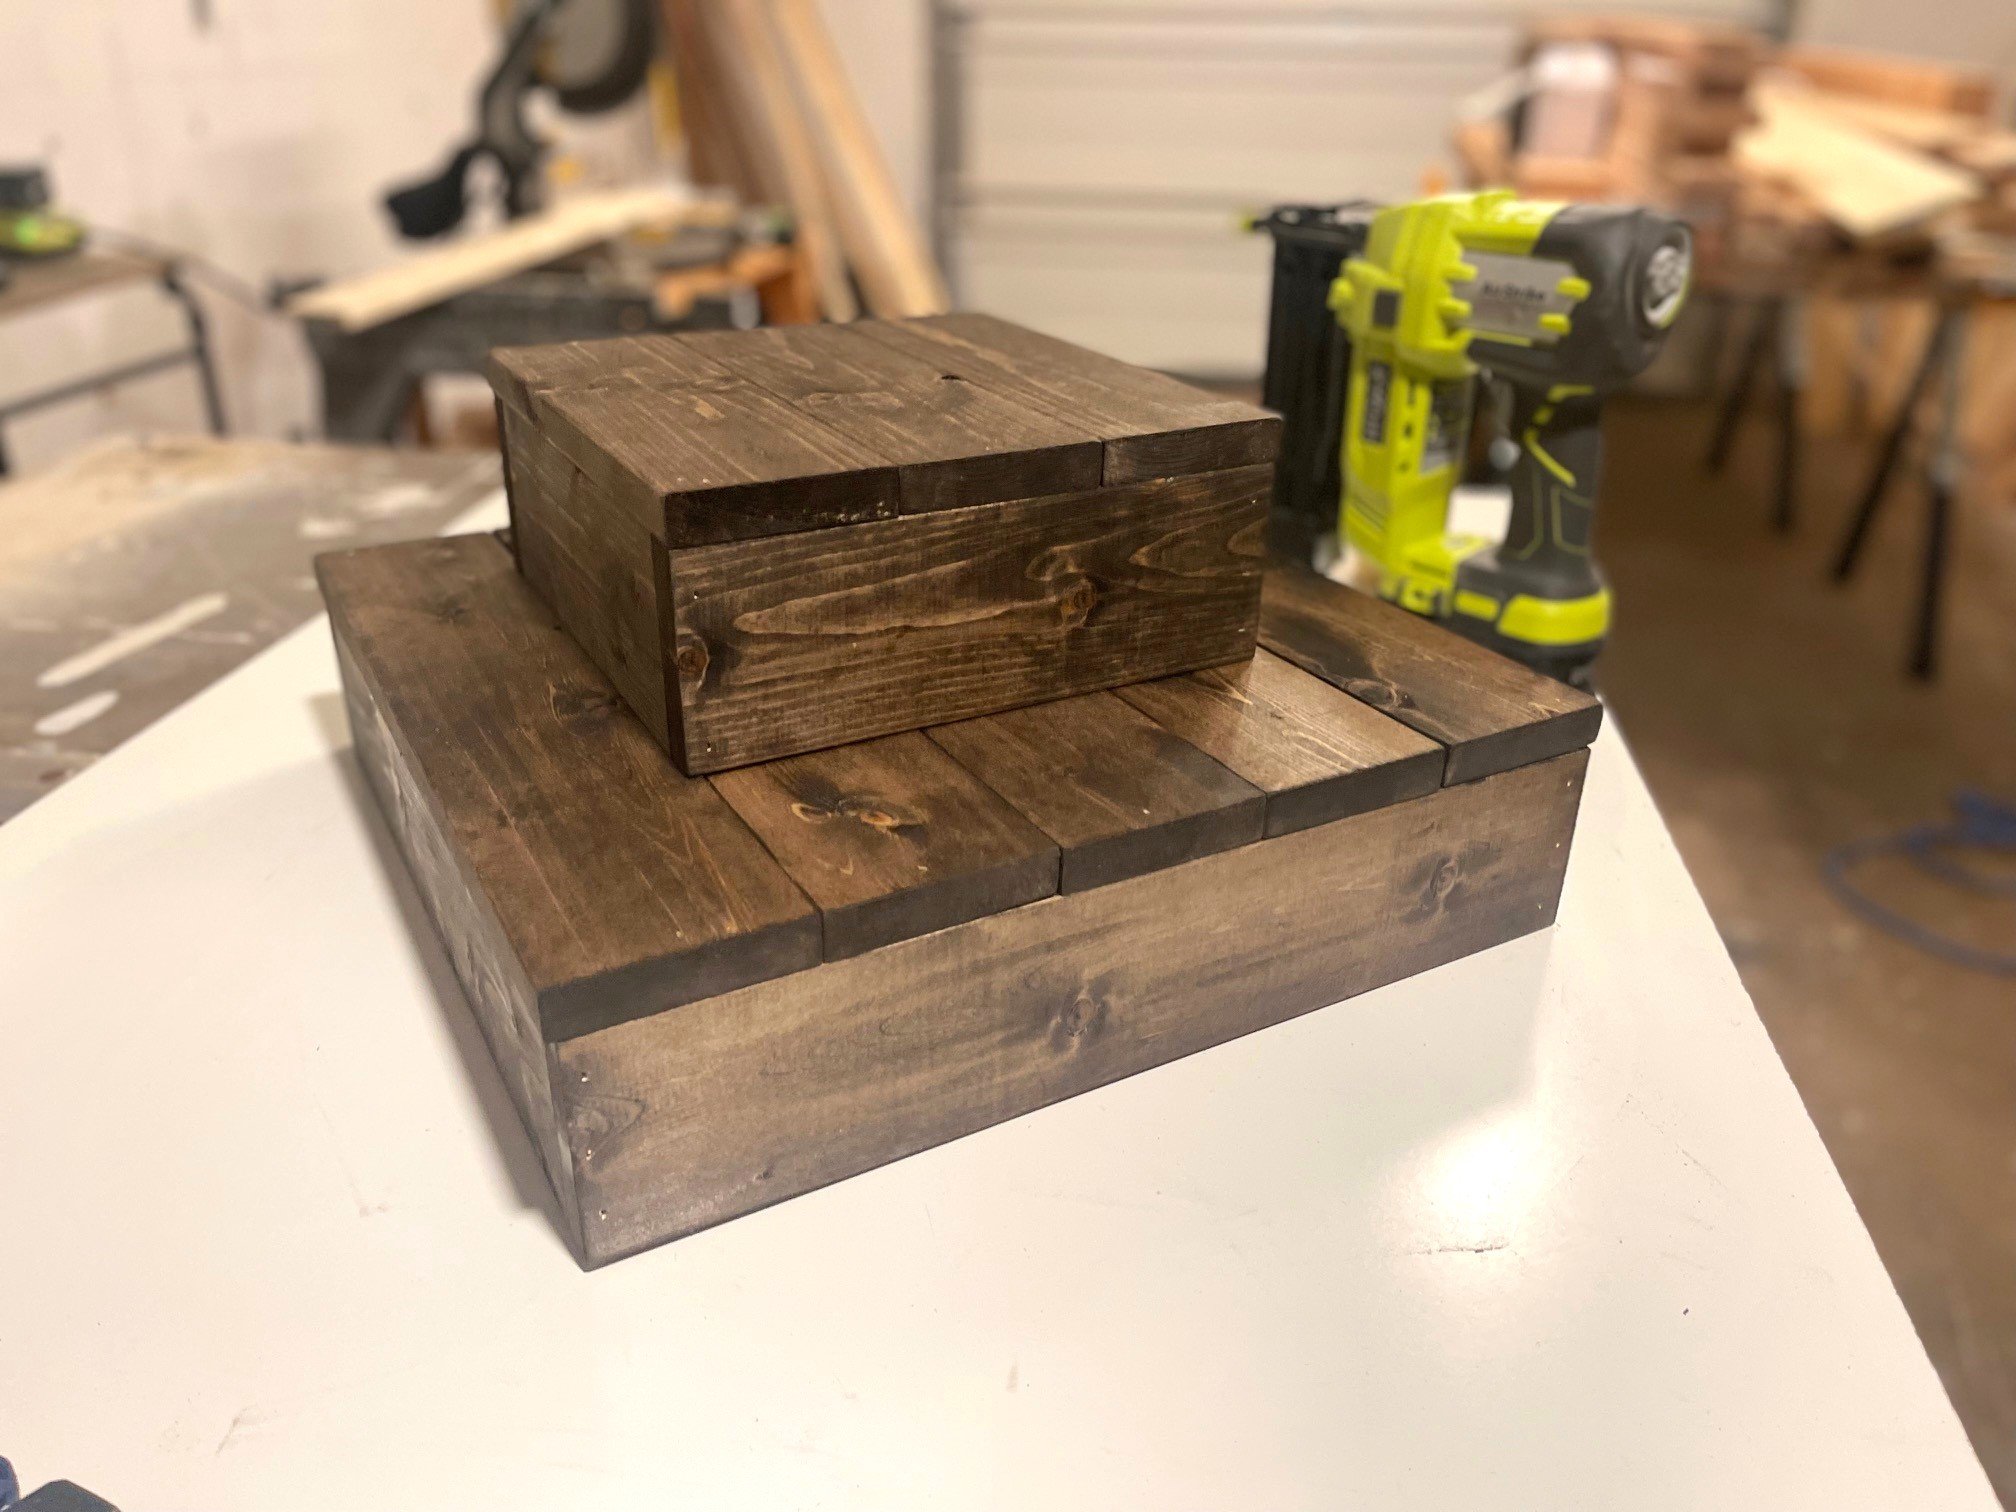
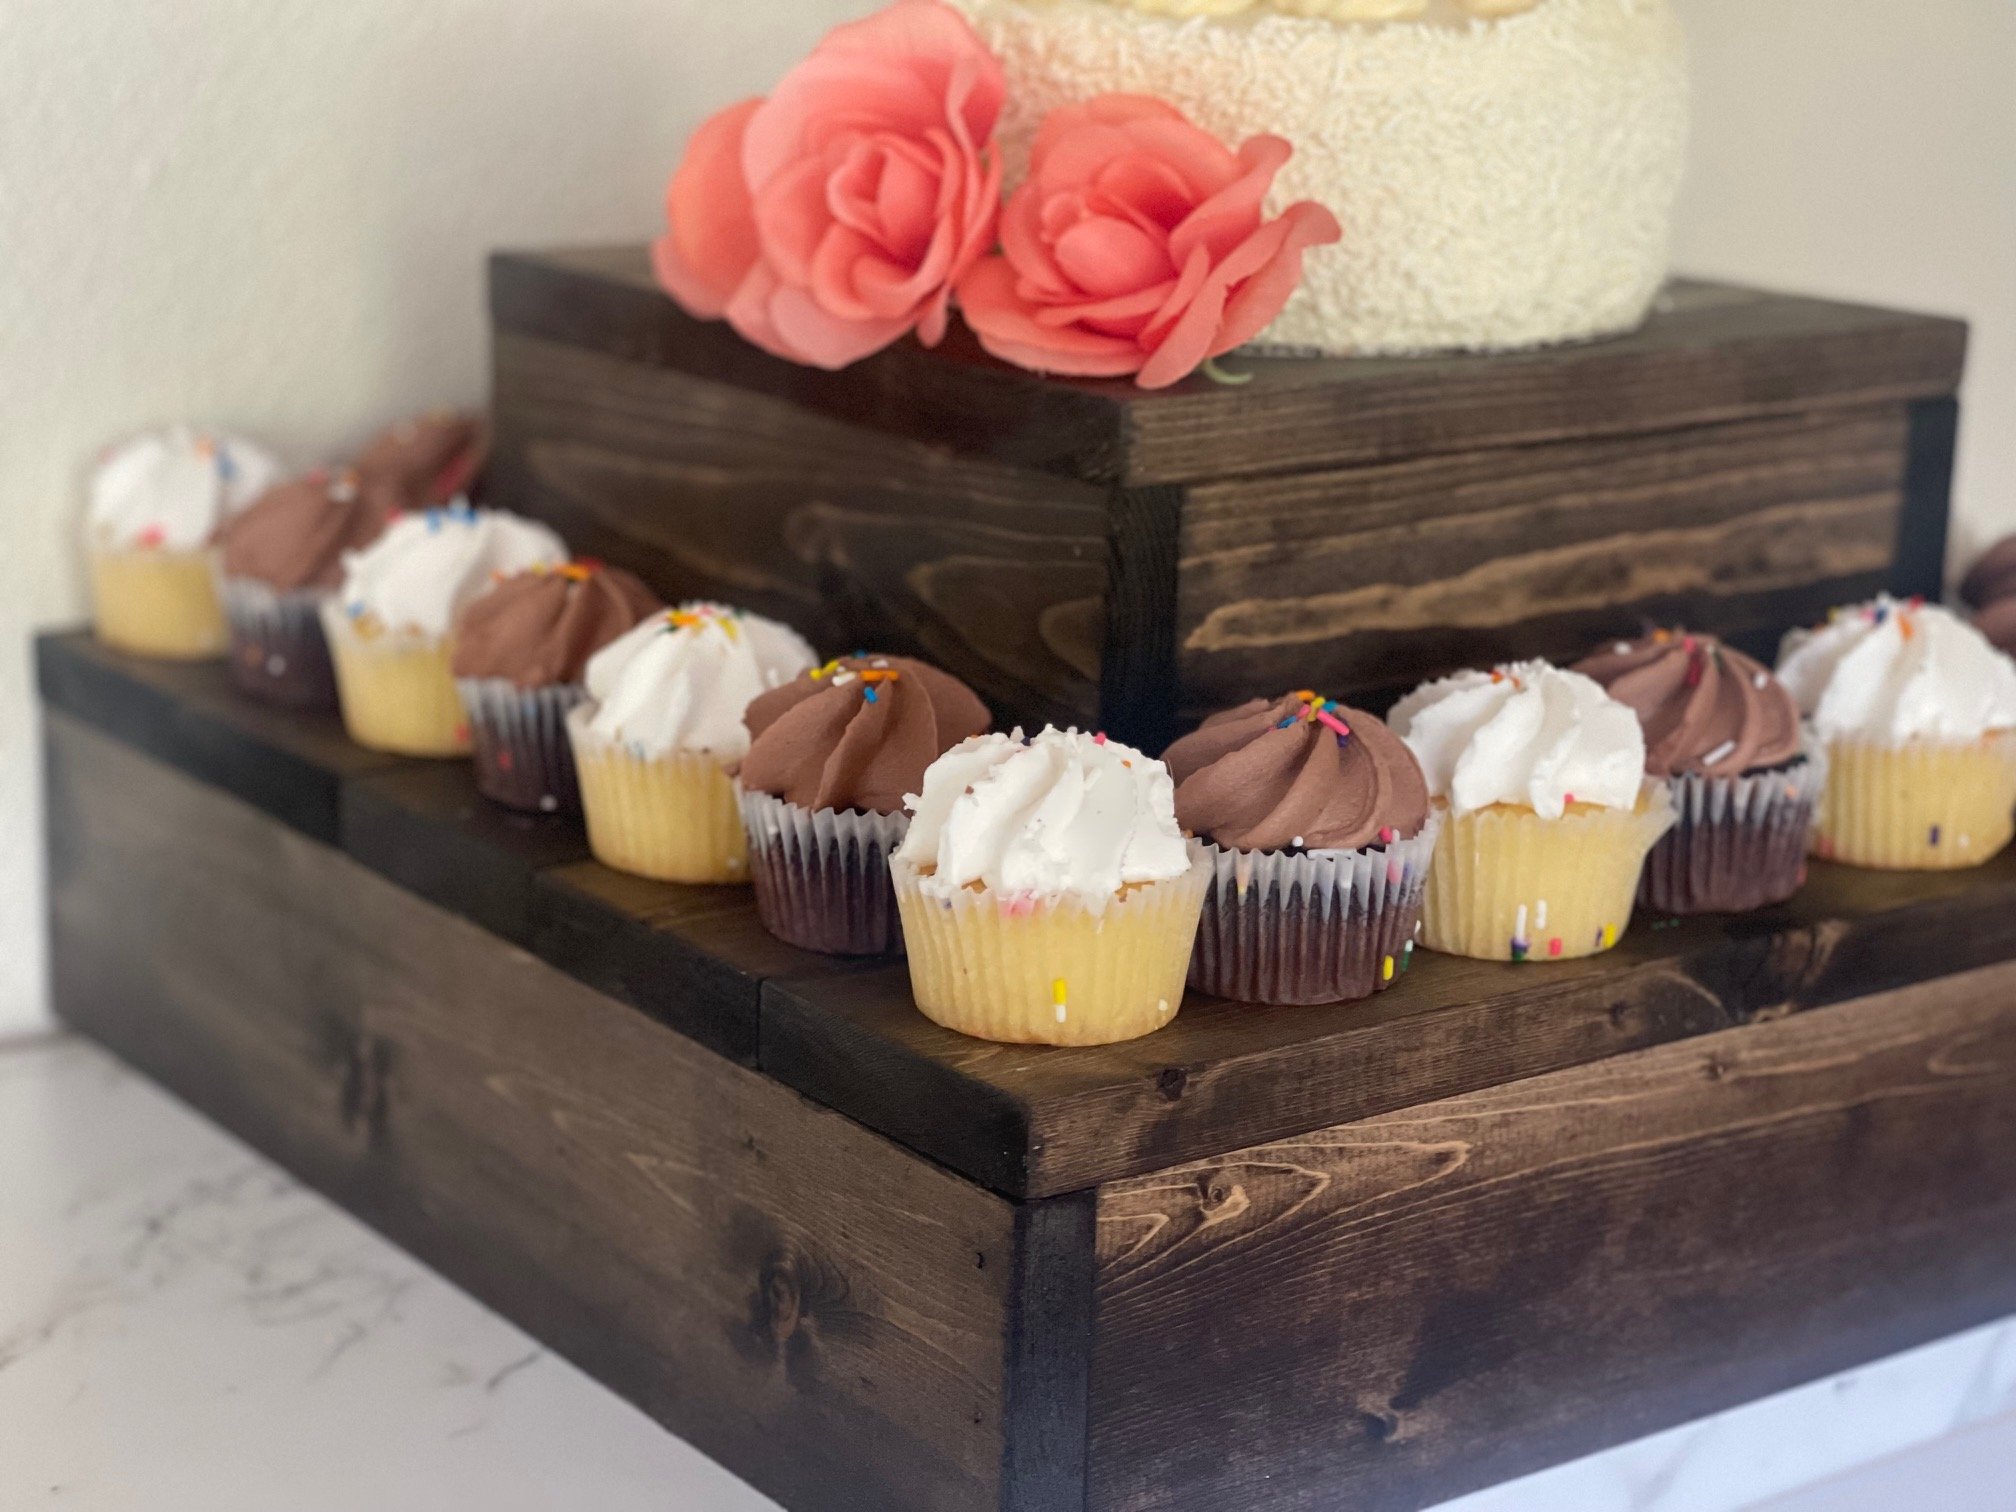 I love that it holds a small cake and cupcakes. This was a super fun and easy build, now it's your turn!
Free Plans for Two Tiered Cake Stand
Ready to build yourself? The free plans for this tiered cake stand are below.
Pin For Later!
Preparation
Smaller Cake Stand
- 1 - 1x4 @ 6 feet long
- 1-1/4" brad nails
- wood glue
- wood stain
Larger Cake Stand
- 1 - 1x4 @ 6 feet long
- 1 - 1x4 @ 8 feet long
- 1-1/4" brad nails
- wood glue
- wood stain
Smaller Cake Stand
- 2 - 1x4 @ 9"
- 2 - 1x4 @ 10-1/2"
- 3 - 1x4 @ 10-1/2"
Larger Cake Stand
- 2 - 1x4 @ 16"
- 2 - 1x4 @ 17-1/2"
- 5 - 1x4 @ 17-1/2"
The preferred method to cut is with a miter saw or similar, but you can also cut with a circular saw or jigsaw. Mark out cuts first and practice a few cuts before cutting boards.


Instructions
Step 1
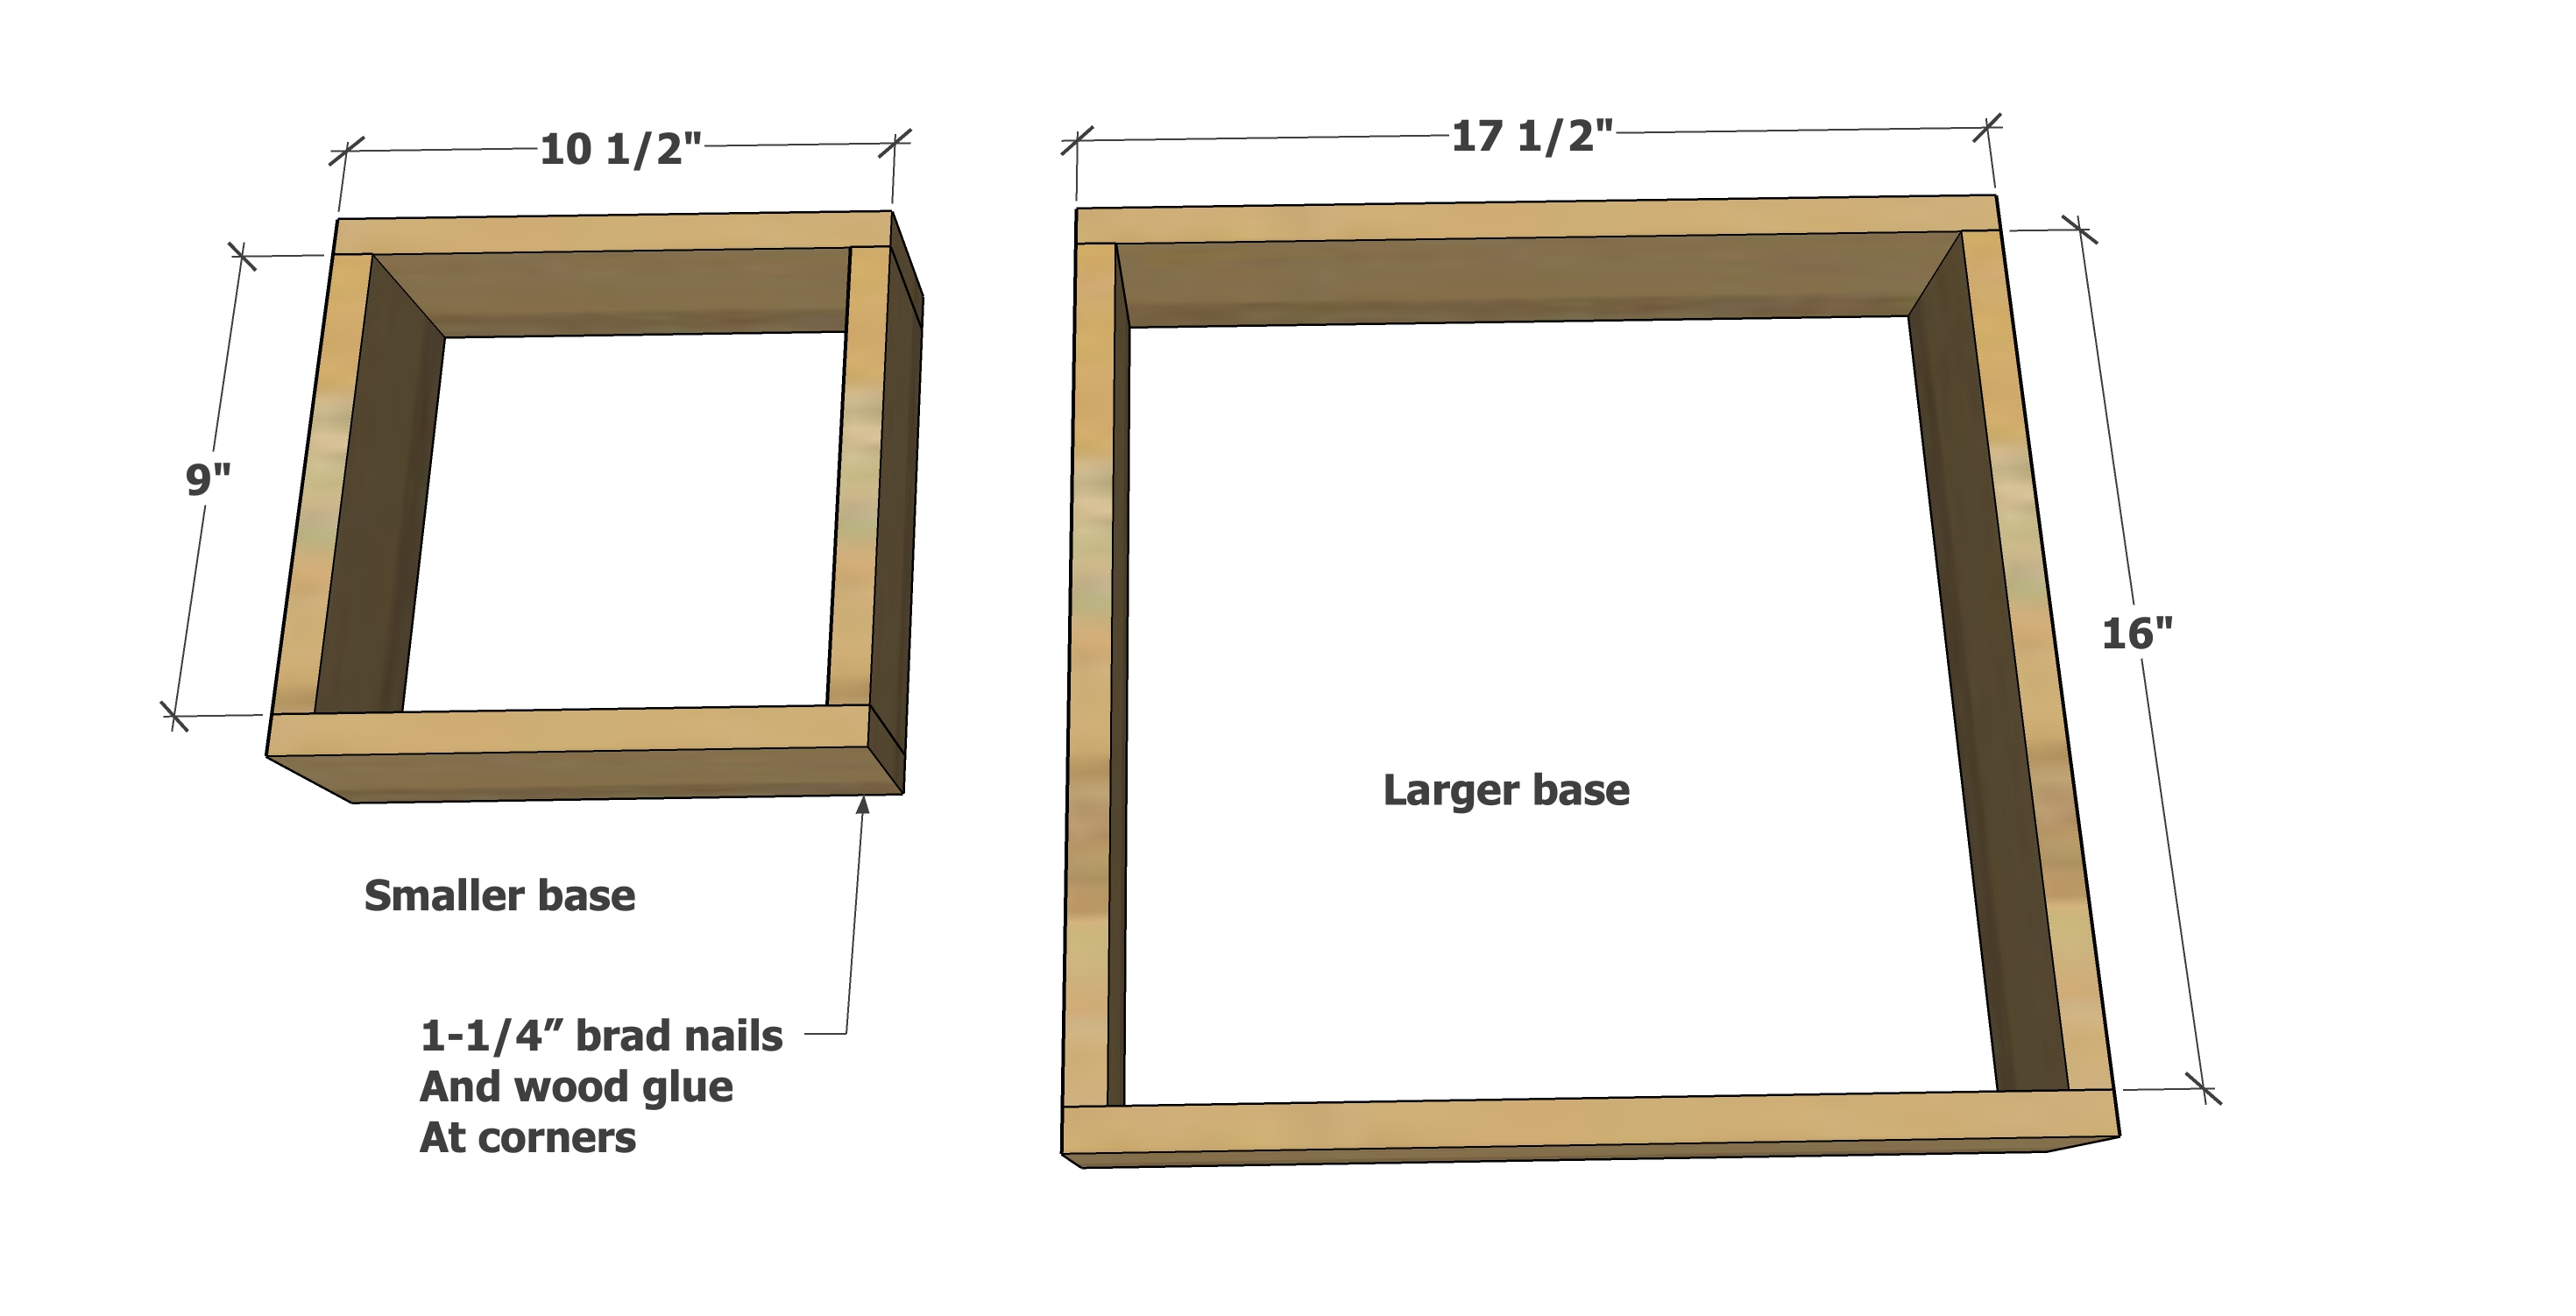
Use 1-1/4" brad nails and wood glue to build the bases for the cake stands. Three nails with glue per corner is good.
Adjust so the frames are square.
Step 2
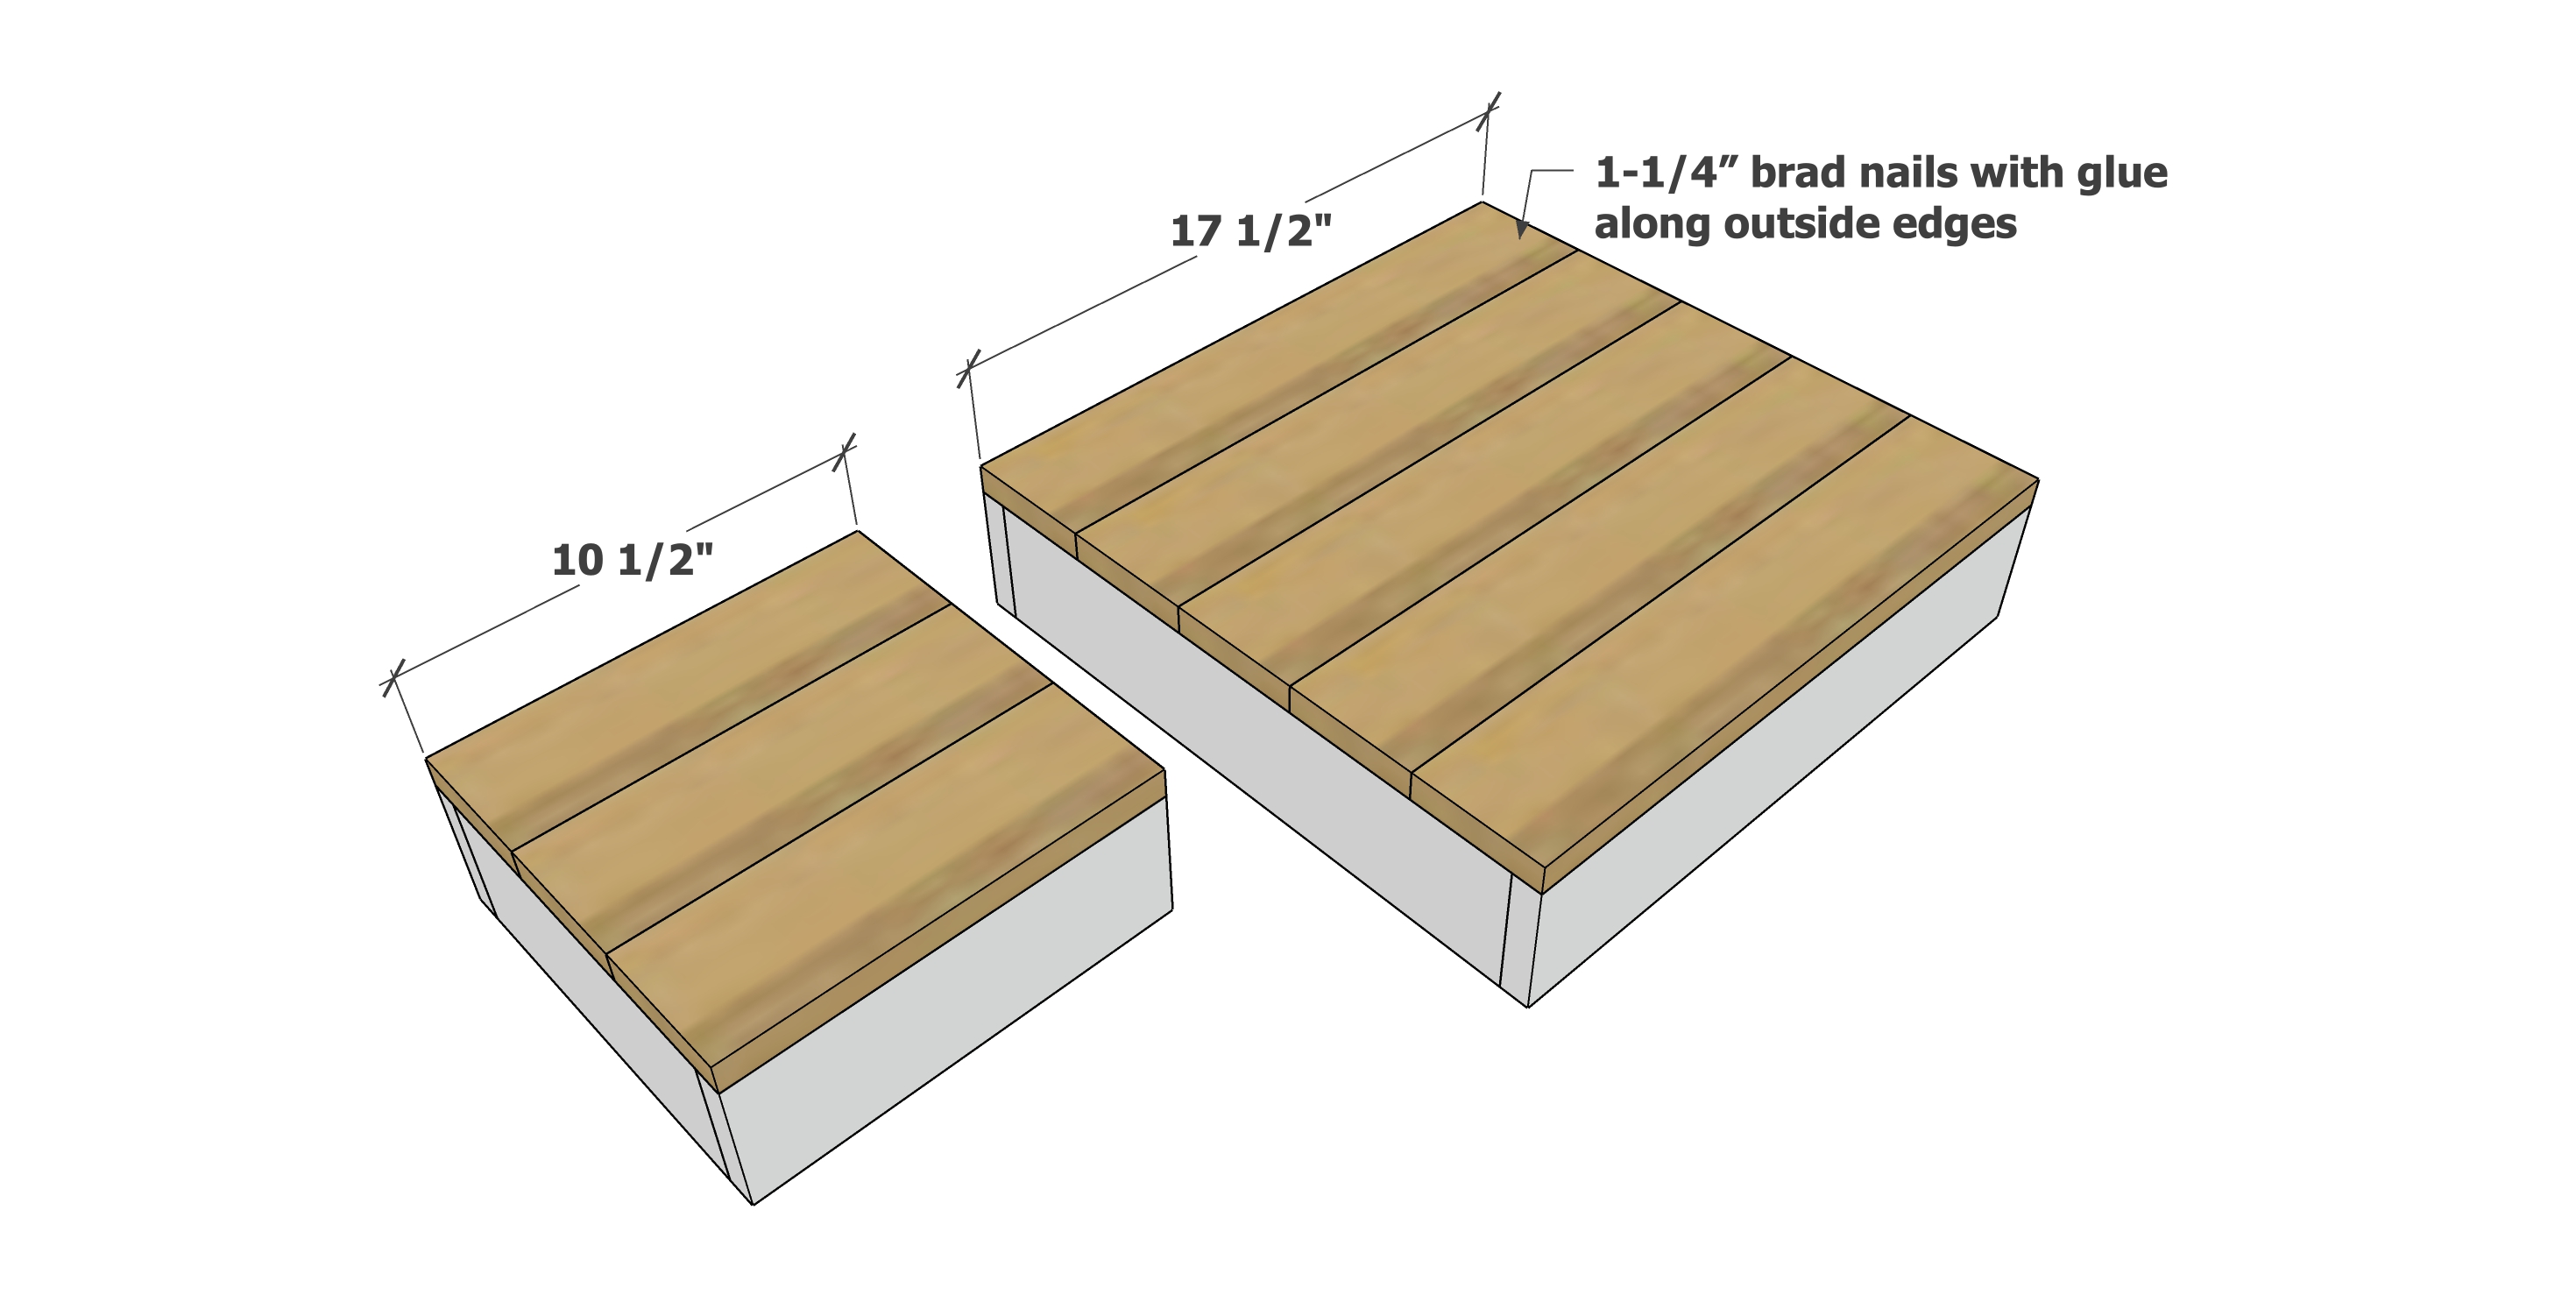
Layout the top decking boards on top.
Attach to base with 1-1/4" brad nails and glue, around the entire perimenter.
Sand well with 120 grit sandpaper.
