

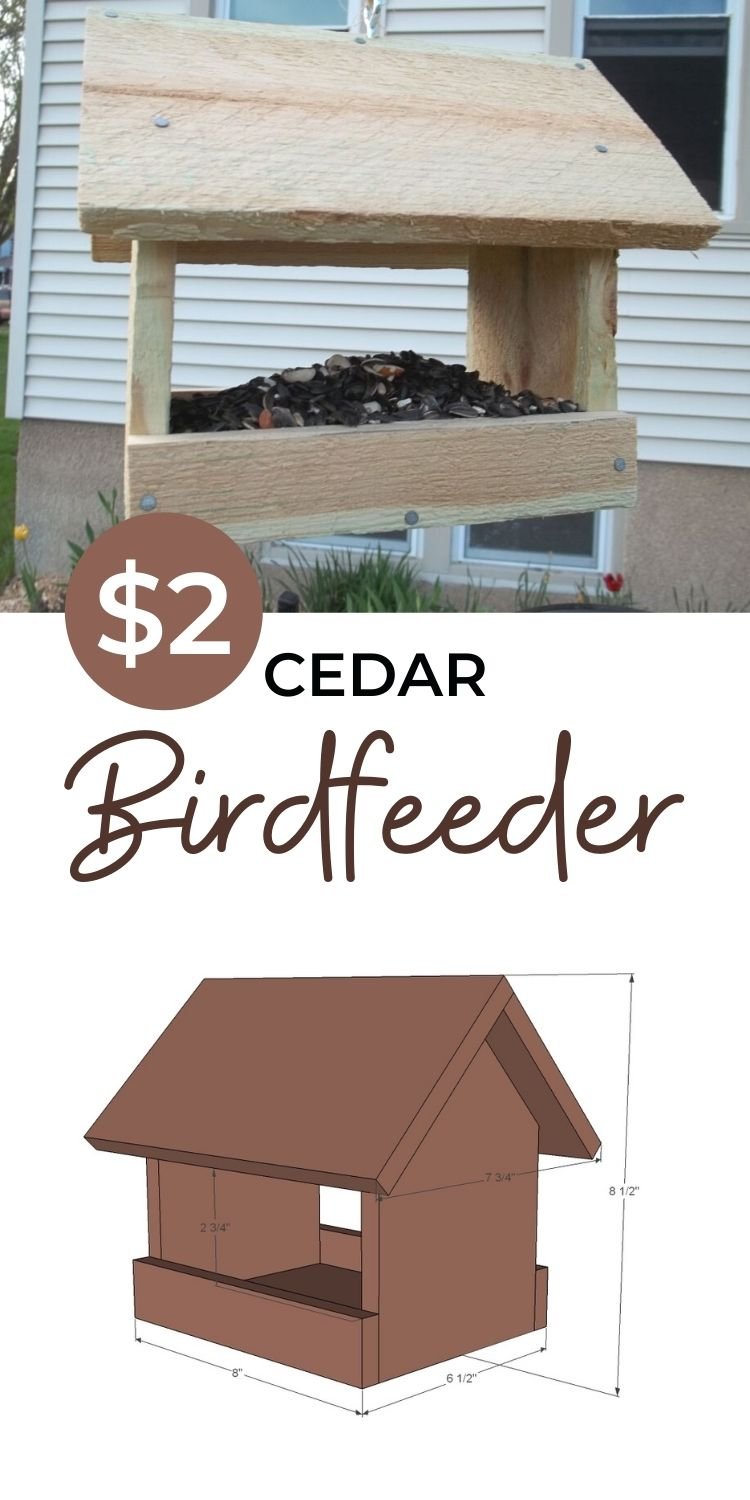
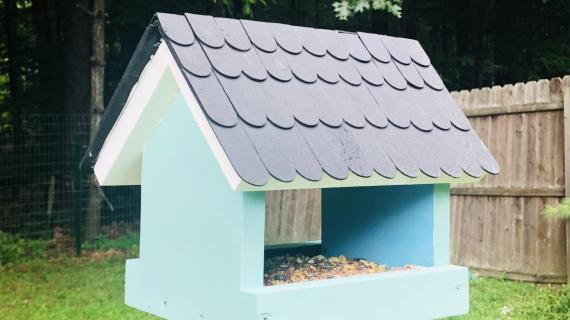
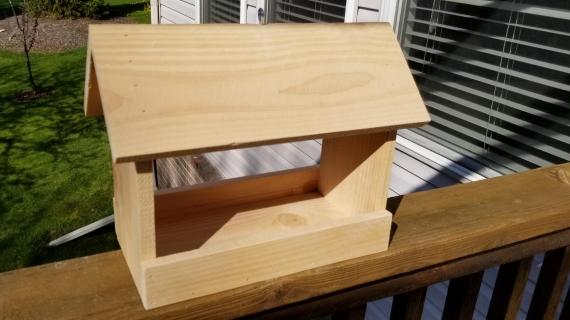
A very simple wood bird feeder project that uses just one cedar fence picket. Includes step by step diagrams and shopping list/cut list - plans from Ana-White.com

With minimal tools and materials you can build one or many bird feeders for an outdoor space easily and inexpensively.
Why Build a Bird Feeder?
- Save Money: Use scrap wood or one cedar fence picket to build each bird house. Get the kids involved or take it on as a beginner project.
- Natural Pest Control: Birds are natural pest controllers, feeding on insects that may harm your garden or plants.
- Enhances Outdoor Aesthetics: Birdhouses add a charming touch to your outdoor décor, enhancing the beauty of your garden or backyard.
- Stress Relief: Watching and listening to birds that visit and inhabit the birdhouse can be a calming and enjoyable activity, reducing stress and promote relaxation.
- Supports Conservation Efforts: Creating habitats for birds helps support conservation efforts by providing safe spaces for them to thrive.
Pin for Later!
What Wood Should be Used for a Birdhouse?
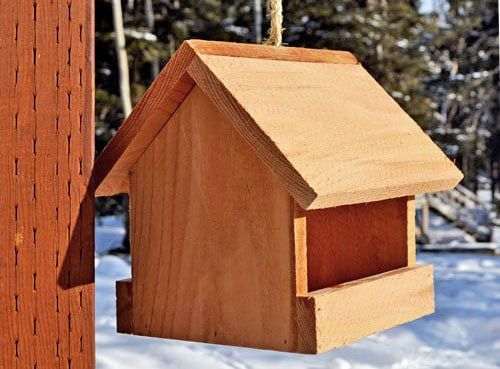
Cedar is often considered the best wood for building birdhouses due to its natural resistance to decay and insects. It's durable, lightweight, and offers good insulation for nesting birds. Additionally, cedar has a pleasant aroma and is relatively easy to work with, making it a popular choice among birdhouse builders.
Browse More Free Plans
Preparation
- 1 cedar fence picket 5 1/2" wide x 72" long - can be dogeared. Expected thickness is 1/2" - but plan accounts for varying widths exterior wood glue suitable for oily woods
- 1 1/4" finish nails or small screws
- For hanging an eye-hook can be used
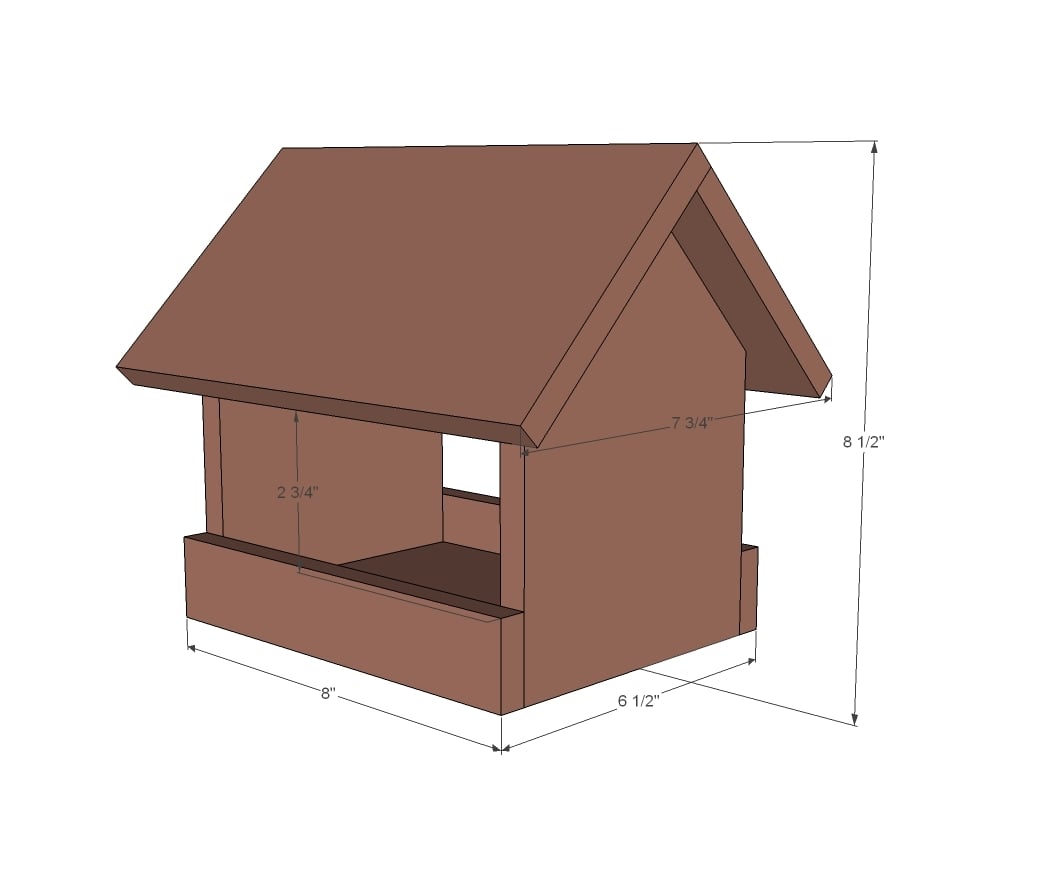
Cut the following from the cedar fence picket:
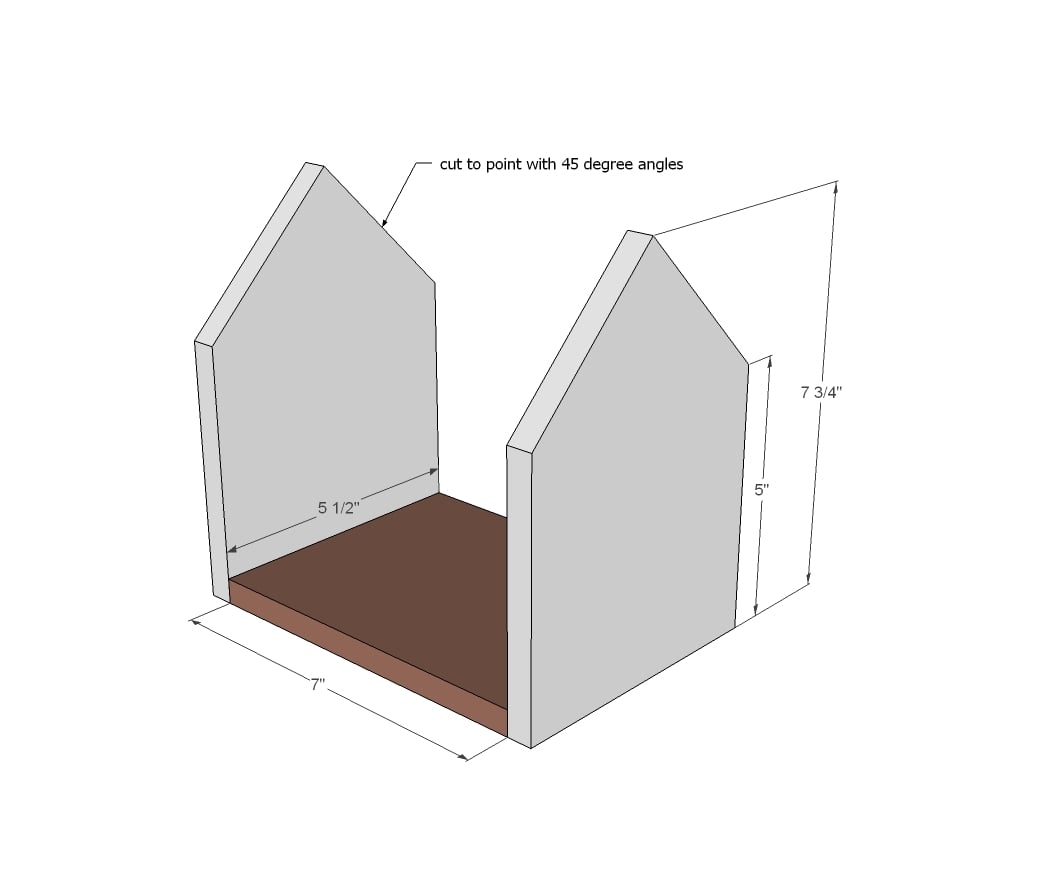
- 2 - 7 3/4" (cut to gable end point at 45 degree angles) - gable walls
- 1 - 7" - floor
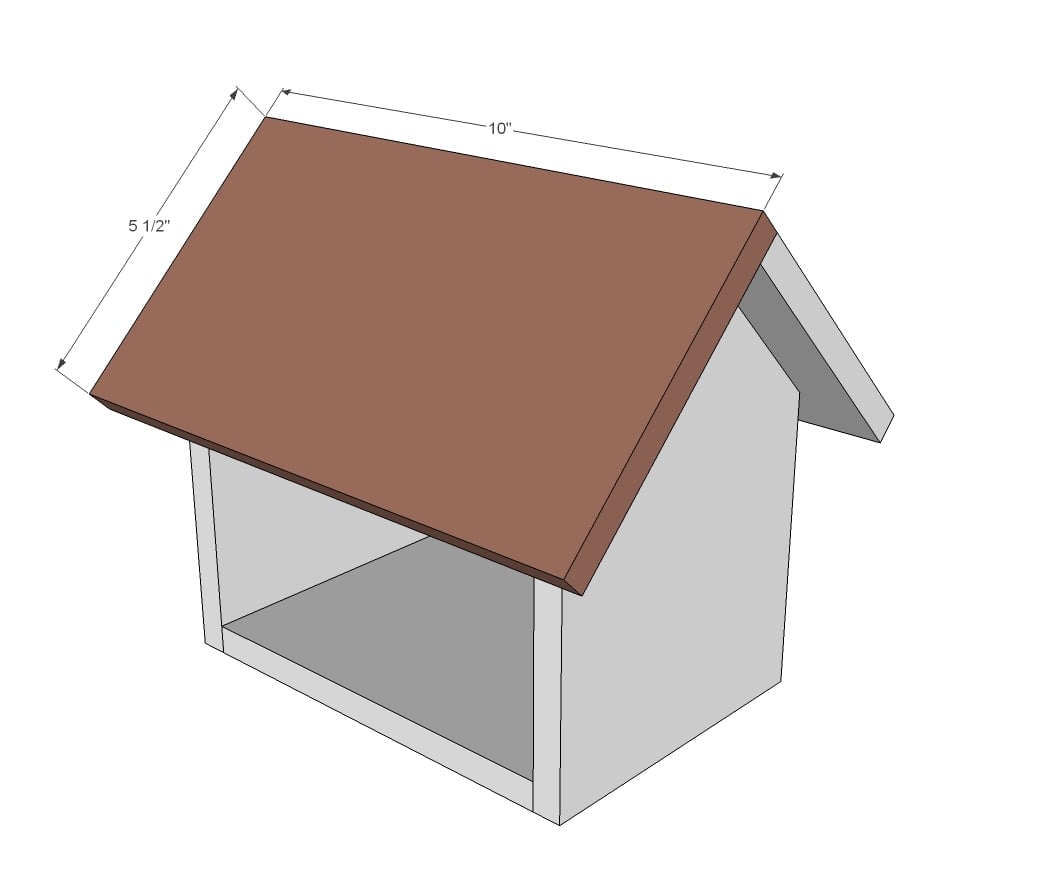
- 1 - 10" (rip 1/2" off one edge to make width 5") - shorter roof
- 1 - 10" - longer roof
- 1 - ~8" (Measure and cut to fit as this may vary slightly depending on thickness of wood. Then from this board, cut two strips 1 1/2" wide for finished measurement of ~8" by 1 1/2")


Please read through the entire plan and all comments before beginning this project. It is also advisable to review the Getting Started Section. Take all necessary precautions to build safely and smartly. Work on a clean level surface, free of imperfections or debris. Always use straight boards. Check for square after each step. Always predrill holes before attaching with screws. Use glue with finish nails for a stronger hold. Wipe excess glue off bare wood for stained projects, as dried glue will not take stain. Be safe, have fun, and ask for help if you need it. Good luck!
Instructions
Step 1
Attach walls to the bottom.
Step 2

Attach shorter roof to walls.
Step 3
Attach wider roof to walls and shorter roof.
Step 4
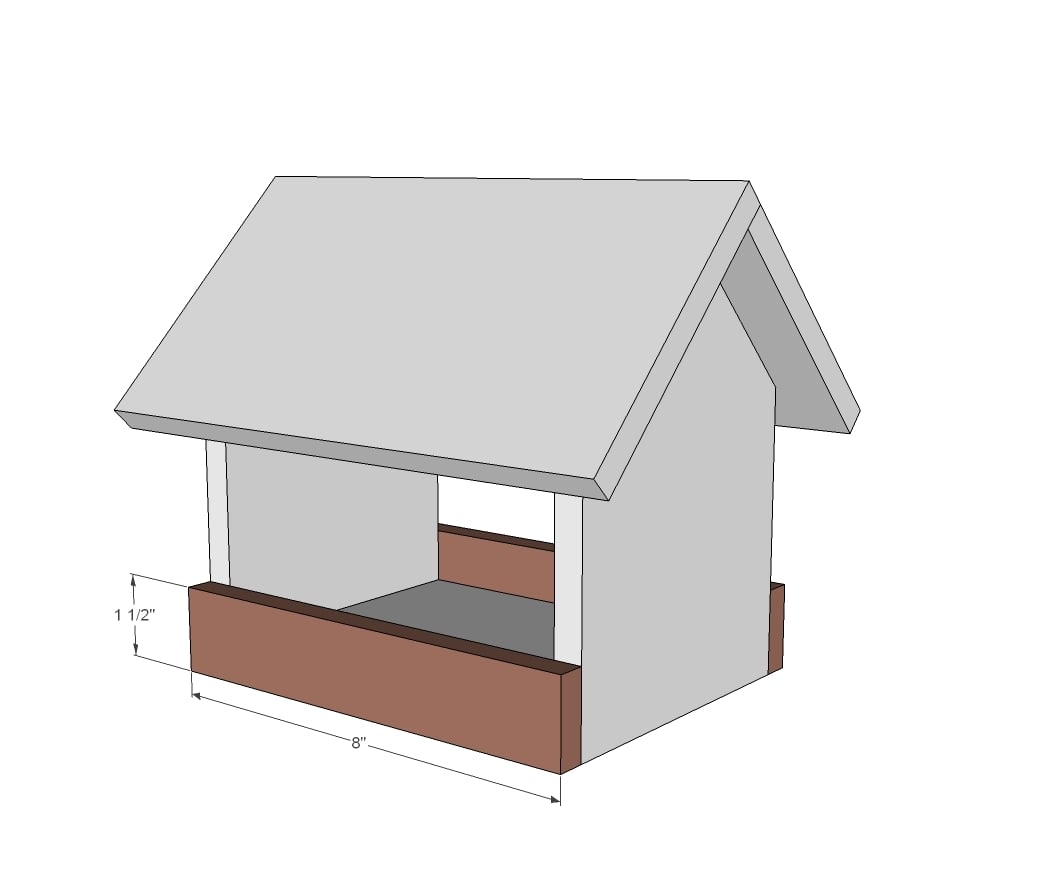
Attach side rails to sides.
It is always recommended to apply a test coat on a hidden area or scrap piece to ensure color evenness and adhesion. Use primer or wood conditioner as needed.


Comments
jaime19861
Sat, 04/13/2013 - 08:35
This is great! I've been
This is great! I've been looking at buying a new feeder. Making one will be even better! Thanks for the plans.
Jacques Remy
Sun, 10/13/2019 - 06:49
thanks
thanks for the plans I'll do this for my mother. :)