

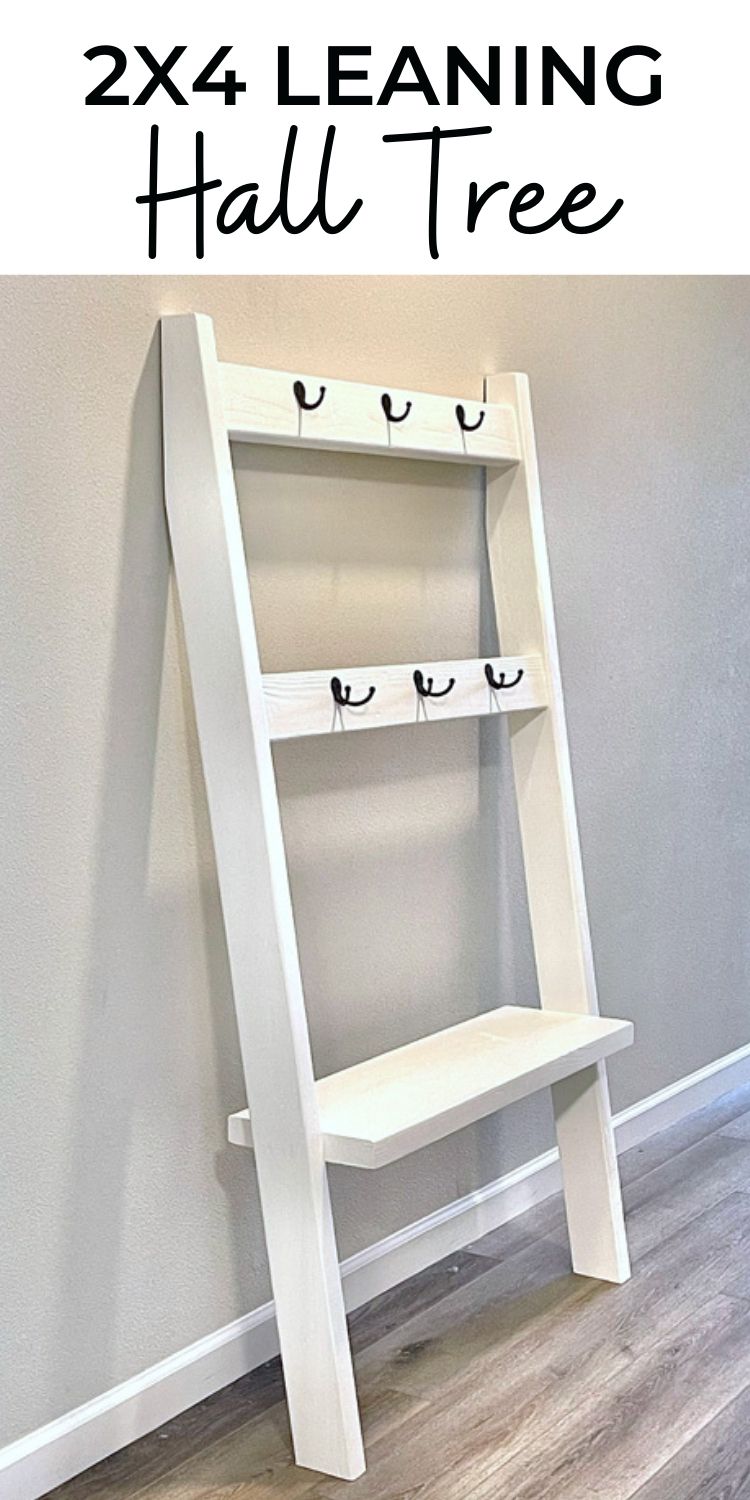
Build your own leaning hall tree! Free plans with step by step diagrams, cut list, shopping list and video tutorial from Ana-White.com.
Does your entryway need systems to get stuff off the floor? No where to hang back packs, lunch boxes, coats, keys and accessories?
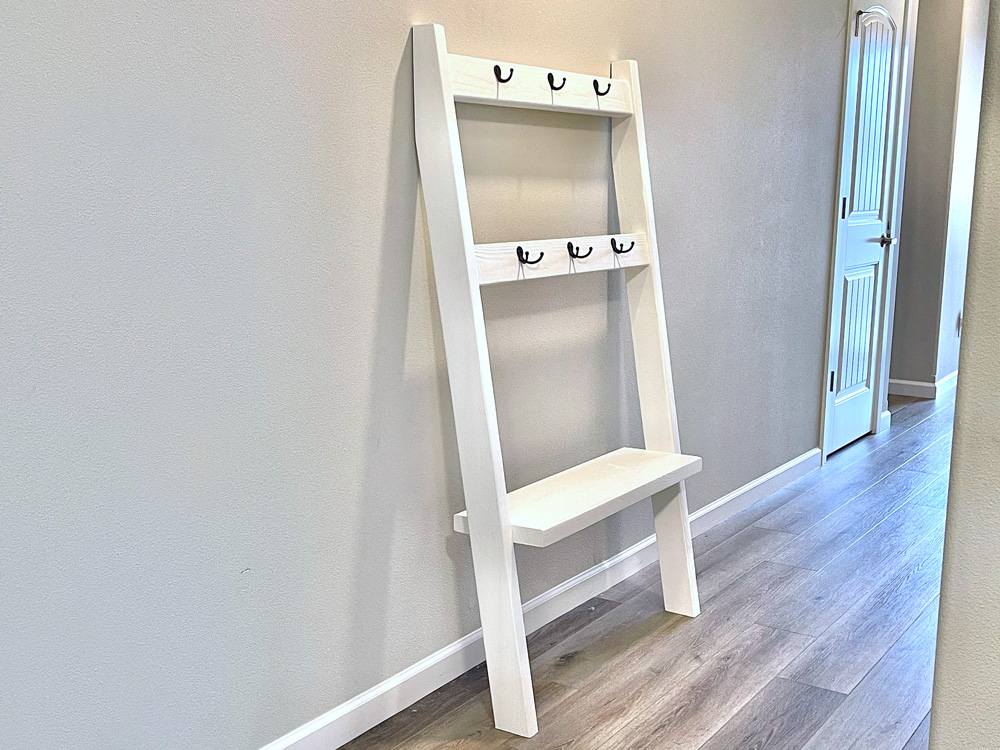
You can build your own entryway leaning hall tree with this free plans. It's a great way to add hooks to the wall - without having to screw into your walls! It's a lightweight but sturdy project, so if you are renting, you can take it with you!
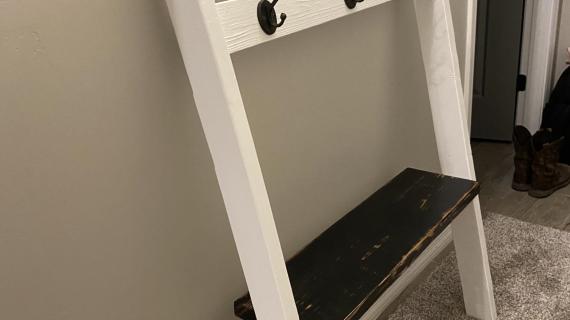
This project features a lower shelf, so you can rest things on a surface too.
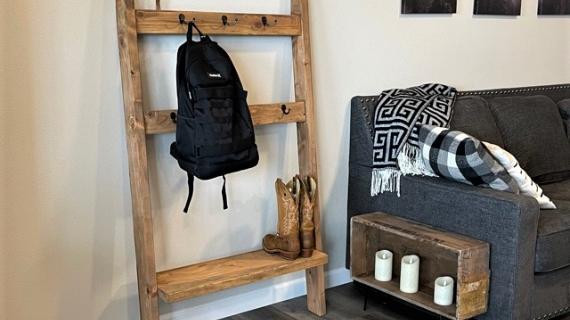
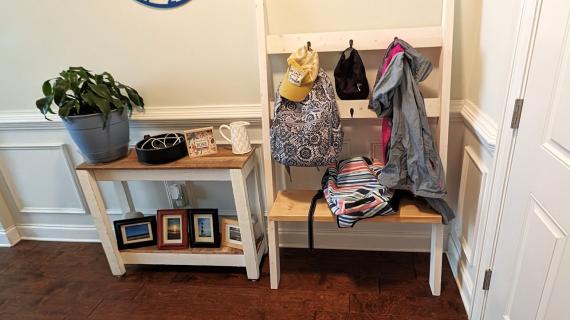
Here it is loaded up as a backpack/lunch box organizer.

Wouldn't this make it easier to get out of the house in the morning?
It's a pretty easy build - watch it come together in our DIY Leaning Hall Tree Build Video:
Here's the free plans for you -
Pin for Later!
Preparation
- 2 - 2x4 @ 8 feet long
- 1 - 2x10 or 2x12 @ 33" long
- 12 - 2-1/2" or longer self tapping star bit screws
- 6 hooks
NOTE: In the video the 2x10 is used for the bottom shelf. You can also use a 2x12 for a wider width shelf, as noted in this plan.
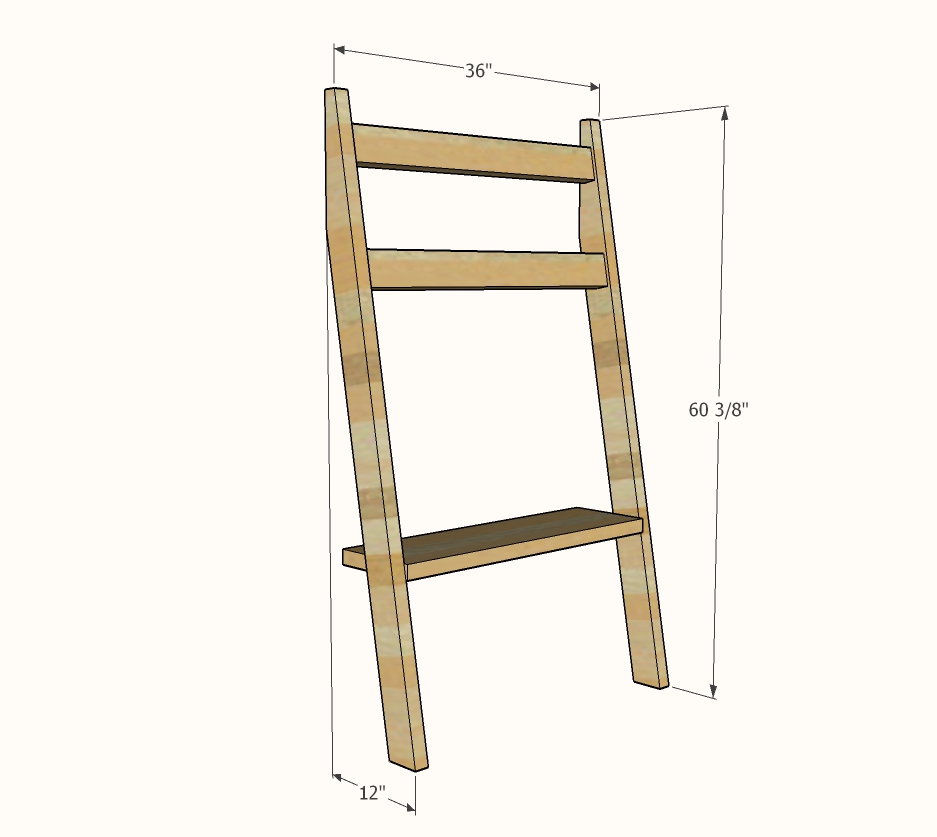
2 - 2x4 @ 61-1/4" - both ends cut at 10 degrees off square, ends ARE parallel - long point to short point measurement
2 - 2x4 @ 33"
1 - 2x10 or 2x12 @ 33"
cut conservatively with the 2x4s, as there is just enough 2x4s to get all the cuts on both boards


Instructions
Step 1
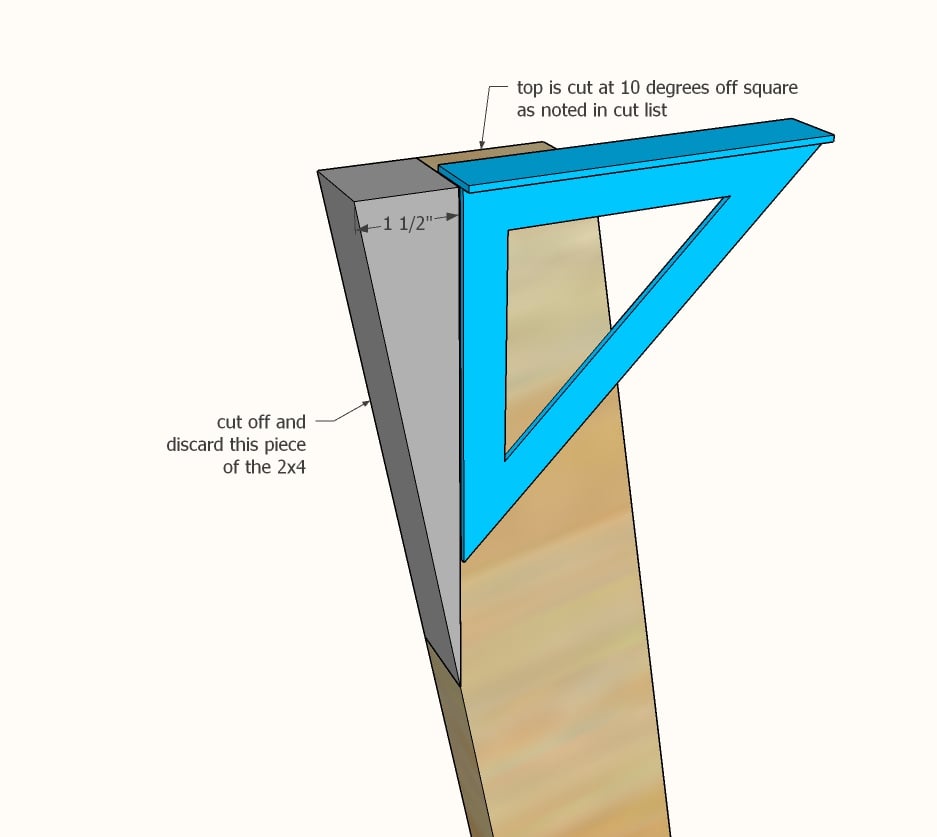
After cutting the 2x4 sides with the 10 degree off square angles on tops and bottoms, on just the top of both legs, mark as shown in the diagram and cut off the gray area with a circular saw. This will make the legs flat on the back, so the project sits flat against the wall.
Step 2
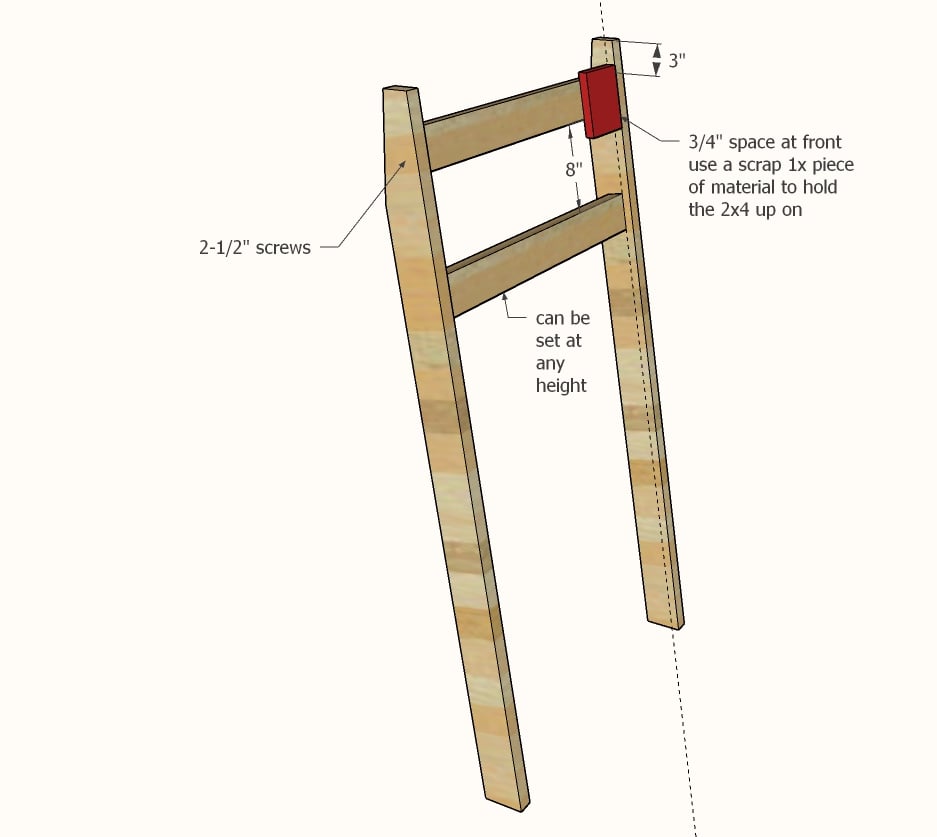
Now lay both legs flat, front edge on the floor or on a flat surface. Use two 1x scrap pieces of wood (3/4" thick) as spacers to hold up the 33" long 2x4s and attach to the legs as shown in the diagram with screws.
Step 3
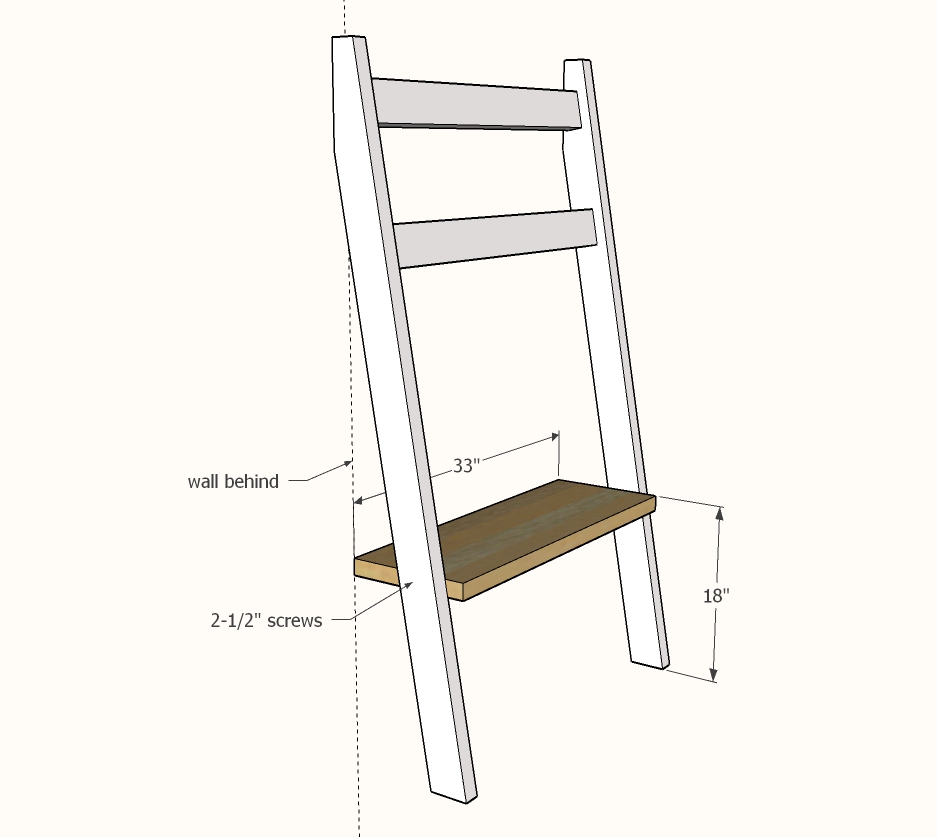
Position the project up against a flat wall, on a level floor, and make sure the legs are plumb vertically (not leaning one way or another).
Set the 2x12 shelf where desired and attach with the screws. Shown is 18" bench height.

Comments
carlm3510
Wed, 10/06/2021 - 11:42
Must do this
Must do this
arlynn
Thu, 10/07/2021 - 13:14
oh geez, I clock on this…
oh geez, I clock on this link to see the project and a loud video started playing unexpectedly. NOT good while at work! I must be careful about opening your website now that we've started with the music videos! ...great project by the way.