
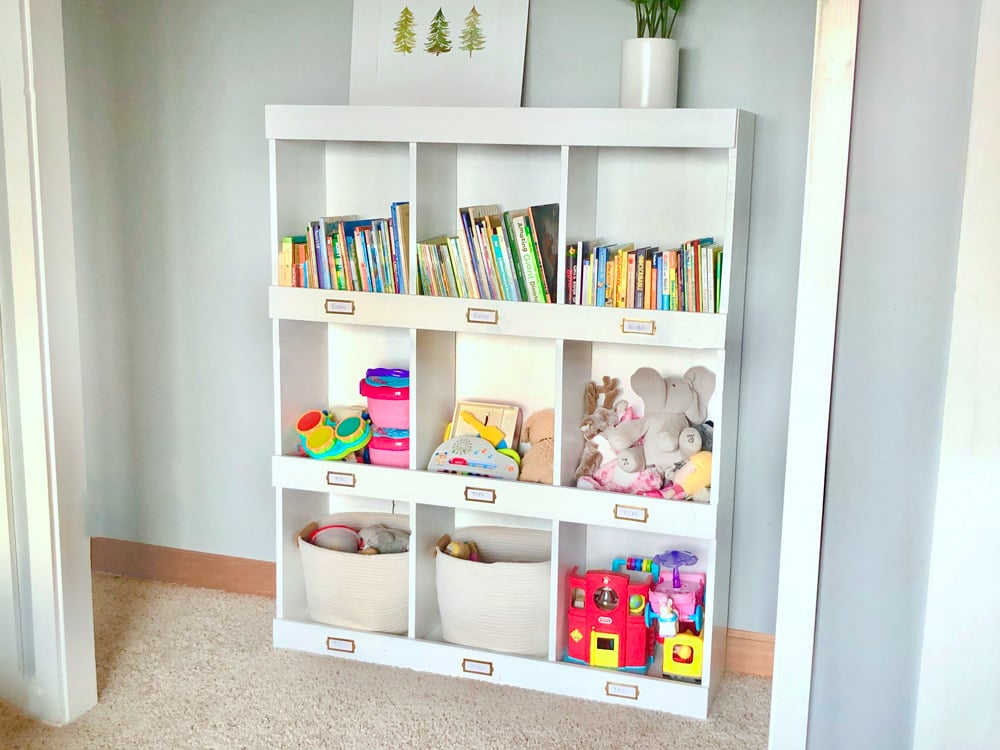

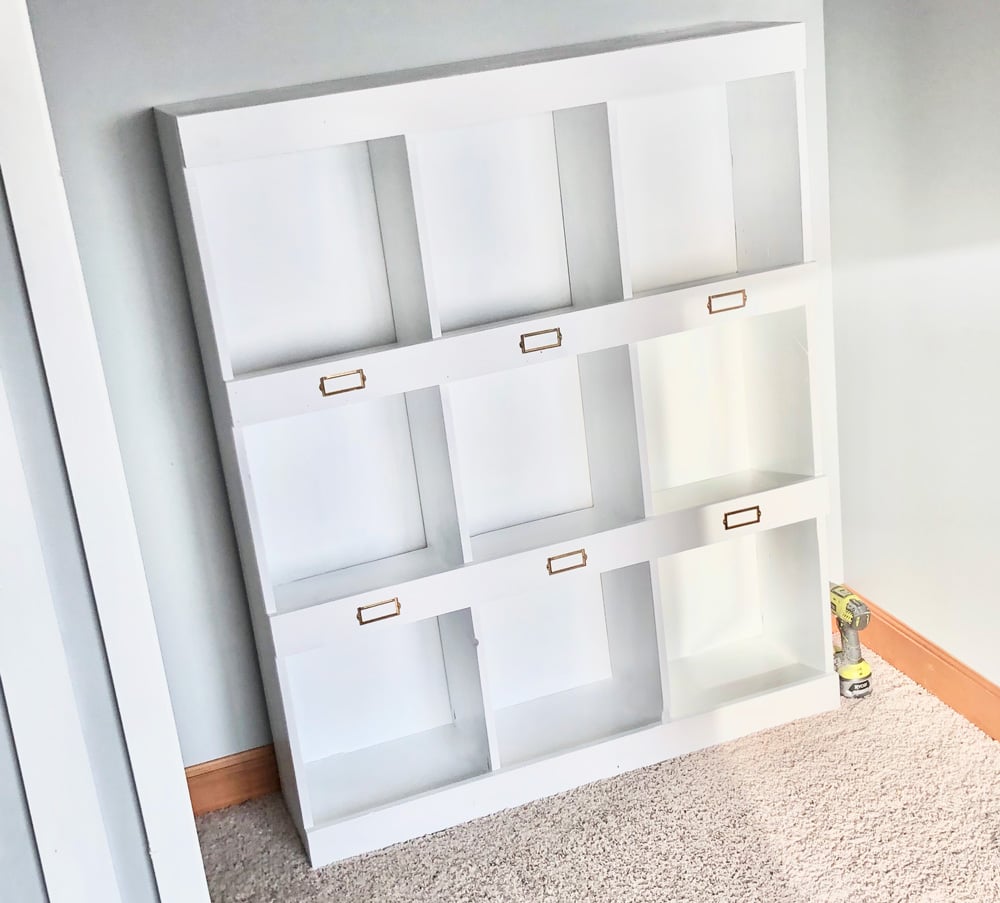
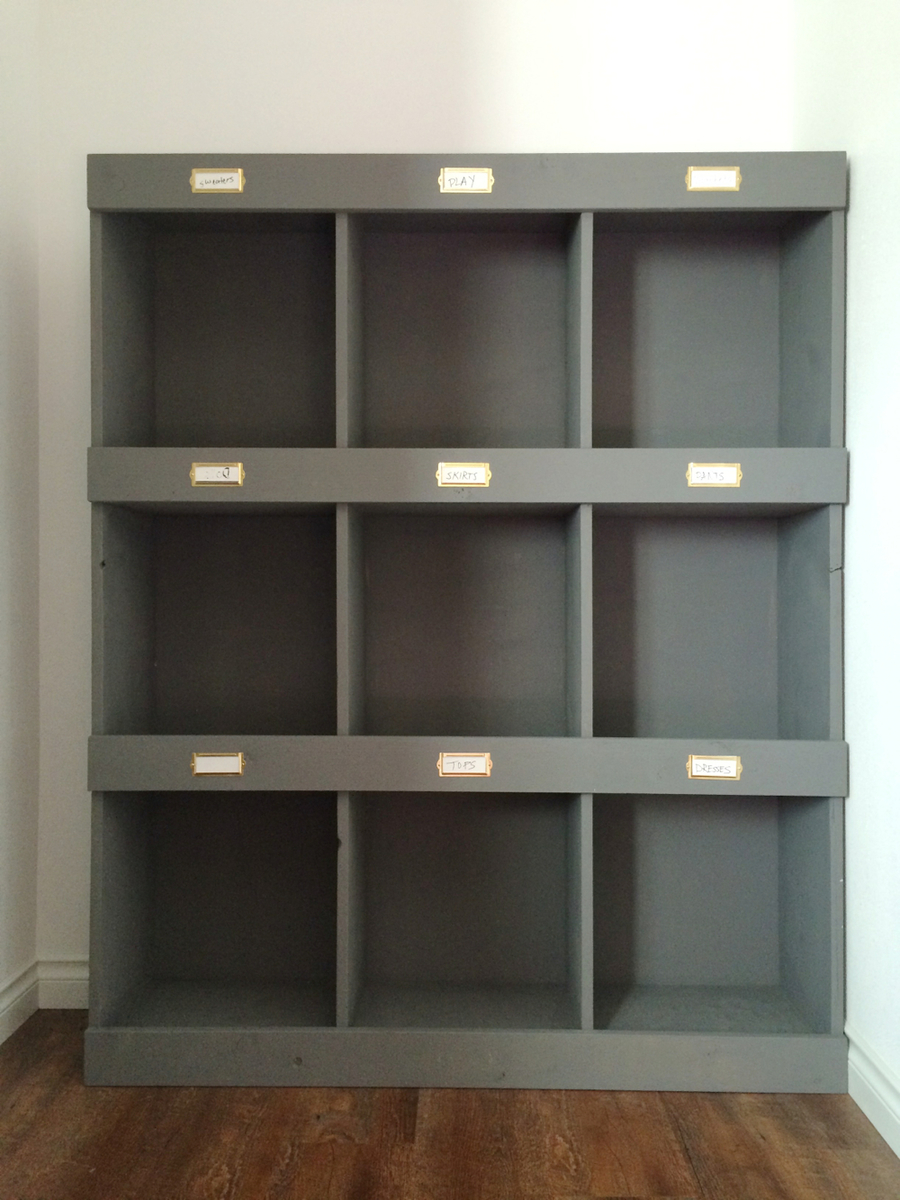
9 big cubbies to store everything from books to toys - or use around the house for a vintage feel. Free step by step plans from Ana-White.com
9 Cubby Bookshelf Features
- 9 large cubbies perfect for books, toys, blankets, and more
- Label each cubby for easy organization
- 1x12 construction - easy to build and takes most any stain or paint
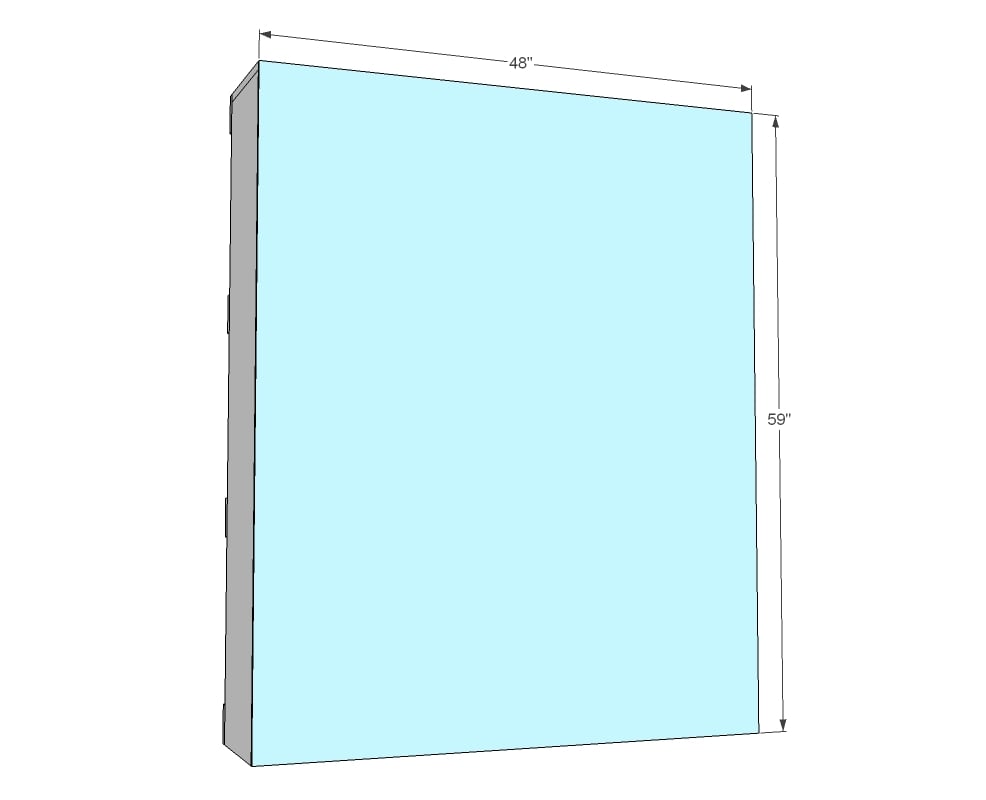
- Back optimized for 48" wide 1/4" thick plywood panels (one easy cut and you are done!)
- About $125 in materials (compare to over $500)
- Solid wood design will last and hold heavy objects and is repairable, re-finish able and easy to re-purpose


Pin For Later!

Preparation
2 - 1x12 @ 8 feet long
2 - 1x12 @ 10 feet long
1 - 1x2 @ 8 feet long
2 - 1x4 @ 8 feet long
1 - Full sheet (4x8 feet) of 1/4" plywood or other hardboard
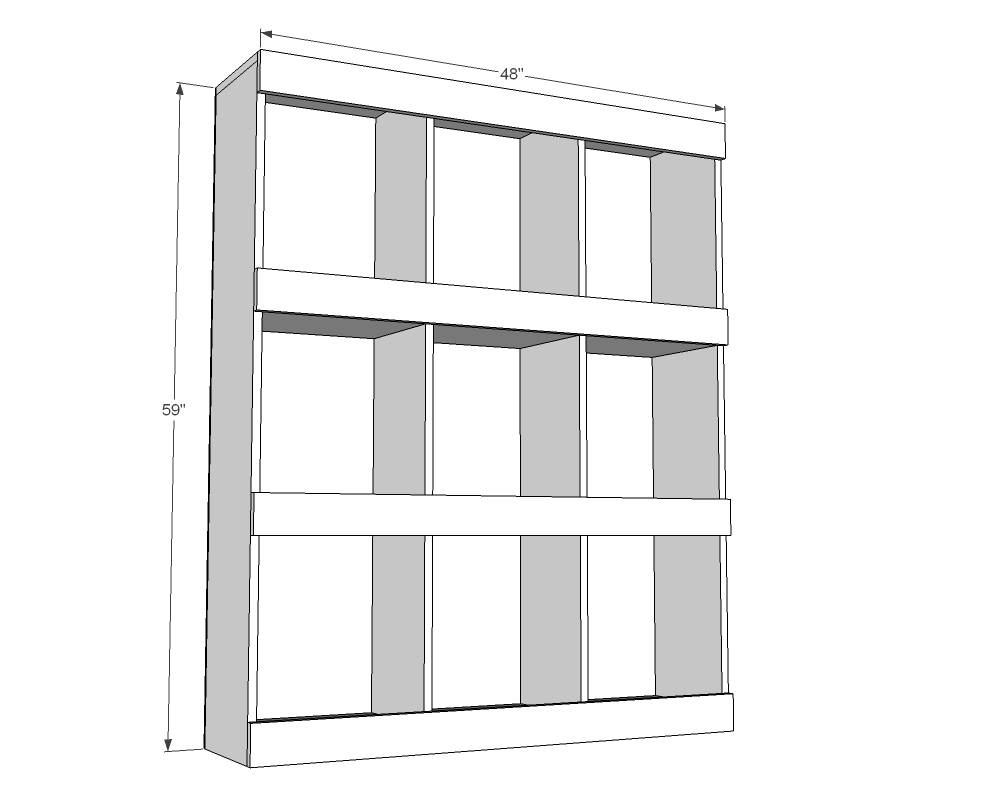
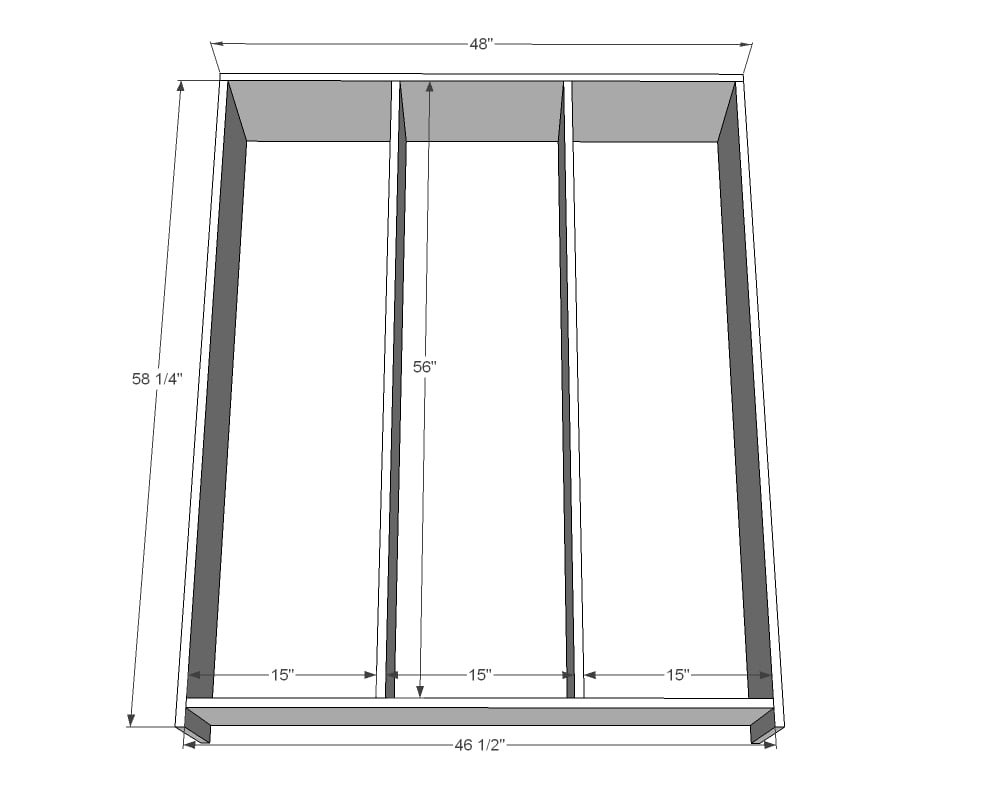
- 1 - 1x12 @ 48" (top)
- 2 - 1x12 @ 59-1/4" (sides)
- 2 - 1x12 @ 56" (dividers)
- 1 - 1x12 @ 46-1/2" (bottom)
- 2 - 1x2 @ 46-1/2" (bottom supports)
- 6 - 1x12 @ 15" (shelves)
- 4 - 1x4 @ 48" (shelf trim)
- 1 - 1/4" plywood @ 48" x 59"
Recommended cuts of 1x12 boards:
- 1x12x8 - 48" and 46-1/2"
- 1x12x10 - 59-1/4" and 59-1/4"
- 1x12x10 - 56" and 56"
- 1x12x8 - 15" and 15" and 15" and 15" and 15" and 15"


Please read through the entire plan and all comments before beginning this project. It is also advisable to review the Getting Started Section. Take all necessary precautions to build safely and smartly. Work on a clean level surface, free of imperfections or debris. Always use straight boards. Check for square after each step. Always predrill holes before attaching with screws. Use glue with finish nails for a stronger hold. Wipe excess glue off bare wood for stained projects, as dried glue will not take stain. Be safe, have fun, and ask for help if you need it. Good luck!
Instructions
Step 1
Build the frame for the shelf with 3/4" pocket holes and 1-1/4" pocket hole screws. Place pocket holes on insides and undersides to hide.
Step 2
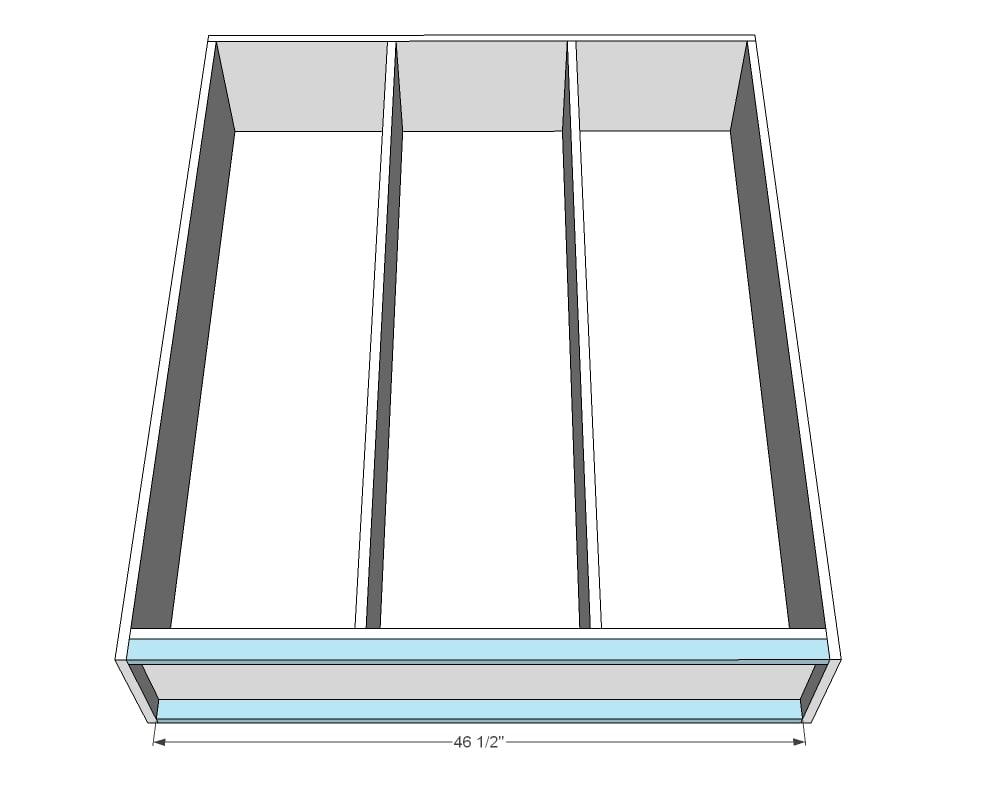
Attach bottom 1x2 trim with 1-1/4" brad nails and wood glue.
Step 3
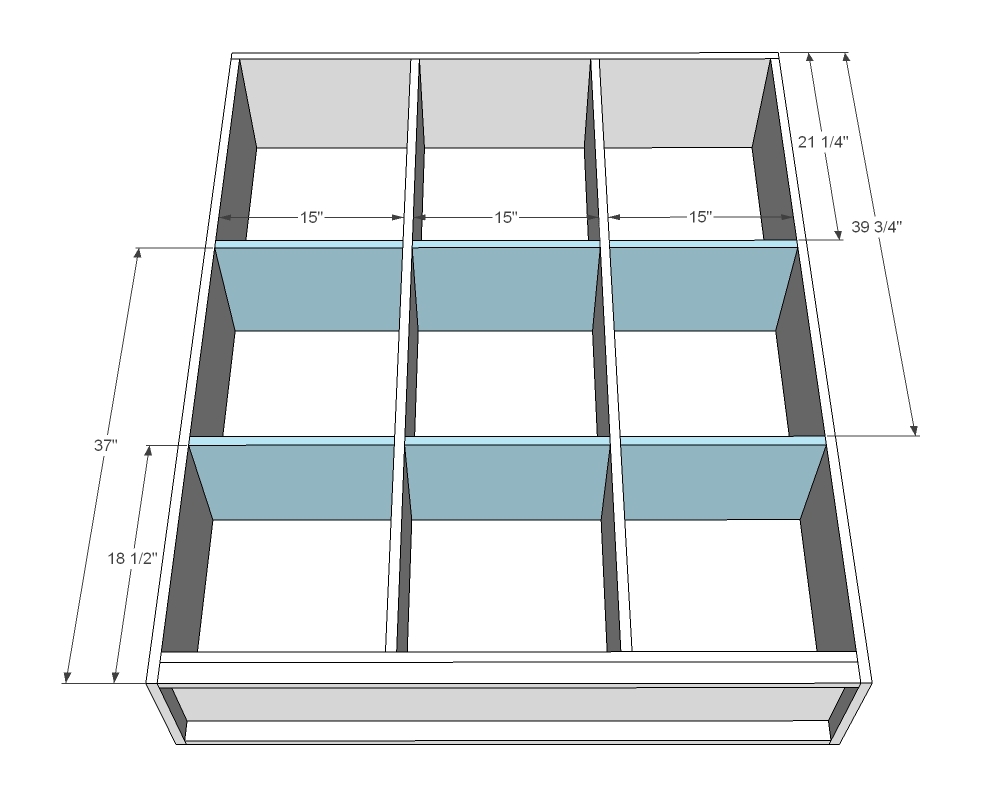
Attach shelves to sides and dividers with 3/4" pocket holes and 1-1/4" pocket hole screws.
Step 4
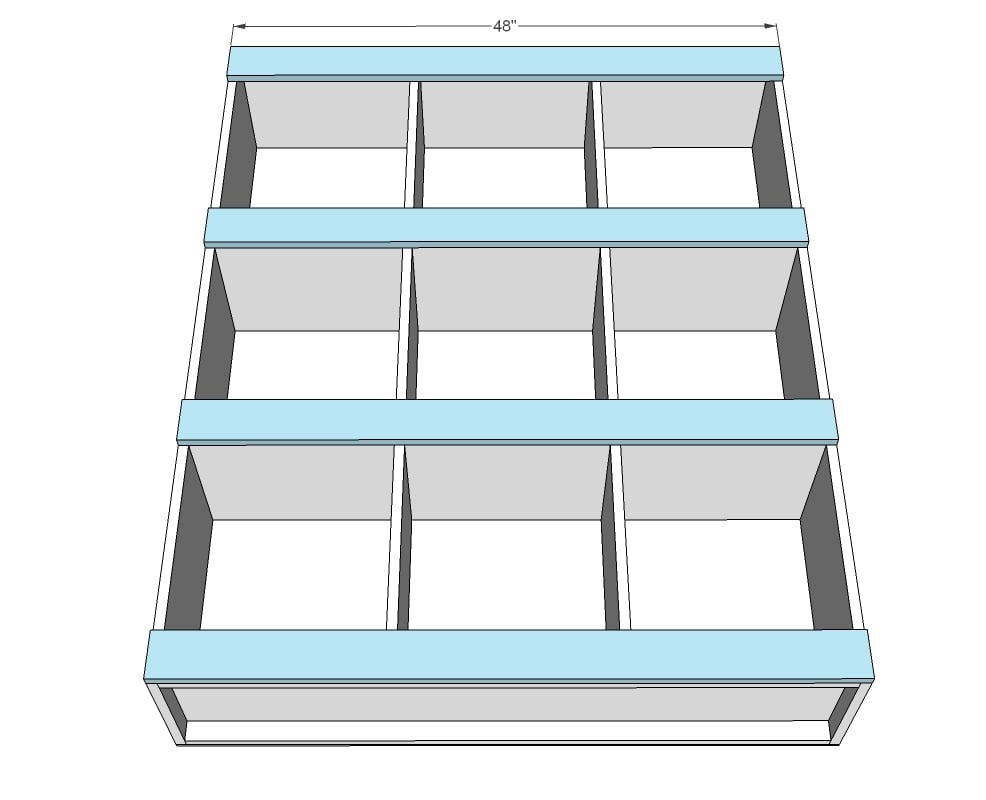
Attach 1x4s to fronts of shelves with 1-1/4" brad nails and wood glue.
Step 5
Add back with glue and 3/4" brad nails. Nail to all dividers and shelves.
It is always recommended to apply a test coat on a hidden area or scrap piece to ensure color evenness and adhesion. Use primer or wood conditioner as needed.

Comments
birdsandsoap
Mon, 01/12/2015 - 21:30
love!
I need a bunch of these! Where did you find your fancy nameplates?
In reply to love! by birdsandsoap
Ana White
Tue, 01/13/2015 - 20:45
Nameplates
Hi Jenny! Always great to see your pretty smile! Nameplates here
http://www.amazon.com/gp/aw/d/B000OK26F8/ref=pd_aw_sbs_1?pi=SL500_SS115…
In reply to Nameplates by Ana White
birdsandsoap
Thu, 01/22/2015 - 15:36
Thank You! Literally DYING to
Thank You! Literally DYING to build again!! But you know- babies.
Calmly
Tue, 01/13/2015 - 16:43
Love these!
These are perfect for so many things. I am thinking this would be great for us sewers who have lots of fabric and stuff.
Ana White Admin
Tue, 01/13/2015 - 20:36
Nameplates
Nameplates here http://www.amazon.com/gp/aw/d/B000OK26F8/ref=pd_aw_sbs_1?pi=SL500_SS115…
cdahlgren
Tue, 01/13/2015 - 23:12
Bookshelf
I would love a couple of these, preferably high gloss white. Thanks so much for making them for me for free. cdahlgren at live dot com
julesluvshop
Wed, 01/14/2015 - 07:36
2 Cubby Shelf
Can you provide the plans for the 2 cubby shelves? These are fantastic by the way!
Drunknstein
Sun, 03/15/2020 - 11:38
Where did the download pdf…
Where did the download pdf go from website. It use to have it. Unless I just dont see it.