
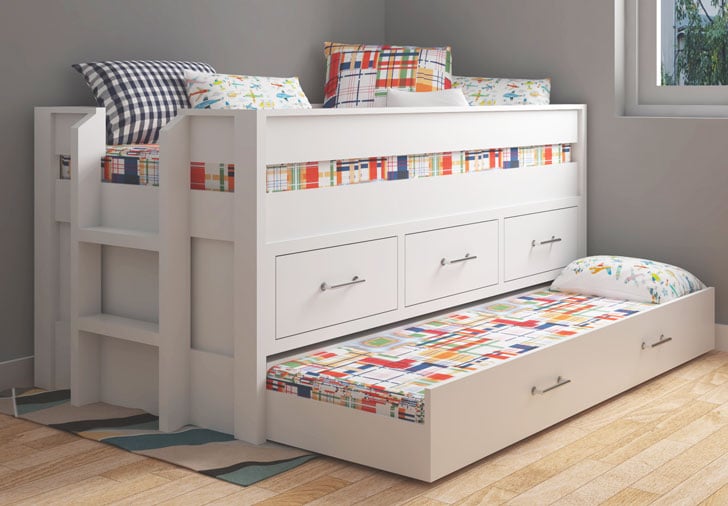

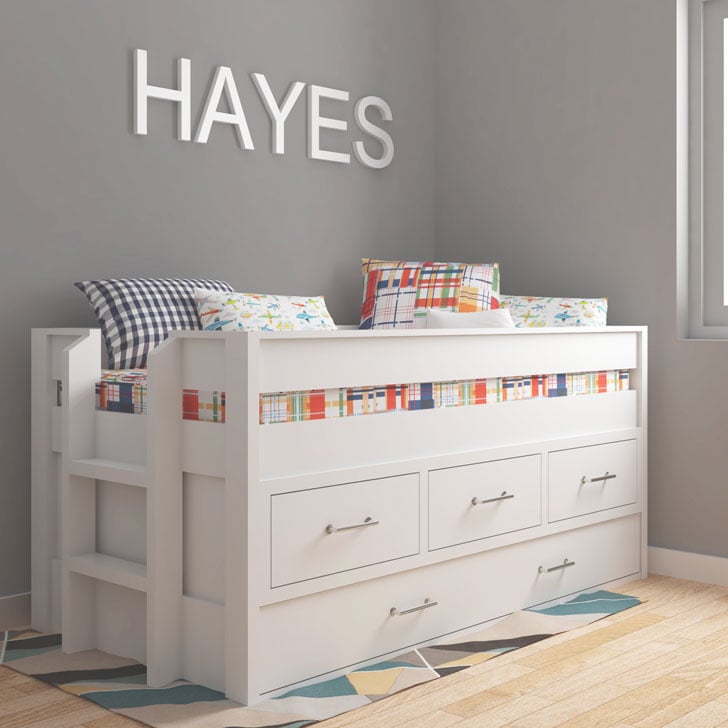
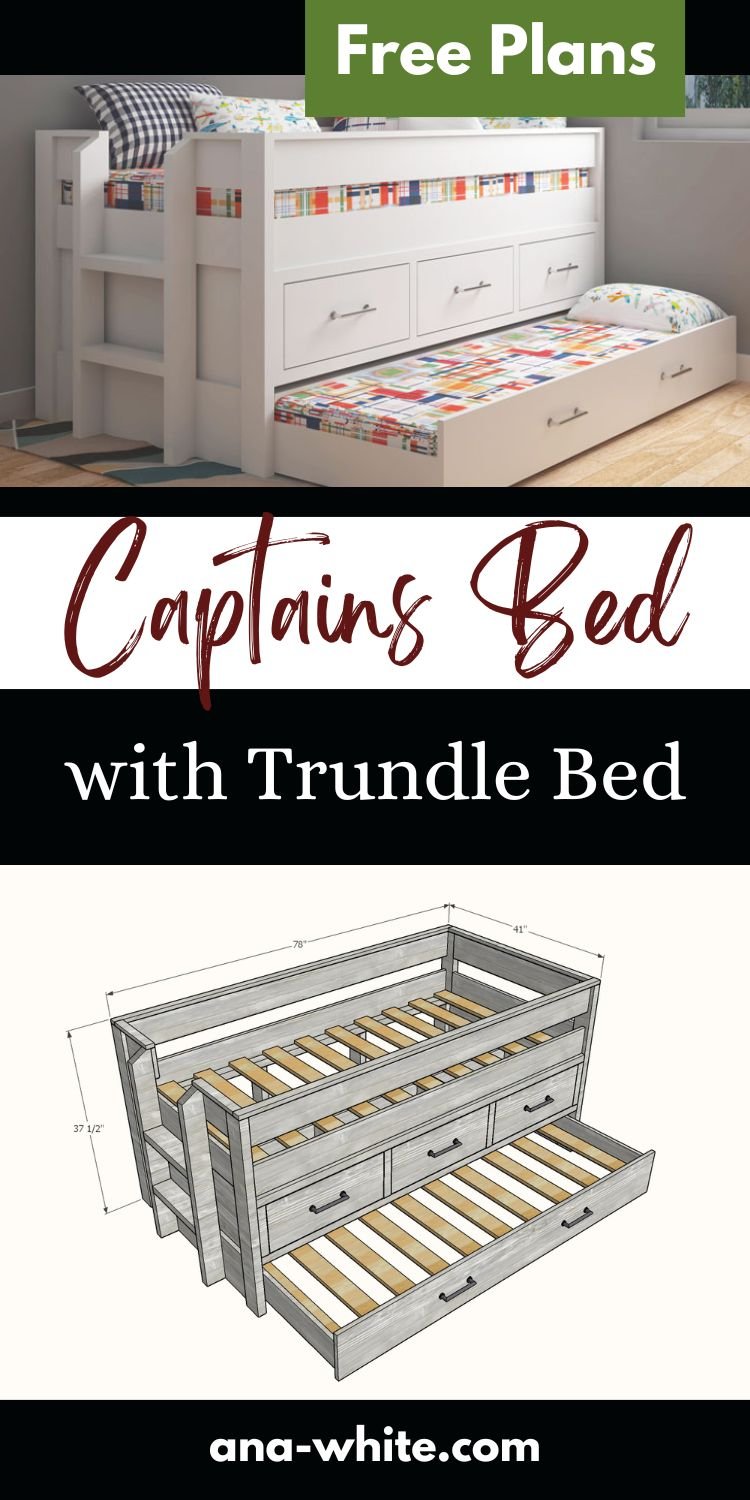
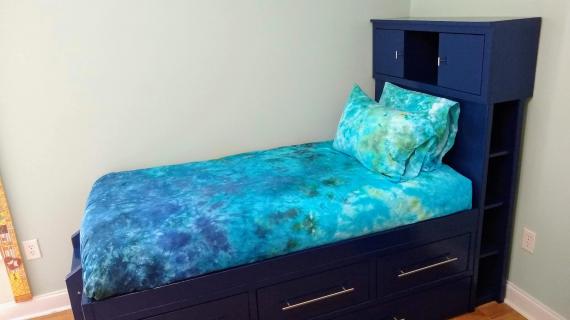
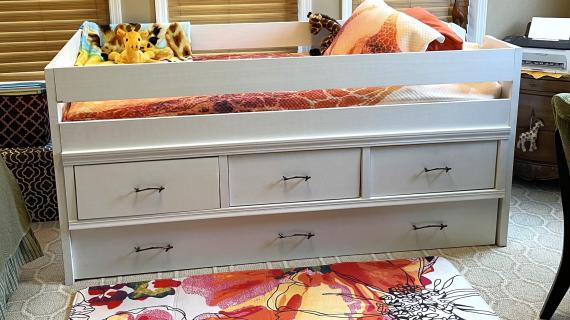
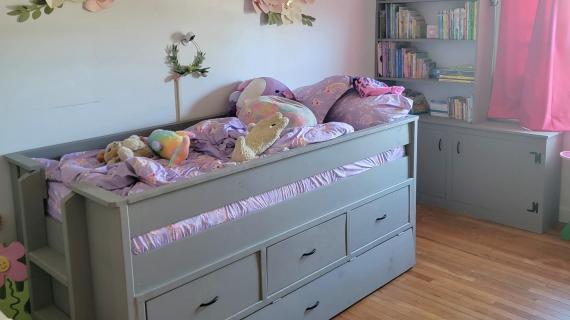
Build your own captains bed with trundle and storage drawers! Spend a couple hundred instead of a couple thousands! Choose your own finish and hardware.
Step by step plans include over 15 diagrams, detailed shopping list and cut list. Free plans by Ana-White.com
Pin For Later!

Preparation
6 - 2" caster wheels (50 pound load rating minimum)
3 - 18" drawer slides
9 - 2x4 @ 8 feet long
1- 2x2 @ 8 feet long
5 - 1x6 @ 10 feet long
4 - 1x2 @ 8 feet long
2 - 1x10 @ 10 feet long
10 - 1x4 or 1x3 @ 8 feet long (used for slats)
1 - 1/4" plywood sheet used for end panels and drawer bottoms
100 - 1-1/4" pocket hole screws
70 - 2-1/2" self tapping wood screws like these
8 - 2-1/2" pocket hole screws
200 - 1-1/4" brad nails
50 - 3/4" brad nails
wood glue
5 - handles or pulls
33" x 72" trundle mattress (sometimes called a "sleeper sofa bed mattress)
38" x 75" standard twin mattress
ENDS
- 6 - 2x4 @ 36-3/4" - legs and ladder legs
- 2 - 1x10 @ 34" - bottom
- 3 - 1x6 @ 34" - top rails
- 2 - 1/4" plywood @ 34" x 15" - end panels
- 2 - 2x4 @ 15" - ladder rungs
- 2 - 1x6 @ 9-1/2" - top rails on ladder side
- 2 - 1x2 @ 13" - top trim ladder side
- 1 - 1x2 @ 41" - top trim end without ladder
SIDES/CENTER
- 4 - 2x4 @ 75" - drawer support framing
- 8 - 2x4 @ 9-1/2" - drawer support framing
- 4 - 1x6 @ 75" - siderails
- 2 - 1x2 @ 75" - top trim, siderails
- 2 - 2x2 @ 34" - drawer support rails
- 2 - 1x2 @ 34" - drawer support rails, ends
- 10 - 1x4 @ 38" - bed slats
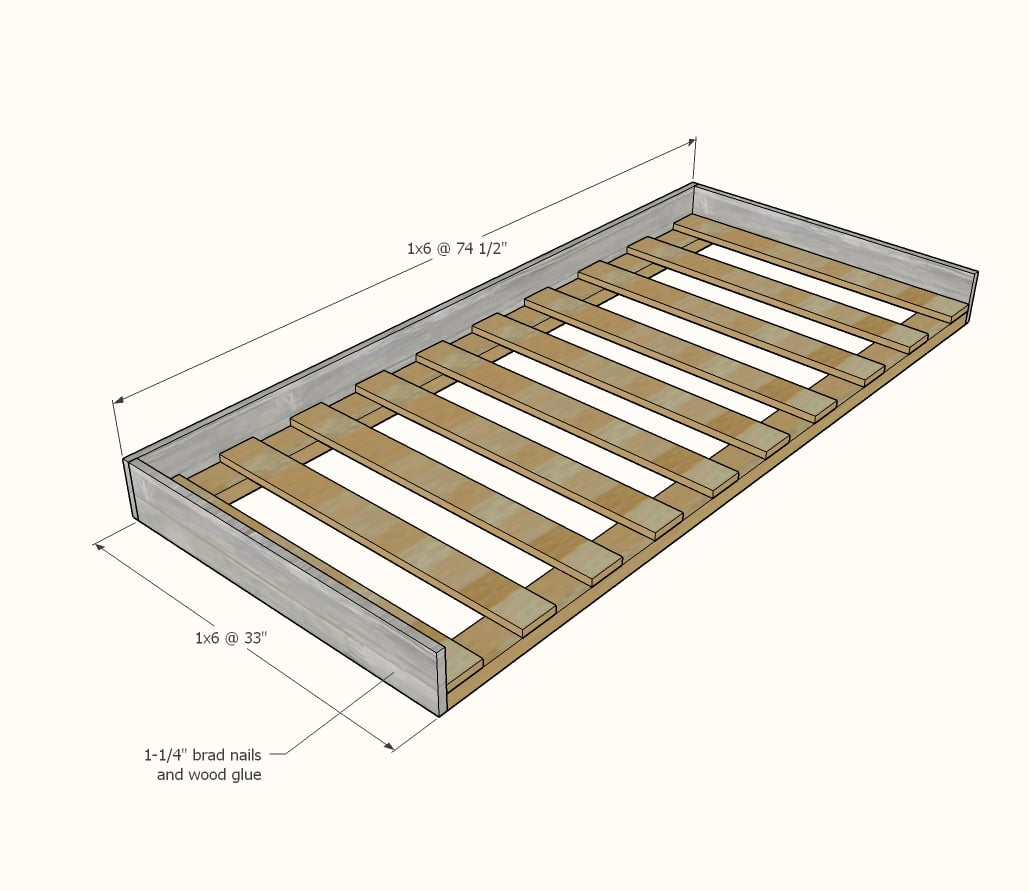
TRUNDLE
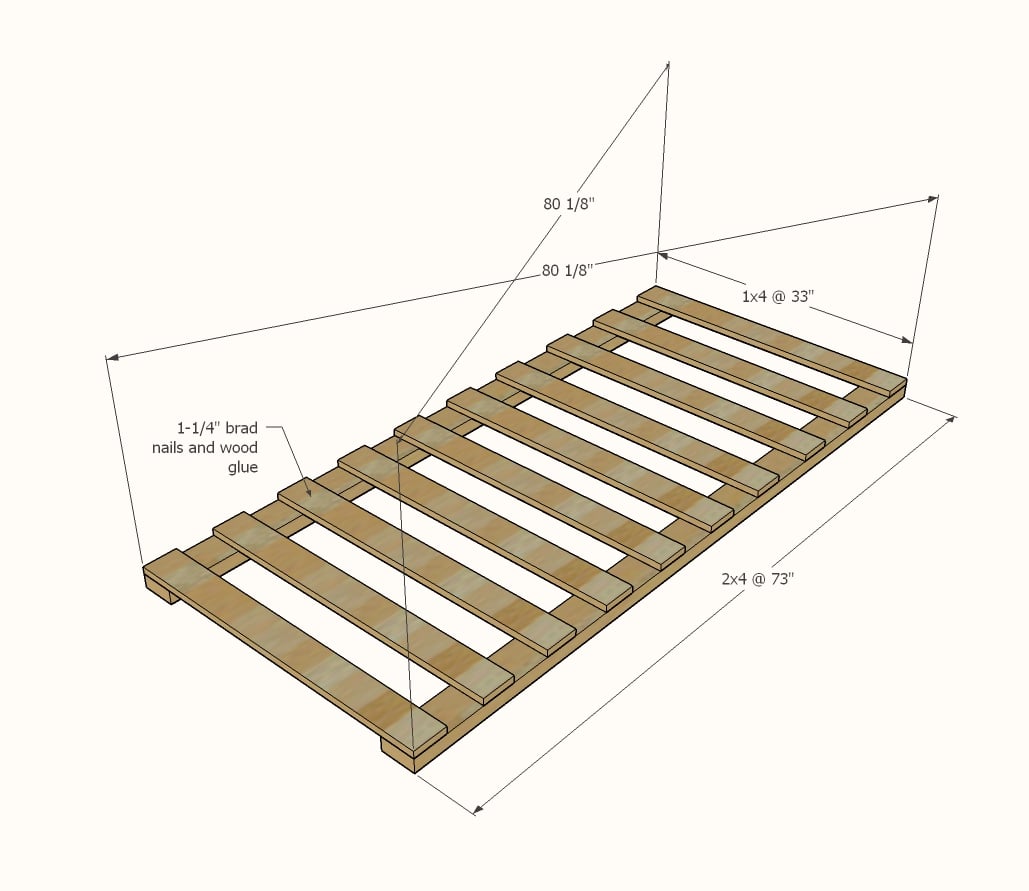
- 2 - 2x4 @ 73" - trundle supports
- 10 1x4 @ 33" - slats
- 2 - 1x6 @ 33" - ends
- 1 - 1x6 @ 74-1/2" - back
- 1 - 1x10 @ 74-1/2" - front
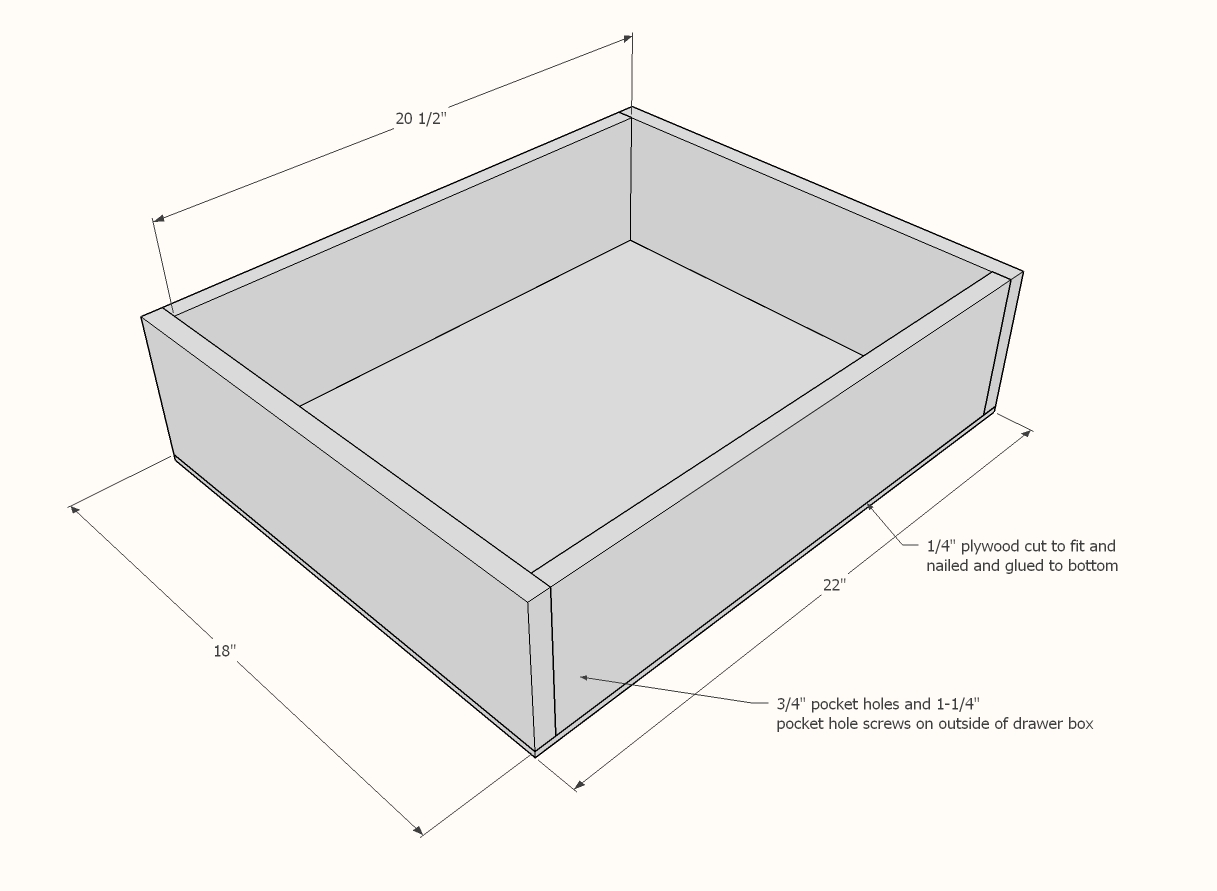
DRAWERS - ASSUMES OPENING OF 23" and 1/2" clearance drawer slides
- 6 - 1x6 @ 18" - drawer sides
- 6 - 1x6 @ 22" - drawer front/back
- 3 - 1/4" plywood @ 18" x 22" - drawer bottom
- 3 - 1x10 @ 22-3/4" - drawer face
Cut the longest cuts first to make sure you get those cuts before cutting smaller pieces
DO NOT cut boards in half for transport - cut according to cut list
Cut 1x and 2x boards with a compound miter saw (recommended) or a circular saw with straight edge.
Plywood needs to be cut with a circular saw or tablesaw.


The finished bed will be large in size and may not fit through a door opening. You may wish to build in pieces, finish pieces that are exposed in final product, then move into the room for final assembly
Instructions
Step 1
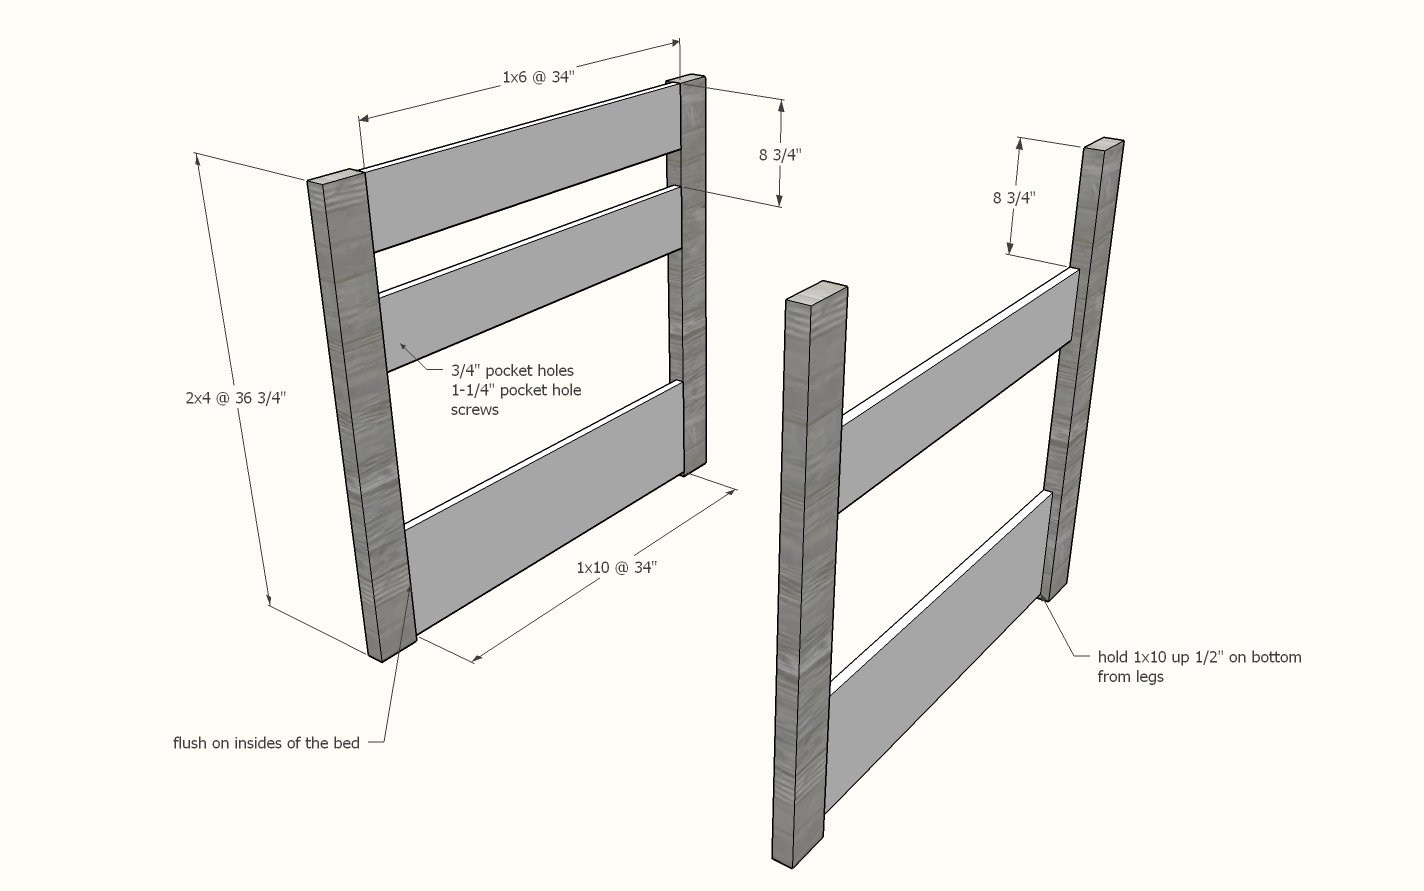
Drill two 3/4" pocket hole son each end of the 1x6 boards. Drill three on ends of 1x10.
Attach with 1-1/4" pocket hole screws to the 2x4 legs, flush on inside, pocket holes on inside.
Step 2
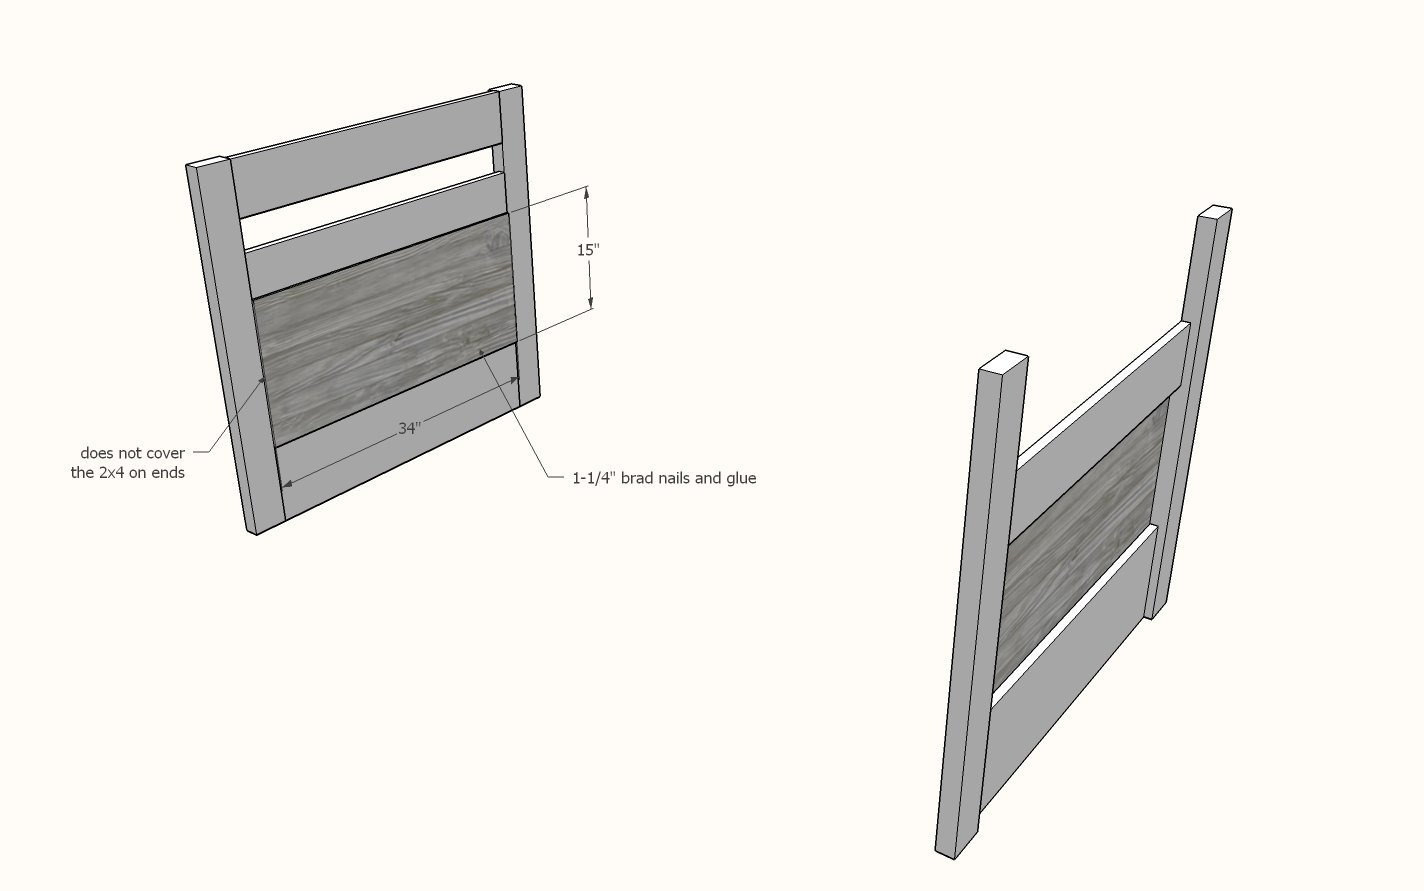
Glue and nail 1/4" plywood to end panels.
Step 3
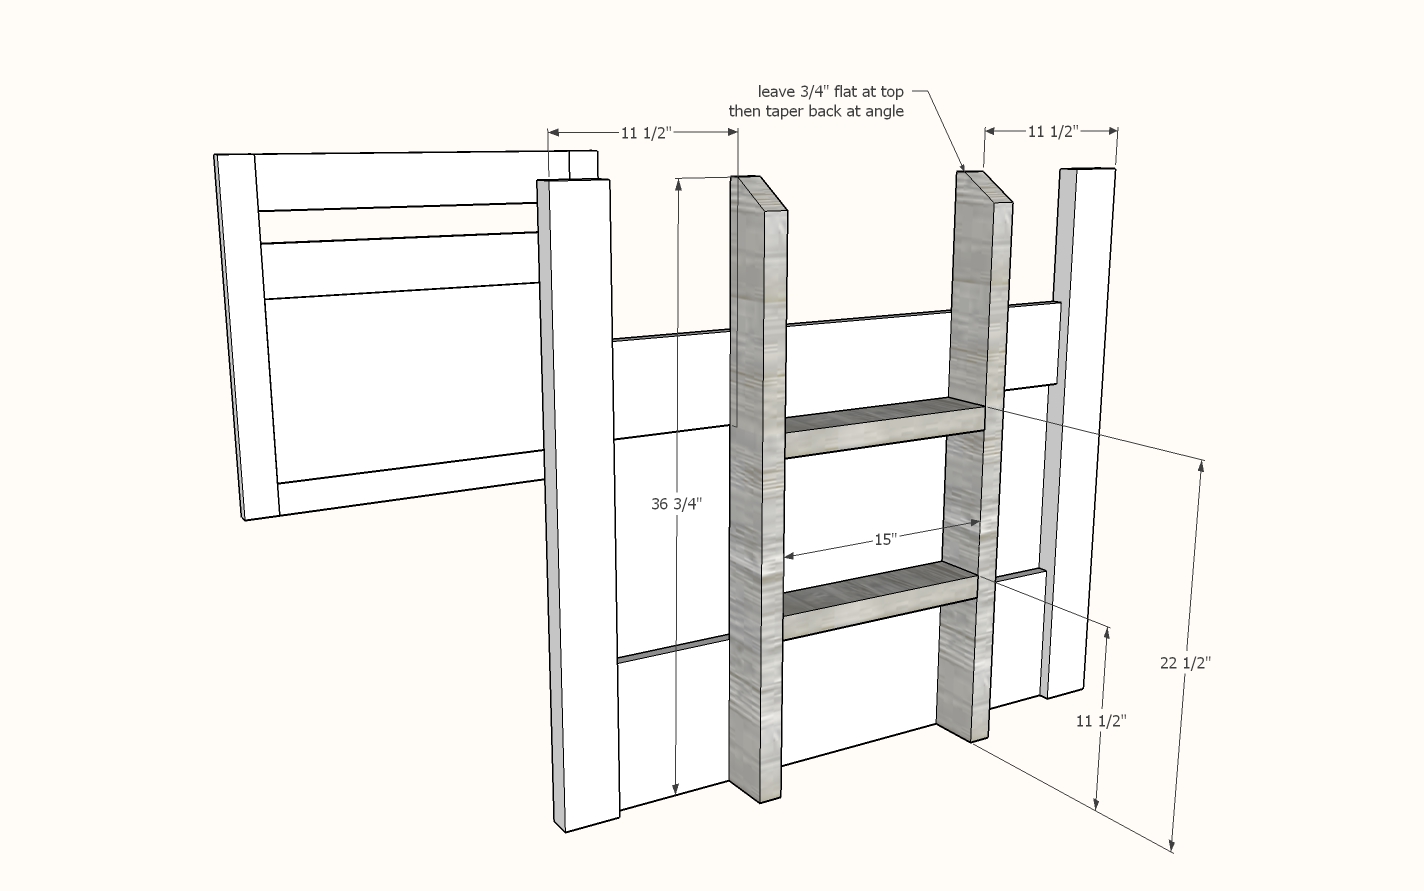
Cut ladder top legs at angle with circular saw or miter saw - shown with 30 degree angle. Leave 3/4" at top flat.
Build ladder with 2-1/2" self tapping wood screws.
Attach from back with 2-1/2" self tapping wood screws.
Step 4

Drill 3/4" pocket holes on ONE end of the small 1x6 pieces. Attach to 2x4 legs with 1-1/4" pocket hole screws.
Attach to top of ladder with 2-1/2" self tapping wood screws.
This completes the two end panels. Finish the entire end panels as desired.
Step 5
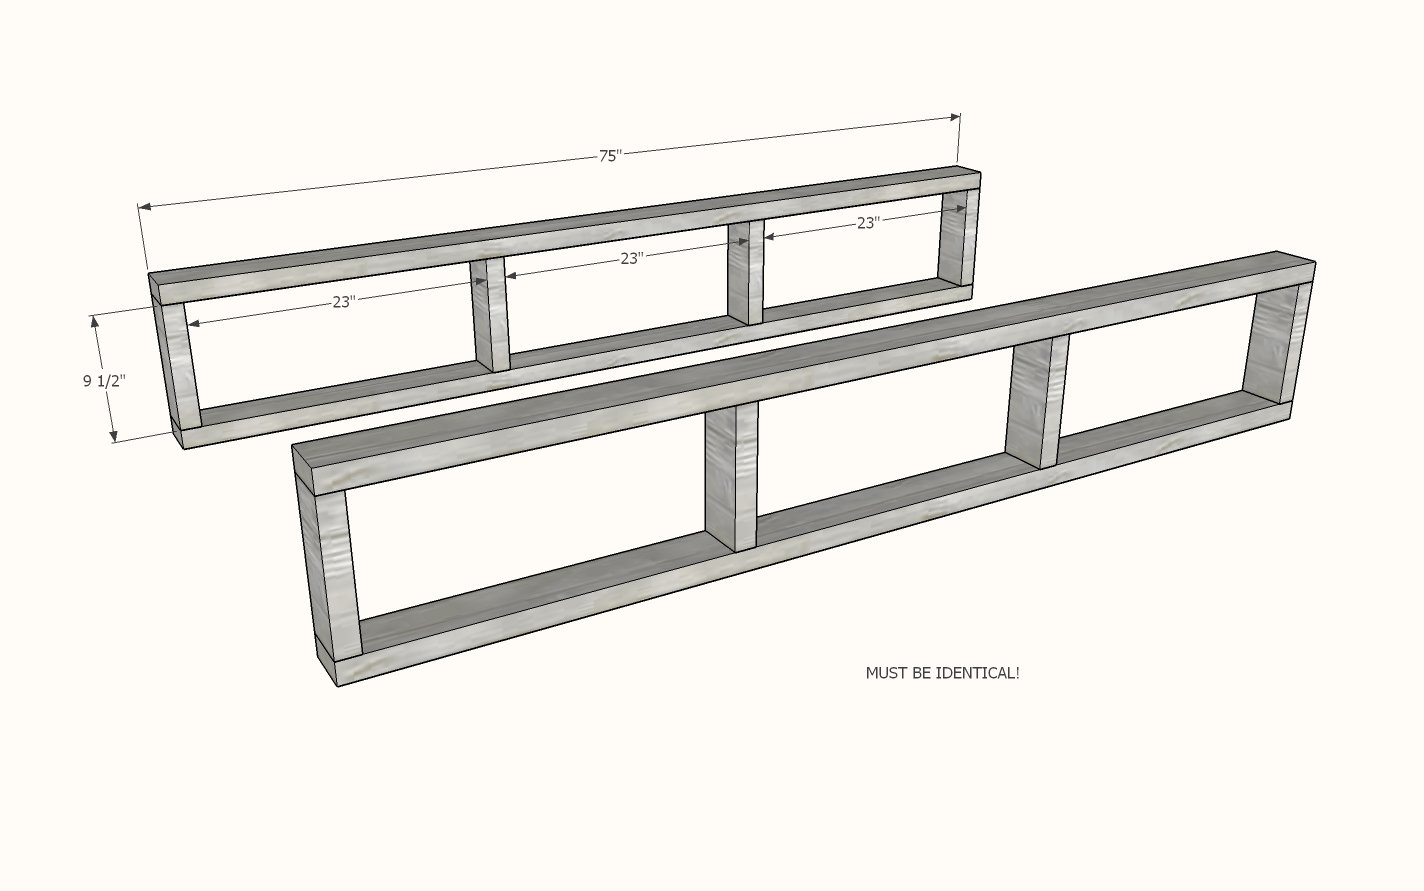
Build two identical drawer support frames as shown - the must match exactly for the drawer slides to slide correctly.
Use 2-1/2" self tapping screws or 2-1/2" pocket hole screws to build.
Step 6
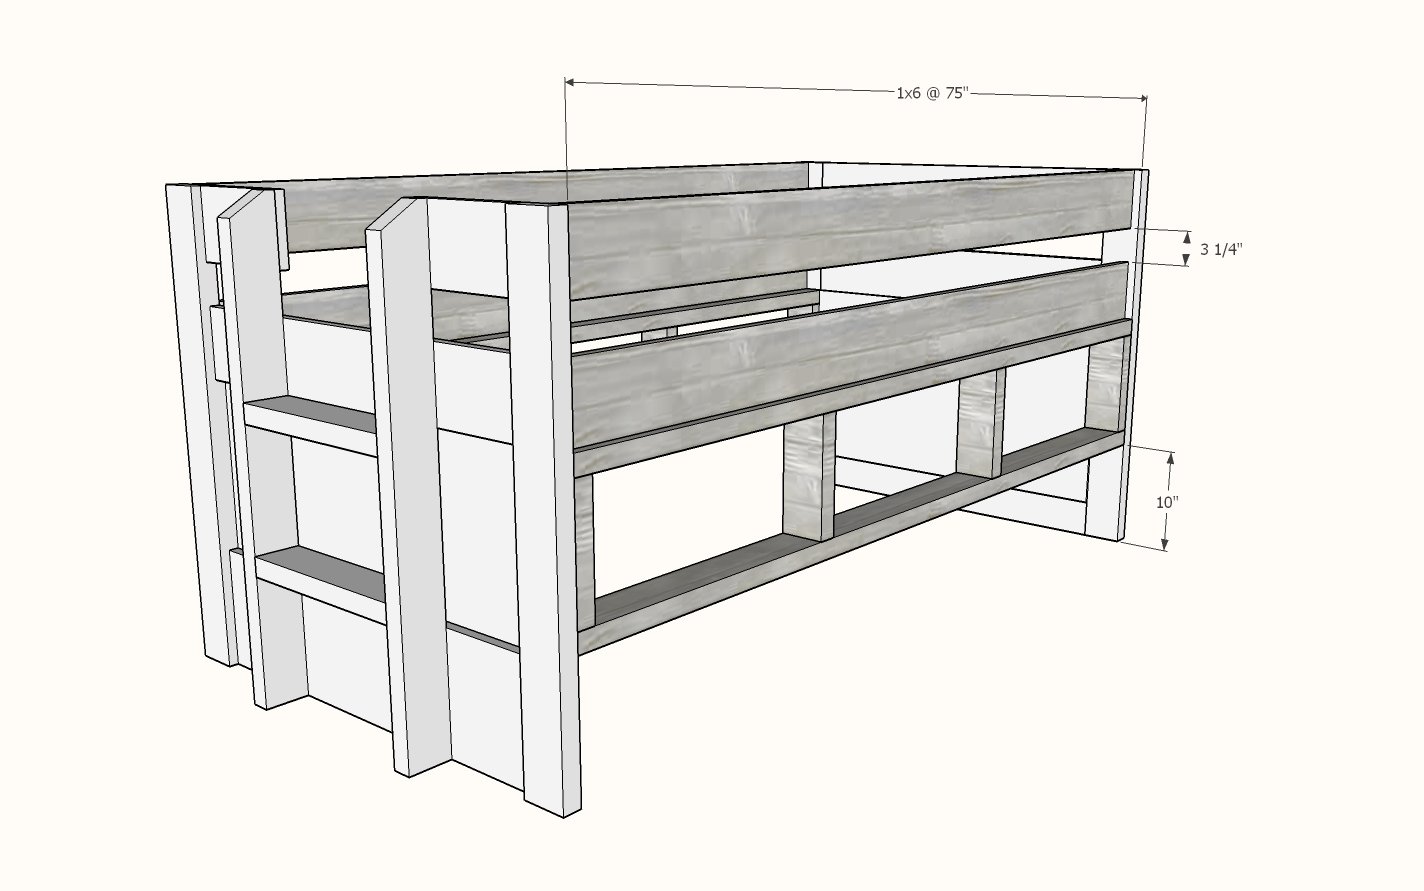
Paint or stain the 2x4 drawer frames and the 1x6 side rails.
Drill two 3/4" pocket holes into each end of the 1x6s.
For the bottom siderails, also drill a few 3/4" pocket holes facing downward to attach to the 2x4s on install.
Attach 1x6 to the ends with 1-1/4" pocket hole screws and glue.
Attach 2x4 drawer framing to end panels with 2-1/2" wood screws.
Attach bottom 1x6 siderail to the 2x4s with 1-1/4" pocket hole screws.
Step 7
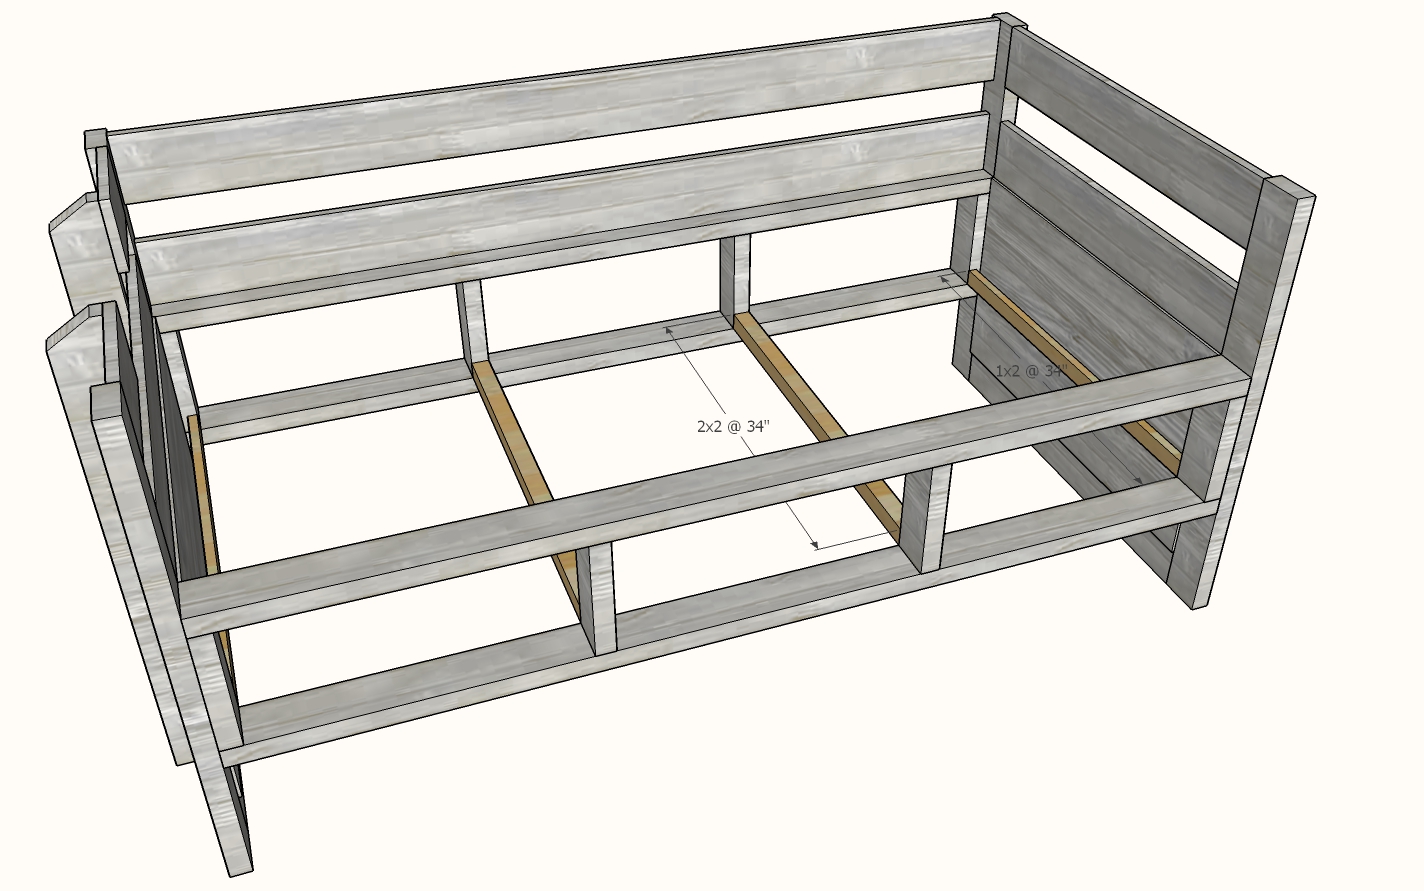
Attach drawer rails to insides of 2x4s with pocket hole screws - use 3/4" setting and 1-1/4" pocket hole screws for 1x material, use 1-1/2" setting and 2-1/2" pocket hole screws for 2x materials.
*Some parts missing to enable a better view of interior of bed
Step 8
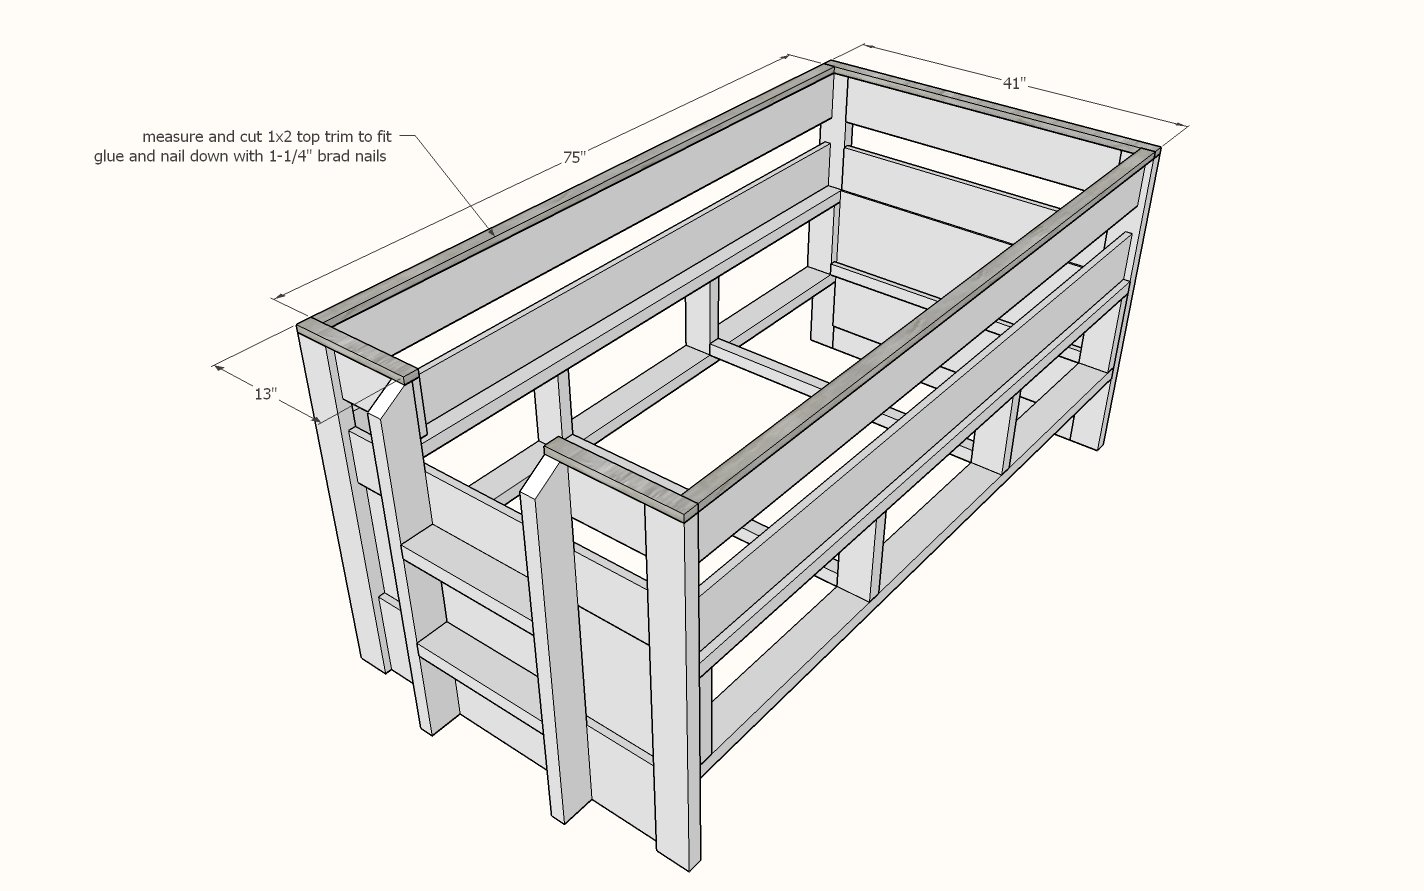
IMPORTANT: Check bed for square. Take diagonal measurements from opposite outside corners and adjust until both diagonals match.
Cut 1x2 trim boards to fit and nail and glue to top of bed.
Step 9
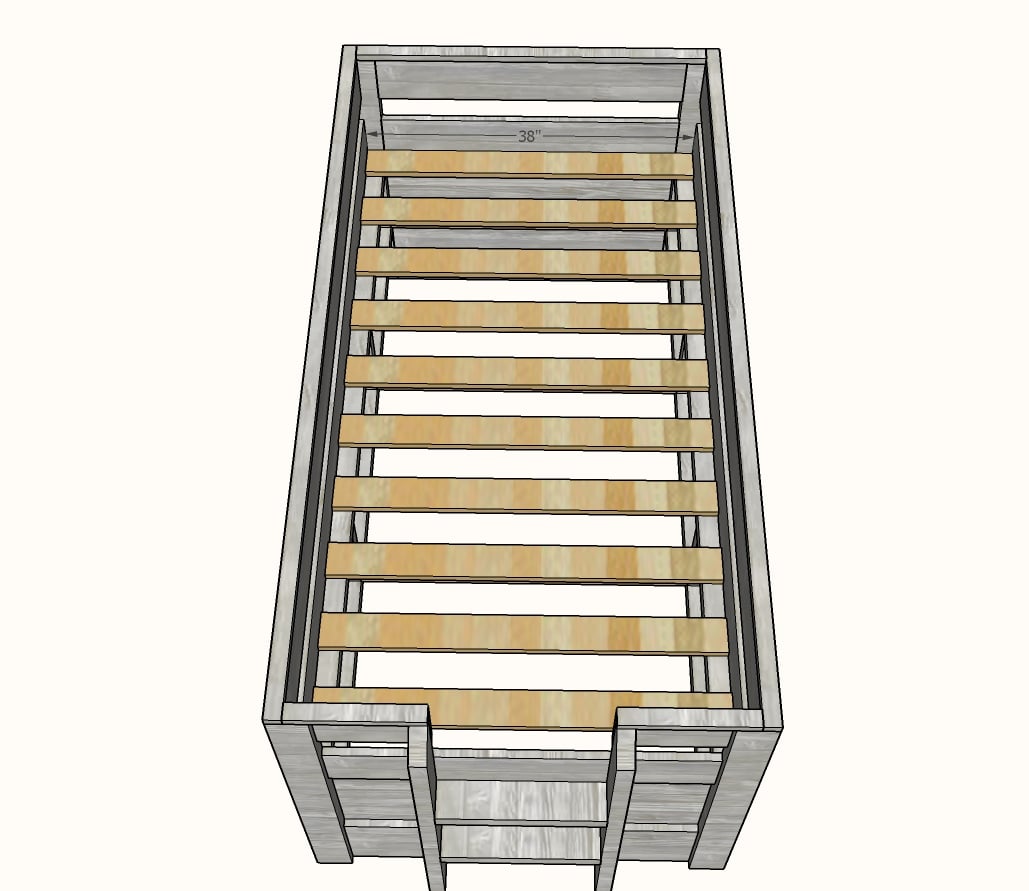
Check for square. Add bed slats and nail or screw down.
Nails are less expensive and easier, but harder to remove. If using screws, use 1-1/2" screws (or close in length)
Step 10
Trundle
Lay 2x4s on a flat surface. Place slats on top.
Adjust for square - opposite diagonals MUST match.
Nail and glue slats to 2x4s.
Step 11
Add back and sides to the trundle.
Recommend: Drill 3/4" pocket holes on top end of the 1x6s and attach with 1-1/4" pocket hole screws at top. Also drill for attaching the front in next step.
Step 12

Add caster wheels, three on front and three on back, to the 2x4s.
Place trundle inside the bed.
Step 13
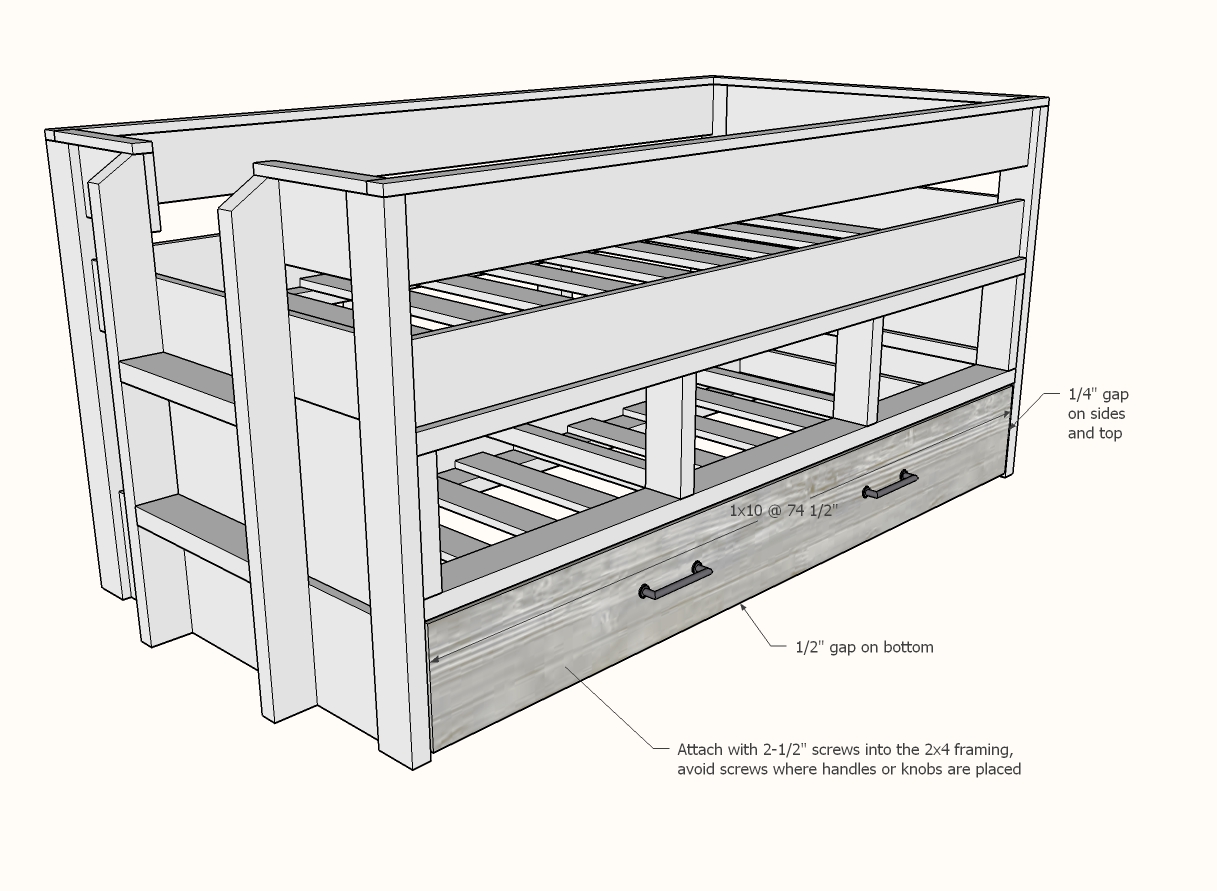
Position the trundle face over the trundle and attach with screws.
Step 14
Read instructions with your drawer slides. This drawer tutorial assumes each drawer slide needs 1/2" clearance (1" overall). If you drawer slide differs you will need to adjust your drawer cuts.
Measure drawer openings and confirm the openings are 23" wide. If not, you will need to adjust the drawer width.
Build drawer boxes.
We recommend pocket holes on the outside (will be covered in later steps by drawer face)
Check drawers for square.
Glue and nail the plywood bottom to the drawer boxes.
Step 15
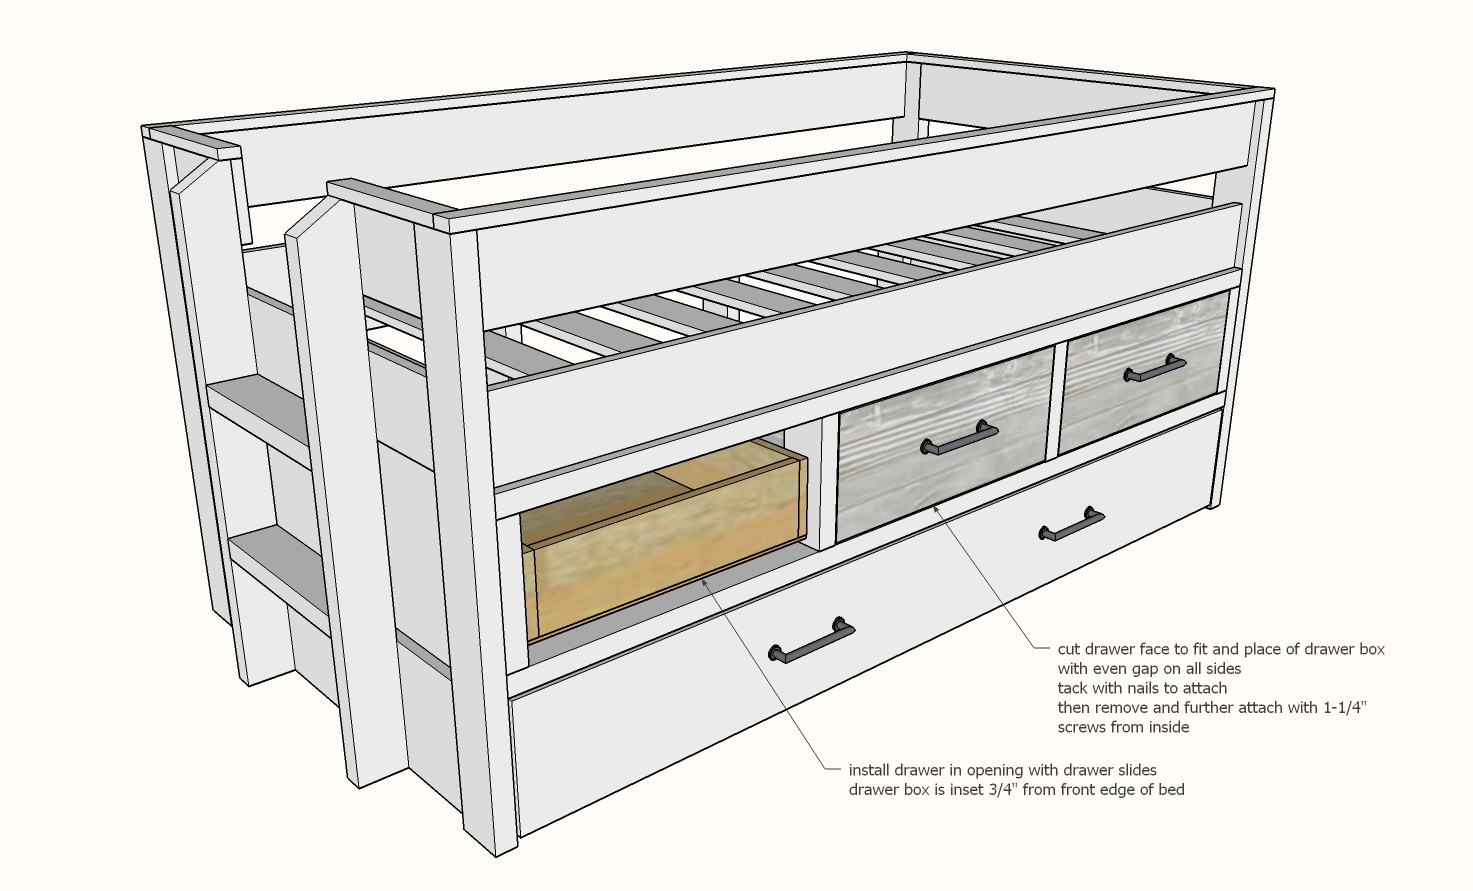
Install drawers inside the openings with drawer slides. INSET 3/4" from front edge of 2x4s to allow for the drawer face.
Cut drawer faces 1/4" smaller than opening.
Place drawer face over installed drawers.
Attach with a couple of 1-1/4" nails (avoid areas where knobs or pulls will be installed)
Remove the drawers and attach from inside with 1-1/4" screws (you can use pocket hole screws)

Comments
Blawson
Mon, 09/02/2019 - 18:54
Love this bed! Would love…
Love this bed! Would love to make for my son but he has a full size. How would I alter your plans to accommodate the full size bed?
klvno
Tue, 09/24/2019 - 19:59
Full Size Modification?
I also love this bed but need a full size bed...other than the size, it is perfect in every other aspect. I would love it if someone could tell me how to modify the plans for a full.
JDT227
Thu, 03/19/2020 - 20:25
Trundle mattress size
Hi Anna, why wouldn't a standard mattress fit as the trundle as well?
In reply to Trundle mattress size by JDT227
mvgreen3
Mon, 04/27/2020 - 18:01
I'm just finishing one of…
I'm just finishing one of these. The standard mattress I bought is a bit to long for the trundle, which slides under the main bed and is therefore shorter. The one she refers to is surprisingly comfortable but fits perfectly. I'd imagine you could make the entire bed a few inches longer and and use a standard mattress.
LouisF87
Mon, 09/21/2020 - 22:44
6 Drawers instead of 3
Just wondering if instead of the trundle bed if I could put 3 drawers with the same dimensions as the other 3.
Annegoldstein
Fri, 10/30/2020 - 12:13
Did you end up making this…
Did you end up making this with 6 instead of 3? Would love to see.
Webbuzzard
Tue, 08/17/2021 - 05:52
Drawer question
I love the design. Is there a way to prevent the drawers from opening when the trundle is out? I see a potential safety issue.
pemp
Sun, 03/27/2022 - 14:22
A couple of typos I spotted…
A couple of typos I spotted...
The shopping list does not include enough boards for the drawer boxes. To make them with 1x6s as in the plans, a today of 7 1x6 @ 10 feet are needed.
The drawer fronts/backs are 22" on the cutlist. They should be 20.5"