
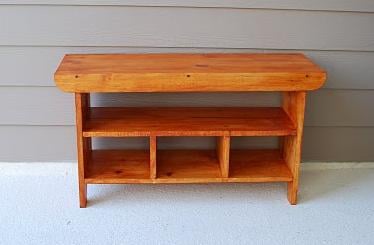

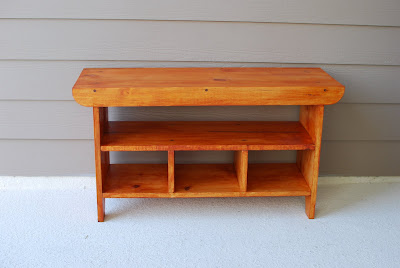
Build your own shoe bench! This little bench provides seating and storage - and it's easy to make! Free step by step plans with lots of reader submitted photos from Ana-White.com
Photo by Jenny.
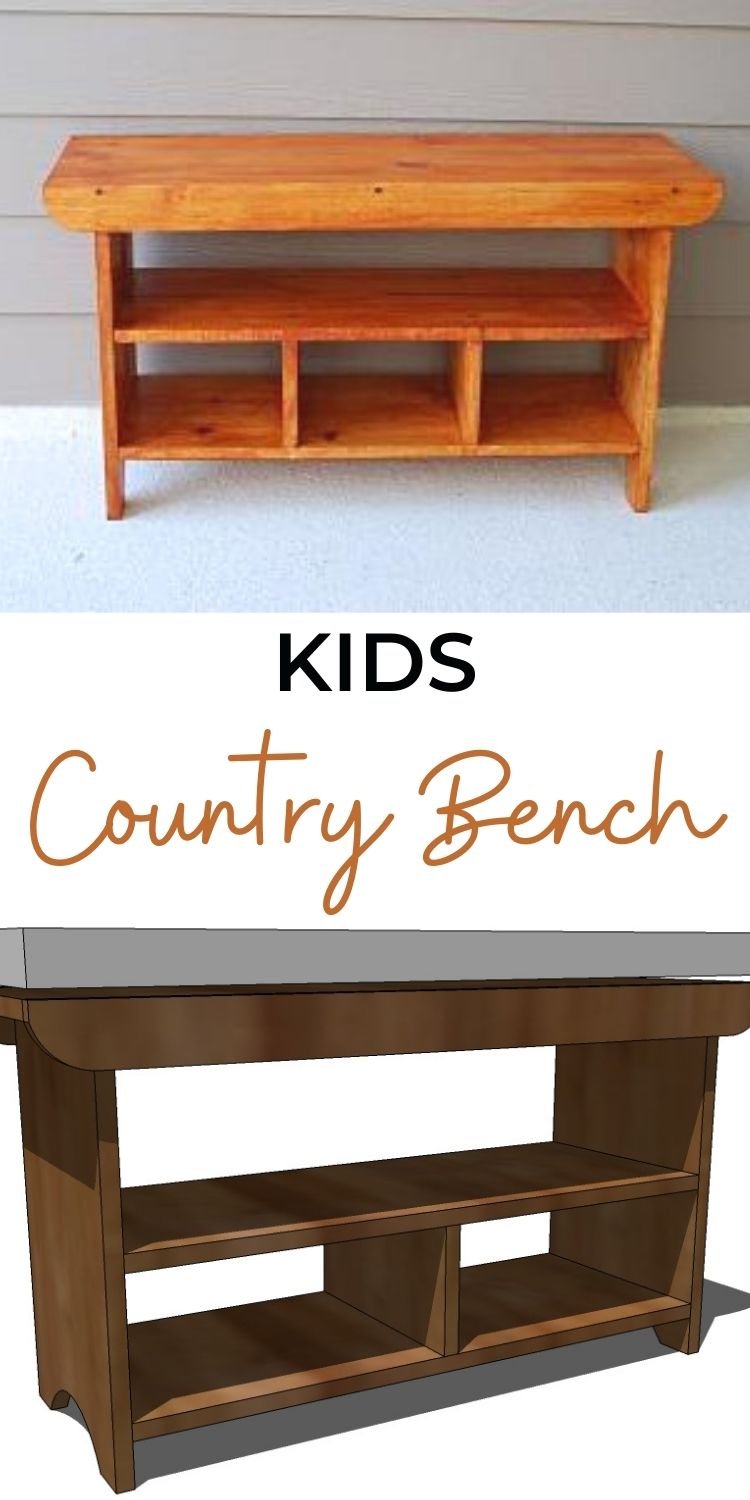
Pin For Later!
Preparation
Shopping List
- 1 – 1×12, 12′ Long
- 1 – 1×3, 8′ Long
- 2″ Self Tapping Star Bit Screws
- Wood Glue
- Wood Filler
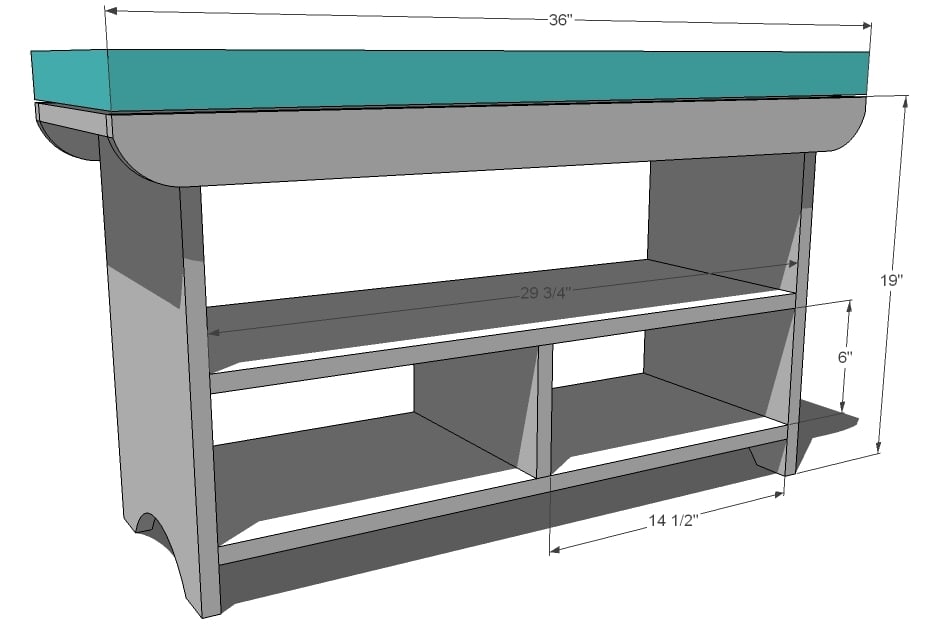
- 2 – 1×12 @ 29 3/4″ (Shelves)
- 1 – 1×12 @ 6″ (Divider)
- 2 – 1×12 @ 18 1/4″ (Sides)
- 1 – 1×12 @ 36″ (Top)
- 2 – 1×3 @ 36″ (Top Trim)


Instructions
Step 1
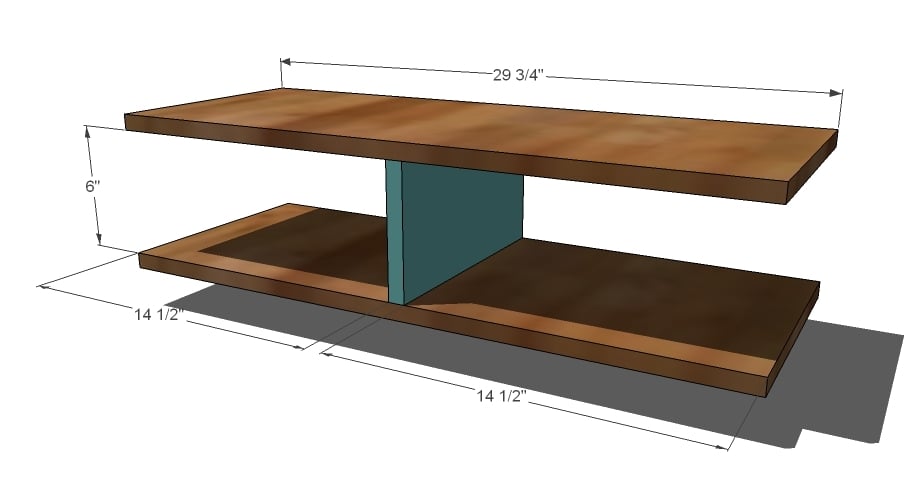
Divider and Shelves. Begin by marking the shelves 14 1/2″ from each end, as shown above. This is the joint. Mark both sides so you also know where to fasten from. Then drill a pilot hole and fasten the divider to the shelves, as shown above. Check for square.
Step 2
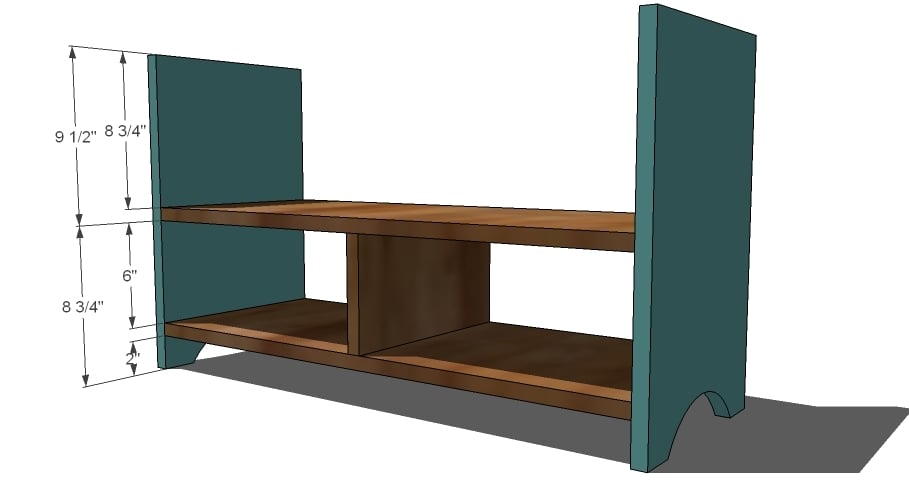
Sides. Mark the sides as you did the shelves, on both the inside and the outside. Then fasten the shelves to the sides. Predrill and countersink your screws, as you did in step 1.
Step 3
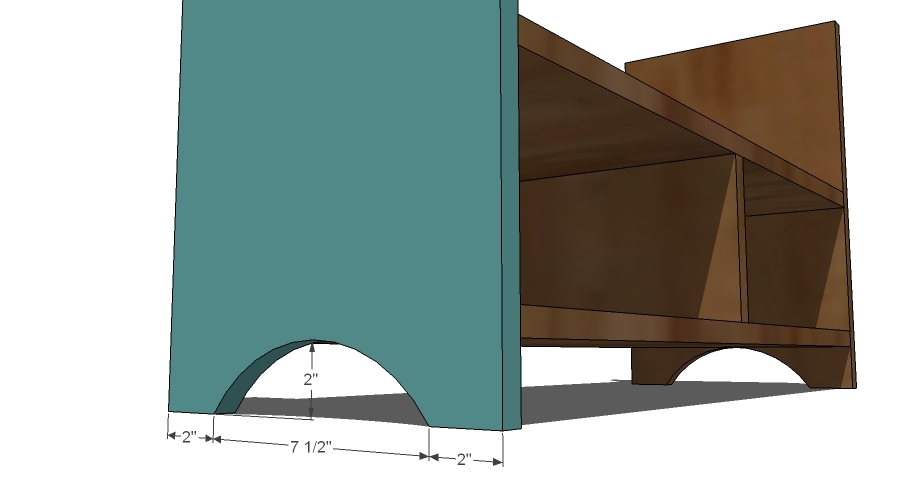
Side Cutout. Use a round object to draw out your side cutouts and then use a jigsaw to carefully cutout the sides as shown above.
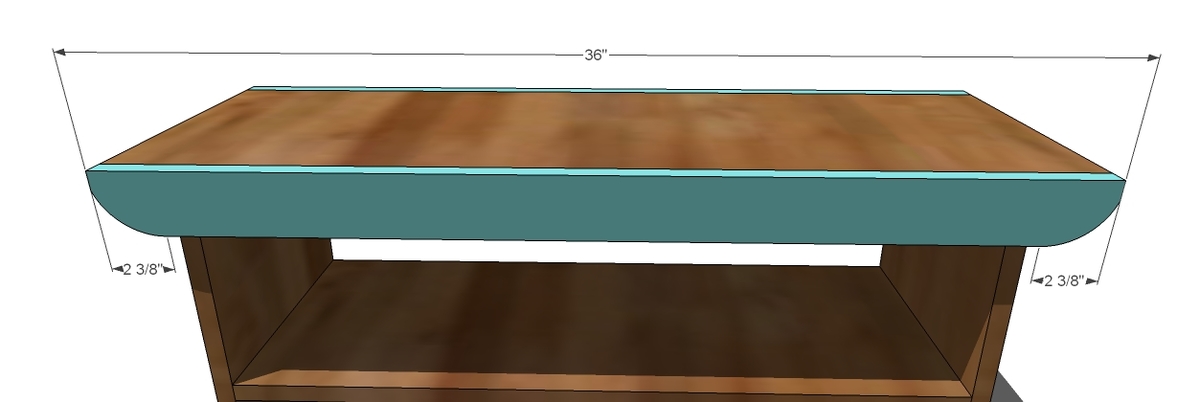
Step 4
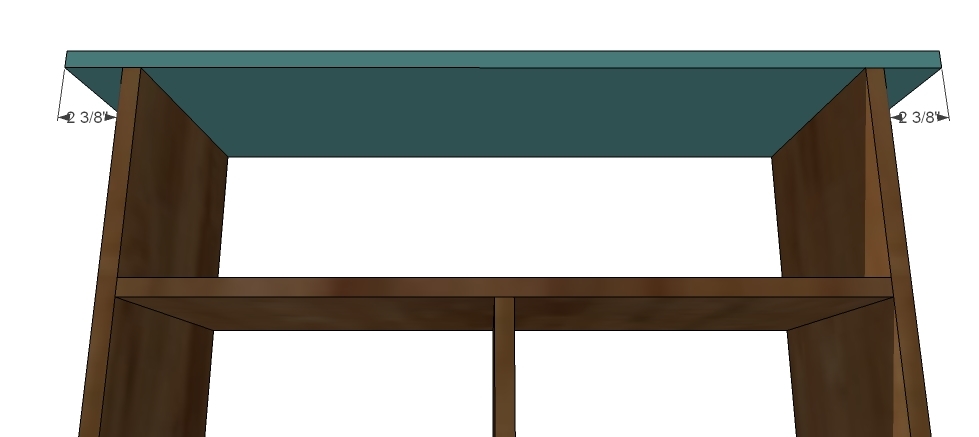
Top. Mark the top 2 3/8″ in from either end and position on top of the bench. Fasten to the sides.
Step 5
Step 6
Finish. Fill any holes with wood filler and sand and finish as desired.

Comments
Angie (not verified)
Thu, 04/08/2010 - 06:26
I'm in the middle of painting
I'm in the middle of painting 10 peices of furniture for my first sale ever as well as redecorating my home but this is one project I plan on trying to tackle. You are an inspiration! Thank you for showing the rest of us that Yes You Can!! ;)
Lici (not verified)
Thu, 04/08/2010 - 06:47
thank you. i just started on
thank you. i just started on the small picnic table and i love that the size is so manageable. i'll be trying this bench next. it's great to have low cost projects to build confidence on.
Flipperdelph (not verified)
Thu, 04/08/2010 - 06:56
Hi,I've never done anything
Hi,
I've never done anything but I'd loved trying this one out...!
Just a newbie question: will the screws remain visible, or should we hide them with wood filler ?
Thanks !
Tuli (not verified)
Thu, 04/08/2010 - 07:06
@Flipperdelph: You'll want to
@Flipperdelph: You'll want to countersink the screws, which lets the head of the screw sit below the plane of the board and allows you to fill the holes with wood filler.
Viola (not verified)
Thu, 04/08/2010 - 07:10
Ana great project. Thank you.
Ana great project. Thank you. Do you think it would allow a little 14 month old toddler to get on it?
gkey (not verified)
Thu, 04/08/2010 - 11:54
Dear
Dear Clever-Country-Carpenter,
I have yet to start my first project....I continue to read every single word here on your site though. (Thank you. Please don't disappear before I get to start) Holding out hope for a building center to be created and some tools and supplies in place for my birthday and mothers day in just a few weeks!
love,
thinking of many wonderful creations I CAN do myself
in
NE
Amanda (not verified)
Fri, 04/09/2010 - 03:15
Nice, with some hook and loop
Nice, with some hook and loop with nice fabric, you can even hide the shelves. These may be my dining room benches.
Jenny (not verified)
Tue, 10/12/2010 - 10:42
I just finished this, my
I just finished this, my first project. My only power tools were a jigsaw (bought for this project) and a drill. It was so easy!
Stephanie Lujan (not verified)
Sat, 01/05/2013 - 22:55
Can this bear weight?
Hi, I am in the middle of making this bench. It's super cute and we want to use it as an entry-way bench to sit on while removing your shoes, etc... But, it suddenly occurred to me that this may not be weight-bearing. Any responses would be helpful.
Thanks!
In reply to Can this bear weight? by Stephanie Lujan (not verified)
Jake
Sun, 01/06/2013 - 06:17
It looks Sturdy to Me
Stephanie this bench should be very sturdy. You can improve its sturdiness by using a combination of PH screws and good wood glue (I use Titebond III) and maybe add the right angle braces you can get at Big Orange or Big Blue. If you are not into PHs then use good glue as you screw the project together. In the end, however, if it does start to sway the user should have time to get off before total failure.
In reply to Can this bear weight? by Stephanie Lujan (not verified)
Jake
Sun, 01/06/2013 - 06:22
Pocket Holes
Ana has a video on making your first PH on the site under Videos.