Crib Mattress Sofa and Sectional - 2x4 Frame

make a sofa out of crib mattresses
Difficulty
Beginner Projects
| Print this plan

Easy DIY sectional or sofa made with 2x4s and crib mattresses.  Very inexpensive and easy to make, full free tutorial by Ana-White.com

Kids Couch - 2x4 DIY Sectional with Crib Mattress Cushions

DIY Sectional or Sofa from Crib Mattresses

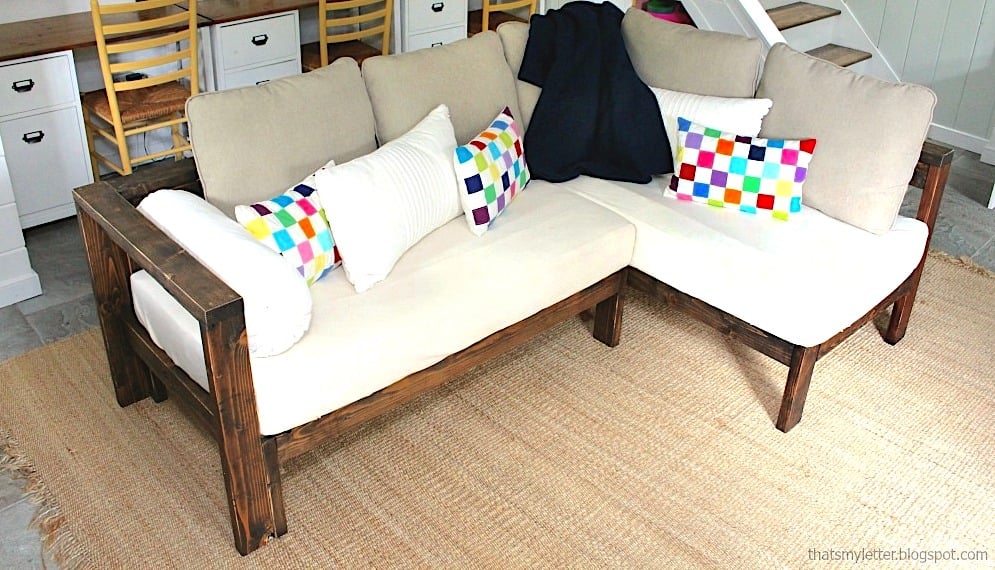
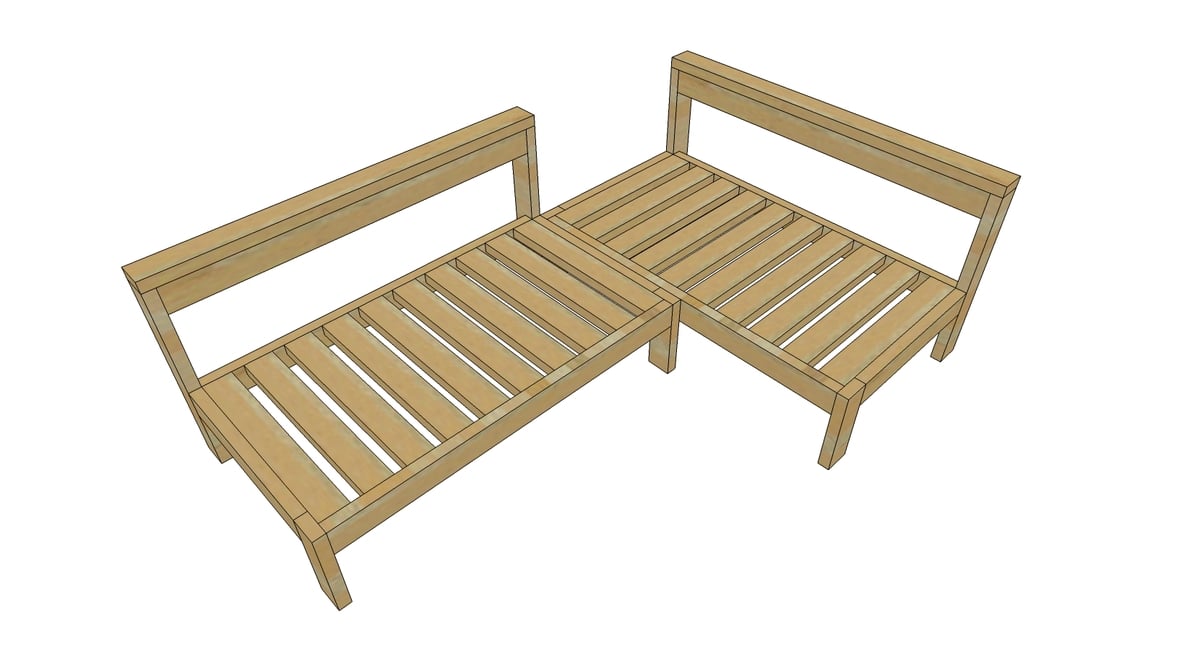
This week is such a fun project!  Jaime had a couple of crib mattresses that she wanted to turn into a preteen lounge area for her kiddos.  So we came up with this - a simple 2x4 kids couch that you can add together and put legs in between to make a sectional in any shape that you want!

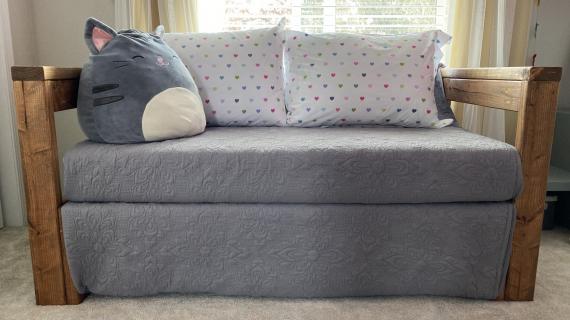
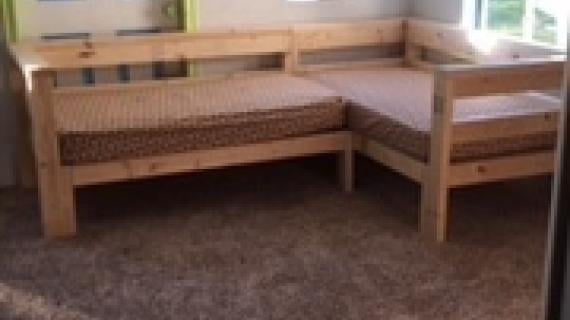
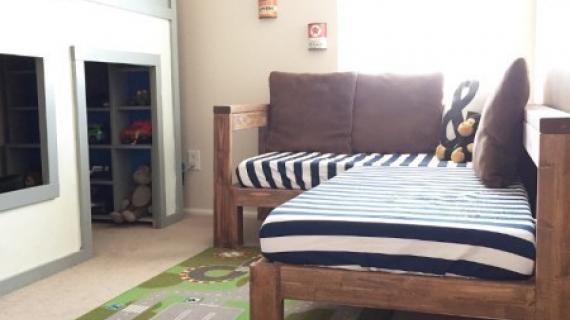
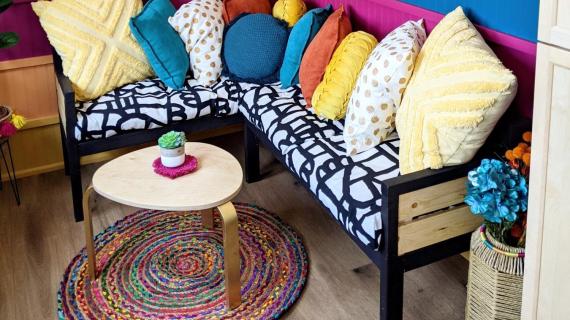
And here's how the kids couch turned out -

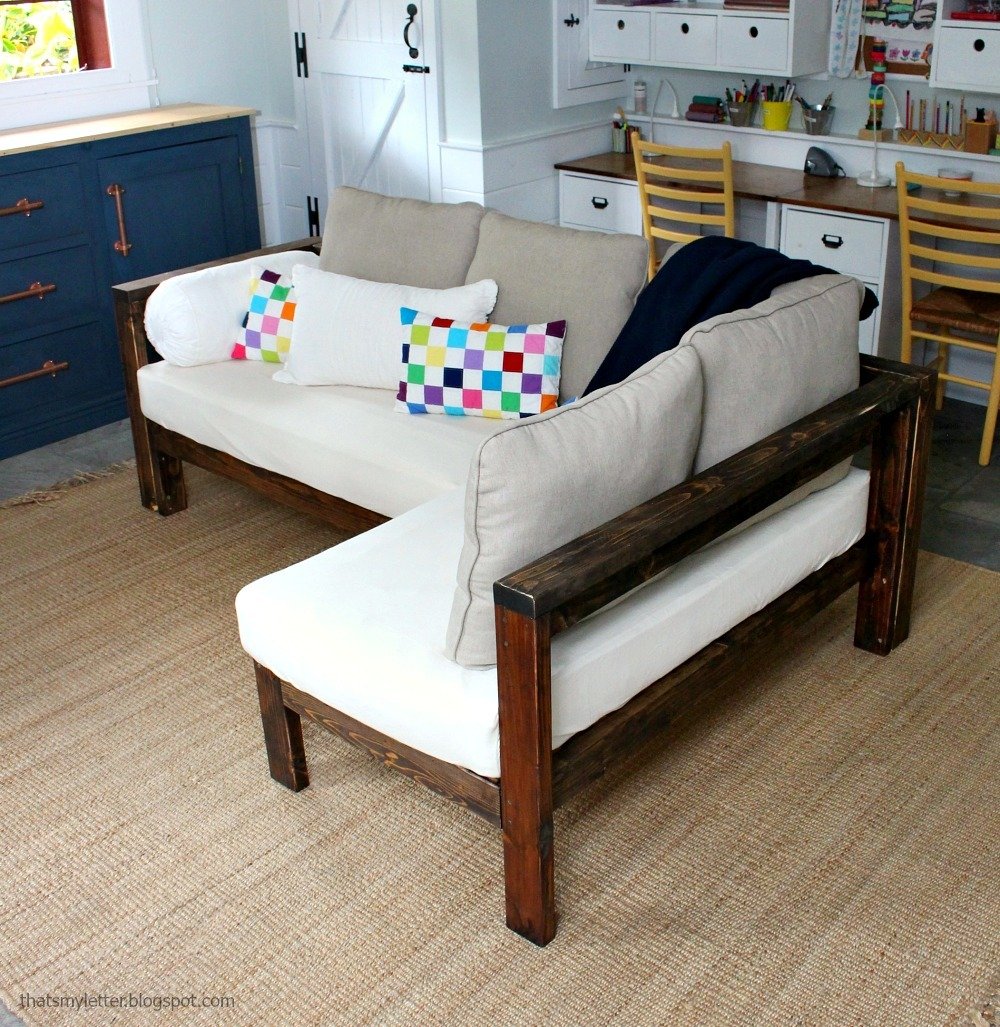
I love the sturdy wood construction, the crib mattresses are genius because they are washable and waterproof - so bring on movie night!


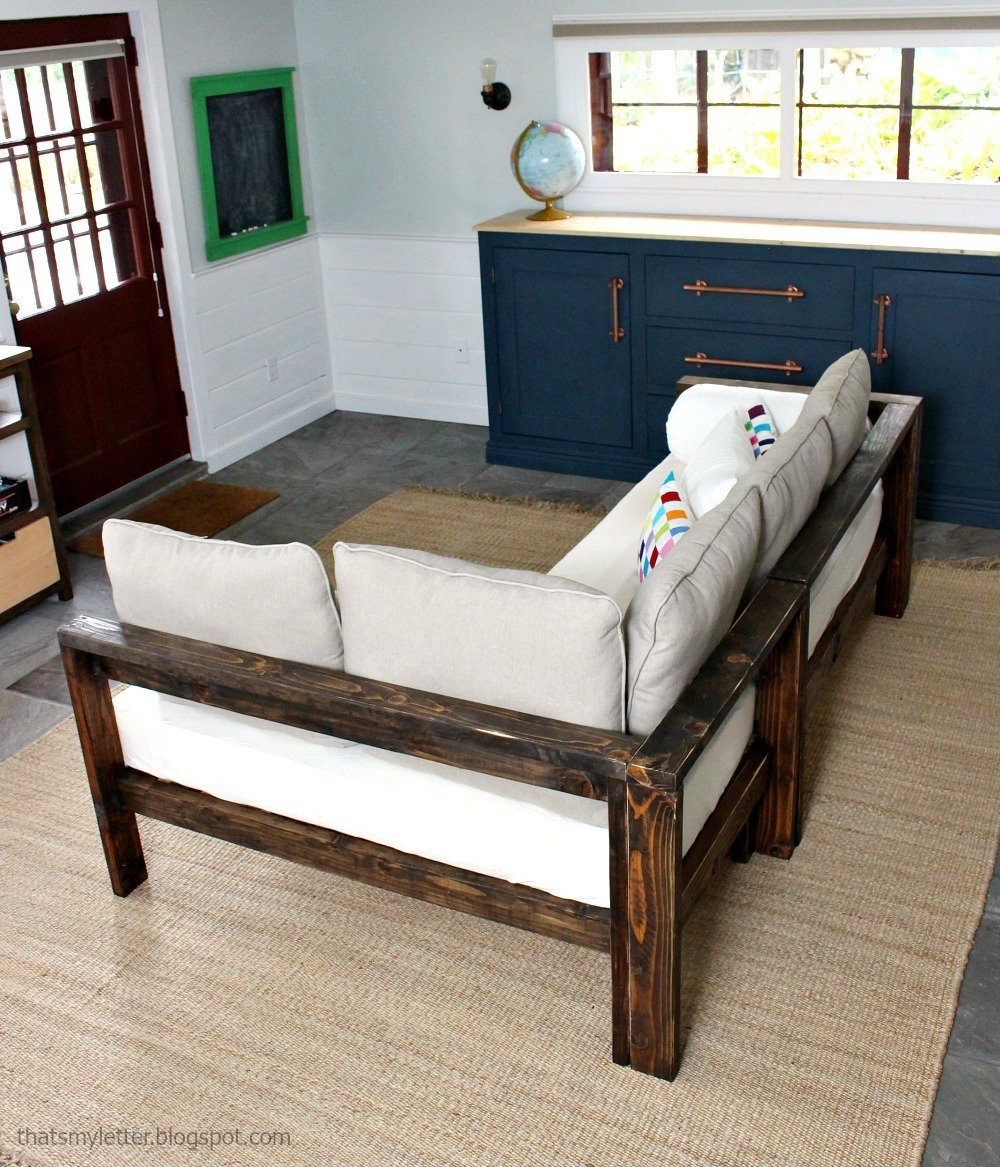
I adore the simple wood frame too!  It is modern, rich in texture, and beautiful, but sturdy at the same time.


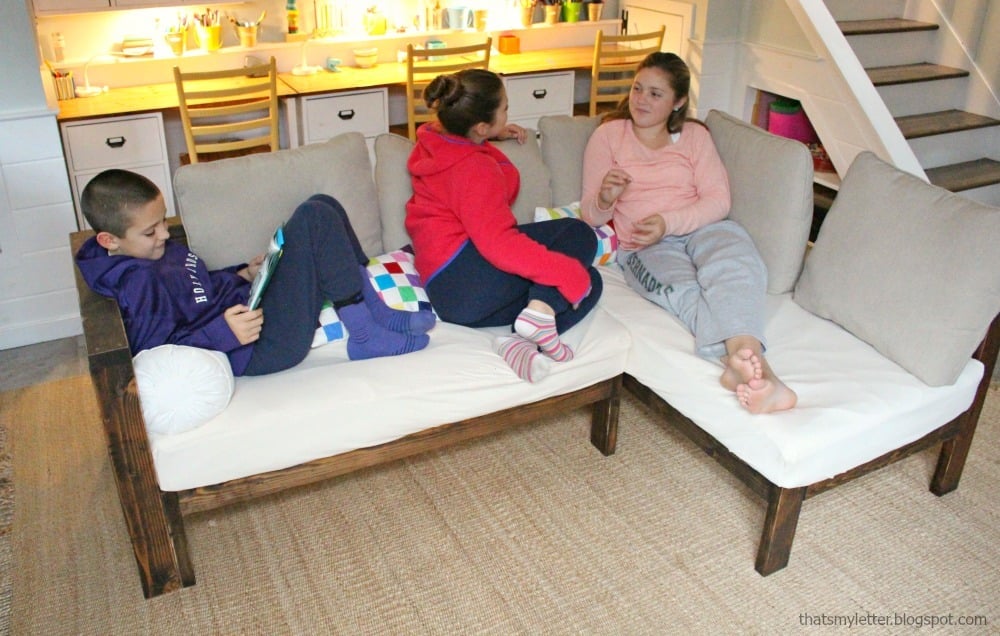
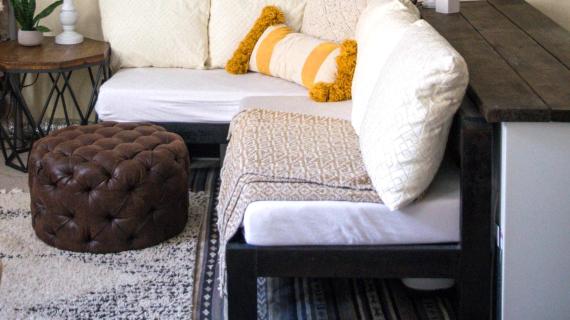
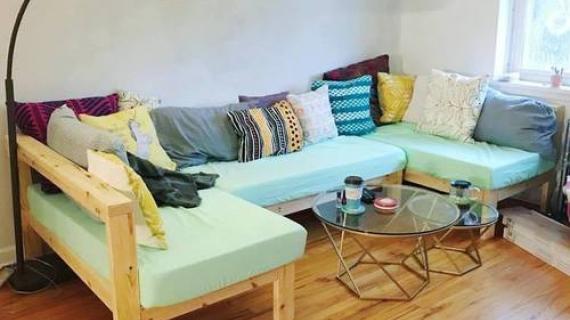
And here's Jaime's preteens on this kids couch  .... perfect!  


I'm sharing the free plans below for this project (of course!) but make sure you take a second to visit Jaime and read through her build post with lots more photos before you grab the plans.


CLICK HERE FOR MORE PHOTOS AND BUILDING PROCESS PHOTOS


Enjoy the plans following! XO Ana


Pin For Later!


Dimensions
Kids Couch - 2x4 DIY Sectional with Crib Mattress Cushions
Dimensions shown above

Preparation

Shopping List

FOR 1 KIDS COUCH
6 – 2x4 @ 104 -5/8” (9’ studs)


FOR 1 ARM FOR KIDS COUCH
1 – 2x4 @ 12 feet long

2-1/2” self tapping screws

Common Materials
Cut List

FOR 1 SOFA

2 – 2x4 @ 26” – back legs

2 – 2x4 @ 23-1/2” – side apron

2 – 2x4 @ 12” – front legs

3 – 2x4 @ 48-1/2” – front/back

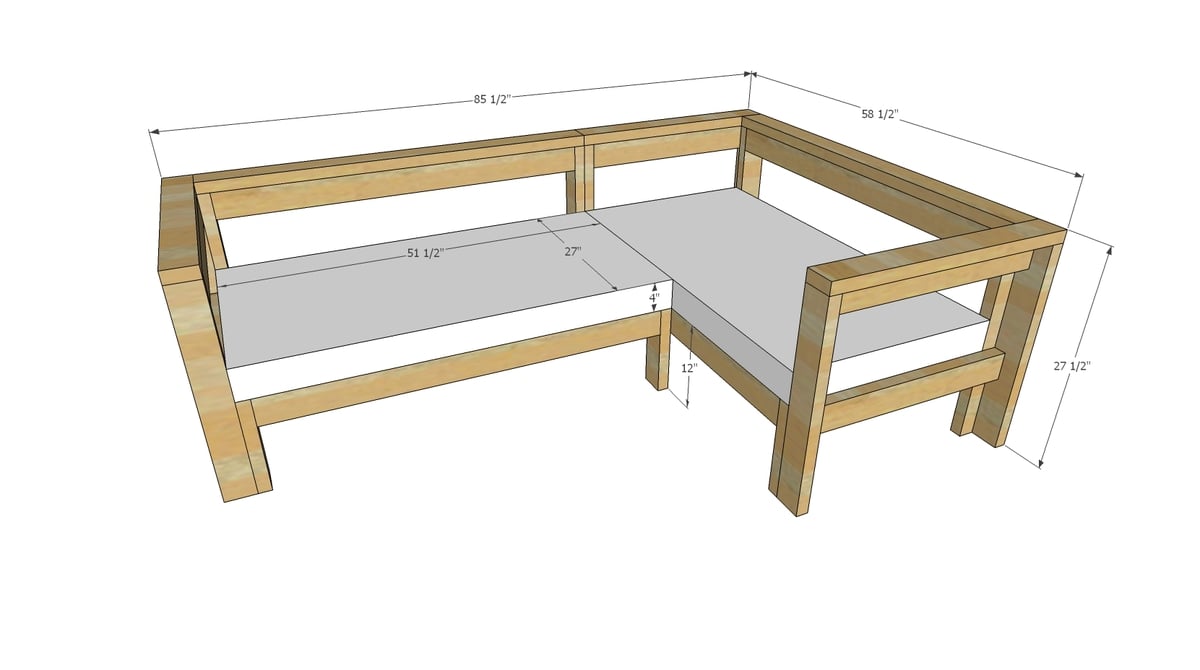
1 – 2x4 @ 51-1/2” – top

10 – 2x4 @ 25-1/2” - slats


FOR 1 ARM

2 – 2x4 @ 26” – legs

2 – 2x4 @ 27-1/2” – sides

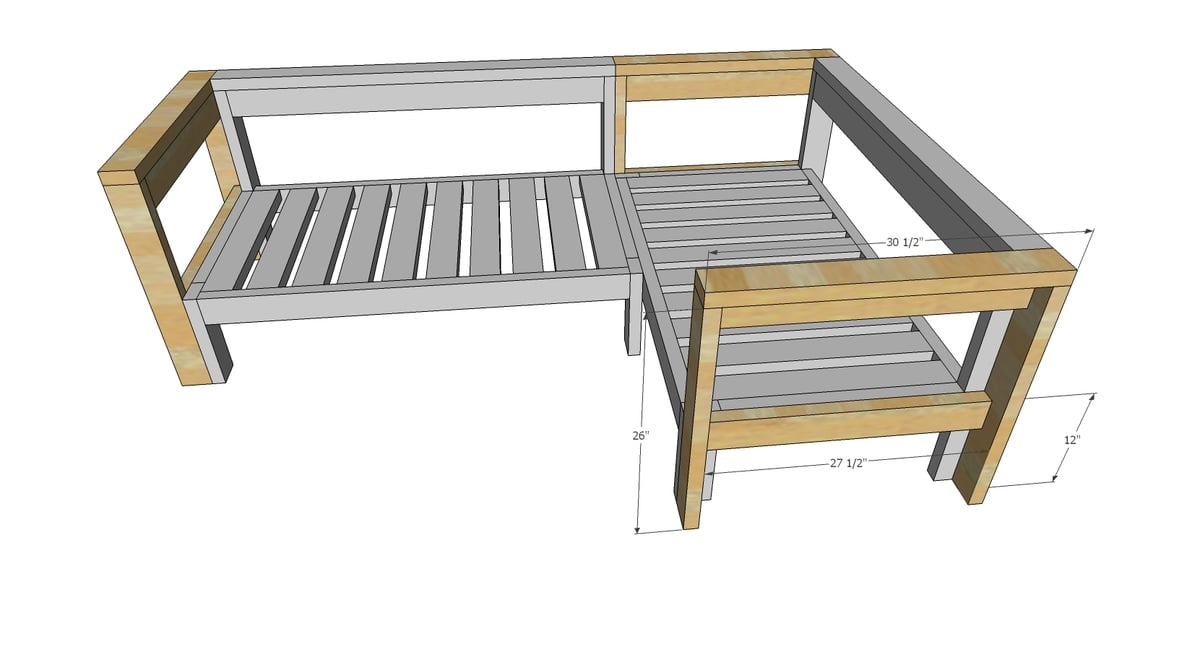
1 – 2x4 @ 30-1/2” - top

Tools
Tape Measure
Speed Square
Pencil
Safety Glasses
Hearing Protection
Kreg Jig
Drill
Miter Saw
Power Sander

Instructions

Step 1

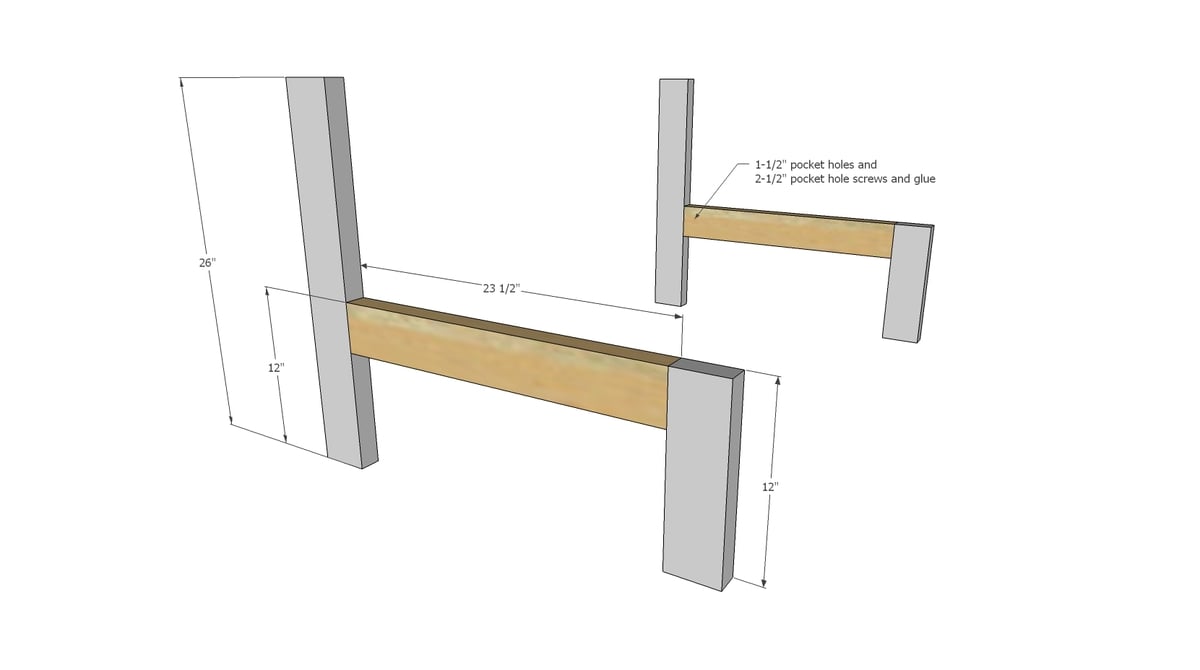
Drill two 1-1/2" pocket holes on each end of the side boards.  Attach to front and back legs with 2-1/2" pocket hole screws and wood glue.  Build two legs per sofa.  Remember that the pocket hole placement should be on the inside, so you will build the legs in mirror.

Step 2

With pocket holes on inside, attach the horizontal supports to the leg sets with pocket holes (1-1/2" setting, 2-1/2" pocket hole screws and glue).

Step 3

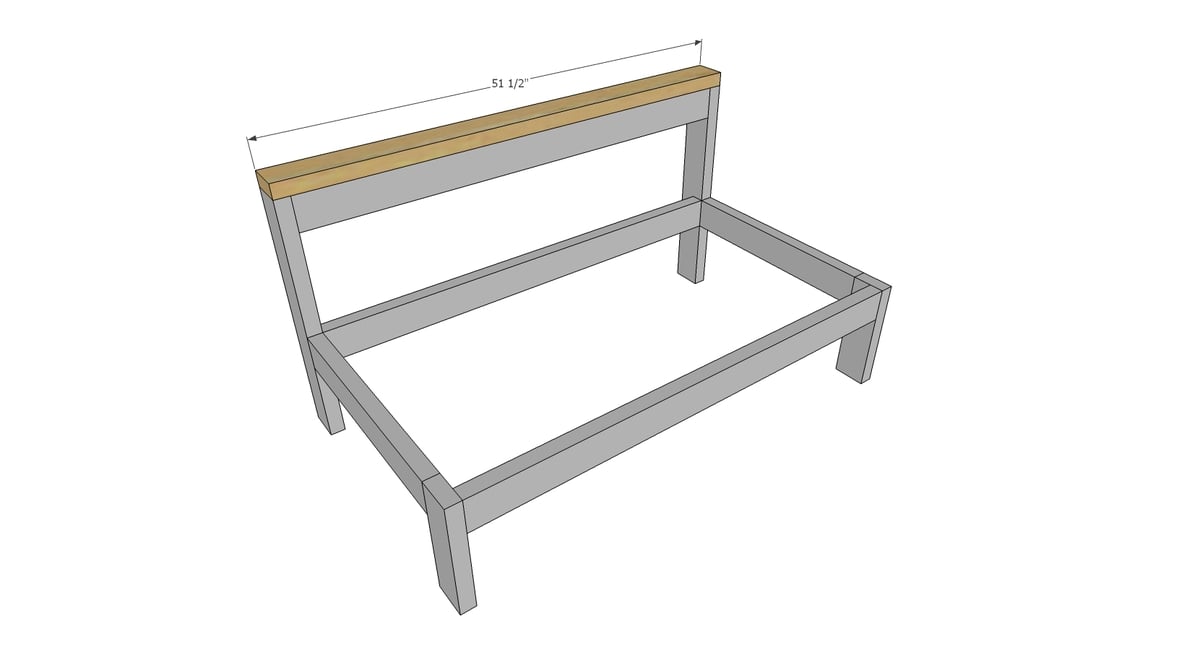
Attach back top support to legs with 2-1/2" screws, predrilling holes if necessary to prevent splitting.

Step 4

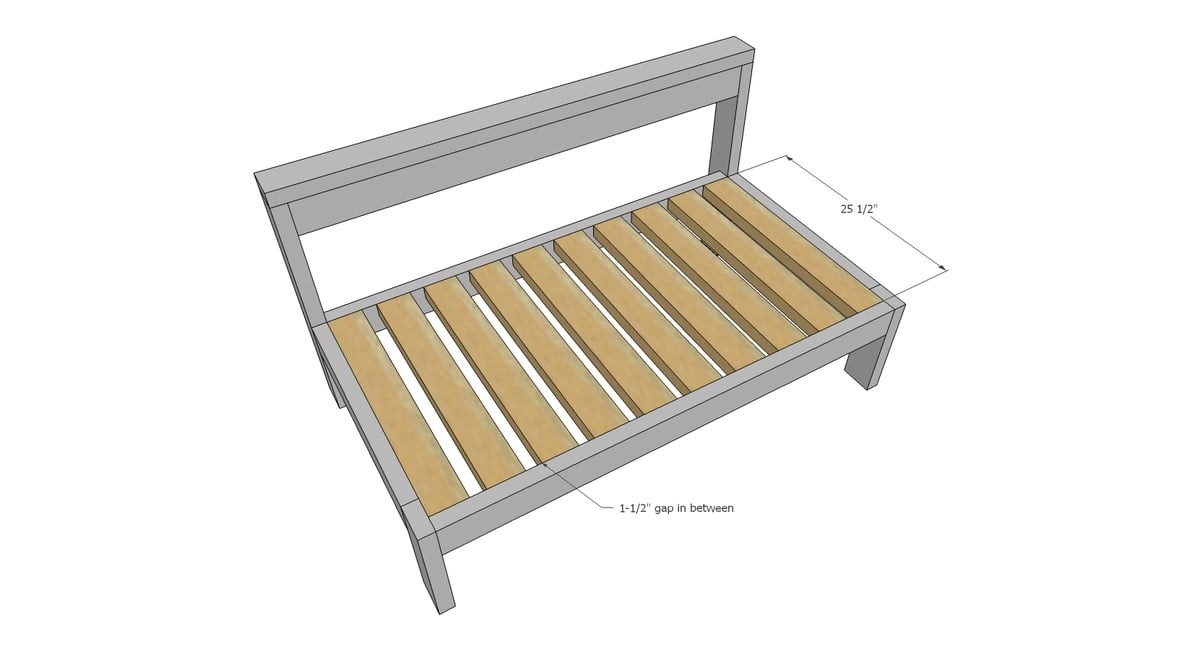
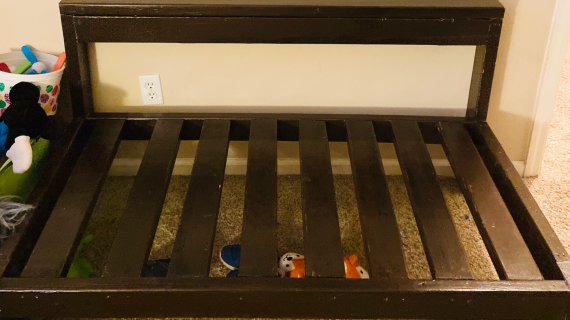
Drill two 1-1/2" pocket holes on each end of the slat boards.  Attach inside the frame.  Also screw the sides of the kids couch to the last slats for added structure.

Step 5

Step 6

Build the arms using 1-1/2" pocket holes and 2-1/2" pocket hole screws and glue. Attach arms to sofas to tie the two sofas together and support the back rests.

Comments

Frequently Asked Questions

Wood Questions

What kind of wood should I use?
Most of our plans use standard construction lumber like pine or fir. It's affordable, easy to work with, and easy to find. It's also rapidly renewing and biodegradable, so a great eco friendly choice!

Can I use hardwoods instead?
Yes—just keep in mind they're heavier, cost more, and can be tougher on tools and harder to join together and finish. I recommend not tackling a hardwood project until after you have built several softwood projects.

What if my boards are warped?
Choose the straightest boards at the store. You can often work around slight warps by cutting them into shorter pieces.

What wood should I use for outdoor furniture?
Use red-toned or pressure-treated 2x lumber for framing, and cedar or cedar fence pickets for the decking. Outdoor furniture should be built like a deck—your local home center can help recommend the right wood for your climate.

Will my wood move or warp after I build?
Potentially, especially in humid climates. Let your wood acclimate indoors before building. Once acclimated and kept in a stable environment, movement should be minimal. Remember, most houses are built using framing lumber - it's all about keeping moisture down indoors.

Cutting Questions

Do I need a miter saw?
A miter saw is great, creating fast, safe, and precise cuts, even for beginners. But most plans can be built with a circular saw and a straight edge. If using a circular saw to cut, take time to practice, and get good at making cuts, before cutting your project boards.

How do I get clean cuts with a circular saw?
Clamp your board, measure twice, cut slow, and use a sharp blade. This takes practice, so spend some time making cuts. I go through becoming proficient at freehand cutting in my course, it is worth taking if you want to master this skill.

Will the store cut my wood?
Yes—most stores will do rough cuts to help you transport your materials home. But from store to store, the quality of cuts could greatly vary.

Joinery Questions

What screws should I use?
We recommend star-head self tapping screws for framing, most common sizes are 2-1/2", 1-3/4". Pre-drill if close to the edge or you find your wood is splitting.

Do I have to use pocket holes?
Pocket holes are the cheapest, easiest and fastest way to do some joints - like edge to edge or a hidden fastener joint. There are other methods, but these can be time consuming and expensive. We recommend using pocket holes as indicated in plans for best results.

How do I keep things square?
Use a speed square and measure diagonals after each step. Always clamp joints before screwing to keep them tight and flush.

Finishing Questions

Stain or paint before or after building?
A quick sand before and a full finish after gives the best results. Pre-finish if you're doing two-tone or detailed finishes.

What type of finish?
Use oil-based or water-based stain. For paint, cabinet-grade latex or enamel works great. High use surfaces on indoor projects should get a coat of polyurethane, I recommend a Helsman or Spar or other flexible poly that won't crack or peel with wood movement. For exterior projects, use a finish suitable for exterior fences.

How to get a smooth finish?
Start with a well sanded project. Sand between coats (220 grit), wipe clean, and apply light coats with a foam brush or roller.

Plan Questions

Can I change the size?
Many people do, and that's the great thing about building your own furniture! But do keep in mind going bigger might mean more supports are required, and often plans are optimized for minimal material waste.

Are these beginner-friendly?
Yes—plans are written with simple tools and clear steps in mind, with every effort to make plans as simple as possible.

Can I sell what I build?
Absolutely! Just don’t resell or repost the plans themselves.

General Questions

What tools do I really need?
A drill, circular saw, tape measure, square, and a few clamps will get you through most projects.

Do I need a workshop?
Nope! A driveway or small patio is plenty to get started, just make sure you have a level place to work. If you find you are building several projects a year, creating a small workbench is a great way to store tools and have a dedicated workspace.

What if I mess up?
Wood filler, sanding, or flipping boards goes a long way. Mistakes are part of the process!

What can I do to make my projects look more professional?
Start with straight boards, make accurate cuts, clamp all joints, and line up everything neatly. Sand thoroughly, use a neutral finish, and apply it in light coats for a clean look.

I've never built anything before. Where should I start?
Start with a few smaller softwood projects to get hands-on experience. Or if you're tackling a big project, buy a little extra lumber and practice your cuts and joints first. If possible, work with someone who has a bit of experience.

Care & Maintenance

How long will my furniture last?
With good joinery and regular care, your DIY furniture can last for decades. I have pieces in my own home that are over 20 years old and still going strong! One of the best parts about DIY furniture is that it’s easy to repaint, refinish, or repair—so your projects can grow and adapt with you.

How should I care for outdoor furniture?
Lightly pressure wash or hose it down once or twice a year. Tighten screws and reapply finish as needed to protect it—just like a deck or fence. A little upkeep goes a long way in extending the life of your furniture.

How about indoor furniture?
Regularly dust or wipe with a damp cloth. If it starts to look worn, a light sanding and touch-up paint or stain can refresh it in no time. DIY pieces are meant to be durable and fixable—so don’t be afraid to give them some love now and then.

Want to Build with Confidence?

Check out my ebook: 12 Skills to Build Your Own Furniture
It walks you through the core skills every builder needs—measuring, cutting, joinery, and finishing—so you can build beautiful furniture that lasts.

Still Have Questions?

Email us anytime at [email protected] and we’ll be happy to help!