


Build a crown moulding ledge shelf! Free DIY plans from Ana-White.com


Hi Everyone!
I hope you had an awesome weekend, blessed with great weather and lots of DIY! We've been busy busy working on the Momplex and I can't wait to share with you later this week our progress! It's coming along! I can almost smell the paint!!!!
Do you remember the lovely Kara from Kara's Corner?

She's been a huge part of what we do from the start.

Remember when she built this daybed?

And then she built ANOTHER one?

And then showed us all how to quilt ... with wood?

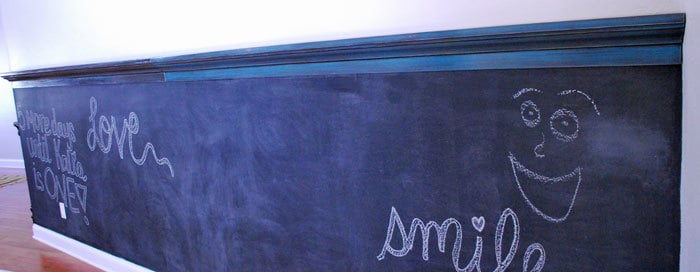
And you've all seen Kara's $10 Ledges Wall, right?
Well, she's been up to an even bigger project these days ... you guessed it with a crib in that photo! Kara's a new mommy now!
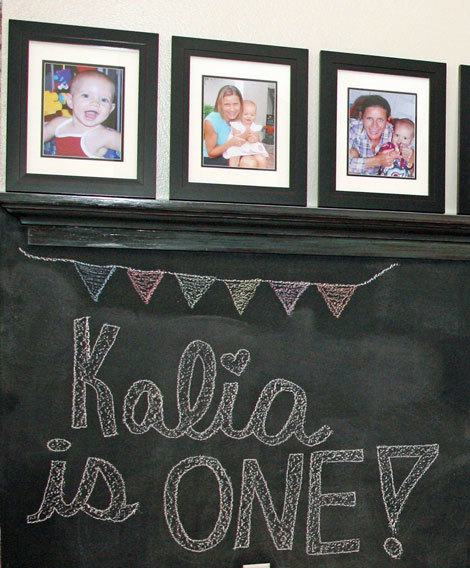
And little Kalia is one now!
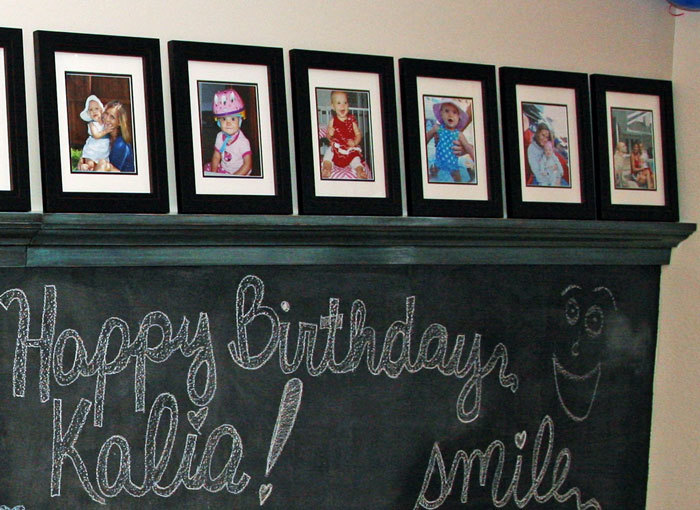
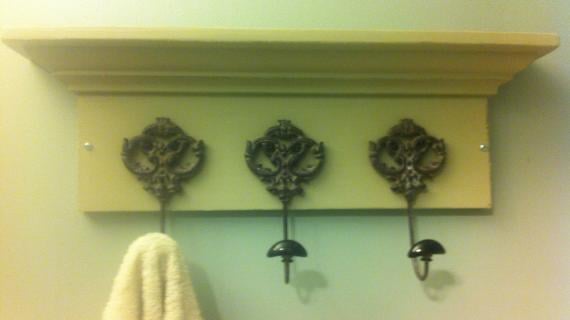
And Kara's built some crown moulding ledges to show off all those cute little moments!
And Kara is sharing her tutorial with us today!!!
But before we get to the plans - I highly recommend you stop over and visit Kara and check out some of her projects! Thank you Kara!
Preparation
1x4s - approximately twice as much in length as the desired length of shelving OR for taller crown use a 1x5 or 1x6 for the back (1x4 in desired shelf length, 1x5 or 1x6 in desired shelf length)
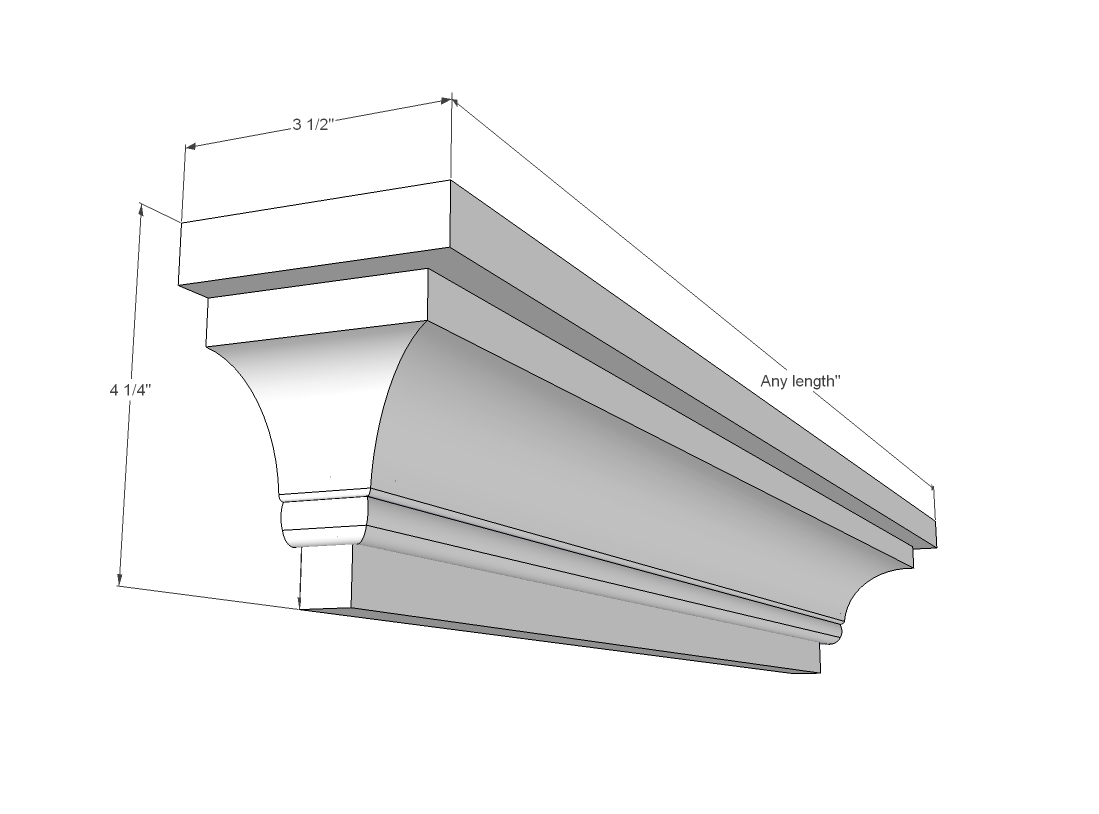
Crown moulding no more than 2 3/4" installed dimension width (you will need approximately the length of your shelf + 12" to accommodate those tricky corners)
2" fasteners or 1 1/4" PH screws
3/4" finish nails and wood glue
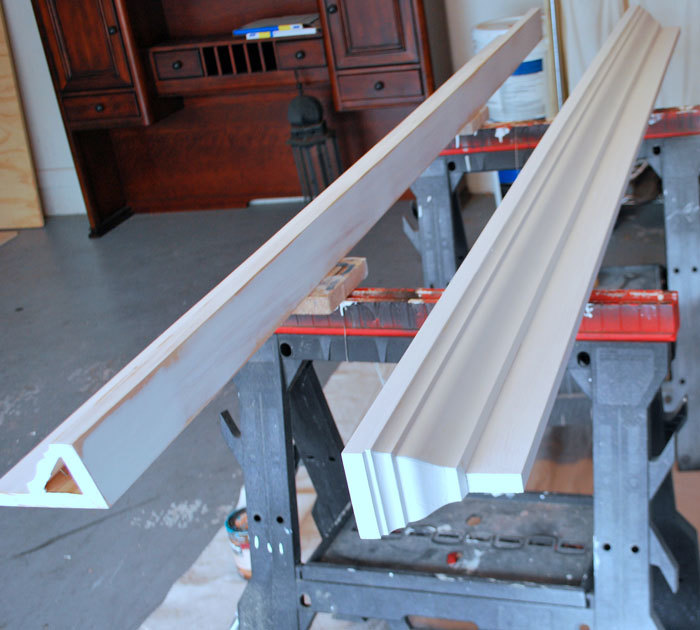
1 - 1x4 in desired shelf length
1 - 1x4 OR 1x5 OR 1x6 (depending on crown height) 5 1/2" LESS than desired shelf length
1 - Crown, shortest point to shortest point edge length of BACK, both ends double beveled outward
2 - Crown, cut in MIRROR, with one end double beveled outward - cut to fit


Please read through the entire plan and all comments before beginning this project. It is also advisable to review the Getting Started Section. Take all necessary precautions to build safely and smartly. Work on a clean level surface, free of imperfections or debris. Always use straight boards. Check for square after each step. Always predrill holes before attaching with screws. Use glue with finish nails for a stronger hold. Wipe excess glue off bare wood for stained projects, as dried glue will not take stain. Be safe, have fun, and ask for help if you need it. Good luck!
Instructions
Step 1
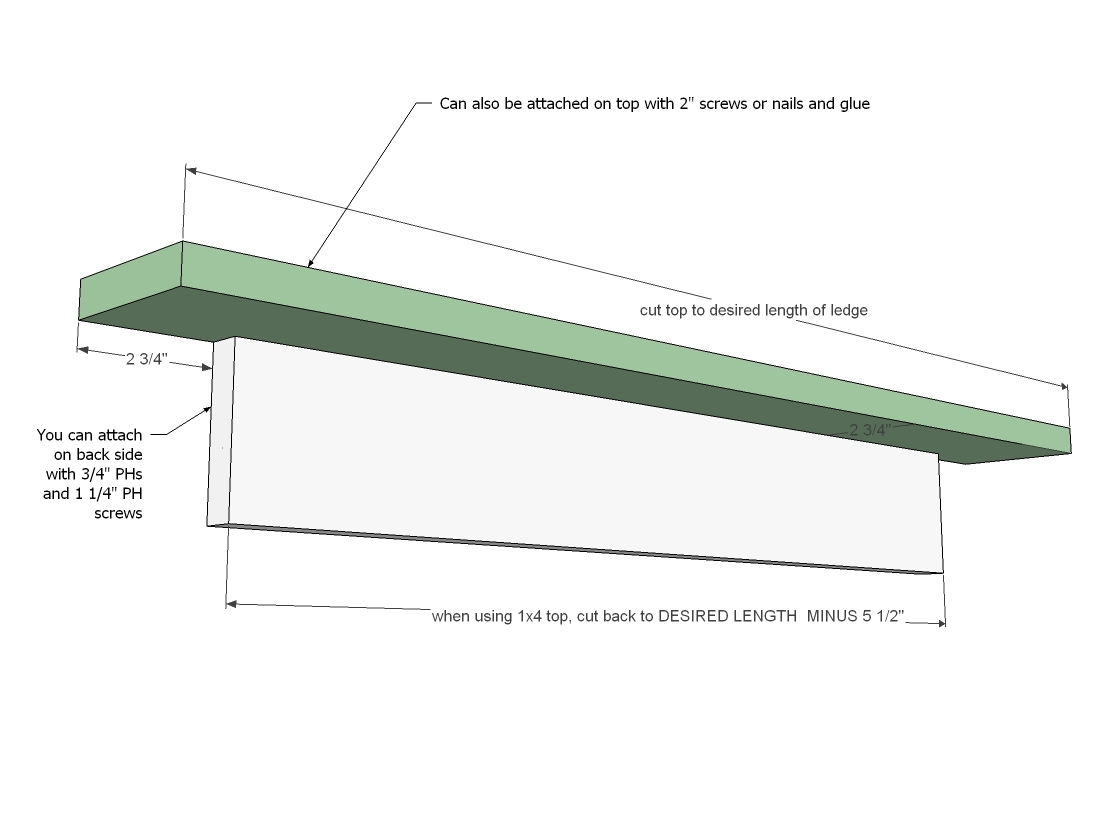
First determine the desired length of your crown moulding ledge. This is the length of your top board.
Then subtract 5 1/2" and cut a 1x4 (or for taller crown, a 1x5 or 1x6) for the back to this length.
Attach the two boards together, with a 2 3/4" overhang on each end, back is flush.
Step 2

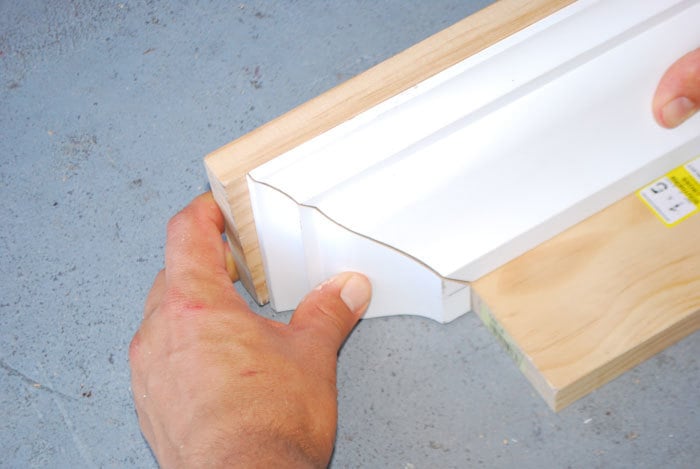
Start with the center crown piece, cut along bottom edge, shortest point to shortest point the length of your back piece. The ends are mitered outward to wrap the shelf.
Step 3
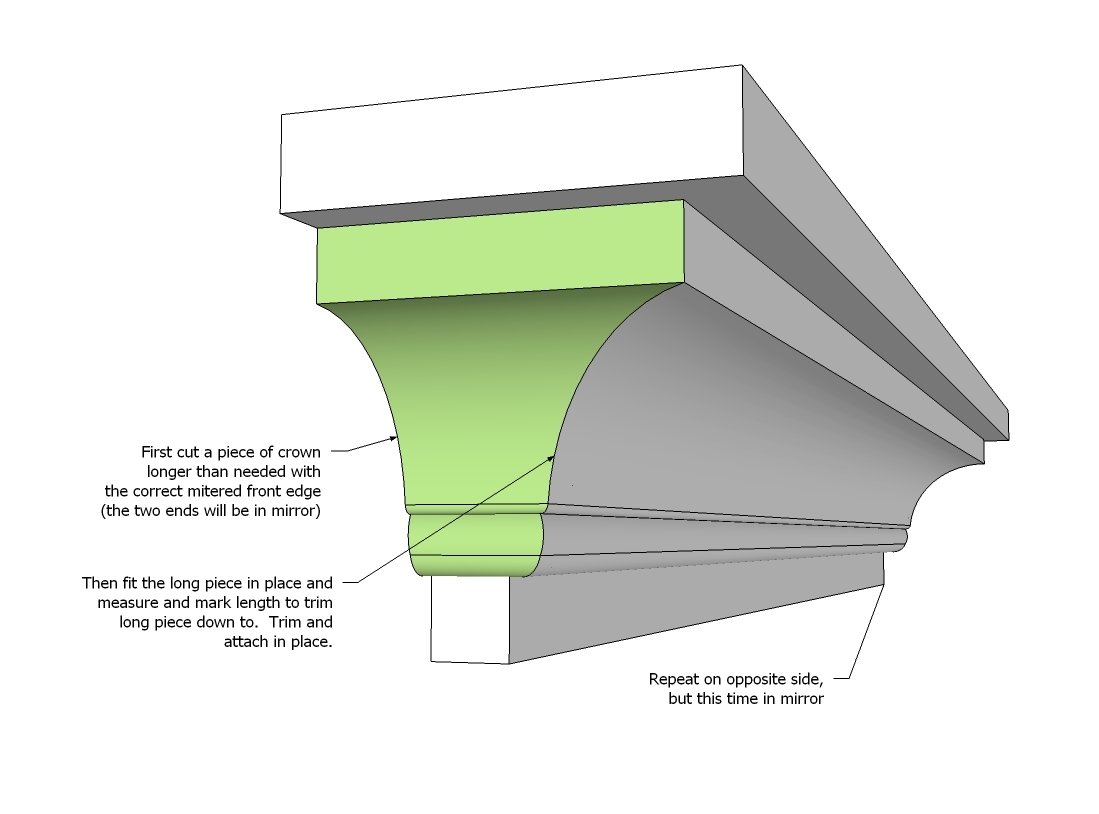
And then cut your two ends. What I do is take my remaining scraps and cut the right angle to match and end. Match the corners up, and mark length. Cut and attach. Then repeat in MIRROR on the opposite side.
Step 4
If you used pocket holes, you can use them as "keyholes" for hanging. You can also buy hardware to assist with hanging.
It is always recommended to apply a test coat on a hidden area or scrap piece to ensure color evenness and adhesion. Use primer or wood conditioner as needed.

Comments
Bunnie1978
Sat, 08/11/2012 - 10:28
Angles...
It would be great to include some formula or details on how to do the angles if you don't have a compound miter saw... like how to do crown moulding with just a table saw?
In reply to Angles... by Bunnie1978
karahart
Sat, 08/18/2012 - 22:01
calculator for angles
Hi Bunnie,
We used this calculator to come up with the measurements for our angles : http://www.construction-resource.com/calculators/crown-molding.php . If you look at this page : http://www.wishihadthat.com/crownmouldinginstallation.aspx and scroll down to where it says in bold How to cut crown molding, and then click on those pictures, it gives you examples of how to do it with just a table saw.
Best of luck!
YankeeBelle
Tue, 08/14/2012 - 17:25
Thanks Kara and Ana !
Love this simple and elegant shelf. I've been wanting to learn how to do this. Your tutorial is so helpful!
Alecia (not verified)
Wed, 10/24/2012 - 09:55
How to make the shelves deeper
Hi, I am hoping you read this in time to hep me. I need to build these about twice as deep and am struggling to figure out how. Can you help? Anyone?
Alecia (not verified)
Wed, 10/24/2012 - 09:55
How to make the shelves deeper
Hi, I am hoping you read this in time to hep me. I need to build these about twice as deep and am struggling to figure out how. Can you help? Anyone?
Dave1344 (not verified)
Fri, 10/26/2012 - 10:09
In order to make deeper you
In order to make deeper you would probably have to build a box below the shelf surface to accomodate the crown molding. Basically make the top of the shelf the same, then using 1x4 make three sides of a box underneath with the same dimensions from the edge as the original to attach the molding to. You will also probably want to put a bottom on that box so the shelf doesn't have a completely open bottom side.
Make sense?