Build your own faux mantle in no time with our free, easy DIY plans! Beautiful solid wood mantle can be painted or stained, add hooks for stockings at Christmas time. Sturdy and narrow for easy storage. Plans include step by step diagrams, shopping list, cut list and a real user video tutorial!
No where to hang stockings? Want a focal point in your living room? But don't want to tackle a huge project or home renovation?
We got you.
For about $50 in lumber, you can build your own faux mantle in an afternoon!
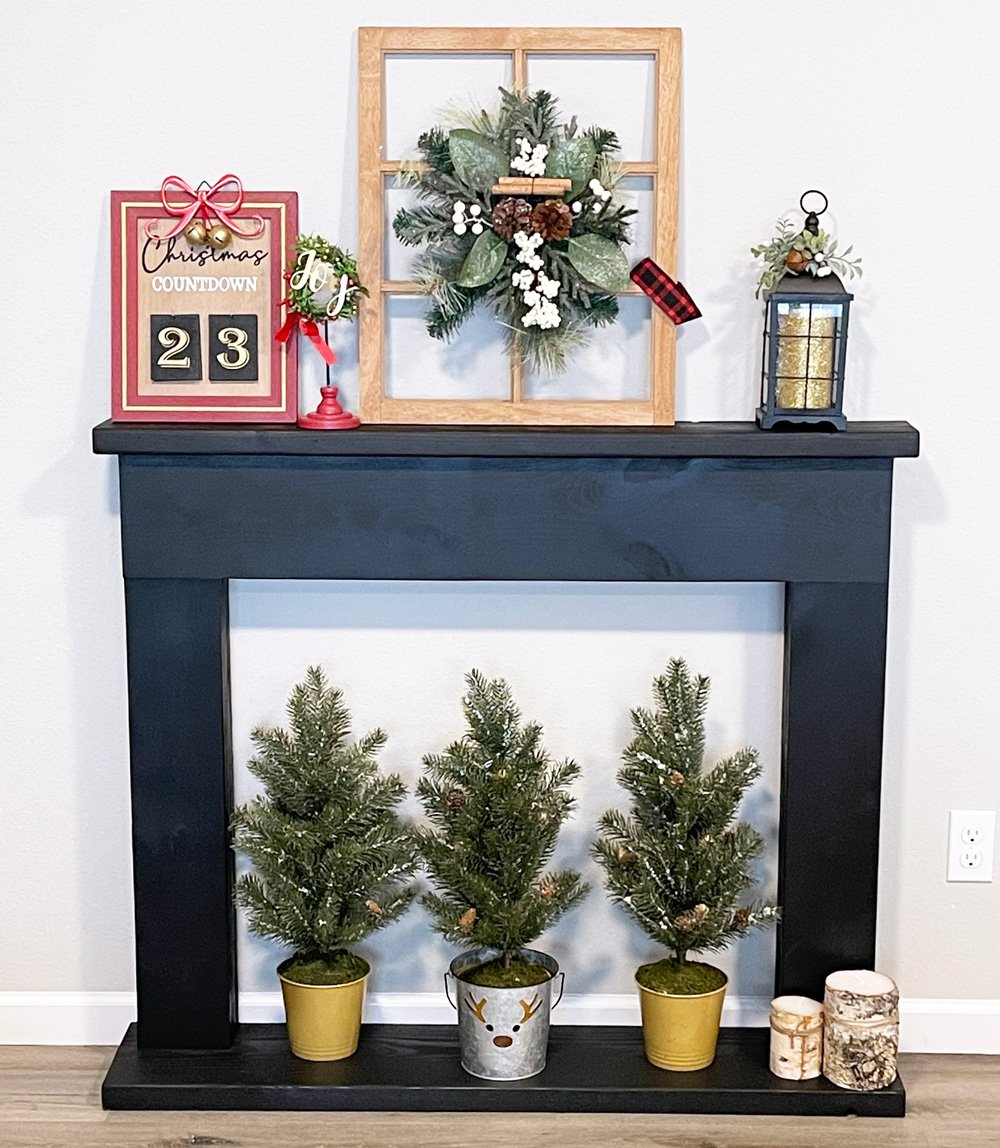
This is an easy beginner project that does not require fancy tools or lots of woodworking experience. Just cut and screw together, nail boards to the front!
Customization Ideas
This is a very easy project to customize. Here's a few ideas:
- Add an interesting back, pallet wood, shiplap, or a faux stone
- Use reclaimed wood or scrap wood on the front facing pieces for a rustic look that saves money
- Add moulding under the top for a fancier look
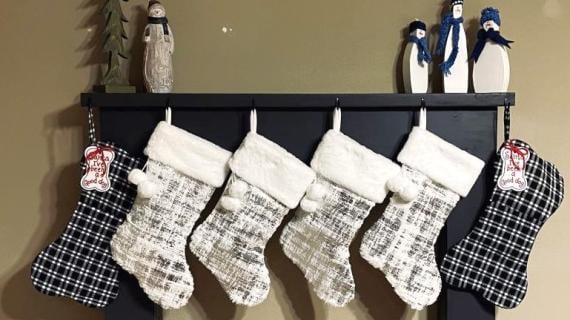
- Hooks for stockings across the top to make hanging stockings easy
- Try a rustic stain to add a farmhouse feel to your home
Real Family Builds it - Watch and See!
Our social media manager Jennifer built this with her family. Jennifer considers herself a beginner woodworker and only has a few tools and a basic garage to work out of. Watch her build it in this video:
Are you ready to build it yourself? Free plans follow!
Pin For Later!

Preparation
- 1 - 2x6x4 feet
- 1 - 2x10x4 feet (can also use 2x8 or 2x10)
- 1 - 2x4x12 feet (can be cut in half for transport)
- 1 - 1x8x4 feet
- 1 - 1x6x5 feet
- 16 - 2-1/2" long self tapping star bit wood construction screws (#8 or #9)
- 1-1/4" brad nails and wood glue
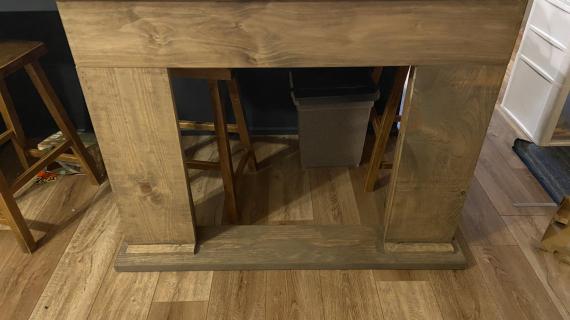
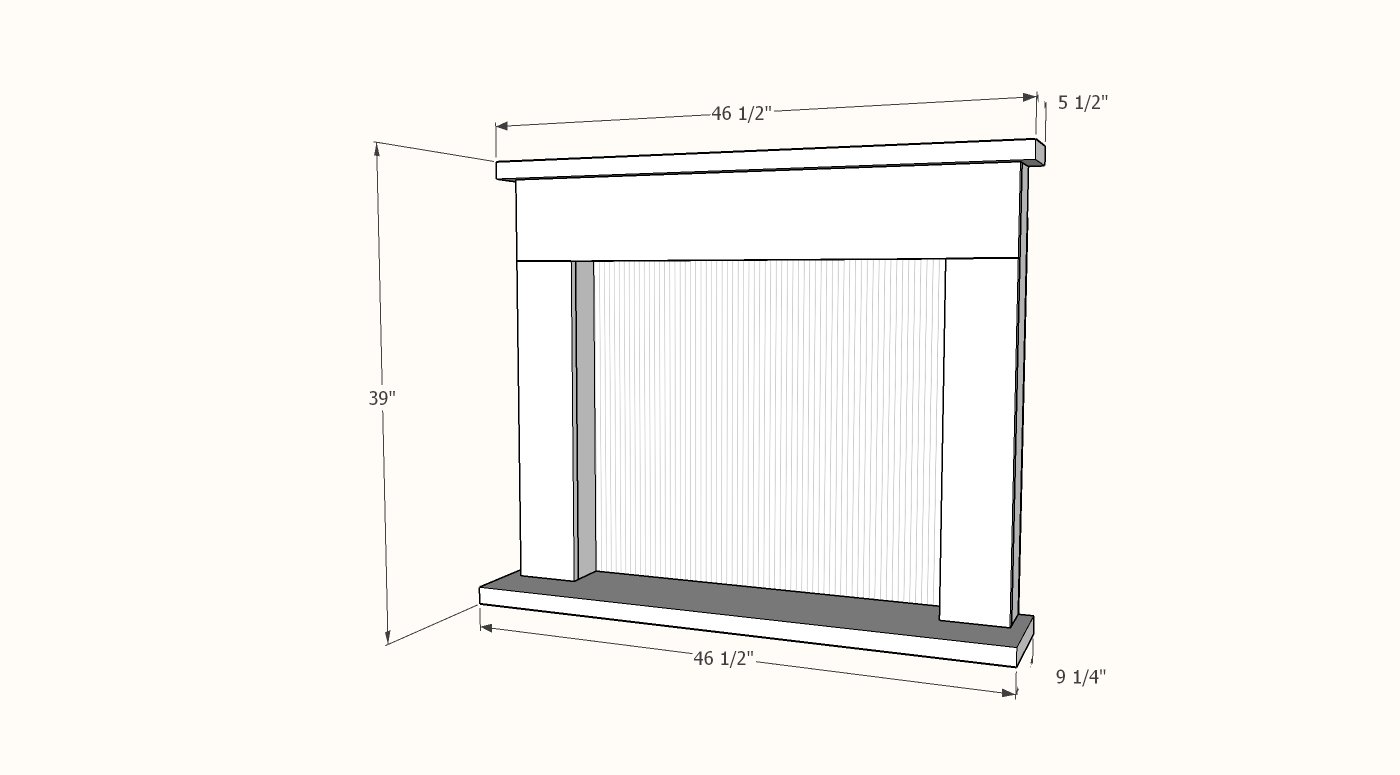
1 - 2x6 @ 46-1/2" - top
1 - 2x10 @ 46-1/2" - base
4 - 2x4 @ 36" - side framing - can be cut shorter, just make sure all four pieces are the exact same length
1 - 1x8 @ ~44" - front top (cut to fit)
2 - 1x6 @ ~28-3/4" - front sides (cut to fit)


Instructions
Step 1
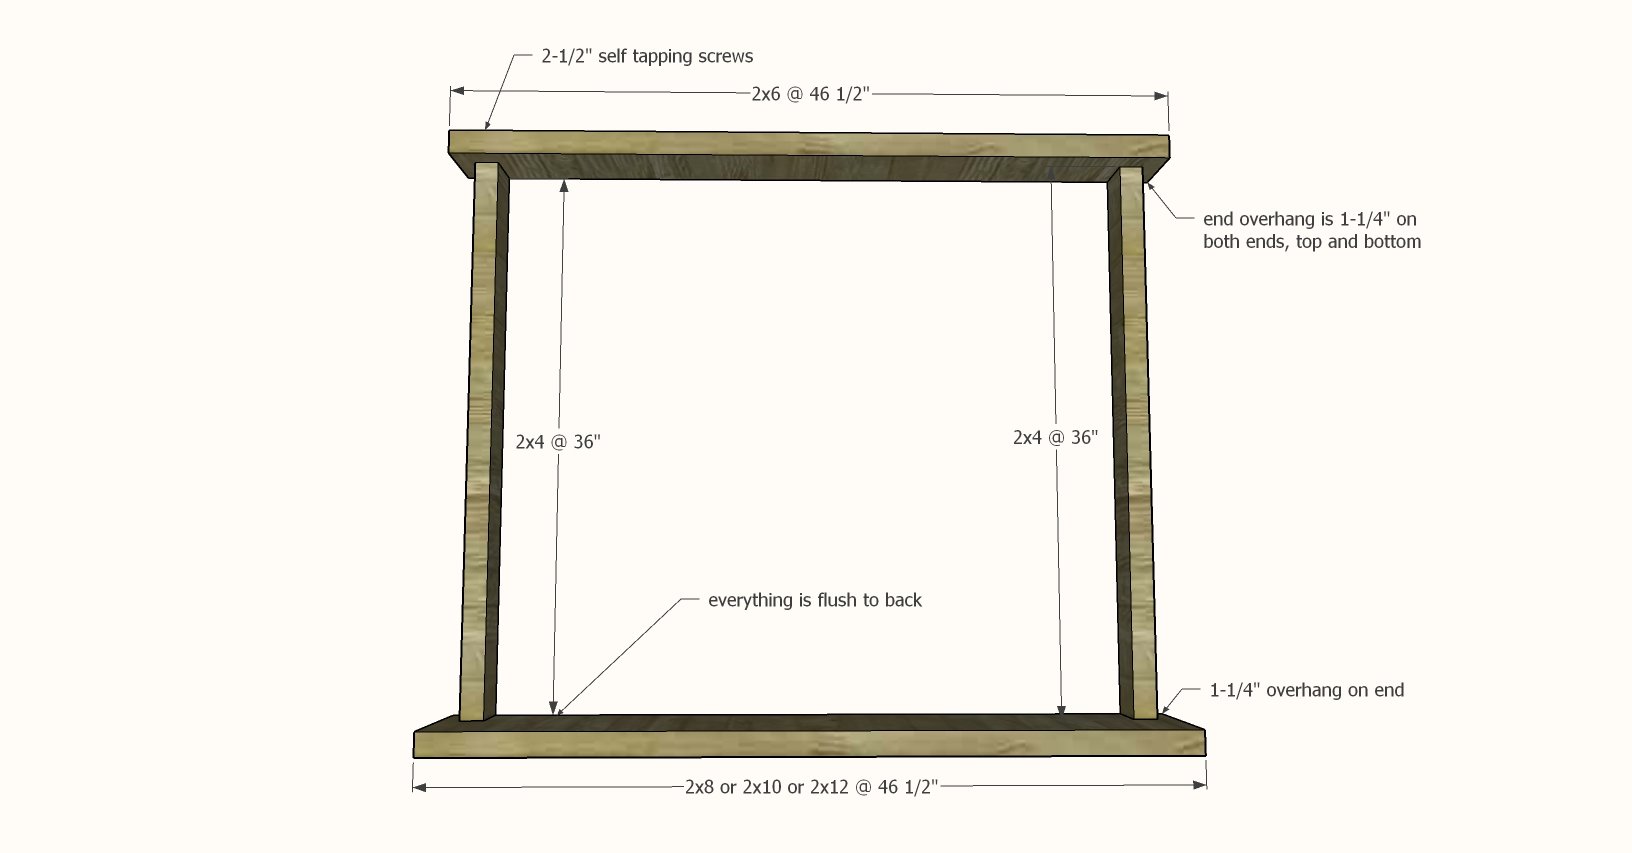
Attach the top and bottom to the outer 2x4s, with 1-1/4" space on outside, all edges are flush to the back. Use the 2-1/2" screws, two per joint.
Step 2

Measure over 5-1/2" (or use a scrap piece of 1x6 as a guide) and attach the second row of 2x4s on the inside, with the 2-1/2" screws.
Step 3
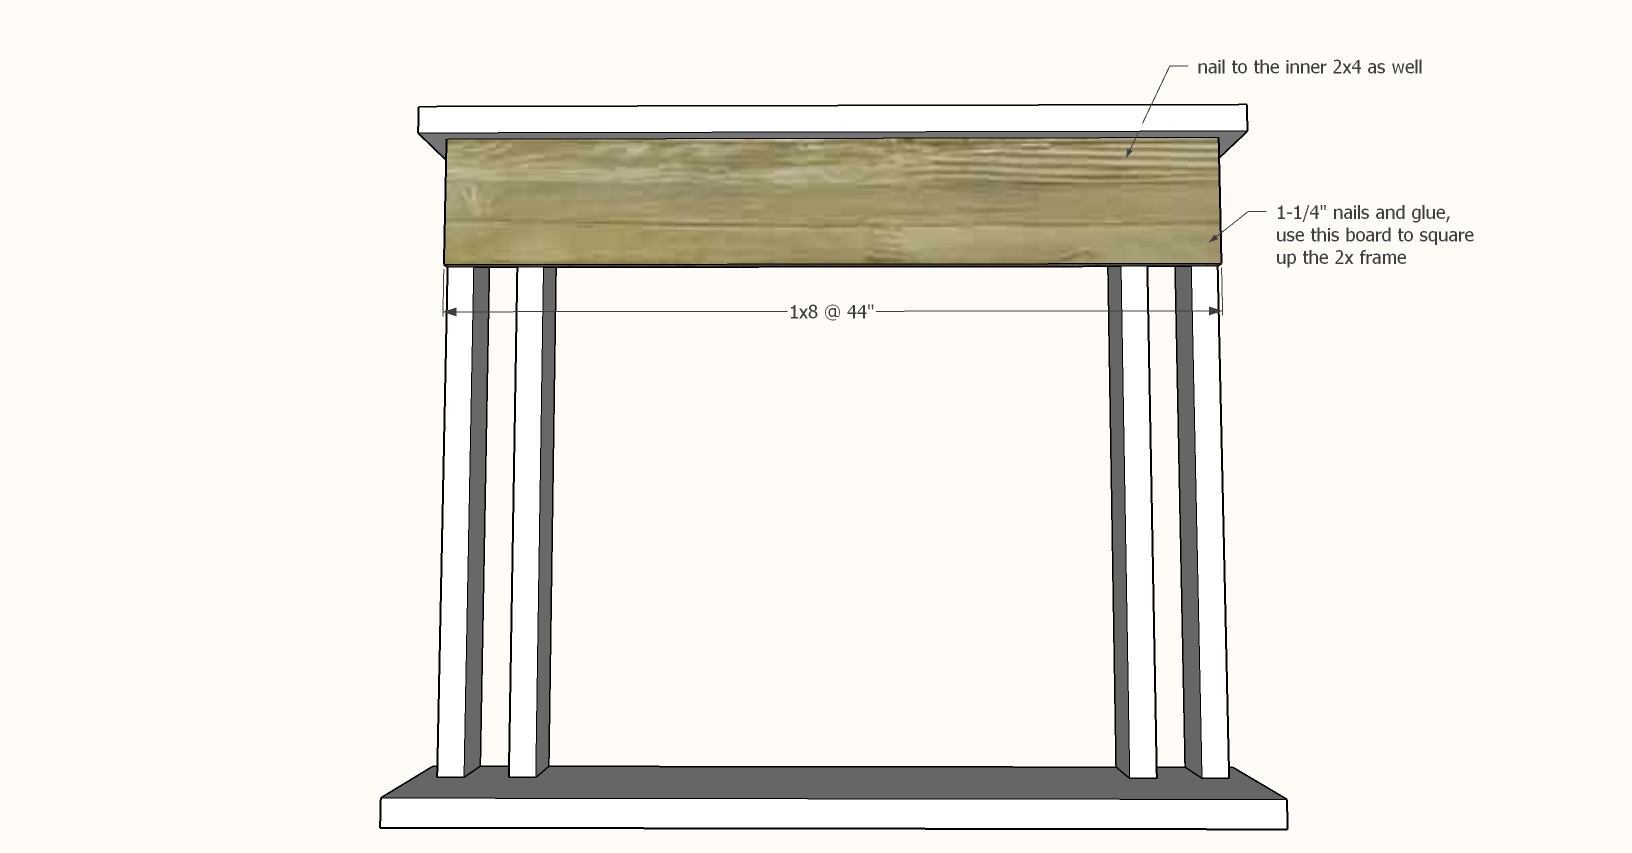
Measure and cut the 1x8 to fit across top.
Attach with 1-1/4" brad nails and wood glue.
No nailer? You can also use self tapping construction screws, I recommend the 2" length.
Step 4
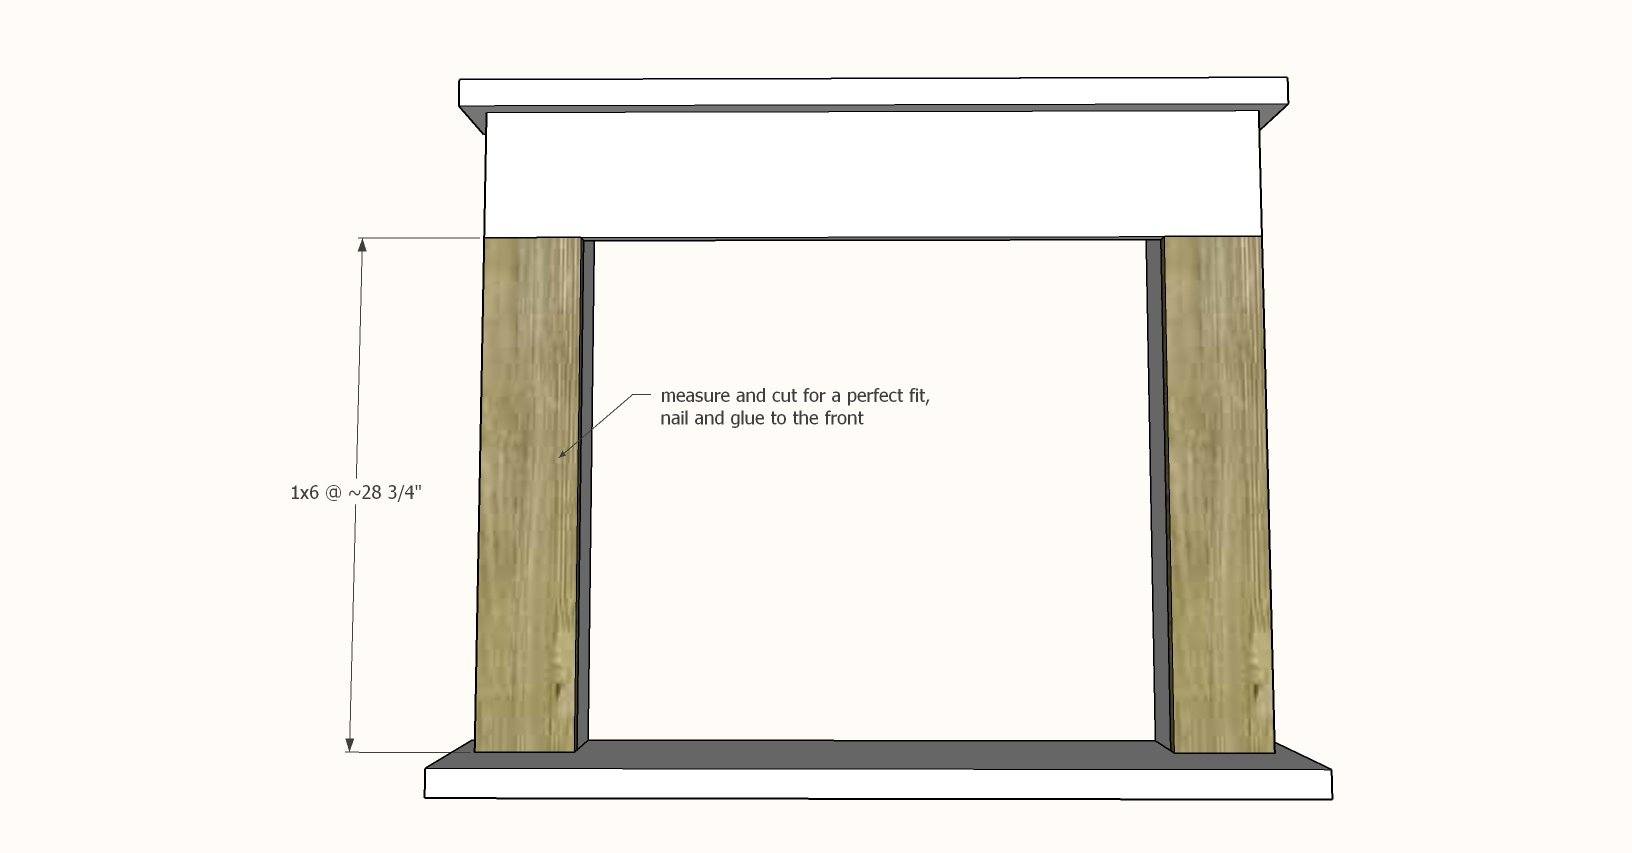
Repeat steps for the 1x6 front "legs".
Step 5
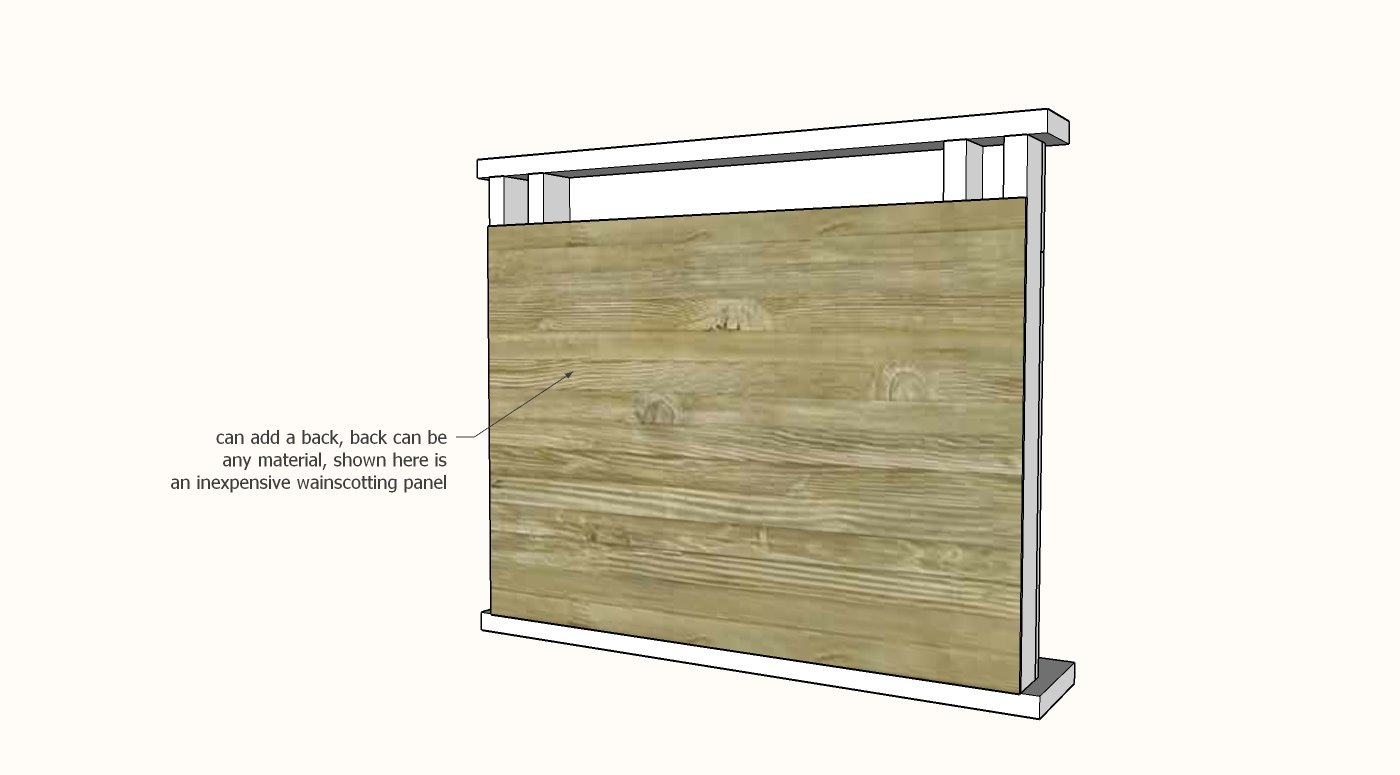
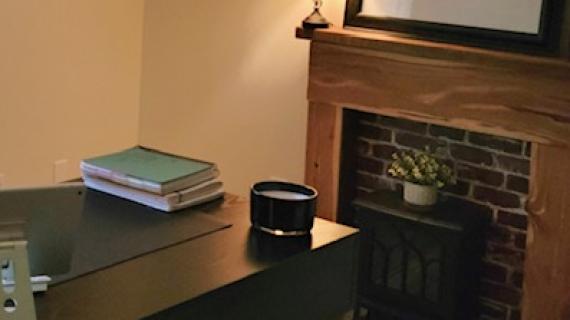
A back can be added for decor reasons.
Shown here is an inexpensive wainscotting panel.