


How to trim out windows and doors without a ton of cutting and different moulding pieces.


Things have been going a little slow at the Momplex.
Painting just takes a ton of time. Especially trim. And especially when half of your skeleton DIY crew is preggers.
But we've been getting there, and I'll share with you soon the steps we've taken to make the painting process go as efficiently as possible, without sacrificing finished quality.
I know we've been working on the Momplex now for over two years, and we spend quite a bit of time up there, so I don't know why, but last night as we were finishing up, I had to snap this photo:

We can hardly believe ourselves that we built this. To not get overwhelmed, we tend to focus on one step at a time, one board at a time, one piece of trim at a time. But seeing what is a finished product, what is a sum of all the little steps, is just surreal to us.
Remind me ... did we really start with a treed lot, did we really start cutting down trees, rent an excavotor and dig out a basement? Did we really stack all those foam blocks, pour concrete walls, stack trusses, hang those windows, pull electrical wires?
We both sat there in disbelief, amazed that all those little steps have added up to this. Really?
And we couldn't be more pleased with how these rooms are turning out. Thank you so much for helping us pick the paint colors, they are perfect.
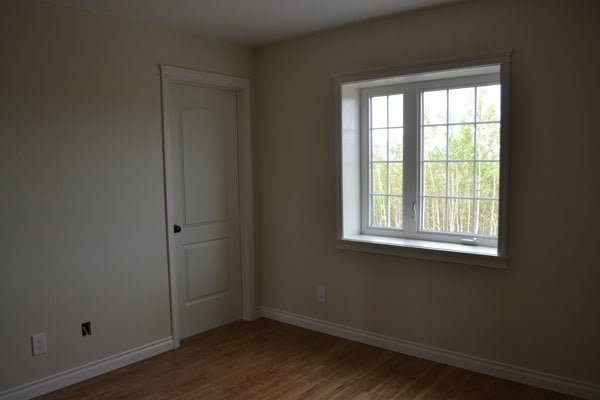
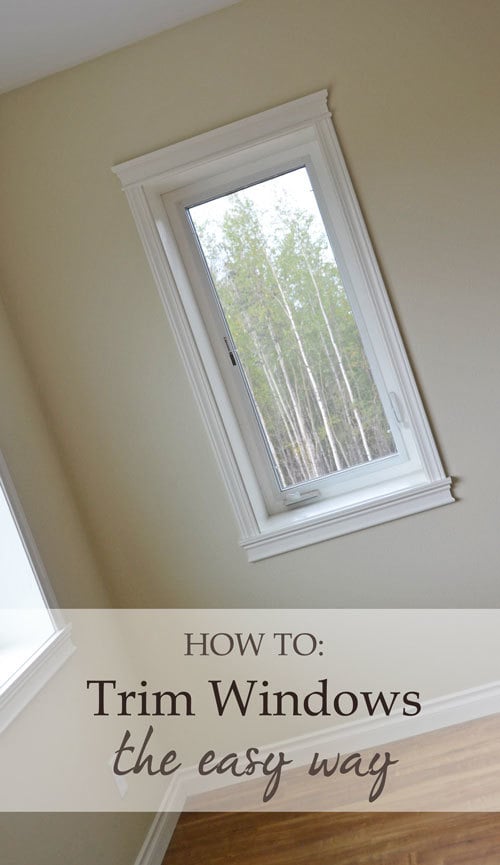
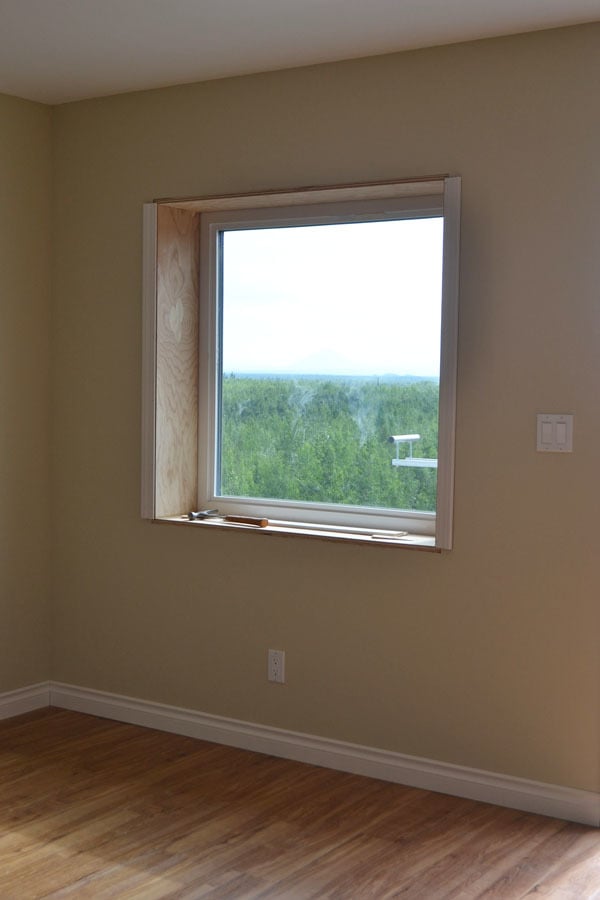
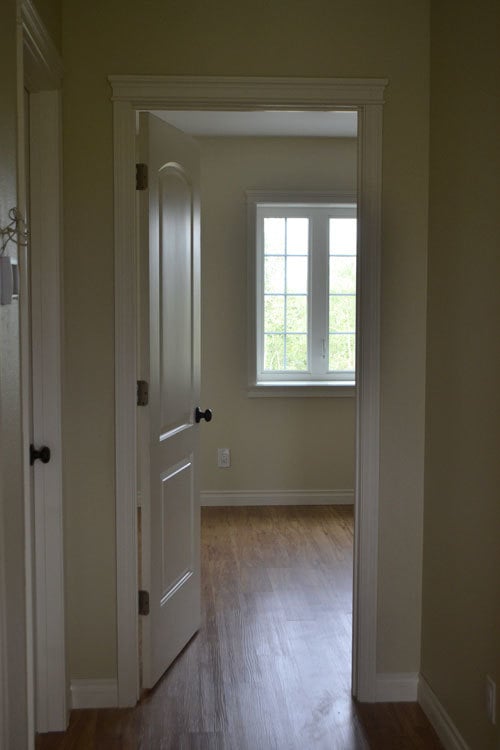
There's really not a lot to these rooms, no fancy ceilings or architectural details. It's all in the trim.
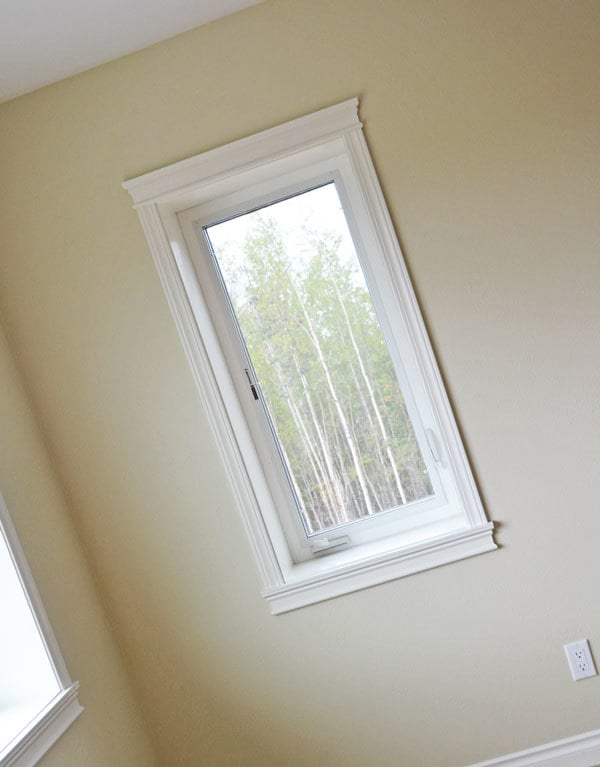
And especially the window and doorway trim.
Today, I want to share with you in a project style plan how we trimmed the windows - maybe it can save you some time and help you fancy up your windows as well. You can find the step by step guide on how we trimmed these windows out just below.
Thank you so much for encouraging us and keeping us going over the years - the journey's been much more fullfilling with your support, and we are very appreciative.
Preparation
Casing trim height of windows multiplied by 2, then add a few inches (we used this pattern, but there's fancier options like this one)
Header trim, width of windows, multiplied by 2, then add at least 1 foot (we used this trim, but for an even fancier window, try this one)
Finish nails for attaching to window jambs and longer nails for attaching to studs in walls
Wood filler for filling nail holes
Side casings are cut to interior height of windows + 1/2" (For 1/4" reveal on top and bottom. For no reveal at bottom for flush window sill, cut just 1/4" longer)
Header and aprons are cut to fit - see project plan below
4 - header and apron mitered returns - see project plan below


Please read through the entire plan and all comments before beginning this project. It is also advisable to review the Getting Started Section. Take all necessary precautions to build safely and smartly. Work on a clean level surface, free of imperfections or debris. Always use straight boards. Check for square after each step. Always predrill holes before attaching with screws. Use glue with finish nails for a stronger hold. Wipe excess glue off bare wood for stained projects, as dried glue will not take stain. Be safe, have fun, and ask for help if you need it. Good luck!
Instructions
Step 1
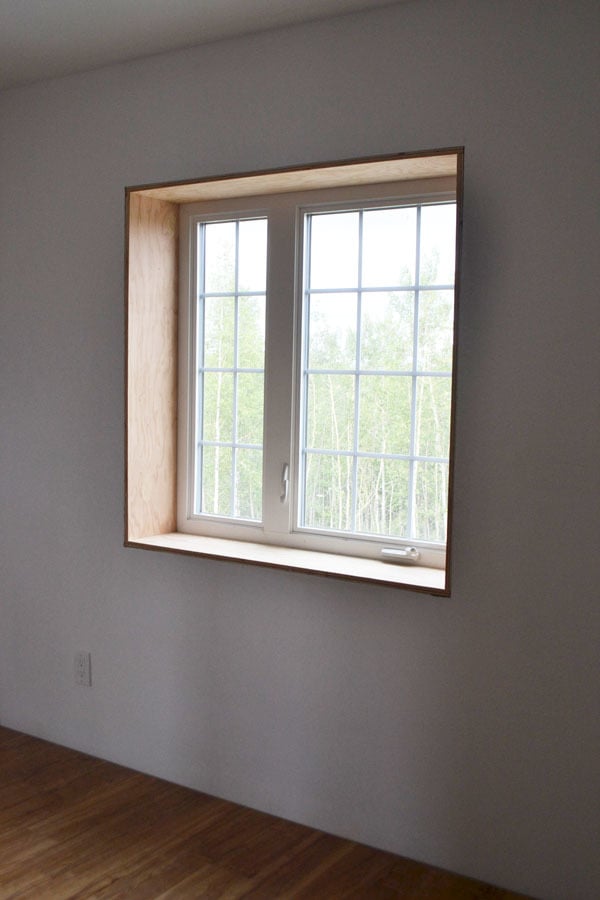
Start with your window, and remove any moulding until your window is flush to the wall. If you need to finish out the window jambs, you can read how we did that here.
Measure the interior height of the window.
Add 1/4" for the top reveal.
Add 1/4" more if you want the bottom of your window to have a reveal too.
This is the length of your side casings. Cut side casing.
Step 2
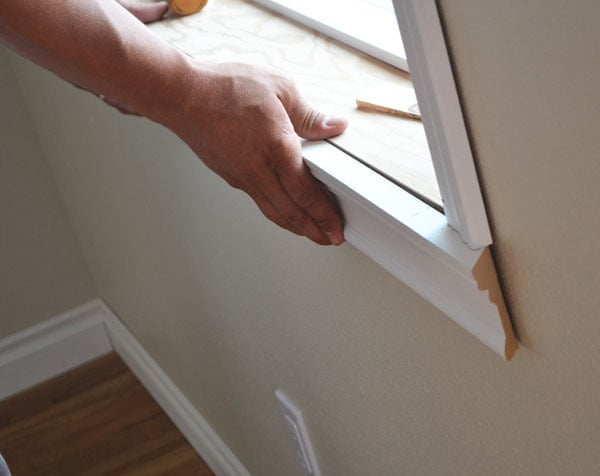
Nail side casings to window jambs and to rough framing of window (behind drywall). We used 1" nails to nail casing to window jambs, and 2" nails to nail window casings to rough framing behind drywall, with an 18 gauge nailer.
The casings are attached with a 1/4" reveal - meaning they are not flush to the insides of the jamb, and instead, 1/4" of the jamb's front face is revealed. This is done because it is very difficult to get two edges perfectly aligned, and keep them aligned over time (think wood shrinking, house settling etc.) The revealed edge also provides and added layer, giving the window even more interest.
You can read more details about how we installed casing trim here.
Step 3
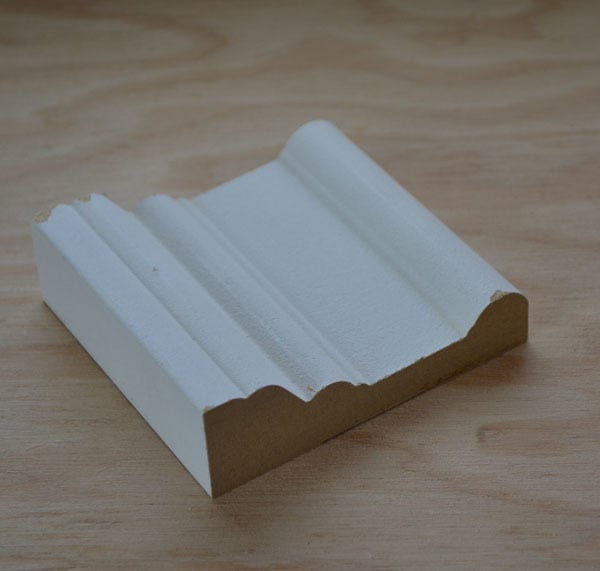
For the headers, you have to use a moulding that has a base that is at least as wide as your casing to cover the casing. The wider top edge gives the window header the appearance of a crown moulding - without doing all the work. These mouldings come in different sizes - use a larger moulding for a more dramatic window.
Step 4
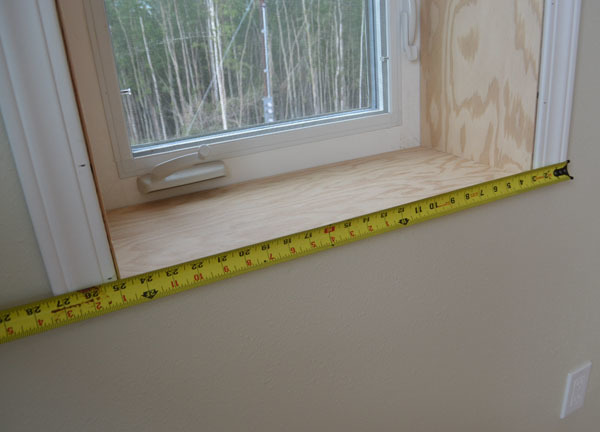
With your casings installed, measure the outside dimensions of casing to casing. Measure the top and bottom and note.
Step 5
Step 6
Once the headers and aprons were cut, we fit on the windows.
We'll need to cut mitered returns to finish off the ends of the headers and aprons.
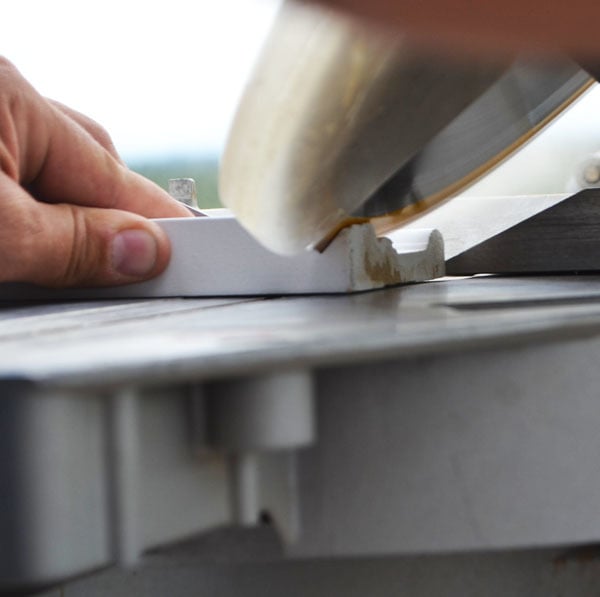
Step 7
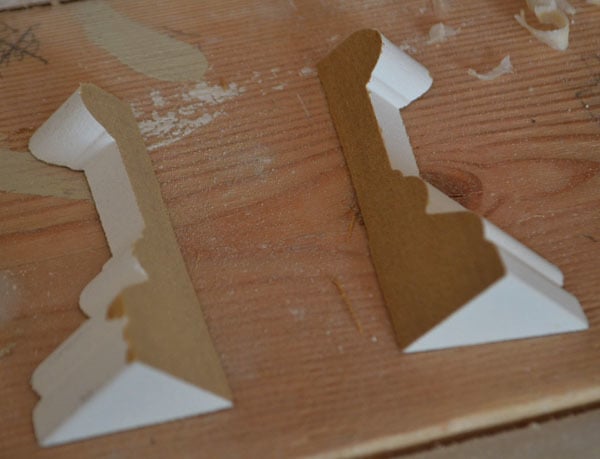
These are the mitered returns - they are basically the header moulding, cut at 0" long to a 45 degree bevel.
Step 8

We used hot glue to glue the mitered returns to the ends of the headers and aprons.
Step 9
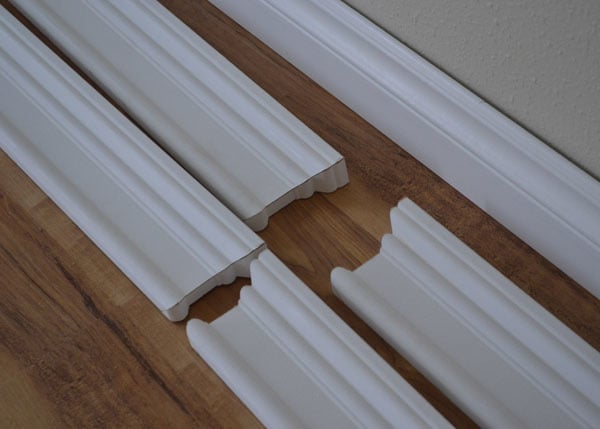
We build all of the headers and aprons at once, and labeled the back sides to keep them from getting mixed up.
We also used wood filler to fill any cracks on the ends, sanded the ends, and then painted them on sawhorses. It's much easier to paint on the ground, then having to tape the headers off, and paint over your head.
Step 10
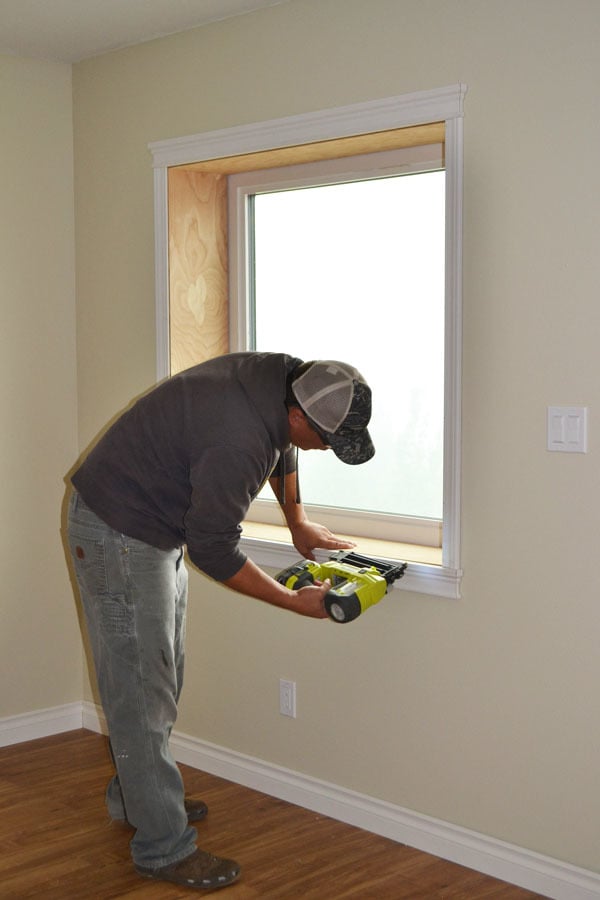
Then the headers and aprons are nailed up, same as the casings.
Step 11

Since the headers and aprons are already pre-painted, I just went and filled all nail holes with wood filler. Then I just had to paint the casings and touch up the headers.
We then siliconed any stubborn cracks/gaps.
You can read more about how we built the headers/aprons here.
Step 12
We did the same with the door headers and closet headers. There were close to 30 headers in just this side, so being able to finish a header without multiple pieces of moulding was a HUGE timesaver.
It is always recommended to apply a test coat on a hidden area or scrap piece to ensure color evenness and adhesion. Use primer or wood conditioner as needed.

Comments
spiceylg
Thu, 08/29/2013 - 11:23
Clever!
In all of my years of watching home improvement shows, I've never seen trim done this way. So pretty and oh so smart! Getting close... :)
JoanneS
Thu, 08/29/2013 - 13:55
Marvelous!
I am loving the moulding and trims you used in the Momplex! What an innovative way to get this fabulous look without a million steps! :) You broke this down and made it un-intimidating - that is so cool! Everything is looking so beautiful! Love the door hardware you used too. :)
birdsandsoap
Thu, 08/29/2013 - 15:47
Beautiful!
Beautiful!
tmack4686
Sat, 02/19/2022 - 09:25
Shopping list items
Hello, this looks great! I wasn’t able to click the links to take me to the specific things you used on your shipping list. Can you post the website link?
Thank you:)!