
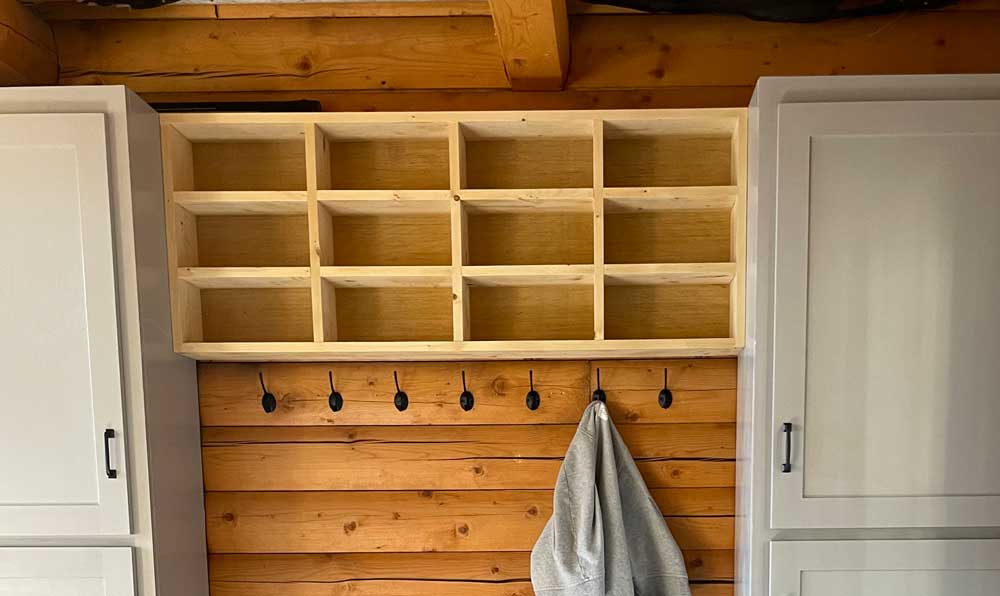

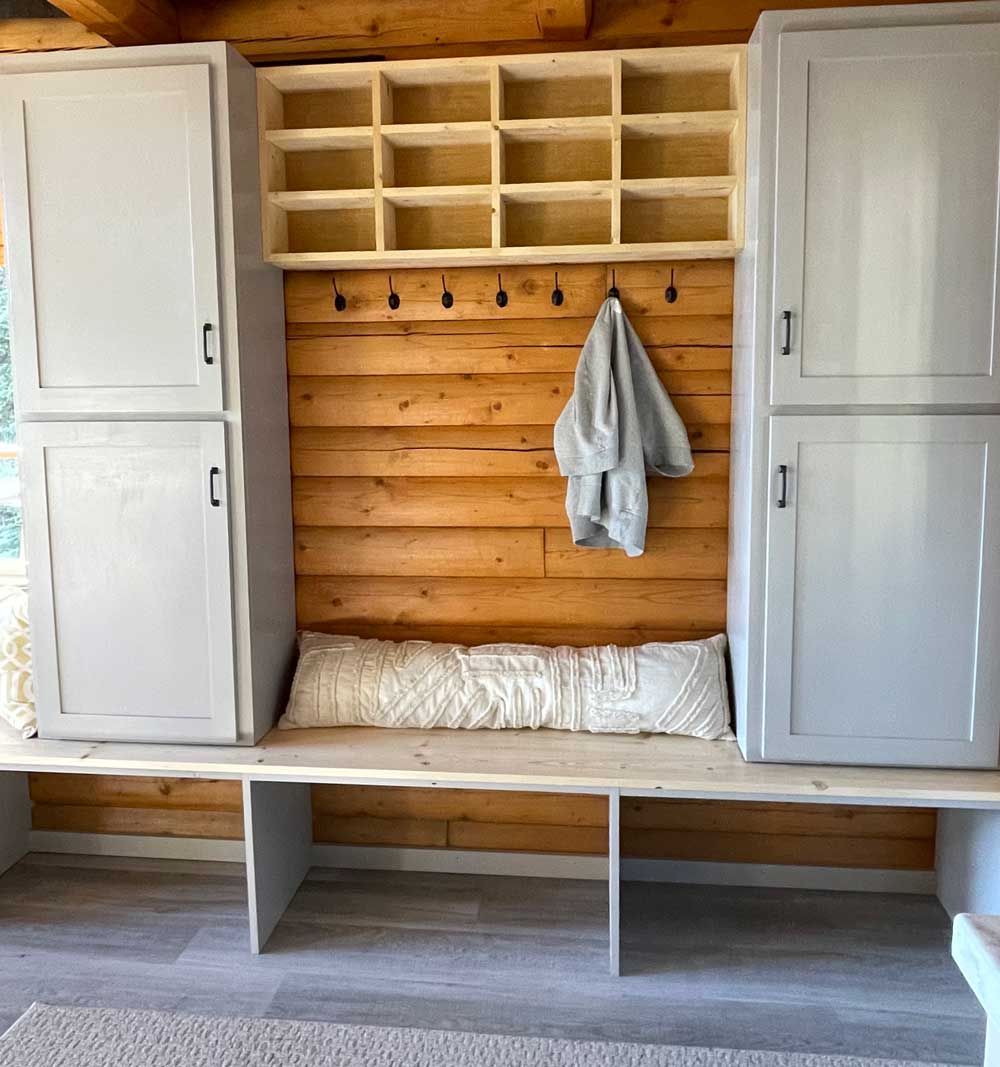
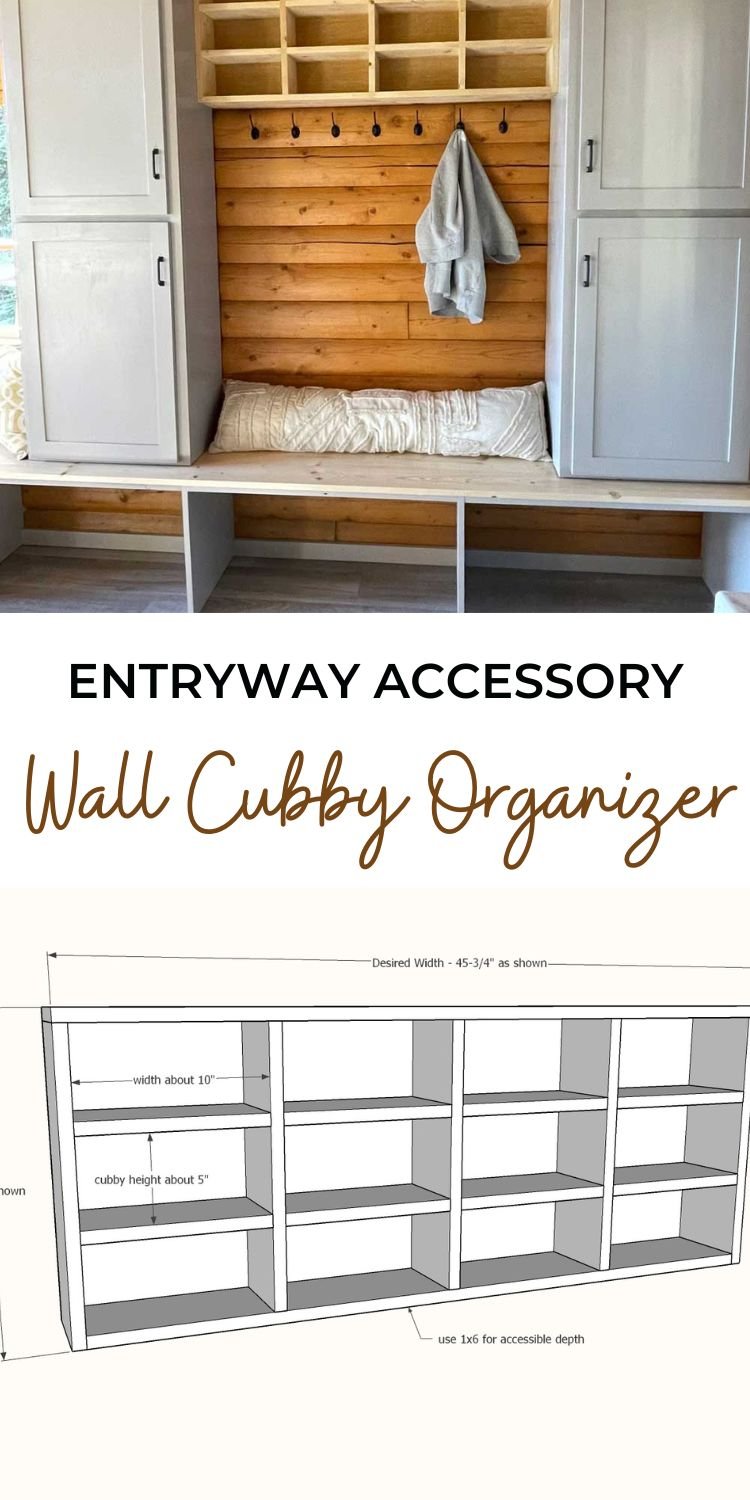
Every entryway needs this! This wall cubby organizer is designed to store hats, mittens, sunglasses and other personal accessories, all within easy reach. Can modify in size. Free step by step plans from Ana-White.com
Related: Open Entryway Bench Plans
The key to a clean and organized entryway is ample storage that is accessible and available.
That means lots of hooks, lots of shelves, good boot storage.
But what about those small items? What about mittens, gloves, hats, scarves?
I recommend in every entryway, a small cubby organizer that keeps all the little things neatly stored and accessible.
So there's a empty shelf available for your gloves.
Actually TWELVE empty shelves available.
I've built this type of organizer before (with hooks here) and it is a must have in the entryway. I can't recommend cubbies like this enough.
But in this plan, I want to do something a little different - I want to make it easy to customize in size, so you can fit it in very specific spaces. Here's how you can design and build your very own cubby organizer, just right for your space.
Pin For Later!

Preparation
1x6 boards
1/4" plwyood for the back
1-1/4" and 5/8" brad nails
wood glue
Screws for hanging to wall or adjacent cabinets (length depends on attachment method)
Cut list generated in Shelf Help App


Instructions
Step 1
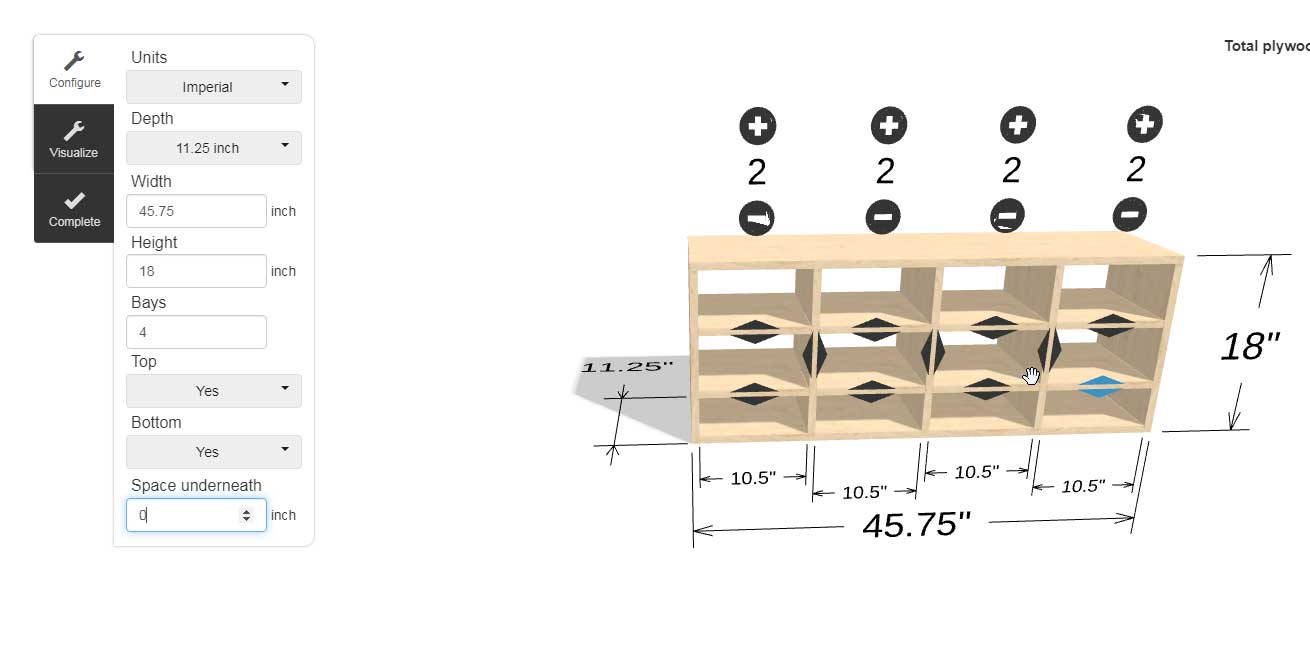
Plan and Design Your Organizer
1. Measure your space - start with measuring your space and determine how big the overall dimensions should be.
2. Design - Use my free Shelf Help Configurator to input your dimensions and create your design.
- Cubbies should be about 5" x 10"
- A top and bottom are recommended, with 0" below the bottom
- Depth doesn't matter, you'll just cross cut down to the right lengths using 1x6 boards
Once you are happy with the design, click "complete" instead of adding to cart, click "Email to me" The documents will show up in your inbox, and you will include a cut list.
Step 2
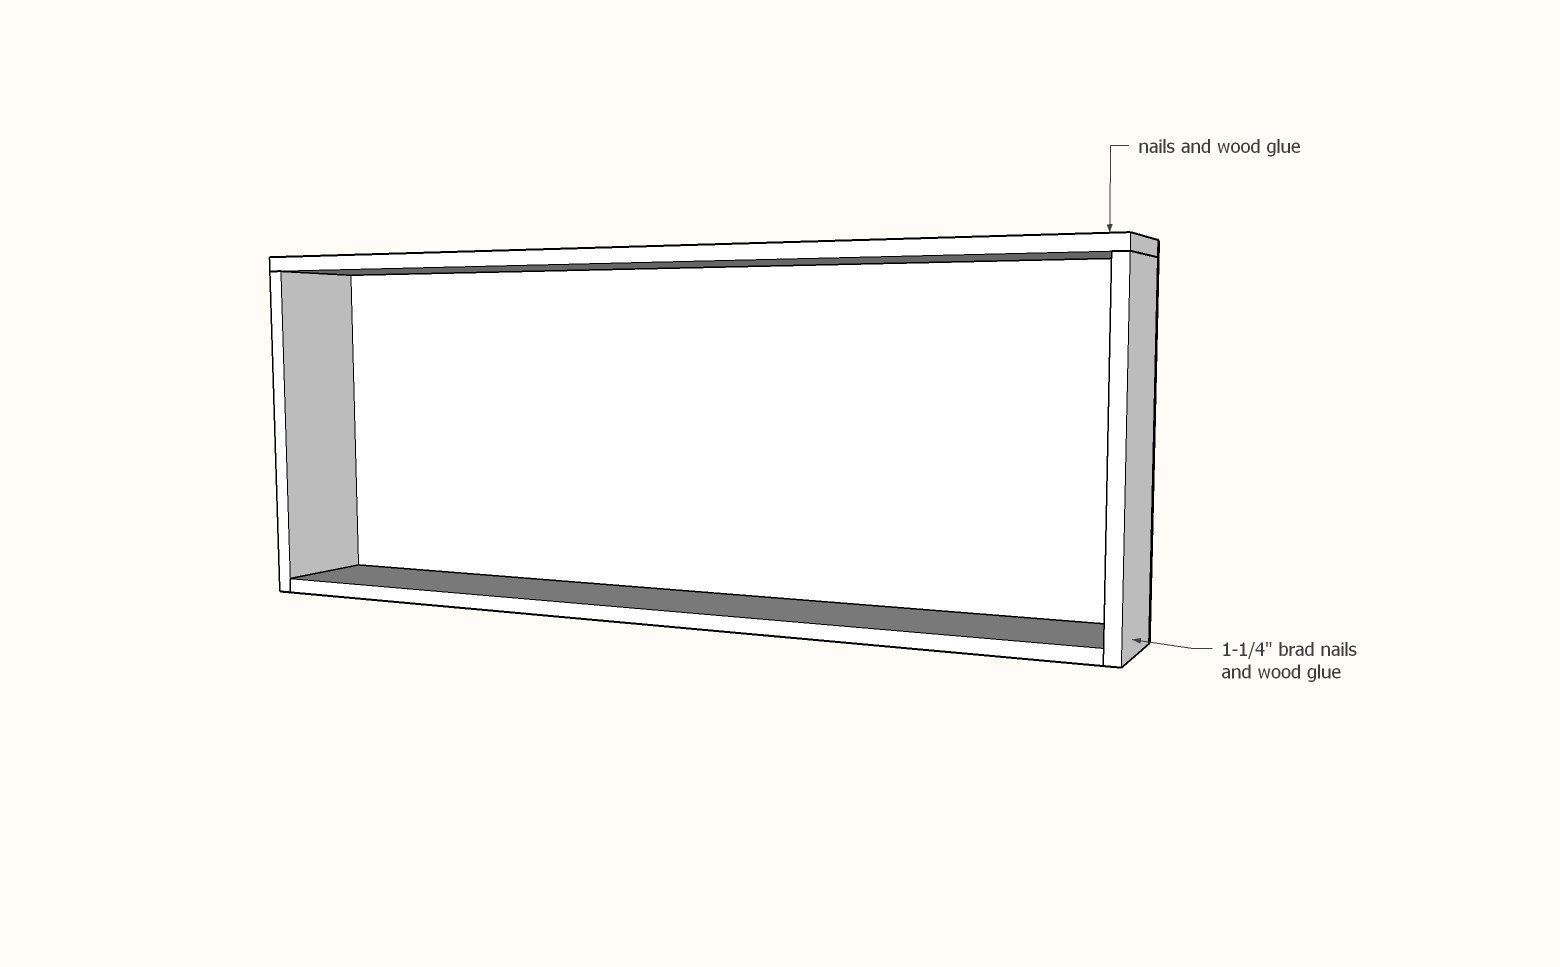
Assemble the sides, top and bottom with 1-1/4" brad nails and wood glue to make the outer frame.
Step 3

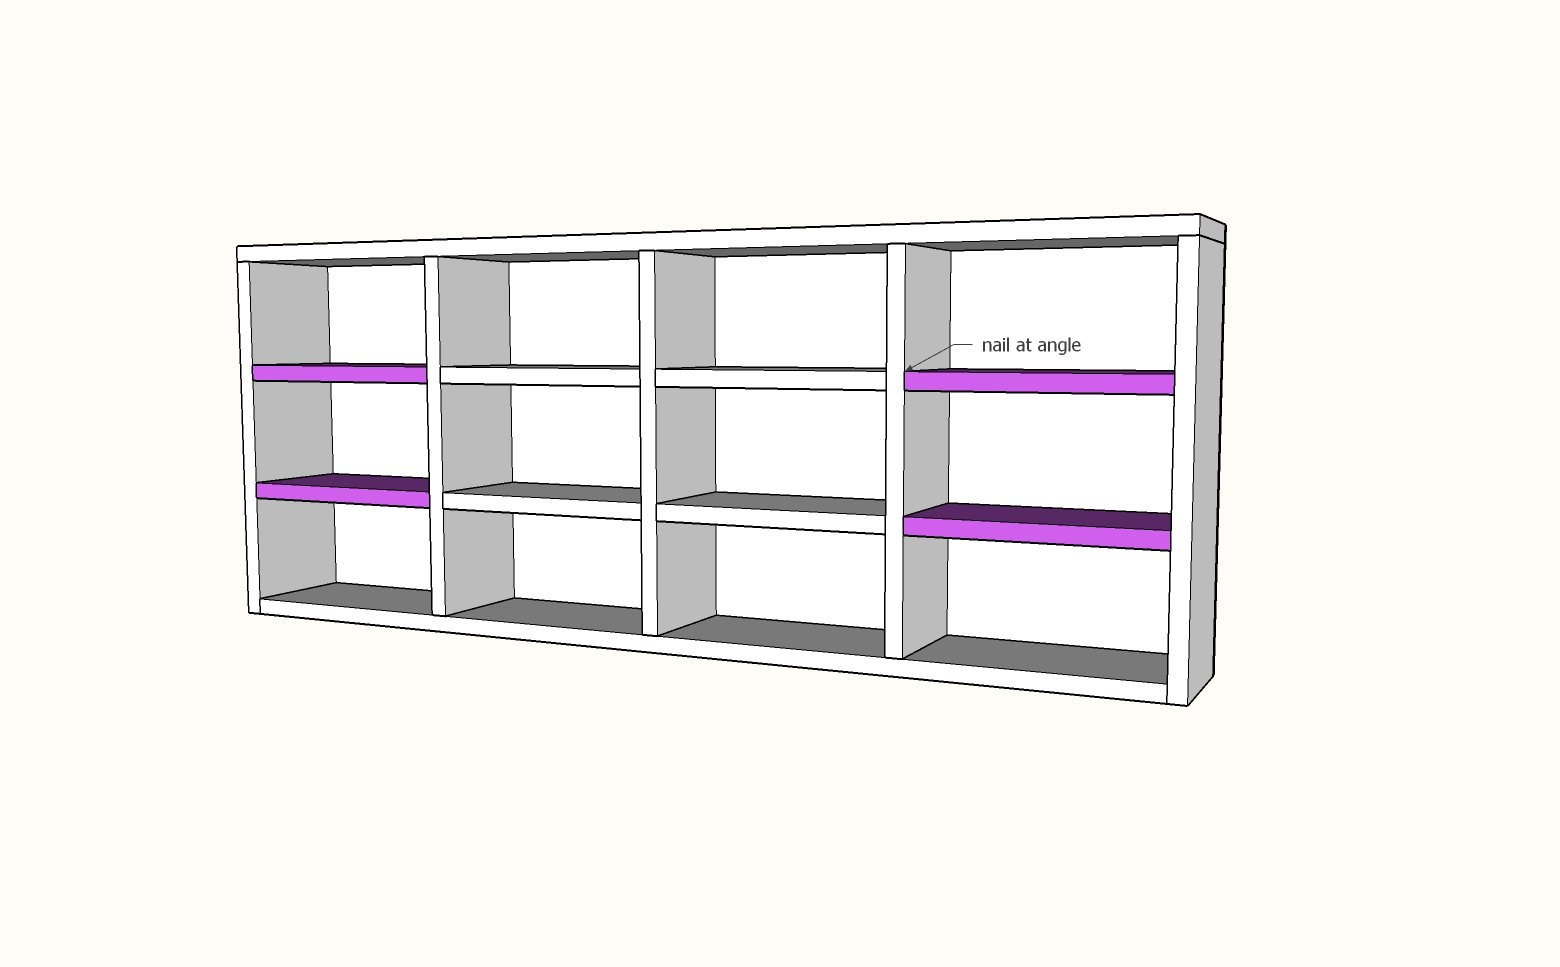
Build the inner section independantly.
Then place the inner section inside the outer frame and attach. In some places, you will need to nail at an angle. Use glue and 1-1/4" brad nails.
TIP: Use the horizontal smaller shelves as spacer to help guide placing vertical dividers.
TIP: Cut blocks to the shelf height and use as spacers to help guide placing horizontal shelves.
Step 4
Place the remaining shelves.
TIP: Use a block cut to the shelf height as a spacer to help place the shelves at the right height.
Step 5
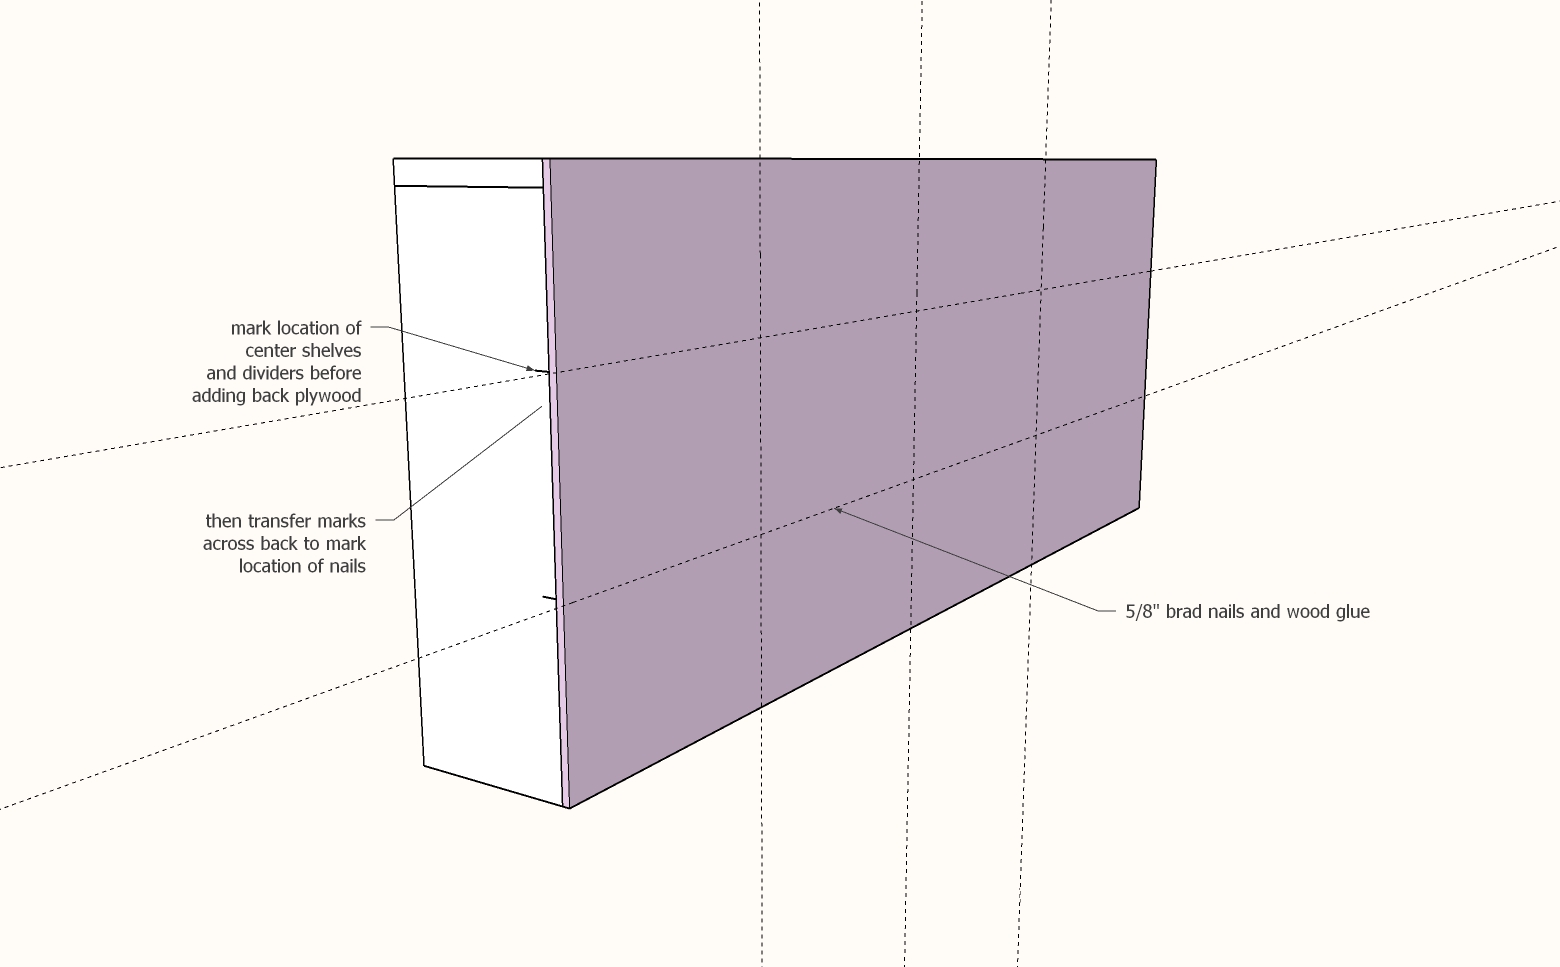
Mark on the sides the location of all center shelves and center dividers.
Cut 1/4" plywood for the back.
Apply glue to the back edges of the shelves and dividers.
Place the plywood on the back.
Use a straight edge to draw lines between your marks on the sides to help with nail placement.
Use 5/8" brad nails and wood glue to secure the back plywood to all back edges of the organizer.
Hang through the back plywood to studs in the wall, or alternatively, use a picture hanging kit mounted to the back to hang, or a french cleat system.
