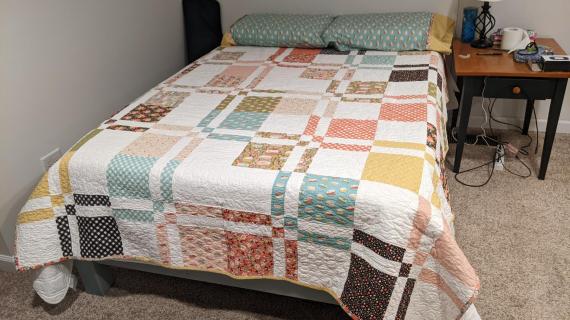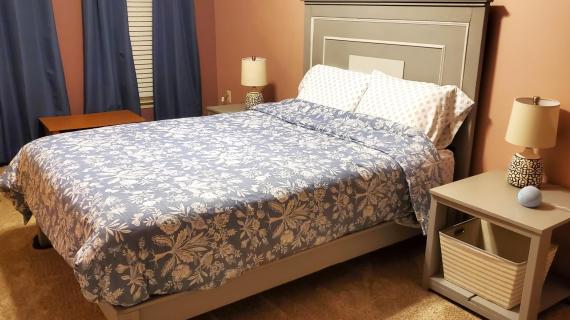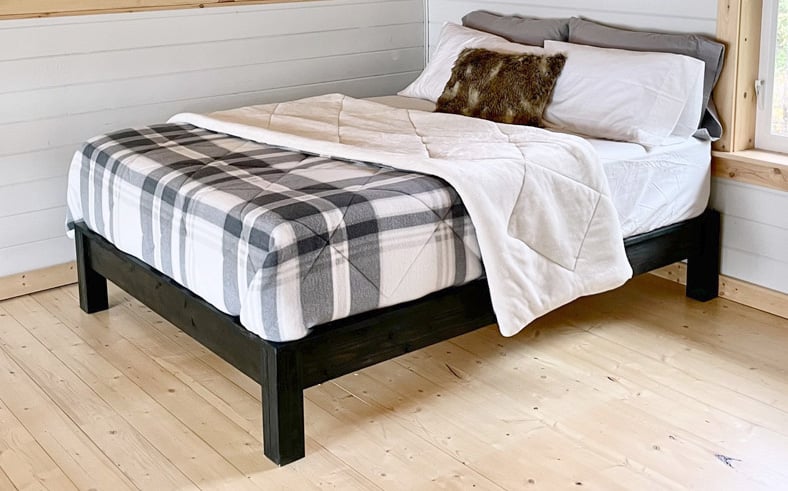

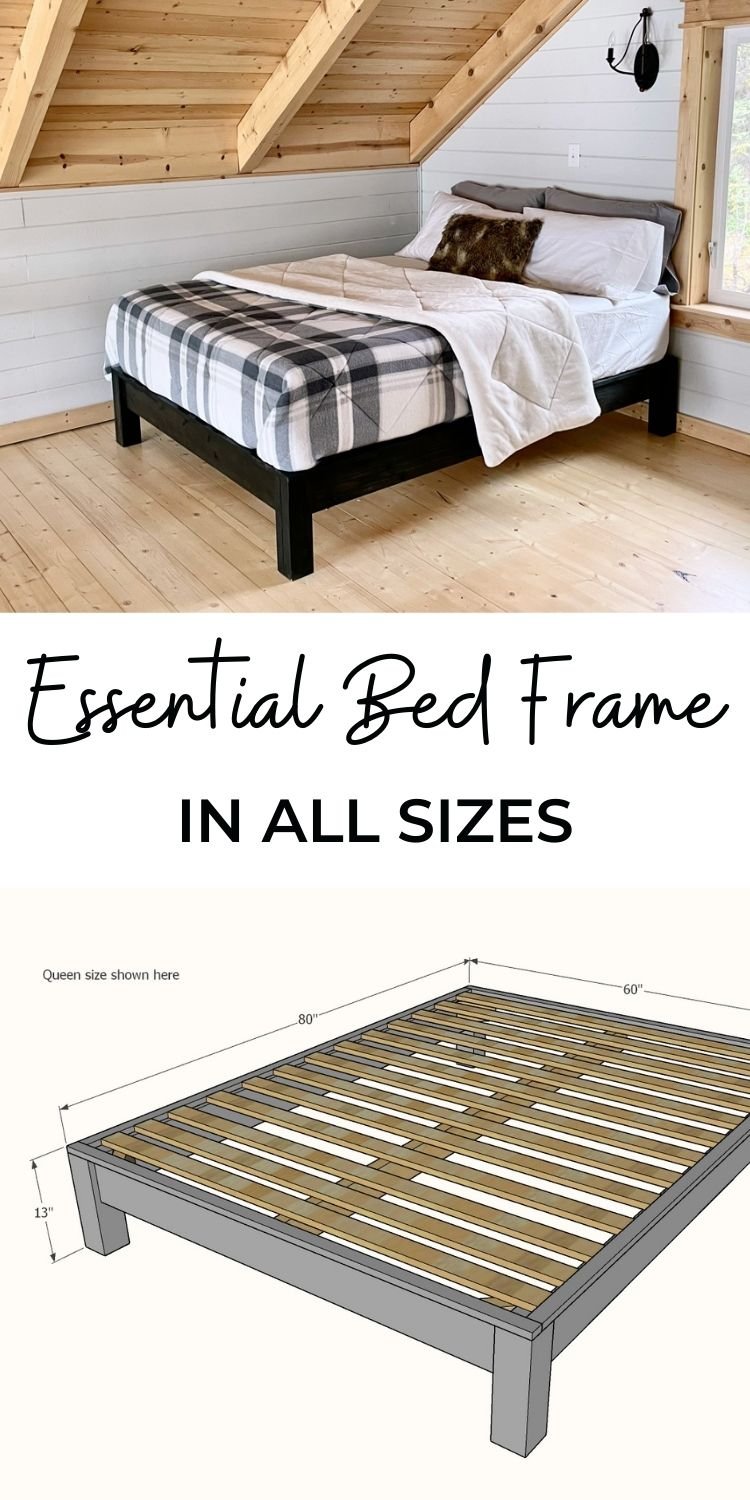
Build your own beautiful and durable wood bed frame in any size. Can be painted or stained any color. Free step by step plans by Ana-White.com
Pin for Later!
Preparation
Twin (Mattress measures 38" x 75")
- 1 - 4x4 @ 6 feet long
- 2 - 2x6 @ 10' long (cut one long frame board and one short frame board from each board)
- 1 - 2x4 @ 8 feet long or scraps for the corner supports
- 1 - 1x2 @ 8 feet long
- 2 - 1x2 @ 6 feet long (adjust to 8' length for extra long twins)
- 6-7 1x3 @ 6 feet long for bed slats, can use furring strips
- 50 - 2-1/2" Kreg Screws
- 1-1/4" brad nails
Full (Mattress measures 54" x 75")
- 1 - 4x4 @ 6 feet long
- 1 - 2x6 @ 8 feet long (cut shorter frame boards from this board)
- 1 - 2x6 @ 12 feet long (cut longer frame boards from this board)
- 1 - 2x4 @ 12 feet long (center supports, corner supports and center leg)
- 1 - 1x2 @ 10 feet long
- 2 - 1x2 @ 6 feet long
- 6-7 1x3 @ 10 feet long, bed slats, can use furring strips
- 50 - 2-1/2" Kreg Screws
- 1-1/4" brad nails
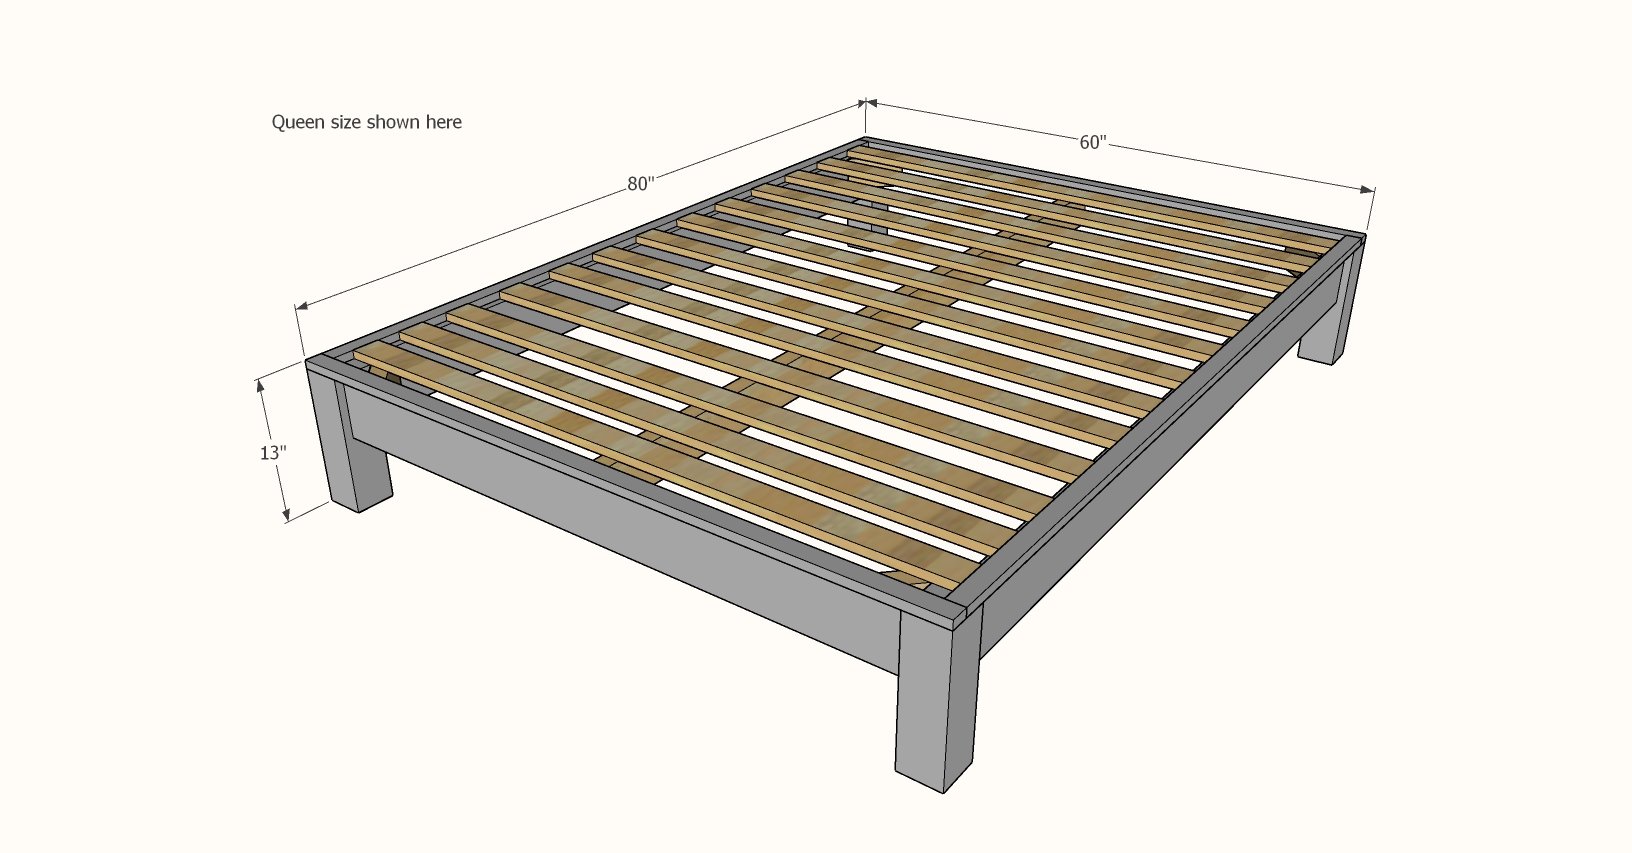
Queen (Mattress measures 60" x 80")
- 1 - 4x4 @ 6 feet long
- 1 - 2x6 @ 10 feet long (cut shorter frame boards from this board)
- 2 - 2x6 @ 8 feet long or stud length
- 1 - 2x4 @ 12 feet long - center support, corner supports and center leg
- 1 - 1x2 @ 10 feet long
- 2 - 1x2 @ 8 feet long
- 6-7 1x3 @ 12 feet long for bed slats
- 50 - 2-1/2" Kreg Screws
- 1-1/4" brad nails
Standard King (Mattress measures 76" x 80")
- 1 - 4x4 @ 6 feet long
- 1 - 2x4 @ 12 feet long - center support, corner supports and center leg
- 1 - 2x6 @ 12 feet long (cut shorter frame boards from this board)
- 2 - 2x6 @ 8 feet long
- 4 - 1x2 @ 8 feet long
- 12 - 14 1x3 @ 8 feet long for the slat system
- 50 - 2-1/2" Kreg Screws
- 1-1/4" brad nails
California King (Mattress measures 72" x 84")
- 1 - 4x4 @ 6 feet long
- 1 - 2x4 @ 12 feet long - center support, corner support and center leg
- 1 - 2x6 @ 12 feet long (cut shorter frame boards from this board)
- 2 - 2x6 @ 8 feet long
- 2 - 1x2 @ 6 feet long
- 2 - 1x2 @ 8 feet long
- 12 - 14 1x3s @ 6 feet long for slat system
- 50 - 2-1/2" Kreg Screws
- 1-1/4" brad nails
Basic Measurements to Adjust From
- LEGS: 4x4 legs cut to 3/4" less than the desired bed frame height. Recommended finished height of beds with mattress is 24"-26"
- FRAME TOP/BOTTOM - 2x6 cut to 7" less than the mattress width
- FRAME SIDES - 2x6 cut to 7" less than the mattress height
- CENTER SUPPORT - 2x4 cut to 4-1/2" less than the mattress height
- CORNER SUPPORTS - Same for all sizes, 6-3/4" long point to long point measurement, both ends cut at 45 degree bevel
- CENTER LEG(S) - Same as 4x4 legs
- TOP TRIM TOP/BOTTOM - Same as mattress width - should be cut to fit
- TOP TRIM SIDES - Mattress length minus 3" - should be cut to fit
- SLATS - Mattress width minus 3" - should be cut to fit
Twin (Mattress measures 38" x 75")
- 4 - 4x4 @ 12-1/4" - bed legs
- 2 - 2x6 @ 31" - frame top and bottom
- 2 - 2x6 @ 68" (for extra long twin (80" mattress length), cut at 73") - frame sides
- 4 - 2x4 or 2x6 @ 6-3/4" - both ends cut at 45 degree bevel, ends perpendicular - corner supports
- 2 - 1x2 @ 38" - top trim, measure and cut to fit
- 2 - 1x2 @ 72" - top trim, measure and cut to fit (77" for extra long twin)
- Slats cut to 35" long, recommend about 12-14 1x3s, but spacing depends on mattress requirements
Full (Mattress measures 54" x 75")
- 4 - 4x4 @ 12-1/4" - bed legs
- 1 - 2x4 or 2x6 @ 12-1/4" long - center leg
- 2 - 2x6 @ 47" - frame top and bottom sides
- 2 - 2x6 @ 68" - frame sides
- 1 - 2x4 @ 70-1/2" - center support
- 4 - 2x4 or 2x6 @ 6-3/4" - both ends cut at 45 degree bevel, ends perpendicular - corner supports
- 2 - 1x2 @ 54" - top trim, measure and cut to fit
- 2 - 1x2 @ 72" - top trim, measure and cut to fit
- Slats cut to 51" long, recommend about 12 1x3s, but spacing depends on mattress requirements
Queen (Mattress measures 60" x 80")
- 4 - 4x4 @ 12-1/4" - bed legs
- 1 - 2x4 or 2x6 @ 12-1/4" long - center leg
- 2 - 2x6 @ 53" - frame top and bottom sides
- 2 - 2x6 @ 73" - frame sides
- 1 - 2x4 @ 75-1/2" - center support
- 4 - 2x4 or 2x6 @ 6-3/4" - both ends cut at 45 degree bevel, ends perpendicular - corner supports
- 2 - 1x2 @ 60" - top trim, measure and cut to fit
- 2 - 1x2 @ 77" - top trim, measure and cut to fit
- Slats cut to 57" long, recommend about 12 1x3s, but spacing depends on mattress requirements
Standard King (Mattress measures 76" x 80")
- 4 - 4x4 @ 12-1/4" - bed legs
- 1 - 2x4 or 2x6 @ 12-1/4" long - center leg
- 2 - 2x6 @ 69" - frame top and bottom sides
- 2 - 2x6 @ 73" - frame sides
- 1 - 2x4 @ 75-1/2" - center support
- 4 - 2x4 or 2x6 @ 6-3/4" - both ends cut at 45 degree bevel, ends perpendicular - corner supports
- 2 - 1x2 @ 76" - top trim, measure and cut to fit
- 2 - 1x2 @ 77" - top trim, measure and cut to fit
- Slats cut to 73" long, recommend about 12 1x3s, but spacing depends on mattress requirements
California King (Mattress measures 72" x 84")
- 4 - 4x4 @ 12-1/4" - bed legs
- 1 - 2x4 or 2x6 @ 12-1/4" long - center leg
- 2 - 2x6 @ 65" - frame top and bottom sides
- 2 - 2x6 @ 77" - frame sides
- 1 - 2x4 @ 79-1/2" - center support
- 4 - 2x4 or 2x6 @ 6-3/4" - both ends cut at 45 degree bevel, ends perpendicular - corner supports
- 2 - 1x2 @ 72" - top trim, measure and cut to fit
- 2 - 1x2 @ 81" - top trim, measure and cut to fit
- Slats cut to 69" long, recommend about 12 1x3s, but spacing depends on mattress requirements


Once finished this project becomes very large, especially for the king sizes.
You may wish to cut and prefinish the legs, frame boards and 1x2 top trim first, then assemble everything in the room.
Instructions
Step 1
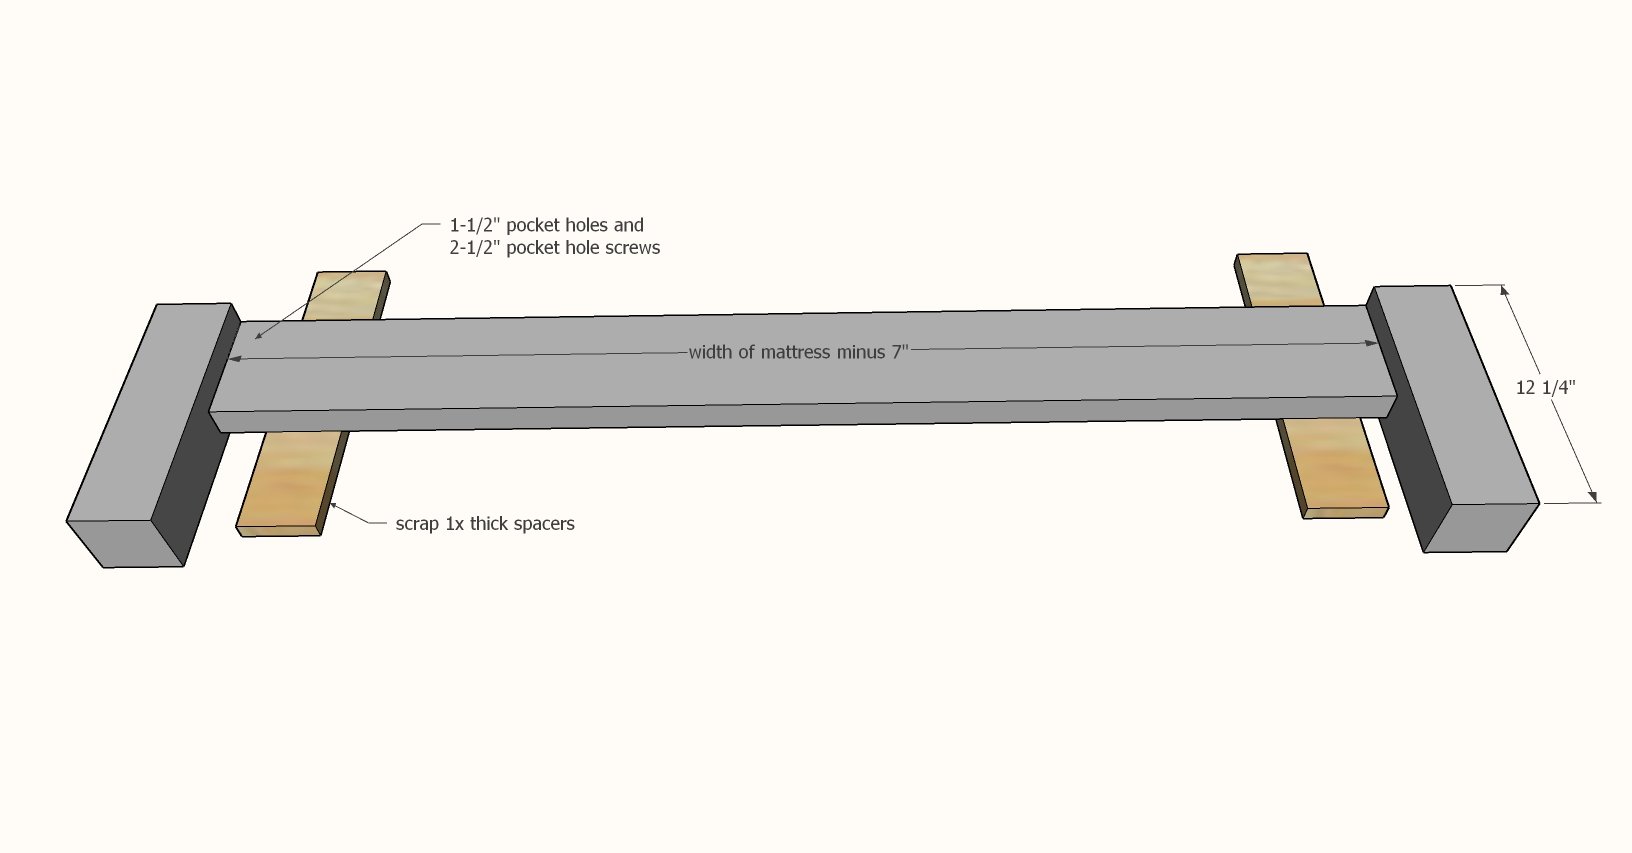
Build the "headboard" and "footboard" sections first by attaching the 2x6 top and bottom frame pieces to two 4x4 legs. Use 1x scrap wood to block up the 2x6, so it is inset on the 4x4 legs by 3/4". Two 1-1/2" pocket holes and 2-1/2" pocket hole screws per joint.
Step 2
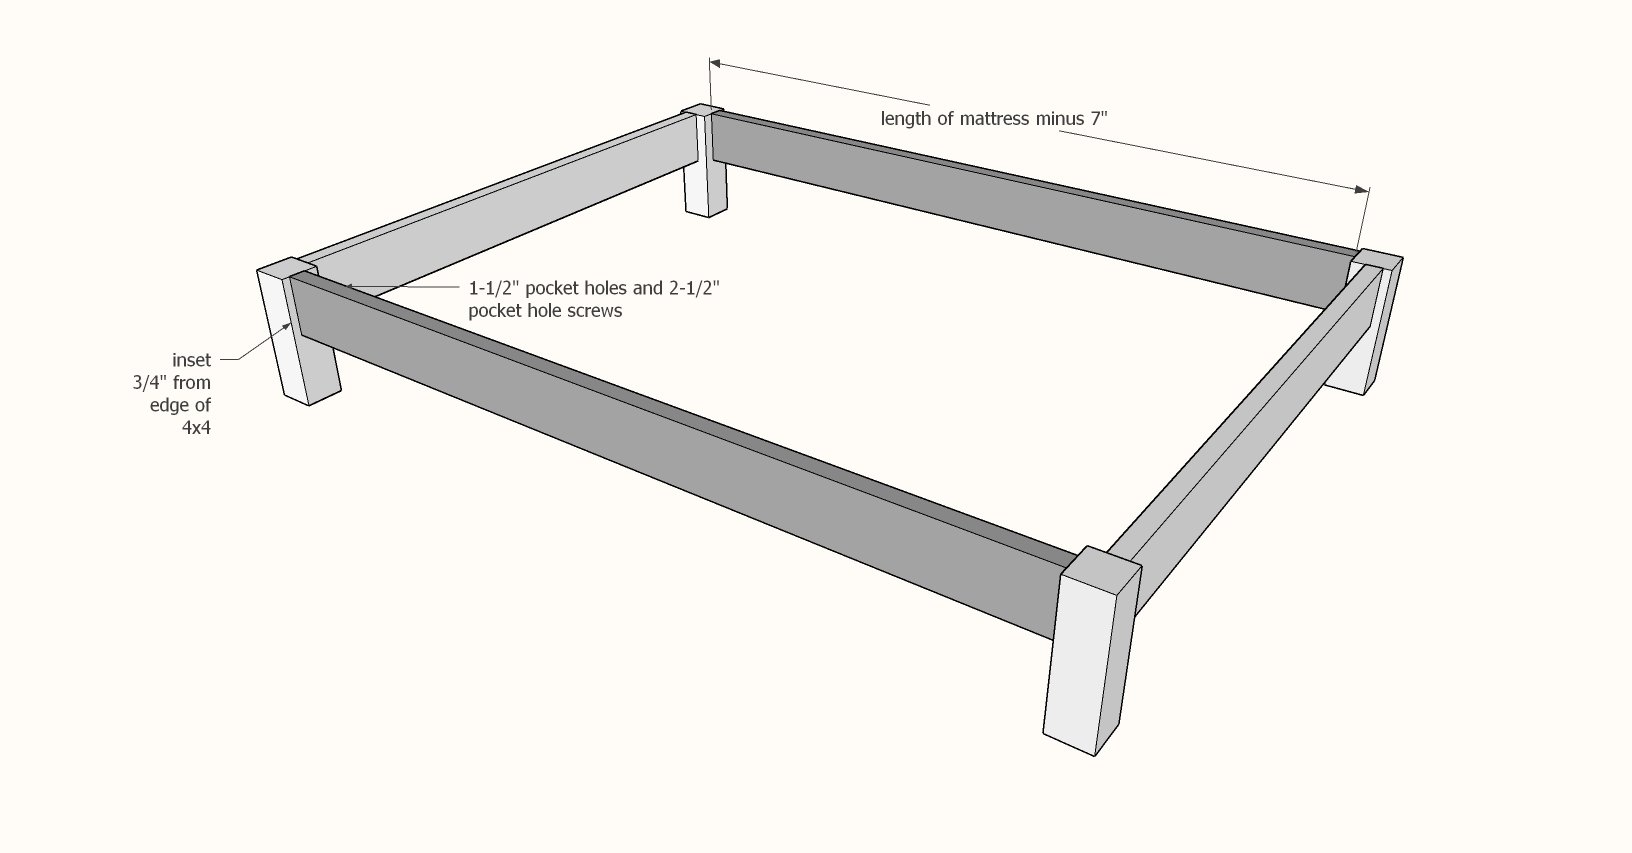
Connect the "headboard" and "footboard" pieces together with the longer frame boards.
This time use three pocket holes (same 1-1/2" thick material setting and 2-1/2" screws).
Again, inset the frame boards on the legs.
Step 3

Adjust the frame for square by taking diagonal measurements and adjusting until the diagonals are exactly the same.
Then attach the corner supports as shown, screwing to the legs and the frame boards.
Step 4
Skip this step for twin beds.
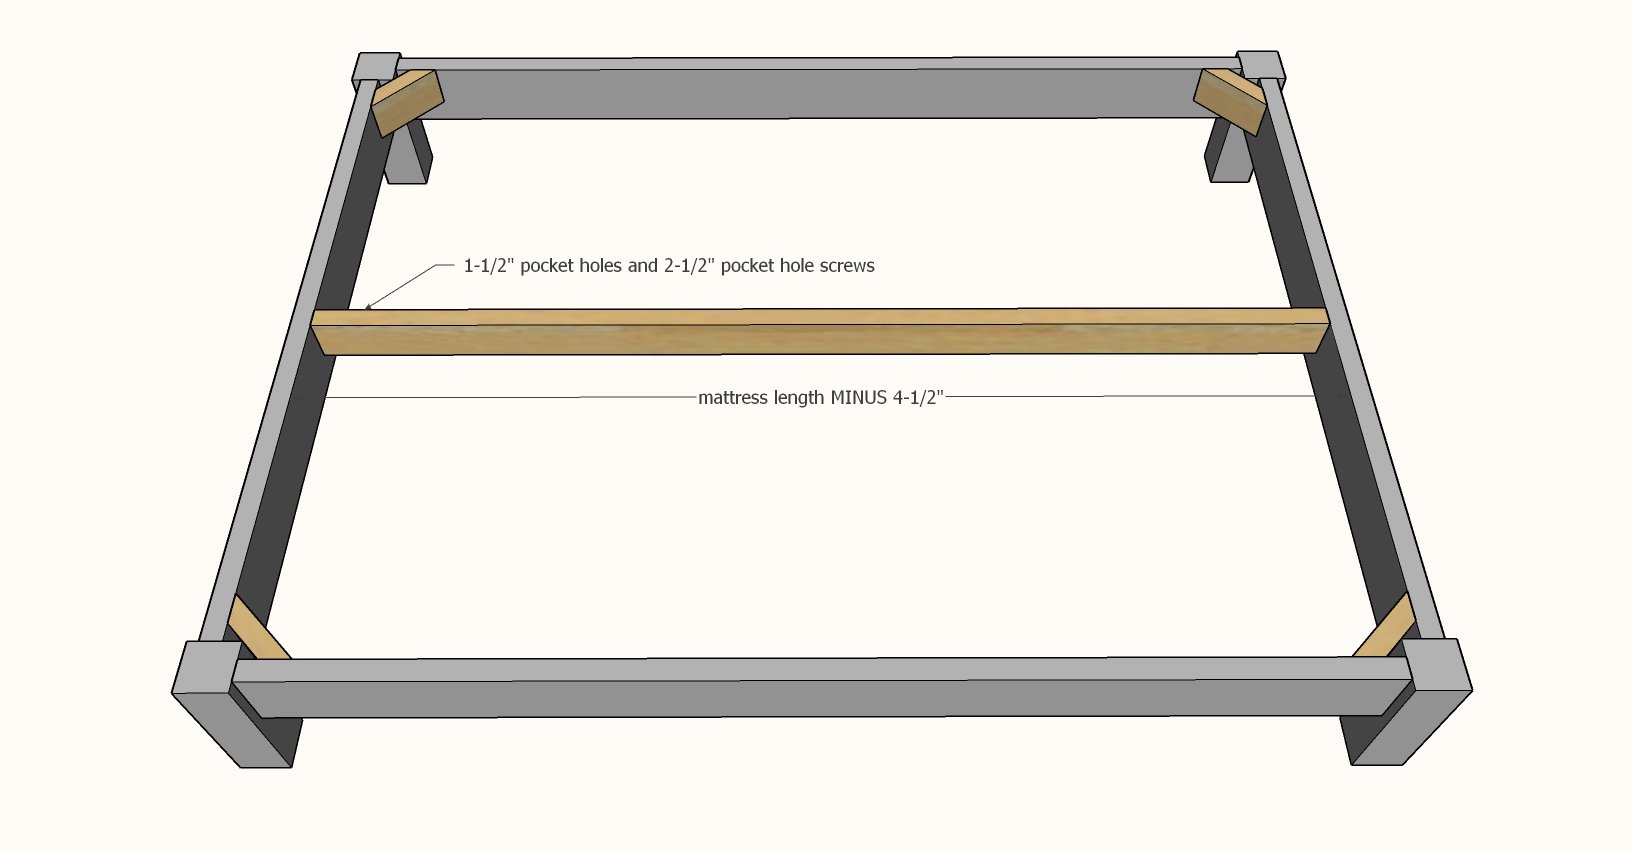
Mark the center of the bed between the "headboard" and "footboard" and add the center support with two pocket holes per end.
Step 5
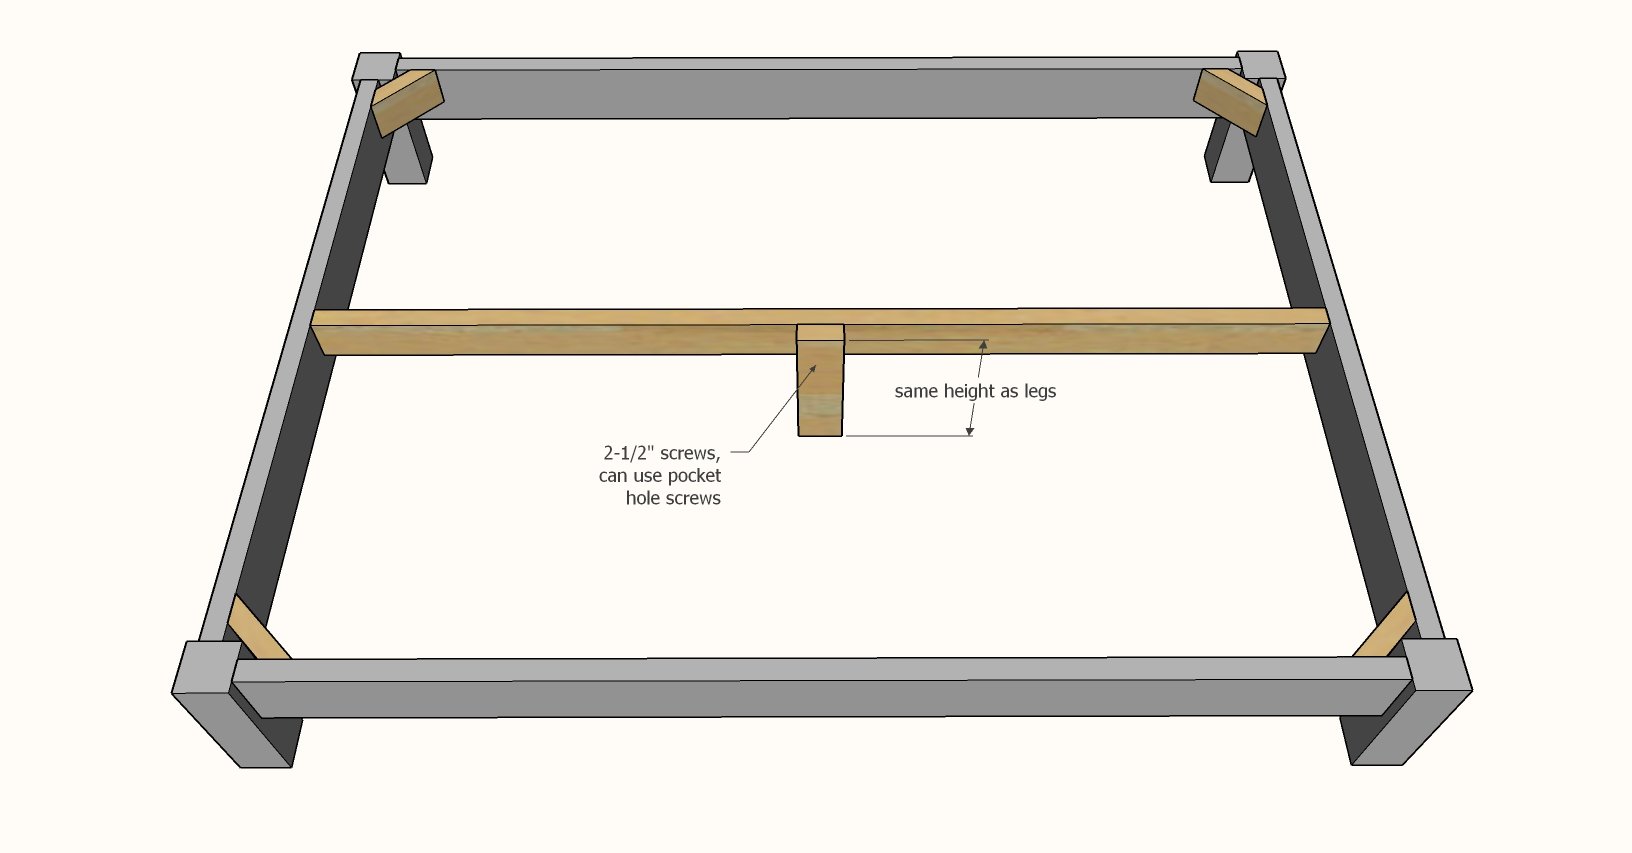
Attach leg to the center support with four 2-1/2" screws.
Step 6
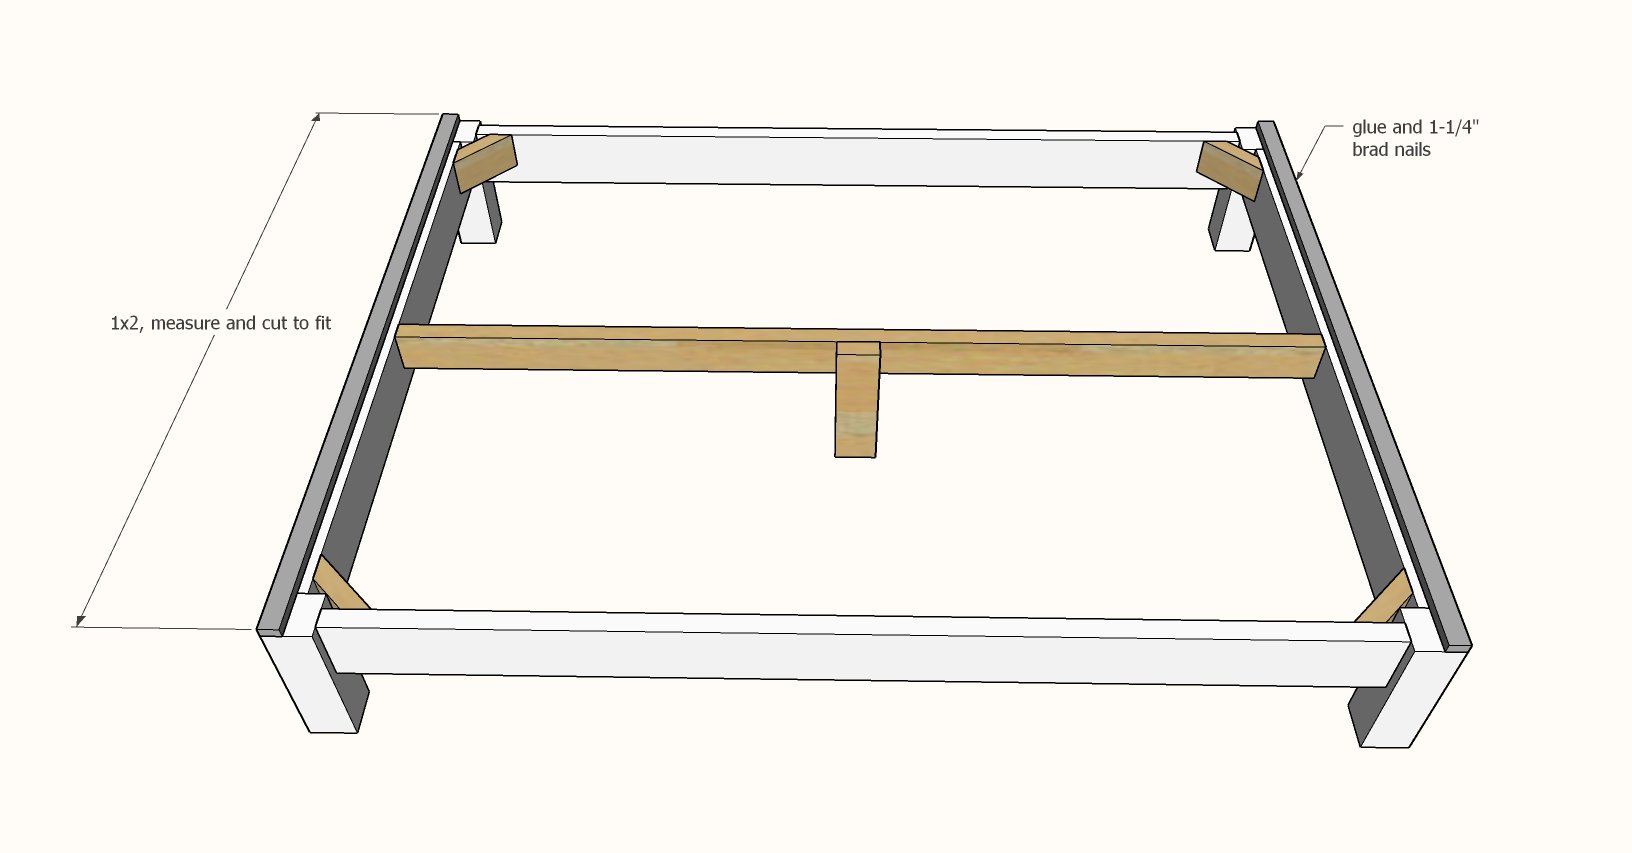
Measure and cut the two trim pieces. Glue and nail to the top of the bed.
Step 7
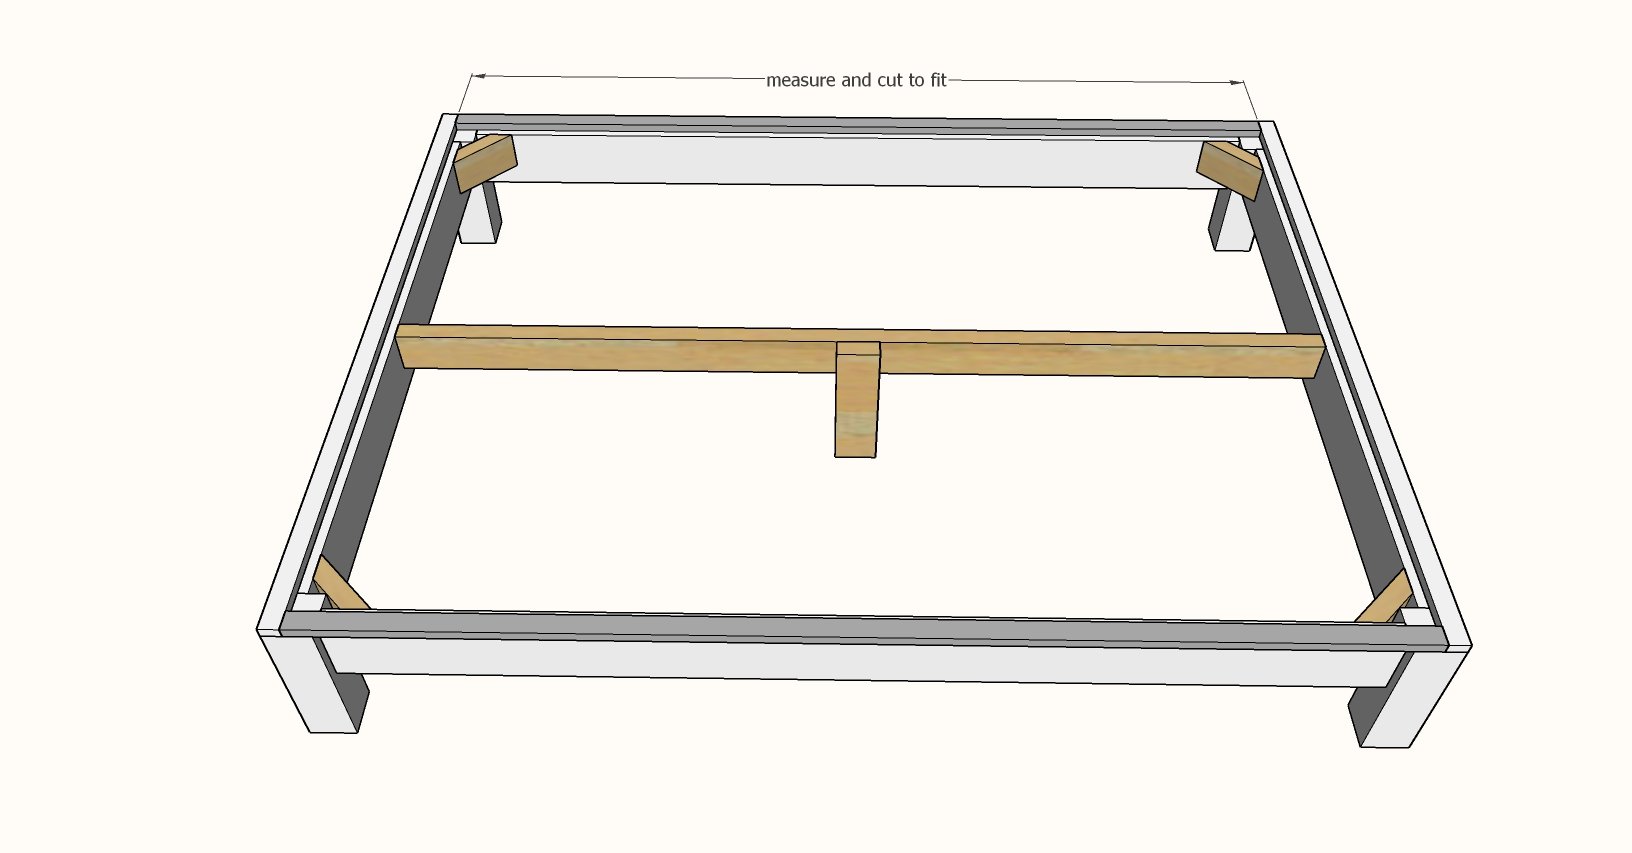
Measure and cut the side trim pieces. Glue and nail to the top of the bed.
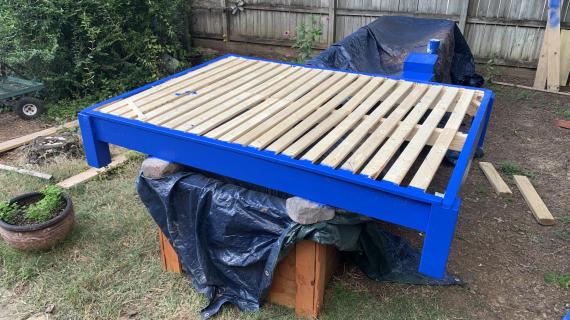
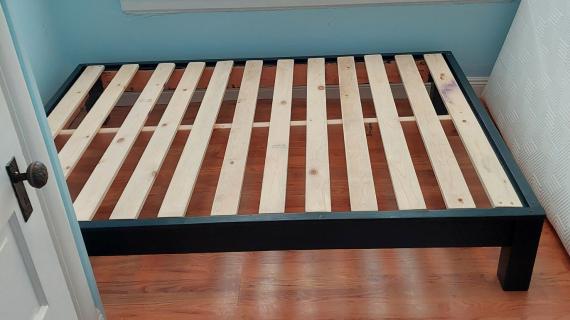
Step 8
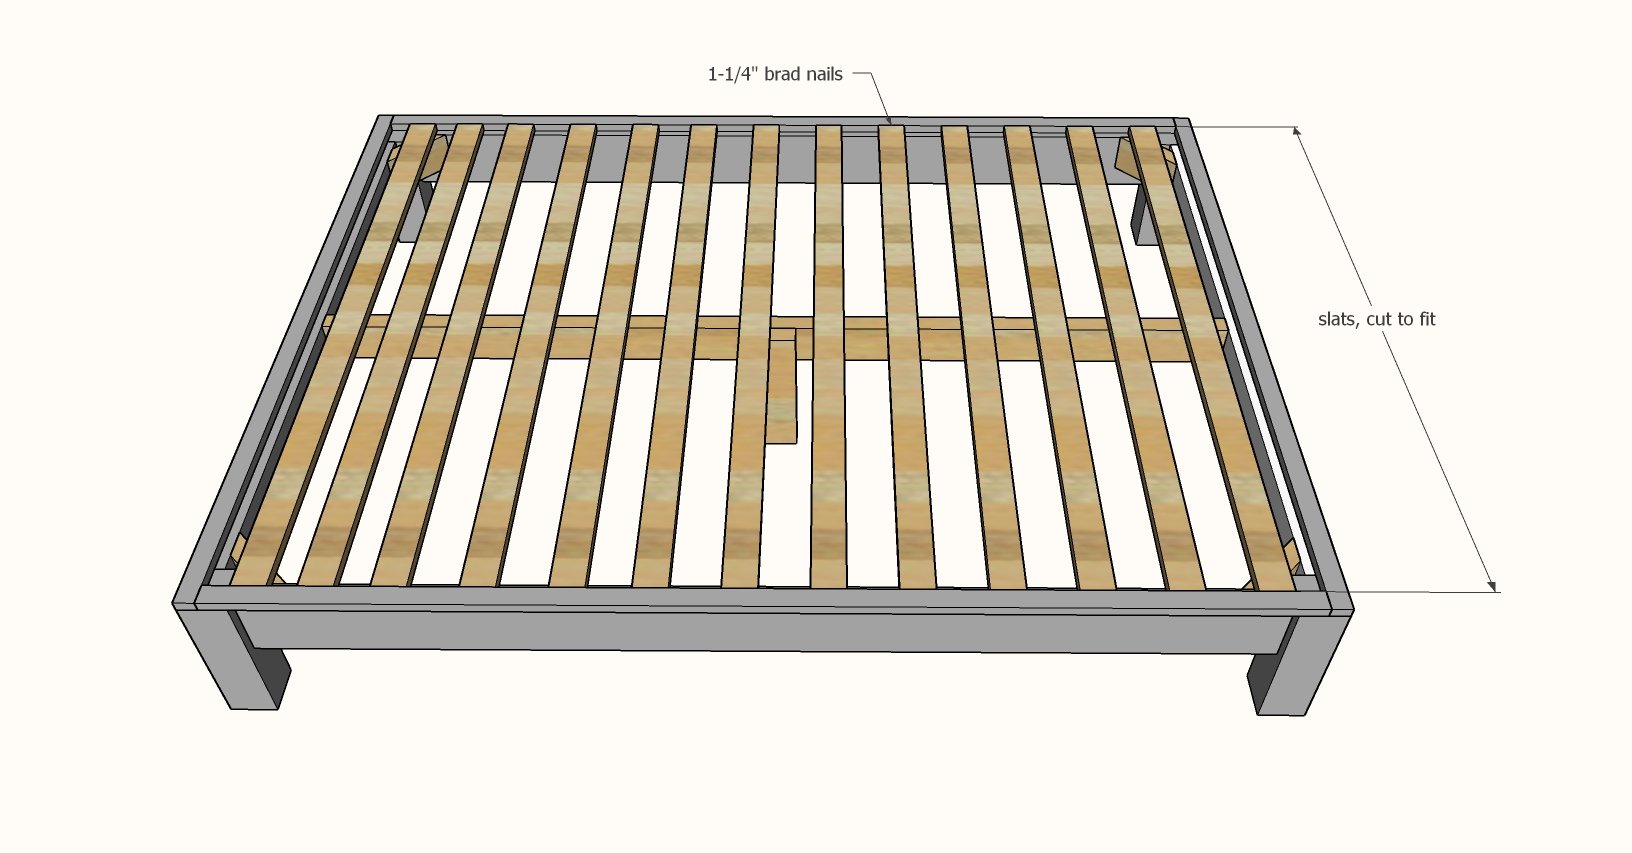
Measure and cut slats. Lay down in bed. Attach with 1-1/4" brad nails and glue.