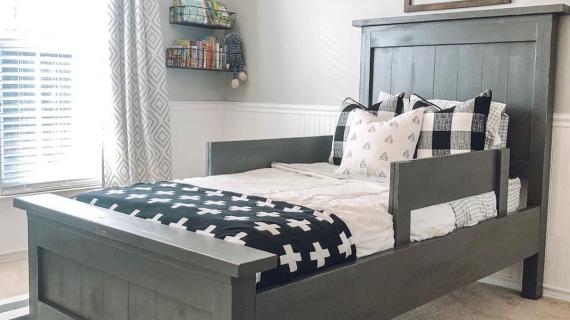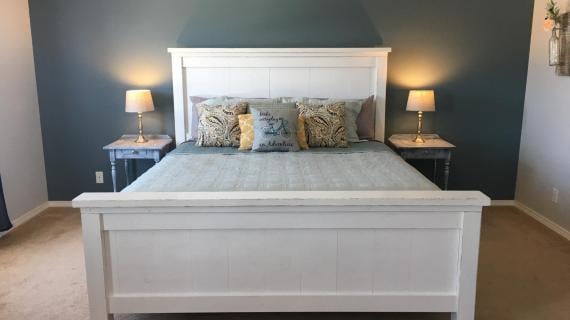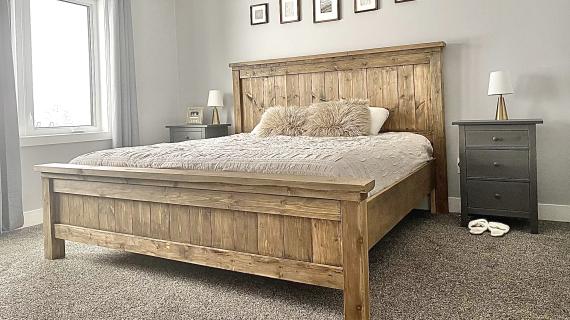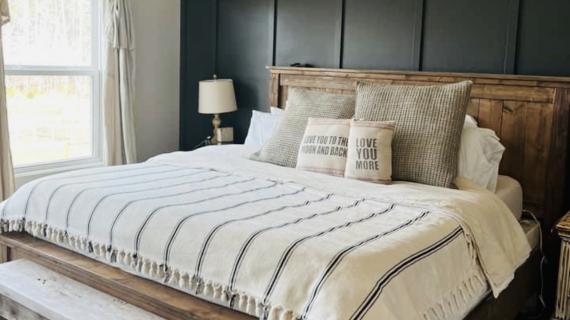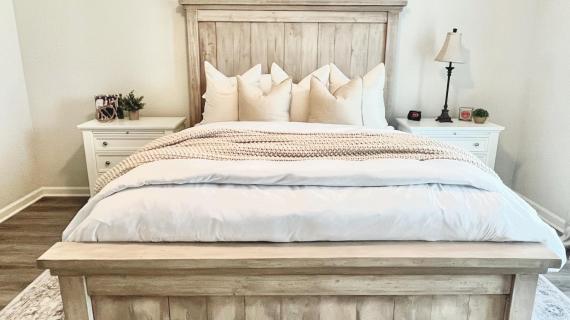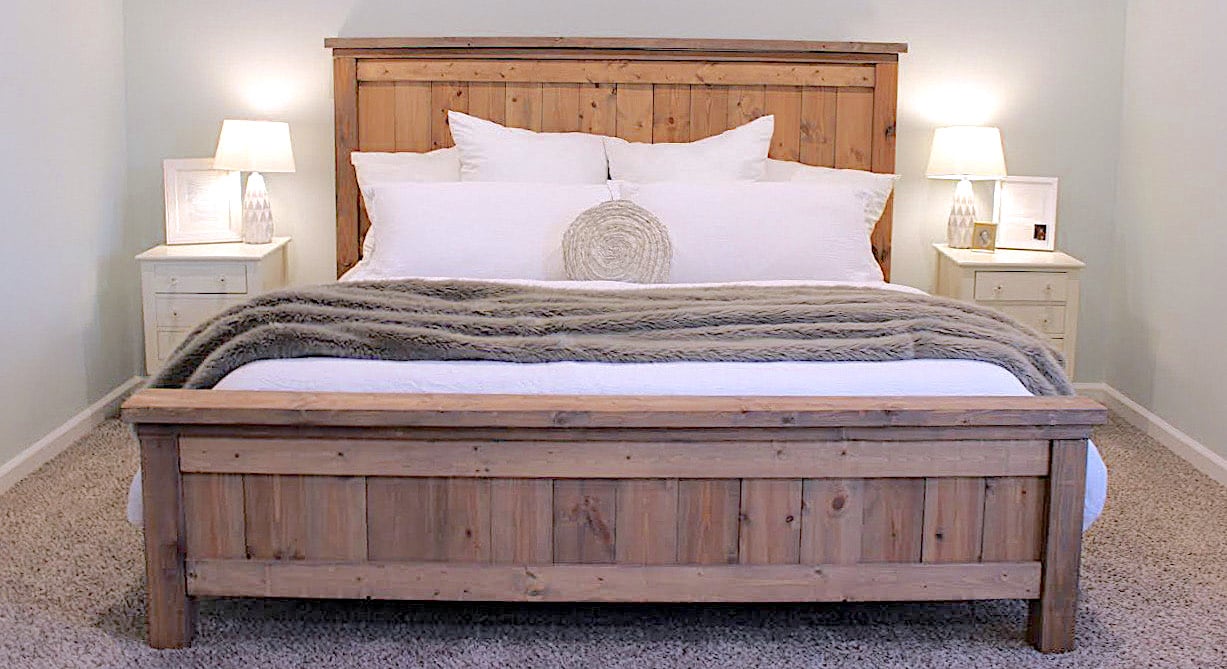

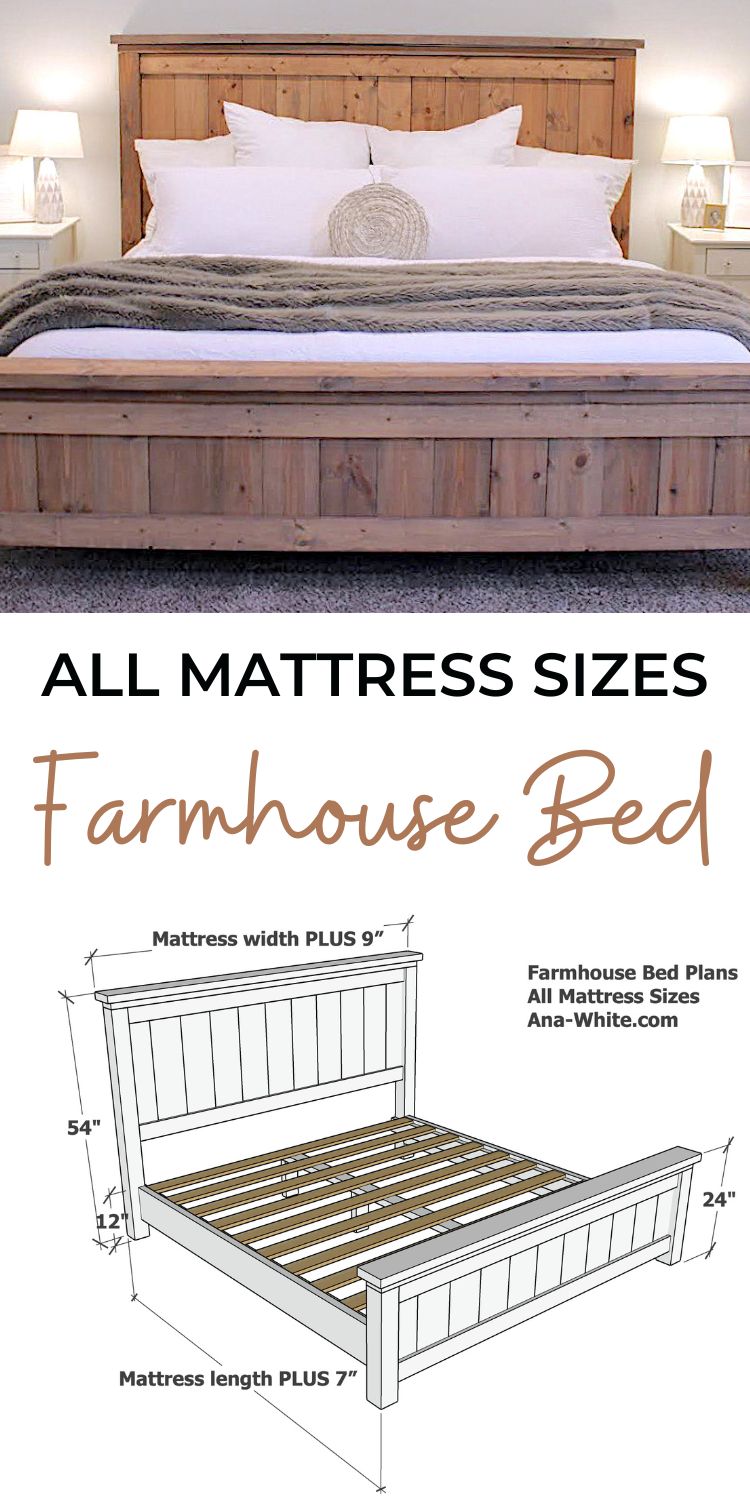
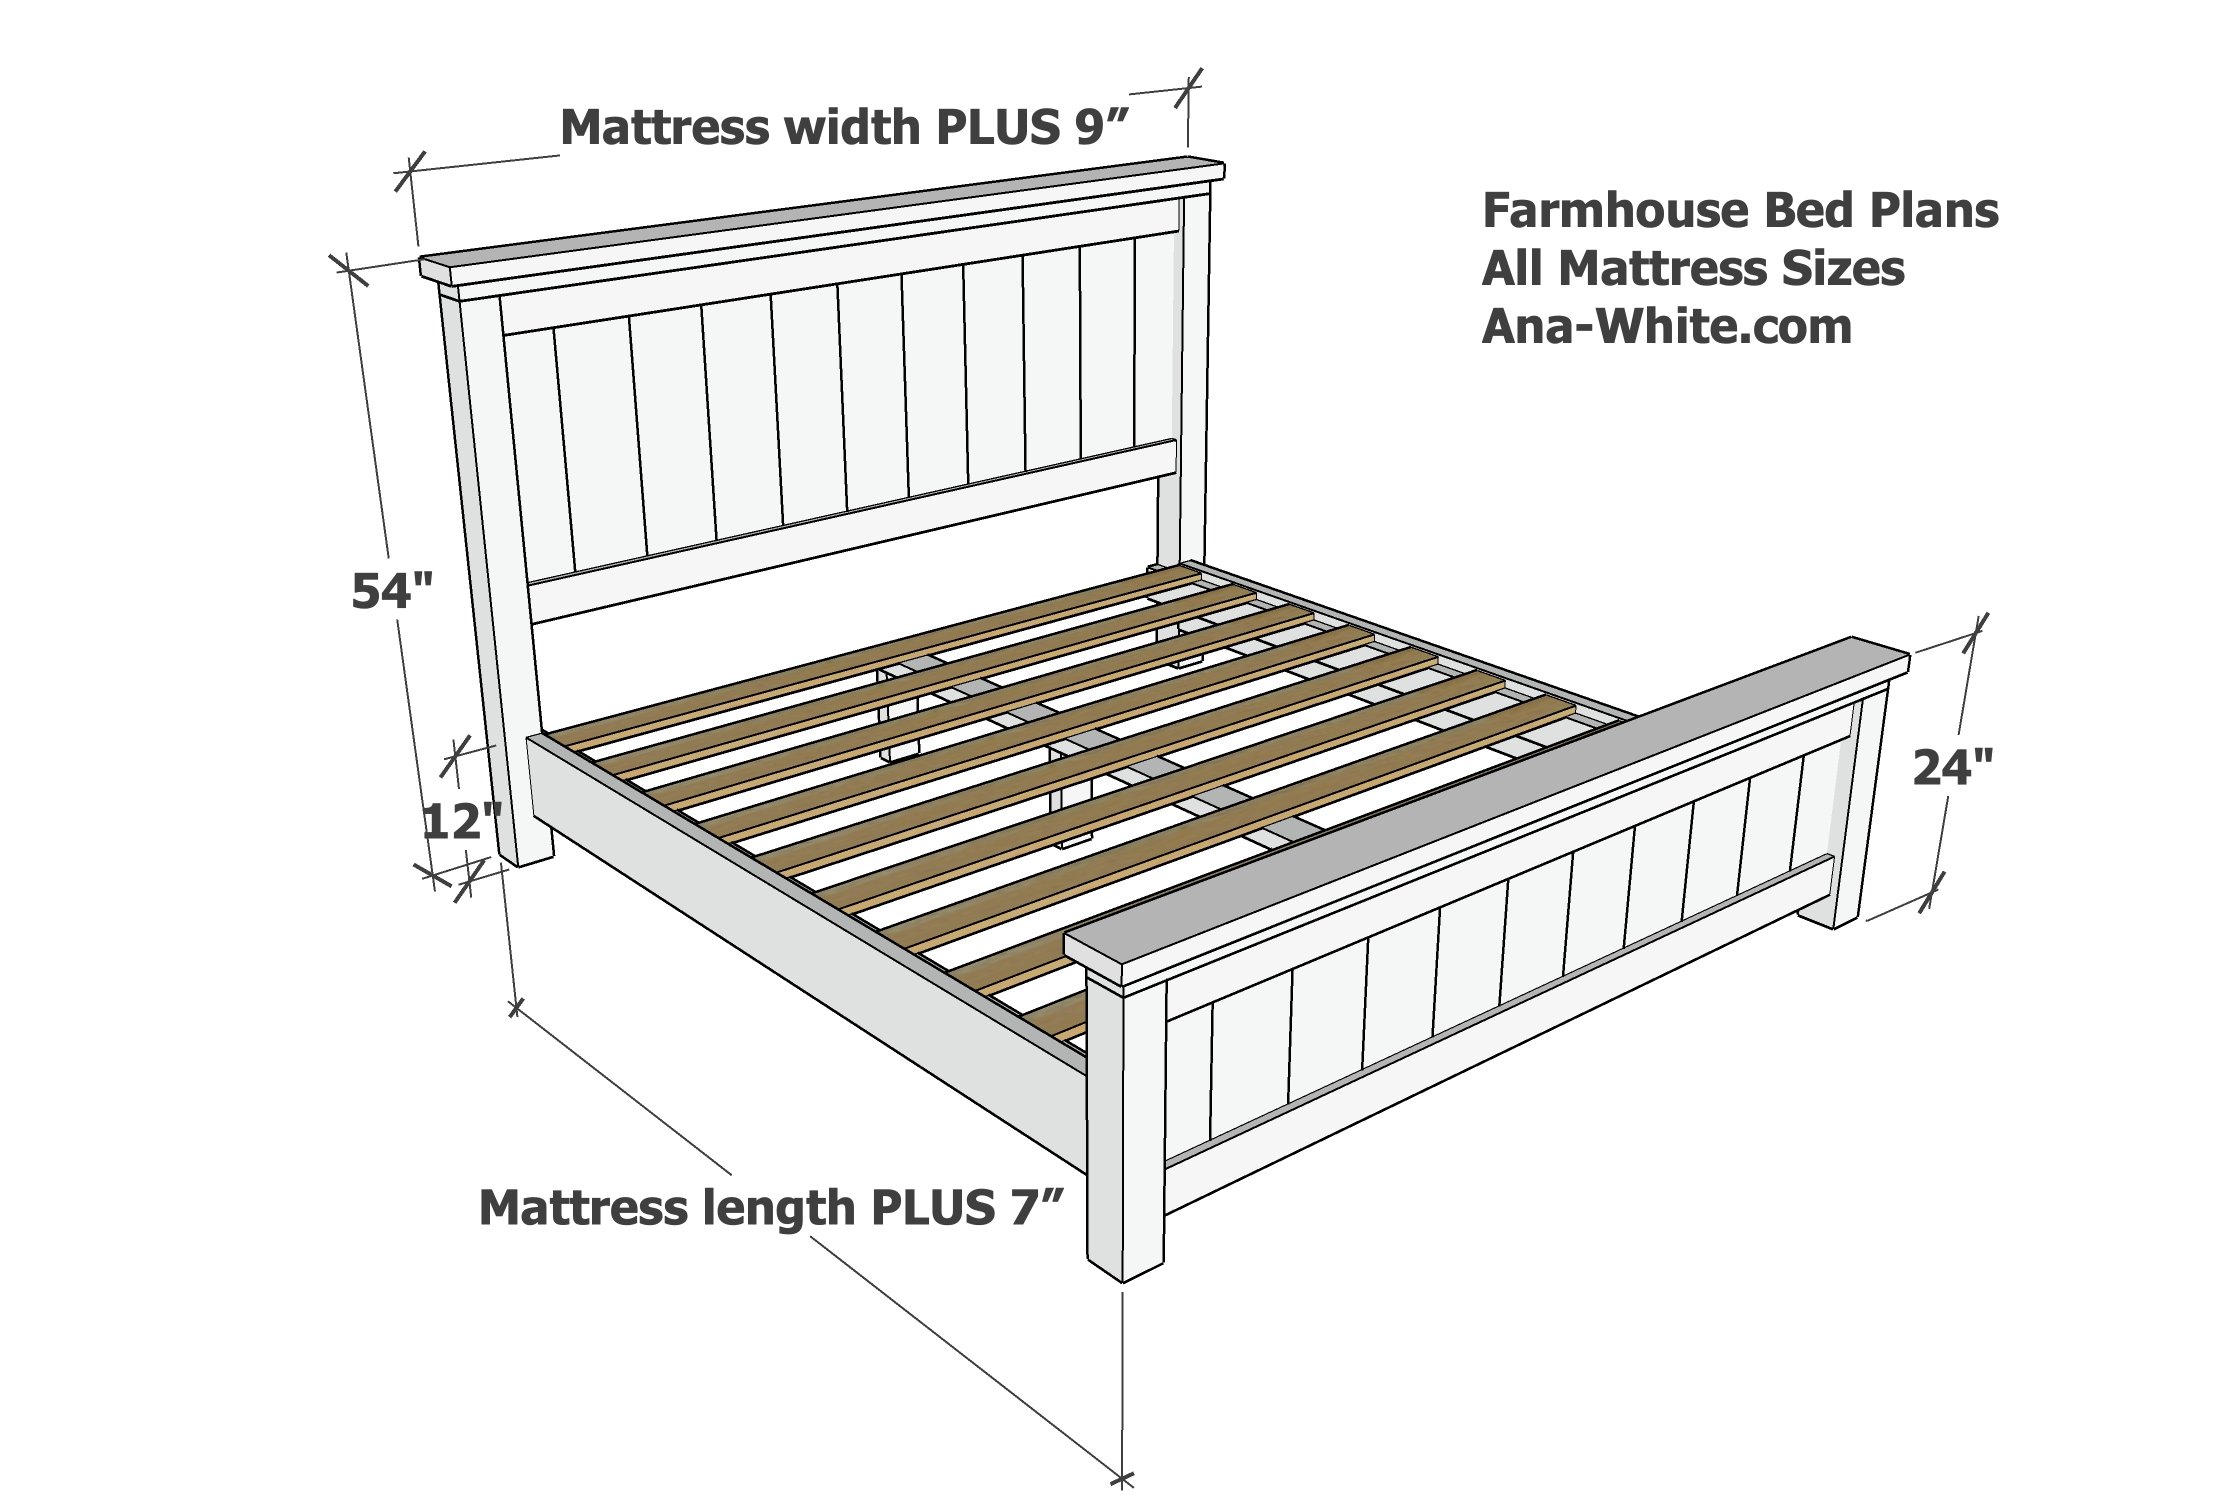
Free plans to build Ana White's Farmhouse Bed. This is an updated plan designed to be easier to build. All mattress sizes are included. Step by step diagrams and video tutorial.
Pin For Later!
Preparation
Twin Size (38" x 75")
- 2 - 4x4 @ 6 feet long
- 2 - 1x4 @ 8 feet long
- 3 - 2x4 @ 8 feet long
- 1 - 2x6 @ 8 feet long
- 2 - 2x8 @ 8 feet long
- 3 - 1x8 @ 8 feet long
- 5 - 1x4 @ 8 feet long (slats)
- 16 - 1-1/4" pocket hole screws
- 12 - 2-1/2" pocket hole screws
- 30 - 2-1/2" self tapping star bit wood construction screws (SPAX or GRK brand or similar)
- 1-1/4" brad nails
- wood glue
Full size (54" x 75")
- 2 - 4x4 @ 6 feet long
- 2 - 1x4 @ 10 feet long
- 5 - 2x4 @ 8 feet long
- 1 - 2x6 @ 12 feet long
- 2 - 2x8 @ 8 feet long
- 4 - 1x8 @ 8 feet long
- 5- 1x4 @ 10 feet long (slats)
- 16 - 1-1/4" pocket hole screws
- 12 - 2-1/2" pocket hole screws
- 50 - 2-1/2" self tapping star bit wood construction screws (SPAX or GRK brand or similar)
- 1-1/4" brad nails
- wood glue
Queen Size (60" x 80")
- 2 - 4x4 @ 6 feet long
- 2 - 1x4 @ 12 feet long
- 5 - 2x4 @ 8 feet long
- 2 - 2x6 @ 6 feet long
- 2 - 2x8 @ 8 feet long
- 4 - 1x8 @ 8 feet long
- 1 - 1x8 @ 4 feet long
- 6 - 1x4 @ 10 feet long (slats)
- 16 - 1-1/4" pocket hole screws
- 12 - 2-1/2" pocket hole screws
- 50 - 2-1/2" self tapping star bit wood construction screws (SPAX or GRK brand or similar)
- 1-1/4" brad nails
- wood glue
Standard King (76" x 80")
- 2 - 4x4 @ 6 feet long
- 4 - 1x4 @ 8 feet long
- 5 - 2x4 @ 8 feet long
- 2 - 2x6 @ 8 feet long
- 2 - 2x8 @ 8 feet long
- 5 - 1x8 @ 8 feet long
- 1- 1x8 @ 4 feet long
- 11 - 1x4 @ 8 feet long (slats)
- 16 - 1-1/4" pocket hole screws
- 12 - 2-1/2" pocket hole screws
- 50 - 2-1/2" self tapping star bit wood construction screws (SPAX or GRK brand or similar)
- 1-1/4" brad nails
- wood glue
California King (72" x 84")
- 2 - 4x4 @ 6 feet long
- 4 - 1x4 @ 6 feet long
- 5 - 2x4 @ 8 feet long
- 2 - 2x6 @ 8 feet long
- 2 - 2x8 @ 8 feet long
- 5 - 1x8 @ 8 feet long
- 12 - 1x4 @ 6 feet long (slats)
- 16 - 1-1/4" pocket hole screws
- 12 - 2-1/2" pocket hole screws
- 50 - 2-1/2" self tapping star bit wood construction screws (SPAX or GRK brand or similar)
- 1-1/4" brad nails
- wood glue
Twin Size (38" x 75")
- 2 - 4x4 @ 51" - headboard legs
- 2 - 4x4 @ 20-1/2" - footboard legs
- 4 - 1x4 @ 38" - headboard/footboard trim
- 2 - 2x4 @ 45" - headboard/footboard top
- 2 - 2x6 @ 47" - headboard footboard top
- 6 - 1x8 @ 30" - headboard panel boards
- 6 - 1x8 @ 18" - footboard panel boards
- 2 - 2x8 @ 75"- siderails
- 2 - 2x4 @ 79-3/4" - cleats
- 10 - 1x4 @ 38" - slats
- Twin size does not require inner support system
Full size (54" x 75")
- 2 - 4x4 @ 51" - headboard legs
- 2 - 4x4 @ 20-1/2" - footboard legs
- 4 - 1x4 @ 54" - headboard/footboard trim
- 2 - 2x4 @ 61" - headboard/footboard top
- 2 - 2x6 @ 63" - headboard footboard top
- 8 - 1x8 @ 30" - headboard panel boards
- 8 - 1x8 @ 18" - footboard panel boards
- 2 - 2x8 @ 75" - siderails
- 2 - 2x4 @ 79-3/4" - cleats
- 1 - 2x4 @ 76-3/4" - center support
- 3 - 2x4 @ 9-1/2" - center support main legs
- 1 - 2x4 @ 6-1/2" - center support footboard leg
- 10 - 1x4 @ 54" - slats
Queen Size (60" x 80")
- 2 - 4x4 @ 51" - headboard legs
- 2 - 4x4 @ 20-1/2" - footboard legs
- 4 - 1x4 @ 60" - headboard/footboard trim
- 2 - 2x4 @ 67" - headboard/footboard top
- 2 - 2x6 @ 69" - headboard footboard top
- 9 - 1x8 @ 30" - headboard panel boards
- 9 - 1x8 @ 18" - footboard panel boards
- 2 - 2x8 @ 80"- siderails
- 2 - 2x4 @ 84-3/4" - cleats
- 1 - 2x4 @ 81-3/4" - center support
- 3 - 2x4 @ 9-1/2" - center support main legs
- 1 - 2x4 @ 6-1/2" - center support footboard leg
- 11 - 1x4 @ 60" - slats
Standard King (76" x 80")
- 2 - 4x4 @ 51" - headboard legs
- 2 - 4x4 @ 20-1/2" - footboard legs
- 4 - 1x4 @ 76" - headboard/footboard trim
- 2 - 2x4 @ 83" - headboard/footboard top
- 2 - 2x6 @ 85" - headboard footboard top
- 11 - 1x8 @ 30" - headboard panel boards
- 11- 1x8 @ 18" - footboard panel boards
- 2 - 2x8 @ 80"- siderails
- 2 - 2x4 @ 84-3/4" - cleats
- 1 - 2x4 @ 81-3/4" - center support
- 3 - 2x4 @ 9-1/2" - center support main legs
- 1 - 2x4 @ 6-1/2" - center support footboard leg
- 11 - 1x4 @ 76" - slats
California King (72" x 84")
- 2 - 4x4 @ 51" - headboard legs
- 2 - 4x4 @ 20-1/2" - footboard legs
- 4 - 1x4 @ 72" - headboard/footboard trim
- 2 - 2x4 @ 79" - headboard/footboard top
- 2 - 2x6 @ 81" - headboard footboard top
- 10 - 1x8 @ 30" - headboard panel boards
- 10 - 1x8 @ 18" - footboard panel boards
- 2 - 2x8 @ 84" - siderails
- 2 - 2x4 @ 88-3/4" - cleats
- 1 - 2x4 @ 85-3/4" - center support
- 3 - 2x4 @ 9-1/2" - center support main legs
- 1 - 2x4 @ 6-1/2" - center support footboard leg
- 11 - 1x4 @ 72" - slats
You will need a 10" miter saw or large circular saw to cut the 4x4 legs. A miter saw is recommended for precise cuts and a professional looking end product.
Make longest cuts first to get all cuts on boards in shopping list.
All boards can be precut.
A tablesaw is recommended for the final panel boards. If you do not have a tablesaw, you can cut with a circular saw, but this is difficult to get straight. You can add trim (1x4) over a less than perfect rip cut if needed.


Instructions
Step 1
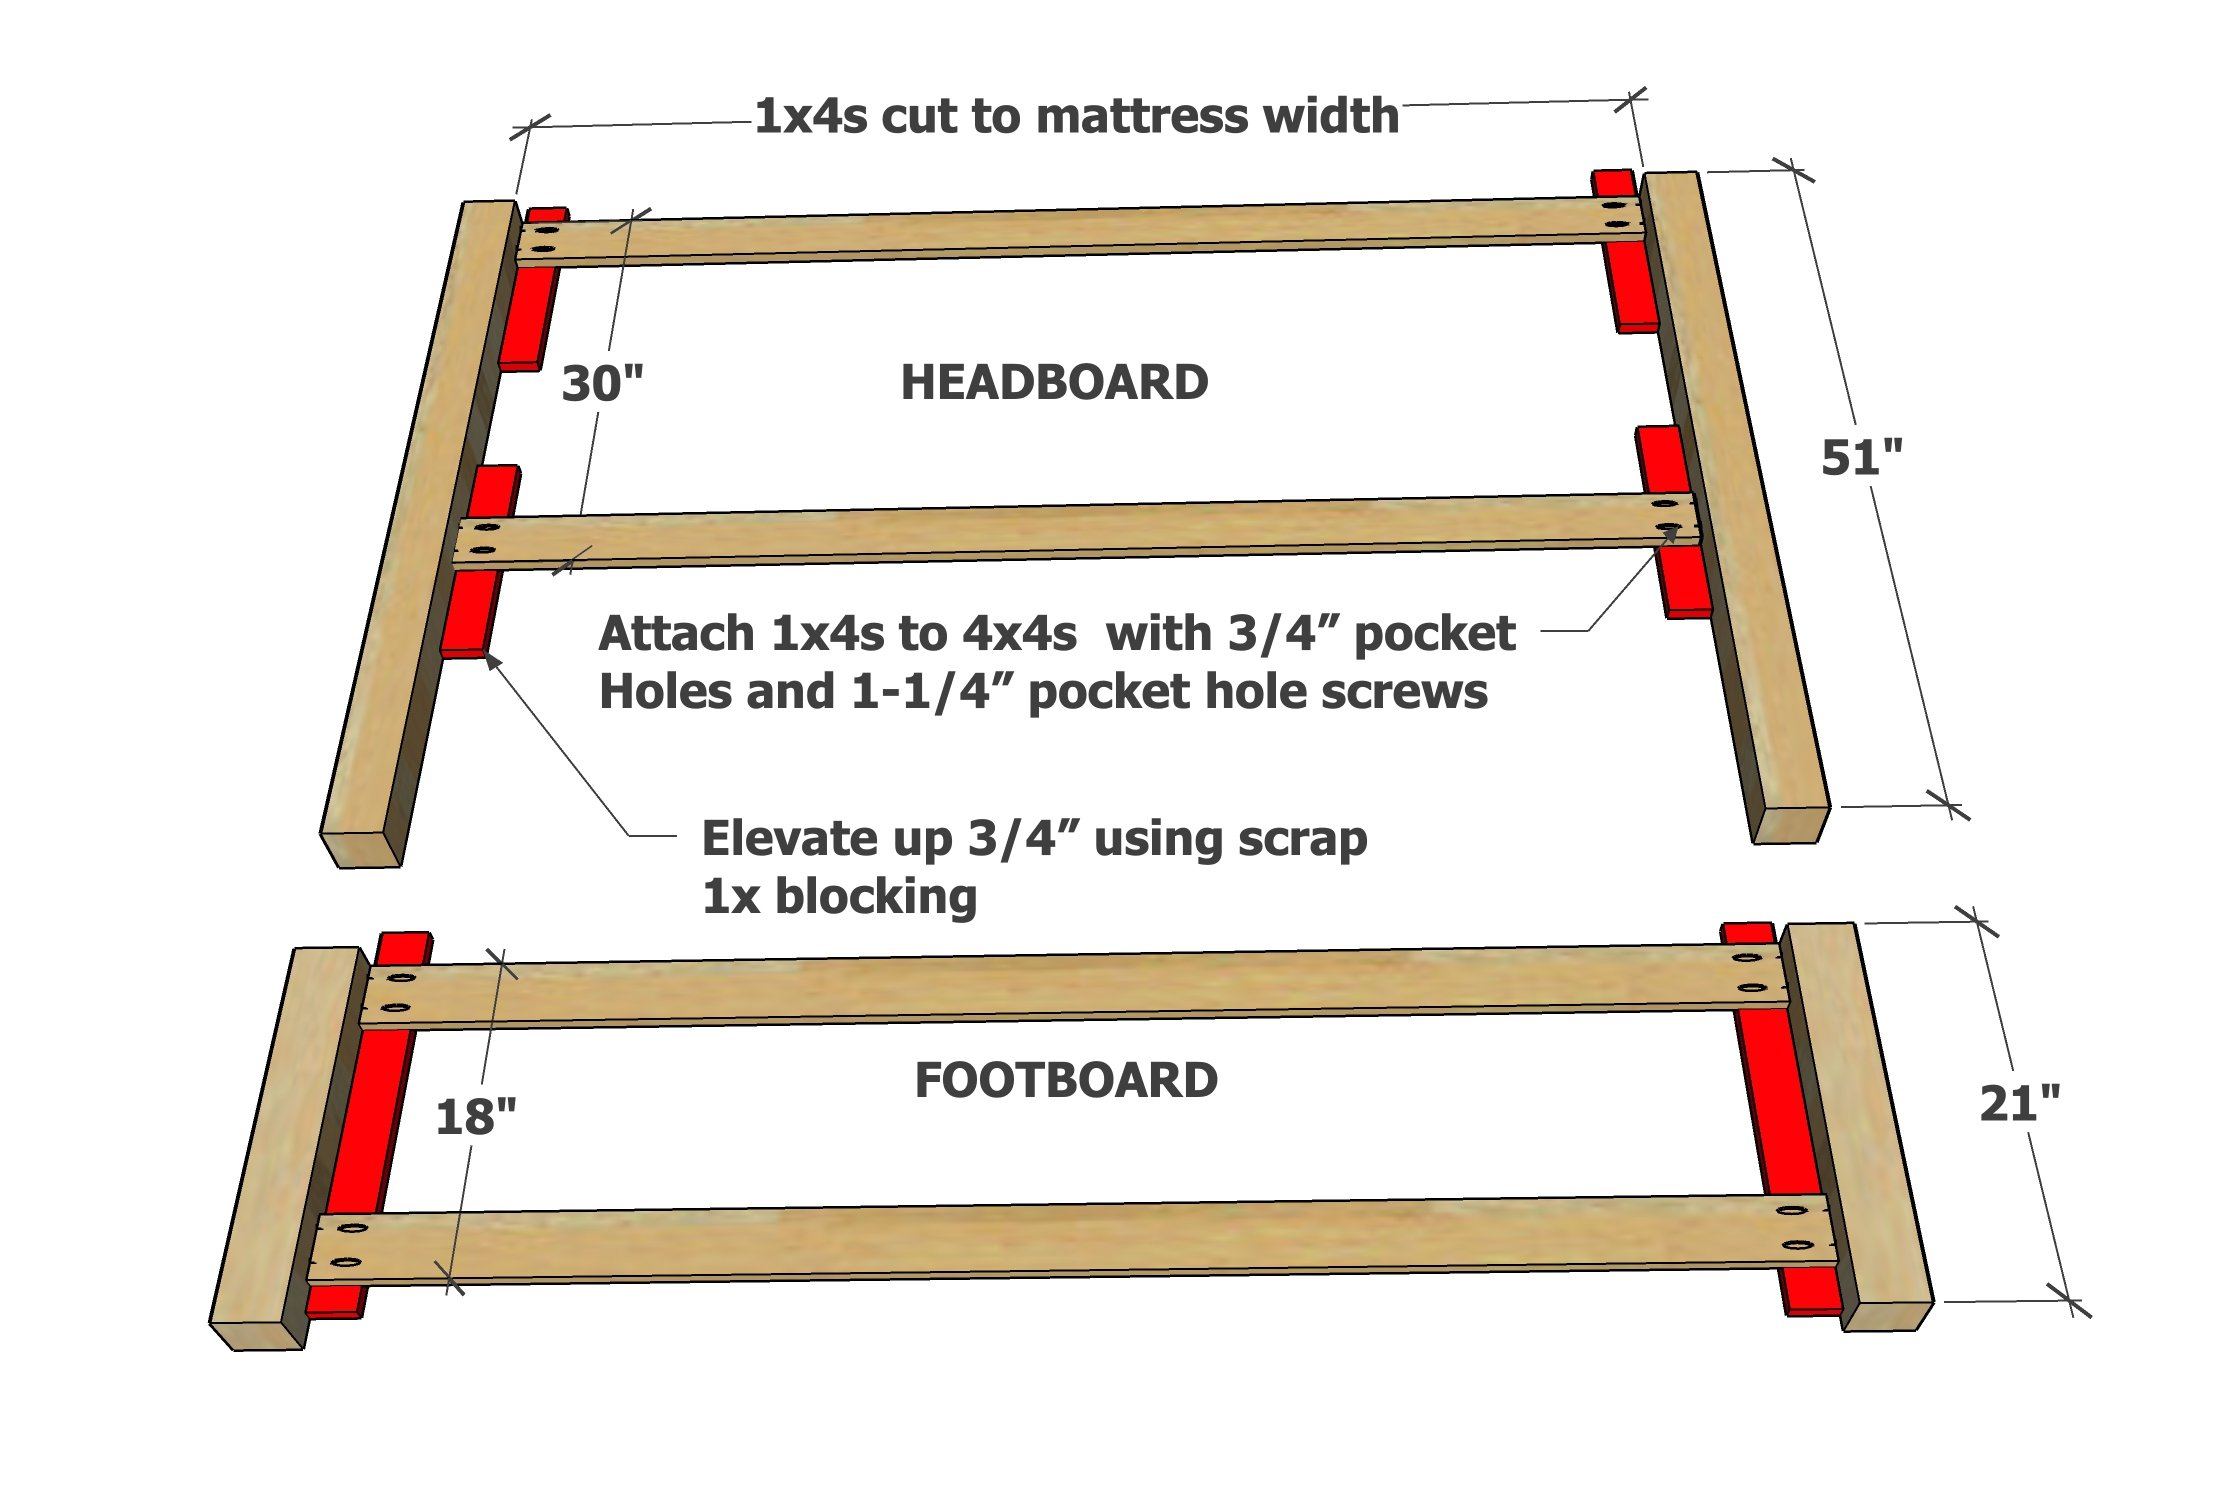
Drill two pocket holes on each end of the 1x4 boards.
Face the nicest side of the 4x4 down.
Elevate 1x4 up on scrap 1x material. Attach to the 4x4s with 1-1/4" pocket hole screws.
NOTE: The footboard length was shortened by 1/2" to allow for cuts to fit on a 6' long 4x4 boards.
As shown, headboard and footboard are face down.
Step 2
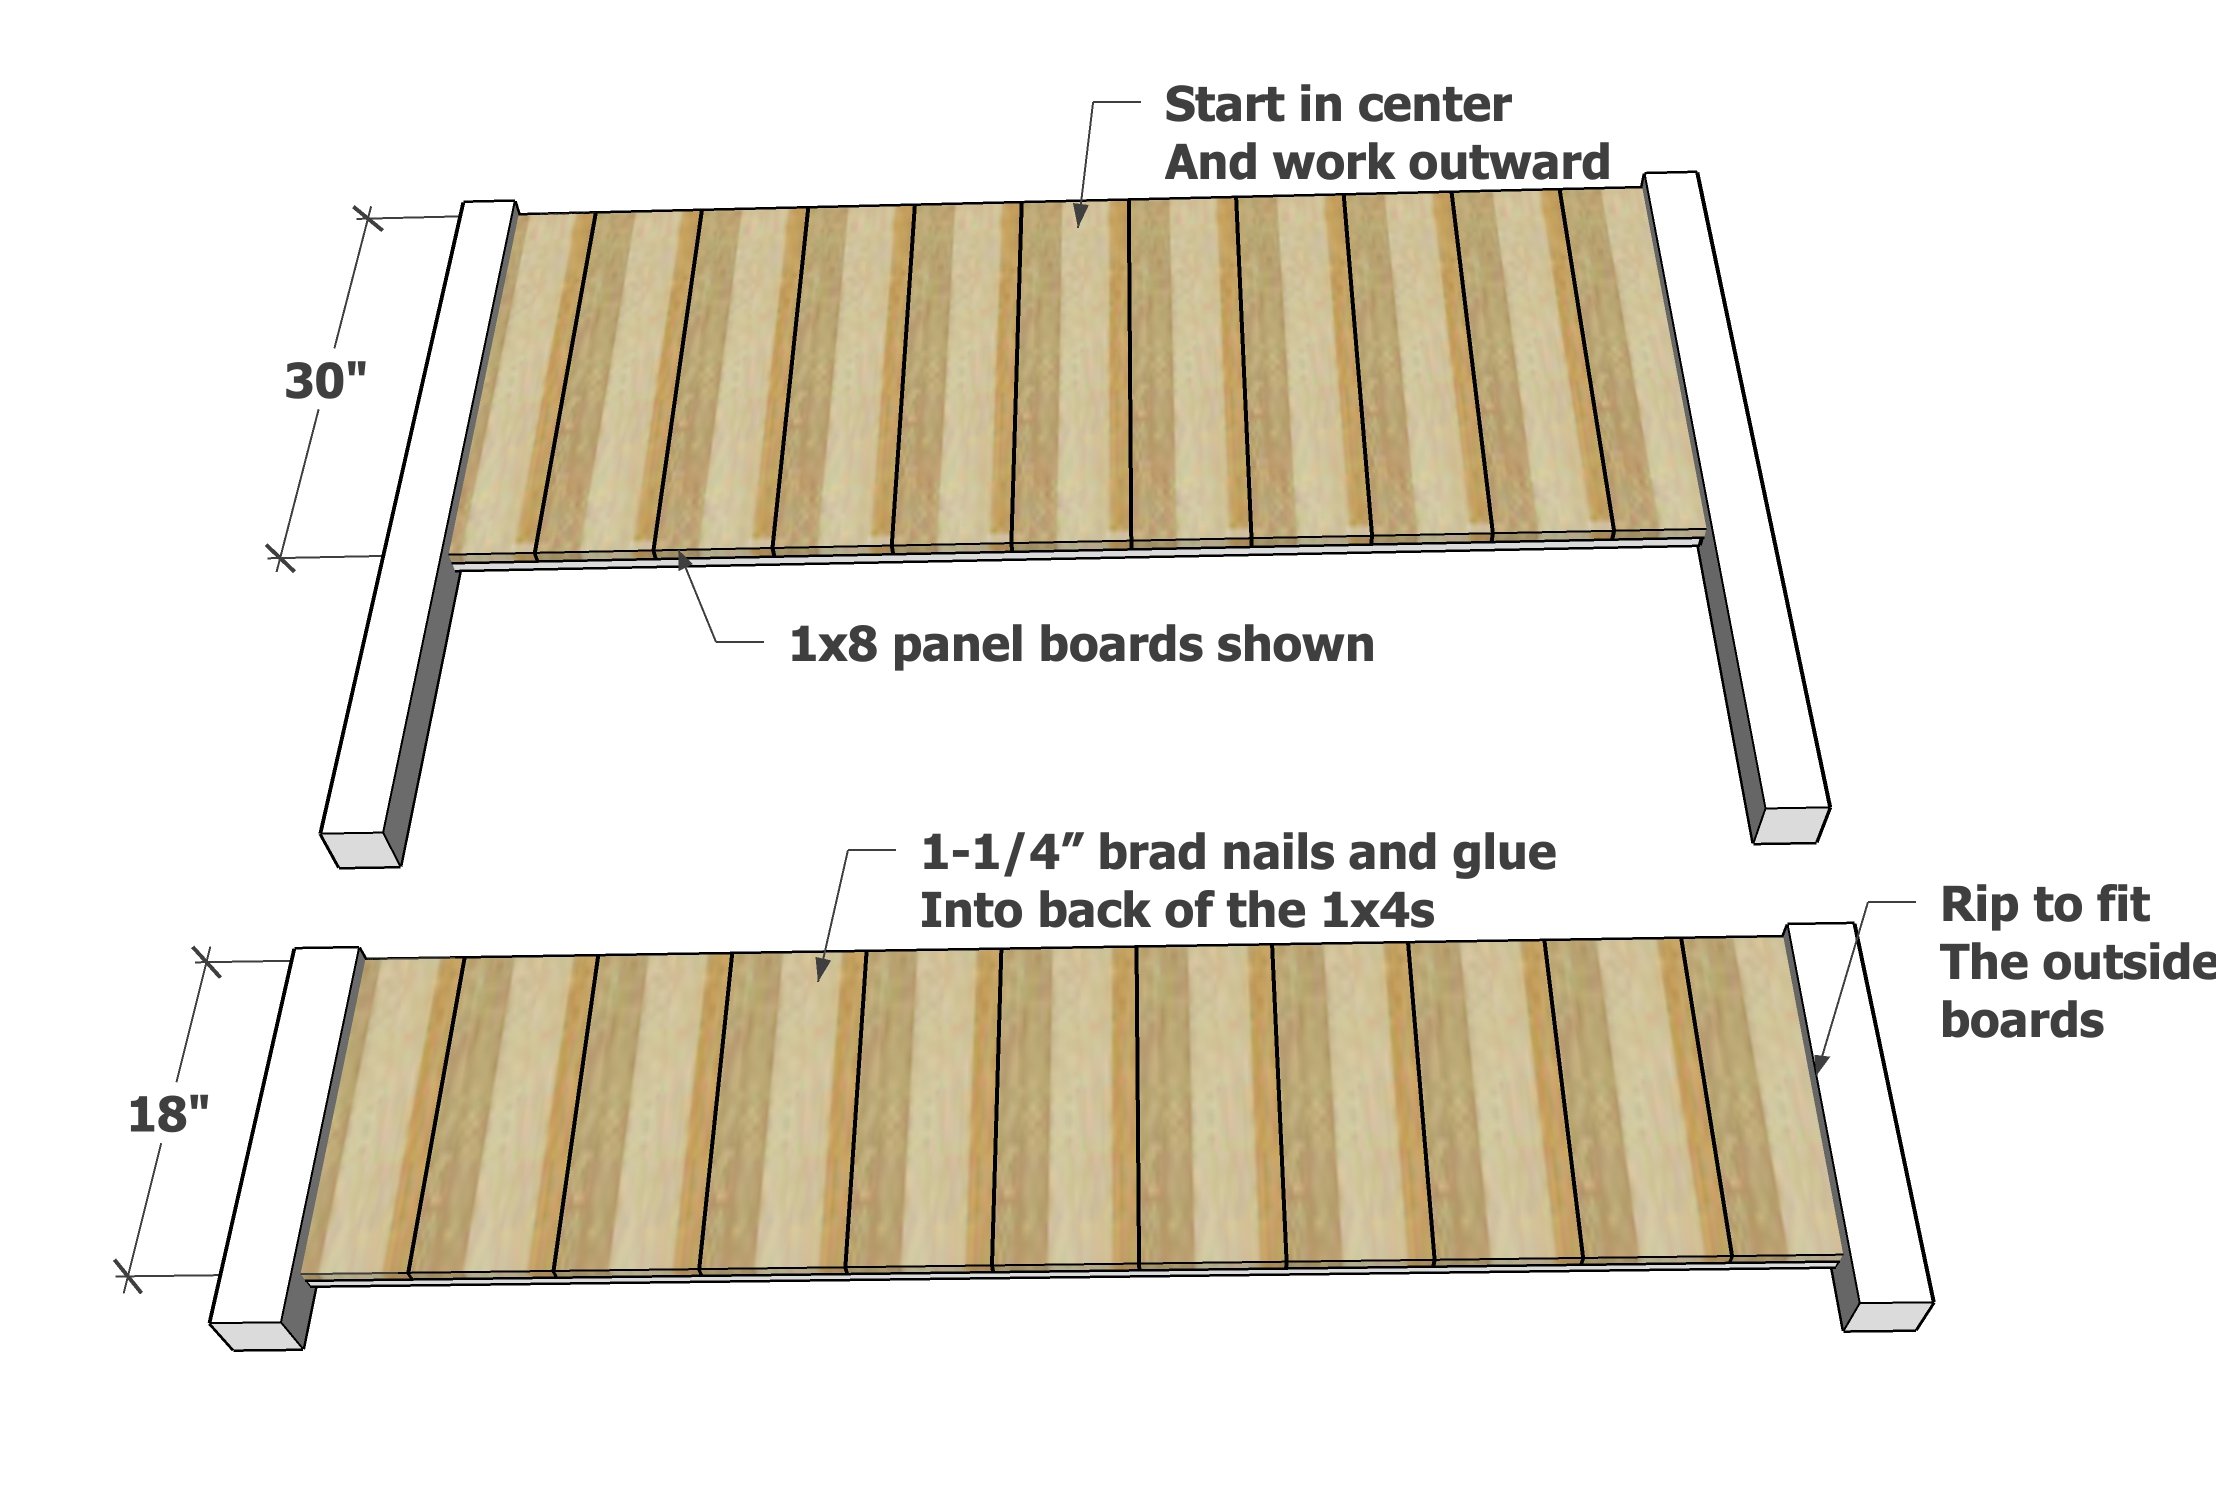
Lay the planking pieces out on the headboard and footboard to make sure it all fits. Make any adjustments as necessary.
Start in the center and work outward. For an odd number of panel boards, mark the center of the first panel board and match it to the center marks. For an even number of panel boards, start at the center marks.
Attach planking pieces with 1-1/4" brad nails and glue, working from the center outward.
For the end pieces, rip to fit with a tablesaw. Then attach with glue and brad nails.
Step 3
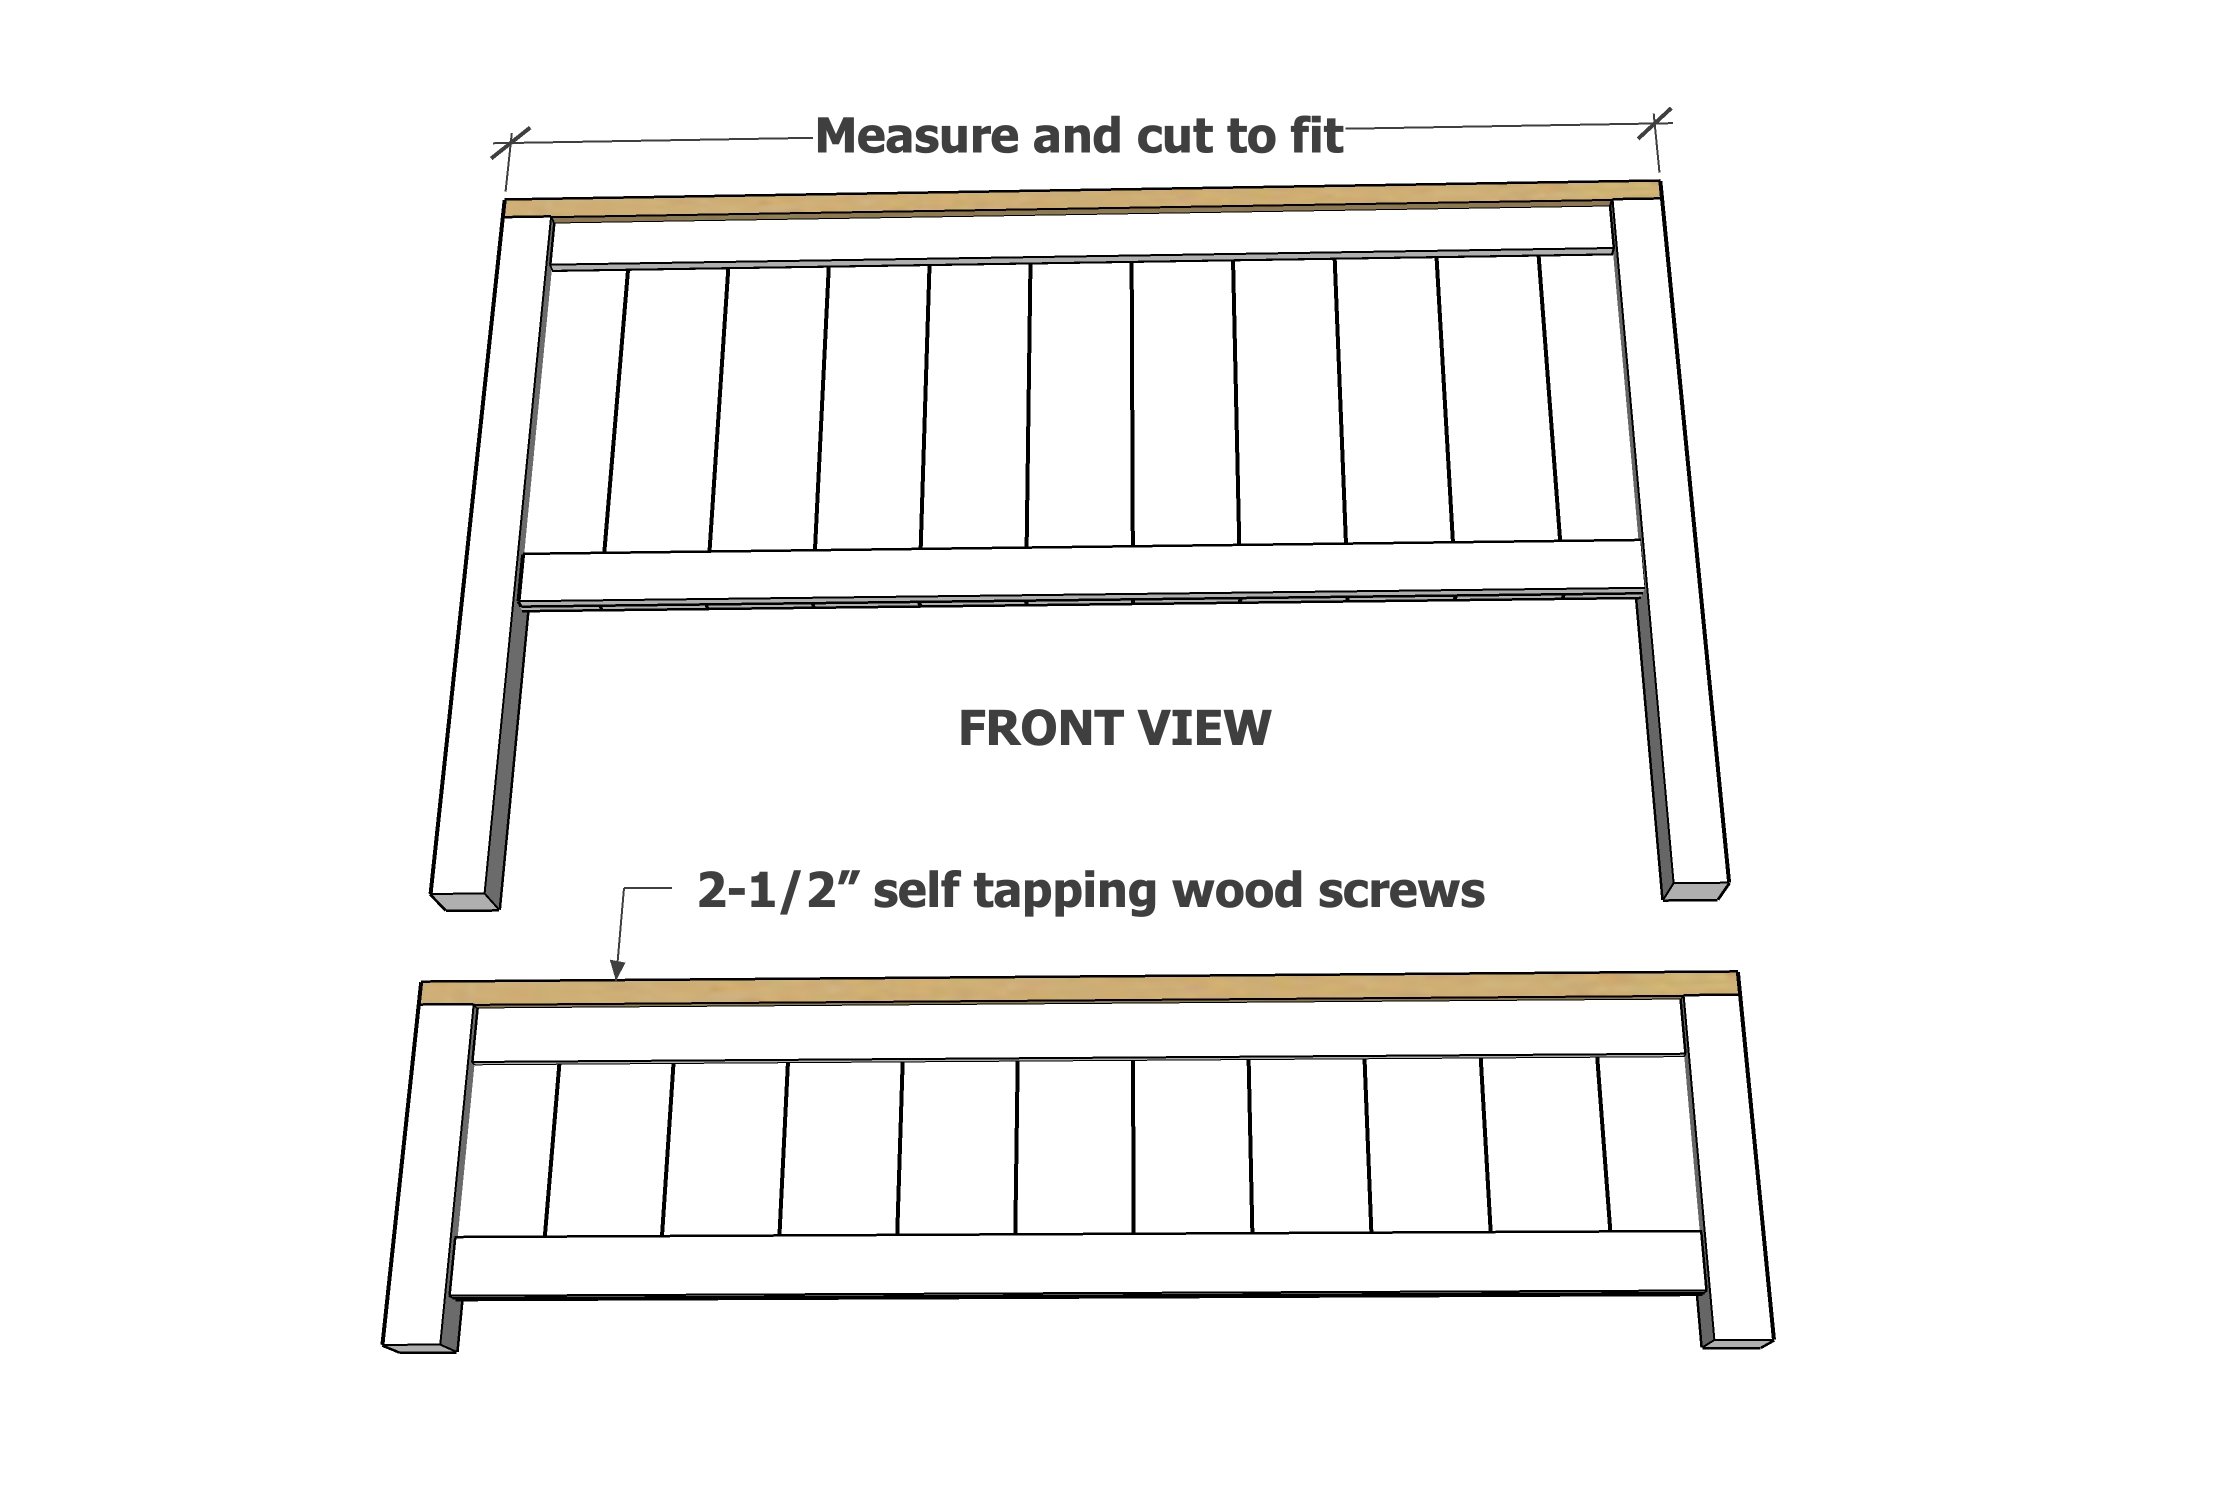
Measure and cut the top 2x4 pieces to fit. Attach from the top with 2-1/2" wood screws and glue.
Step 4

Cut the 2x6 final top piece 2" longer than the 2x4 from previous step.
Attach with 1" overhang on all sides with 2-1/2" self tapping screws. Use glue.
Step 5

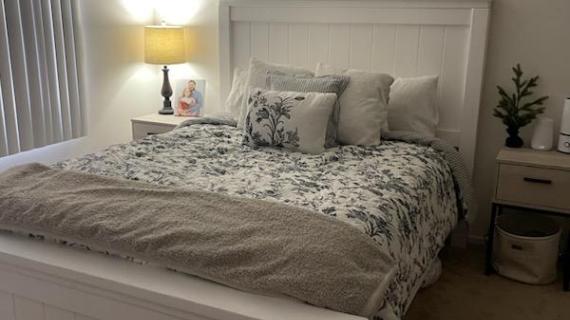
Finishing
The headboard and footboard are ready for finish. Sand well with 120 grit sandpaper, then finish with 220 grit sandpaper. Remove all sanding residue with a vacuum with soft bristled brush. Paint or stain as desired. A final 220 sanding on the finish will achieve a buttery soft finish.
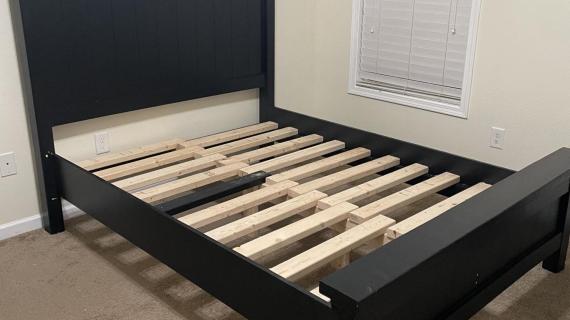
Assembly
Drill three 1-1/2" pocket holes on each end of the 2x8 siderails.
Attach to the headboard and footboard, the height at the top is 12", with 2-1/2" pocket hole screws.
Step 6

Attach the 2x4 cleat on the inside of the siderail. Screw to 4x4 legs and the 2x8 using 2-1/2" self tapping wood screws, spacing screws about 10" appart.
Step 7
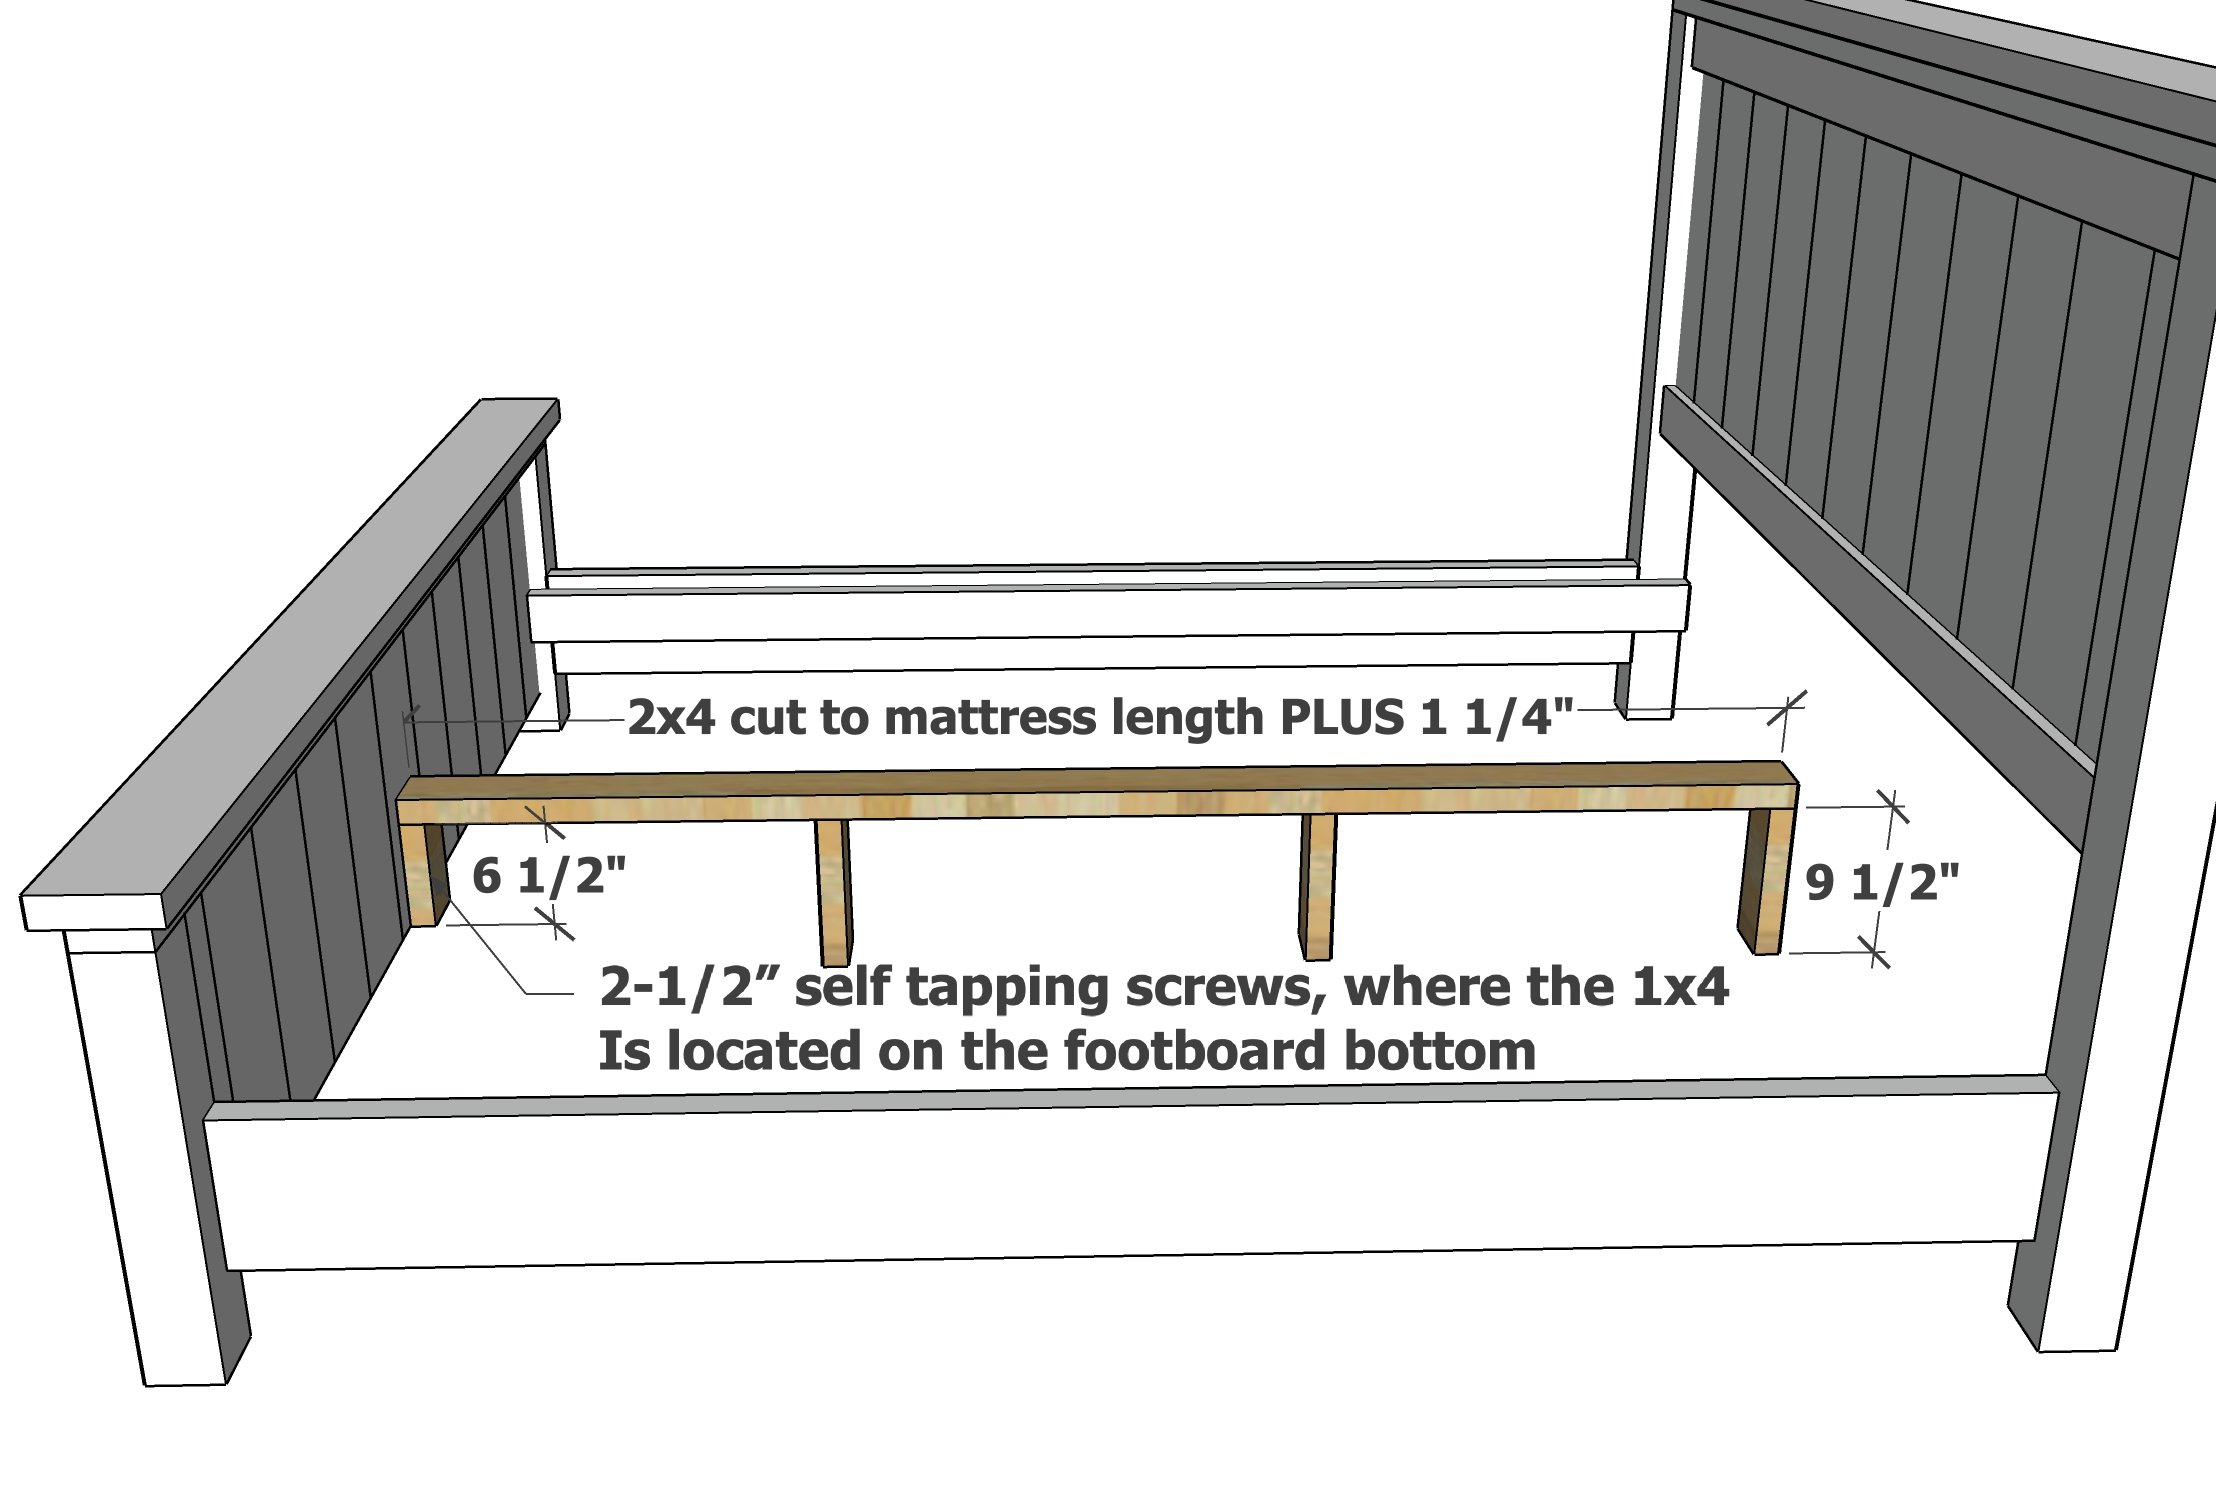
Build the center support (not required for twin) using the 2-1/2" self tapping screws.
Screw center support to the footboard, where the 1x4 outside trim is located, using two 2-1/2" self tapping wood screws. The center support is centered on the footboard.
Step 8
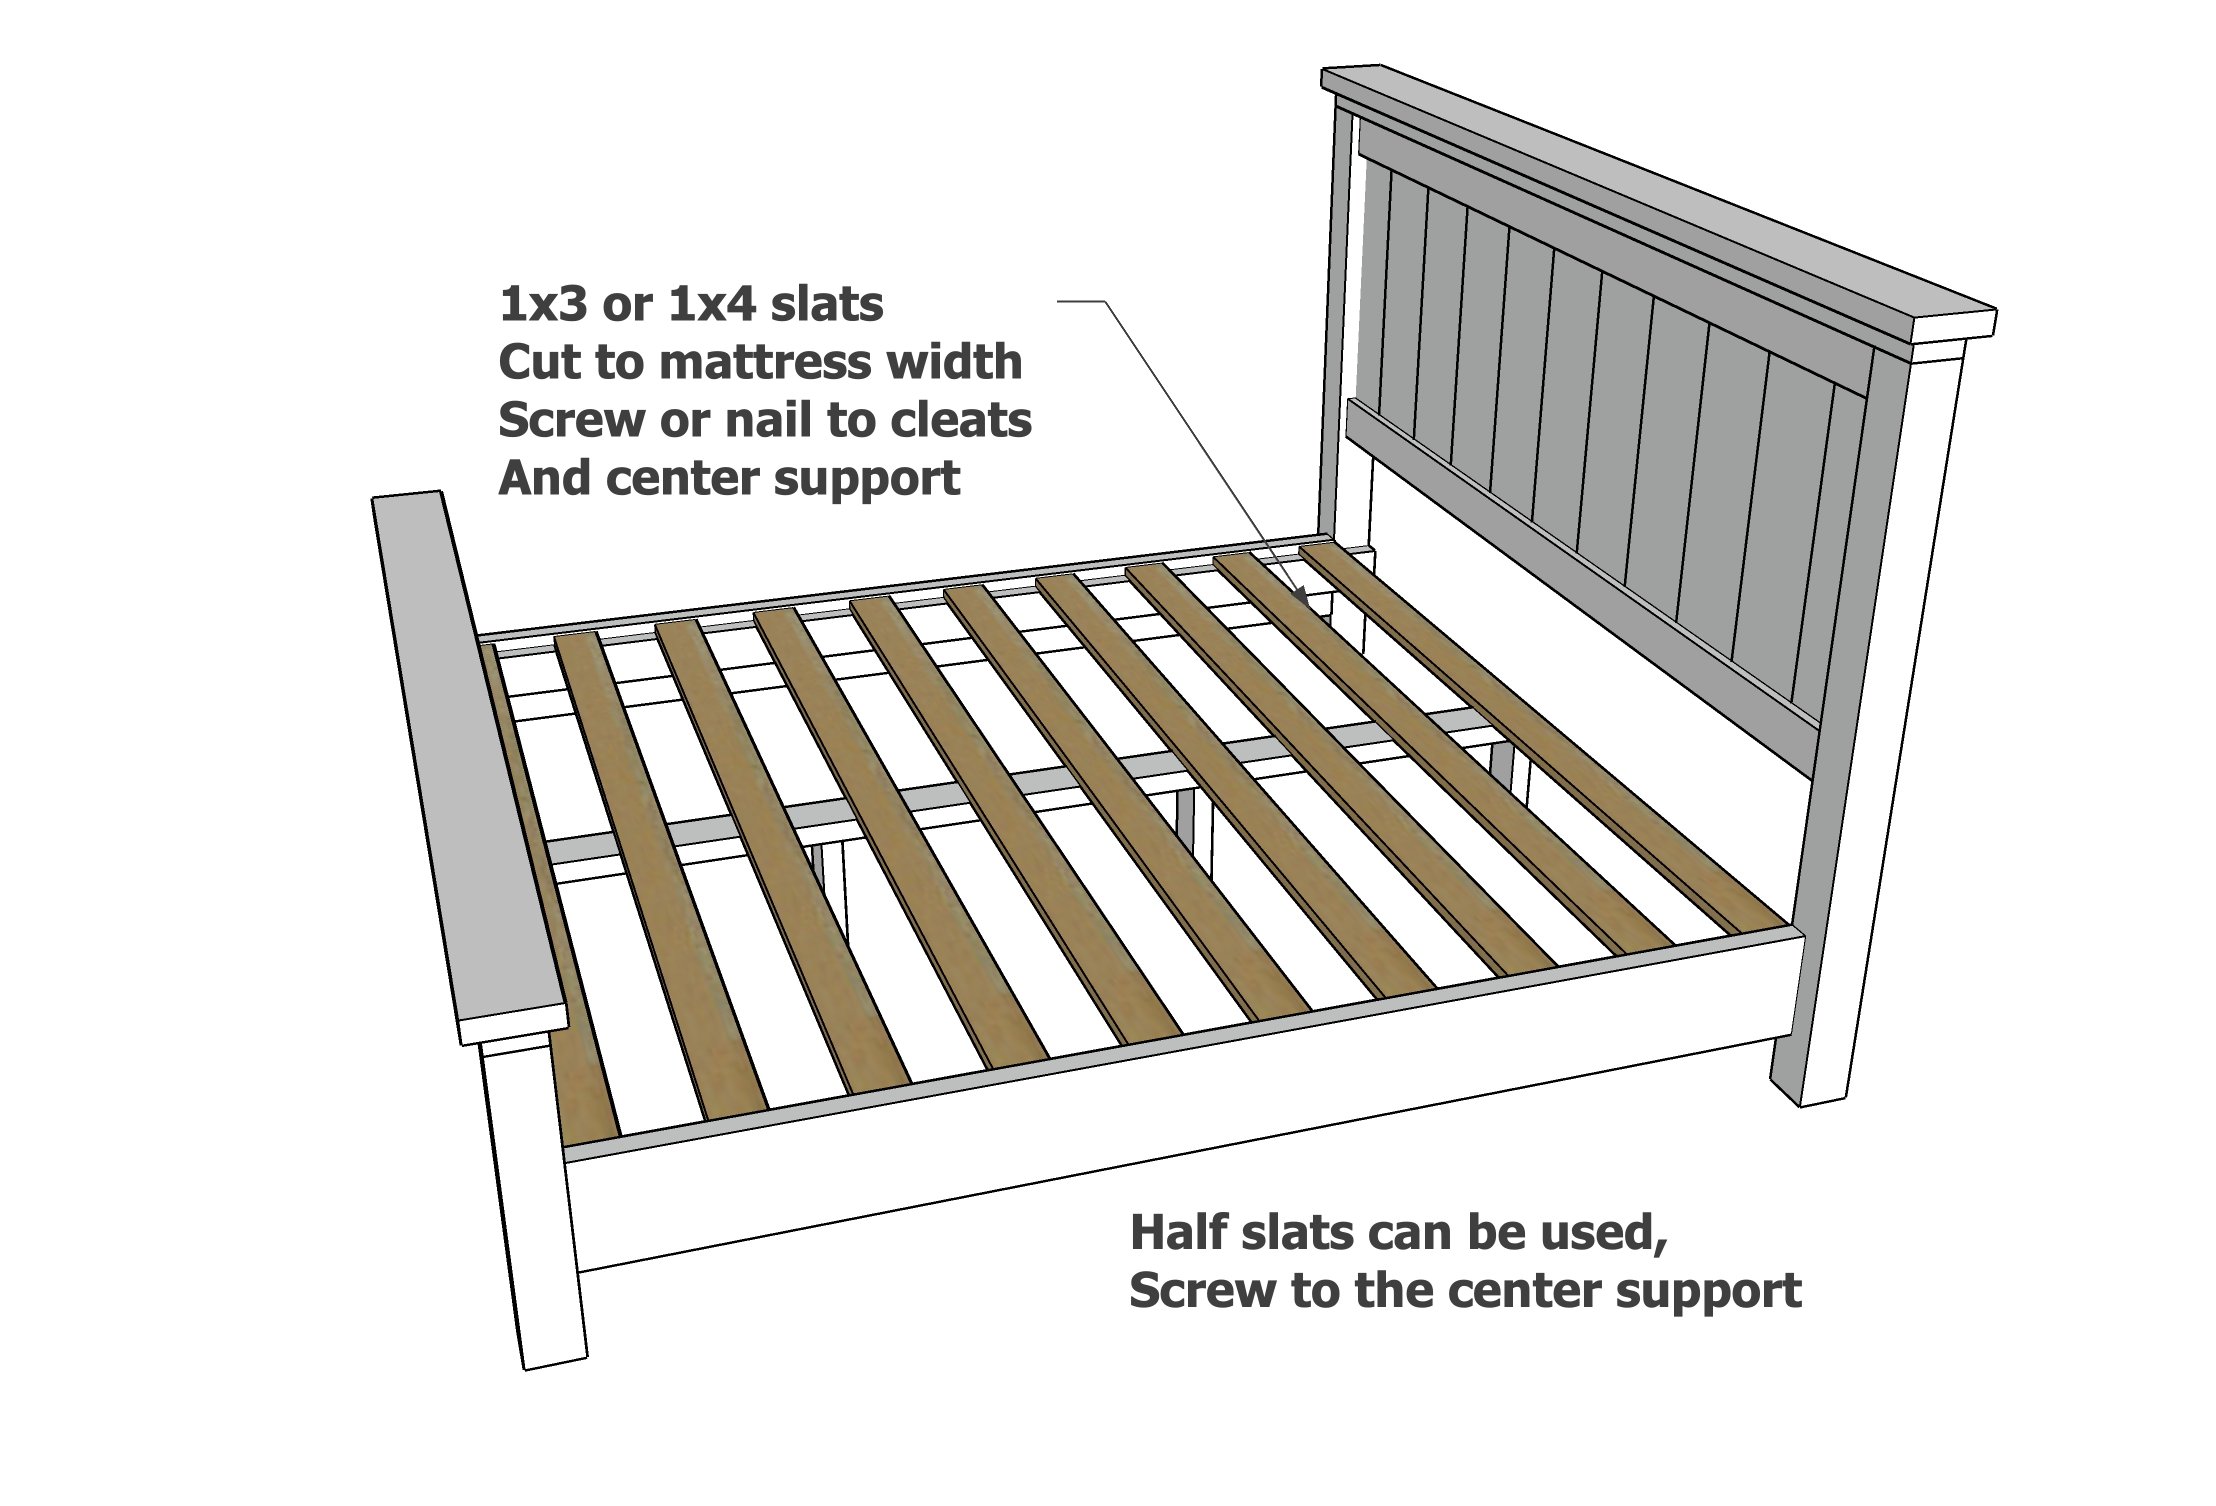
Lay slats on top of cleats and center support.
You can nail down with the 1-1/4" brad nails, or use 1-1/4" self tapping screws to secure.