
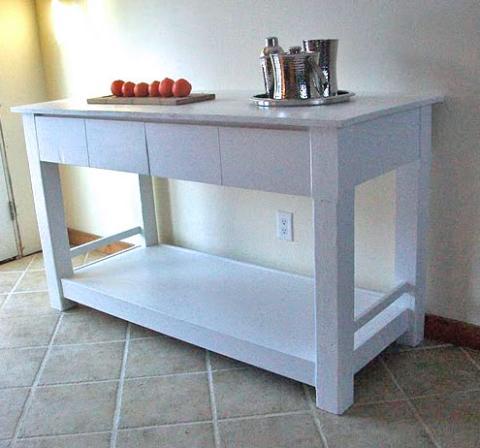

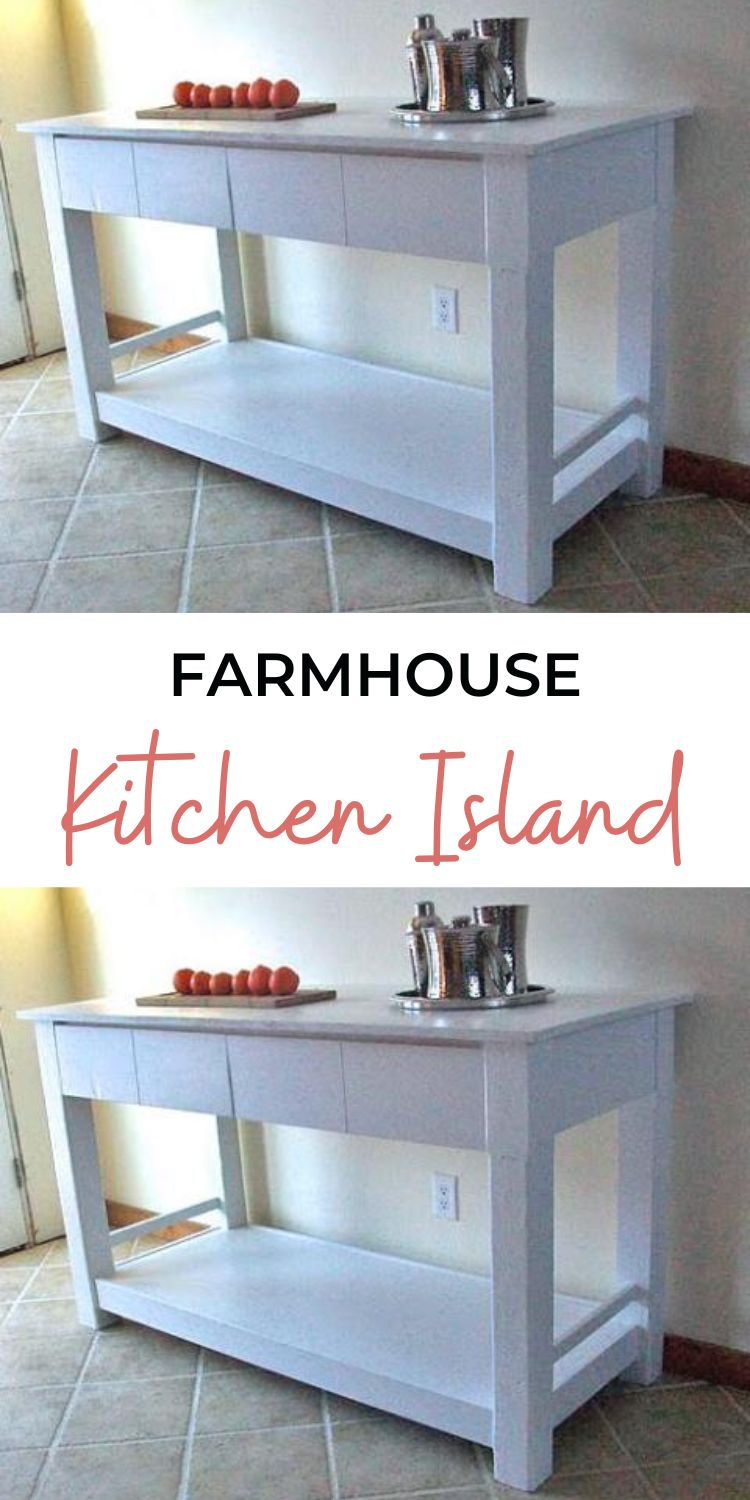
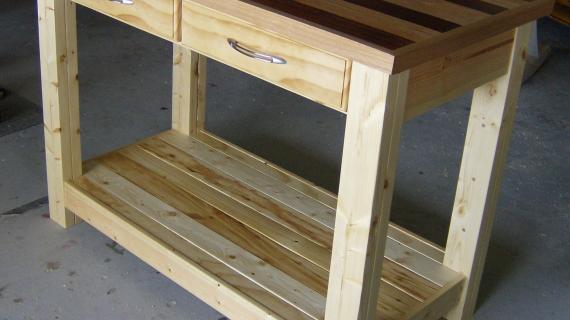
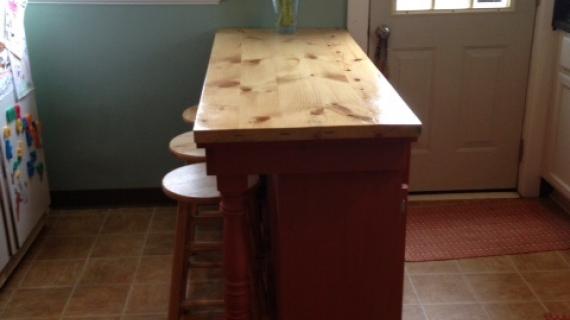
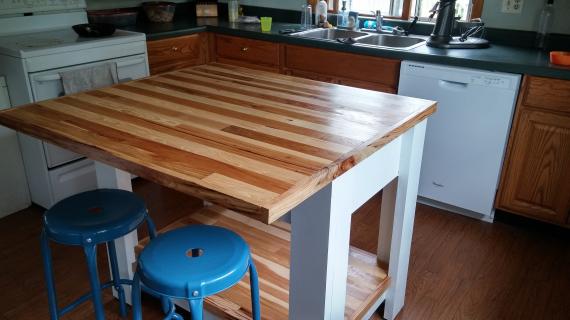
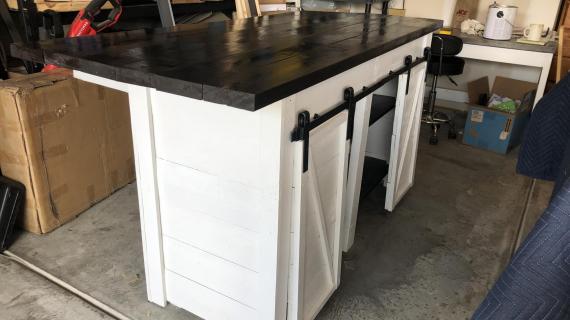
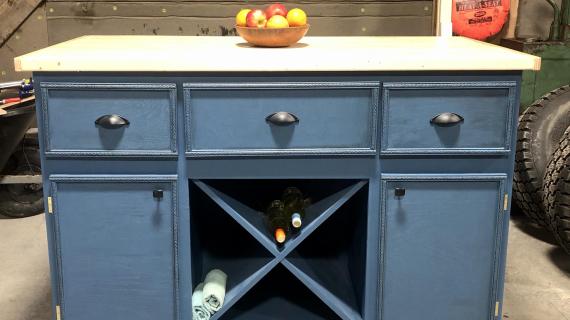
This sturdy Farmhouse style kitchen island features two drawers and a large bottom shelf. Solid wood legs.
Pin For Later!
Preparation
1 Sheet of 3/4″ MDF or Plywood 1 – 12′ 4×4 Post 1 – 8′ 2×8 Board 1 – 12′ 1×8 Board 1 – 8′ 2×2 Board 4 - 8′ 1×4 Boards 2 – Sets of 21″ Side Mount Drawer Slides 2″ Screws 3″ Screws Wood Glue Wood Putty Sandpaper
A) 4 – 4×4 Posts @ 34 1/2″ (Legs) B) 4 – 1×3 @ 7 1/2″ (Spacers) C) 2 – 1×8 @ 17″ (Side Aprons) D) 3- 2×8 @ 21 1/4″ (Top Support and Center Divider) E) 2 – 2×2 @ 17″ (Bottom Supports, Outside) F) 2 – 2×2 @ 20″ (Bottom Supports, Inside) G) 1 – 1×8 @ 51 3/4″ (Back Apron) H) 2 – 1×2 @ 51 3/4″ (Bottom Front and Back Supports) I) 2 – 1×4 @ 17″ (Side Trim for Bottom Shelf) J) 2 – 1×4 @ 51 3/4″ (Front and Back Trim for Bottom Shelf) K) 1 – 3/4″ Plywood @ 21 1/2″ x 55″ (Bottom Shelf) Notched out corners L) 2 – 1×2 @ 51 3/4″ (Front Face Trim, Horizontal) M) 3 – 1×2 @ 4 1/2″ (Front Face Trim, Vertical) N) 1 – 3/4″ Plywood @ 26″ x 60 3/4″ (Top) Drawer Cut List Approximations (Cut Drawers to fit your glides and openings) O) 2 – 3/4″ Plywood @ 21 1/8″ x 19 1/2″ (Drawer Bottoms) P) 4 – 1×4 @ 21 1/8″ (Drawer Fronts and Backs – shown in purple) Q) 4 – 1×4 @ 21″ (Drawer Sides) R) 2 – 1×8 @ 25 7/8″ (Drawer Faces – CUT TO FIT)


This is not a beginner project. Check for square after every step. Use 2″ screws and glue unless otherwise directed. Work on a clean level surface. Measure and cut your boards to your project to get the best fit. Build your drawers according to the recommendations of the drawer slides. Predrill and countersink all of your screws before fastening.
Instructions
Step 1

Spacer. Attach the spacers, B, to the legs, as shown above. Notice how the spacers are not all located in the same position on each leg. Take not of where each leg will be place when fastening the spacer.
Step 2
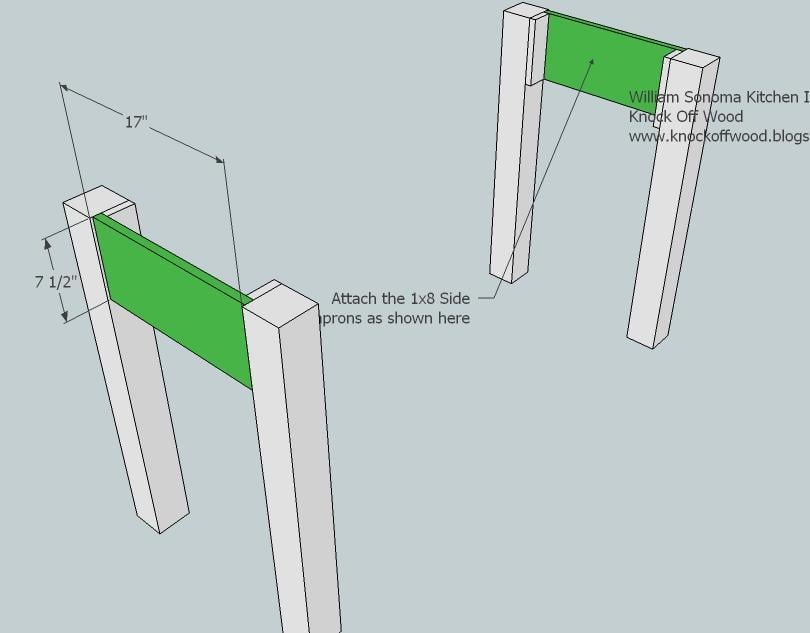
Side Apron. Fasten the side apron to the spacers, as shown above.
Step 3
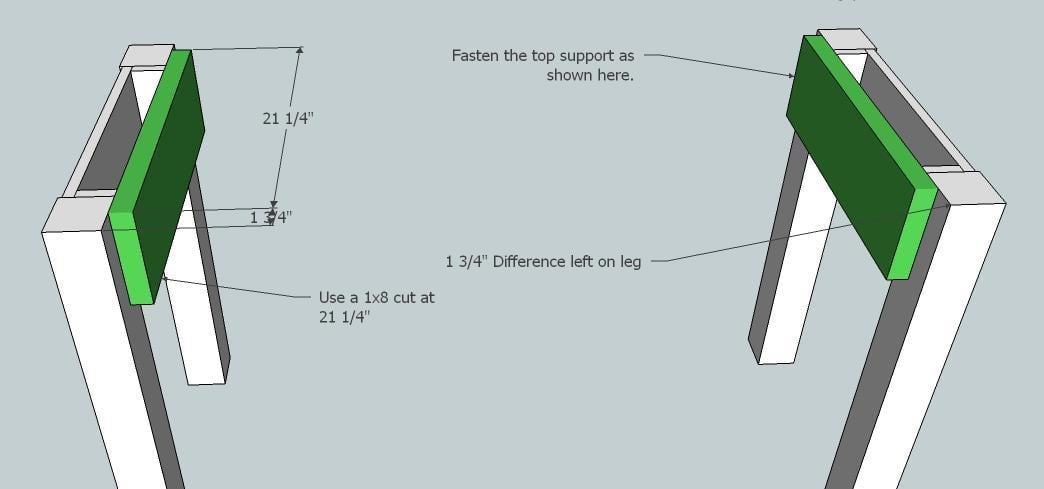
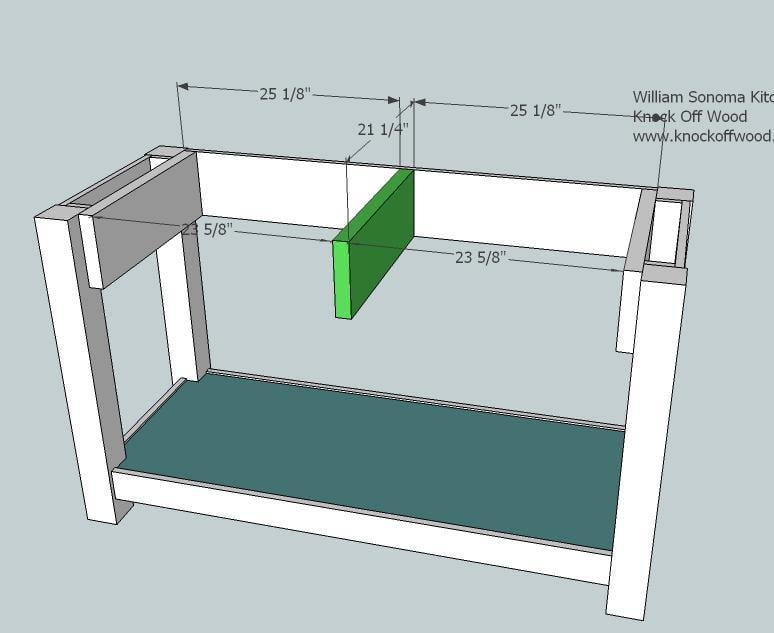
Top Support. Use 3″ screws to fasten the top support to the legs, as shown above. Use the above measurements to guide you. Notice the 1 3/4″ difference on the sides, as shown above.
Step 4
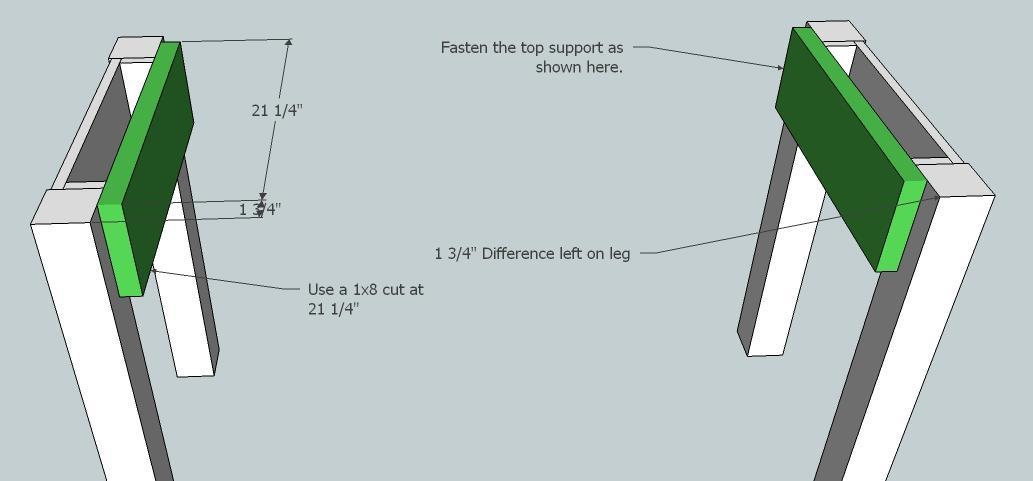
Top Support. Use 3″ screws to fasten the top support to the legs, as shown above. Use the above measurements to guide you. Notice the 1 3/4″ difference on the sides, as shown above.
Step 5
Step 6

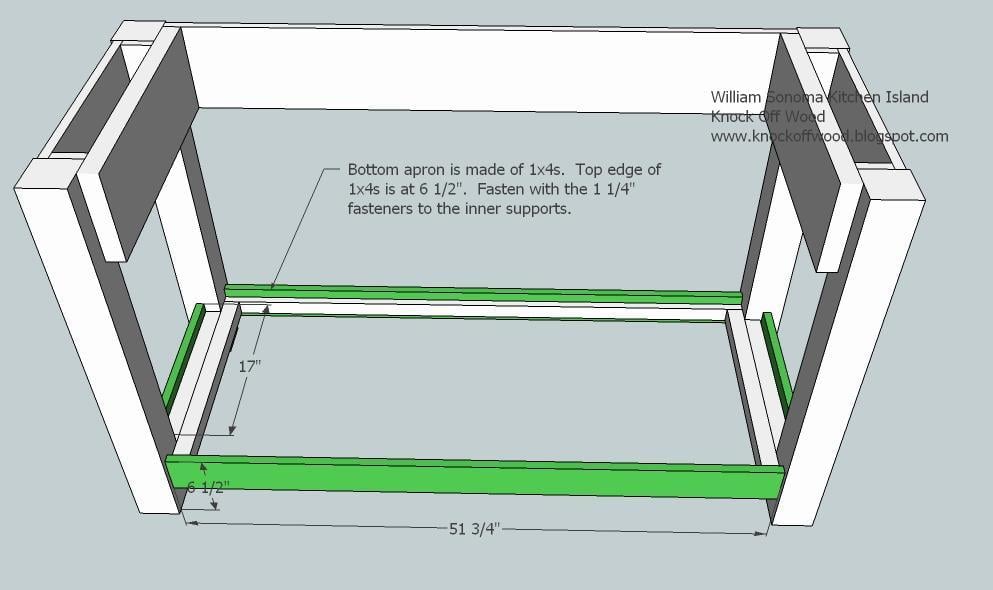
Back Apron. Use the 2″ screws and glue to fasten the back apron in place as shown above. Use glue and make sure you square everything up.
Step 7
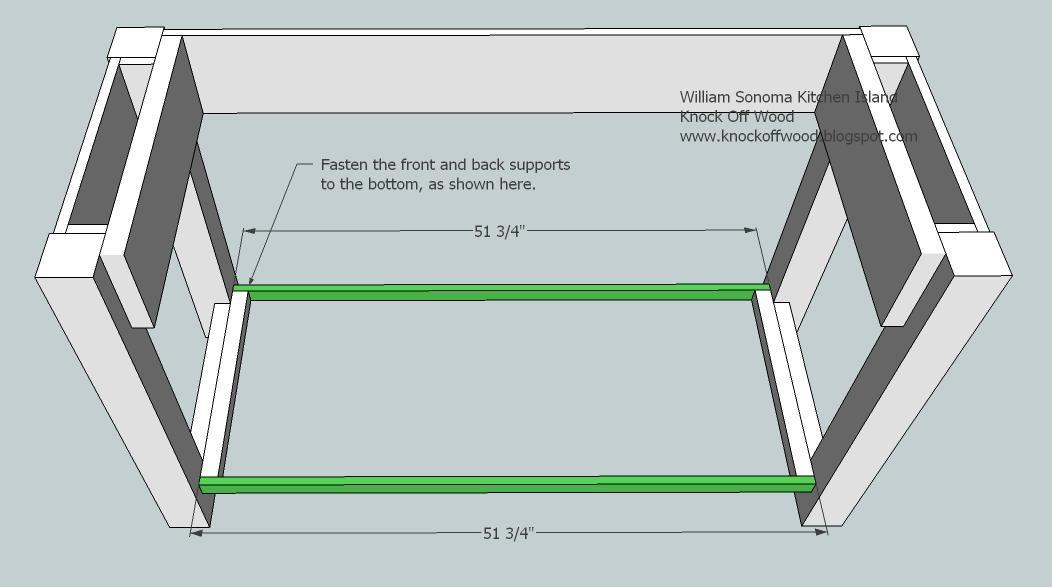
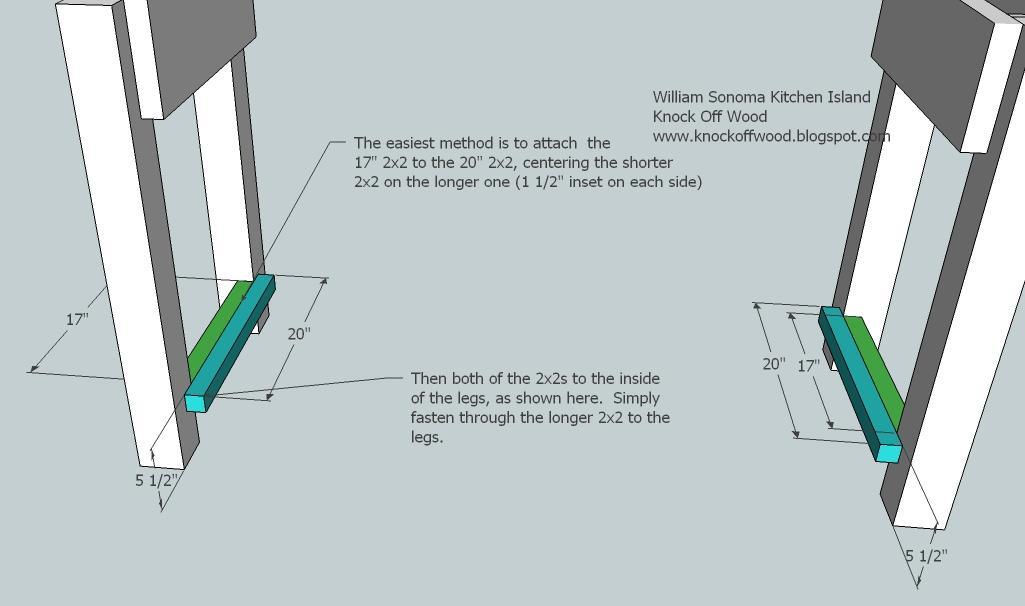
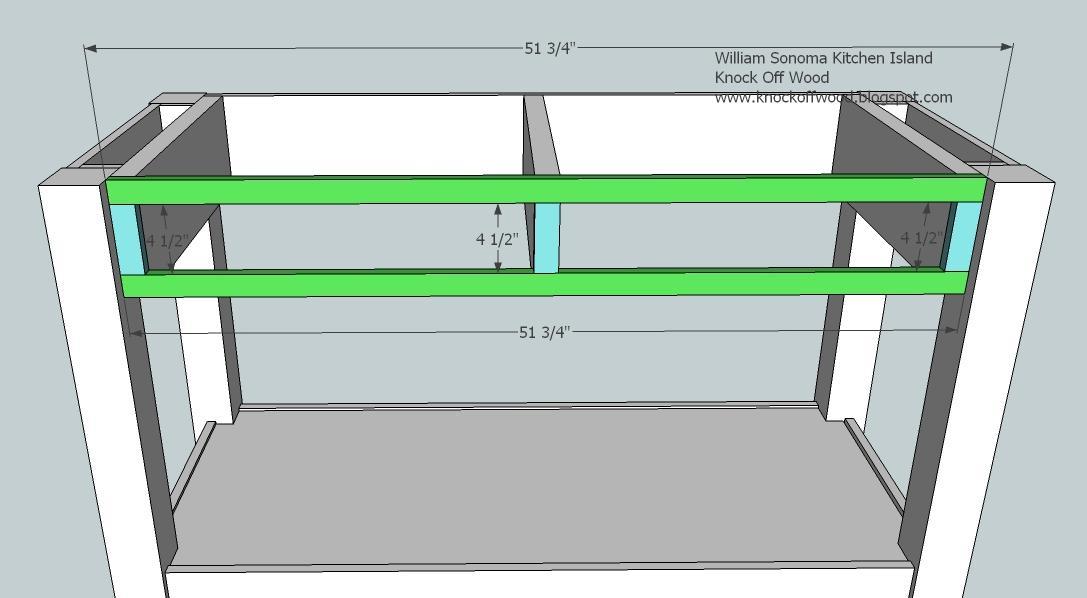
Bottom Front and Back Supports, H. Fasten the bottom front and back supports to the side supports, as shown above. If you plan on having heavy objects on the bottom shelf, I recommend adding a couple of 2×2 supports cut at 20″ between the boards H. Don’t forget to take a square of the project.
Step 8
Bottom Front and Back Supports, H. Fasten the bottom front and back supports to the side supports, as shown above. If you plan on having heavy objects on the bottom shelf, I recommend adding a couple of 2×2 supports cut at 20″ between the boards H. Don’t forget to take a square of the project.
Step 9

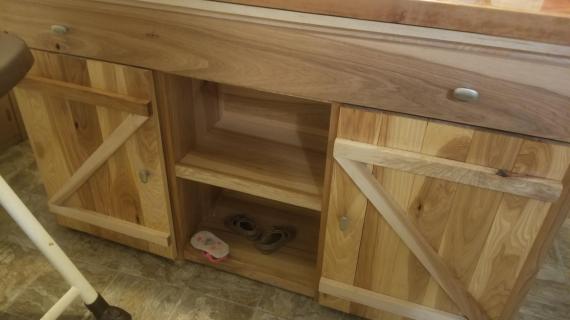
Bottom Shelf. Notch out the corners of the bottom shelf to fit, as shown above. Then place on the bottom shelf. Fasten in place.
Step 10
Center Drawer Divider. Using your remaining board D, Use 3″ screws to fasten the divider in place. You must make sure this board is placed square. Any out of square joints will cause your drawers to not glide smoothly.
Step 11
Face Trim. Start by fastening with 2″ fasteners the boards L in place. Make sure you fasten to the middle divider, being certain that the middle divider has remained in place from step 10. Then fasten the boards M in place.
Step 12
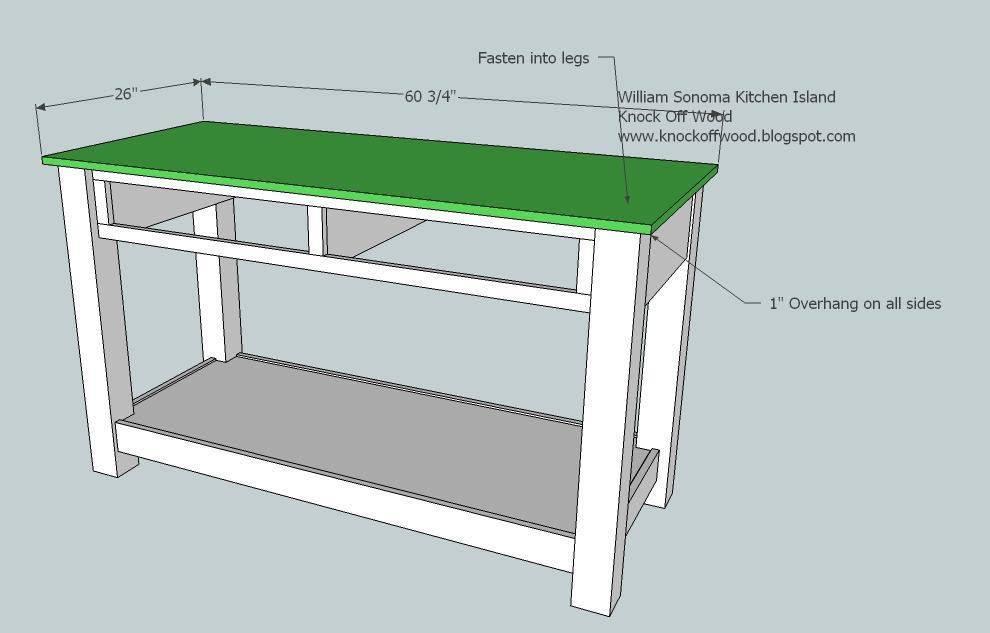
Top. Fasten the top in place. You will want to fasten to the trim from step 11, the legs, and aprons, and the supports, boards D (the 2x8s). Center the top, leaving a 1″ overhang on all sides. You may wish to add the top after you have built and inserted the drawers.
Step 13
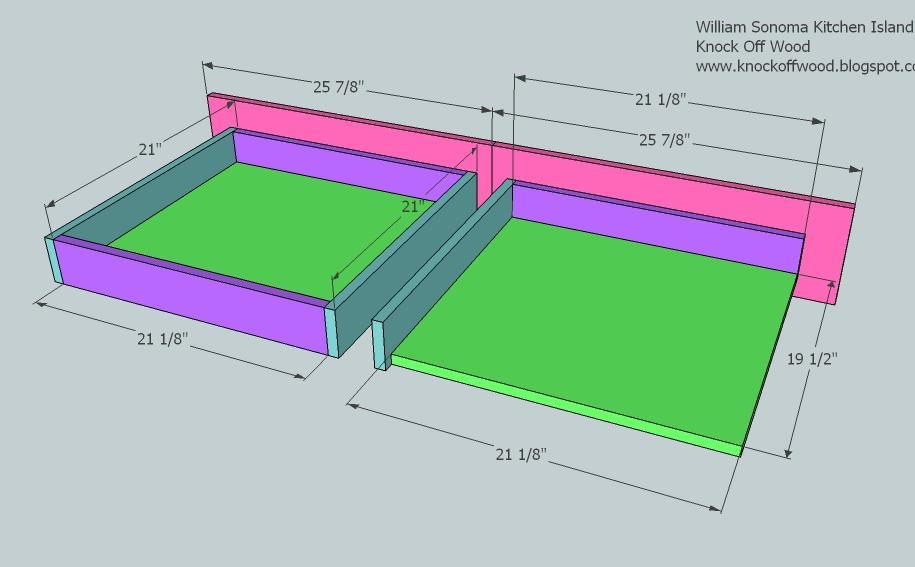
Drawers. Read the instructions from the drawer slides before attempting to build your drawers. The above measurements are expecting you to use side mount drawer slides that need 1/2″ clearance on the drawer sides. I recommend measuring your openings and building your drawers to fit your openings.
YOU MUST CUT YOUR BOTTOM PLYWOOD PERFECTLY STAIGHT. Then fasten the front and back of the drawers (made of 1x4s) to the drawer bottom. Then fasten the sides to the bottom and front and back. Then use your drawer guides to fit your drawers into the drawer openings.
Once your drawers are set in place, measure and cut your drawer faces. Mark the center of the drawer face and add a 1/8″ deep cut to the center, creating the look of 2 drawers. Then position the faces on the drawers and nail in place using 1 1/4″ nails and glue. Use just a couple of nails per drawer face, avoiding the area where you will place pulls or knobs. Then pull the drawers out and use screws to fasten from the inside of the drawer into the drawer face.

Comments
onlymehere (not verified)
Tue, 02/09/2010 - 03:34
No matter how hard I try I
No matter how hard I try I can't print out your plans. I really want to make this island but use it as a cutting table for sewing. I'm not a novice craftsman either but I don't have a computer in my workshop that I can keep running to to make this and need to print the plans :) Any information you can give me would be appreciated! Also when I click on your plans button nothing shows. Cindy
jennie (not verified)
Tue, 02/09/2010 - 04:30
for onlymehere - i just copy
for onlymehere - i just copy and paste the blog entry into a word document, delete anything i don't need, and print them that way. you can add your own page breaks, which i do to separate out each step so i don't have to flip back and forth between pages constantly.
CRAZYMOM (not verified)
Tue, 02/09/2010 - 04:51
What c cool blog! Glad I
What c cool blog! Glad I found you! :)
Annalea (not verified)
Tue, 02/09/2010 - 06:14
Yet another simple and
Yet another simple and well-built plan. Thanks so much!
I've been wondering why you use face-framed drawers, instead of European-style drawers which allow for more storage overall. Does the front drawer trim add something structurally? Is there a way to modify the instructions to allow for an open drawer bay?
It's so frustrating to put something in a drawer that is just barely too tall, when you know that it's only the trim that's getting in the way, and there's plenty of height behind the trim.
All My Yesterdays (not verified)
Tue, 02/09/2010 - 06:51
Haven't commented much, but
Haven't commented much, but always come to see what you've created. You are so talented and I love that you share it all with everyone. Thanks!
Gen M. (not verified)
Tue, 02/09/2010 - 06:58
Hi Ana! I love love love
Hi Ana! I love love love your blog! I am a novice and I have not build anything yet but I look everyday and I think my first project will be the storage bench thing.
Have you ever though about rating your projects like a 1, 2 or 3 for super easy to slightly more complex? Since I have never build anything it would be great to click on "super easy" and see all the projects I could start with. Just a suggestion.
Keep up the good work!!!!!! Gen
Anonymous (not verified)
Wed, 02/24/2010 - 11:17
This is next on my list to
This is next on my list to tackle! I am turning it into a project/scrap table for my kitchen dining area so I can work on stuff while the kids are playing and in between chores! THanks so much for all of your hard work!
Erin K
[email protected]
Karen (not verified)
Thu, 03/11/2010 - 05:40
I was wondering if you think
I was wondering if you think I could make the william sonoma kitchen island type piece bigger...using same ideas different dimensions of course..maybe 72 inches lon and still be sturdy to support the upper shelving...thank you for all you do you are really a pistol...I mean that is a very good way ..Karen
Rose (not verified)
Wed, 10/06/2010 - 15:12
I'm so inspired! I know you
I'm so inspired! I know you hear that every day, but wow! How do you do it all? I'm staying at home with a 3yr old and have another in 3rd grade, and it's all I can do to keep the dishes and laundry done and the floor swept! I'm feeling guilty for just spending time looking through all these plans while the toys lay on the floor...yikes! Do you just have a super amount of energy, or a super helper, or both? Either way, great work. Thanks for all this fantastic diy fodder. It really keeps hope alive for me!
Angela (not verified)
Thu, 12/30/2010 - 12:08
I am so excited about trying
I am so excited about trying this plans out. I just got some tools for Christmas. I come from a family of wood crafters, so I hope I can follow in their footsteps. This will be step 1 in my New Year's Resolution! Thanks so much for sharing your fabulous ideas!
ps- I spent the last hour adding to my "to-do list".
cate (not verified)
Fri, 01/28/2011 - 16:58
Why is this not catalogued
Why is this not catalogued under kitchens???? I'm desperate to rejig my island and this has given me some ideas!
isabelle (not verified)
Fri, 02/03/2012 - 08:28
C'est une super idée , ma
C'est une super idée , ma soeur devrait essayer , elle a une grande cuisine. Bisous de france