


Build your own custom sized bookshelf! This plan includes a custom designer so you can build your bookshelf in any size. Free plans with step by step diagrams, video tutorial and more from Ana-White.com
Video Tutorial - How I Built this Custom Sized Bookshelf
Build a bookshelf to your size and finish! Watch how in my new video:
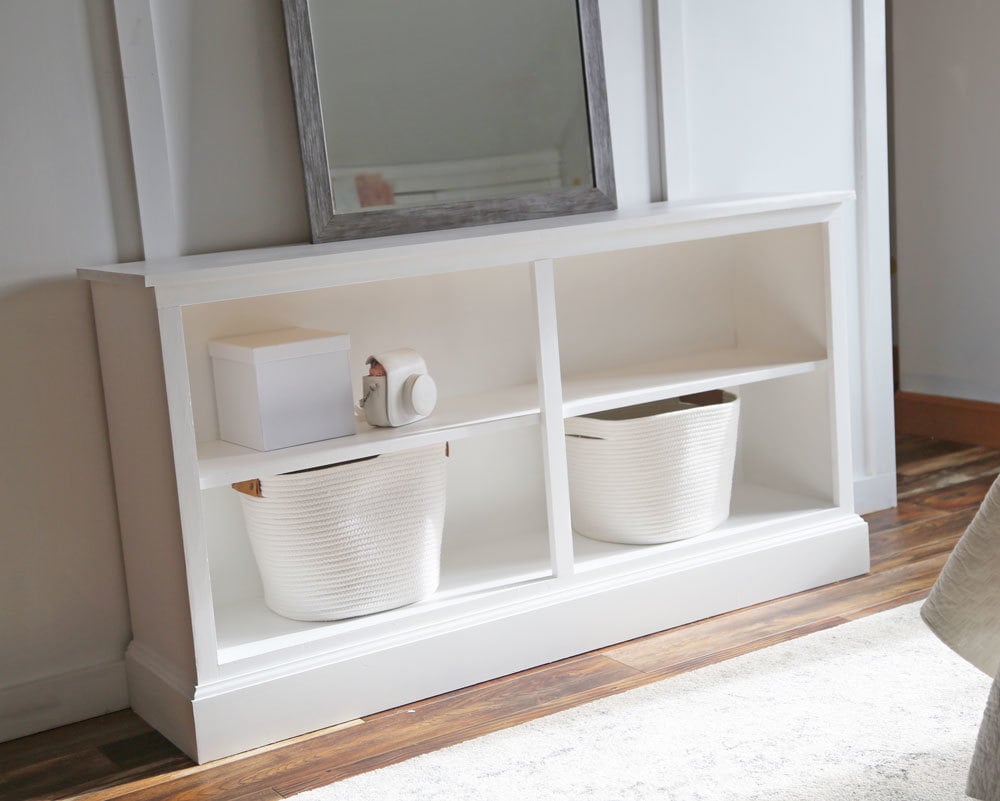
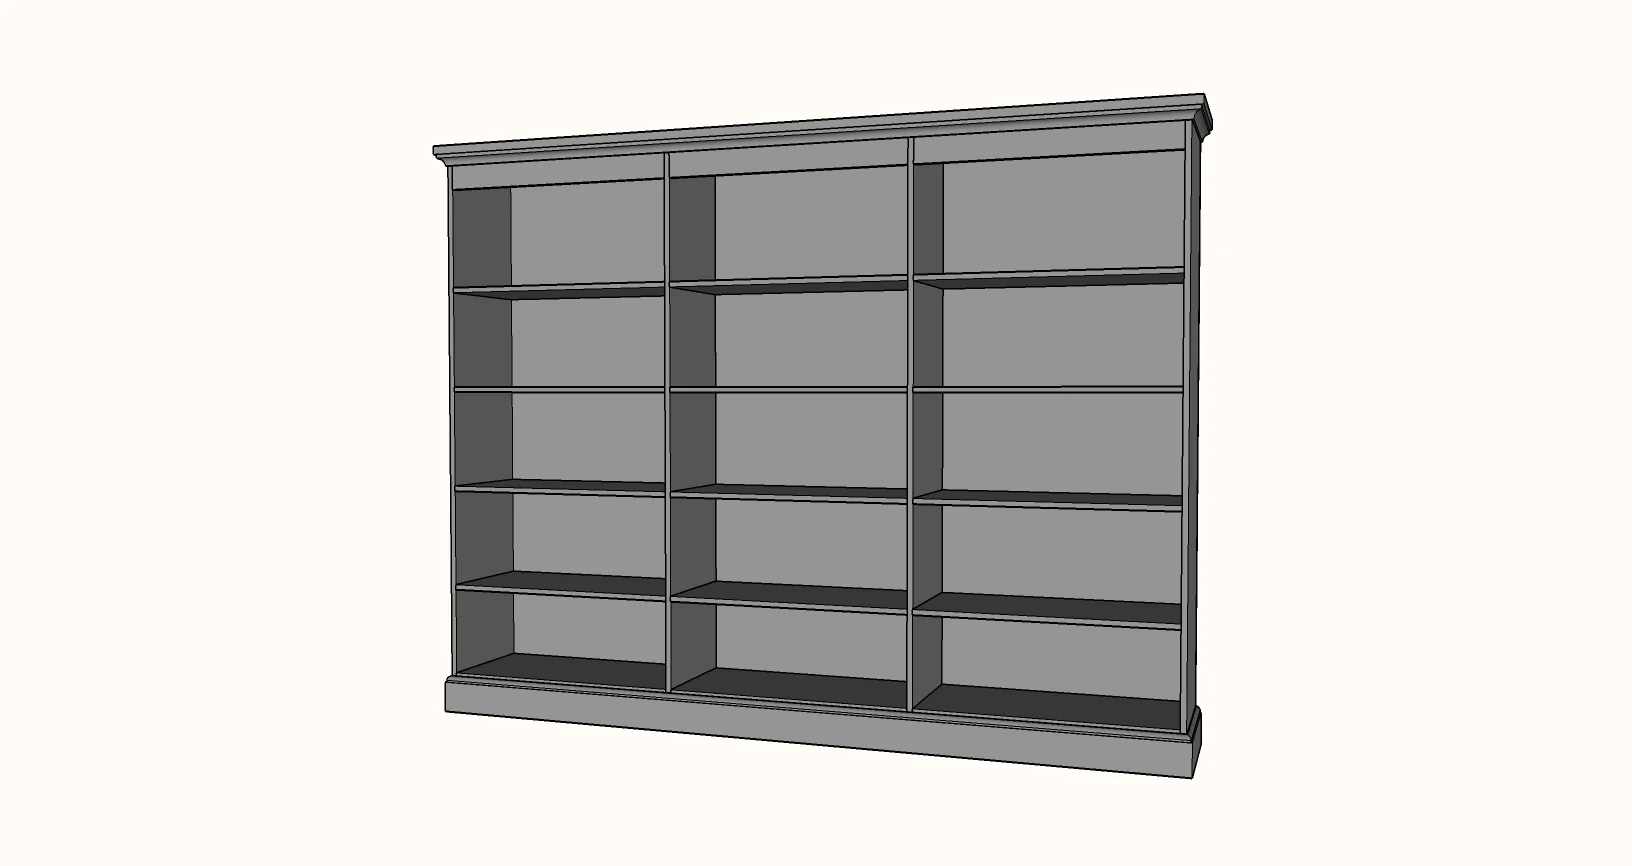
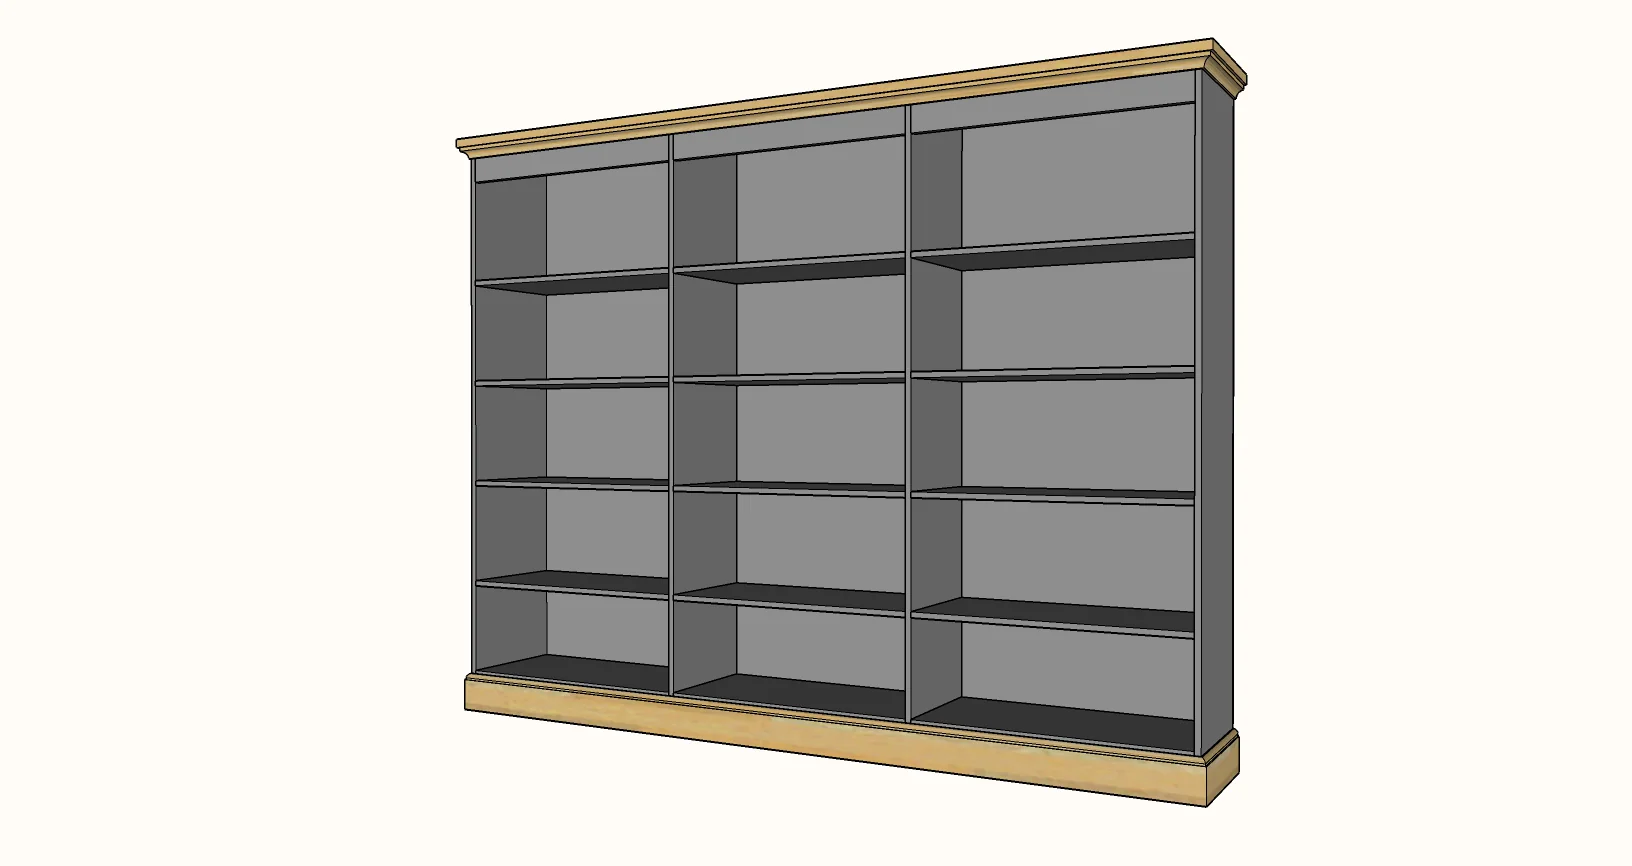
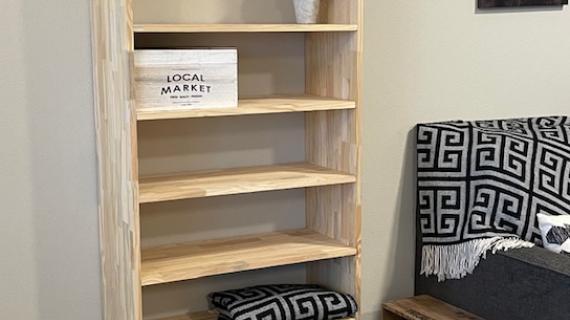
Add quality, high end shelving almost anywhere with this bookshelf plan. Can be customized to different lengths, number of bays, and heights up to 8 feet tall.
Face Frame vs Frameless Bookshelf
This bookshelf is "frameless" meaning the front edges don't have 1x2 trim on the front. Here is a face frame version -
If you'd like to build a bookshelf with a face frame, please check out these plans here.
How to Design and Build Your Own Custom Frameless Bookshelf
Now for the plans for the frameless bookshelf! Get it designed and get it built - here's the plans!
Preparation
- 3/4" plywood ripped into strips for the desired width of shelving
- 3/4" edge banding in matching wood veneer
- 1x4 and 1x6 bay support material
- 1/4" plywood for back
- 5-1/4" baseboard moulding
- 1-1/4" Kreg Screws
- 1" brad nails
- wood glue
Cut list is generated in Ana's Design App


For long term durability and more professional results, I recommend using a pocket hole joinery system for wood joints. Here is a video with tips for using a pocket hole jig:
Instructions
Step 1

Design Your Bookshelf Using Ana's Design App (Below)
- Depth: 12" depth recommended, 16" depth may be used for closets, deep baskets and bins, linens and blankets.
- Height: Up to 96", recommend between 72"-84"
- Length: Any length, if extra long, must be built in place or built in sections, as it will become too large and cumbersome to be moved.
- Bays: To prevent shelves from sagging, bays should not be more than 36" wide
- Shelf Spacing: most shelf spacing is minimum 12", middle shelves can be made adjustable. Leave more room at the top shelf since the header and crown moulding will be installed over the top.
Complete your design and download the drawings.
Rip plywood into desired strips and cross cut to match the cut list provided in the custom plan.
Apply edge banding to the front edges of the plywood to finish, using an iron and a trimming tool or razor. Lightly sand the edges of edge banding to round slightly.
Step 2
Assemble the Bookshelf
Assemble the pieces of plywood using 3/4" pocket holes and 1-1/4" pocket hole screws.
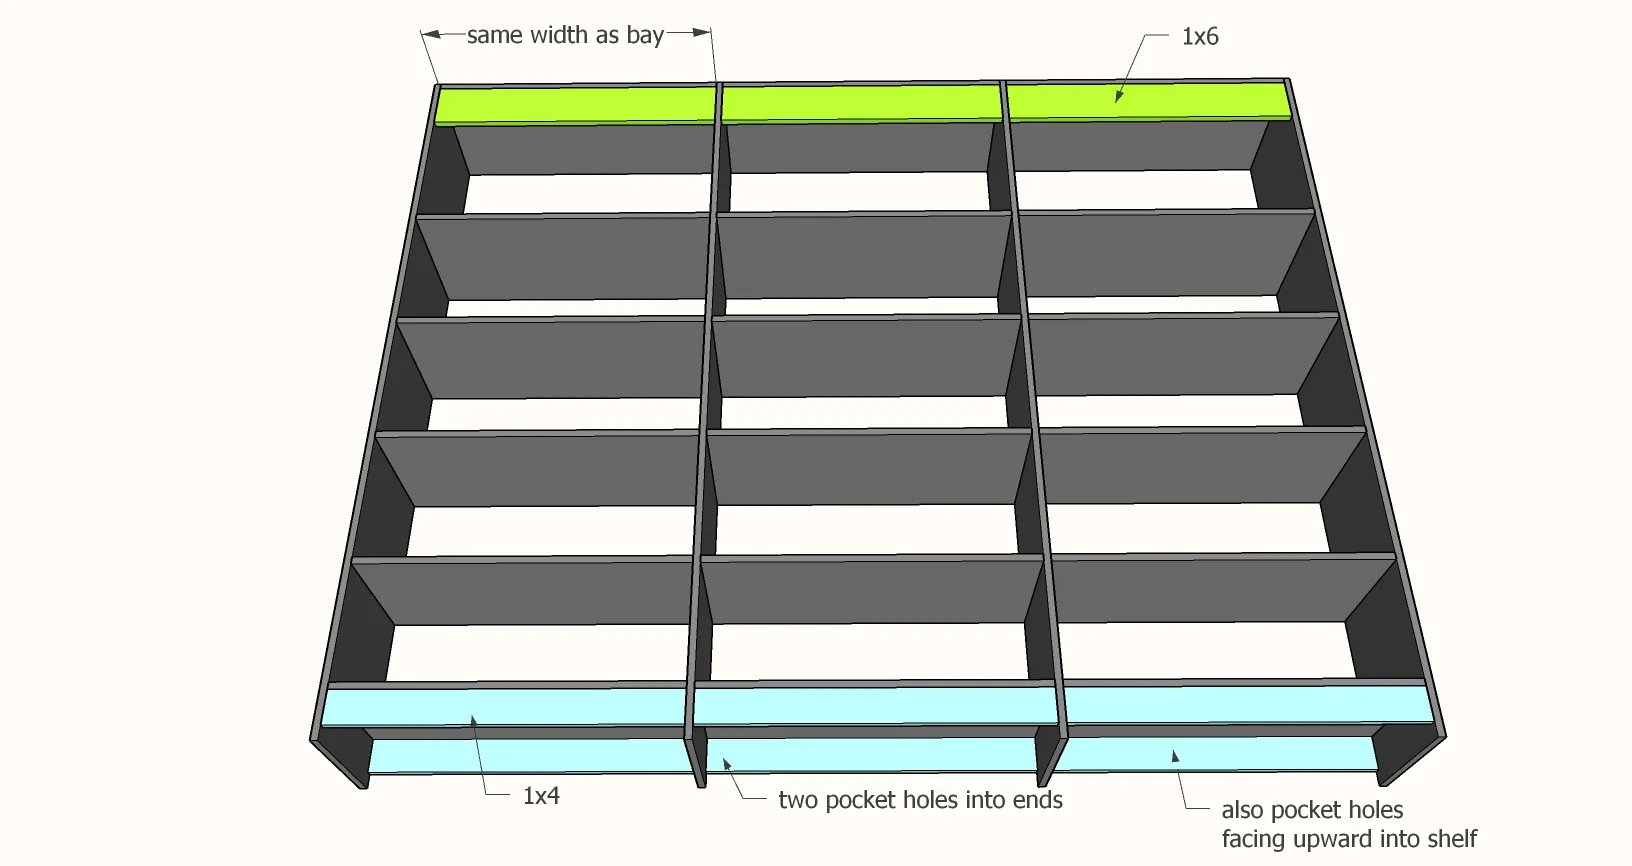
Add Bay Supports
To make the bookshelf strong and provide a backing for the crown and base mouldings, 1x boards are added.
Cut to match the width of your shelf lengths.
Attach with 3/4" pocket holes and 1-1/4" pocket hole screws on ends and top.
Step 3
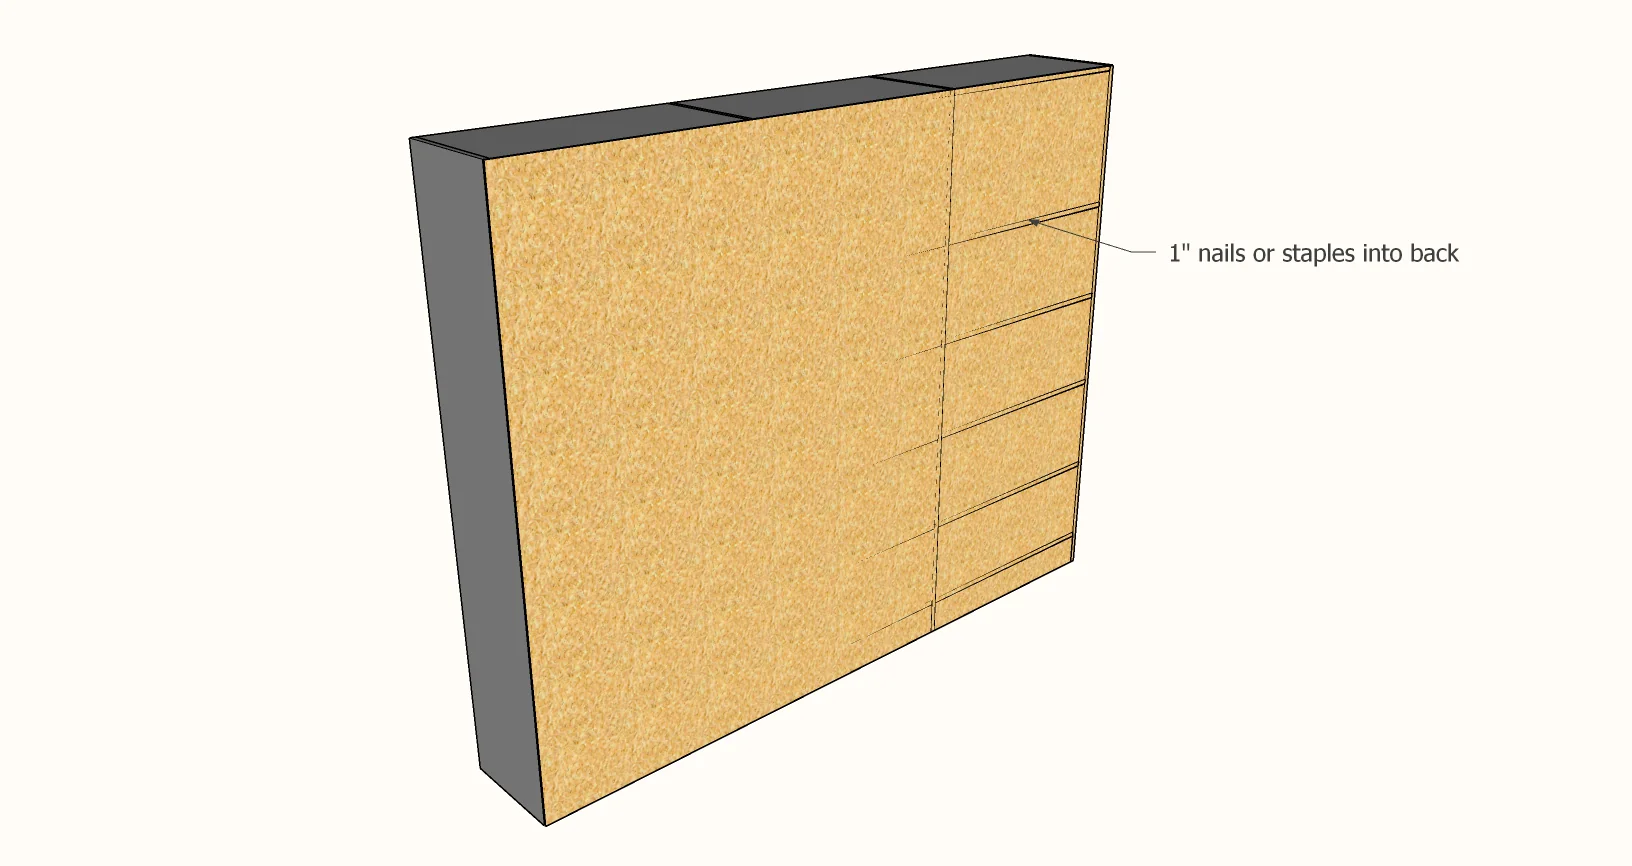
Adding the Back
1/4" plywood, beadboard, paneling, or shiplap and tongue and groove products can all be used. For plywood panels, if the project is too large for a single panel, cut so the plywood seams land on a wood joint.
Use 1" nails for 1/4" material, 1-1/4" nails for 1x material. Attach to all fixed shelves and dividers with glue.
TIP: Before laying the back on, mark with a pencil the location of the dividers and fixed shelves on the sides of the bookshelf. Then lay the back on, and draw lines on the back between your pencil marks on the sides.
Step 4
Base and Top Moulding
Crown and base moulding will give your bookshelf a finished, built-in look.
It should be cut to fit, start with the front pieces and miter the ends at 45 degrees.
Attach with 3/4" brad nails and wood glue.

Comments
jennylabendz
Sat, 11/28/2020 - 15:07
Just one question. Am I…
Just one question. Am I seeing this correctly? You can put pocket screws that go into the vertical pieces at the same spot on either side? Or did you have to position the pocket holes differently so they don't bump into each other?
Thanks!
rachelolson
Mon, 12/28/2020 - 11:43
I am unable to input…
I am unable to input anything higher than 74 inches for height into shelf help.