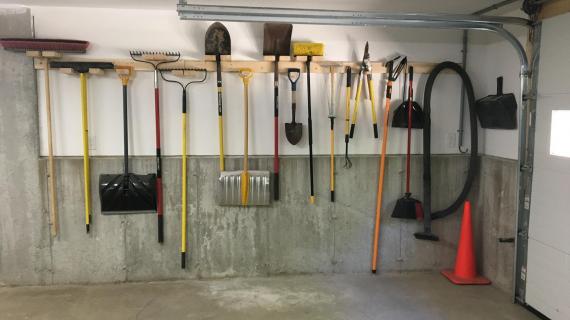
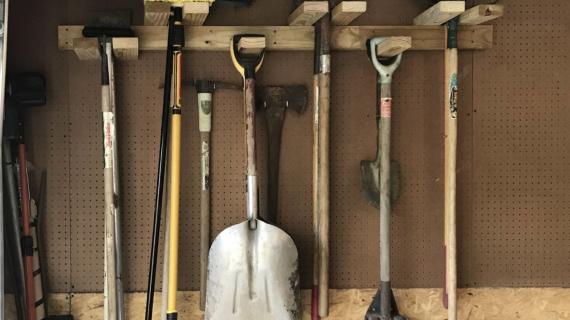
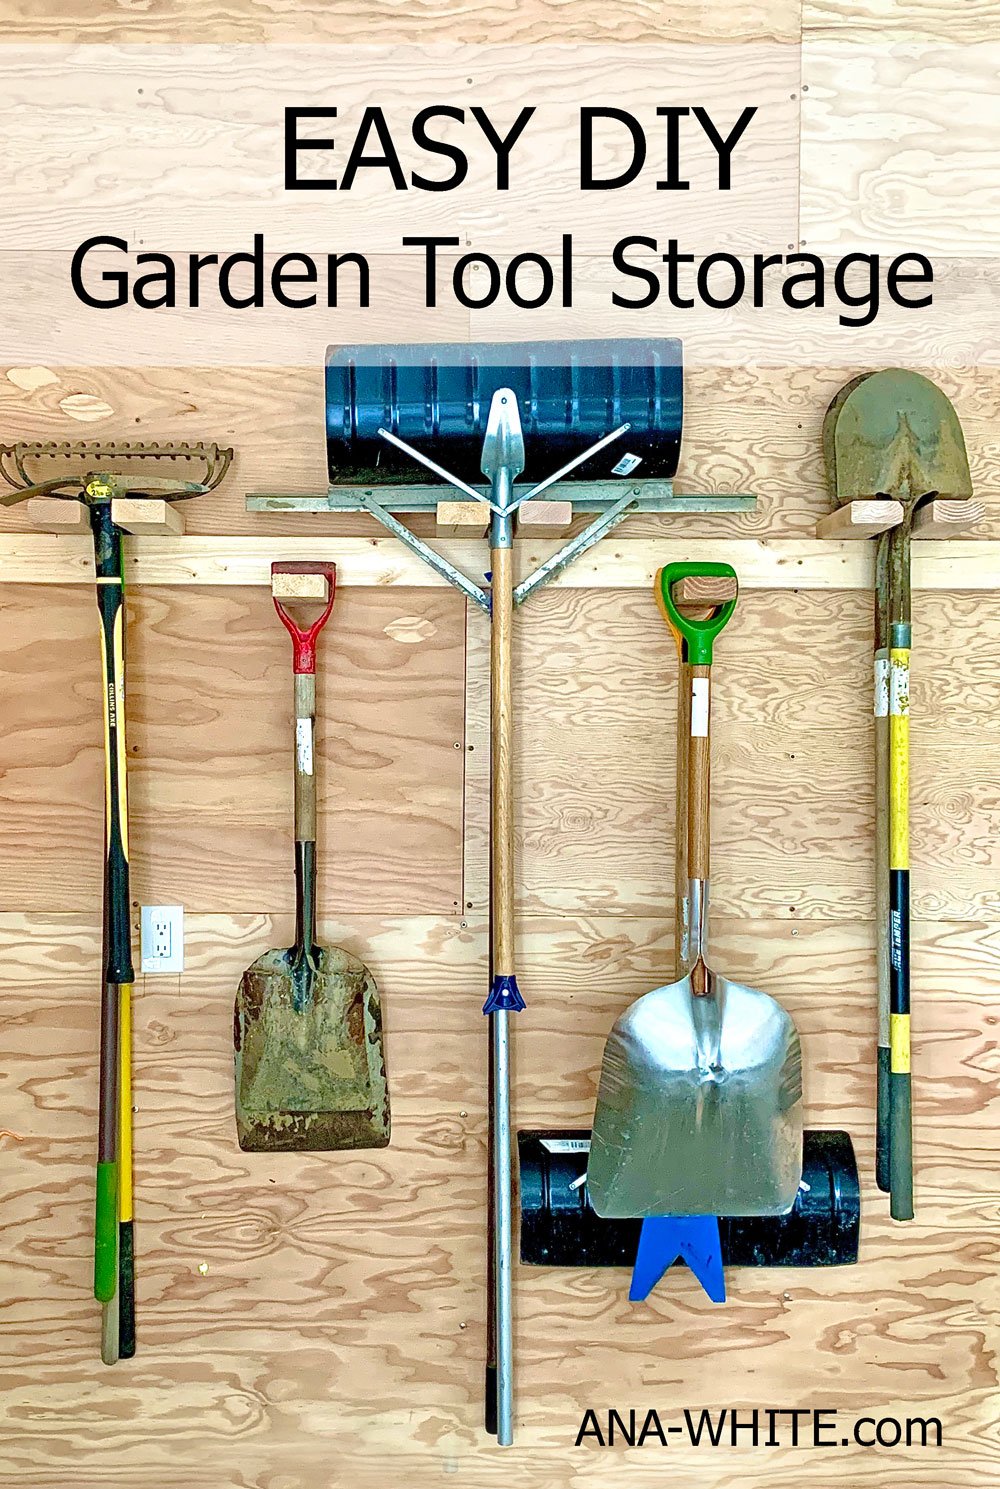
Get those rakes and shovels up off the ground and put away! Super easy and quick DIY project to organize and store your garden tools. Customize for your space and tools. About $10 in materials to build. Free plans by Ana-White.com
Garden Tool Storage Features
- Sturdy 2x4 construction can be used indoors or outdoors
- Can be painted or stained to match exterior siding
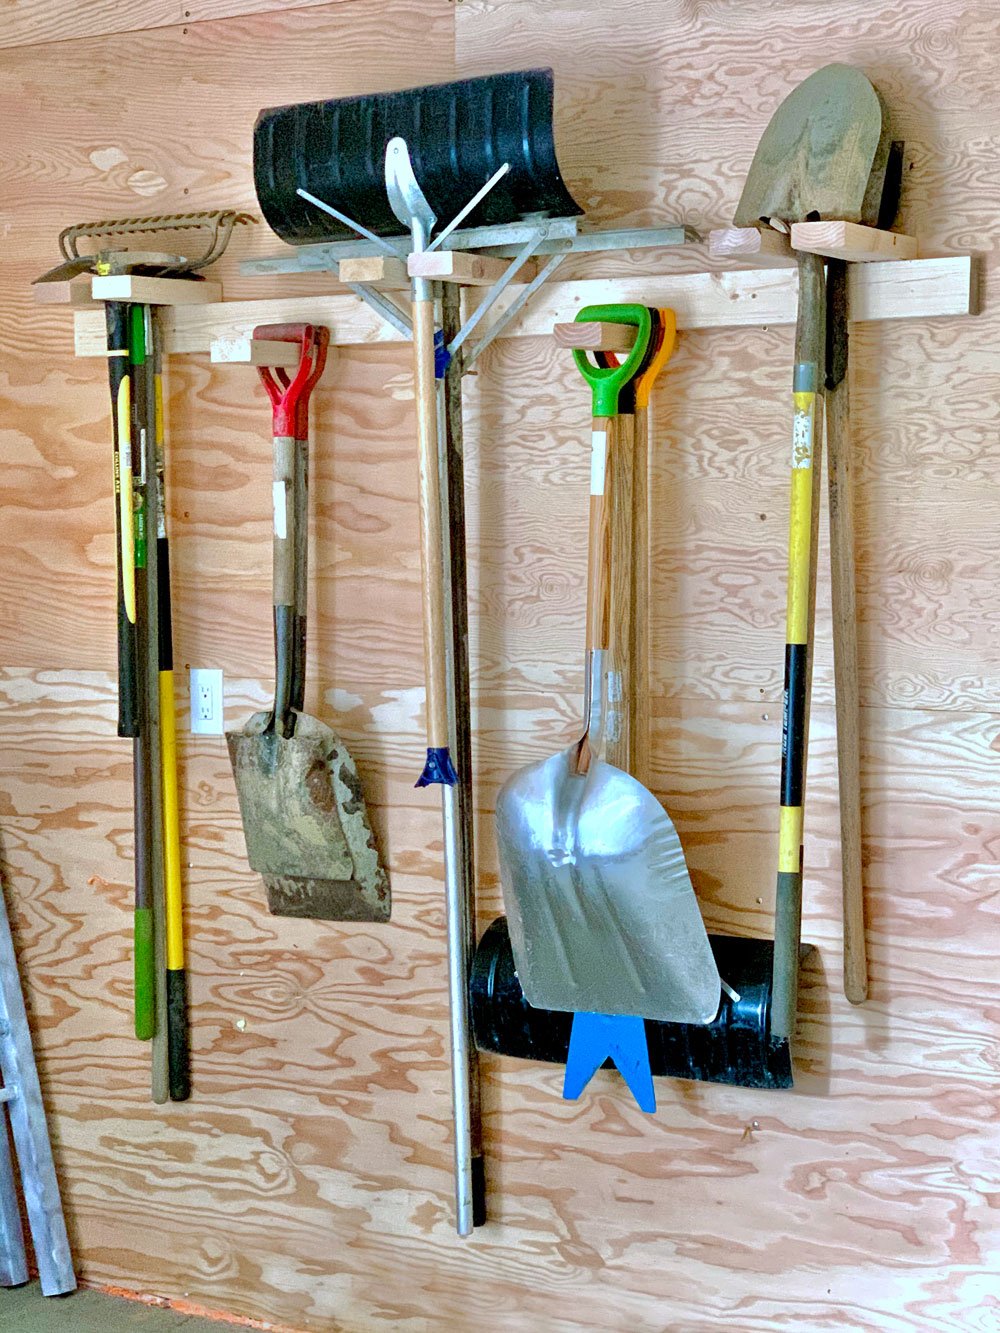
- As shown, fits up to 20 tools of varying sizes easily! (16 shown on the rack)
- About $10 to build
- Easy to customize for YOUR tools and YOUR space
- Hang by handle, or upside down, so works with almost any tool
- Super easy build out of just two 2x4s - make it in about 10 minutes!
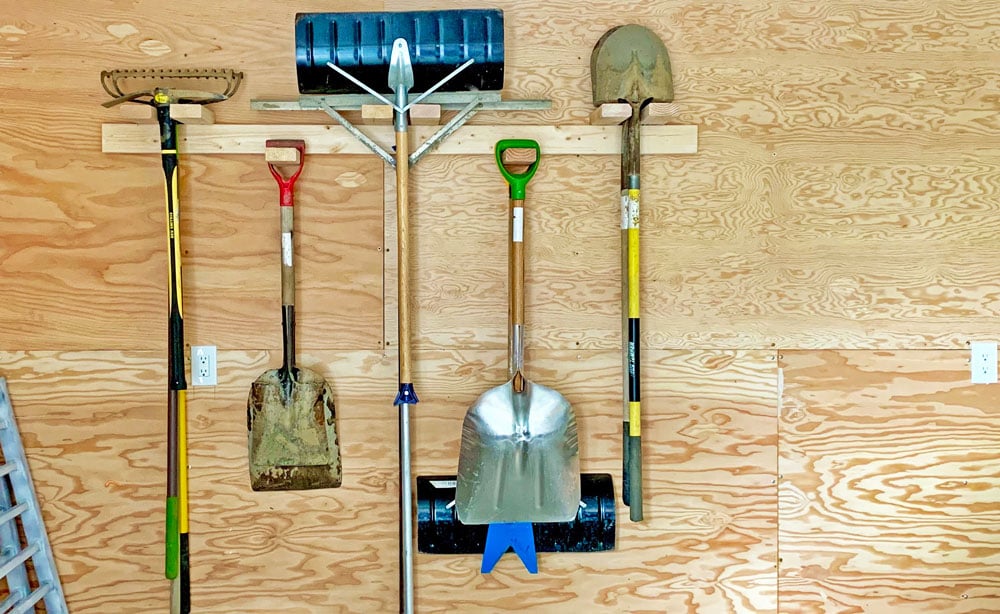
From the front, the garden tool rack looks all neat and organized, with the handles all lined up perfectly -
But it holds a TON of tools - up to five tools slot!
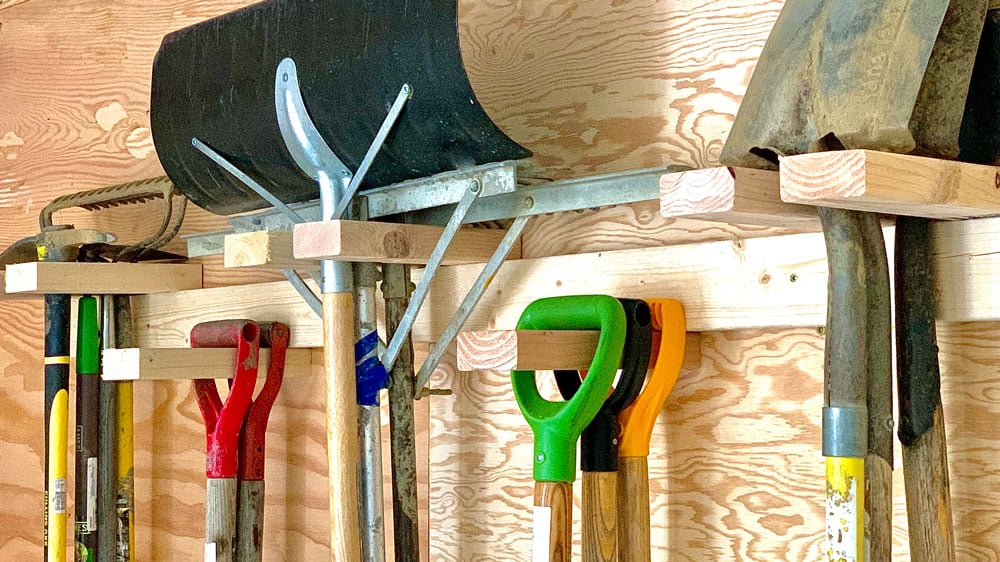
We love that it is sturdy and EASY to put tools away. Now swinging tools or wobby hooks, or having to slide handles into little holes upside down. This project is designed to be user friendly, so it actually gets used!
Video Tutorial
In this video I show you how I built mine by laying it out first, and then assembling. Please take a quick second to watch!
Ready to Build? Here's the Plans!
We've prepared plans below for exactly as shown in the photos - but of course, please, modify to suit your needs and space.
Preparation
2 - 2x4 @ 8 feet long
20 - 2-1/2" to 3" long self tapping screws (like these) look for the star bit ones, make sure they are exterior rated if using outside
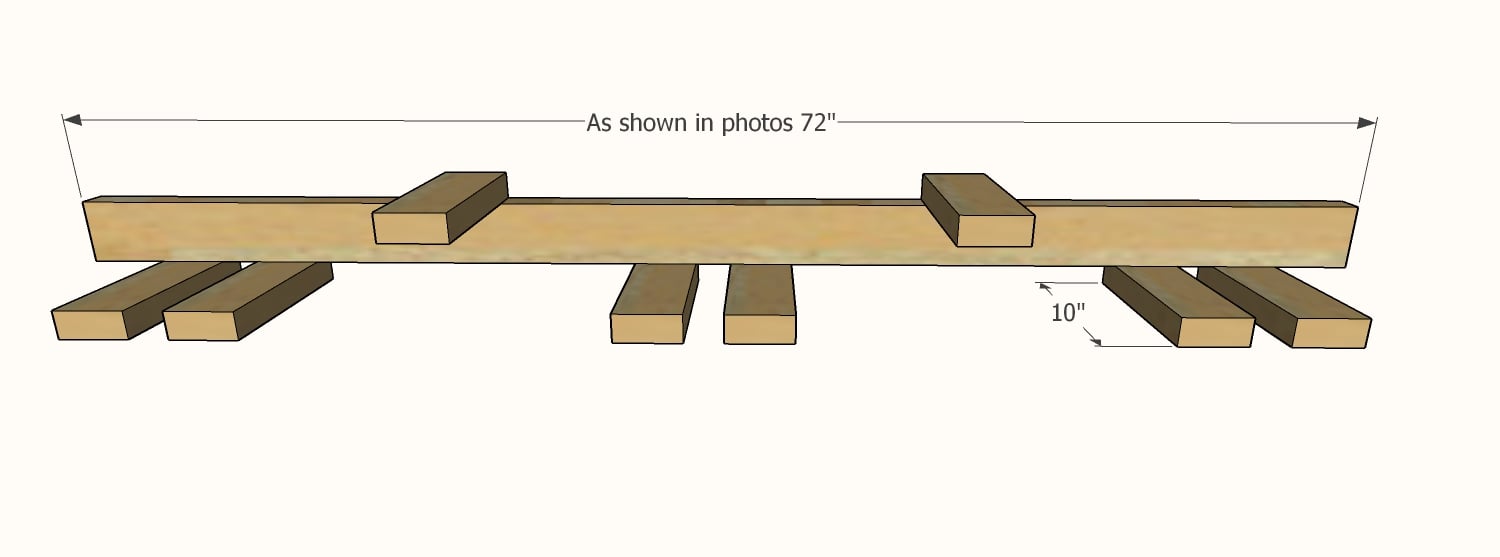
Can be made to any dimensions. Cut list as shown in photographs and video
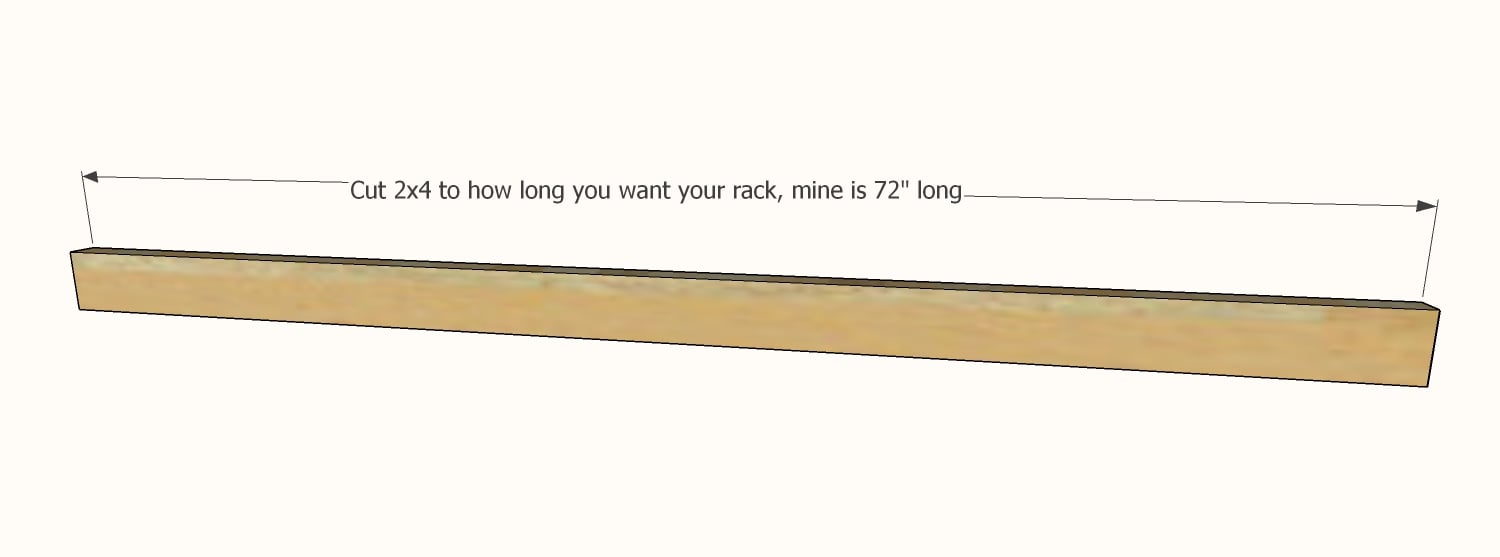
- 1 - 2x4 @ 72"
- 8 - 2x4 @ 10"


Instructions
Step 1
If you are customizing -
Measure your space.
Cut a 2x4 to fit the desired length of the garden tool rack.
Lay on a flat surface and begin placing your tools over the cut 2x4, organizing tools without D ring handles upside down at the top, and tools with a D ring handle hanging below.
Lay out the position of the 10" blocks and mark.
Step 2

Attach the upper hanger blocks to the top edge of the 2x4 with screws, two per joint. Leave a 2" gap in between for sliding tools in.
Step 3
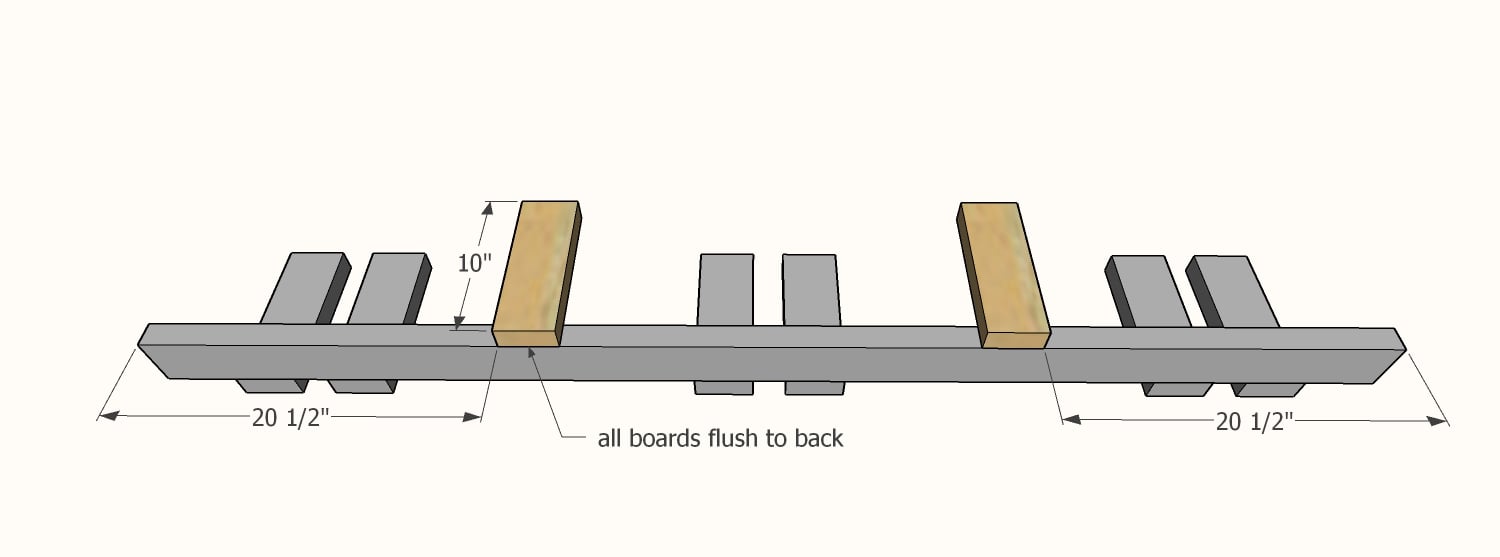
Add the bottom row of hanger blocks.
Step 4
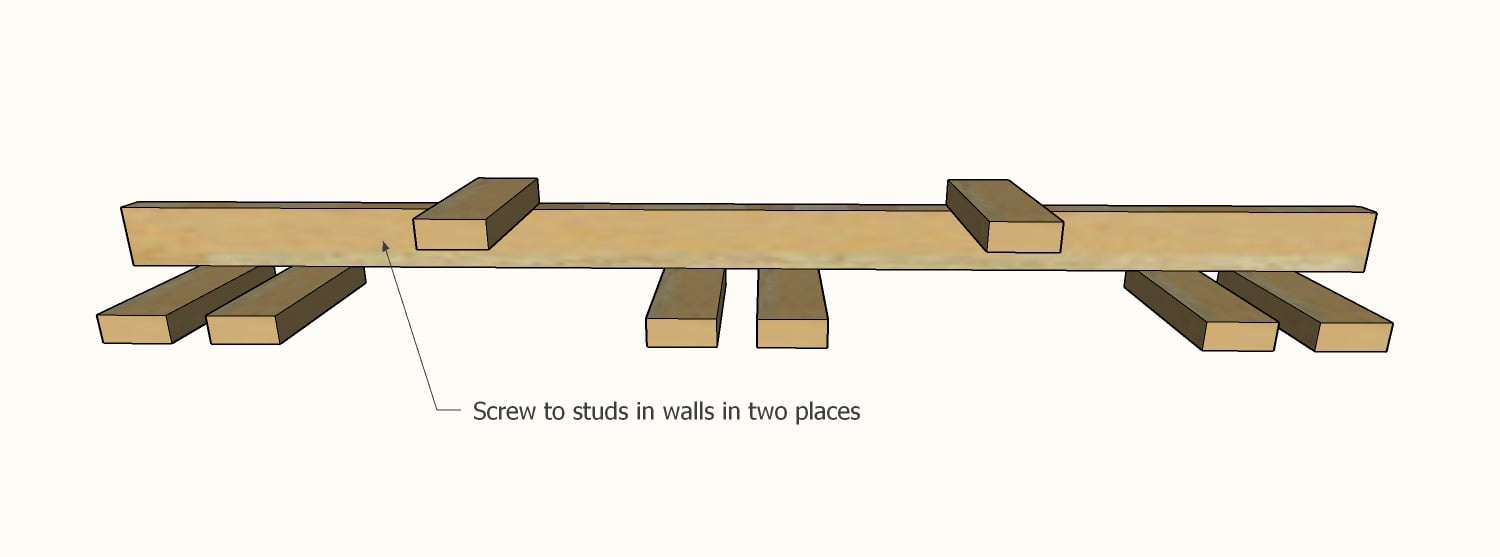
Locate two studs in the wall and hang to the studs, high enough so the longest tool does not hit the ground (I hung ours at 72"). You need two screws per stud, minimum four screws.