Grocery Bag Dispenser Holder

Difficulty
Beginner Projects
| Print this plan

DIY grocery bag holder dispenser trash

Finally a solution for those disposable grocery bags!

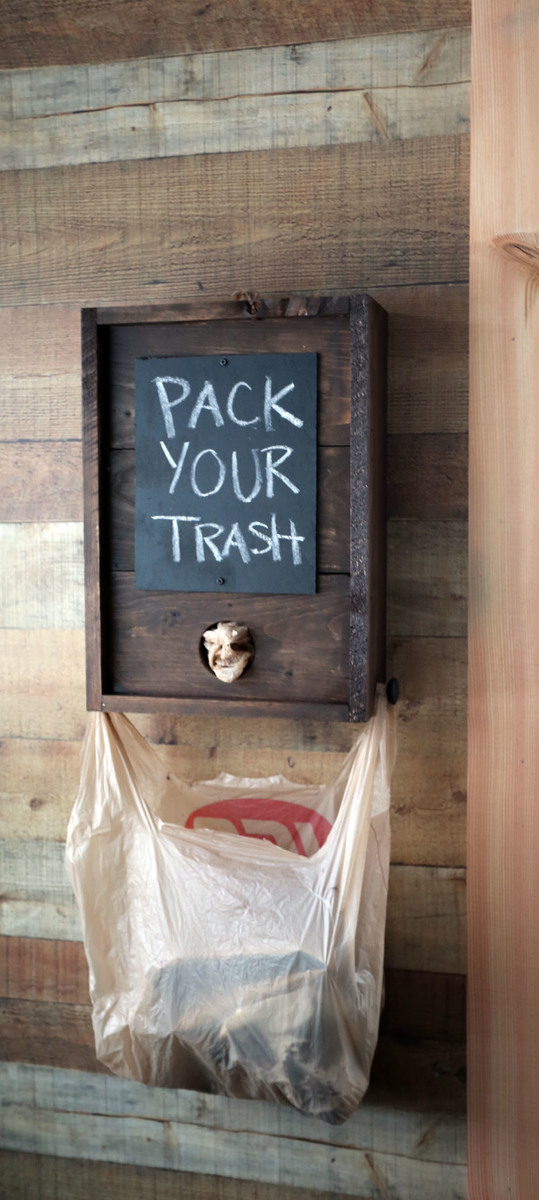
This DIY Grocery bag dispensers stores, dispenses and holds bags - the perfect solution for reusing those plastic grocery bags.

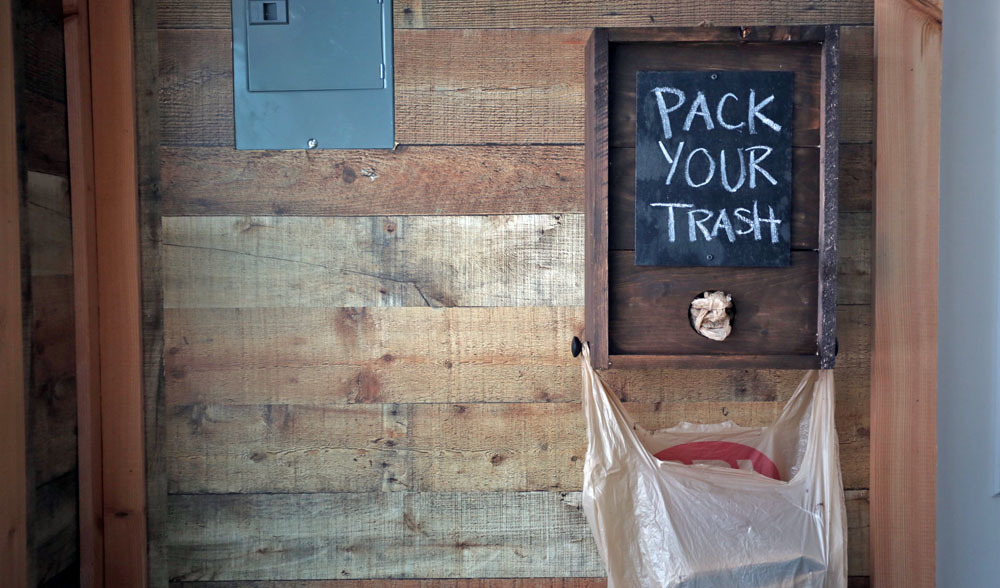
We are donating a Warm Up Shack to our Community Ice Rink.  There is no budget for daily janitorial, so I knew better than to include a trash can without having a designated means to take the trash out.  So I racked my brain - How could we create a system that enabled people to pack their own trash?  And one that doesn't cost our community any extra money?

Of course we use reuseable grocery bags, but inevitably, everyone ends up with some plastic grocery bags.  I can't stand throwing them away, so will use them in bathroom trash cans and keep a few in the car and in my diaper bag (when we are in the diaper years).  They can be quite handy for dealing with trash.

So I came up with this - 

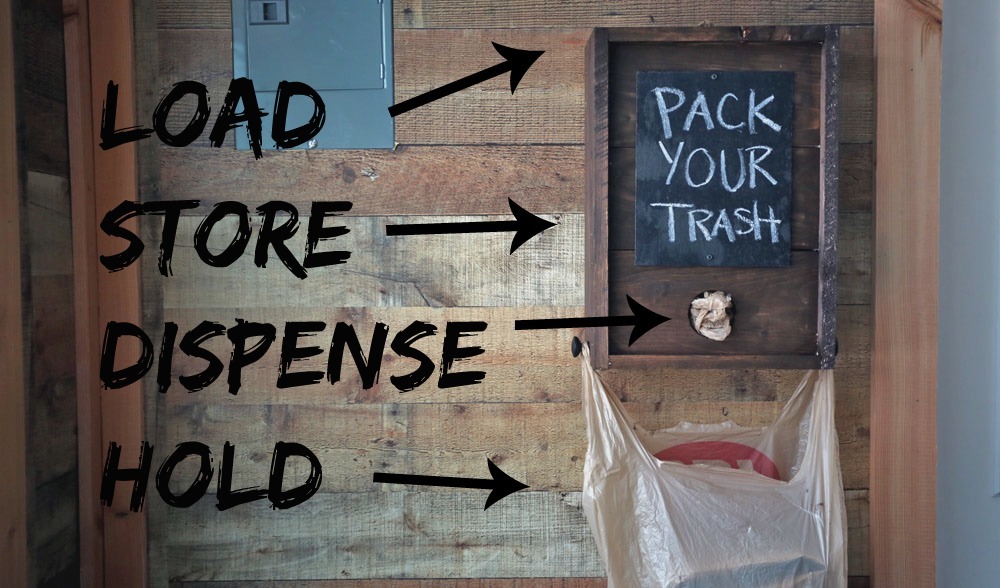
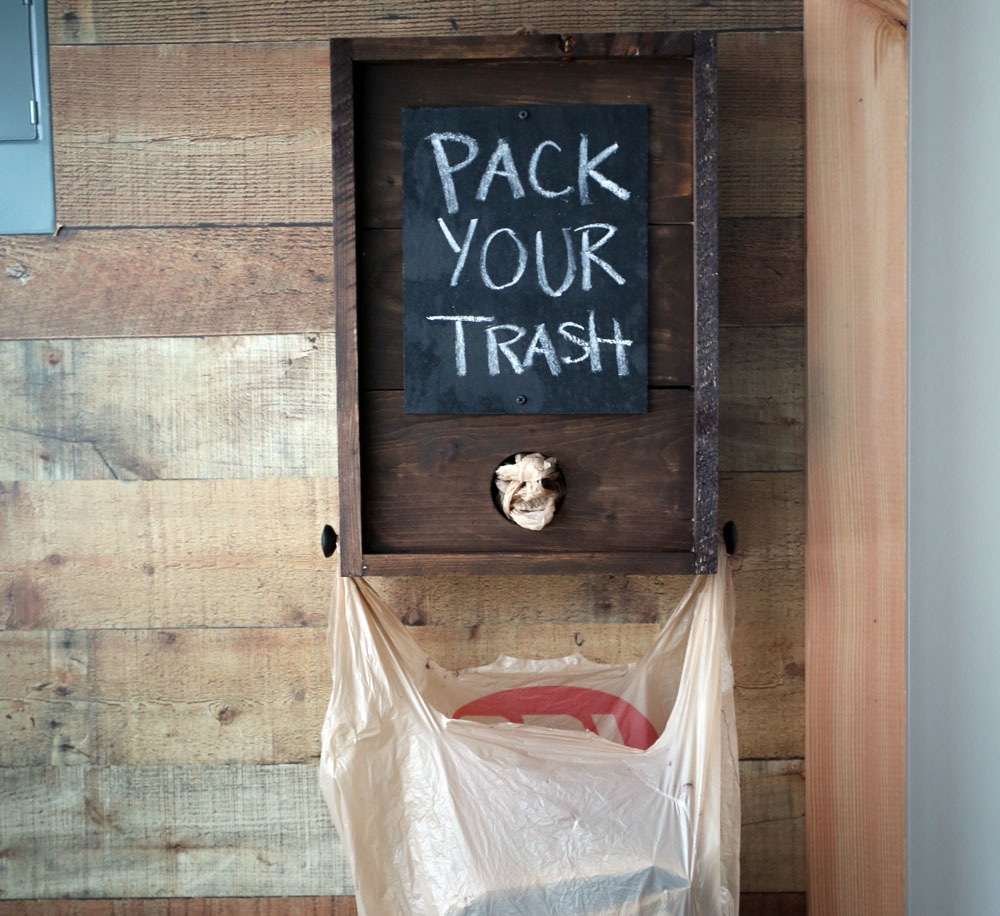
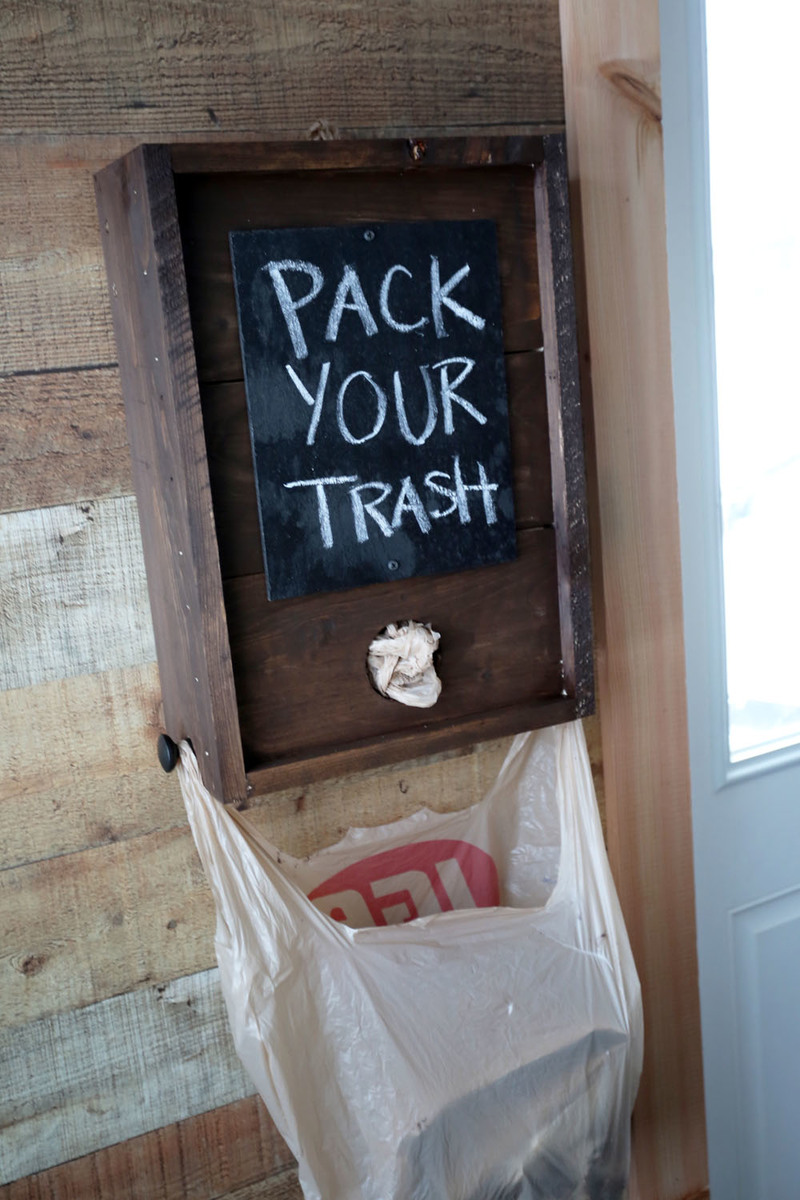
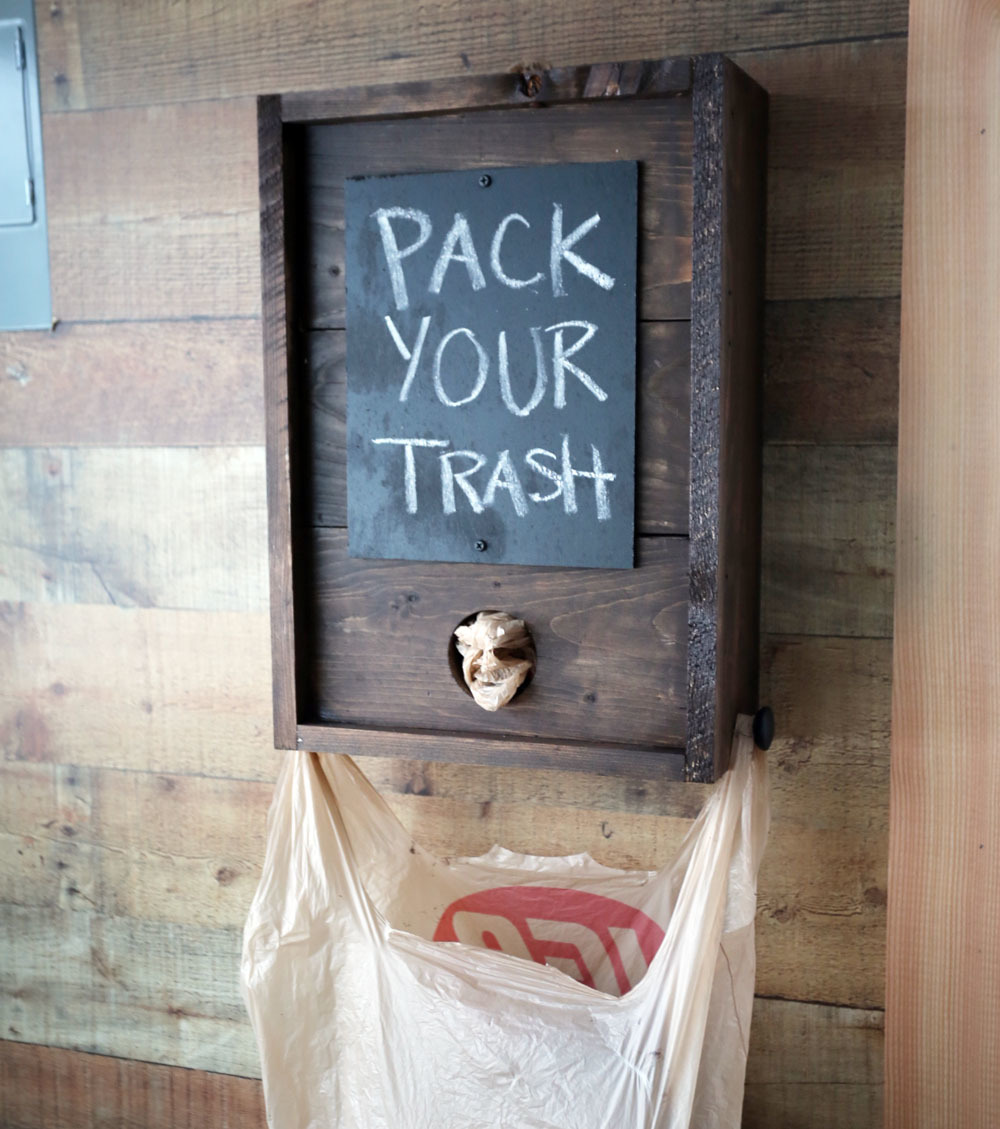
Plastic grocery bags can be stuffed in from the top.  Bags can be dispensed out the front.  And two knobs can be used to hold the bag up when in use as a trash can.

We've already used it a few times, and the system works!  It's too easy to pack your own trash this way, and I'm confident this system will be very help to users of the Skate Shack.

You can watch me build it in this video -

Since then I've stained the outside Rustoleum Dark Walnut -

And added the chalkboard to the front.  It's just a piece of 1/4" scrap plywood spray painted with Rustoleum Chalkboard Paint.

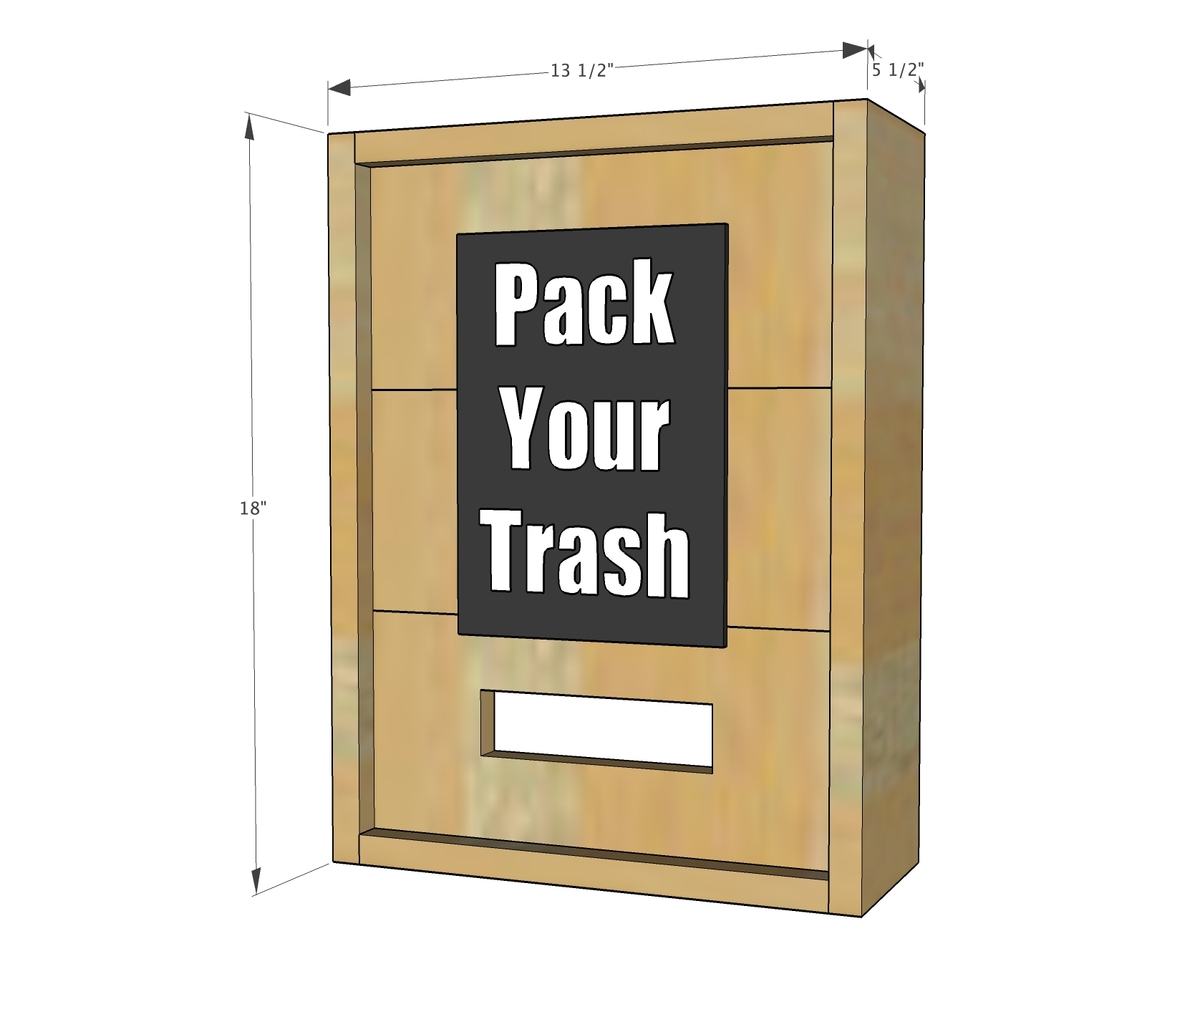
It's just 8 feet of 1x6 boards, and some holes drilled!  

You'll find the plans following - do share if you build, can't wait to see how your Grocery Bag Dispenser turns out - and how you use it too!

XO Ana


Dimensions

Preparation

Shopping List

1 - 1x6 @ 8 feet long

1 - 2x3 or 2x4 @ 12" long - cleat for hanging, can also use hanging brackets

1-1/4" brad nails

2 - knobs (nails or screw heads would work too)

Cut List

5 - 1x12 @ 11-3/4" (I shortened these cuts so you can get all the cuts from the 1x6x8)

2 - 1x12 @ 18" - cut to fit

1 - 2x3 or 2x4 @ 11-3/4"

Tools
Tape Measure
Speed Square
Pencil
Drill
Circular Saw
Brad Nailer
Hole Saw Kit

Instructions

Step 1

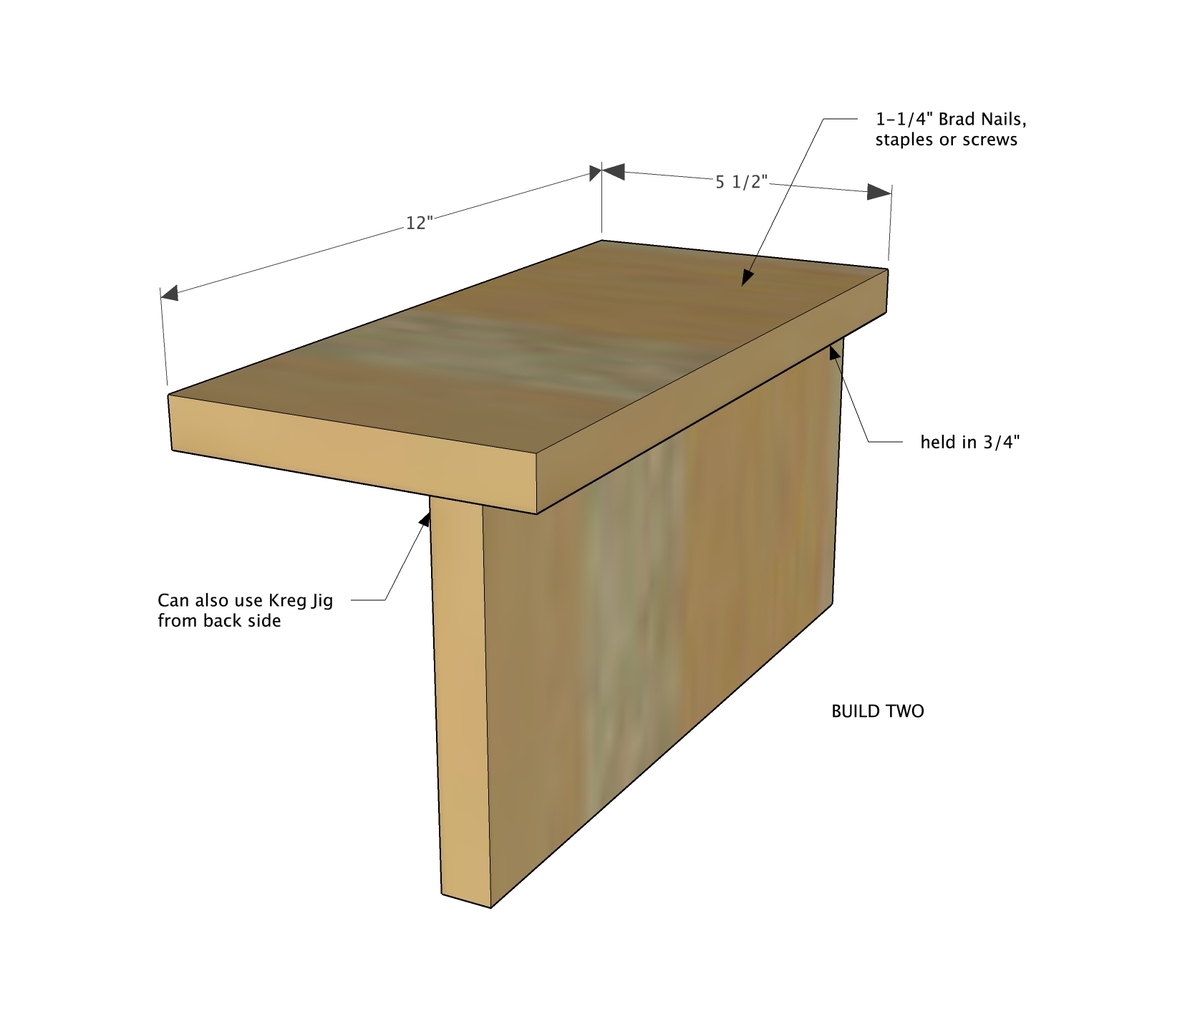
Nail two 1x6s together as shown in diagram.  TIP: Elevate inset board on a 1x6 board to get the 3/4" inset depth.

Repeat to build two.

Step 2

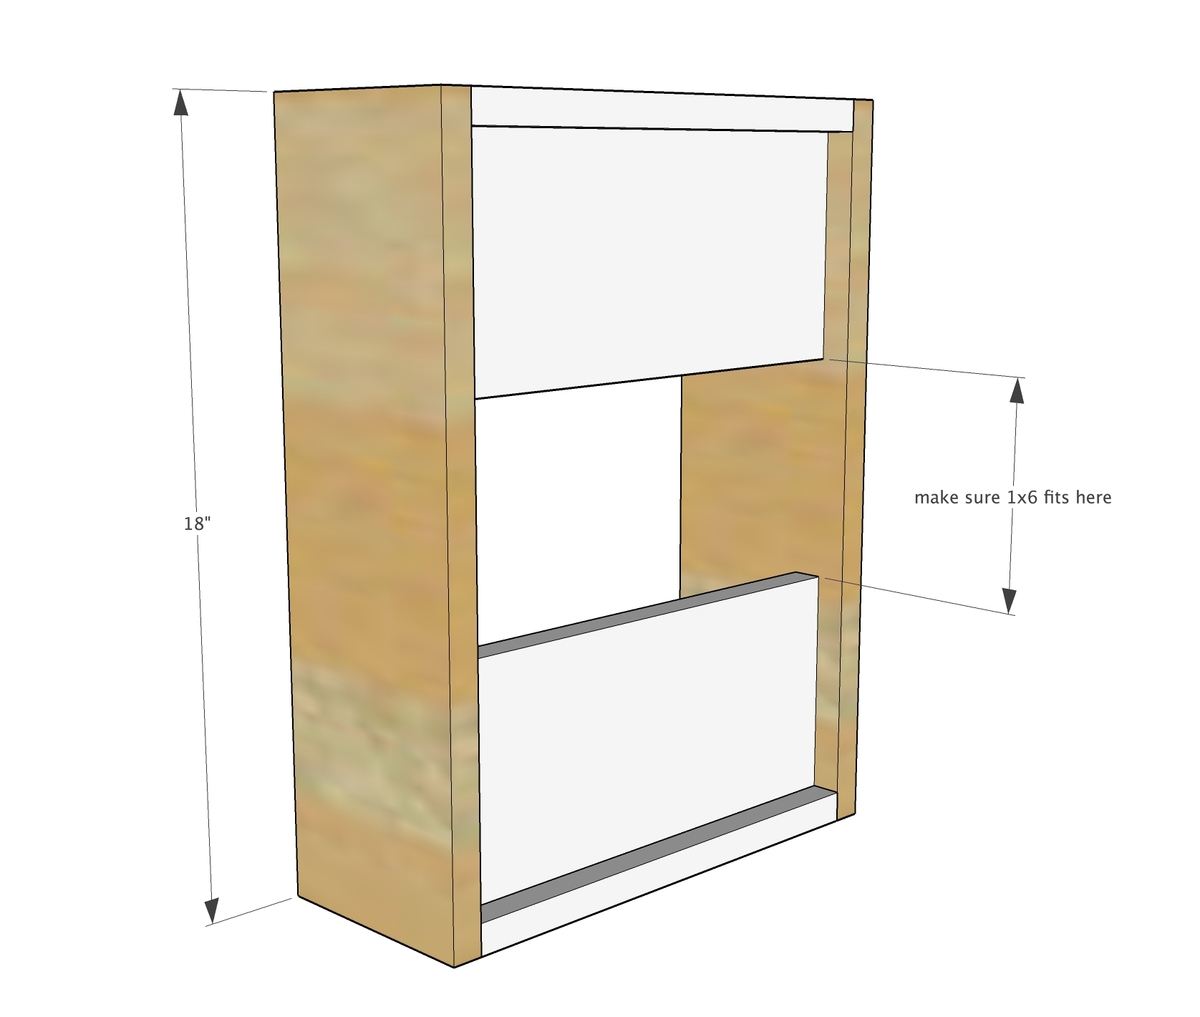
Layout the top and bottom with the middle board in place.  Measure and cut sides (should be about 18").

Nail the sides to the top and bottoms you built in step 1 with 1-1/4" brad nails and wood glue.  

Step 3

Nail the last 1x6 board in the center.

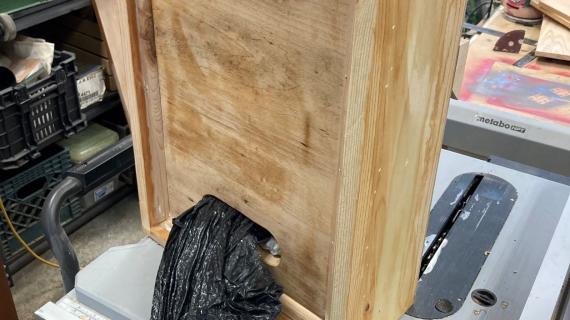
Cut out the openings for loading and dispensing the bags.  I wish I'd used a jigsaw to cut a square opening in the front as it does look a little "birdhousy" - as my four year old put it.

Step 4

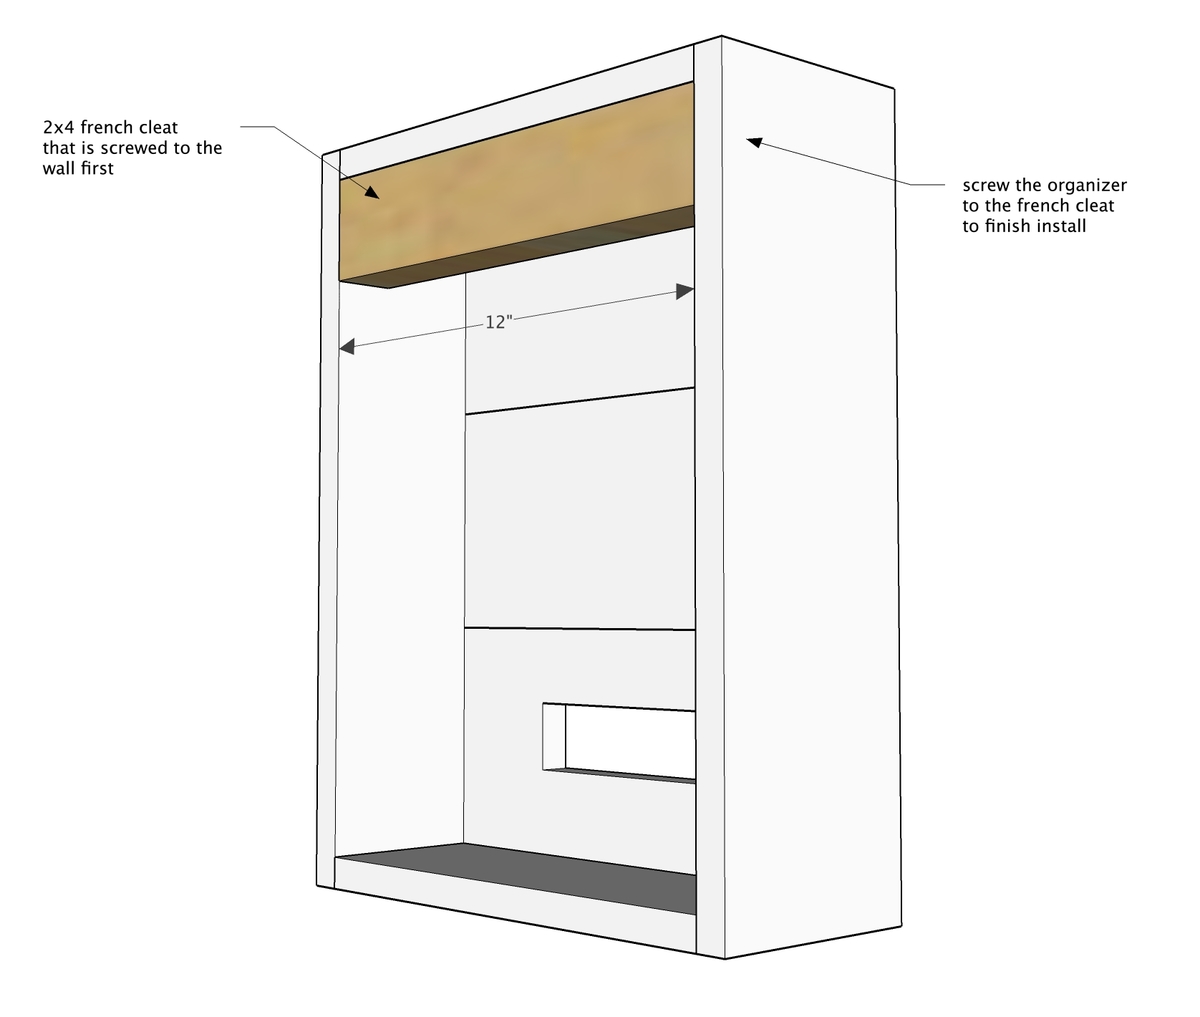
To hang, I cut a scrap 2x4 board 11-3/4" long and screwed it to the wall where i wanted the grocery bag dispenser hung.  Then I just placed the grocery bag dispenser over the 2x board and screwed it down with a couple of 1-1/4" wood screws.

You could also hang with metal brackets or a picture hanging kit.

Frequently Asked Questions

Wood Questions

What kind of wood should I use?
Most of our plans use standard construction lumber like pine or fir. It's affordable, easy to work with, and easy to find. It's also rapidly renewing and biodegradable, so a great eco friendly choice!

Can I use hardwoods instead?
Yes—just keep in mind they're heavier, cost more, and can be tougher on tools and harder to join together and finish. I recommend not tackling a hardwood project until after you have built several softwood projects.

What if my boards are warped?
Choose the straightest boards at the store. You can often work around slight warps by cutting them into shorter pieces.

What wood should I use for outdoor furniture?
Use red-toned or pressure-treated 2x lumber for framing, and cedar or cedar fence pickets for the decking. Outdoor furniture should be built like a deck—your local home center can help recommend the right wood for your climate.

Will my wood move or warp after I build?
Potentially, especially in humid climates. Let your wood acclimate indoors before building. Once acclimated and kept in a stable environment, movement should be minimal. Remember, most houses are built using framing lumber - it's all about keeping moisture down indoors.

Cutting Questions

Do I need a miter saw?
A miter saw is great, creating fast, safe, and precise cuts, even for beginners. But most plans can be built with a circular saw and a straight edge. If using a circular saw to cut, take time to practice, and get good at making cuts, before cutting your project boards.

How do I get clean cuts with a circular saw?
Clamp your board, measure twice, cut slow, and use a sharp blade. This takes practice, so spend some time making cuts. I go through becoming proficient at freehand cutting in my course, it is worth taking if you want to master this skill.

Will the store cut my wood?
Yes—most stores will do rough cuts to help you transport your materials home. But from store to store, the quality of cuts could greatly vary.

Joinery Questions

What screws should I use?
We recommend star-head self tapping screws for framing, most common sizes are 2-1/2", 1-3/4". Pre-drill if close to the edge or you find your wood is splitting.

Do I have to use pocket holes?
Pocket holes are the cheapest, easiest and fastest way to do some joints - like edge to edge or a hidden fastener joint. There are other methods, but these can be time consuming and expensive. We recommend using pocket holes as indicated in plans for best results.

How do I keep things square?
Use a speed square and measure diagonals after each step. Always clamp joints before screwing to keep them tight and flush.

Finishing Questions

Stain or paint before or after building?
A quick sand before and a full finish after gives the best results. Pre-finish if you're doing two-tone or detailed finishes.

What type of finish?
Use oil-based or water-based stain. For paint, cabinet-grade latex or enamel works great. High use surfaces on indoor projects should get a coat of polyurethane, I recommend a Helsman or Spar or other flexible poly that won't crack or peel with wood movement. For exterior projects, use a finish suitable for exterior fences.

How to get a smooth finish?
Start with a well sanded project. Sand between coats (220 grit), wipe clean, and apply light coats with a foam brush or roller.

Plan Questions

Can I change the size?
Many people do, and that's the great thing about building your own furniture! But do keep in mind going bigger might mean more supports are required, and often plans are optimized for minimal material waste.

Are these beginner-friendly?
Yes—plans are written with simple tools and clear steps in mind, with every effort to make plans as simple as possible.

Can I sell what I build?
Absolutely! Just don’t resell or repost the plans themselves.

General Questions

What tools do I really need?
A drill, circular saw, tape measure, square, and a few clamps will get you through most projects.

Do I need a workshop?
Nope! A driveway or small patio is plenty to get started, just make sure you have a level place to work. If you find you are building several projects a year, creating a small workbench is a great way to store tools and have a dedicated workspace.

What if I mess up?
Wood filler, sanding, or flipping boards goes a long way. Mistakes are part of the process!

What can I do to make my projects look more professional?
Start with straight boards, make accurate cuts, clamp all joints, and line up everything neatly. Sand thoroughly, use a neutral finish, and apply it in light coats for a clean look.

I've never built anything before. Where should I start?
Start with a few smaller softwood projects to get hands-on experience. Or if you're tackling a big project, buy a little extra lumber and practice your cuts and joints first. If possible, work with someone who has a bit of experience.

Care & Maintenance

How long will my furniture last?
With good joinery and regular care, your DIY furniture can last for decades. I have pieces in my own home that are over 20 years old and still going strong! One of the best parts about DIY furniture is that it’s easy to repaint, refinish, or repair—so your projects can grow and adapt with you.

How should I care for outdoor furniture?
Lightly pressure wash or hose it down once or twice a year. Tighten screws and reapply finish as needed to protect it—just like a deck or fence. A little upkeep goes a long way in extending the life of your furniture.

How about indoor furniture?
Regularly dust or wipe with a damp cloth. If it starts to look worn, a light sanding and touch-up paint or stain can refresh it in no time. DIY pieces are meant to be durable and fixable—so don’t be afraid to give them some love now and then.

Want to Build with Confidence?

Check out my ebook: 12 Skills to Build Your Own Furniture
It walks you through the core skills every builder needs—measuring, cutting, joinery, and finishing—so you can build beautiful furniture that lasts.

Still Have Questions?

Email us anytime at [email protected] and we’ll be happy to help!