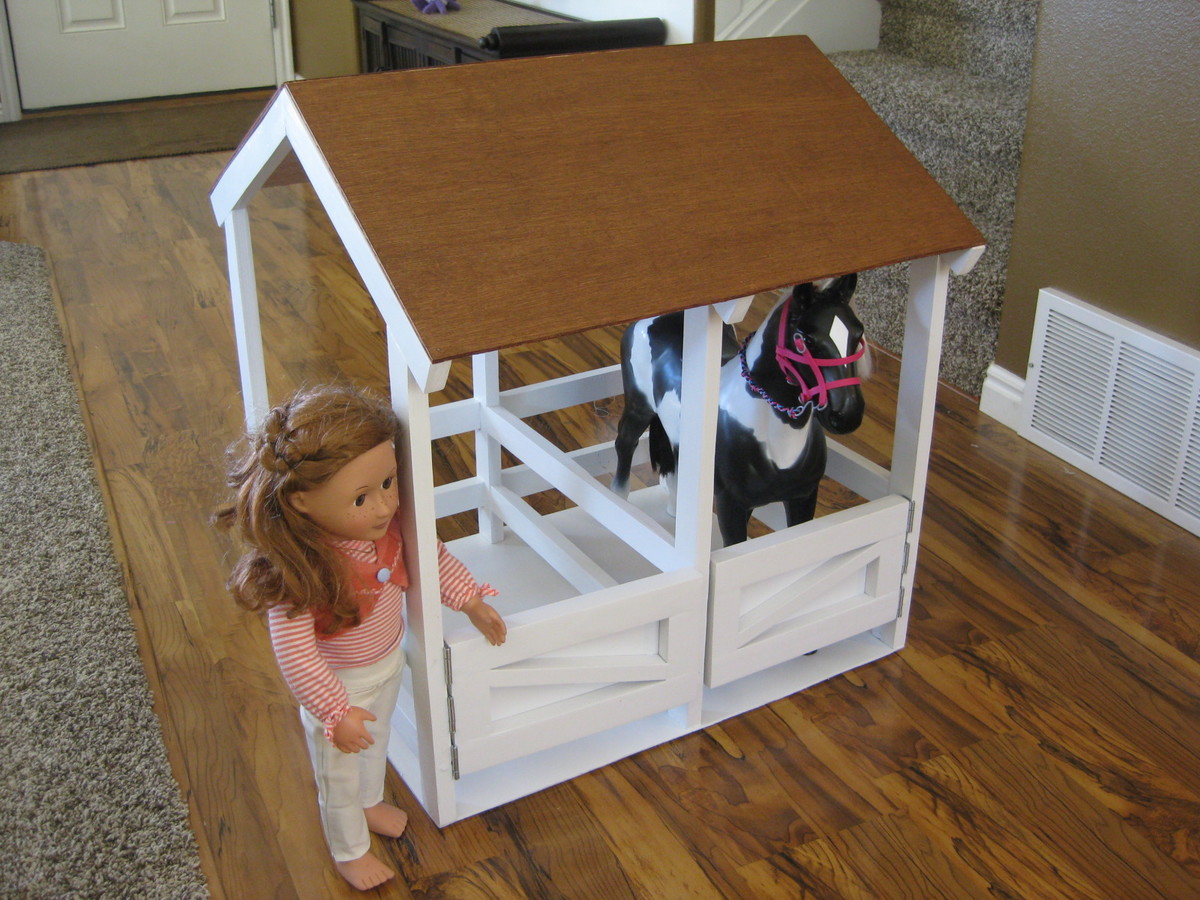
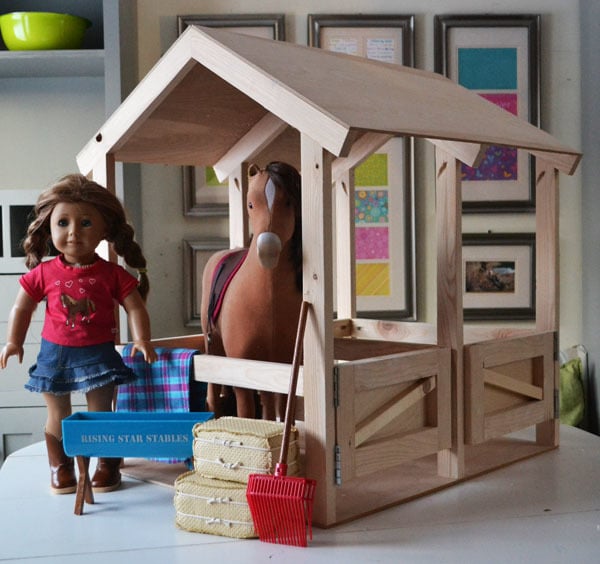
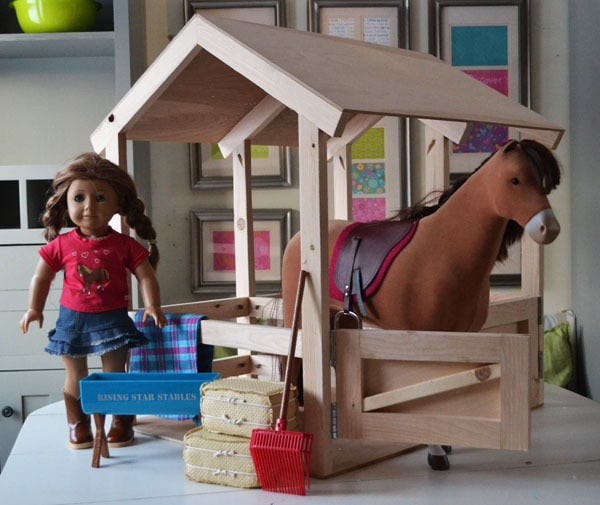
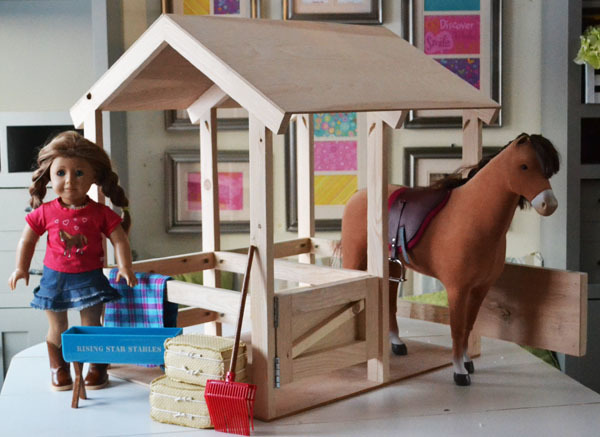
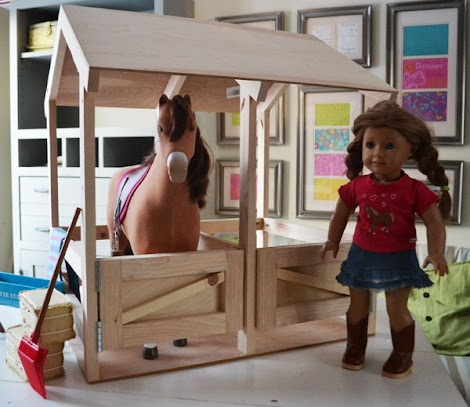
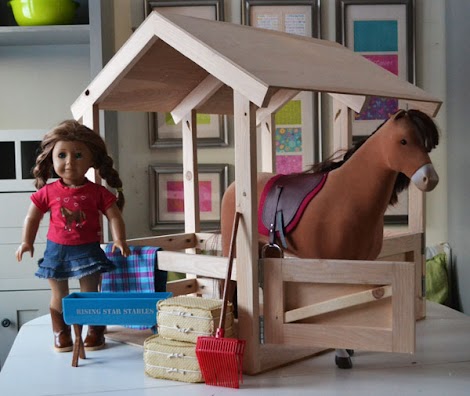
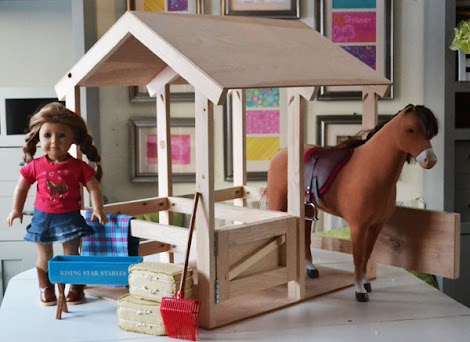
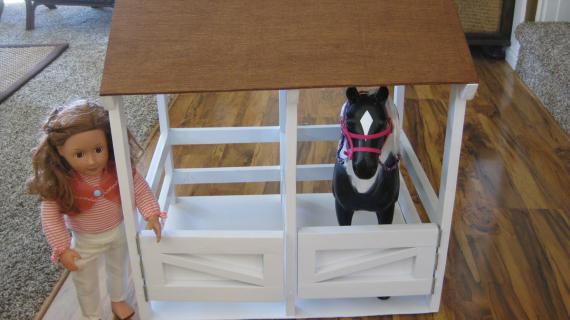
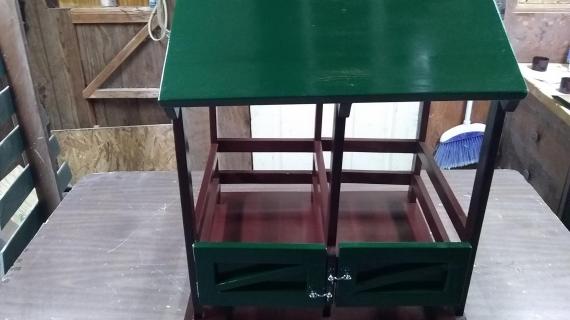
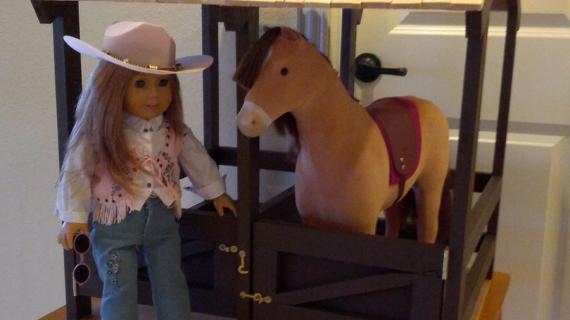
How to build a horse stable for American Girl or 18" dolls.
Preparation
- 4 - 1x2 @ 8 feet long
- 24" x 48" (Quarter sheet) of 1/4" plywood or hardboard
- 21 - 1 1/4" pocket hole screws
- 6 - flat headed wood screws (1" - 2" in length for attaching the base to the legs)
- wood glue
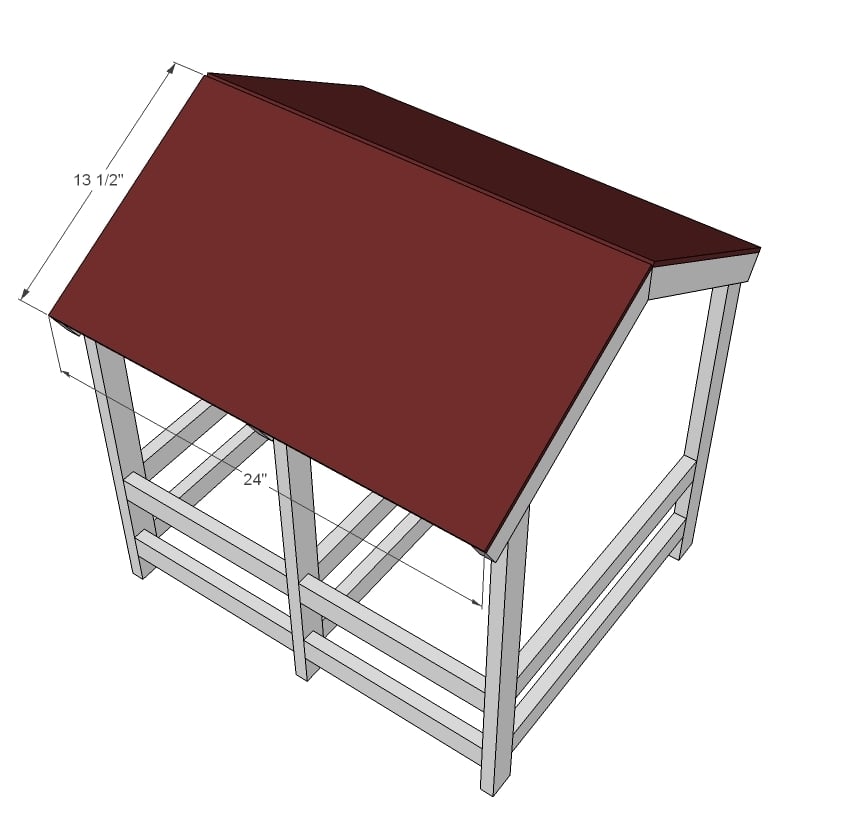
- 12 - 1 1/4" brad nails (for attaching the roof - you can use screws)
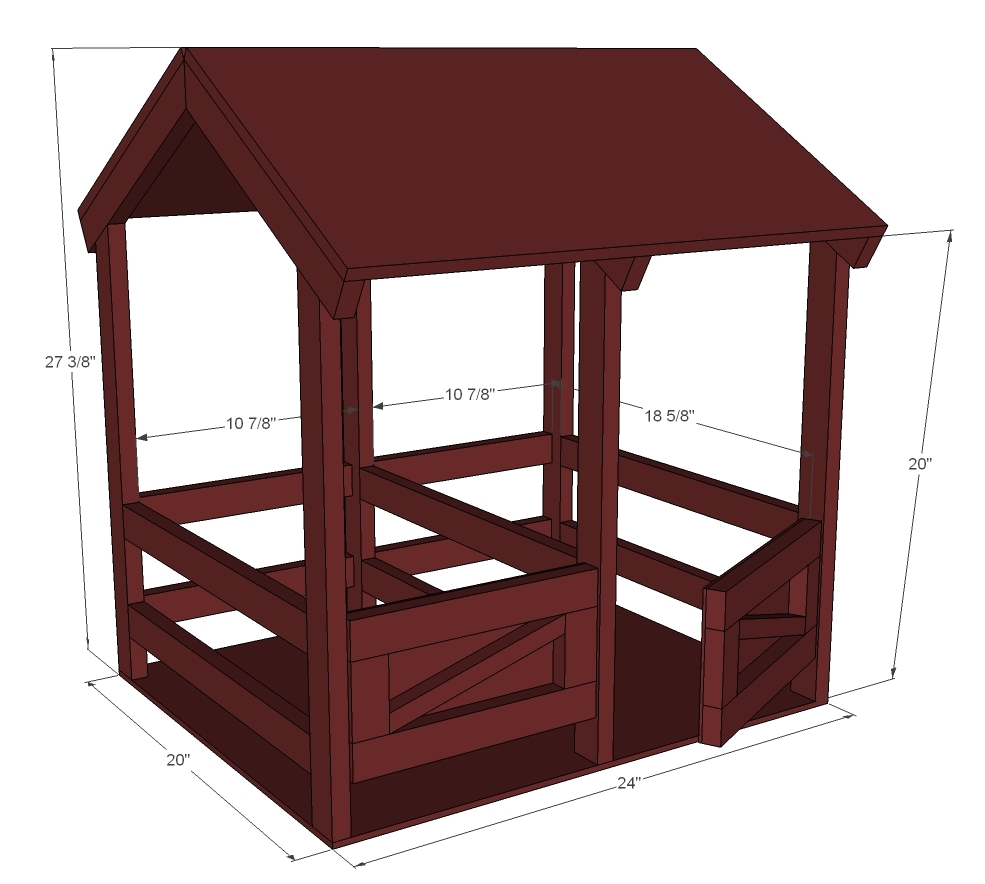
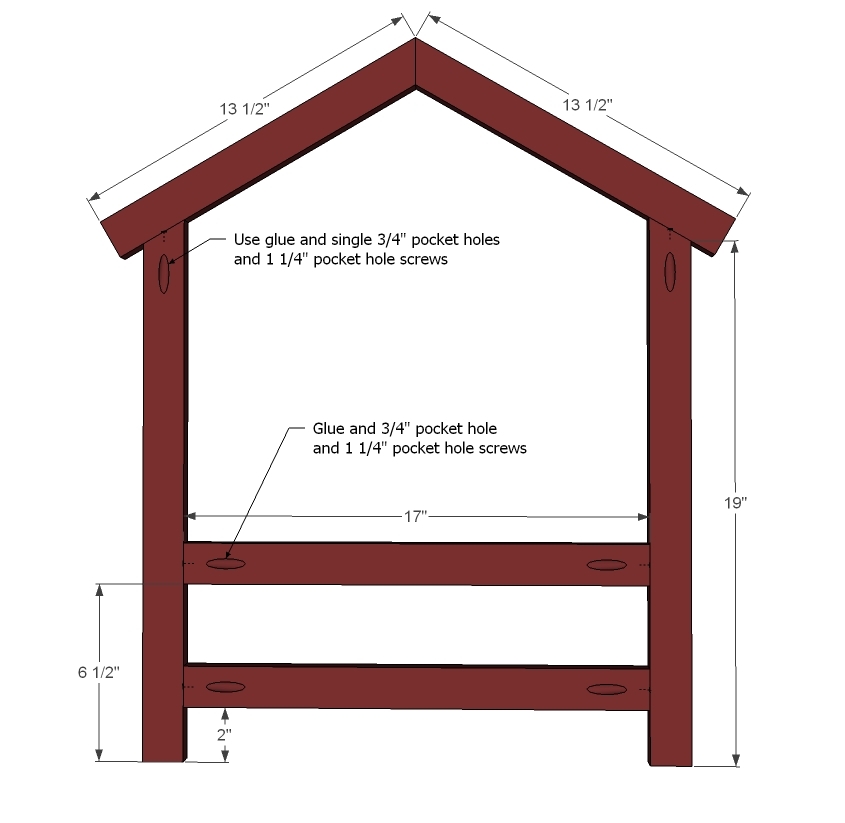
- 6 - 1x2 @ 17" 6 - 1x2 @ 19" (SHORT point measurement, top end is cut at 30 degrees off square)
- 6 - 1x2 @ 13 1/2" (LONG point measurement, top end is cut at 30 degrees off square)
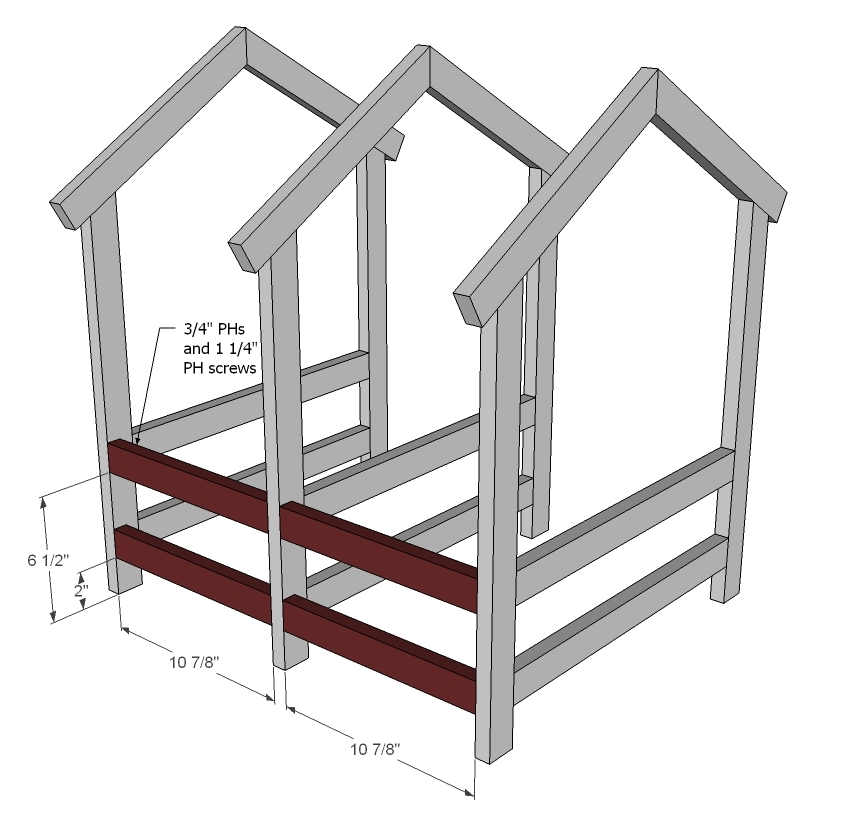
- 4 - 1x2 @ 10 7/8"
- 2 - 1/4" plywood @ 13 1/2" x 24"
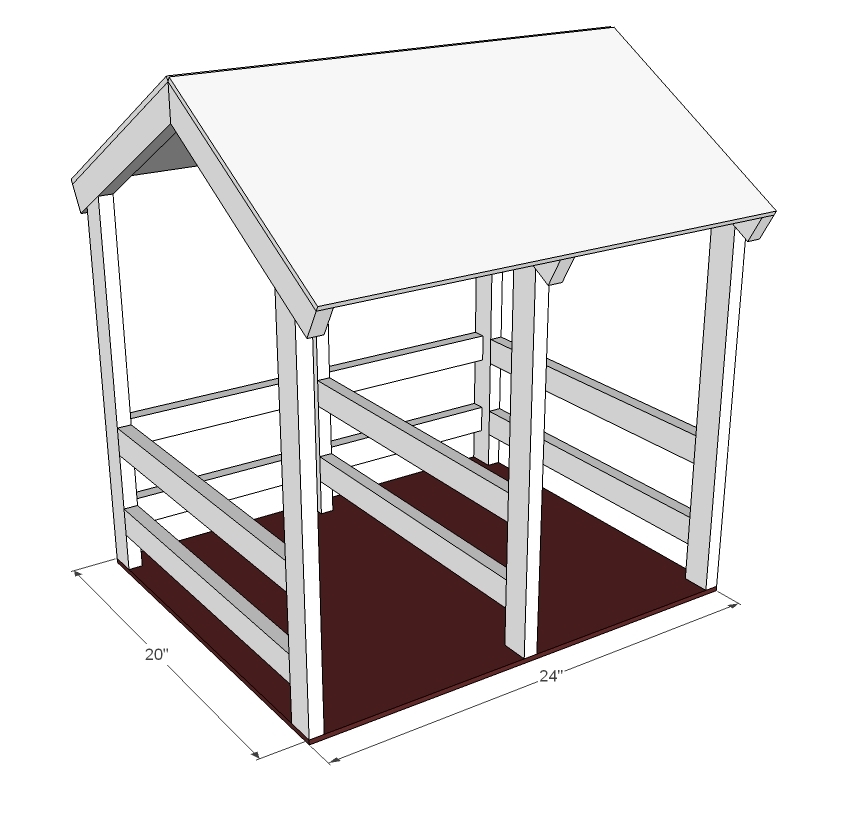
- 1 - 1/4" plywood @ 20" x 24"
DOORS
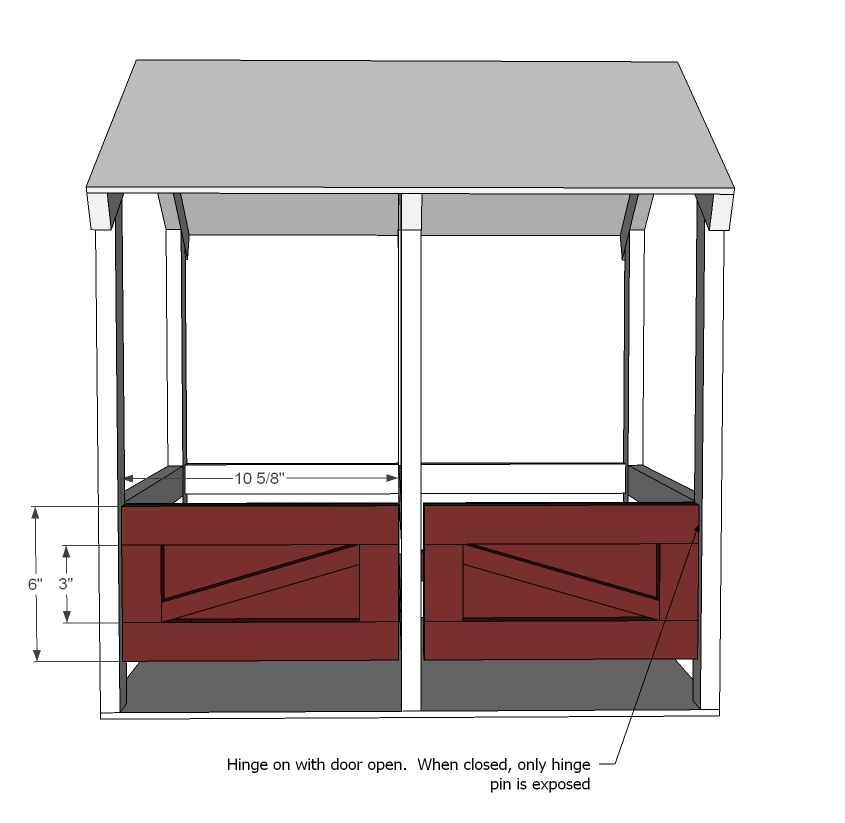
- 4 - 1x2 @ 10 5/8"
- 4 - 1x2 @ 3"
- 2 - 1/4" plywood @ 10 5/8" x 6"
- (optional) 2 - 1x1 cut to fit - end angles are approximately 15 degrees off square
Please read through the entire plan and all comments before beginning this project. It is also advisable to review the Getting Started Section. Take all necessary precautions to build safely and smartly. Work on a clean level surface, free of imperfections or debris. Always use straight boards. Check for square after each step. Always predrill holes before attaching with screws. Use glue with finish nails for a stronger hold. Wipe excess glue off bare wood for stained projects, as dried glue will not take stain. Be safe, have fun, and ask for help if you need it. Good luck!
Instructions
Step 1
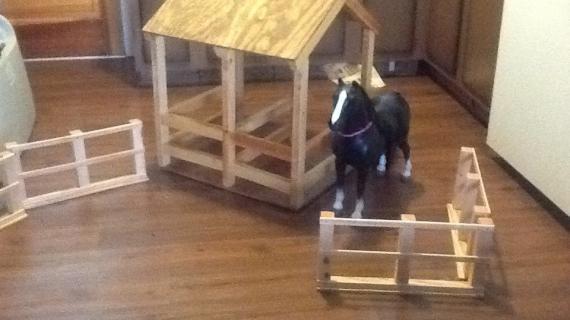
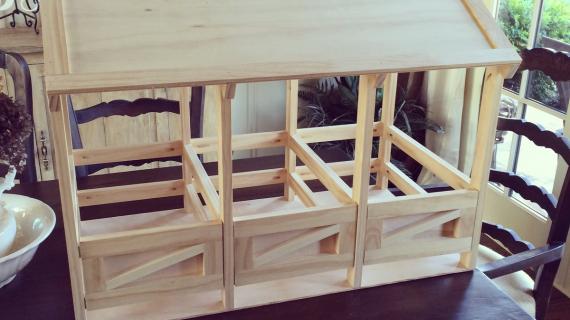
Start by building three trusses out of the lx2s. Clamp all joints and attach with glue. What I did was first put together all three roof trusses by attaching at the top with a 3/4" pocket hole and 1 1/4" pocket hole screw. I laid these flat to dry and then built the walls. Then I centered the trusses on the walls and attached. Overhangs were about 1 1/4" for me. I built one on top of the other to make sure they all matched up. TIP: If you find your wood is splitting, try setting your pocket hole jig to the 1/2" setting and using 1" pocket hole screws.
Step 2
This should be the easy part but it was actually the hardest part! The reason is my drill was too big to fit inside and attach the pocket hole screws. I ended up using a screwdriver and hand attaching. If you are painting, an easy solution is to simply place the pocket holes to the outsides so you can fill and paint them. Another option is to just drill the pocket holes on one side, and then attach all four back pieces to the center truss. Then attach the outside trusses with countersunk wood screws from the outsides to the back. Remember to rotate your trusses so that the pocket holes are hidden to the insides unless you are painting - then you might want to keep them on the outside to fill, sand and finish them easier.
Step 3
Step 4
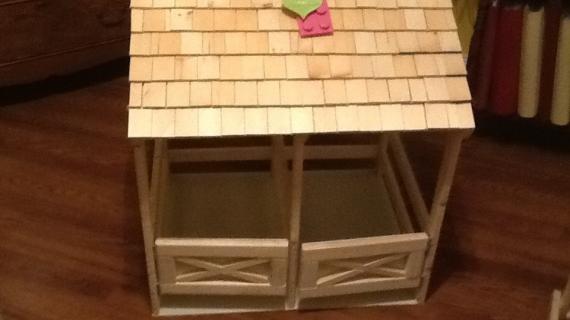
Now I really considered no bottom, but the project needs it for structure. If you didn't want a bottom, you should at least place 2 - 1x2s 24" long hitting each of the truss legs on front and back. I screwed the plywood on with 2" wood screws and wood glue, using a countersink bit to keep my wood from splitting. This really squared things up and made the horse stable sturdy.
It is always recommended to apply a test coat on a hidden area or scrap piece to ensure color evenness and adhesion. Use primer or wood conditioner as needed.








Comments
whitney_smith
Fri, 12/21/2012 - 11:42
AKKK!!
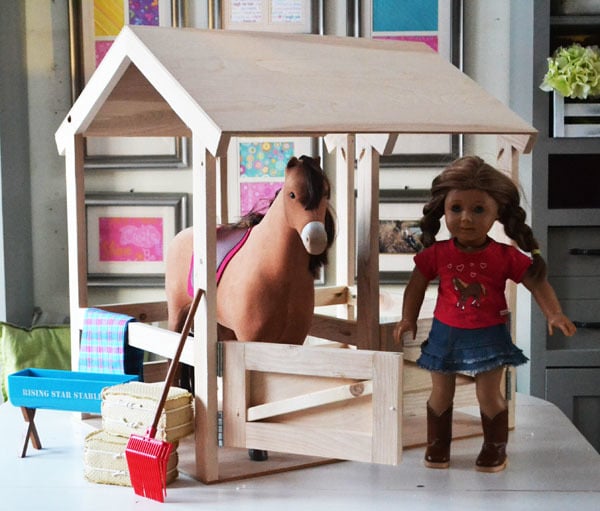
I love the barn... and then I saw the hay bales! Holy crap you are so smart! I love that idea!
I can count about 5 people who will want this!
Brook @ BeingBrook (not verified)
Fri, 12/21/2012 - 12:03
SO cute!
How adorable!! So doing this next Christmas!
Eener (not verified)
Fri, 12/21/2012 - 12:05
I can NOT wait to make that
I can NOT wait to make that for my daughters! They are set for Christmas but it's a must for their birthdays!! LOVE it, Ana!!! And yes, the hay bale tutorial would be awesome!! Thanks for such another great plan!!!
Renee
dmcarwin
Fri, 12/21/2012 - 12:06
This clinches it...my
This clinches it...my daughter needs a doll and a horse so I and build the bed and stables! I love it!
April S. (not verified)
Fri, 12/21/2012 - 12:10
Adorable! My daughter is
Adorable! My daughter is getting the same size horse only the Target brand one this year and this would be awesome. Although she'll have to clean her room to fit this haha! Love it! I'd love to see a tutorial on the hay bales as well - we are horse people and I can think of endless uses for those!
Jan Linsley-Noakes (not verified)
Fri, 12/21/2012 - 13:07
Hay Bales Tutorial
Just love the horse stable. Please could you send me the tutorial on the hay bales.
Deb Kane (not verified)
Fri, 12/21/2012 - 13:50
Horse stables and hay bails
This is so cute!!! I am going to start building it today even though I am fighting the tail end of the flu. I would love to know how you made the hay bails, they would be a great addition for my little cowgirls Christmas.
Pam the Goatherd
Fri, 12/21/2012 - 17:17
Yes!Yes!Yes! on the tutorial
Yes!Yes!Yes! on the tutorial for the hay bales! I live in the heart of 4H country and can think of several hundred farm kids around here that would LOVE those!
BookladyDavina (not verified)
Fri, 12/21/2012 - 20:32
yes, we neee hay bales, too
am so going to e to find out my grand daughter has any of these dolls.. if so, she is going to need a horse and this barn.. if not... i know she has barbies and pretty sure this could work for those too *lol*
momofour09
Sat, 12/22/2012 - 10:00
Cute!!
Now I feel like I have to go buy my girls AG dolls and horses... Very cute and I would LOVE the tutorial for the hay bales, they really help round it out :)
Stephanie Blake (not verified)
Sat, 12/22/2012 - 15:41
Adorable!
Love this! My daughter is getting the 18" doll farmhouse bed made by me! As well as a doll closet made by my husband and I! They are Christmas presents and I am actually relieved this plan didn't come earlier because I would have added it to the list and my husband would kill me! Did I mention we made a custom lego play table for the other daughter and we are in the process of making the Playhouse Loft Bed with the stair add on too? :) Thanks for the free plans! So much fun!
Carol B. (not verified)
Sat, 12/22/2012 - 19:23
American Girl horse stable
Thank you so much! My 8 year old granddaughter just asked for one the other day after we went for a walk and she saw my neighbors stable, and I just couldn't bring myself to pay $100 for one. Now we can build it!
redhead_61
Sun, 12/23/2012 - 15:41
Building note
I struggling with what to get my 5 year old for her "from Santa" present. Not a good thing to be doing just DAYS before Christmas. She is not a doll person but she loves to play animals and I thought this would be perfect. I started cutting half hour later. I hope she loves it.
Couple building notes!
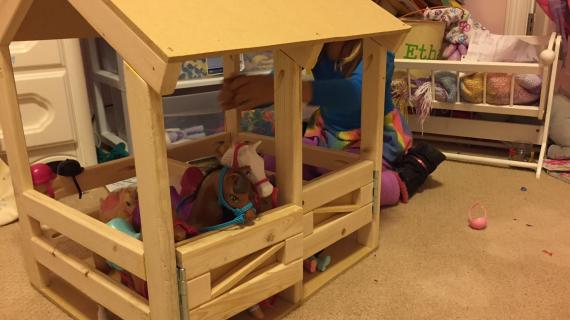
1) this is HUGE. Ana you really should take pictures of these "toys" with an adult standing next to it. That way people who don't have enough extra room for a nightstand size toy in their rooms might have to think twice about this one.
2) I messed up and put two of the trusses on with the support going the wrong angle! OOPS, so I chopped off the top and now we just have a divider. So my middle truss doesn't go all the way to the roof. I needed some extra support so I added two "apron" pieces (22.5") just at the end of the roof line going the long way. Does that make sense? So you end up with support to attach to the roof and the sides. This of course could be done built like the plan is also, you would just cut 4 extra pieces at 10 7/8" and add them at the roof line.
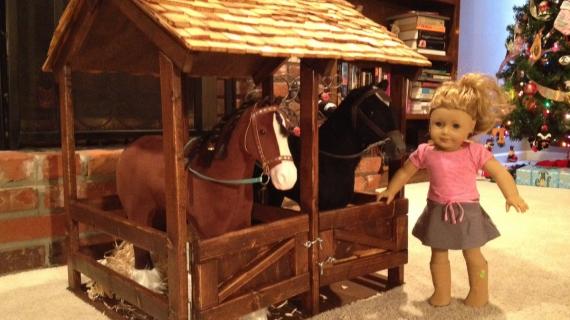
I will have to do a brag post to show how it worked out. I am leaving it wood for now and she can help me paint it one day. I was also thinking a shingle roof would be super cute on it too.
Cynthia D (not verified)
Wed, 12/26/2012 - 12:19
A MUST-HAVE for any AG Doll FAN!!
Ana, I must admit I am a huge fan! (My hubby too!!) Because of you, I purchased the Kreg jig system for his birthday gift and he LOVES IT!!
We cannot wait to make this stable and hay bales for 2 of the sweetest little girls that I know! They are going to absolutely LOVE IT!! We also have plans to build 2 of your doll wardrobes!! I love reading your blog on the MomPlex also!! Thank you for such wonderful ideas!!
Cynthia D (not verified)
Wed, 12/26/2012 - 12:24
A MUST-HAVE for any AG Doll FAN!!
Ana, I must admit I am a huge fan! (My hubby too!!) Because of you, I purchased the Kreg jig system for his birthday gift and he LOVES IT!!
We cannot wait to make this stable and hay bales for 2 of the sweetest little girls that I know! They are going to absolutely LOVE IT!! We also have plans to build 2 of your doll wardrobes!! I love reading your blog on the MomPlex also!! Thank you for such wonderful ideas!!
Colleen Mayberry (not verified)
Thu, 12/27/2012 - 12:39
Love this!!!
I can't wait to build this for my daughters. They have eight horses total so this is going to be a great addition to their collection! Thanks for the plans. I would love the directions to make the bales of hay as well.
Joe Iverson (not verified)
Fri, 12/28/2012 - 22:57
coral
The plans were great, but I was 32.5" short. I bought the 4 - 1x2x8 and cut everything just as you had instructed. But, I was left with 4 s 1x2's with only one long enough to be cut into the 10 5/8" piece for the doors. So unless I cut incorrectly, you will need at least 36" more to make the doors. I hope I don't sound like I'm complaining, I love the website and all the cool plans. I just found it a few days ago when I was looking for ideas to make for my daughter's birthday present. I have already made the pallet boxes, and the coral and I am going to make the shoe cupboard for my wife.
Thank you
Wyoming Joe.
AJ
Sat, 11/02/2013 - 22:44
Material list flawed
As Wyoming Joe commented, there is not enough material to complete the project. Like WJ, we only had enough 1x2 leftover to cut one 10 5/8 piece for the second gate. Our total waste was less than 2" and there was no mistakes. We decided to go with only one gate rather than buy another 1x2x8 for the time being. But beware, this thing is huge and will take up a lot of space! It also took me 5-6 hrs to build. Bottom line,my daughters love the stable. Thanks Ana.
Paula Goller (not verified)
Fri, 01/11/2013 - 11:00
Ana: I love your patterns
Ana:
I love your patterns and am making a prototype of the bunk bed now, out of cardboard. It is pretty cute, and I plan on covering it with the new colored duct tape. I made a desk out of cardboard and covered it with leopard tape. Real cute. and makes it more stable. It is just a prototype but my granddaughter took it! Just a question, do you use the kreg plugs to fill the holes? I try to assemble my supplies before I build, as I tend to just keep going till I finish a project, and hate it when I have to stop to shop.
P.S. Doesn't your horse have his saddle on backwards?
Paula
JMGore (not verified)
Wed, 01/16/2013 - 10:01
Hay bales
This is such a cute stable. Thank you for the plans. You are so inspiring! I am going to make this for my niece's birthday. She is going to be so excited! I can't wait either! I would love the plans for the hay bales. Forgive me if you have already posted them but I didn't see them anywhere. Thanks again. I love your site!
jandlhodges
Wed, 02/20/2013 - 09:16
Size of 1x2s...
I know, it sounds like a simple answer but I'm referring to the furring strips used in this project. From the pictures, I can tell it's not a standard 1x2 which I know is approx .75 x 1.75 roughly. When I went to the big box stores they couldn't seem to agree on what furring strips were and what their dimensions should be. Thanks for the help!
In reply to Size of 1x2s... by jandlhodges
Jake
Wed, 02/20/2013 - 19:17
Furring Strips
Your comment is interesting if not typical of the service you get at the typical Lowes or Home Depot. Ask the wrong person and get the blank stare or a comment that seems to indicate you don't know what you are talking about. Every Lowes, Home Depot, or lumber yard I have gone to have a stack of what are labeled Furring Strips. They are just the most sub-standard of the lumber but useful in certain places in some projects, and they are a lot cheaper. Just ask for the guy responsible for the lumber inventory and you will find someone that can answer your question.
jandlhodges
Wed, 02/20/2013 - 19:53
Furring strips
So, furring strips are the same size as a standard 1x2?
In reply to Furring strips by jandlhodges
Jake
Thu, 02/21/2013 - 04:38
Yes Sort of....
Typical furring strips are 1x2 (0.75 x 1.5) but there are also wider ones. They are just not as well selected as the more expensive lumber. If you need a purer 1x2 take your tape measure with you to the store and double check the size or just spend a few bucks more for the #2 grade or even a little more for #1 grade. If I was putting it in my house I would spend the extra.
Tamara09
Thu, 10/10/2013 - 19:34
Haybales
I love your stable and the adorable haybales! Would you please send me the haybales plans, thanks :)
hemigirls4
Sat, 11/09/2013 - 12:24
Hay Bales
Hubby and I are building this for our 3 girls and I would love to have the hay bales plans.
In reply to Hay Bales by hemigirls4
JoanneS
Mon, 11/11/2013 - 13:59
Hay bales plan
Here's the link to the plan for the hay bales:
http://ana-white.com/2012/12/plans/toy-hay-bales-horse-stable-american-…
a_marines_wife03
Tue, 11/12/2013 - 20:06
Im new to wood working. I
Im new to wood working. I would love to make this for my daughter for Christmas but it needs to be smaller we are in an apartment something that would fit a barbie size horse would be great. But im not sure how to do this correctly. Could someone help me scale it down so it comes out looking right.
jdoc284
Tue, 09/30/2014 - 18:52
Horse size
This just fit our american girl horse height. However we have a plastic horse, probably our generation brand, who has large upright ears. I had everything cut out and realized it was too short. I am going to add a board across the bottom of each set of supports to give it enough height so all our horses can go inside.
Mhb123rbb
Thu, 12/01/2016 - 19:05
Short and long point measurement
Hey, can you please explain the shirt and long point measurement? Also can I get the tutorial for the hay bales? My husband and I are planning to make this for our daughters for CHRISTmas! Thank you! Michelle
Mhb123rbb
Thu, 12/01/2016 - 19:08
Short and long point! Not
Short and long point! Not "shirt"!
Momofazjel
Fri, 01/19/2018 - 18:17
Confused!
Ana, absolutely love all your plans, but this one had kept me thinking. In the first step, the pocket holes that attack the trusses are too deep and go almost completely through the board. I tried adjusting the bit, but that left the screw exposed. If I adjust the height, the screw comes out the truss. Do you have any other suggestions to make this work?
Julz0930
Wed, 10/14/2020 - 08:27
Could you send me the…
Could you send me the tutorial on the hay bales please? Thank you so much!!