
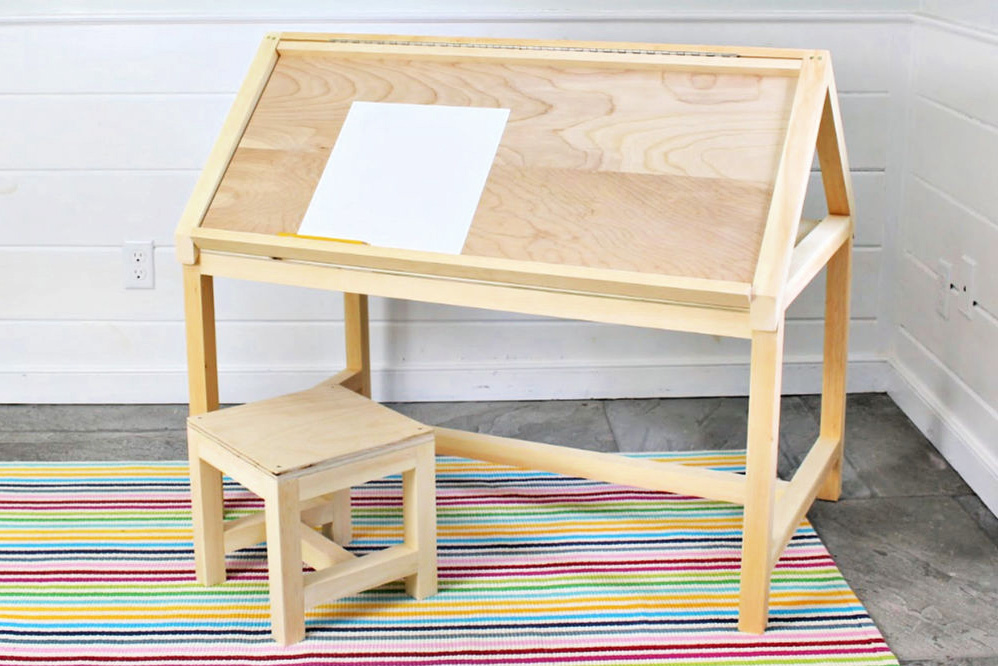

This little house shaped play table features and angled desktop perfect for coloring or drawing. Flip it around for storage and a flat work surface. Our free DIY plans make it easy to build - step by step plans with diagrams and shopping list from Ana-White.com
For the past 7 years, Jaime Costiglio and I have been teaming up every fall for a collaboration we call Handbuilt Holiday
Here's how it works - Jaime and I get our heads together and come up with plan ideas (mostly Jaime here!), then I create the sketchup plan, and then Jaime builds and photographs it.
We love this series so much, and have found much joy in creating the plans. You an see all the projects from the past seven years here.
We are kicking off Handbuilt Holiday 2019 today with a fun new project plan!

This house shaped desk features a storage area, and an angled drafting desktop.
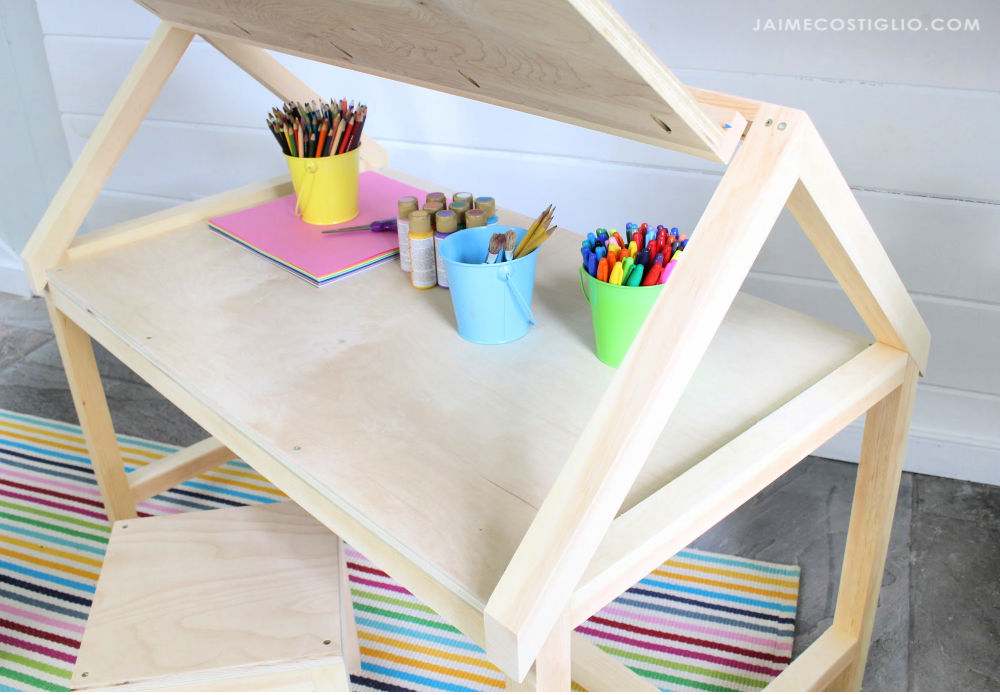
Jaime made her version extra fun by adding a hinge up top, so the supplies are within easy reach.
So here's what to do:
Go check out Jaime's build post here, with more details, photos and the stool tutorial
Then grab the free plans below.
Happy Holidays!
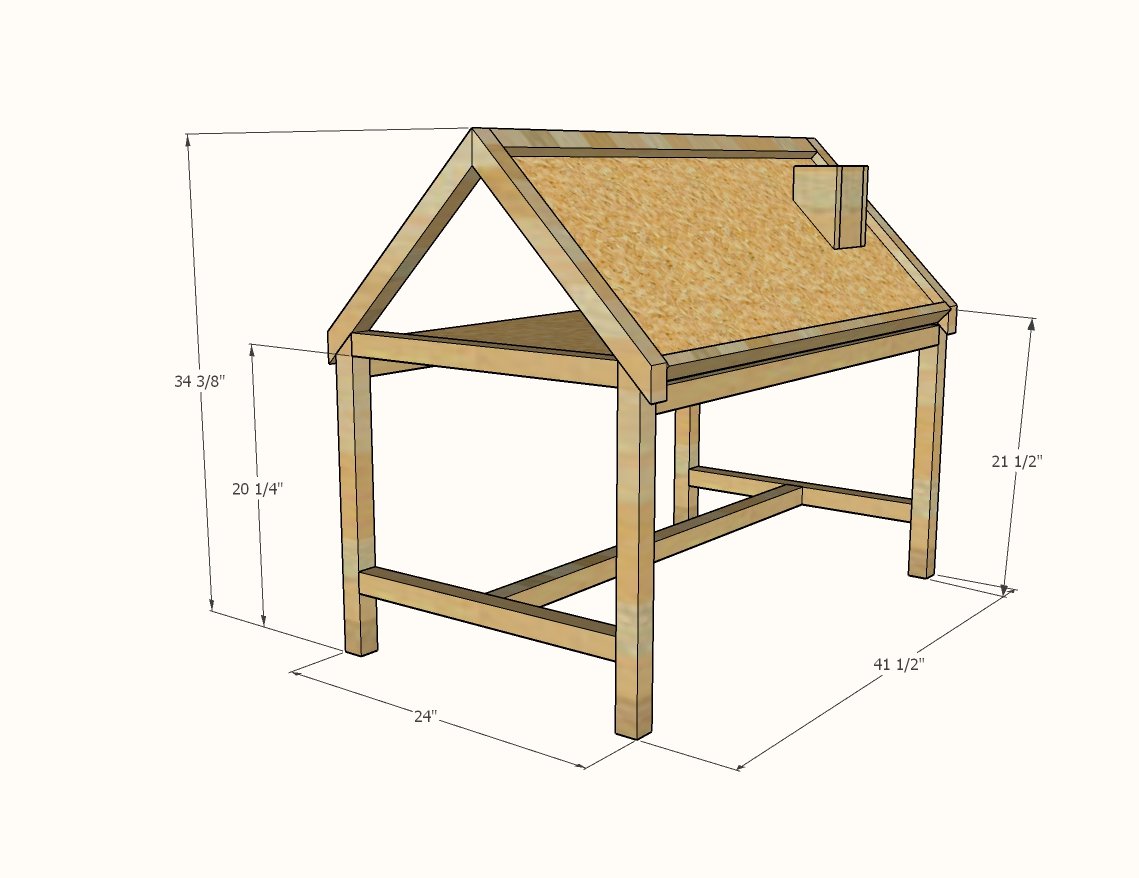
Preparation
- 5 - 2x2 @ 8 feet long
- 1 - 1x2 @ 4 feet long
- 1 - 3/4" plywood @ 4' x 4'
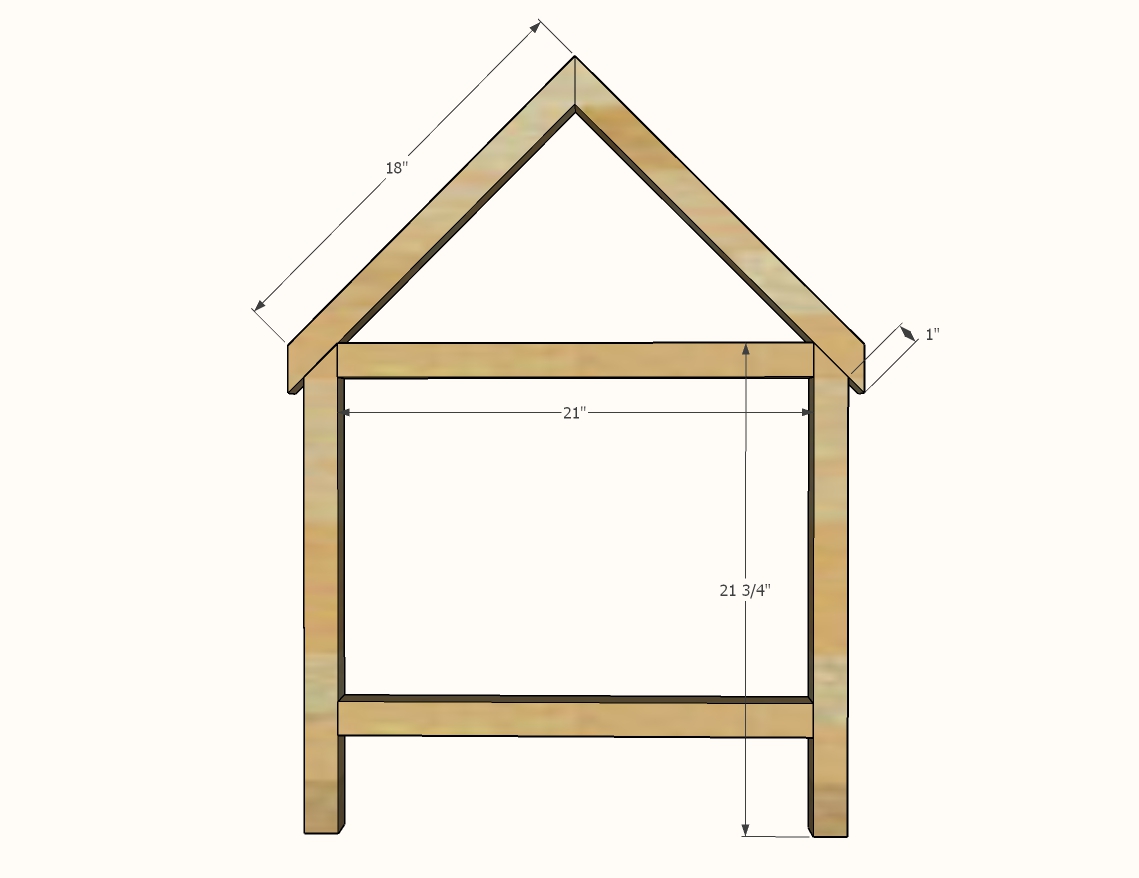
- 4 - 2x2 @ 18" - long point to short point measurement, both ends cut at 45 degrees, ends ARE parallel
- 4 - 2x2 @ 21-3/4" - longest point measurement, one end cut at 45 degrees
- 4 - 2x2 @ 21"
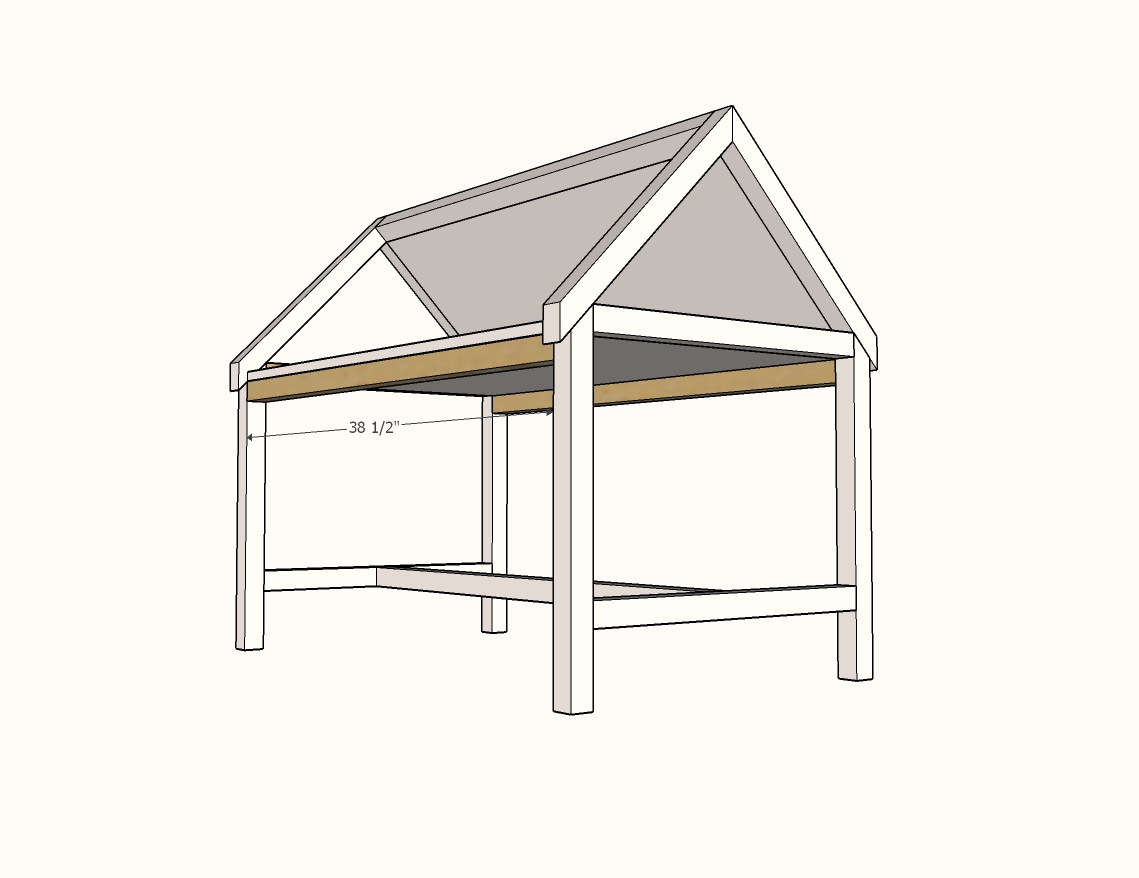
- 4 - 2x2 @ 38-1/2"
- 1 - 3/4" plywood @ 38-1/2" x 16"
- 1 - 1x2 @ 38-1/2"
- 1 - 3/4" plywood @ 38-1/2" x 23-1/4"
Pencil Holder
- 2 - 1x4 @ 6" - longest point measurement, one end cut at 45 degree angle
- 1 - 1x4 @ 2-1/2"
- 1 - 1x4 @ 6" - longest point measurement, one end cut at 45 degree bevel


Instructions
Step 1
Build two of the house ends as shown, using 1-1/2" pocket holes and 2-1/2" pocket hole screws and glue.
Step 2
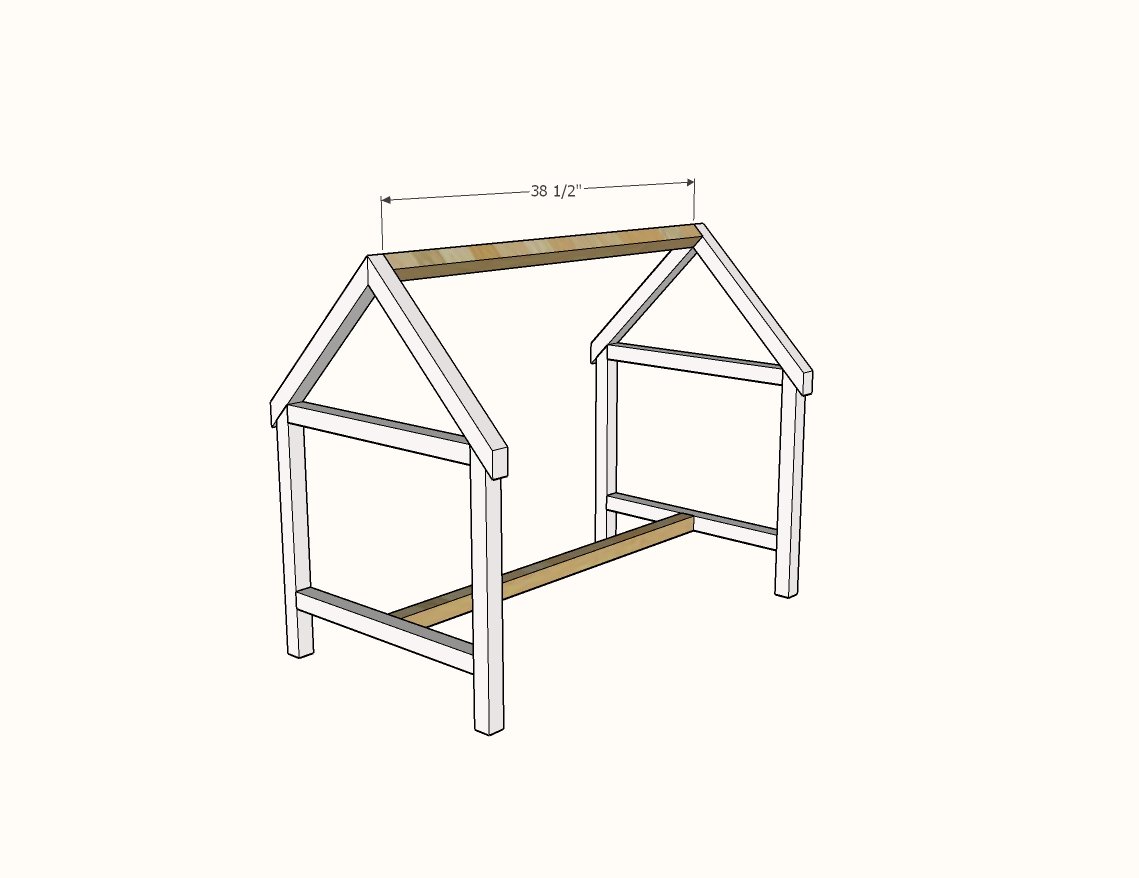
Attach the two ends together with 2x2s using 1-1/2" pocket holes and 2-1/2" pocket hole screws.
Step 3
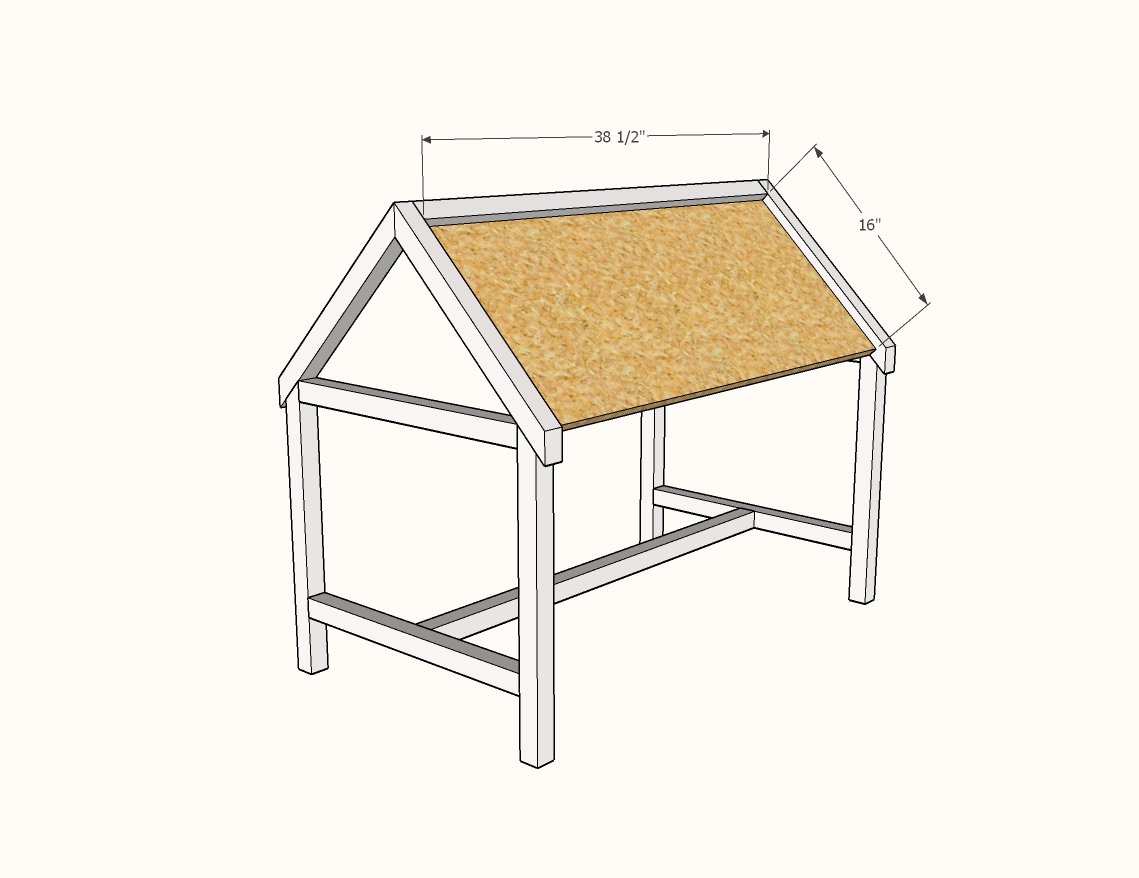
Drill 3/4" pocket hole about every 6" along all four edges of the smaller plywood panel and attach to the 2x2s with 1-1/4" pocket hole screws.
Step 4
Attach 1x2 trim with 1-1/4" pocket hole screws through the holes drilled in step 3.
Step 5
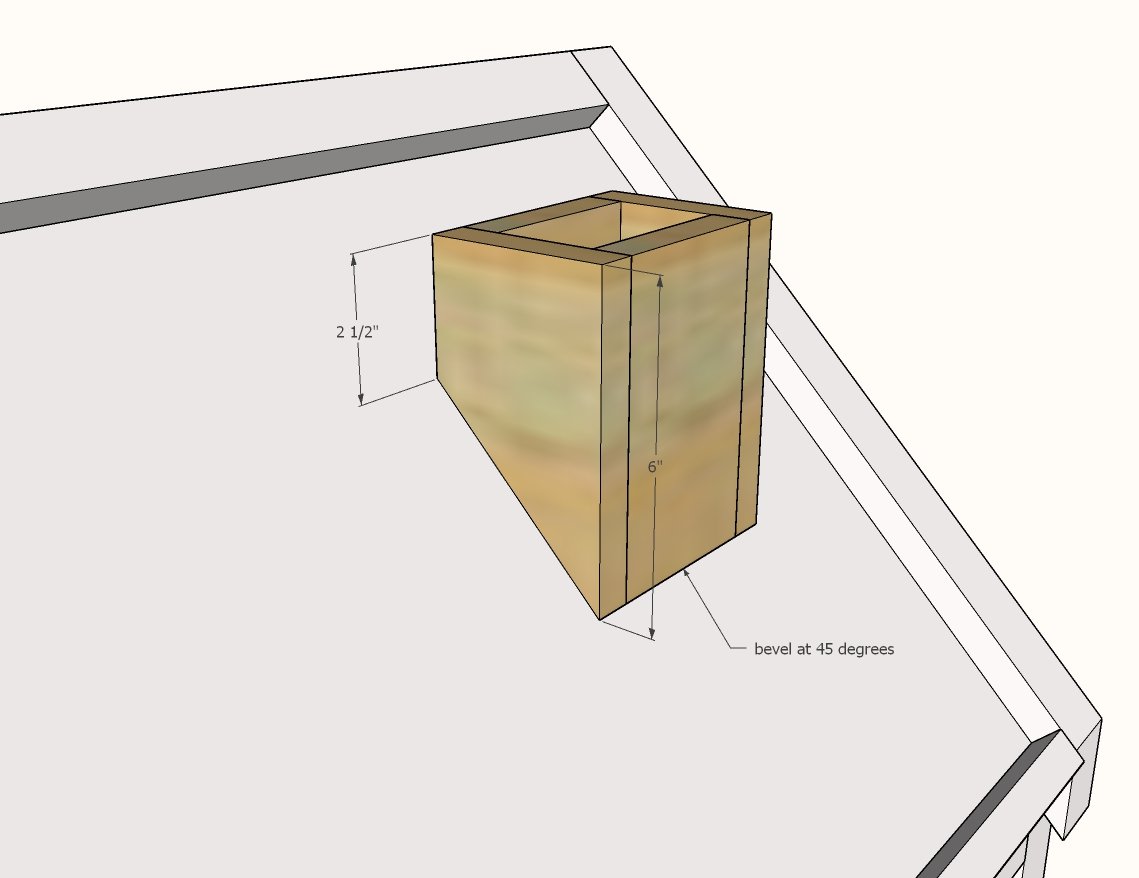
Build the roof pencil holder out of 1x4 boards first, and glue and 1-1/4" brad nails.
Attach to the desktop from underneath with 1-1/4" brad nails or screws (yes, you can use pocket hole screws). You only need a couple of fasteners to attach.
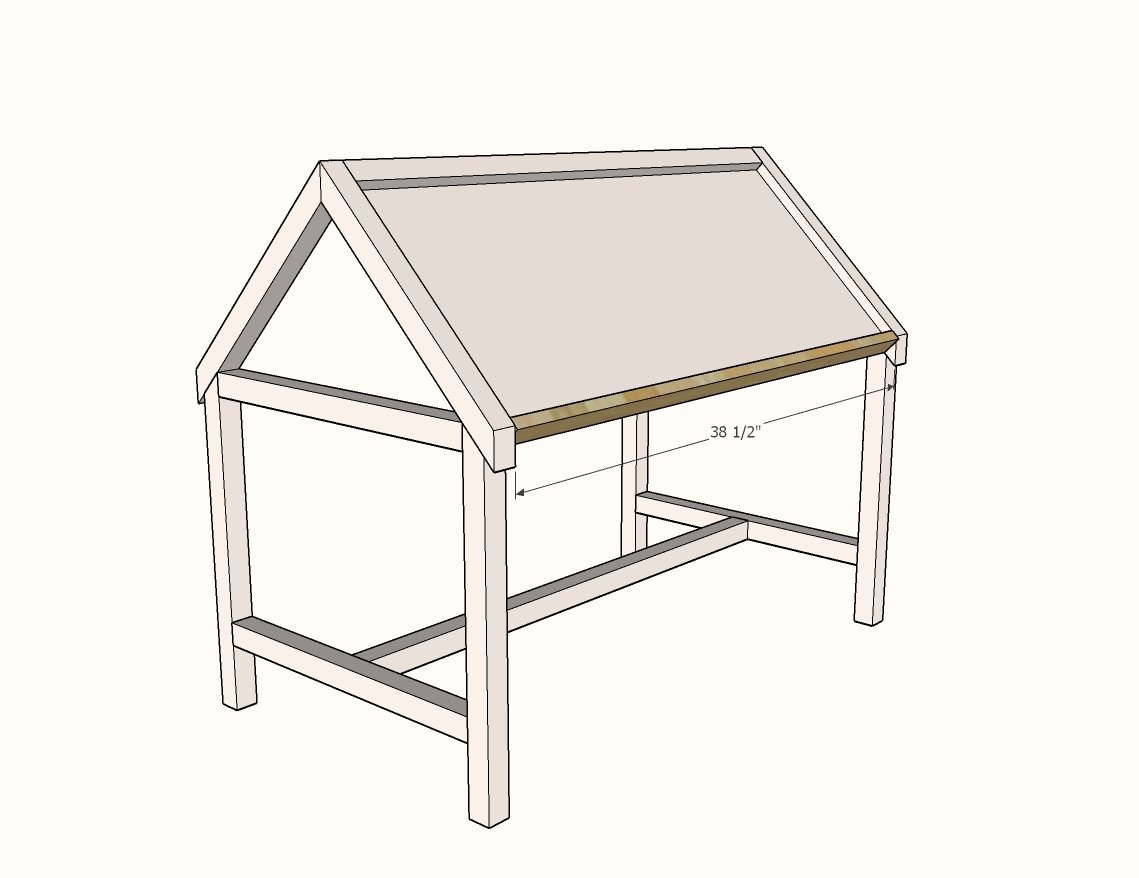
Step 6

Drill 3/4" pocket holes about every 6" on both shorter ends of the larger plywood panel.
Attach with 1-1/4" pocket hole screws to the ends.
Step 7
Attach 2x2 underneath the plywood with 1-1/2" pocket holes and 2-1/2" pocket hole screws.
Also recommended is to attach the plywood panel with glue and 1-1/4" nails to the 2x2 underneath.
